Human Detection Lighting Control System
SenseCraft AI Project
SenseCraft AI is a user-friendly platform designed to simplify the process of training and deploying machine learning models. It allows users to easily label data, train models, and even test them with real-time data, making it ideal for IoT projects like the one we're working on.
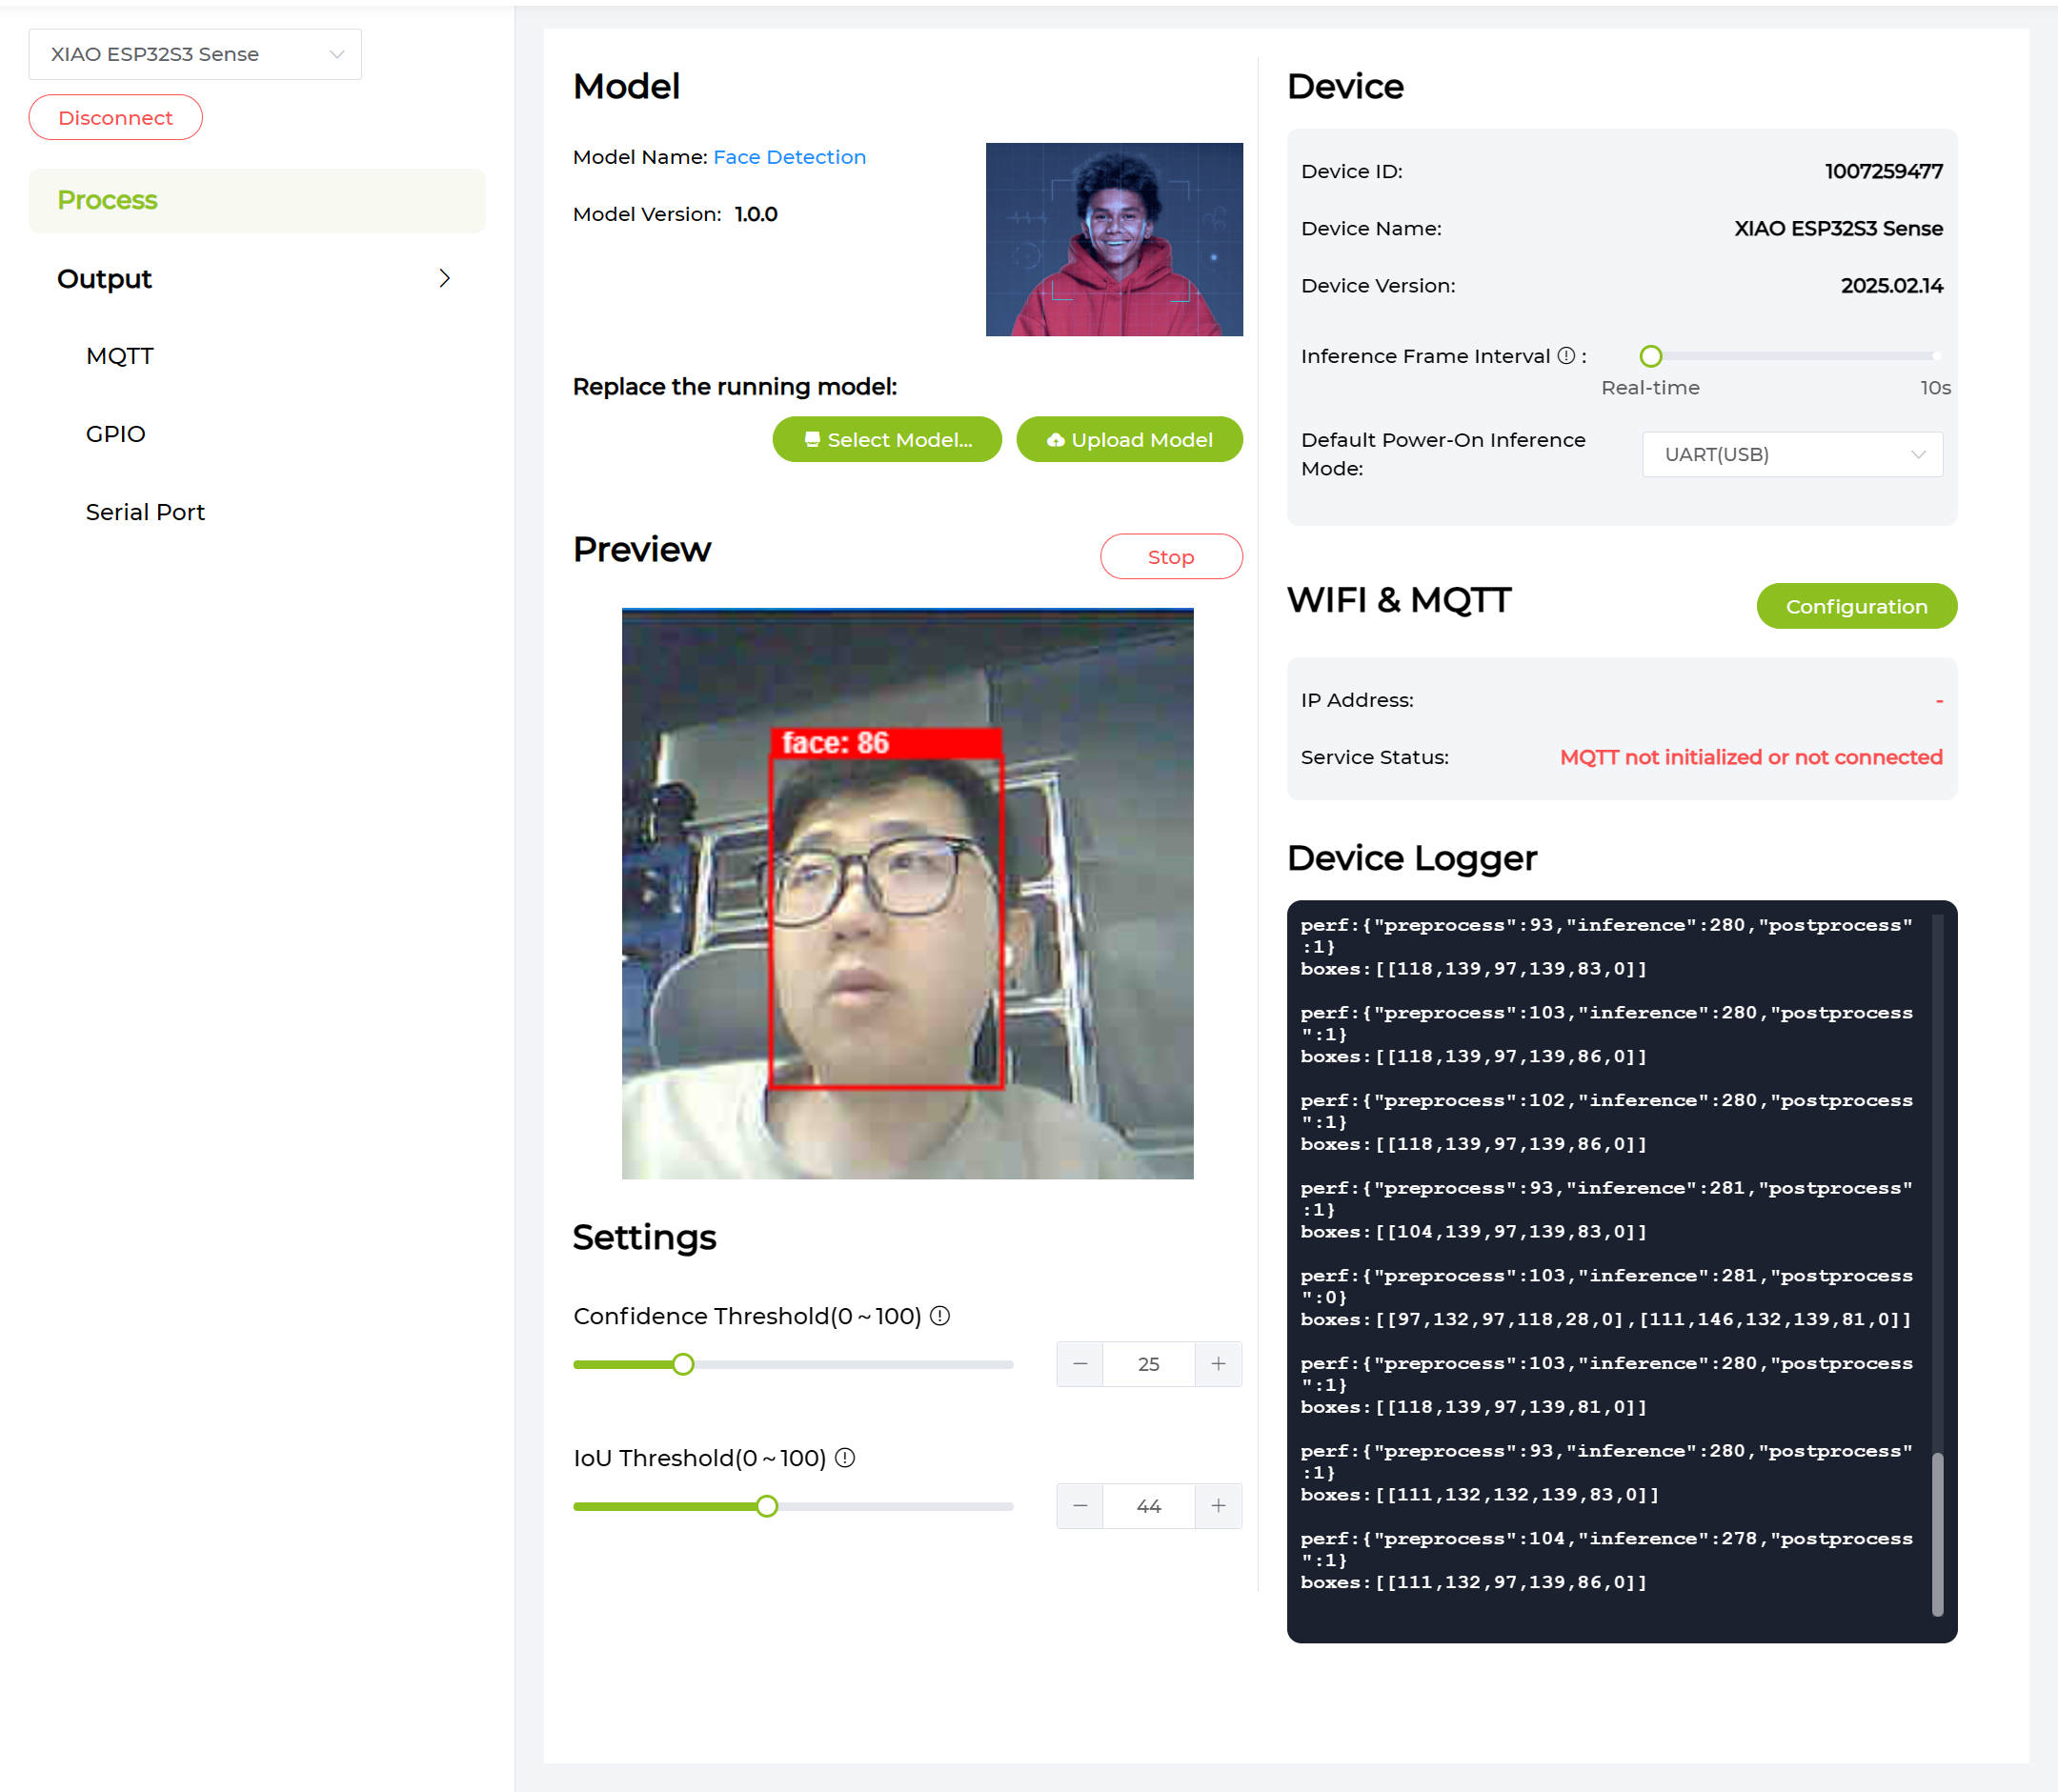
Step 0: Test existing models
- Choose a Model: I selected the existing model "Face Detection" from SenseCraft AI. This model is specifically designed to detect people in images, making it perfect for our application.
- Test the Model: I uploaded a sample image to SenseCraft AI to see if the model could correctly identify a person in the image.

- Result: The model accurately detected a person in the image, confirming its effectiveness.
Step 1: Train the Model
- Data Collection: Captured over 20 photos of people in various positions and backgrounds within my room. Also, took an equal number of photos of empty backgrounds to provide a clear contrast for the model.
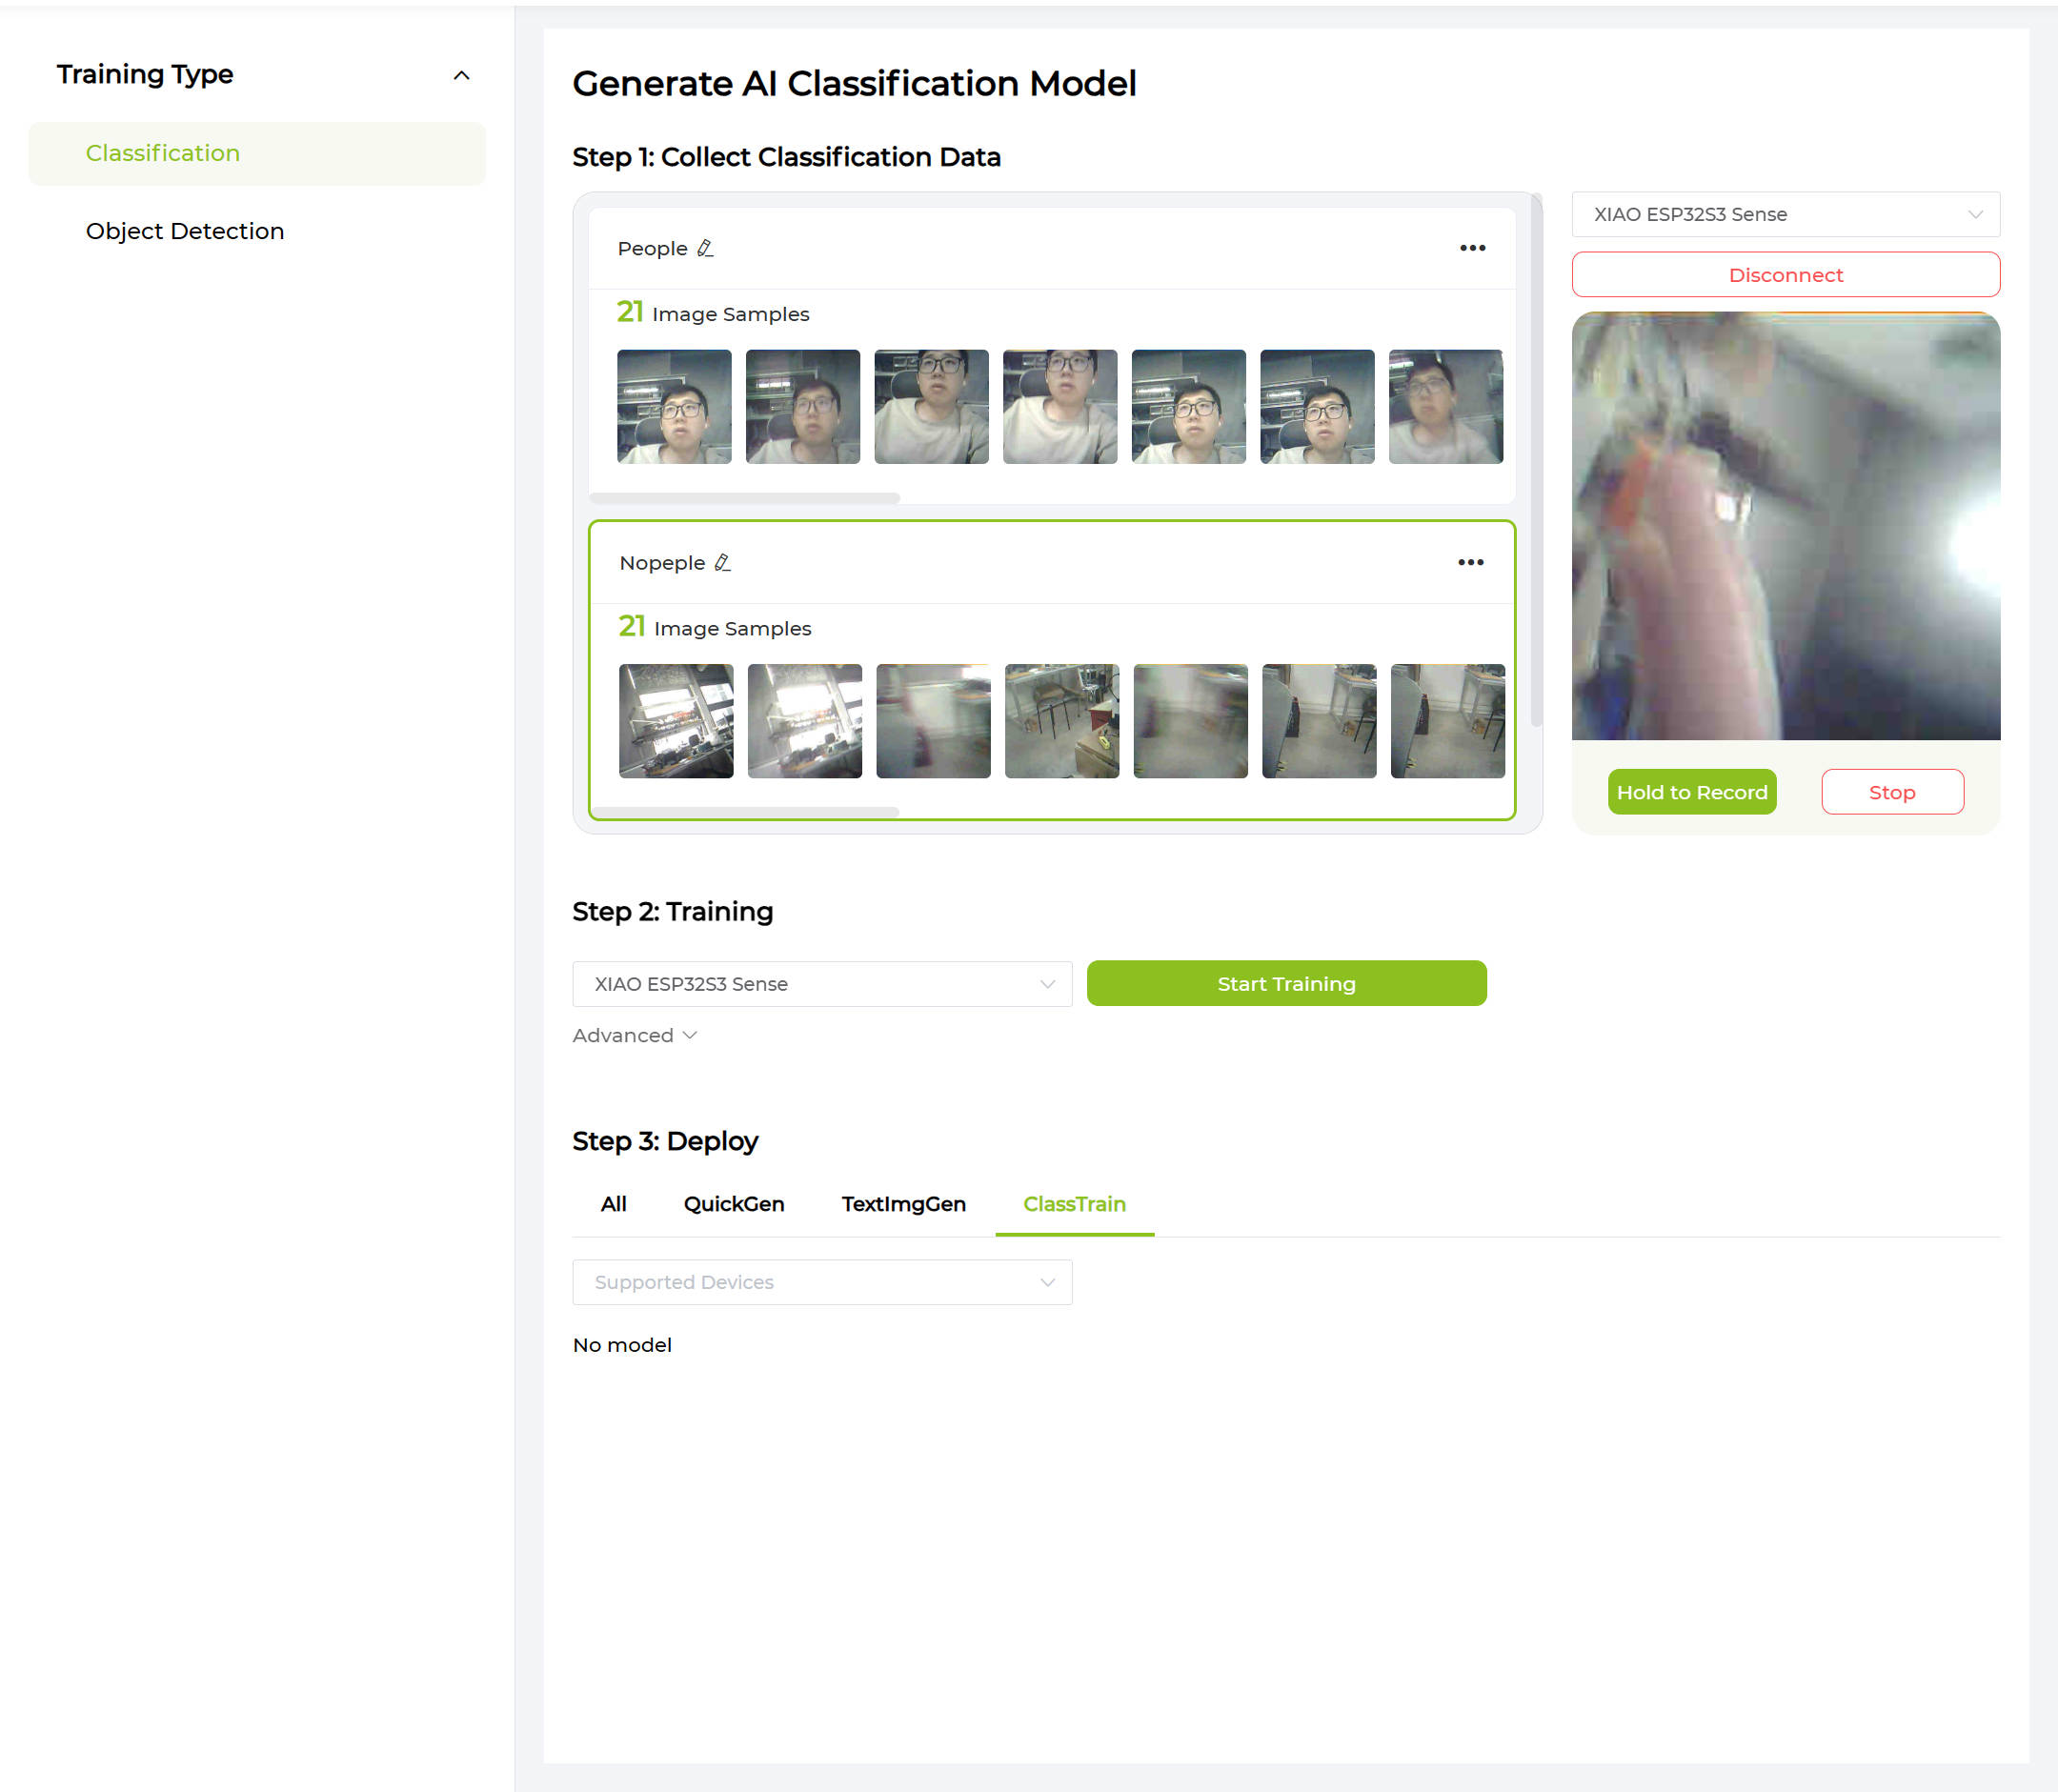
- Training Process: Initiated the training process on SenseCraft AI platform. The platform's intuitive interface made it straightforward to kick off the training with the labeled dataset.
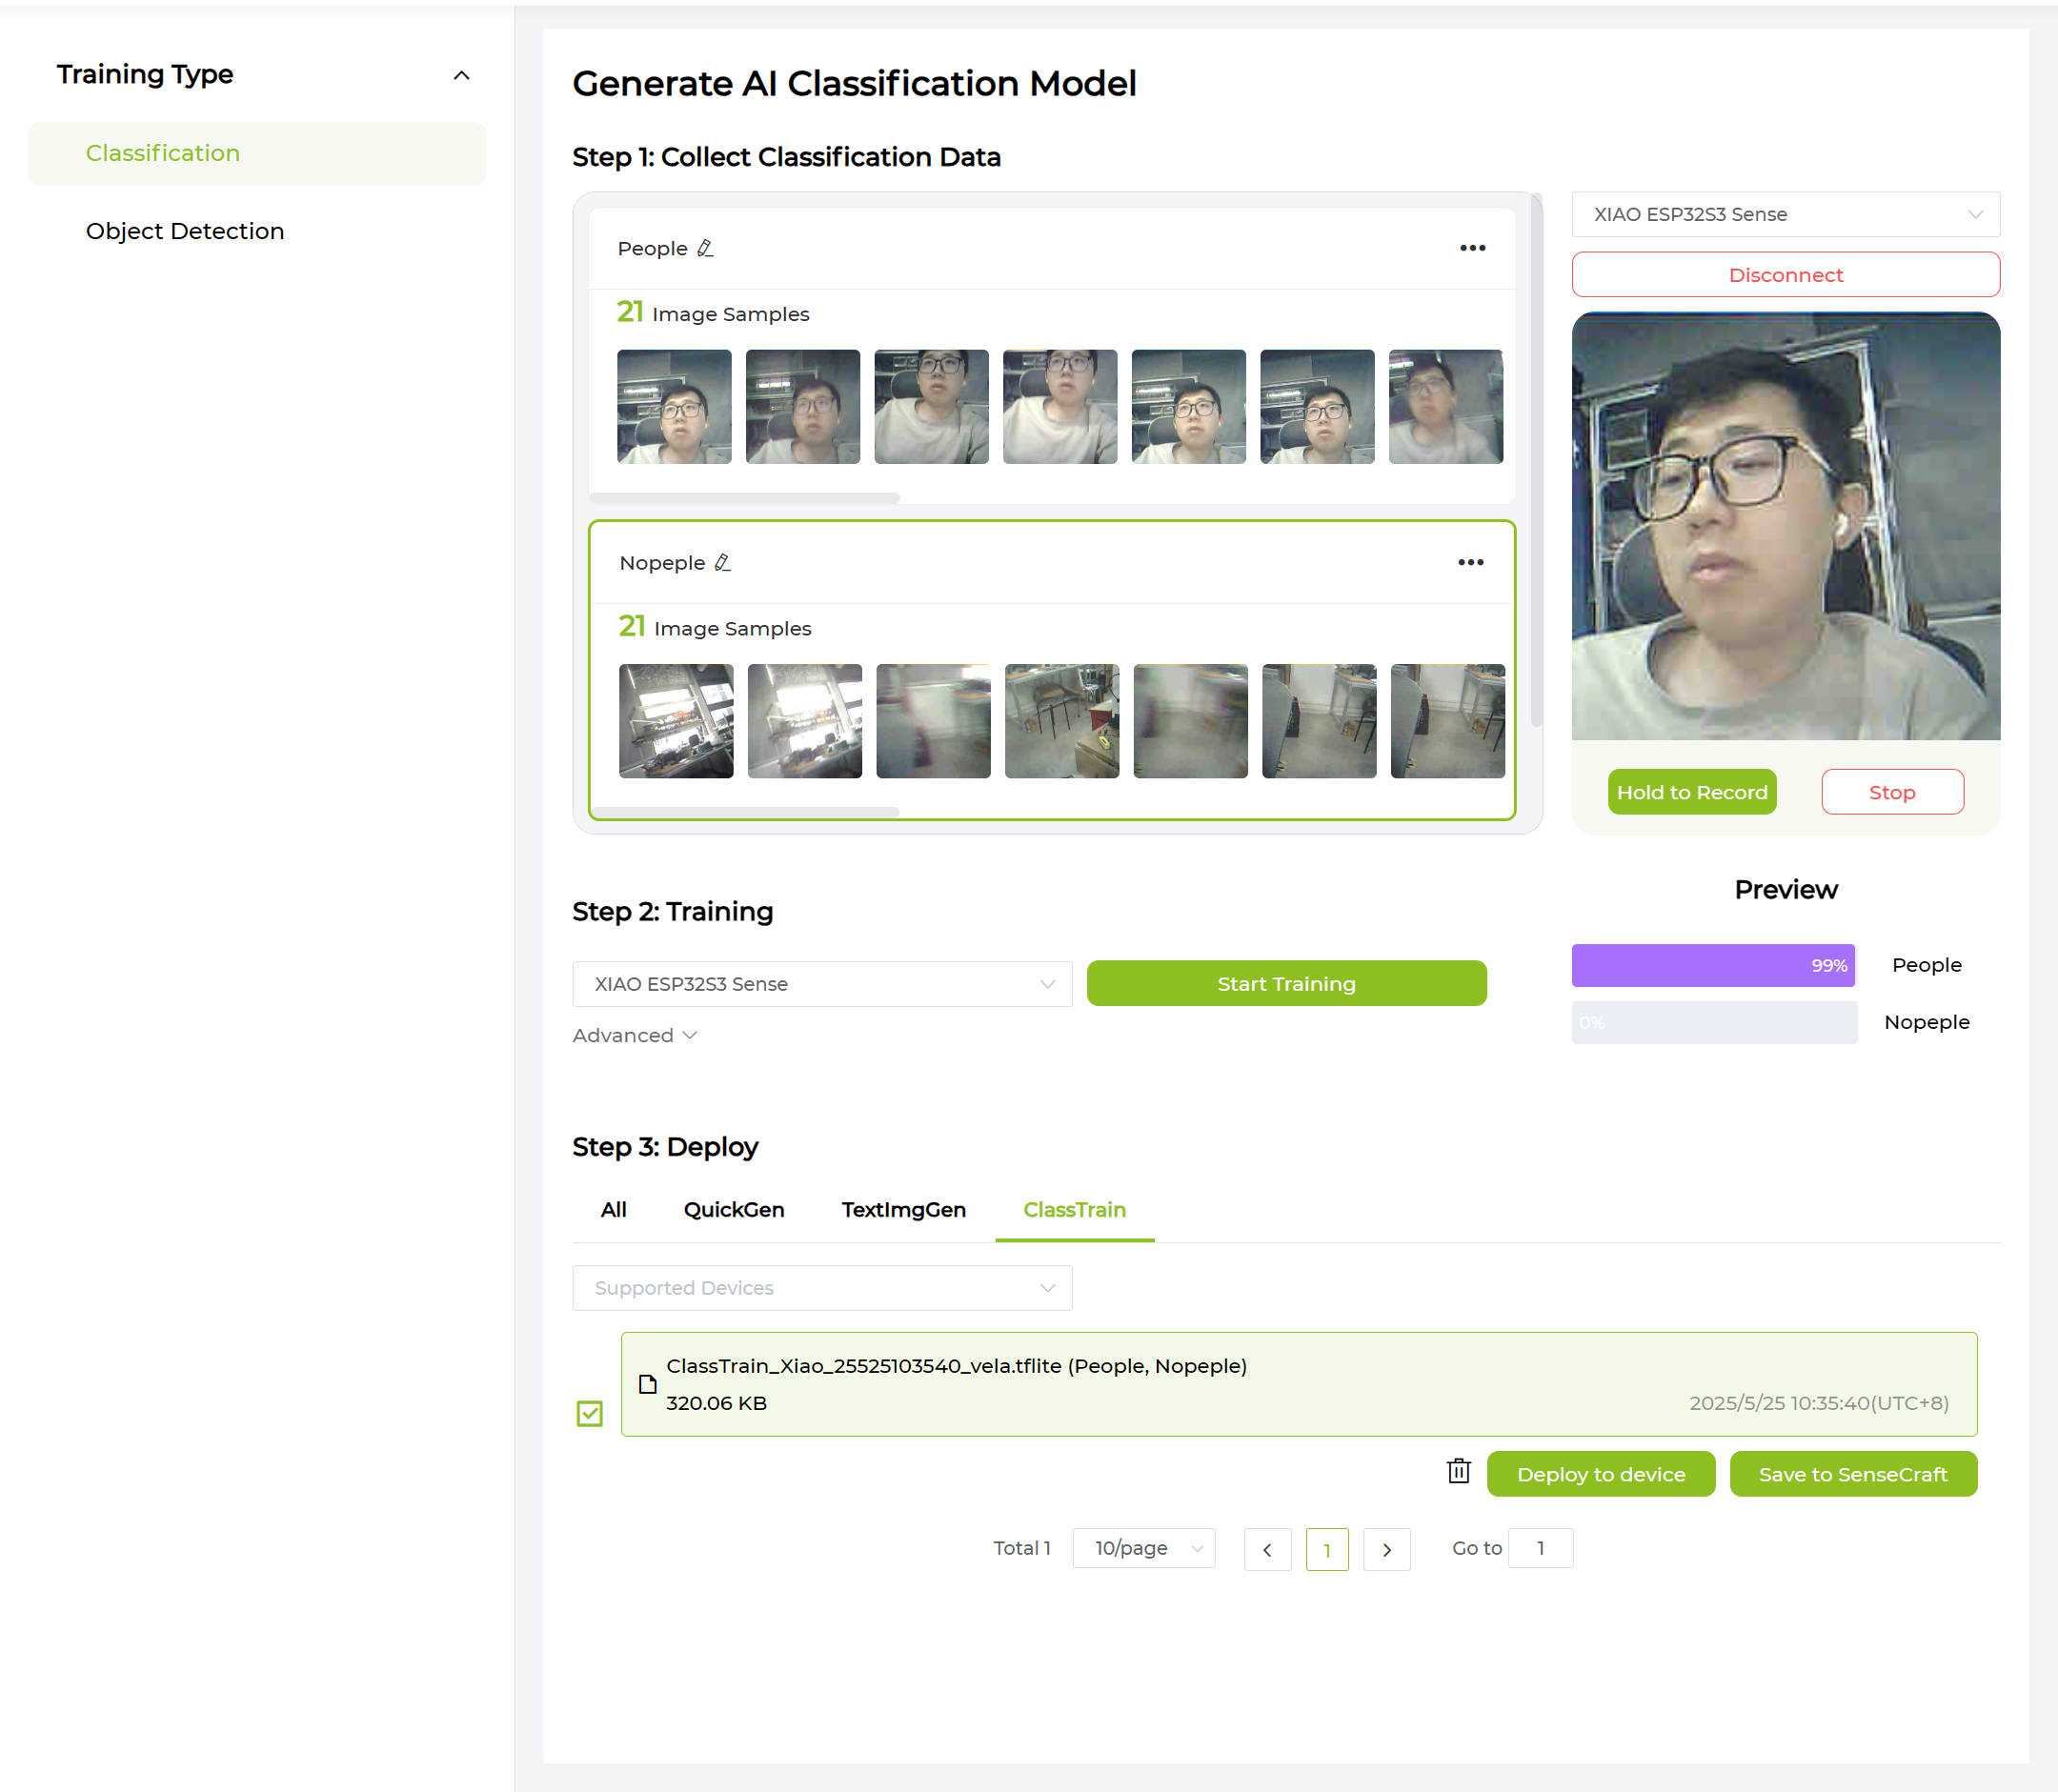
Step 2: Test the Model
- Model Download: After the training was complete, downloaded the trained model in .tflite format from SenseCraft AI.

- Accuracy Check: Utilized SenseCraft's built-in testing tool to evaluate the model's accuracy. The tool provided a straightforward way to upload the model and run tests.
- Verification: Conducted a live test by appearing in front of the camera to verify if the model could accurately detect a person. The model successfully lit up, confirming its functionality.
Step 3: Program ESP32-S3
- Hardware Setup: Connected a camera module to the ESP32-S3 microcontroller following the provided wiring diagram. Ensured all connections were secure to avoid any issues during operation.

- Code Implementation: Copied the basic detection code provided by SenseCraft AI to the ESP32-S3. This code enabled the microcontroller to interface with the camera and utilize the trained model for detection.
- LED Integration: Use Bulitin ta GPIO pin on the ESP32-S3. Configured the code to light up the LED whenever the model detected a person, providing a clear visual indication.

#include <SSCMA_Micro_Core.h>

#include <Arduino.h>
#include <esp_camera.h>


SET_LOOP_TASK_STACK_SIZE(40 * 1024);


SSCMAMicroCore instance;
SSCMAMicroCore::VideoCapture capture;


void setup() {

    // Init serial port
    Serial.begin(115200);

    // Init video capture
    MA_RETURN_IF_UNEXPECTED(capture.begin(SSCMAMicroCore::VideoCapture::DefaultCameraConfigXIAOS3));

    // Init SSCMA Micro Core
    MA_RETURN_IF_UNEXPECTED(instance.begin(SSCMAMicroCore::Config::DefaultConfig));

    PinMode(BUILTIN_LED, OUTPUT);

    Serial.println("Init done");

}

void loop() {

    auto frame = capture.getManagedFrame();

    MA_RETURN_IF_UNEXPECTED(instance.invoke(frame));

    for (const auto& cls : instance.getClasses()) {
        Serial.printf("Class: target=%d, score=%f\n", cls.target, cls.score);
        if(cls.target == 0){
            Serial.println("Human detected");
            digitalWrite(BUILTIN_LED, HIGH);
        }else{
            Serial.println("Non-human detected");
            digitalWrite(BUILTIN_LED, LOW);
        }
    }

}
Step 4: Build the Case
- Case Selection: Chose a plastic box as the enclosure for the project. The box provided ample space to house the ESP32-S3, camera, and LED.

- Customization: Carefully cut holes in the plastic box for the camera lens and LED. Ensured the holes were precisely sized to allow clear visibility for the camera and LED.
- Assembly: Secured all components inside the box using hot glue. The assembly was done in a way that ensured stability and protection for the electronics.
Troubleshooting
- Lighting Issues: If the LED did not turn on, checked the wiring connections to ensure they were correctly made. Also, tested the LED with a simple blink code to verify its functionality.
- Detection Problems: If the model failed to detect properly, experimented with different lighting conditions and retrained the model with more varied photos to improve accuracy.
Future Work
- Battery Integration: Plan to add a battery to make the device portable and usable in different locations.
- Advanced Features: Explore integrating additional features such as pet detection and connecting the device to a smartphone for real-time alerts.
- Performance Optimization: Continue to refine the model and code to enhance detection accuracy and overall performance.
Conclusion
This project provided valuable hands-on experience in training and deploying a machine learning model using SenseCraft AI. The process, from data collection to hardware integration, was both challenging and rewarding. The successful implementation of the model in a practical setup demonstrated the potential of AI in everyday applications.