1. Git Tutorial
1.1 What is Git?
Git is a distributed version control system that allows you to track changes in your codebase. It is a powerful tool that allows you to collaborate with other developers, track changes in your codebase, and revert to previous versions of your codebase. Besides code, Git can also be used to track changes in other types of files, such as images, documents, and configuration files.
Version Control
Version control is the practice of tracking and managing changes in your codebase. It allows you to keep a history of changes, collaborate with other developers, and revert to previous versions of your codebase. Version control systems like Git make it easy to manage changes in your codebase and collaborate with other developers.
1.2 Installing and Configuring Git
Before you can start using Git, you need to install it on your computer and configure it with your username and email address. Git is available for Windows, macOS, and Linux, and can be installed using the official Git installer. Once Git is installed, you can configure it with your username and email address using the git config command.
Installation
To install Git on your computer, follow these steps:
- Download the official Git installer from the Git website.
on macOS, you can install Git using Homebrew by running the following command:
brew install git
on Linux, you can install Git using your package manager. For example, on Ubuntu, you can install Git using the following command:
sudo apt-get install git
-
Run the installer and follow the on-screen instructions to install Git on your computer.
-
Once Git is installed, open a terminal window and run the following command to verify the installation:
git --version

User Configuration
To configure Git with your username and email address, run the following commands in your terminal:
git config --global user.name "Your Name"
git config --global user.email "
for my case, I have configured my git with my name and email address as shown below:
git config --global user.name "hongtai"
git config --global user.email "lht856@foxmail.com"
1.3 Basic Git Operations
Cloning a Repository
To clone a repository from a remote source, use the git clone command followed by the URL of the repository. For example, to clone the Fab Academy repository, run the following command:
git clone https://gitlab.fabcloud.org/academany/fabacademy/2025/labs/chaihuo/students/hongtai-liu
File Operations
To add a new file to your repository, use the git add command followed by the name of the file. For example, to add a file named index.html, run the following command:
git add readme.md
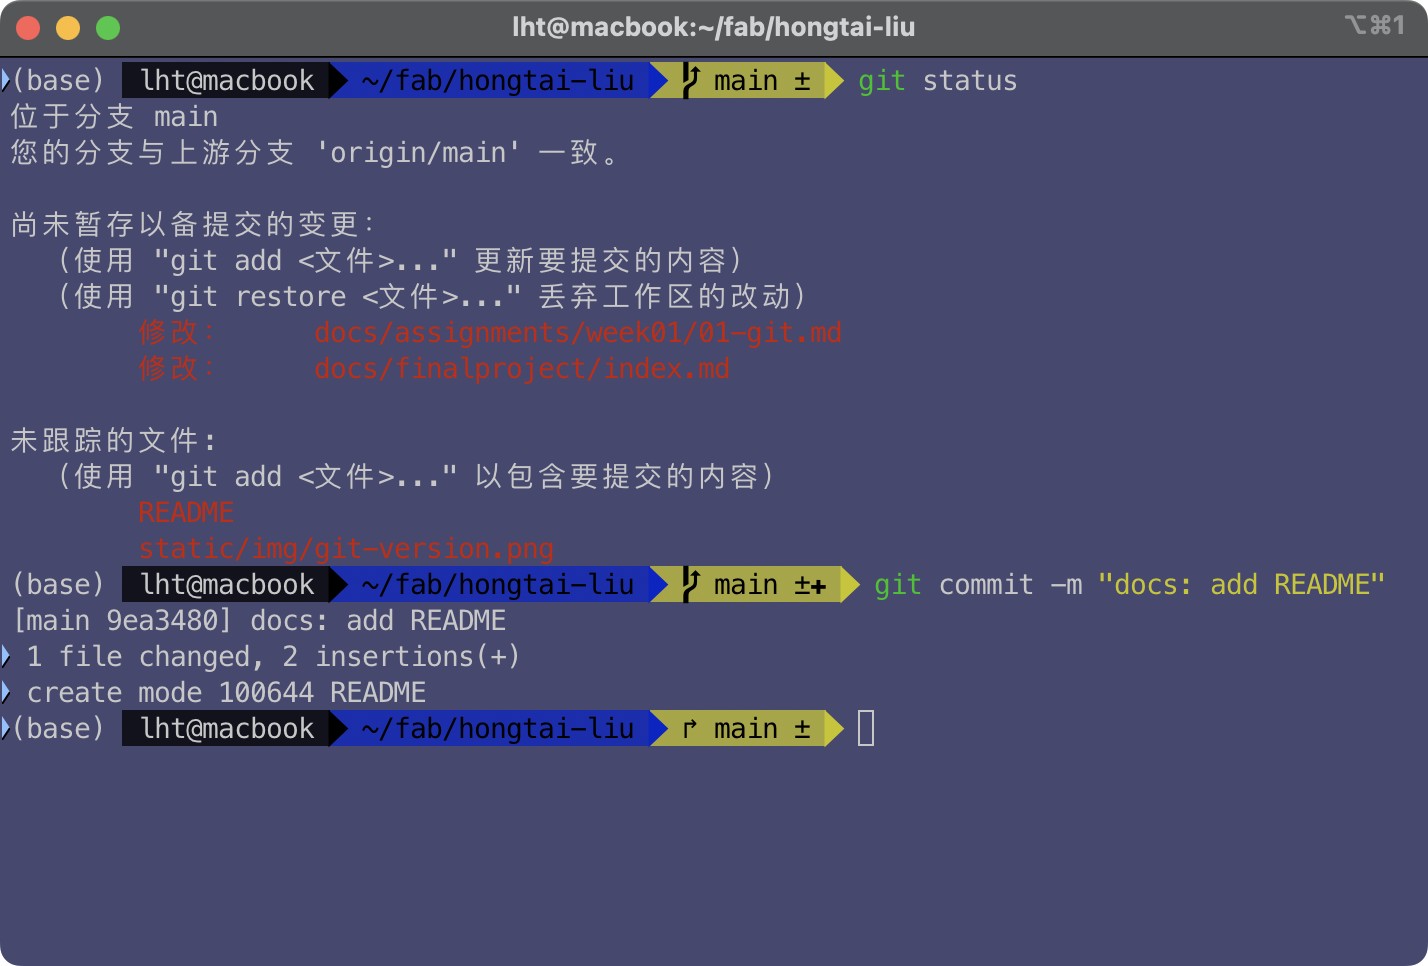
To commit changes to your repository, use the git commit command followed by a commit message. For example, to commit changes with the message "Add index.html", run the following command:
git commit -m "docs: add README"
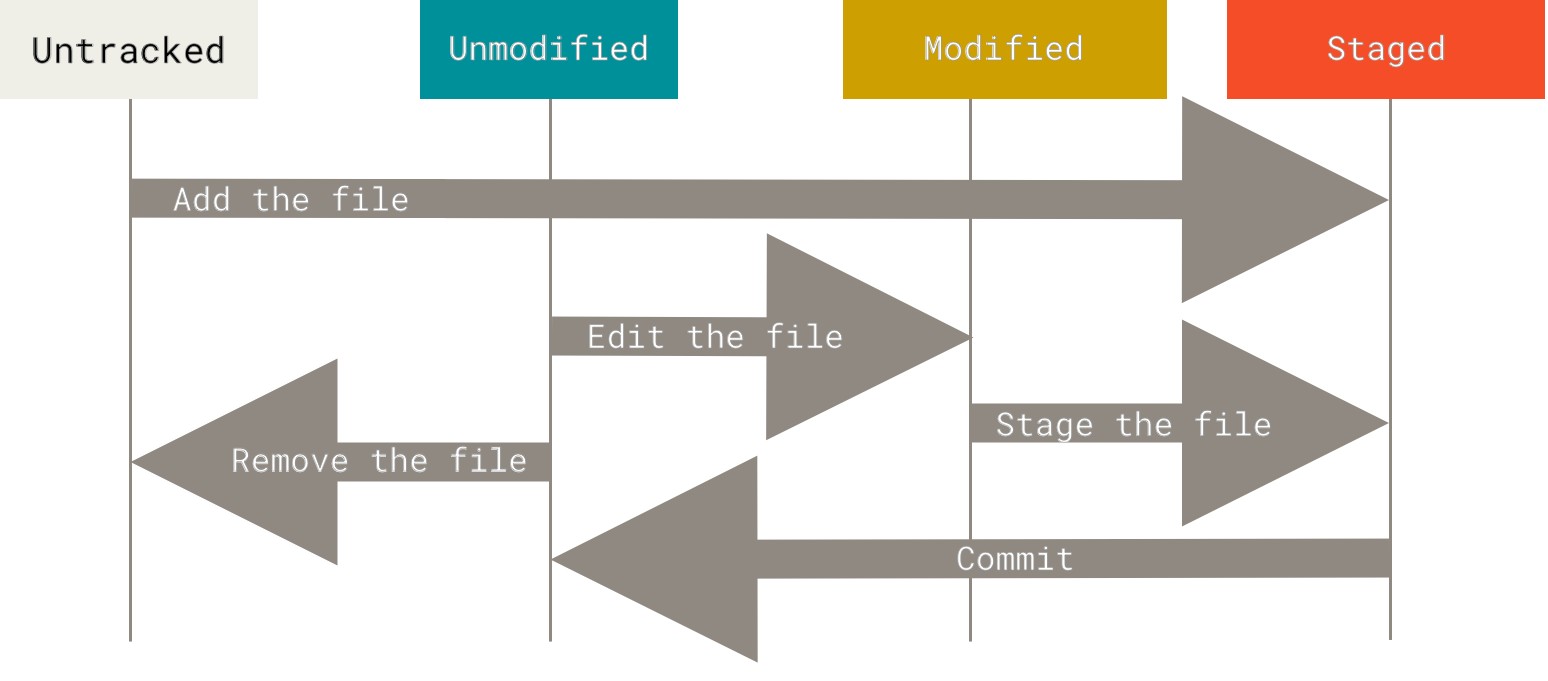
To view the status of your files, use the git status command. This command will show you which files have been modified, added, or deleted in your repository.
1.4 Setup Remote Repository
To set up a remote repository, you need to create a new repository on a hosting service like GitHub, GitLab, or Bitbucket. Once you have created the repository, you can add it as a remote to your local repository using the git remote add command. For example, to add a remote named origin with the URL of the remote repository, run the following command:
git remote add origin
if you was cloned a repository from a remote source, you can check the remote repository using the following command:
git remote -v

In some case, you need to configure the authentication of the remote repository, you can use the following command to set up the authentication:
git config credential.helper store
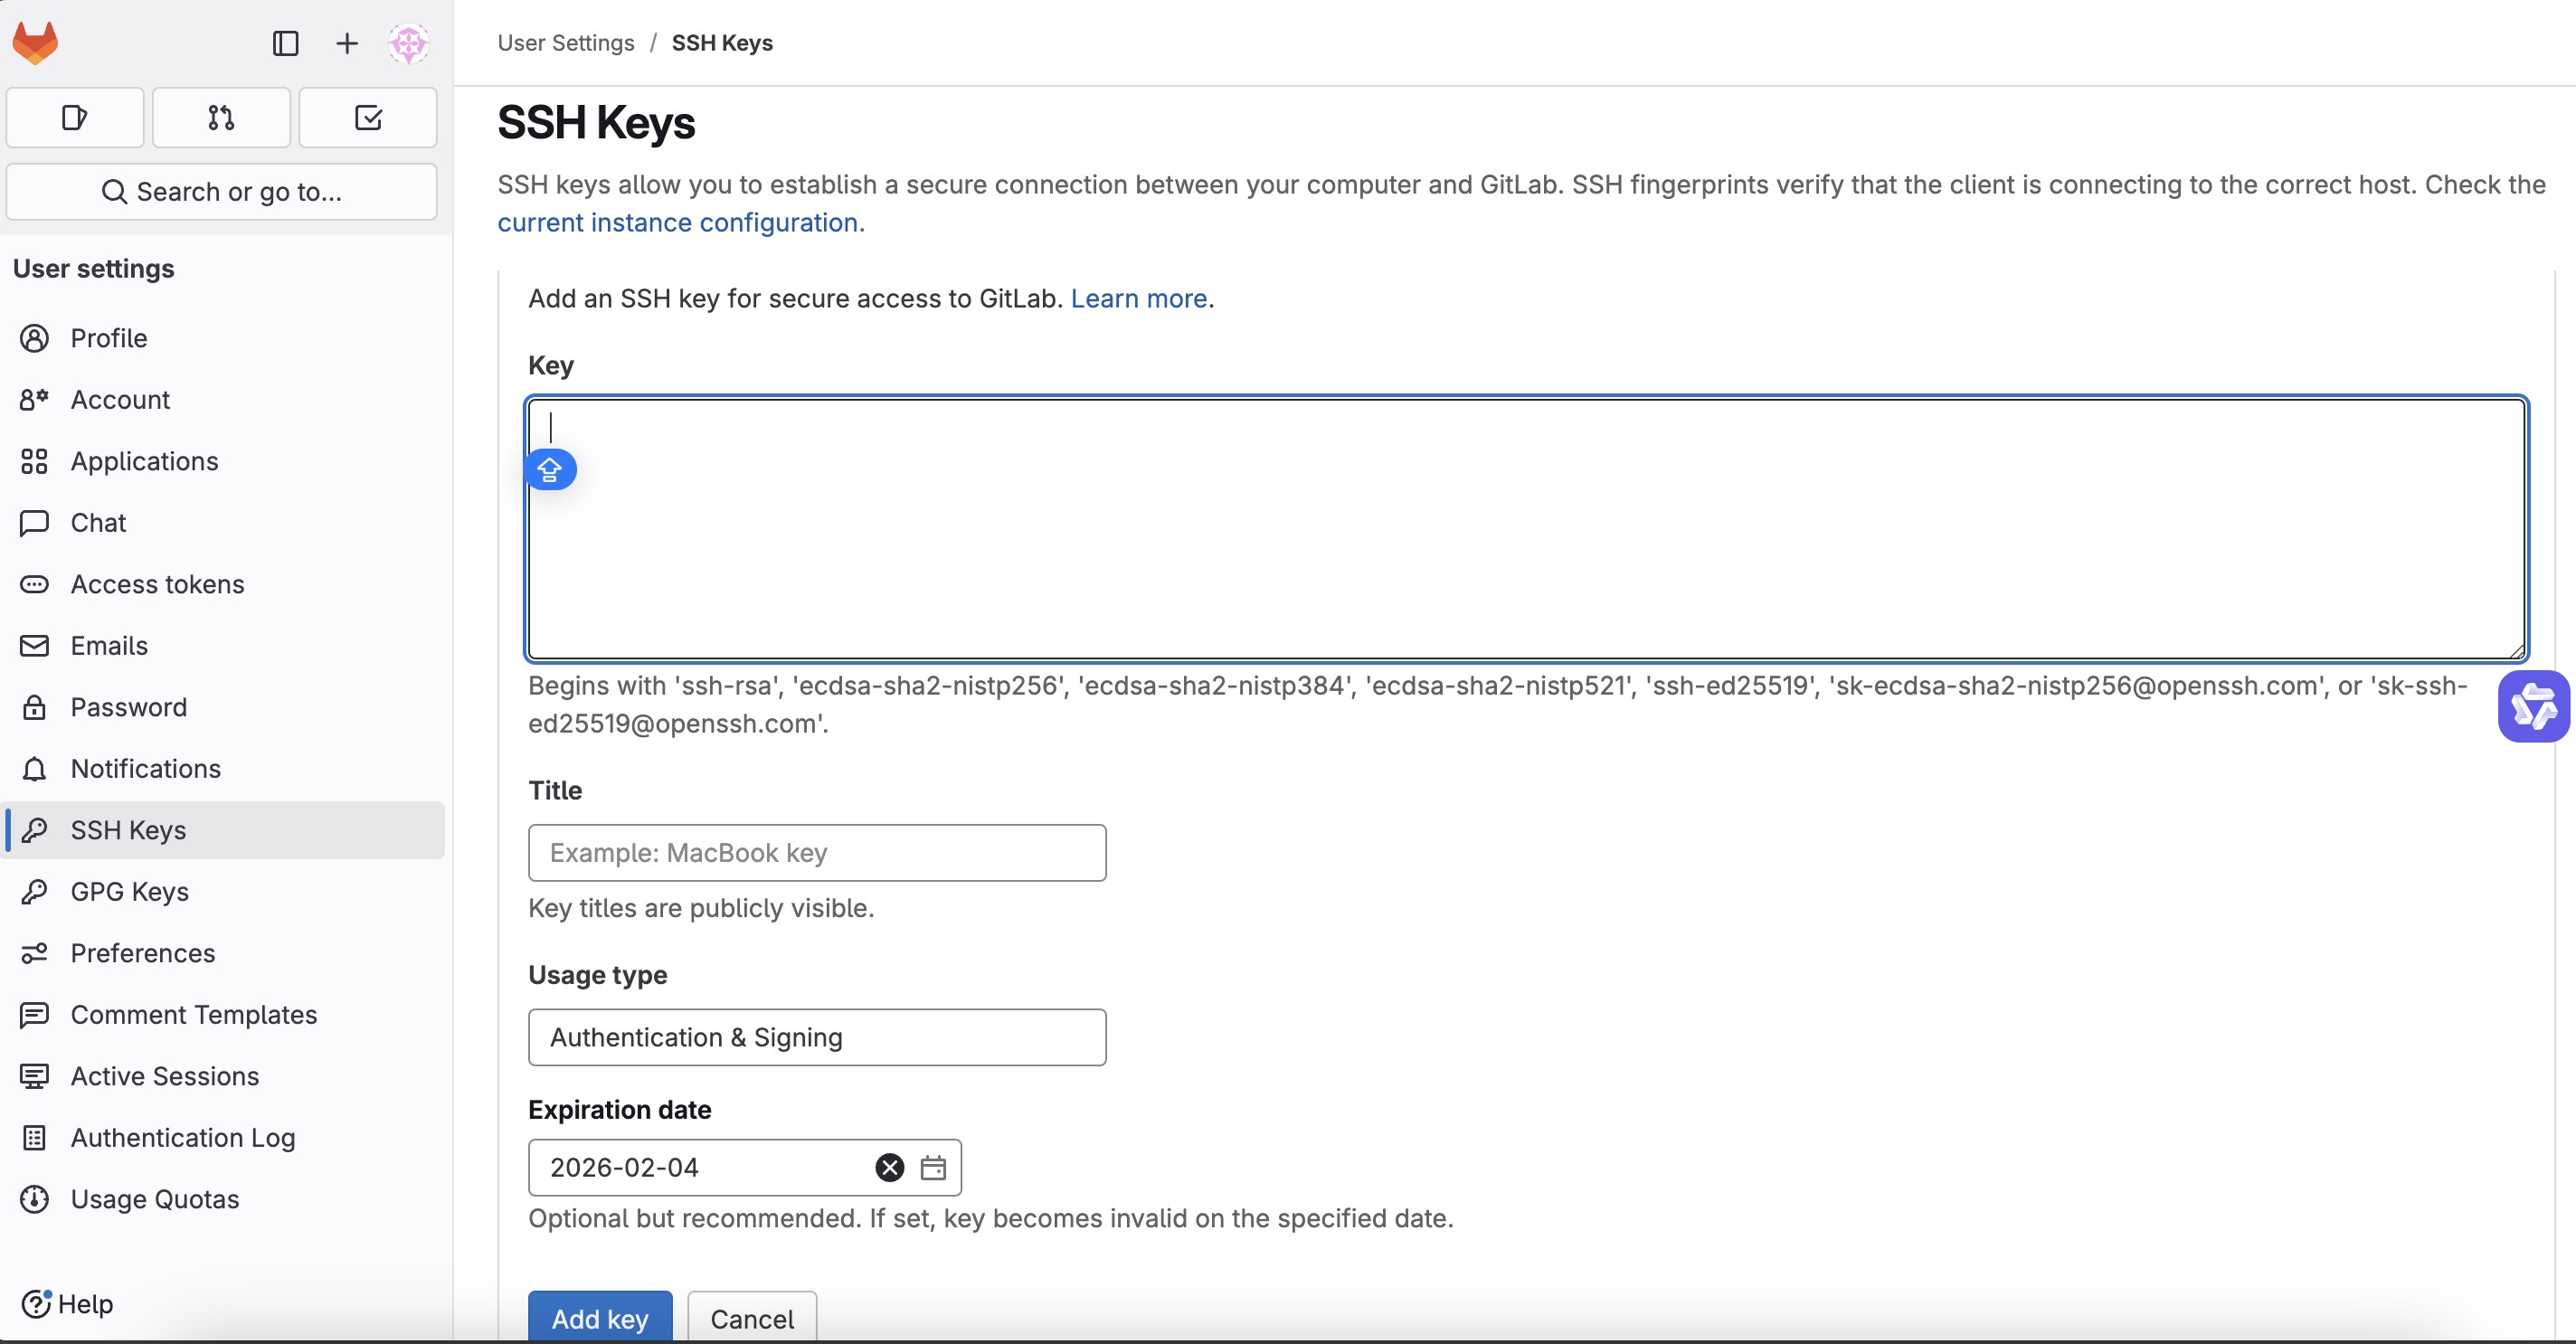
1.6 SSH Key Configuration
To set up an SSH key for your Git account, follow these steps:
- Generate an SSH key using the
ssh-keygencommand. You can generate an SSH key with the following command:
ssh-keygen -t rsa -b 4096 -C "
- Add the SSH key to your Git account. Copy the contents of the public key file (usually
~/.ssh/id_rsa.pub) and paste it into the SSH keys section of your Git account settings.
1.7 Notes
In the case of fabacademy, the repository is limited the maximum size of the repository is about 200MB, so you need to be careful about the size of the repository. If the repository is too large, you will get an error when pushing the repository to the remote repository.