Week 14 - Interface and Application Programming
Published on: June 01, 2025 Updated on: April 11, 2026
In this week's assignment, the focus was on Interface and Application Programming. As part of the individual assignment, I developed an application that interfaces with the microcontroller I used for my final project — allowing the user to control the device through a custom-built user interface. In the group assignment, we explored different programming environments and tools to evaluate their strengths and limitations for creating interactive applications.
Creating a Simple Remote Control App for Manual Operation
To create a basic app for manually controlling my final project, I used MIT App Inventor — a beginner-friendly platform that allows for quick and intuitive app development using a drag-and-drop interface.
App Inventor is available online: https://ai2.appinventor.mit.edu/
In order to use it, I had to login with a Google account. Once logged in, I created a new project and was able to design the app layout by dragging and dropping interface components like buttons and arrangements directly onto the smartphone preview screen.
Creating an App with App Inventor
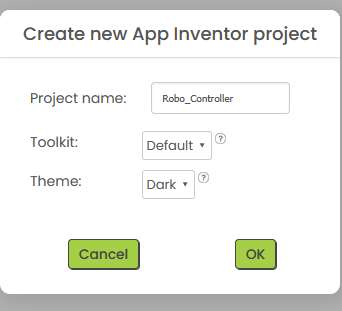
The first step is to create a new project. Settings such as the name of the project and the preferred theme can be made. I decided to chose a dark theme and called the App Robo_Controller.
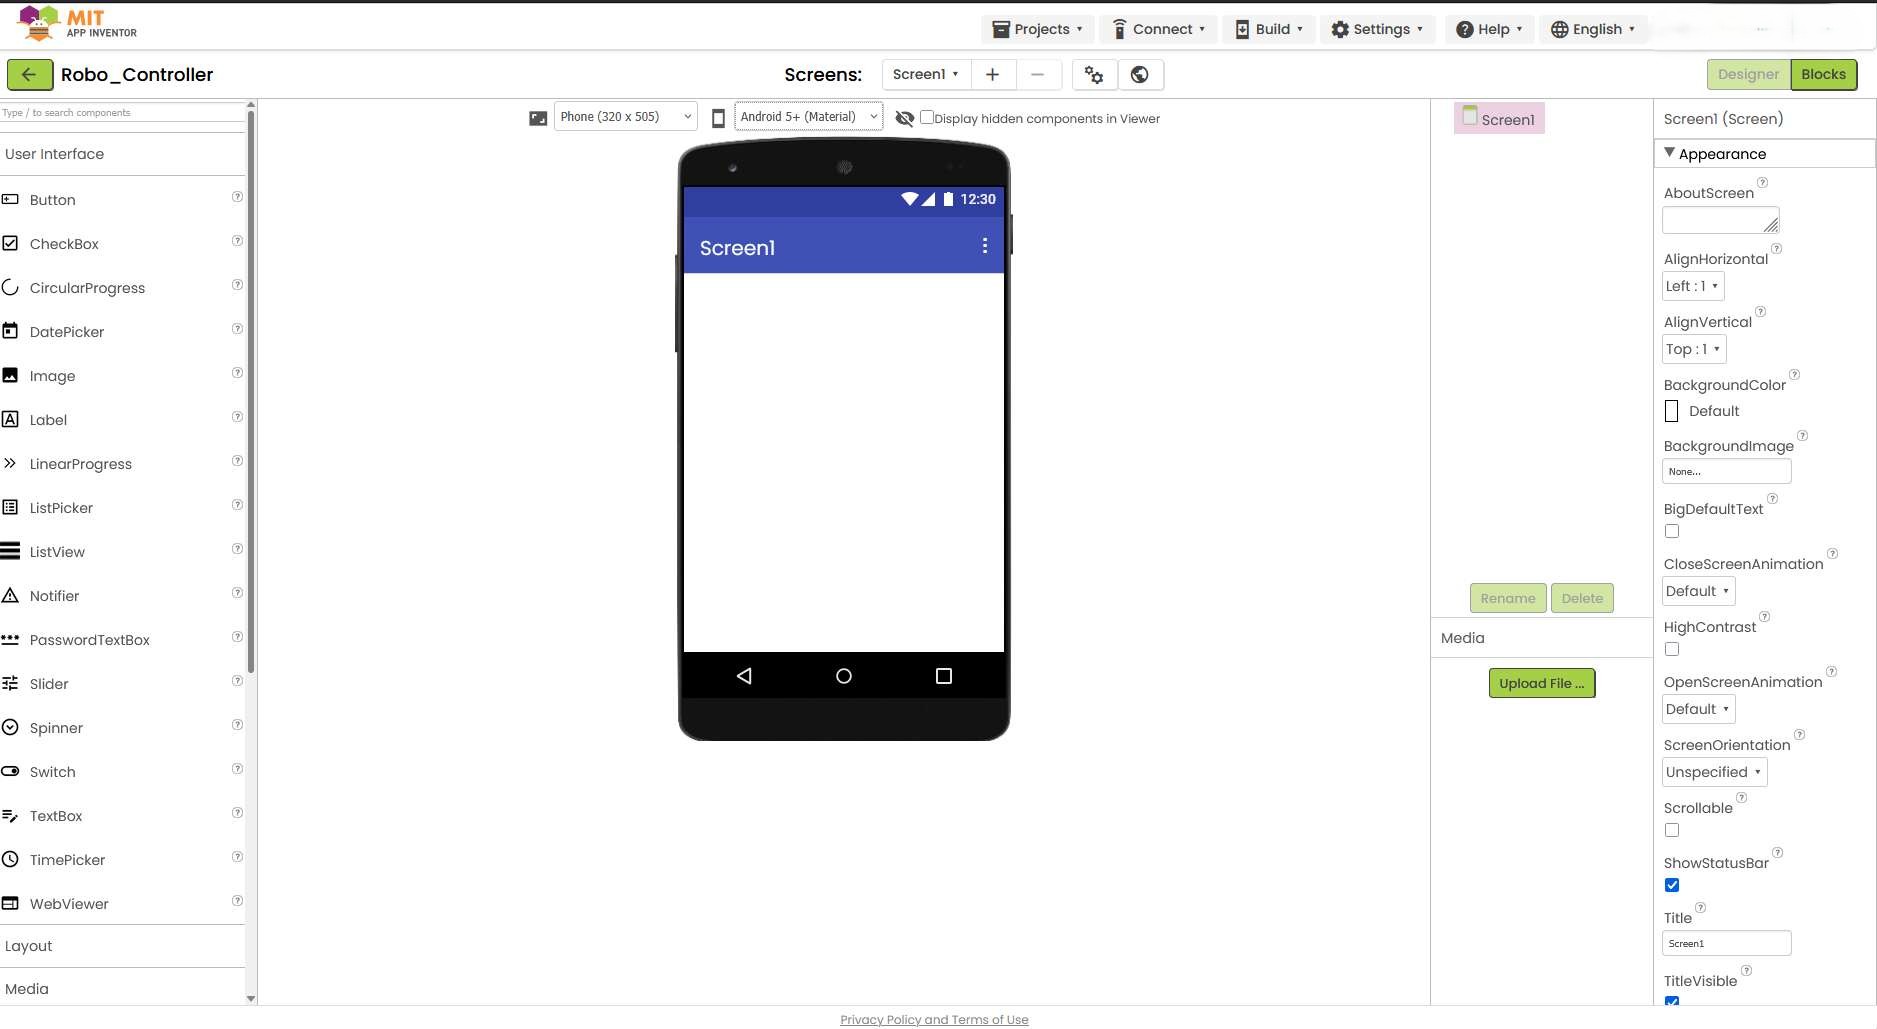
The App Inventor interface appears next. In the center is an old emulated smartphone and on the left in the list are a handful of components that can be placed on the screen using drag and drop.
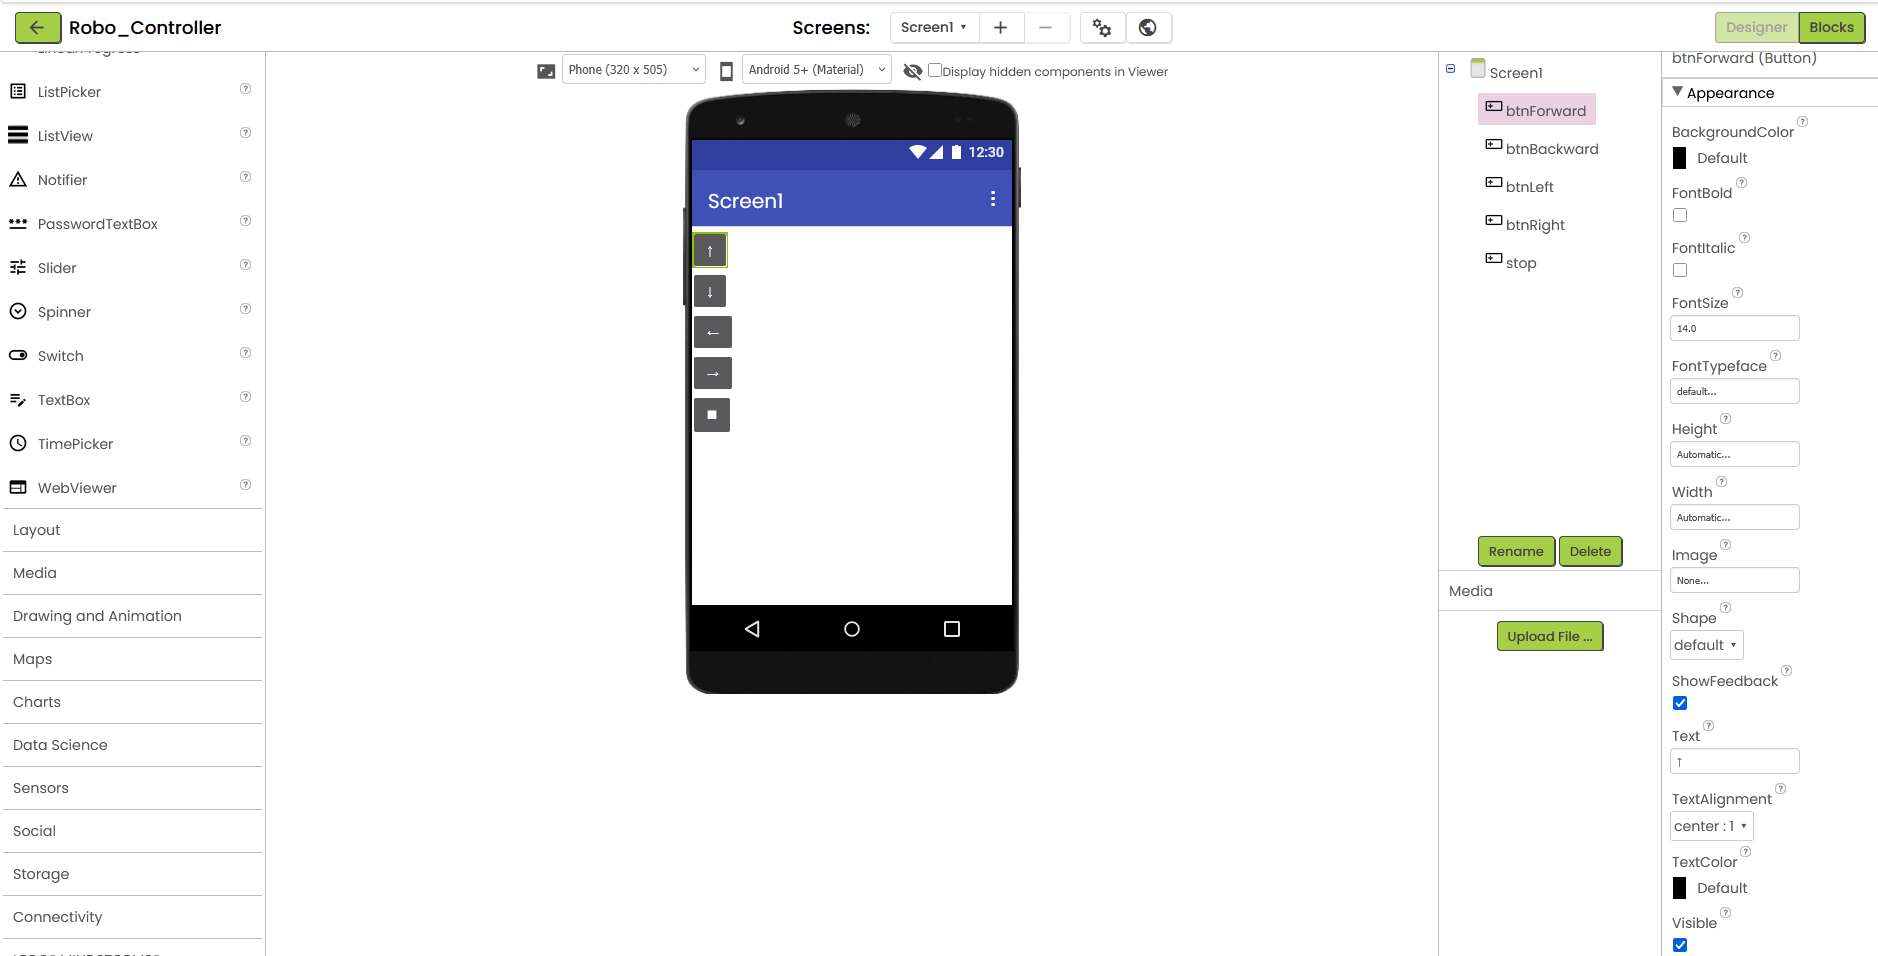
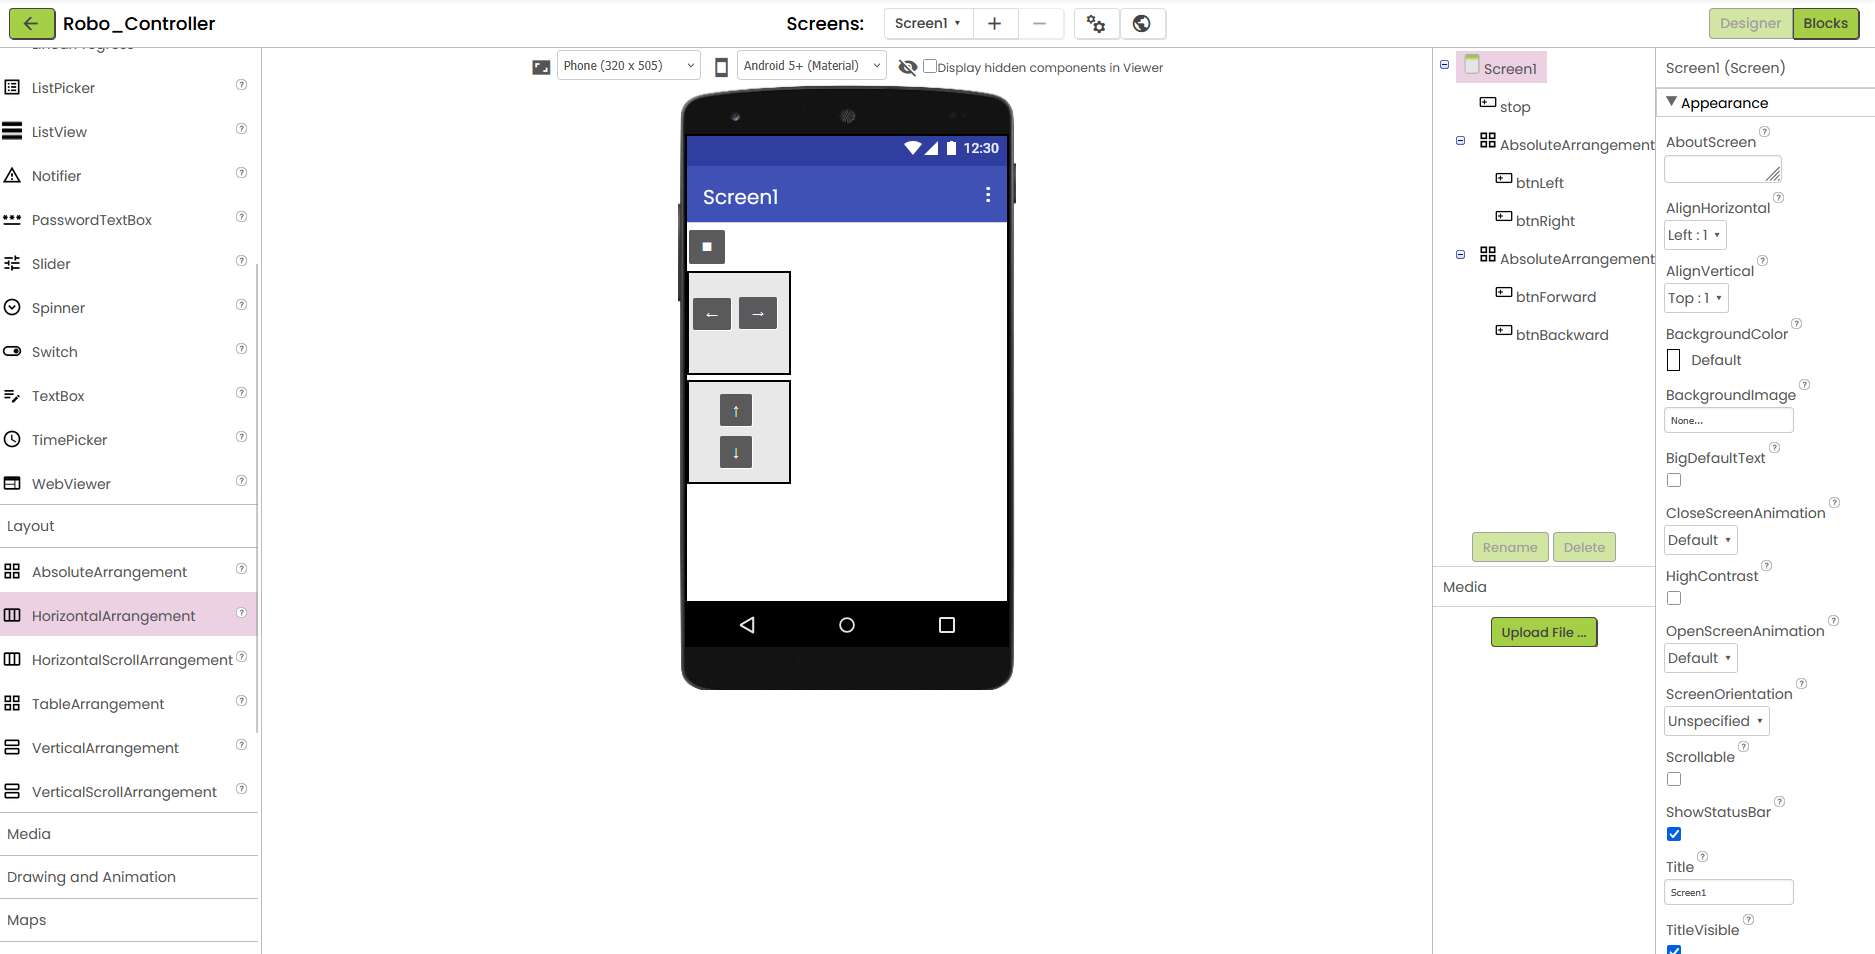
First, I created five buttons and labeled them with arrow symbols and a stop icon. In the right view I have the names of the buttons for the internal program code.
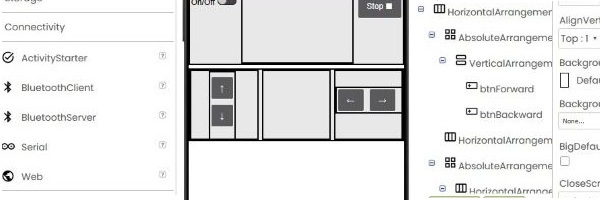
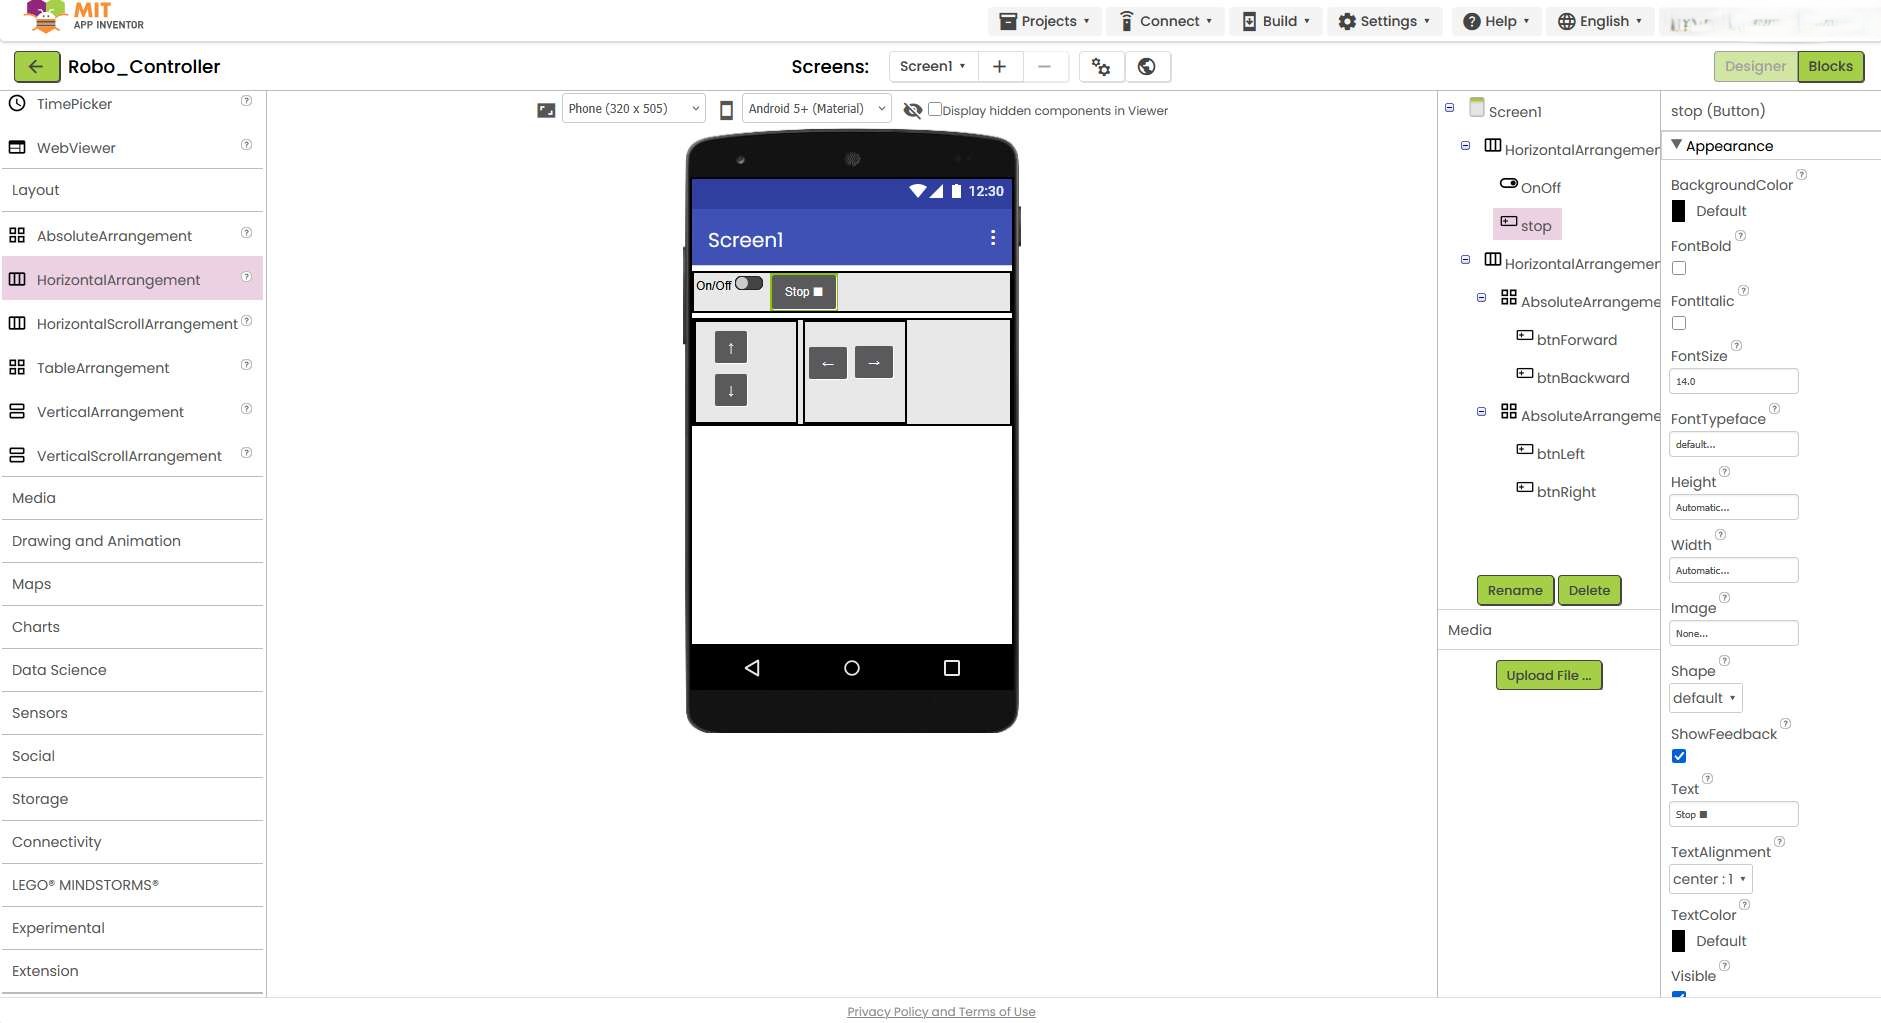
Next, I experimented with the different arrangements, as I was aiming for a layout similar to that of a game controller.
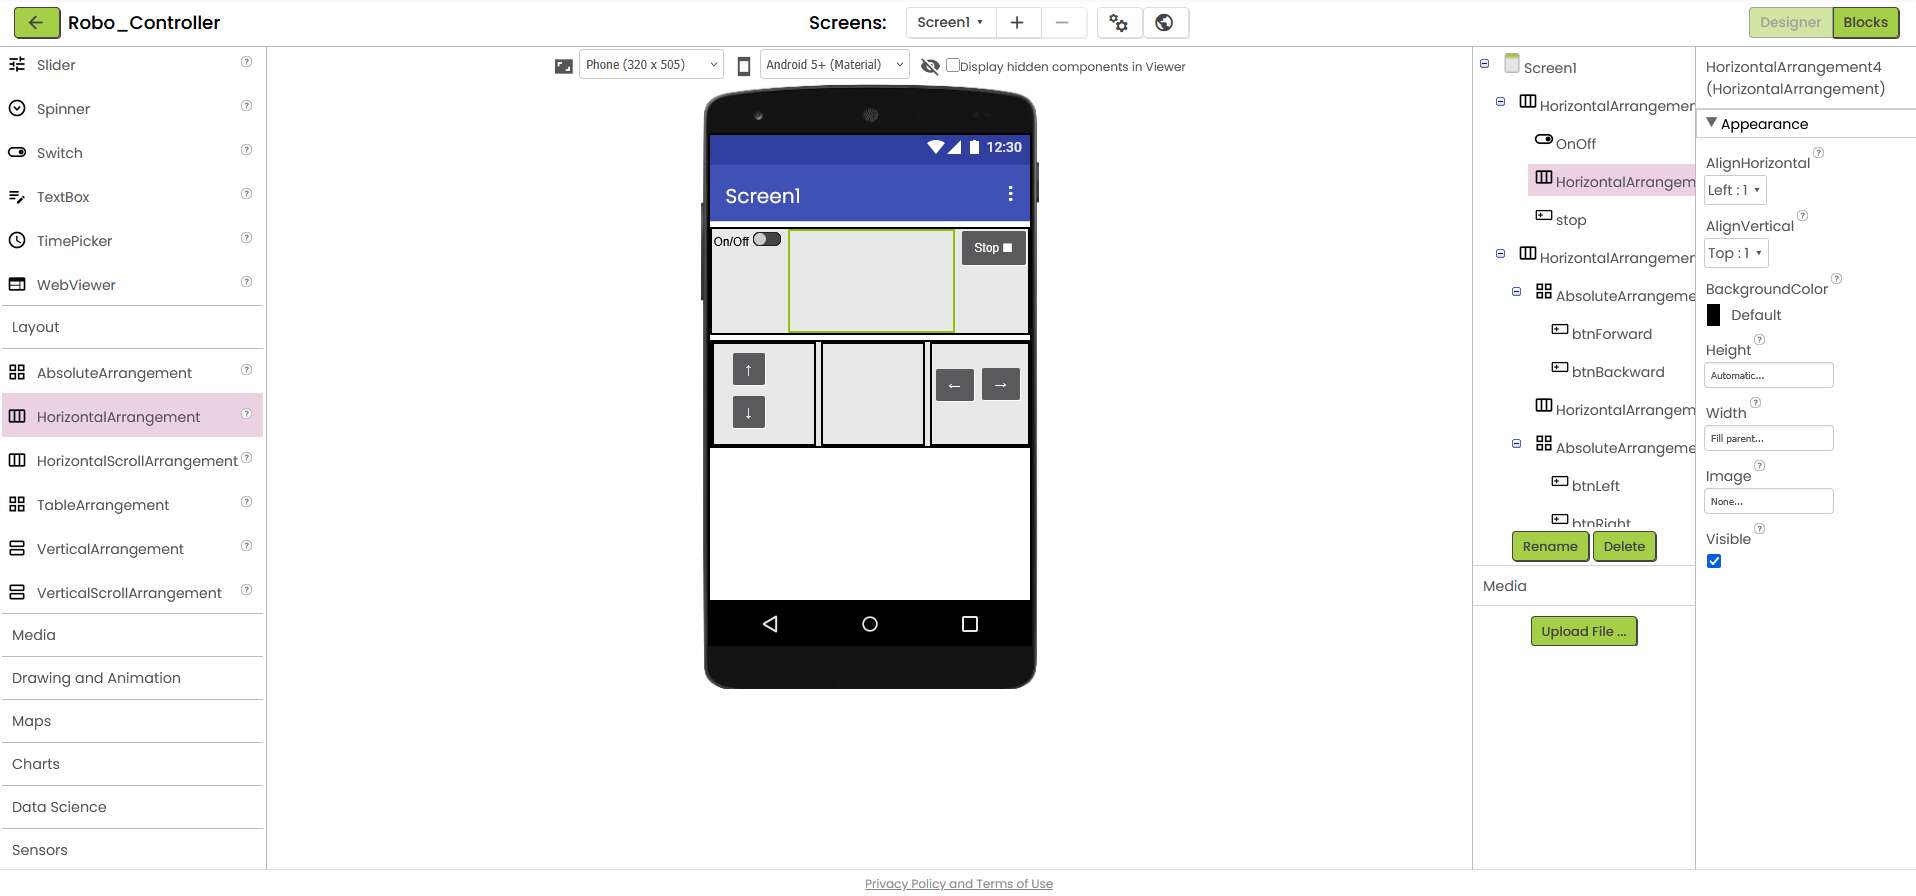
I tried to get closer to my goal with horizontal and vertical arrangements. When I was ready, I initially searched in vain for the function of a placeholder.
After a little research, I found out that you can achieve this by placing an appropriate arrangement where the space is to be kept free and setting the width to fill parent.
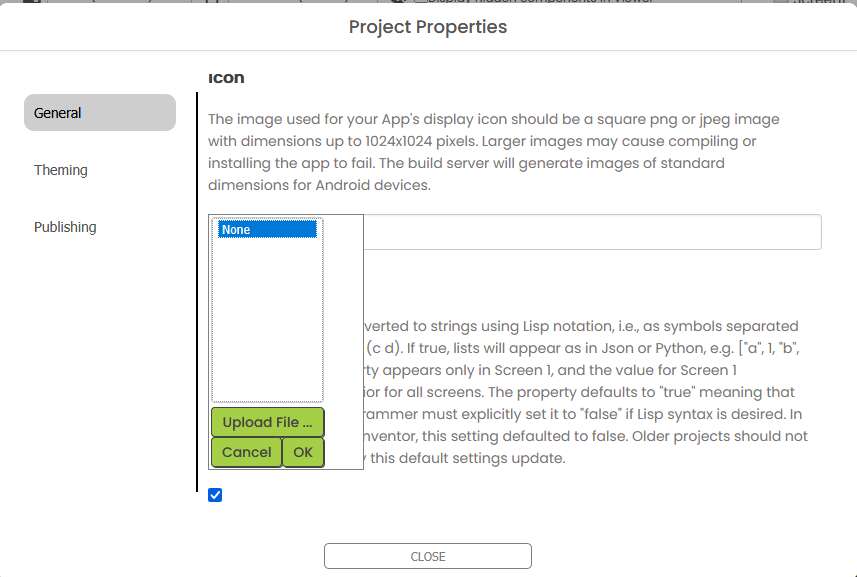
If you want to give the app its own image, which is displayed on the home screen, you can do this here.
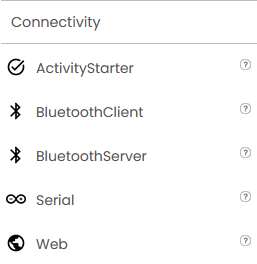
I was looking for a way to configure UDP communication in the table on the left column. Unfortunately, there were only other connectivity options.
Sending Messages via UDP
Adding UDP Communication
To control the ESP32 via WiFi, I needed UDP communication. App Inventor does not include a native UDP component, so I installed an external UDP extension.
Extensions can be found here: https://puravidaapps.com/extensions.php
I found the UDP extension from the community archive: Community UDP Extension Link
Installing the Extension
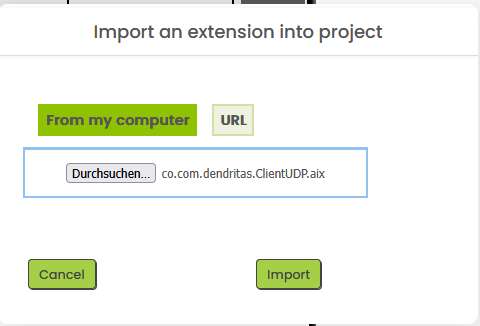
To install it:
- I downloaded the
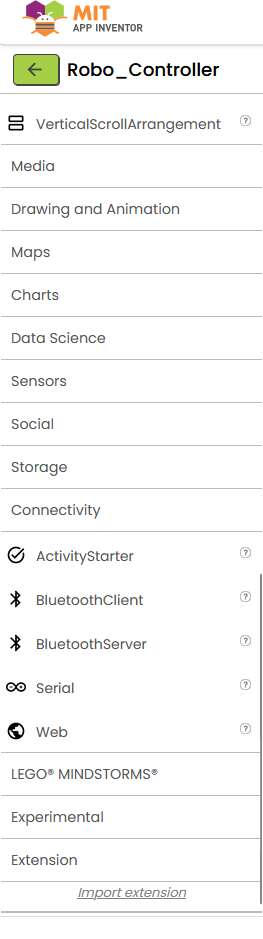
.aixfile. - In App Inventor, I scrolled down to Extension in the left-hand sidebar.
- Clicked Import Extension and uploaded the file.
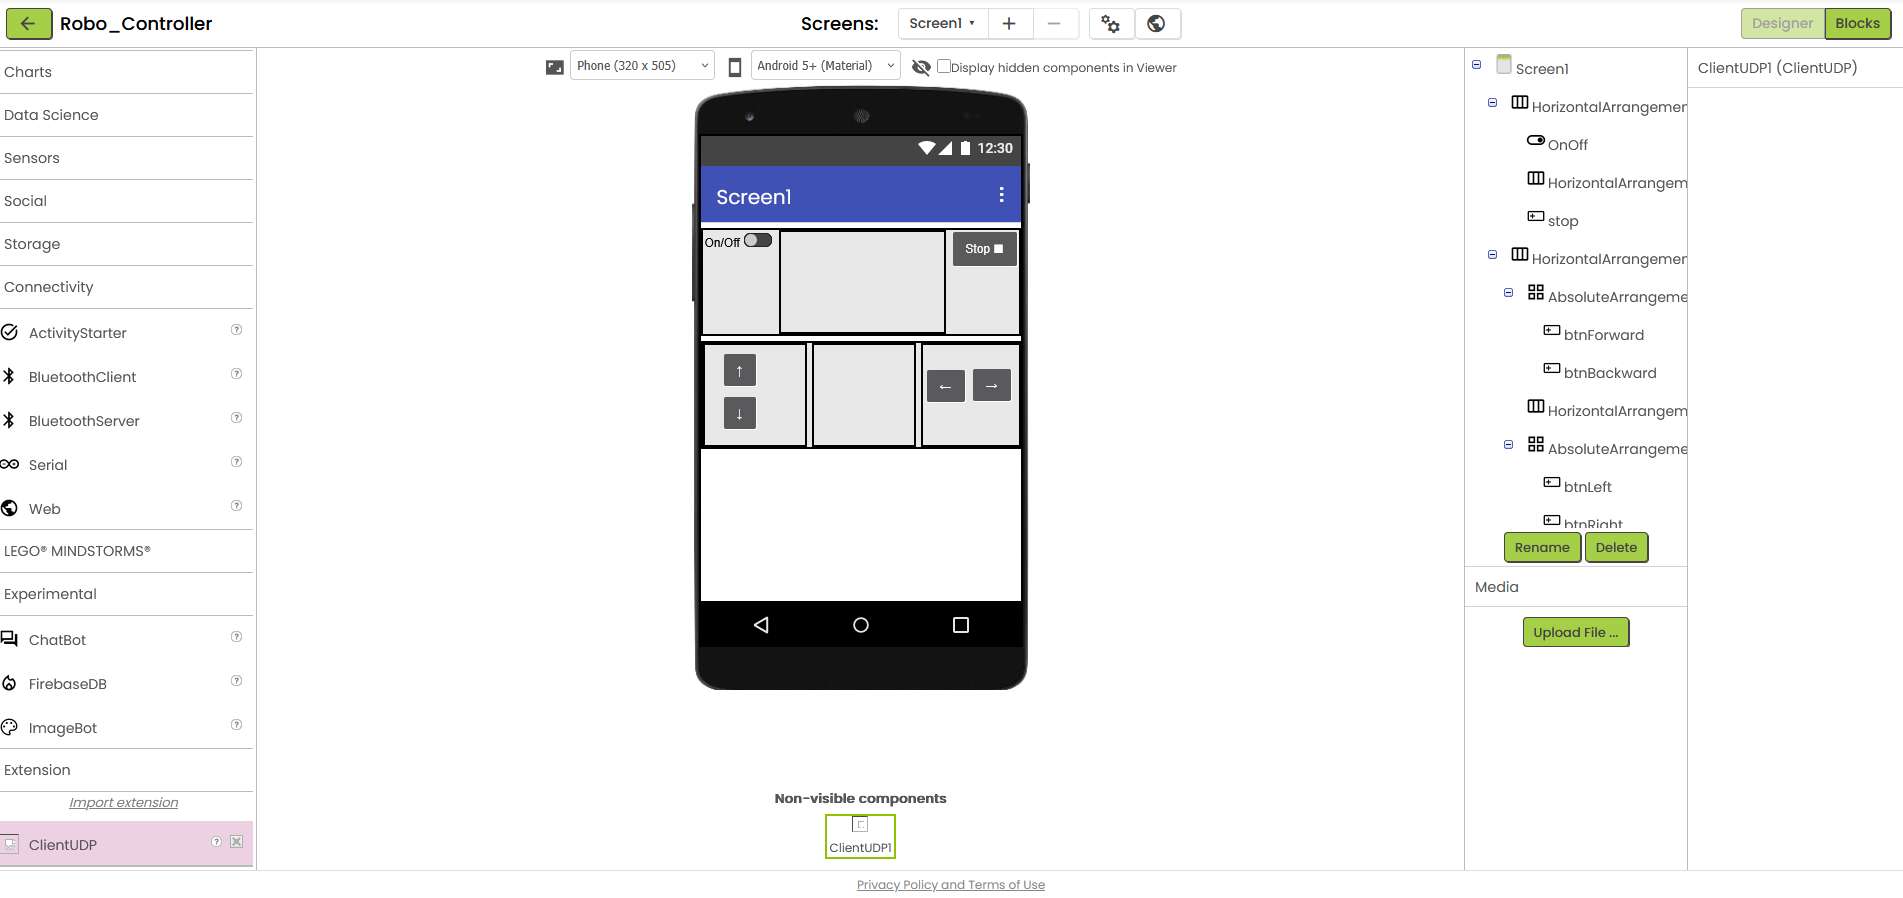
Once installed, I dragged the ClientUDP component into my project (non-visible components area).
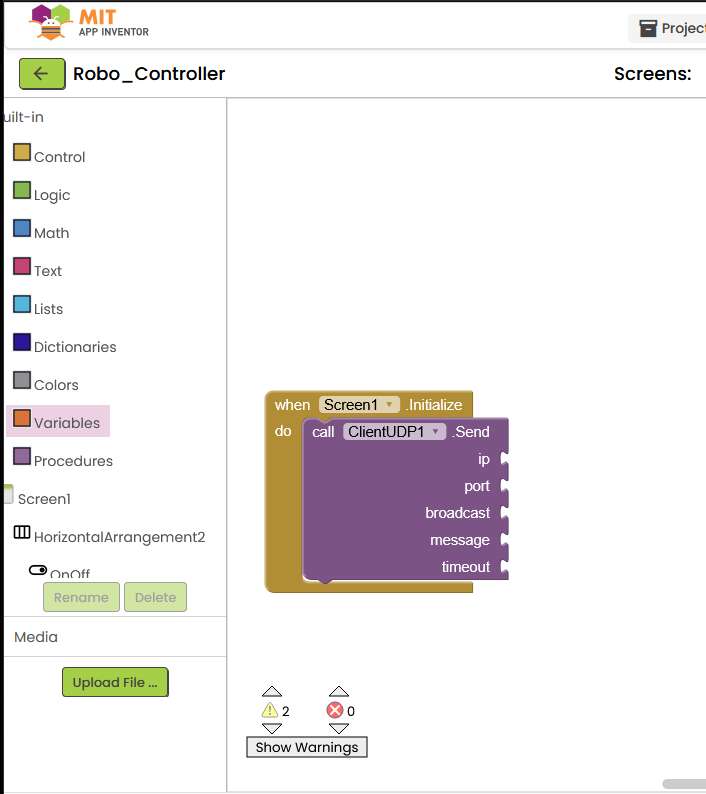
I switched to the block view and dragged a call ClientUDP1.Send block into the view. This should be triggered first when the app initializes Screen1.
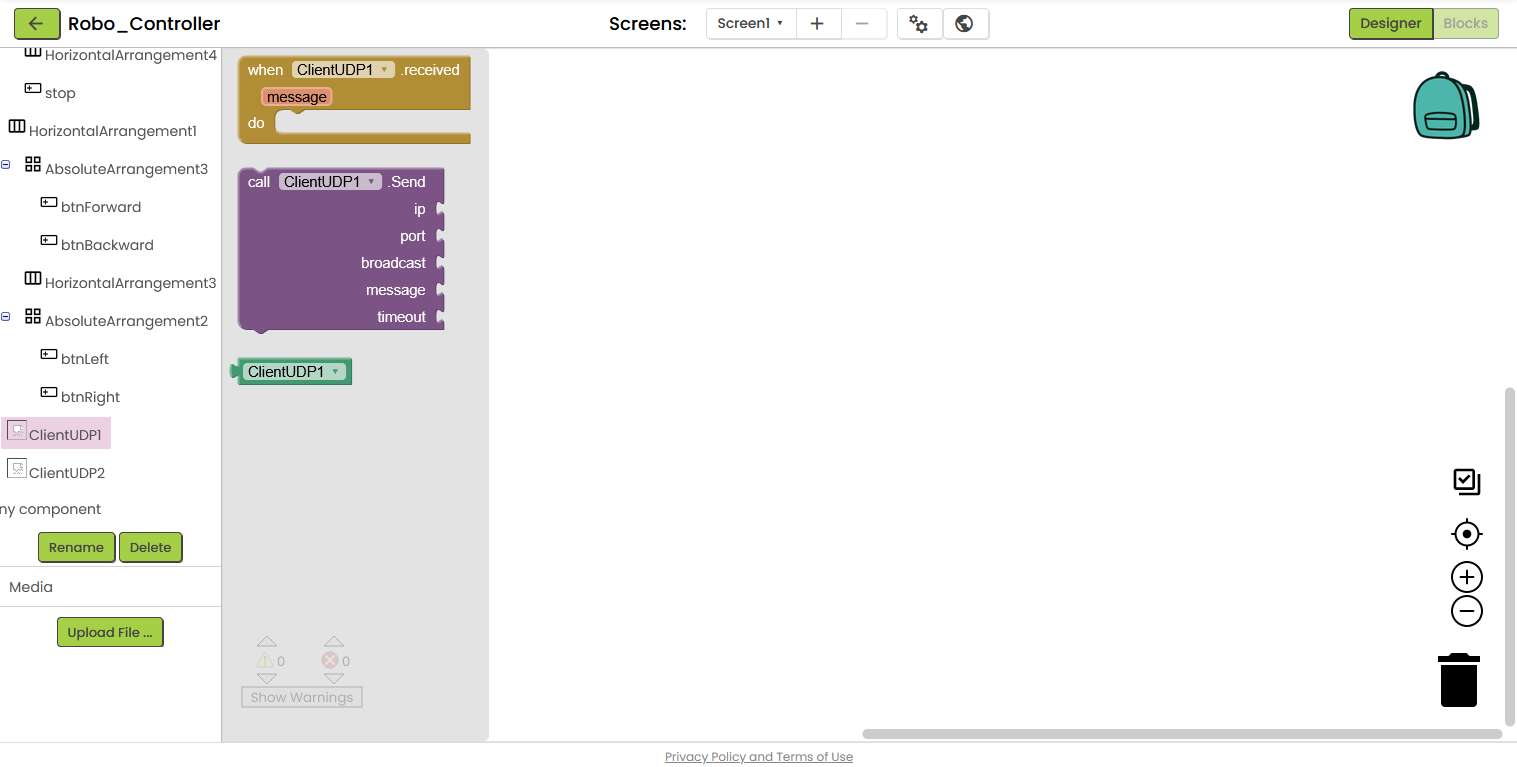
For this reason, I have nested the UDP block in the Screen1.Initialize block.
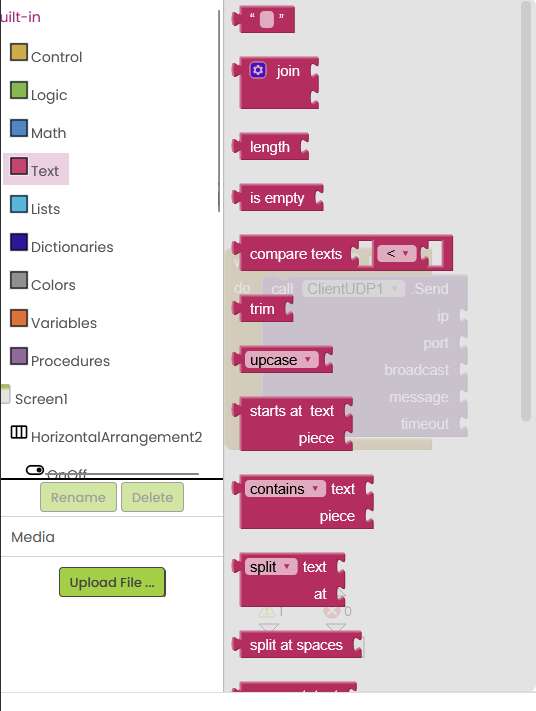
To fill the different variables of the UDP block with values, I had to create different types of built-in blocks. This was slightly counter-intuitive, as I had to create a text block for the IP and a math block for other numbers such as the port, for example.
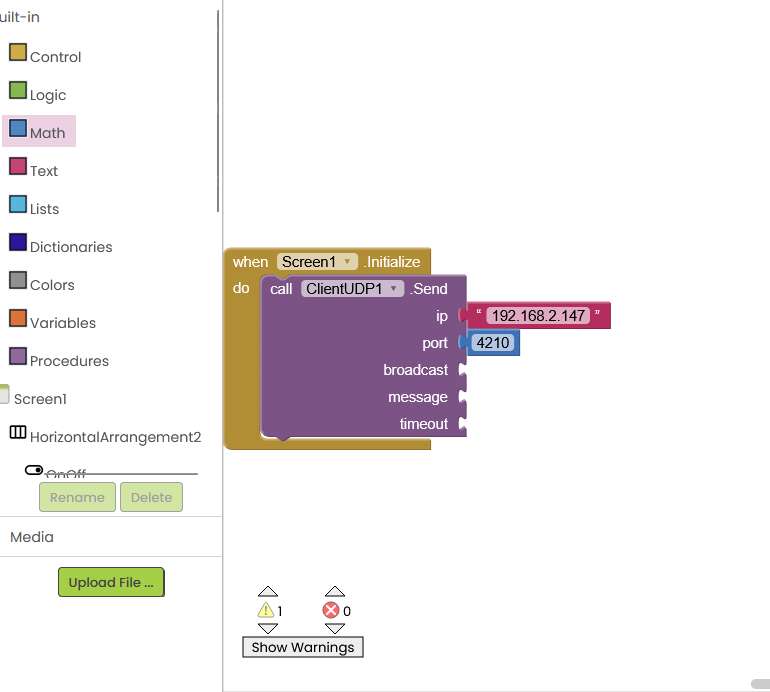
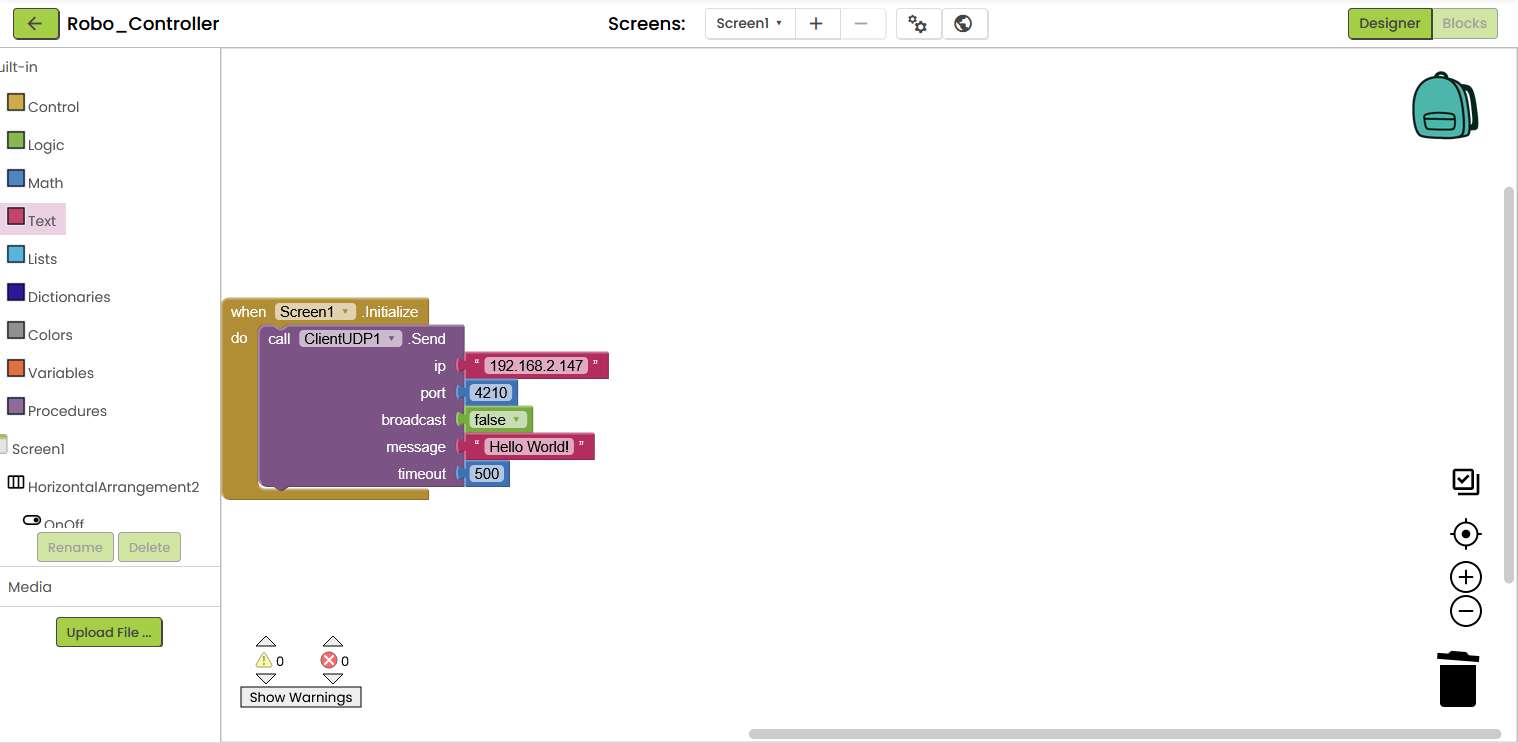
After I had gradually filled the necessary elements of the UDP block, the app was ready for a first test. The aim of the first test was to send a "Hello World" via UDP from the cell phone to the ESP32 and output it on the console.
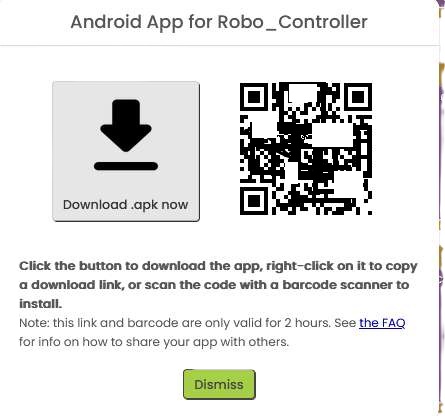
Building the .apk
To test the app on my smartphone, I first had to create an .apk and then download and install it on my phone. Fortunately, App Inventor offers a very simple build process. You click on the "build" tab at the top and wait until the progress bar has run through. You can then download and install the app on your cell phone using a QR. I was really impressed with how easy and smooth the process was.

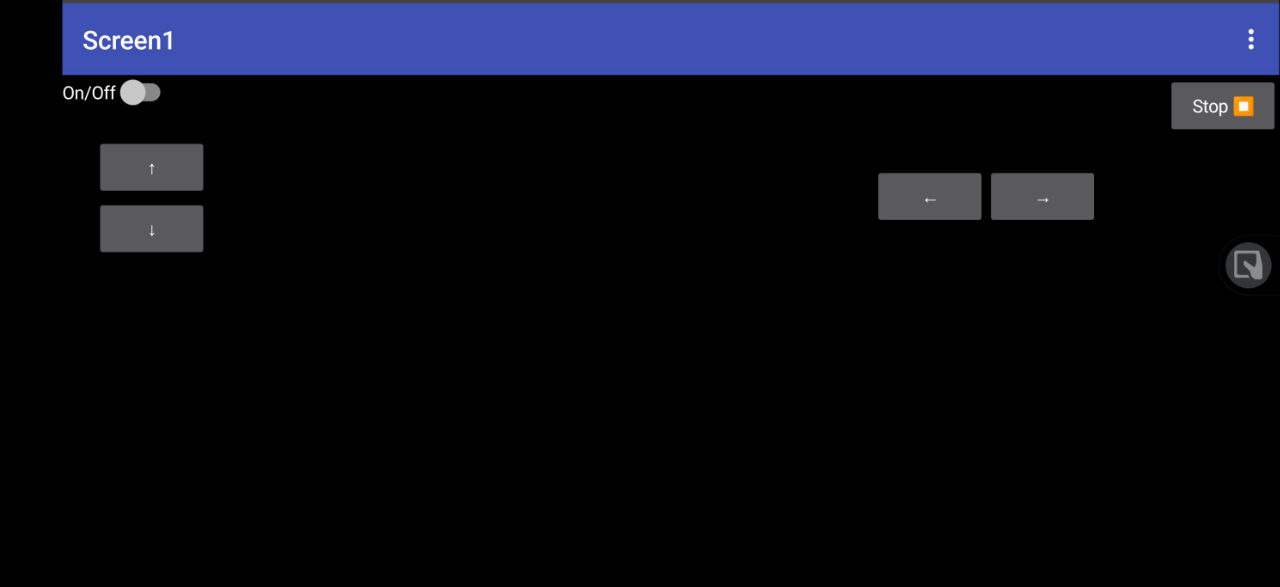
And this is what the finished app looks like on my smartphone. Unfortunately, it's not as pretty as I would have liked for now, but at least it's functional.
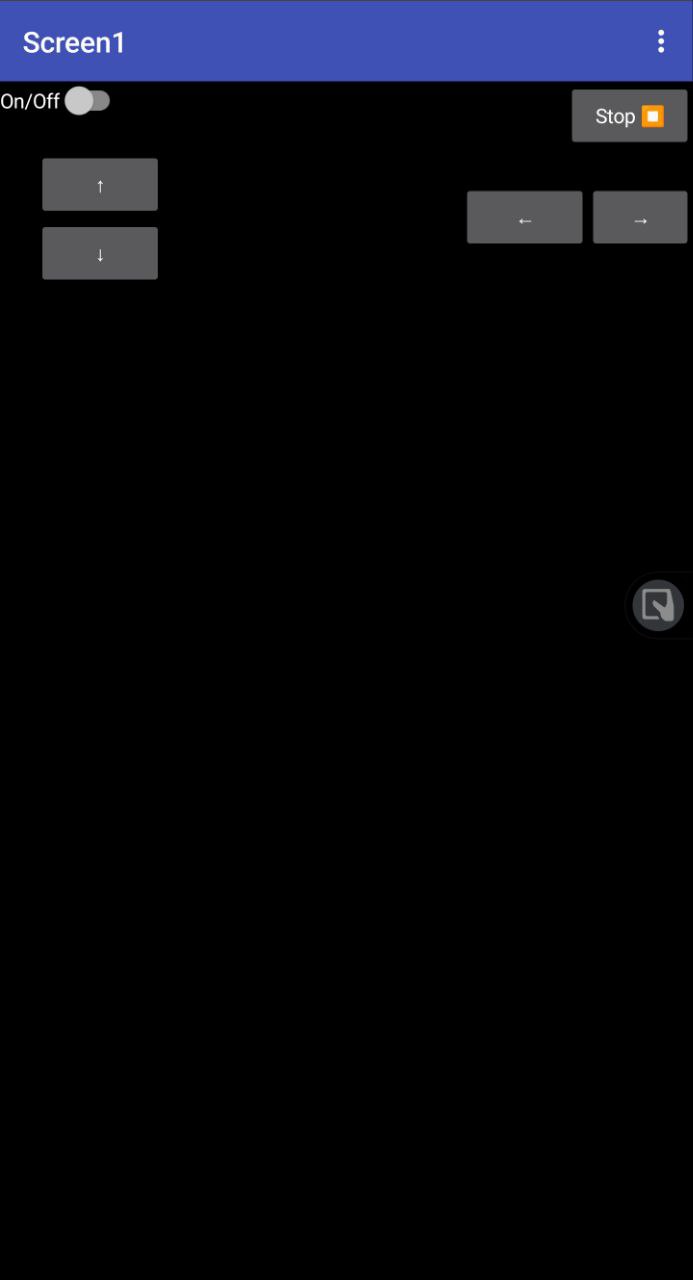
At least the app can be rotated automatically without me having to change anything in the settings, so that there is at least a minimal bit of game controller feeling in landscape format.
Receiving Messages with the ESP32
To receive the message sent by the app via UDP, I programmed the appropriate sketch for the ESP32. This sketch is very similar to the sketch I presented in the Network and Communication week.
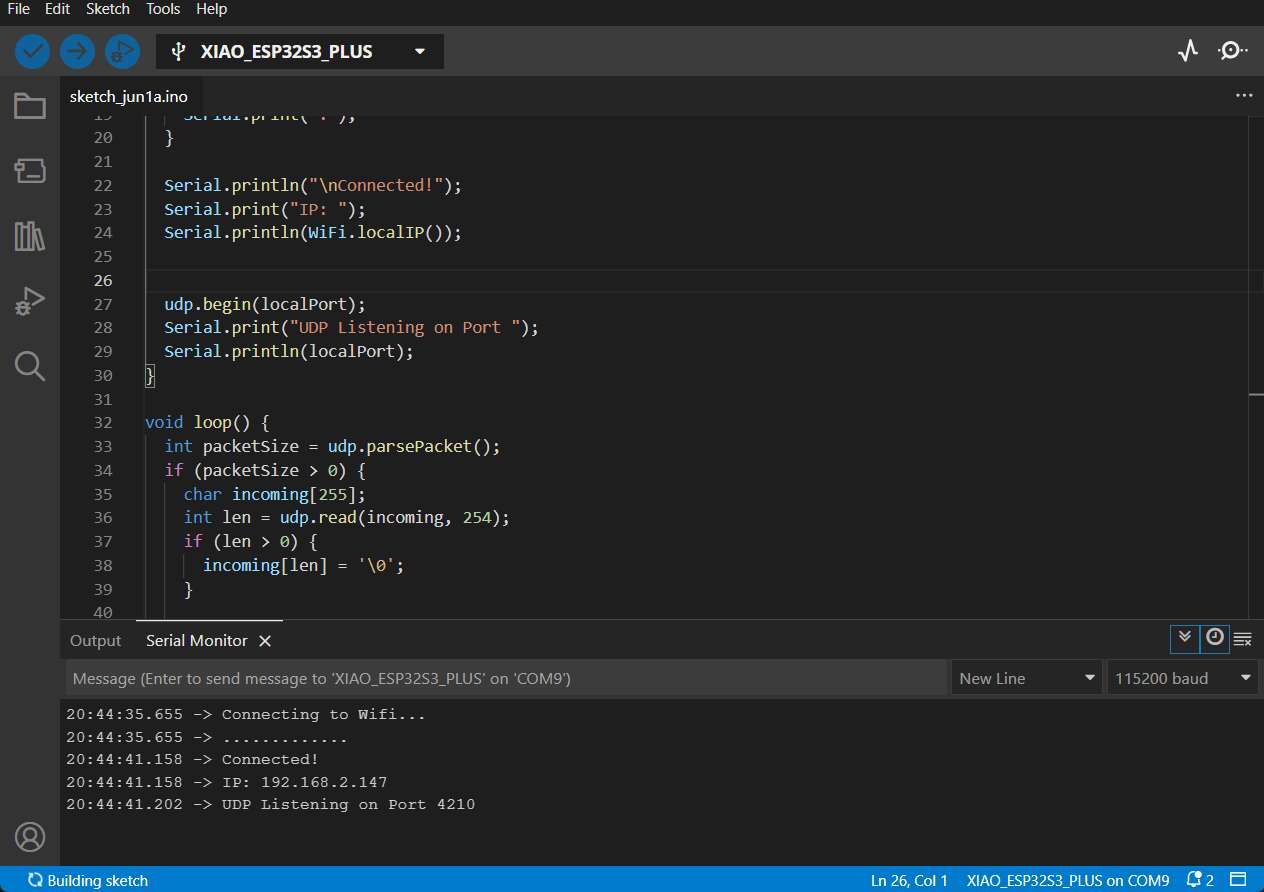
First, the ESP32 connects to the WiFi and then starts receiving messages on port 4210. These are then parsed in the loop and a null operator is appended as the last character of a 255 character message.
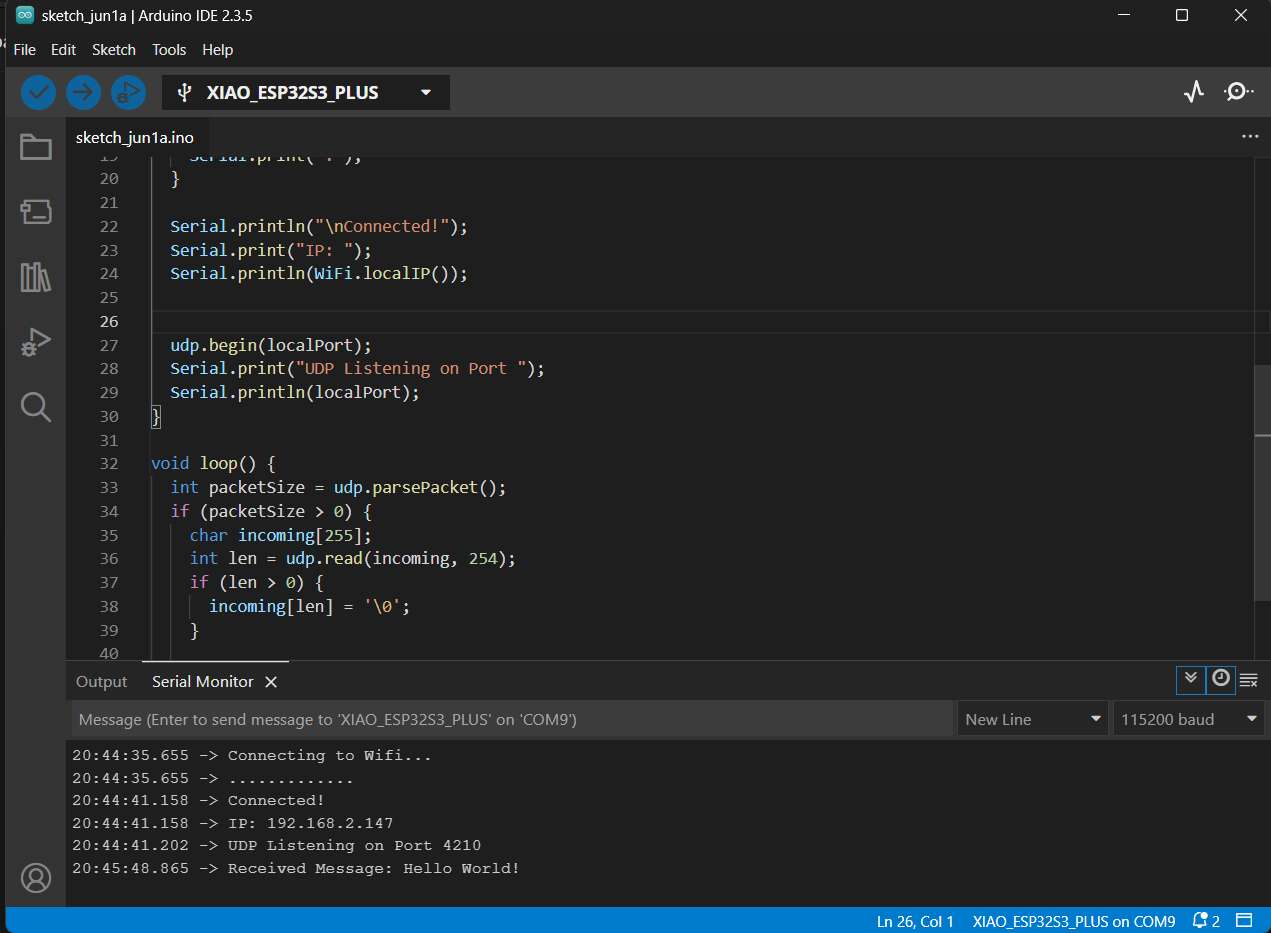
This message is then displayed in the serial monitor and I was very happy that the "Hello World" sent was displayed there when I started the app on my smartphone. As always, the entire code for the ESP32 is available for download in the download section.
Implementation of the control commands
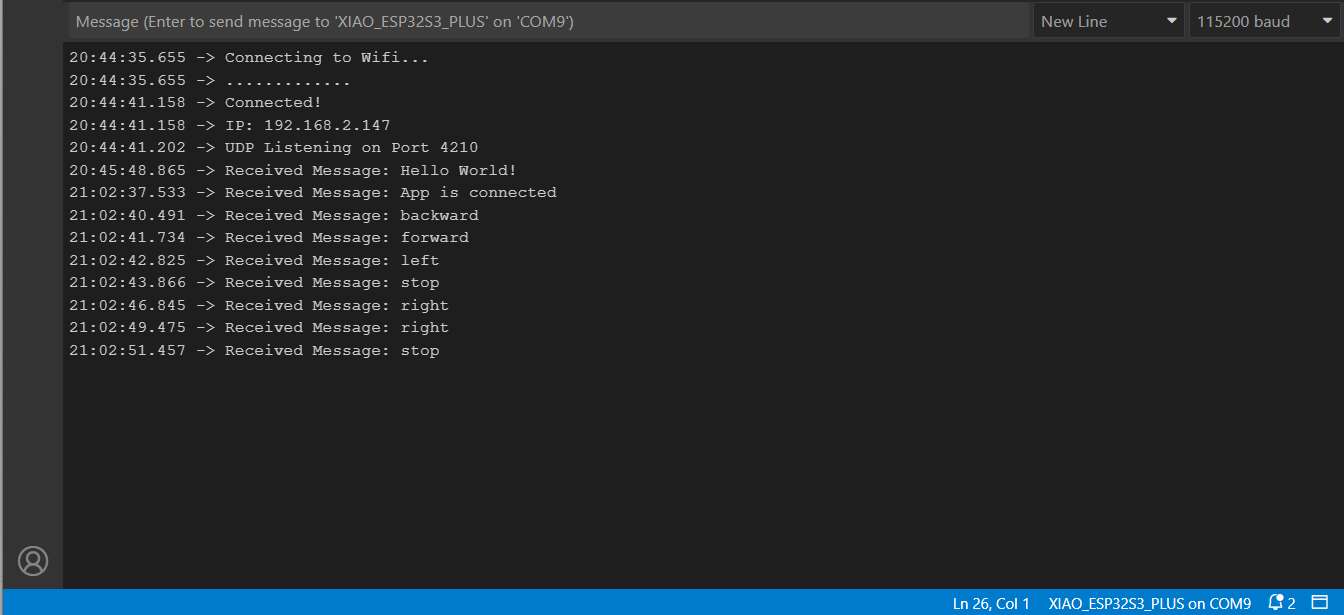
In order to transfer meaningful commands via the individual keys, I decided to create TouchDown and TouchUp blocks for the individual arrow keys. These have the advantage that they send something when the button is first pressed and something else when it is released. This allows the robot to be controlled more precisely than with simple .click blocks.
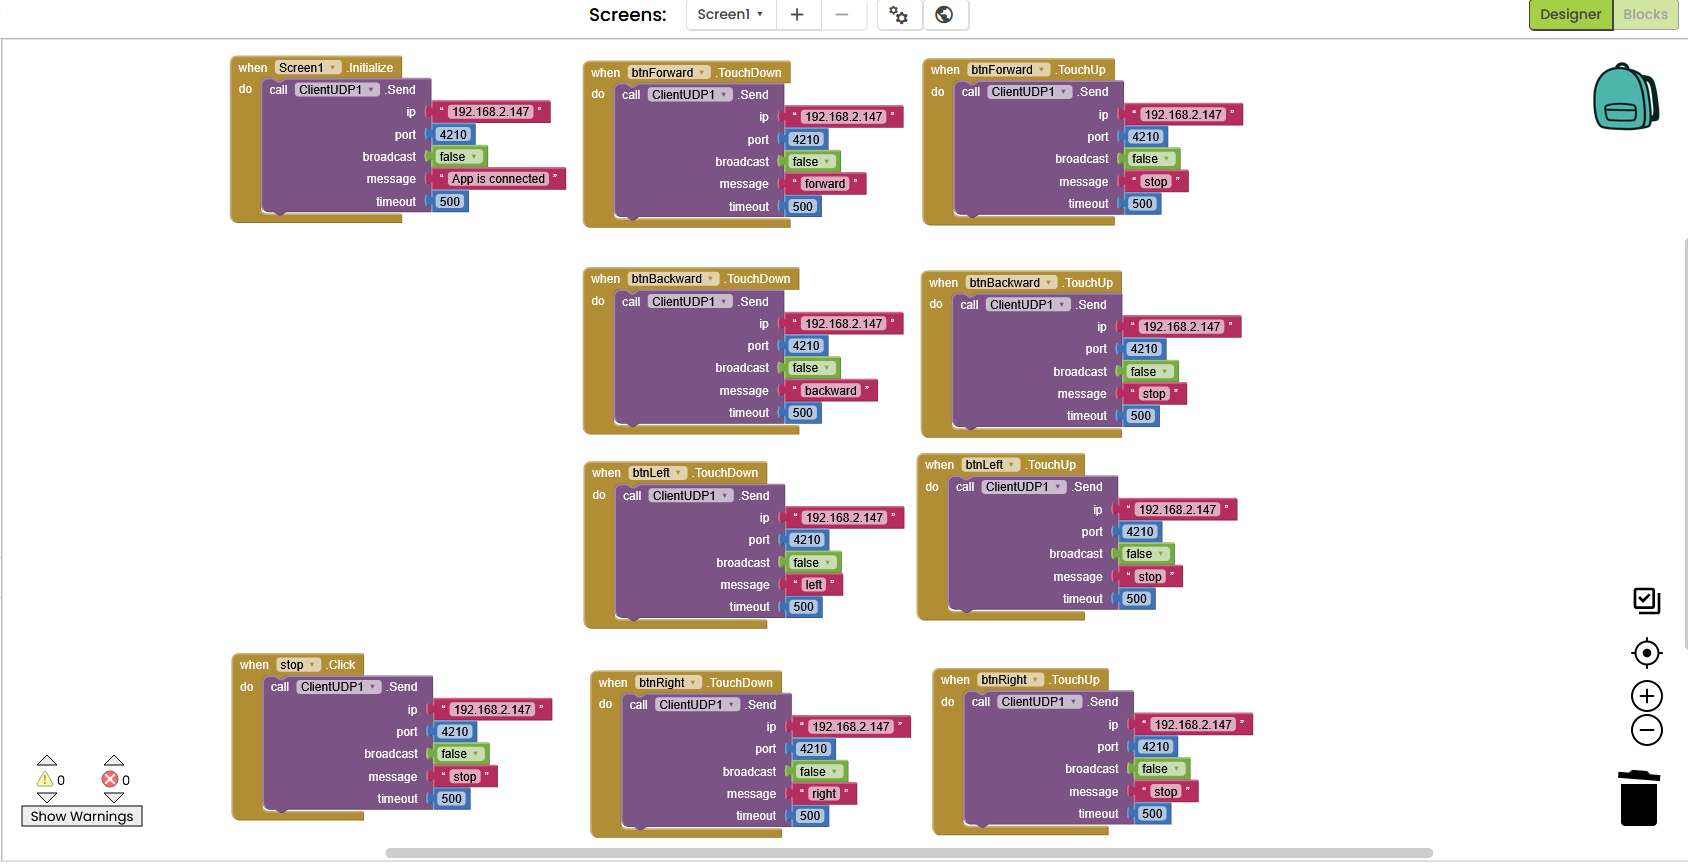
After I had finished configuring the blocks, I created the new app, uploaded it to the smartphone and was pleased to see that the correct commands were transferred.
Originally I wanted to use a slider to control it, but unfortunately I couldn't find it in App Inventor. With the help of the slider, I could have transmitted not only the directional impulse but also a value, for example from 0-100 for the intensity. I hope that I will find the opportunity to implement this in the future.
Downloads
Group Assignment
In the world of embedded systems, the development doesn't end with sensors, actuators, and microcontroller code. A crucial part of many projects is the interface between humans and machines - whether for control, configuration, or visualization. Choosing the right tool for creating such an interface depends on various technical constraints, target platform, project complexity, and prior experience.
As part of our group assignment, I evaluated different ways of building an interface to communicate with a microcontroller - in my case, an ESP32S3.
Personally, I have already created applications using:
- Qt/QML for cross-platform desktop apps
- React Native for mobile cross-platform apps
- Android Studio for native Android development
- MIT App Inventor for rapid prototyping
- HTML/JavaScript-based web interfaces hosted directly by an ESP32 access point
This allowed me to assess these tools not only functionally but also in terms of development effort, toolchain complexity, and target platform compatibility.
Comparison Table
| Tool / Framework | Platforms | Advantages | Disadvantages | Requirements |
|---|---|---|---|---|
| Android Studio | Android | Native performance, full system access, layout editor | High complexity, Java/Kotlin required | Android Studio IDE |
| React Native | Android, iOS | Cross-platform, hot reload, modern UI | Requires Node.js, limited native system access | Node.js, Expo CLI |
| Flutter | Android, iOS, Web | Excellent performance, declarative UI | Requires Dart, heavy toolchain | Flutter SDK, Dart |
| Swift/Xcode | iOS | Native iOS development, modern language | macOS only, limited cross-platform | macOS, Xcode |
| MIT App Inventor | Android | Rapid prototyping, visual blocks, quick UDP implementation | Limited flexibility, not suited for production apps | Web browser, Google account |
| HTML/JS (ESP Hosted) | All (browser) | No installation, hosted directly on ESP32 | Limited mobile optimization, touch input tricky | HTML/CSS/JS |
| Qt/QML | Desktop, Android | High performance, native apps, flexible UI | High learning curve, complex deployment | Qt SDK, C++ |
Simulation & Debugging
Modern frameworks like Flutter and React Native support features like Hot Reload or simulators for testing without a physical device. One example is Expo Go. Android Studio also includes a robust emulator.
Networking Differences
When building an interface to communicate with a microcontroller like the ESP32, it's important to consider how each platform handles network communication. Some key aspects include:
- Supported protocols: Does the framework support UDP, TCP, HTTP, or WebSocket?
- Access to local networks: Can the app connect to devices within the same Wi-Fi network (LAN)?
- Permission handling: Are special user permissions or firewall rules needed?
- Ease of implementation: How complex is it to send and receive data?
- Responsiveness: Does the interface remain smooth while handling background communication?
Comparison Example of UDP
Android Studio (Java/Kotlin): Offers full low-level control via native networking libraries like DatagramSocket for UDP. Great for performance-critical or custom protocols, but more verbose.
MIT App Inventor: Extremely quick to set up using the "UDP Client" extension — perfect for prototyping. Less flexibility for advanced networking logic but ideal for students or non-programmers.
React Native: Requires third-party modules such as react-native-udp. Cross-platform, but setup is more involved, and iOS network permissions can be tricky.
Conclusion - What I have learned
- The use case decides: App Inventor is completely sufficient for simple prototypes and controls. For production-ready or complex apps, I would choose React Native or Android Studio.
- UDP works across platforms, but the integration varies significantly in complexity.
- I have developed a deeper understanding of app toolchains, network architecture and the importance of making the right choice between low-code, hybrid and native solutions.
Update 2026 - Programming the Robo Controller in React Native
For the robot controller app, I chose React Native as the framework. The main reason was cross-platform compatibility: a single codebase runs natively on Android, iOS, iPadOS, and also in the browser with the help of React Native Web. This meant I didn't have to write and maintain separate apps for different devices, which was a huge advantage for a project where the controller might be used from a phone, a tablet, or a laptop depending on the situation.
React Native also has a large ecosystem of ready-to-use components, which made it straightforward to implement things like sliders, touch events, and network requests without starting from scratch.
Setting Up a React Native Project in VS Code
-
Install prerequisites: Make sure you have Node.js and the Expo CLI installed globally:
bash npm install -g expo-cli -
Create a new project:
bash npx create-expo-app RobotController cd RobotController -
Install dependencies used in this project:
bash npm install @react-native-community/slider -
Open in VS Code:
bash code . -
Start the development server:
bash
   npx expo start
From there you can scan the QR code with the Expo Go app on your phone, or run it in a browser or emulator directly.
Core Features of the Controller
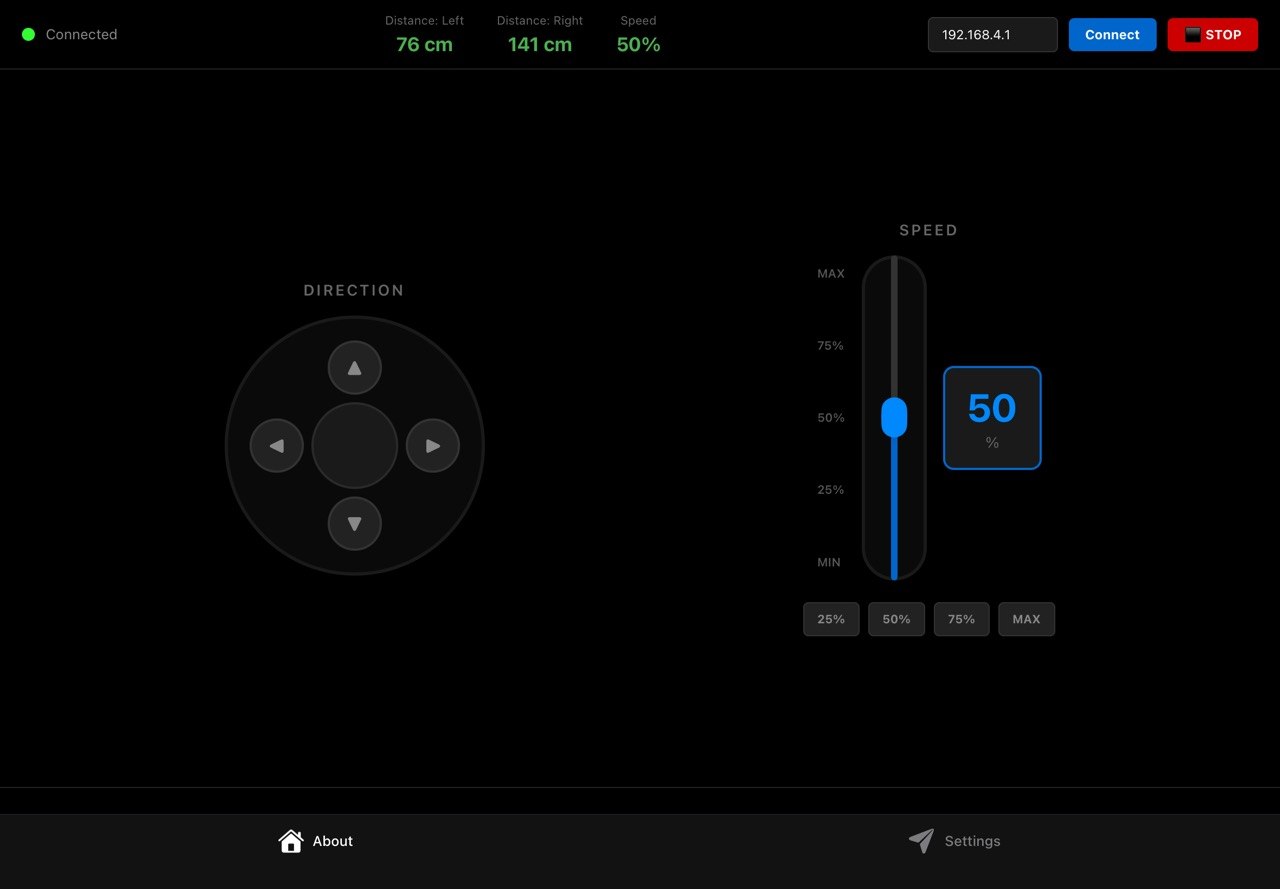
Access Point & Pairing
The ESP32 runs as a Wi-Fi Access Point with the default IP 192.168.4.1. The app connects to it directly without needing a router. The IP address can be changed in the input field at the top right of the UI if needed.
Pairing works by sending a ping request to the ESP32 and checking the response:
const testConnection = async () => {
  try {
    const response = await fetch(`http://${esp32IP}/ping`, {
      method: 'GET',
      timeout: 2000
    });
    if (response.ok) {
      setIsConnected(true);
      Alert.alert('Connected', 'ESP32 connected successfully!');
    }
  } catch (error) {
    setIsConnected(false);
    Alert.alert('Error', 'Cannot connect to ESP32');
  }
};
The connection status is shown in the header via a green/red indicator dot. As long as the device is not connected, all control buttons are blocked and an alert is shown if the user tries to press them anyway.
Direction Control
The direction pad sends HTTP GET requests to the ESP32's /cmd endpoint with the corresponding action (forward, backward, left, right, stop). To make the control feel responsive, commands are not just sent once on press. They are repeated every 100 ms using an interval for as long as the button is held down:
const startContinuousCommand = (direction) => {
  isPressingRef.current = true;
  currentDirectionRef.current = direction;
  setActiveButton(direction);

  sendCommand(direction);

  commandIntervalRef.current = setInterval(() => {
    if (isPressingRef.current && currentDirectionRef.current) {
      sendCommand(currentDirectionRef.current);
    }
  }, 100);
};
As soon as the finger is released (onPressOut, onTouchEnd, onTouchCancel), stopAllCommands() is called. This clears the interval and sends a final stop command to the robot:
const stopAllCommands = () => {
  isPressingRef.current = false;
  currentDirectionRef.current = null;
  setActiveButton(null);
  clearInterval(commandIntervalRef.current);
  if (isConnected) sendCommand('stop');
};
Speed Control
The speed can be set in two ways. There is a vertical slider covering the full 0–100% range, and four quick-select buttons for 25%, 50%, 75%, and MAX, which are handy when you need to switch speed quickly while driving.
Both methods call the same updateSpeed function, which updates the local state and sends the new value to the ESP32 via the /speed endpoint at the same time:
const updateSpeed = async (newSpeed) => {
  setSpeed(newSpeed);
  if (!isConnected) return;
  await fetch(`http://${esp32IP}/speed?speed=${Math.round(newSpeed)}`, {
    method: 'GET',
    timeout: 300
  });
};
The current speed is also shown as a live numeric display next to the slider, so it's always clear what value is active.
Distance Sensors (Ultrasonic Left / Right)
The app polls the ESP32's /sensors endpoint every 300 ms while connected and reads back the distance values from the two front ultrasonic sensors:
const interval = setInterval(async () => {
  const response = await fetch(`http://${esp32IP}/sensors`, {
    method: 'GET',
    timeout: 1000
  });
  const data = await response.json();
  setSensorData({
    frontLeft: data.frontLeft || 0,
    frontRight: data.frontRight || 0,
    speed: data.speed || speed
  });
}, 300);
The values are displayed in the header in real time. If either sensor reads less than 20 cm, the value turns red to alert the user of an obstacle:
<Text style={[styles.sensorValue, sensorData.frontLeft < 20 && styles.sensorWarning]}>
  {sensorData.frontLeft} cm
</Text>
Emergency Stop
The ⬛ STOP button in the top right corner triggers an immediate emergency stop. It calls stopAllCommands() to halt all ongoing command intervals, sends a final stop command to the ESP32, and shows a confirmation alert:
const emergencyStop = () => {
  stopAllCommands();
  Alert.alert('STOPPED', 'Robot emergency stop!');
};
Automatic Obstacle Avoidance
The obstacle avoidance logic runs on the ESP32 firmware rather than in the app. When the ultrasonic sensors detect an obstacle closer than a defined threshold, the ESP32 automatically overrides any incoming drive commands and steers the robot away, regardless of what the app is sending. The app contributes to this by displaying the live sensor readings in real time, so the user can always see what the robot is detecting. The red warning highlight gives an additional visual cue when distances get critical.
First test with an earlier version of the app
Building the APK
To install the robot controller app on an Android device, the React Native project needs to be built as an .apk file. The easiest way to do this with Expo is via EAS Build, which compiles the app in the cloud.
First, install the EAS CLI and log in with your Expo account:
npm install -g eas-cli
eas login
I had to upgrade to the latest Expo version in order to build the APK, because otherwise it wouldn't have been possible to create an .apk file. To do this, I used npm install expo@latest.
Then configure the project once and start the build:
eas build:configure
eas build -p android --profile preview
The preview profile produces a directly installable .apk file. Once the build is done, EAS provides a download link. To install the APK on the phone, make sure to enable "Install from unknown sources" in the Android settings, since the app is not coming from the Play Store.