16. Interface and application programming
Learning Outcomes:
- Implement a User Interface (UI) using programming and explore protocols to communicate with an embedded board.
Group Assignment
Summary
The group assignment for this week, our group compared several tools for creating interfaces and applications that interact with hardware. The tools we examined were Arduino Cloud, Processing, and Blynk. Below is a summary of our findings:
Arduino Cloud
Brief: Arduino Cloud is a platform for connecting Arduino devices to the cloud for remote monitoring and control.
Typical Use Cases: Ideal for makers, hobbyists, and IoT enthusiasts who want to create projects involving remote monitoring and control.
Workflow and Setup:
1. Set up an Arduino Cloud account and download the Arduino Client.
2. Navigate to the Arduino Cloud dashboard, select the appropriate device, and create a new “thing.”
3. Program the device to connect to Arduino Cloud.
4. Customize the dashboard with widgets for interaction.
Opinions:
- Likes: User-friendly interface, seamless integration with Arduino hardware.
- Dislikes: Limited dashboard customization, reliance on stable internet connection.
Advantages:
- Simplified setup process.
- Well-documented libraries.
- Provides basic IoT functionalities without extensive backend development.
Disadvantages:
- Limited flexibility in dashboard customization.
- Dependency on internet connectivity for remote access.
Processing
Brief: Processing is an open-source graphical library and IDE for creating interactive visual applications.
Typical Use Cases: Used for interactive art installations, data visualizations, simulations, and educational tools.
Workflow and Setup:
1. Install Processing from the official website.
2. Write a Processing sketch to create the user interface.
3. Connect the Arduino board and upload the provided code.
4. Run the Processing sketch to interact with the interface.
Opinions:
- Likes: Intuitive graphical interface design, seamless integration with Arduino via serial communication.
- Dislikes: Limited scalability for complex applications, lack of built-in support for advanced UI components.
Advantages:
- Rapid prototyping of interactive visual applications.
- Extensive community support.
- Cross-platform compatibility.
Disadvantages:
- Steeper learning curve for advanced features.
- Limited support for 3D graphics and advanced rendering techniques.
Blynk
Brief: Blynk is a platform for easy development of IoT applications with drag-and-drop widgets.
Typical Use Cases: Used for creating IoT projects involving remote monitoring and control of hardware devices.
Workflow and Setup:
1. Install the Blynk app and create an account.
2. Create a new project in the app, selecting the appropriate hardware device.
3. Add and configure widgets to control the LED.
4. Write Arduino code to connect the device to the Blynk server.
5. Upload the code and run the project from the app.
Opinions:
- Likes: User-friendly interface, wide range of pre-built widgets.
- Dislikes: Limited customization options for widgets, dependency on internet connectivity.
Advantages:
- Rapid development of IoT applications without extensive coding.
- Cross-platform compatibility.
- Integration with popular IoT platforms.
Disadvantages:
- Limited flexibility in UI design and customization.
- Subscription-based pricing model for advanced features.
Individual Assignment: Distance-Based Fractal Visualization
Basic Description
In this project, I used an ultrasonic sensor connected to a Seeed Xiao RP2040 development board to measure the distance to an object. The measured distance is then sent to a Processing sketch, which uses the data to dynamically alter a visual fractal pattern. The fractal becomes more complex or simpler based on the distance readings, creating an interactive visual experience.
The ultrasonic distance sensor was chosen for its capability to measure distances by emitting ultrasonic waves and calculating the time it takes for the waves to bounce back. This sensor is commonly used in applications such as obstacle detection, level sensing, and proximity sensing in robotics and automation. Its accuracy, reliability, and non-contact measurement make it a valuable component in various projects.
Communication Method
The communication between the Seeed Xiao RP2040 and the Processing interface is established using serial communication. The Xiao RP2040 continuously reads the distance from the ultrasonic sensor and sends this data via a serial connection to the Processing sketch. The Processing sketch reads the incoming serial data, processes it, and updates the fractal visualization accordingly.
Sensor Setup
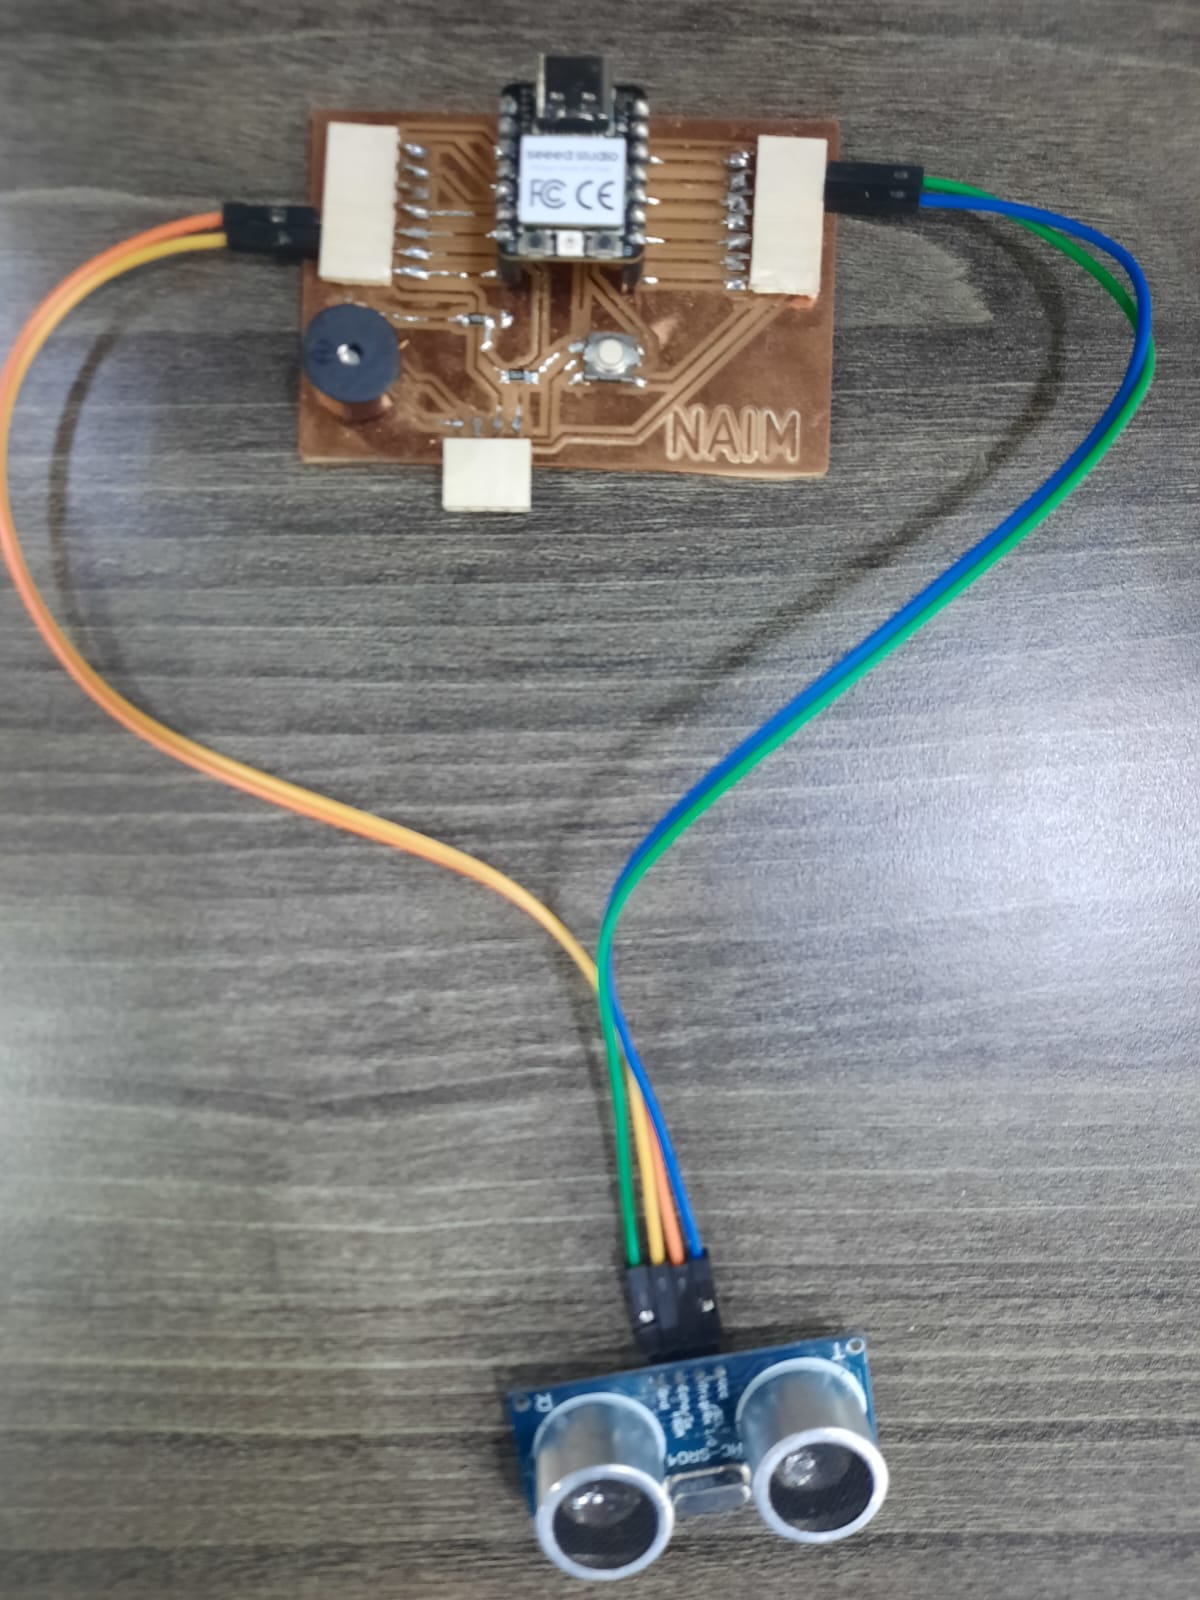
- Connect the VCC pin of the sensor to the 3.3V pin on the development board.
- Connect the GND pin of the sensor to the GND pin on the development board.
- Connect the TRIG pin of the sensor to a digital output pin on the development board.
- Connect the ECHO pin of the sensor to a digital input pin on the development board.
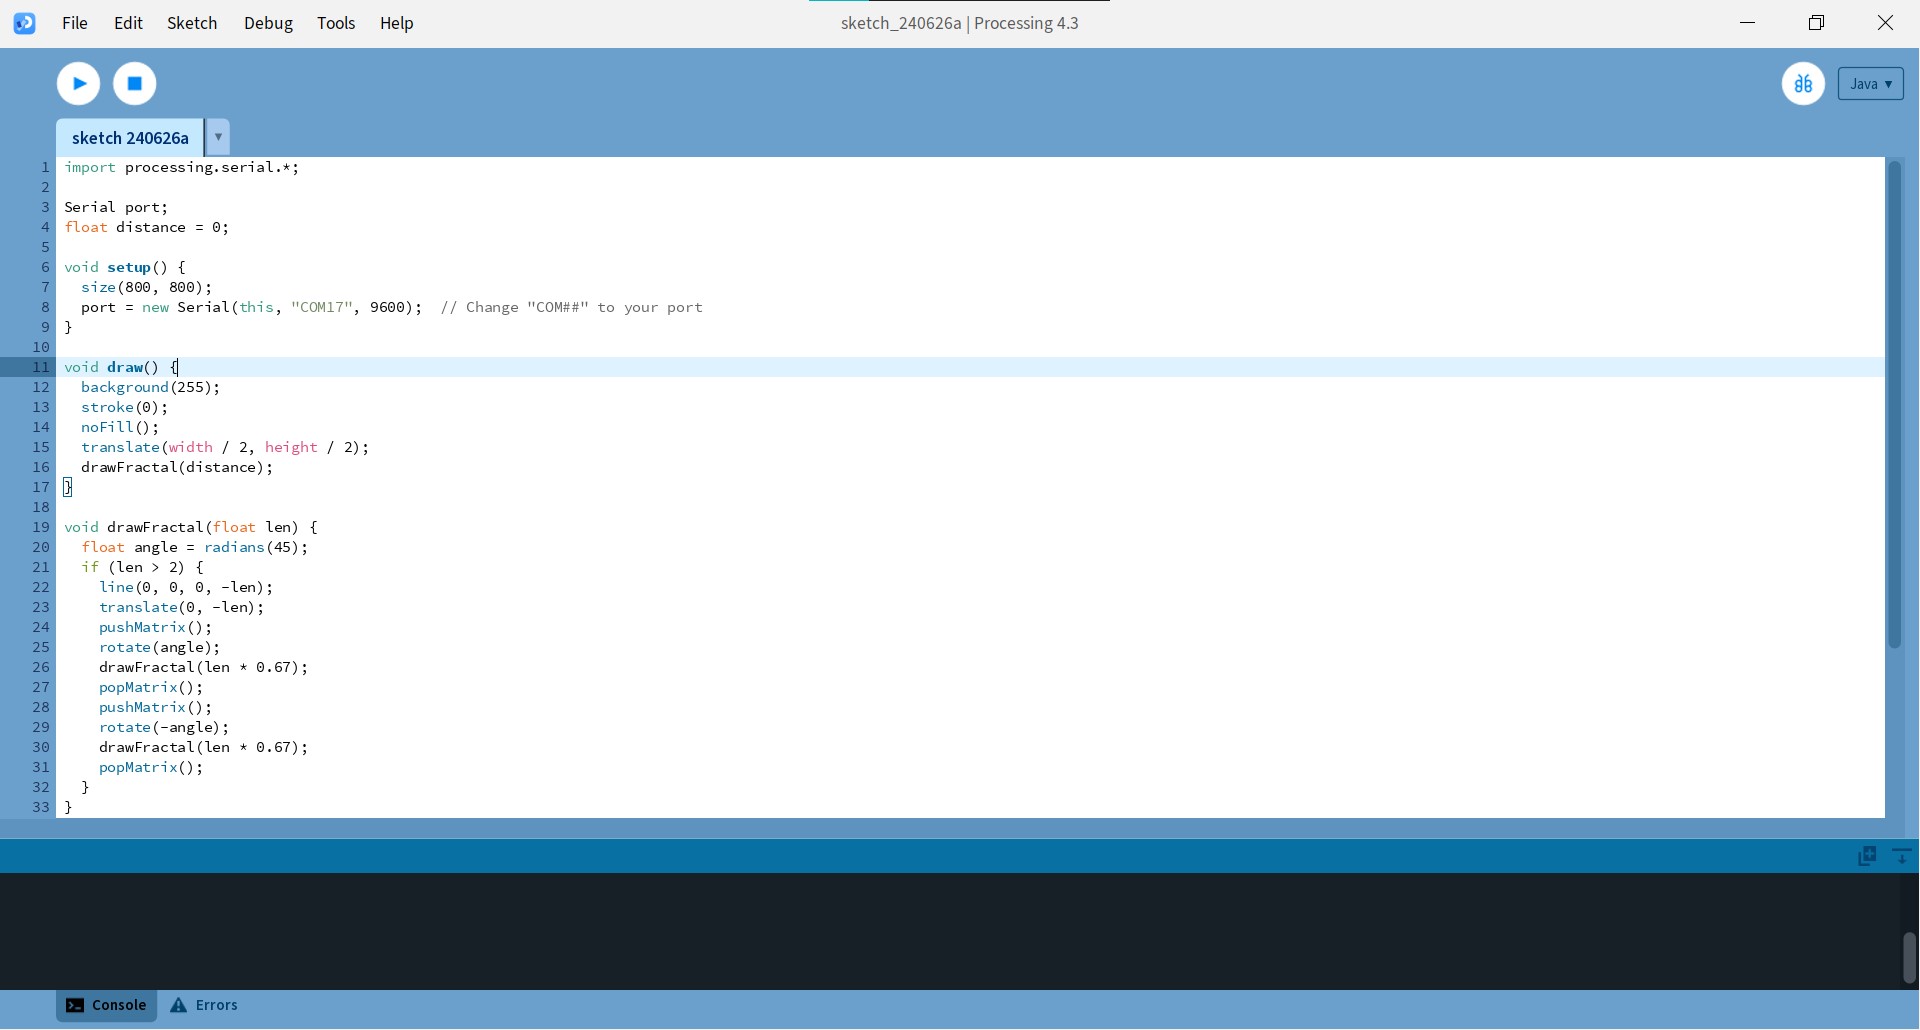
Processing Code
import processing.serial.*;

Serial port;
float distance = 0;

void setup() {
  size(800, 800);
  port = new Serial(this, "COM17", 9600);  // Change "COM#" to your port
}

void draw() {
  background(255);
  stroke(0);
  noFill();
  translate(width / 2, height / 2);
  drawFractal(distance);
}

void drawFractal(float len) {
  float angle = radians(45);
  if (len > 2) {
    line(0, 0, 0, -len);
    translate(0, -len);
    pushMatrix();
    rotate(angle);
    drawFractal(len * 0.67);
    popMatrix();
    pushMatrix();
    rotate(-angle);
    drawFractal(len * 0.67);
    popMatrix();
  }
}

void serialEvent(Serial port) {
  String inString = port.readStringUntil('\n');
  if (inString != null) {
    inString = trim(inString);
    float inFloat = float(inString);
    if (inFloat != -1) {
      distance = map(inFloat, 0, 200, 10, 300);  // Adjust the mapping as needed
    }
  }
}
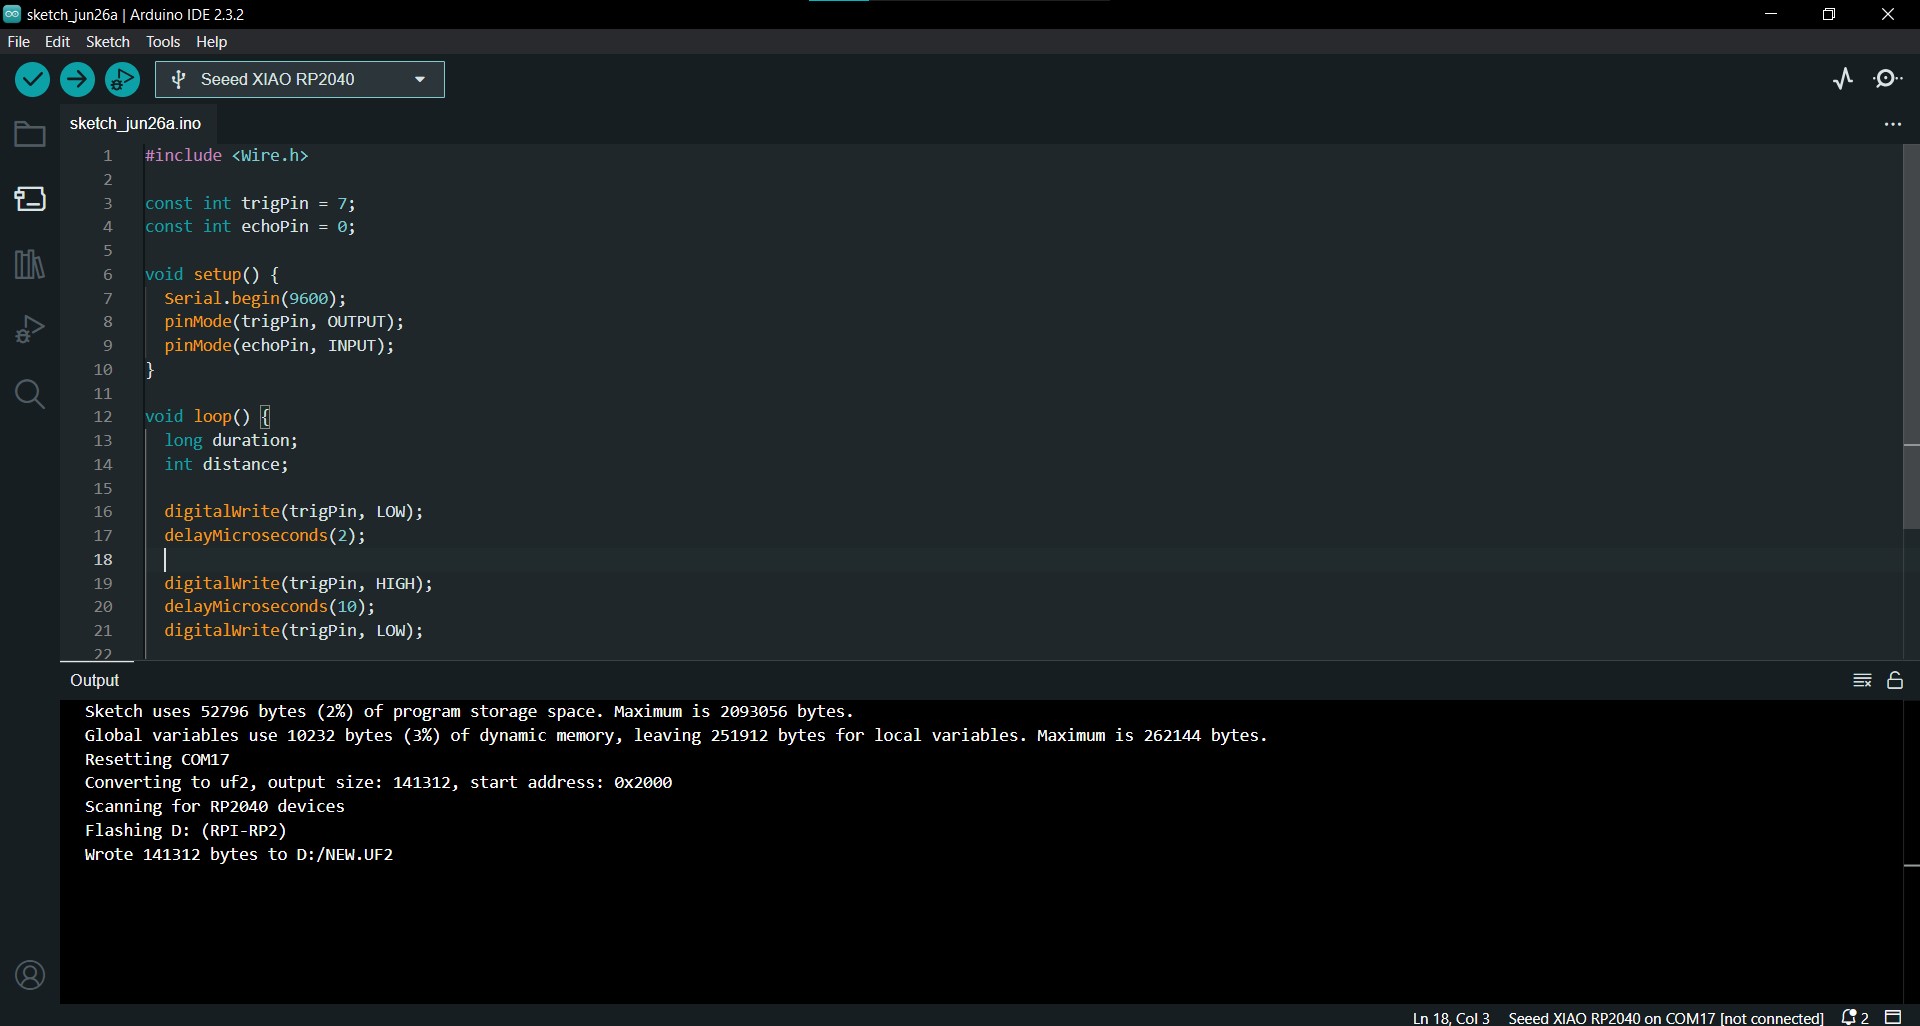
Arduino Code for Seeed Xiao RP2040
#include <Wire.h>

const int trigPin = 7;
const int echoPin = 0;

void setup() {
  Serial.begin(9600);
  pinMode(trigPin, OUTPUT);
  pinMode(echoPin, INPUT);
}

void loop() {
  long duration;
  int distance;

  digitalWrite(trigPin, LOW);
  delayMicroseconds(2);

  digitalWrite(trigPin, HIGH);
  delayMicroseconds(10);
  digitalWrite(trigPin, LOW);

  duration = pulseIn(echoPin, HIGH);
  distance = duration * 0.034 / 2;

  Serial.println(distance);
  delay(100);
}
Explanation of the Code
-
Processing Code
- Setup and Initialization: The Processing code sets up a serial connection to the Xiao RP2040 and initializes the display window.
- Drawing the Fractal: The drawFractal function recursively draws lines at specific angles to create a fractal pattern. The length of these lines is determined by the distance variable, which is updated based on the sensor readings.
- Serial Communication: The serialEvent function reads the distance data sent from the Arduino, maps it to a suitable range for visual representation, and updates the distance variable.
-
Arduino Code
- Setup: The Arduino code initializes the pins connected to the ultrasonic sensor and starts the serial communication.
- Loop: The loop continuously measures the distance using the ultrasonic sensor and sends this data to the serial port. The distance is calculated based on the time it takes for the ultrasonic pulse to travel to an object and back.
Video of the Working Project
Conclusion
This project demonstrates the integration of hardware and software to create an interactive visual experience. By using an ultrasonic sensor to measure distance and Processing to visualize the data, I was able to create a dynamic fractal pattern that changes based on real-world interactions. This project showcases the potential of combining simple sensors with creative coding to produce engaging and responsive visuals.