
Showsack
Okay, so, here´s the deal, I've got this super cool idea to create a backpack that can move parts around, perfect for drag queens and fashion designers who want to amp up their outfits for a show! Now, I'm pretty new to all this programming and building stuff, but here's how I'd go about it:.
Planning
First things first, I'd sketch out what parts I want to move and how I want them to move. Do a little brainstorming and figure out what the backpack is gonna look like. Also it was super important to use everything I learned here, of course I couldn´t use everything but it ended up looking 🎀✨gorgeous✨🎀.
Structure
Now, I've gotta design and build the structures that the servos will move. Thinking about how to make it look fab and not too heavy is key.
-
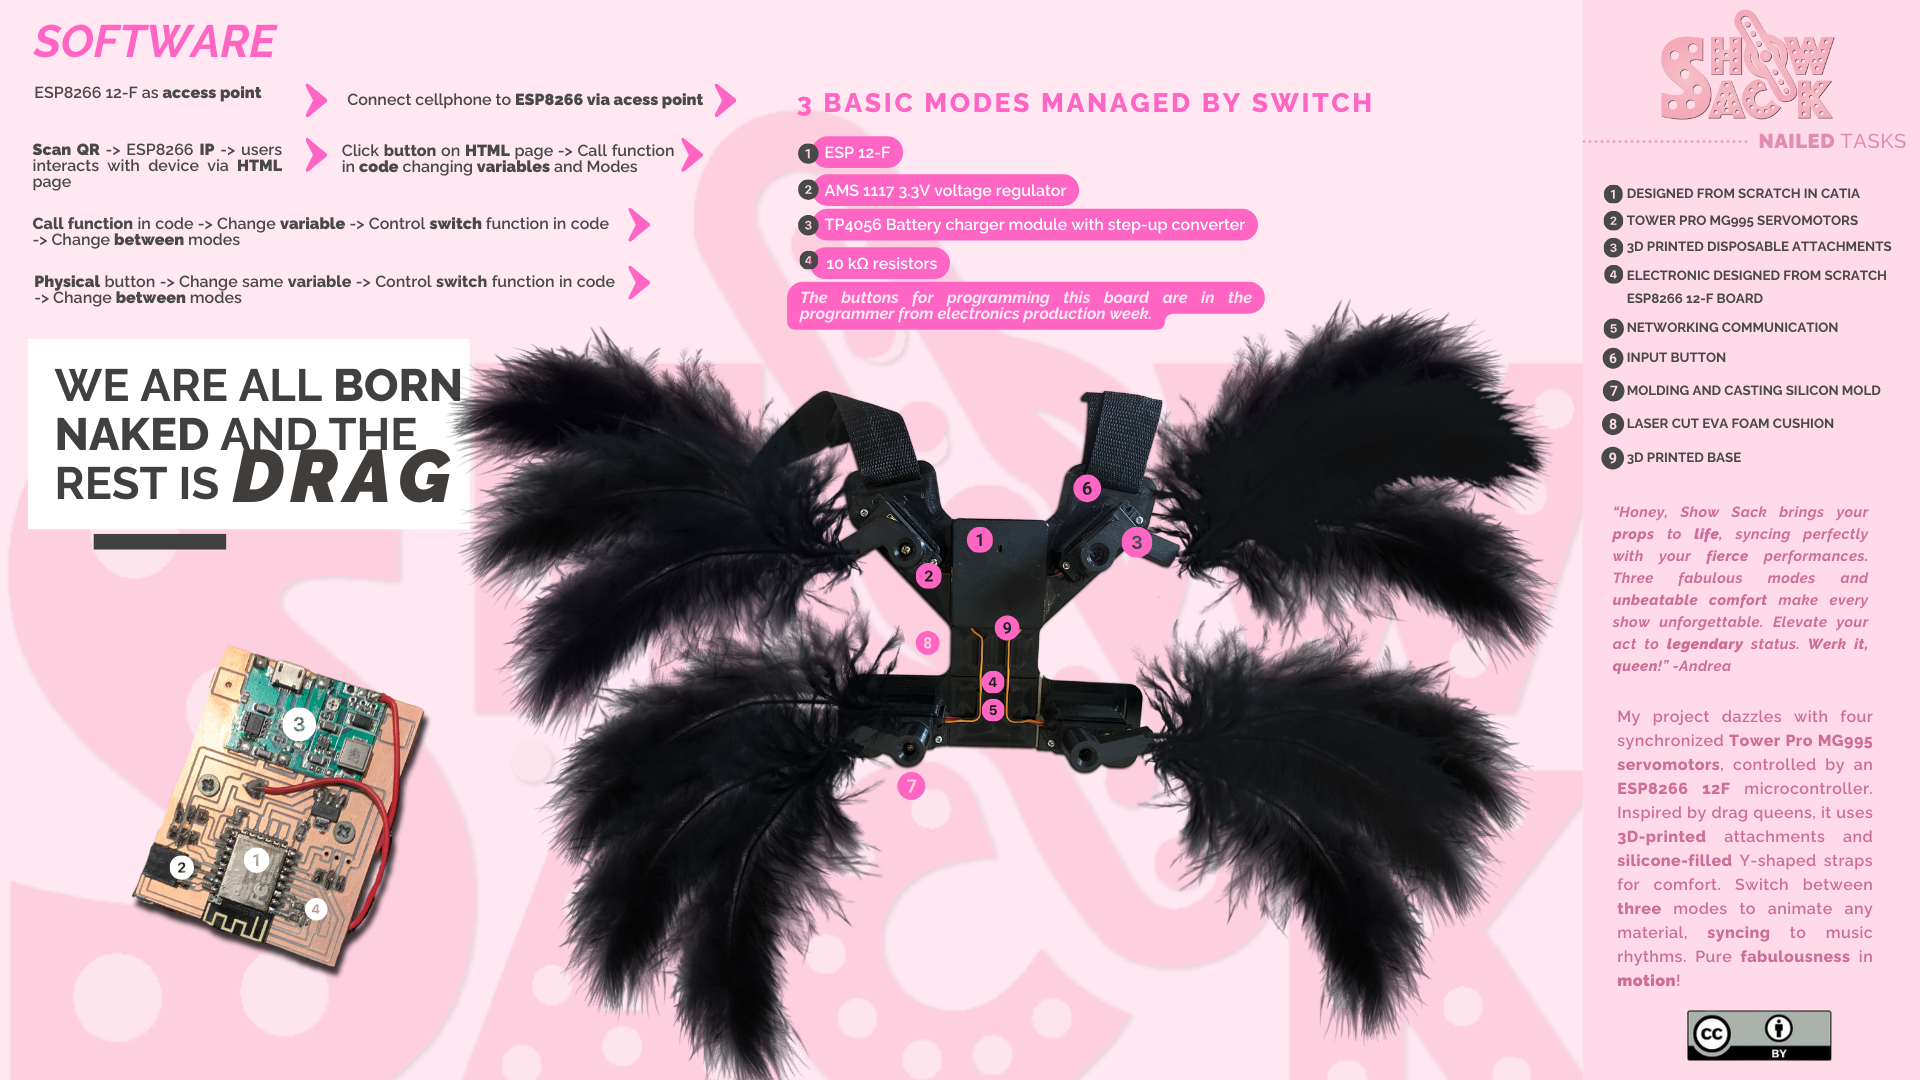
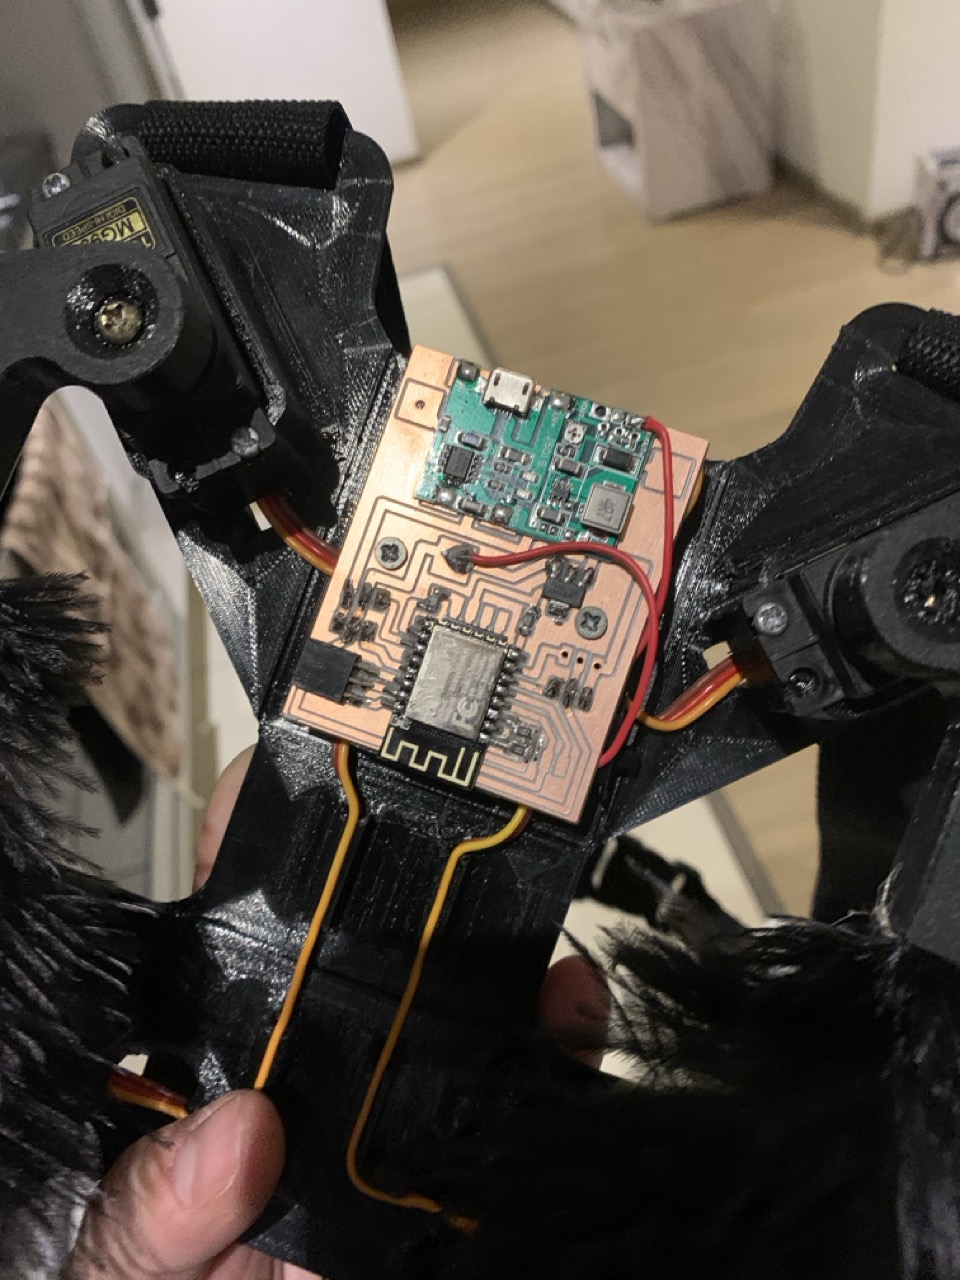
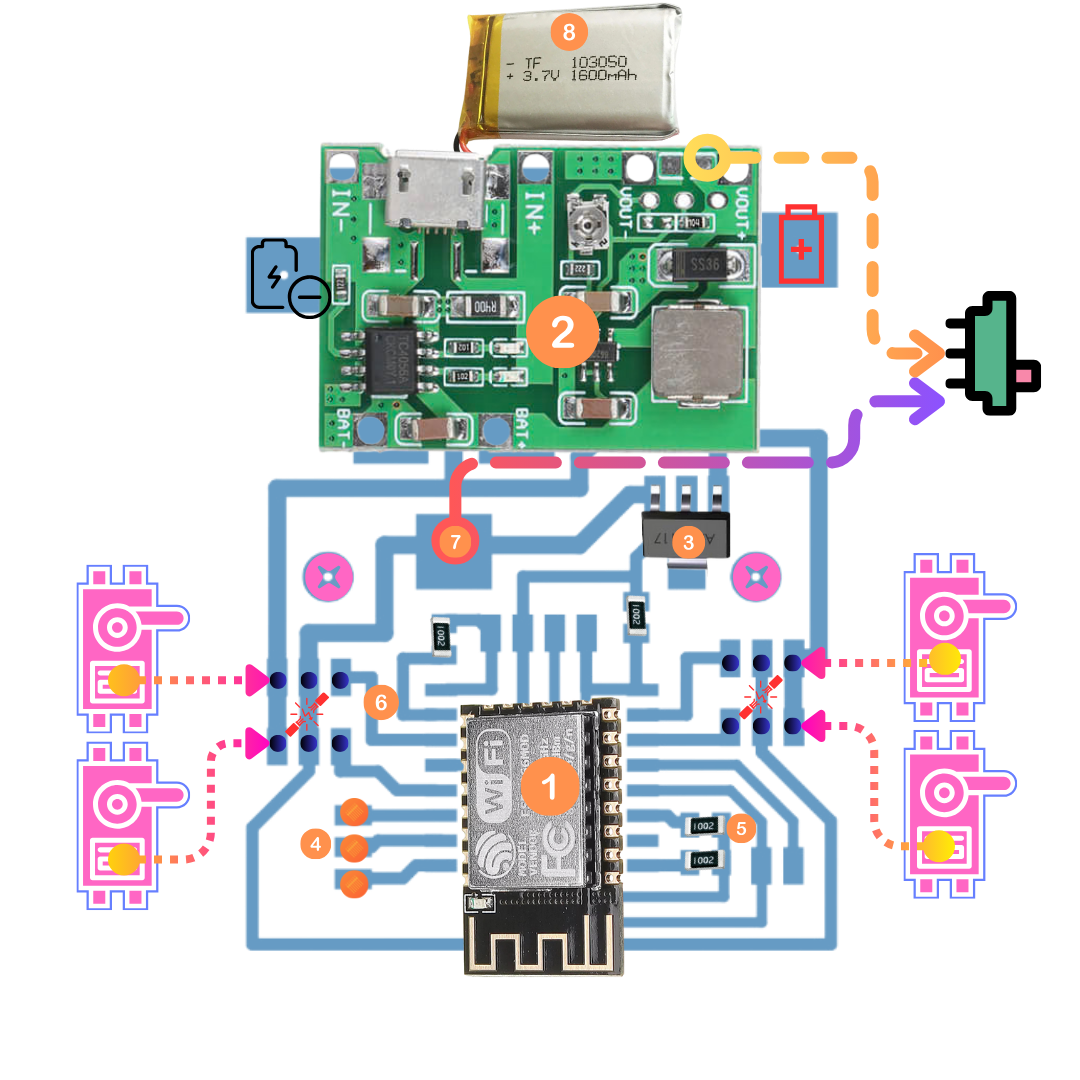
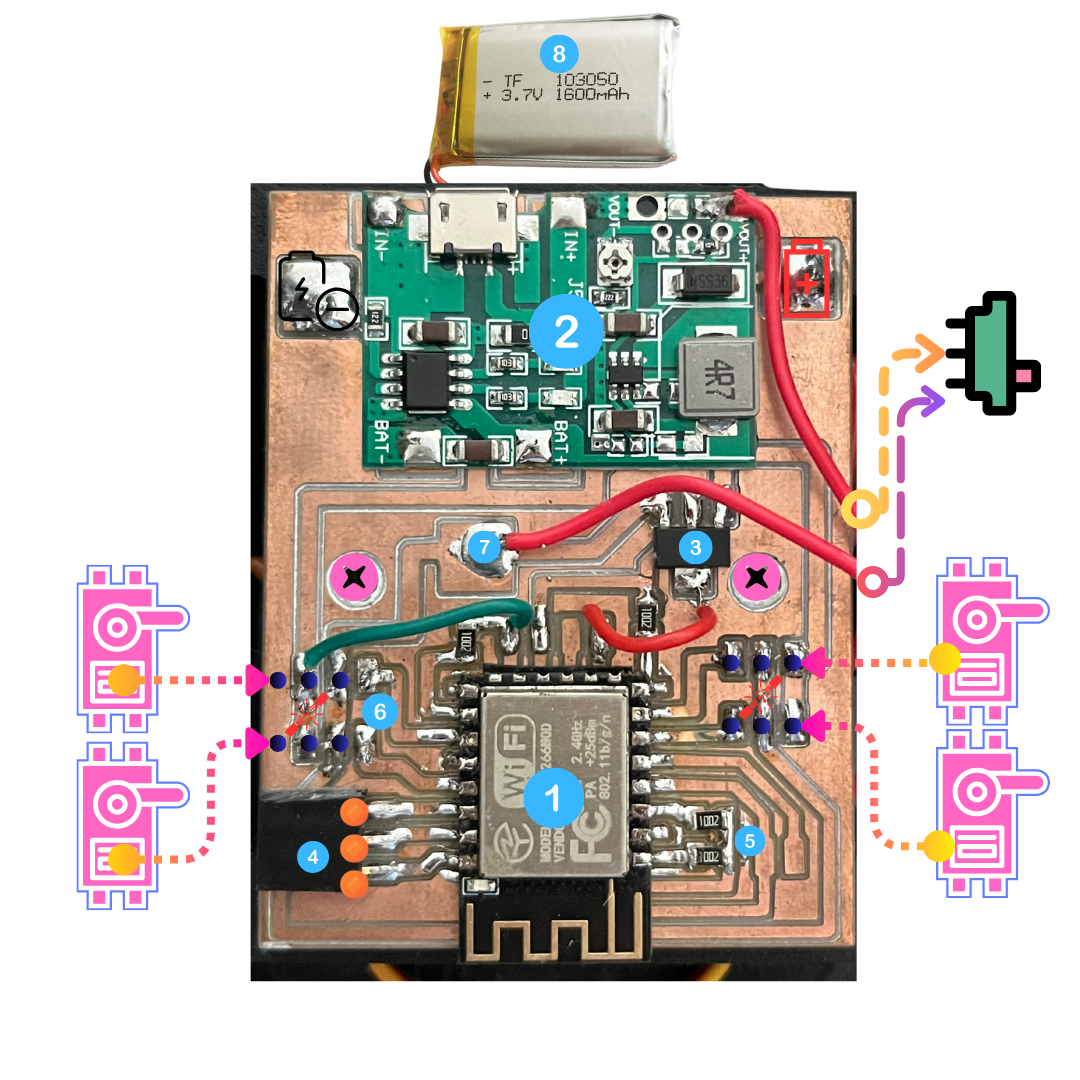
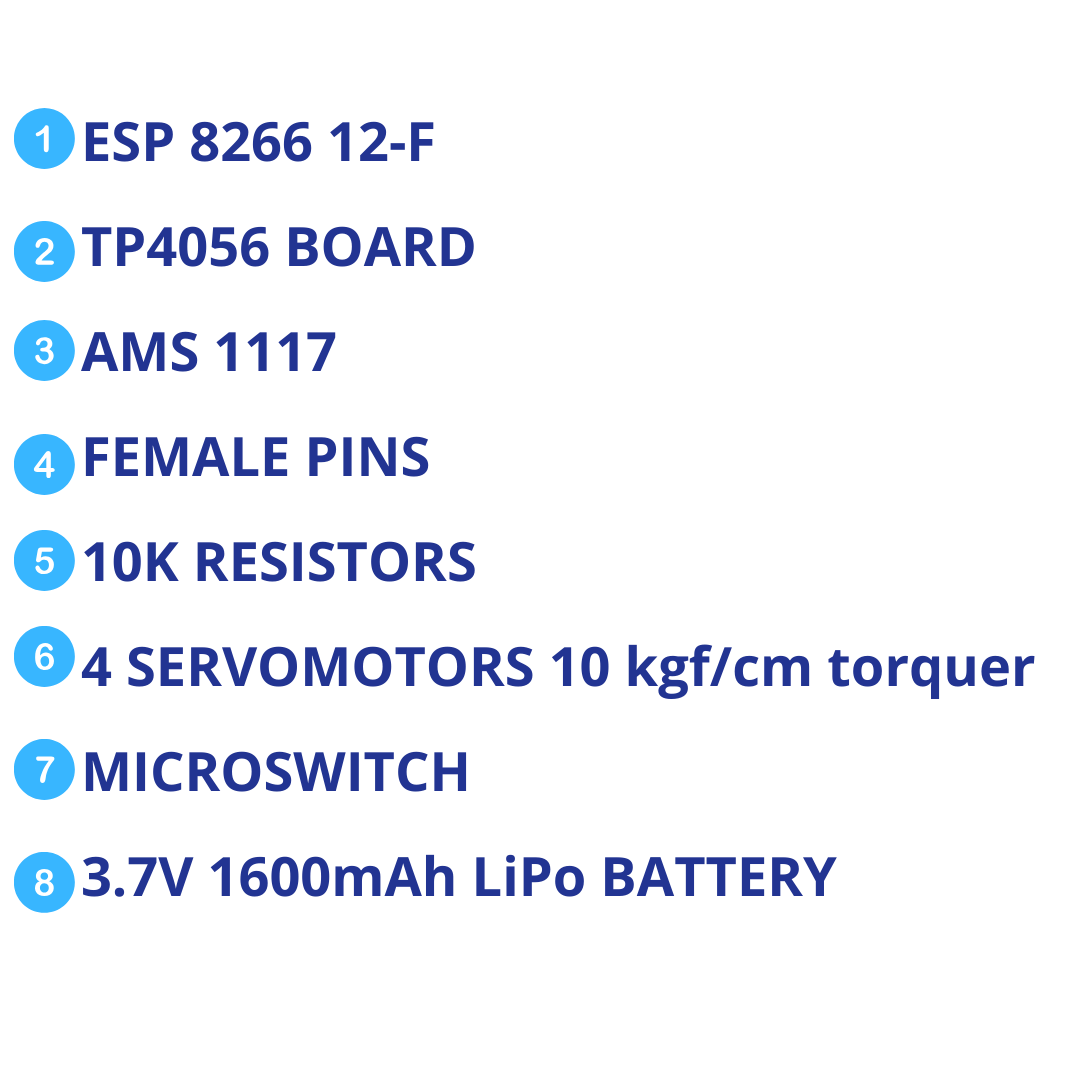
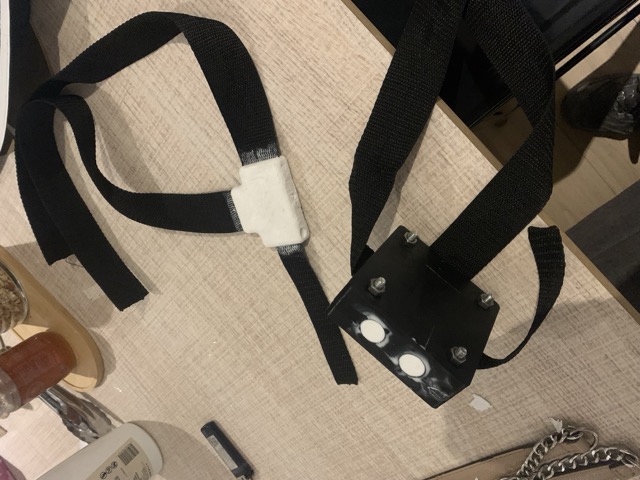
So, the back of the Showsack is where all the action's at. We're talking four servos, one in each corner. These little guys are moving whatever we hook up to 'em in the accesories attachments. The servos are hooked up to this ESP thing, which tells 'em what to do. It's like the brains behind the operation. Each servo gets mounted in a corner of the backpack in different heights, nicely so they can do their thing without wobbling around.
-
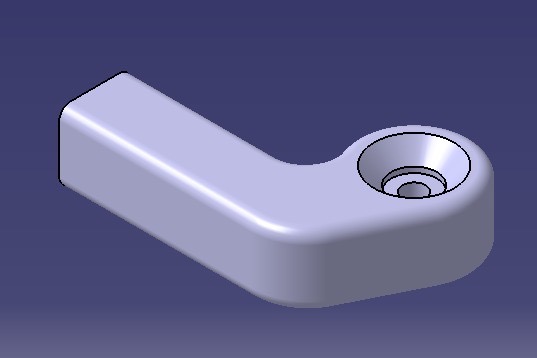
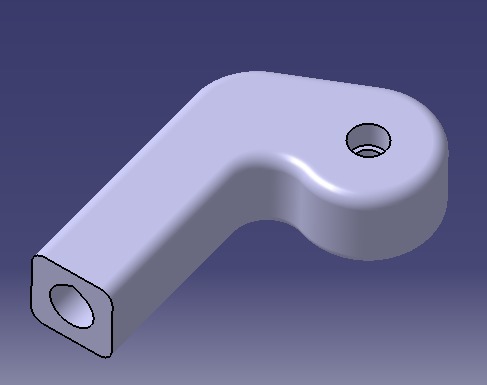
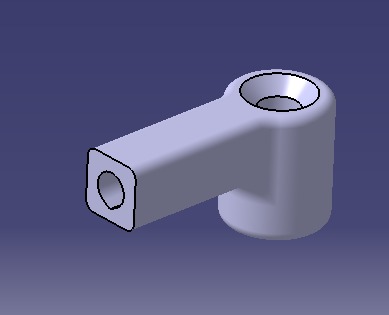
These motors have a specially designed 3D-printed attachments that snap right in, allowing you to insert any material you want to animate.
-
With three fabulous modes that you can switch between with just a button, everything is controlled by an ESP8266 12F microcontroller with built-in WiFi.
-
The inspiration behind this creation comes from the electrifying performances of drag queens, syncing perfectly with the rhythm and lyrics of their music. I researched the most popular beats and crafted three unique servo movements to groove along with them.
-
The base and the chic attachments are all made using 3D printing technology.
-
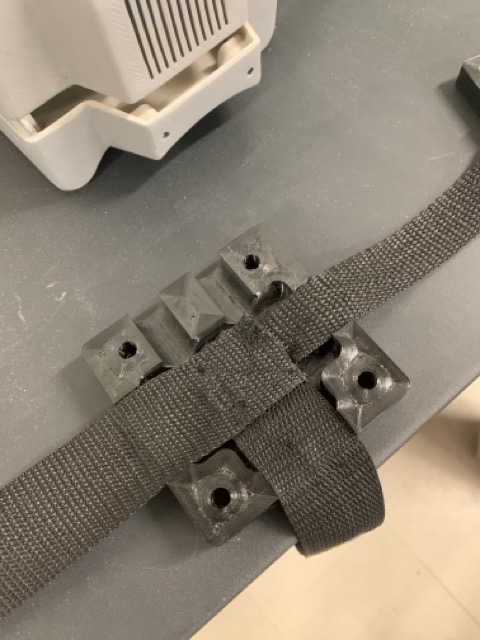
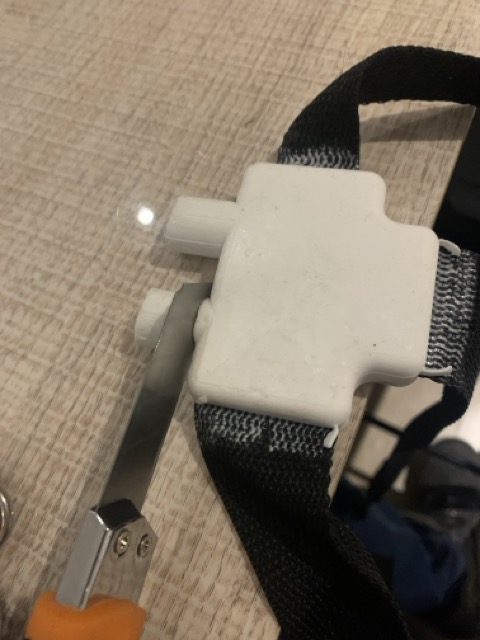
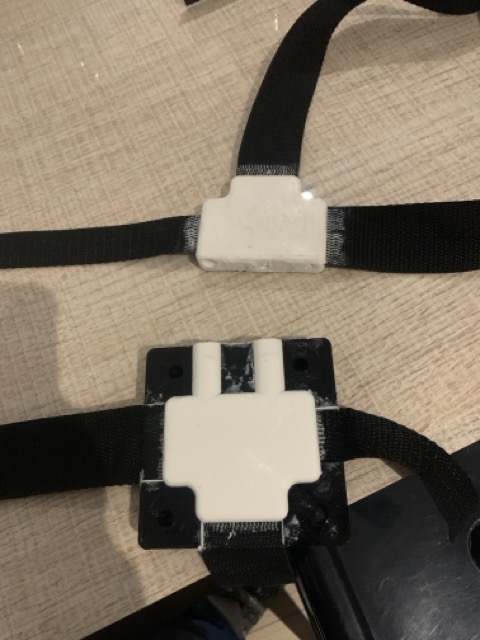
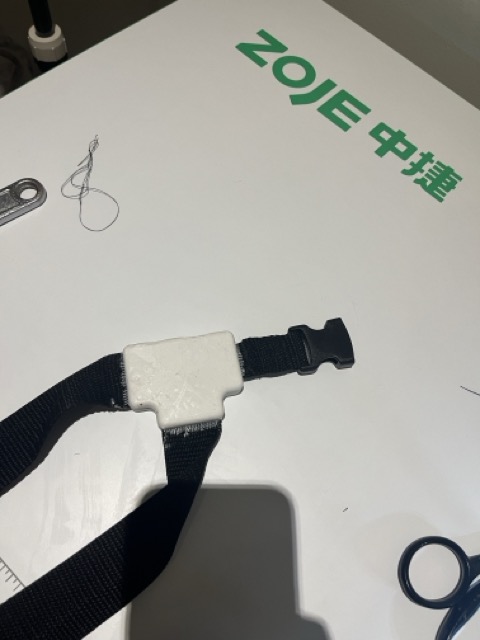
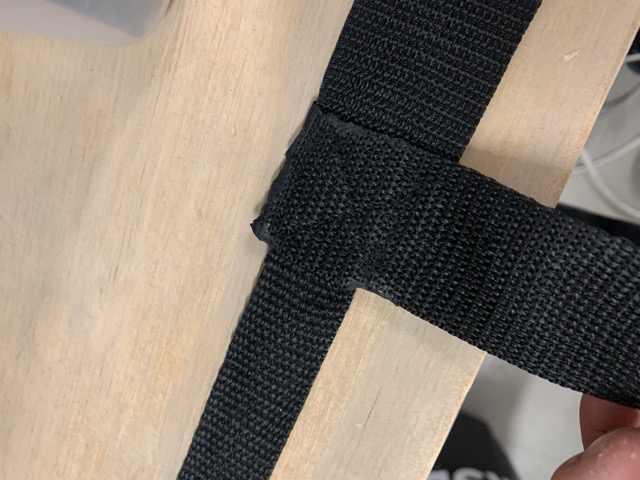
To ensure the backpack straps don’t put too much pressure on the wearer, I designed a Y-shaped mold for the intersection of the three straps on the chest using 3D printing, then casted it with silicone. This brilliant move has made the backpack incredibly comfortable.
-
Also I laser cut this eva foam cushion for the back of the device to give so much more coooooommmmmfort in the user´s back.
-
For this personal project, I filled the cute motor´s attachments with black feathers to test its fabulous capacity hole setup.
- CAD week✨
-
Starting with the Strap: First, I sketched out the strap’s outline in CATIA using the Sketch tool. (I figured out the size based on a typical back size, making sure to get the proportions right).
-
I created a new Part and drew a 3mm thick plate using Pad. For extra flex in specific areas, I sketched out the reductions and used Pocket to thin it down to 1.5mm where needed.
-
Then, I used the Pocket feature to add grooves so the strap could fold easily. (I made sure the grooves were reduced to 1.5mm to give it that extra flexibility).
-
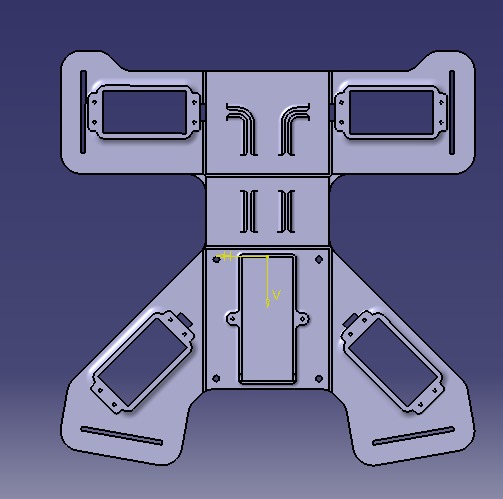
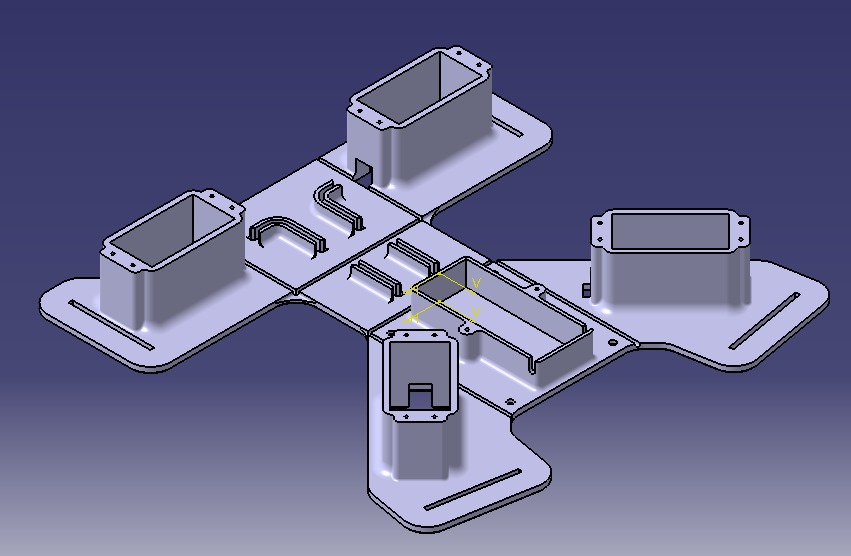
For the battery compartment I designed the compartment for the LiPo battery by sketching and extruding it with Pad. Added two side holes with the Hole tool for screwing in the PCB.
-
Next, I positioned the mounts for the 4 servos (2 vertical and 2 diagonal) using Pad and Pocket to get them just right.
-
After that, I used the Hole tool to add 1.5mm holes where the screws would go. ( These holes are designed so screws can form their own threads, making it super easy and quick.)
-
Then, I added passages for the servo cables using Sketch and Pocket, allowing me to neatly route and organize the cables.
-
For the cover design I sketched out the cover size based on the board dimensions and screw positions. Then, used Pad to create the cover, making sure it fit perfectly.
-
After that, I added holes for the charging cable and switch with the Hole tool, I included a hole to see the LED status for the battery and added grooves for the servo cables using Pocket.
-
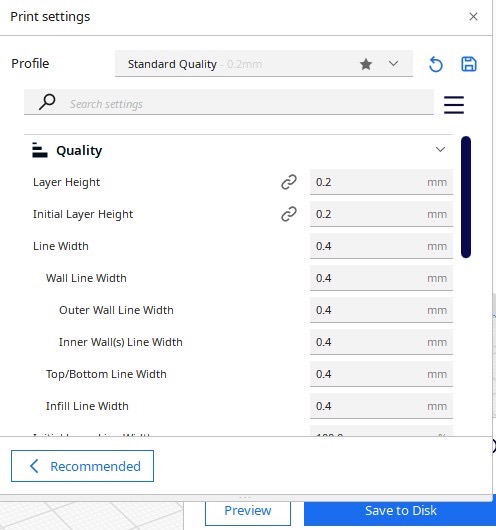
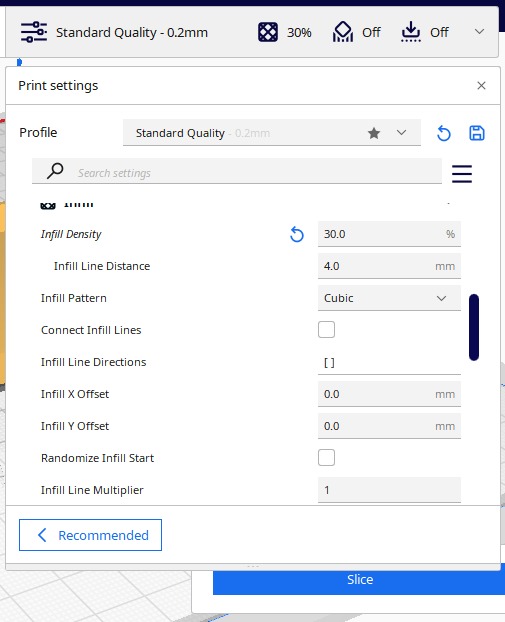
Finally, I exported the final design and set the infill to 30% for printing, ensuring it was both strong and lightweight. Obviously I did this at the ultimaker cura cuz I just love it. This were my parameters:
-
I took a 2D projection of the bottom part that contacts the back using the Drafting workbench. Adjusted the sketch, removed unnecessary bits, and prepared the DXF for cutting.
- SRM-20 Startup Guide
- Electronic design week ✨
-
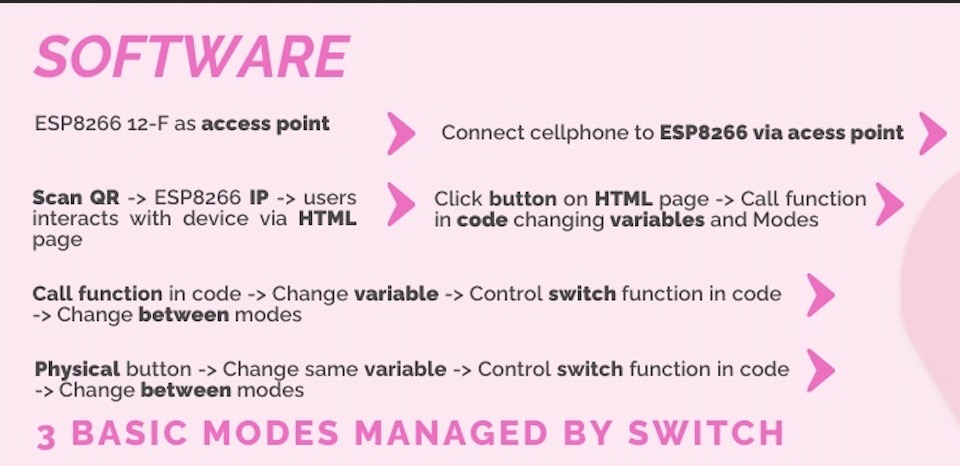
I set up the ESP8266 12-F as the WiFi access point (kinda like a router) so, it could hand the WiFi signal itself.
-
Then I connected my cellphone to this WiFi network (SHOWSACK)
-
After that I scanned a QR code that had the IP address of the ESP8266. This opened up a custom HTML page I had programmed into the ESP. (for the modes gurl) Remember the system has 3 basic movement modes.
-
On this HTML page, there's a button. When I press it, it triggers a function in the ESP's code. This function changes a variable, which then changes a function called switch that controls different modes.
-
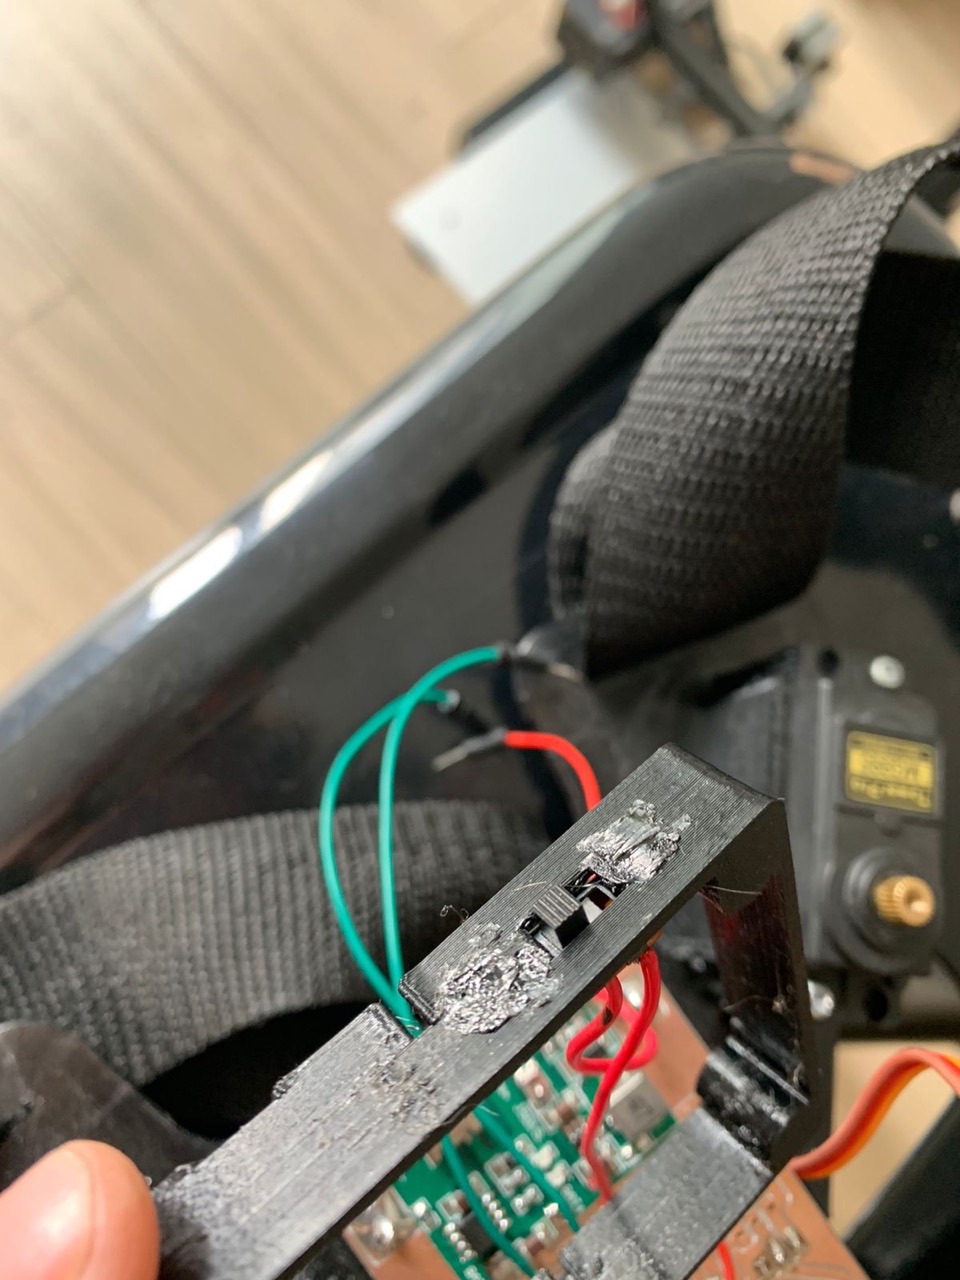
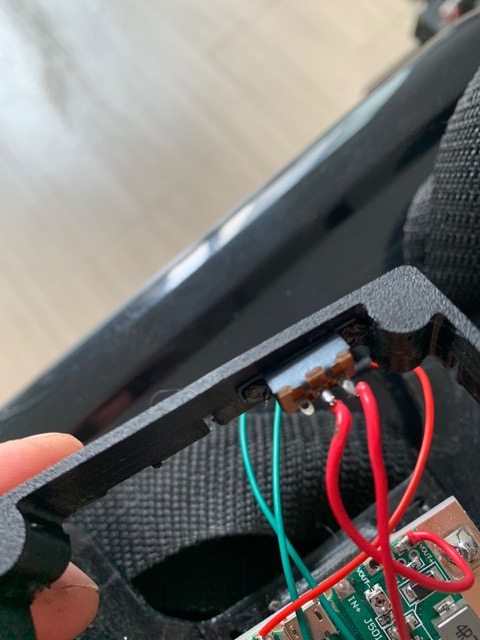
Oh, and super important: This variable can also be changed with a physical button, not just through the webpage.
-
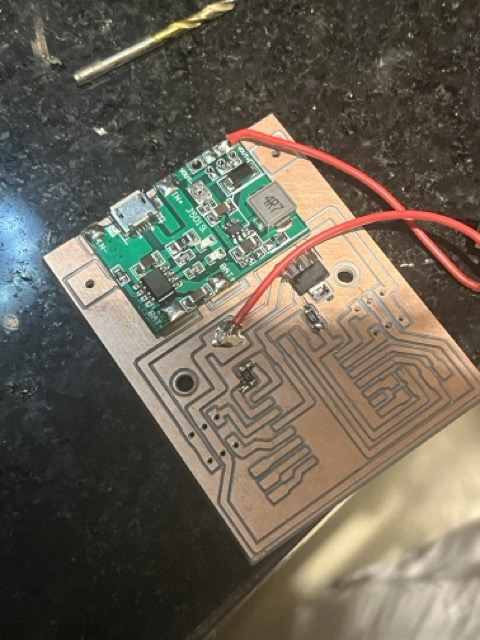
The LiPo battery needs a charging circuit. My board has a TP4056 chip for this.
-
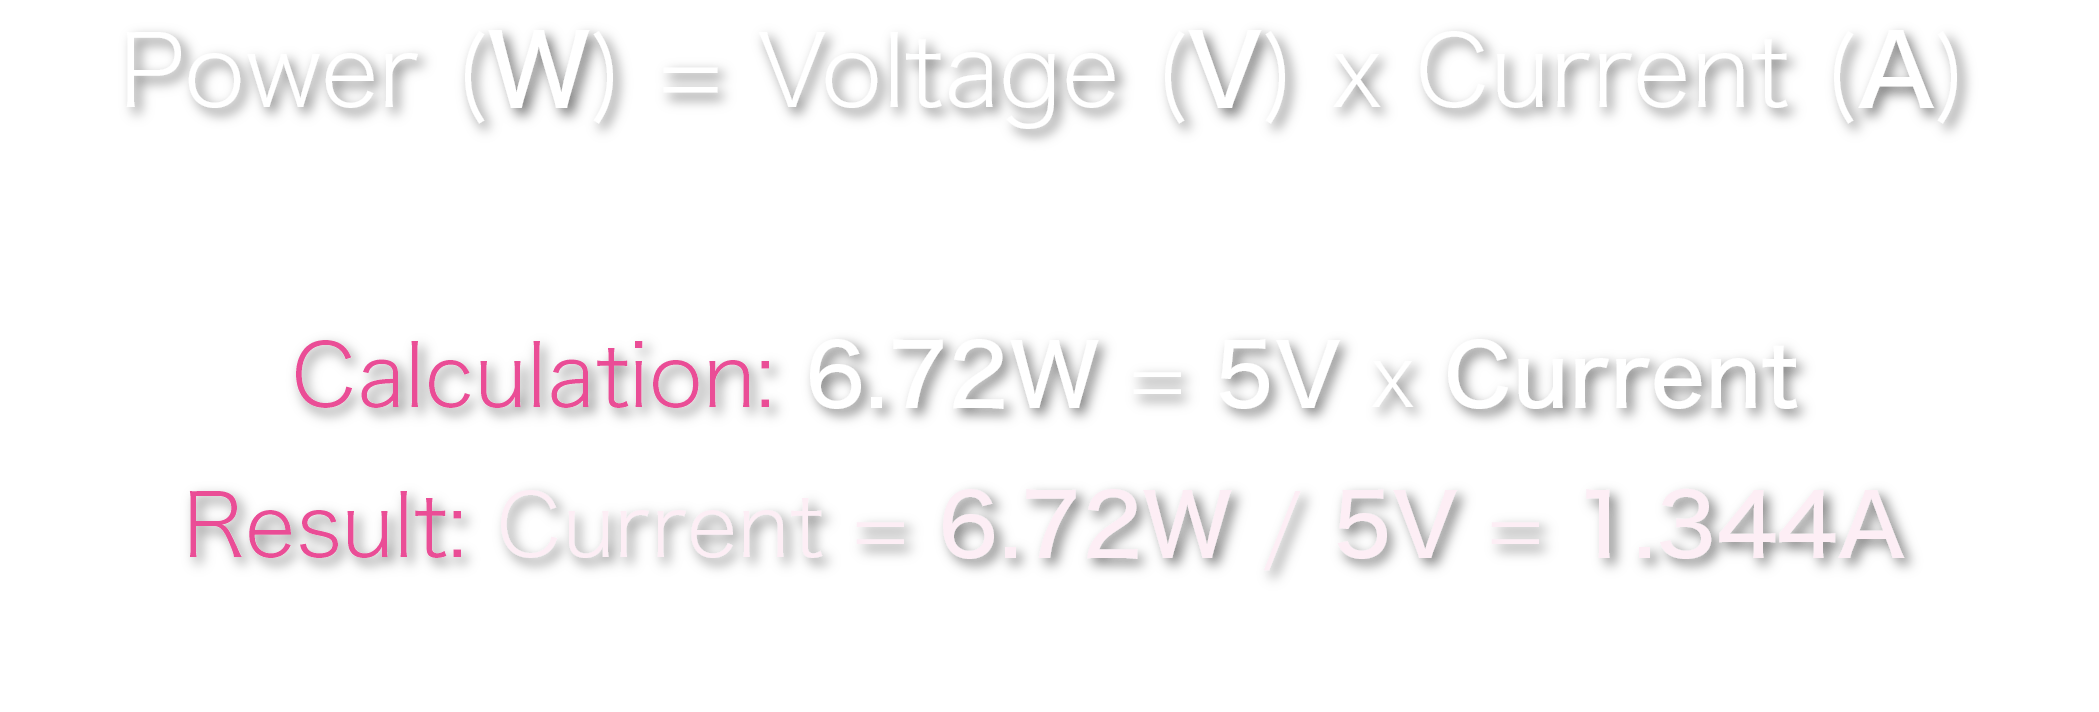
Next to it, there's a step-up circuit that increases the voltage, but it sacrifices current to do this. It takes my 1600mAh battery from 4.2V to 5V (or up to 27V if needed) by reducing the current.
-
The battery has 6.72 watts (4.2V x 1.6A). To see how much current we have at 5V
-
I picked this battery because 1.344A is enough to run 4 servos needing 800mA (200mA each). The ESP8266 can use up to 200mA, sometimes peaking.
-
I run the servos at 5V and the ESP at 3.3V.
-
To convert the 5V from the board to 3.3V, I used an AMS1117-3.3 voltage regulator.
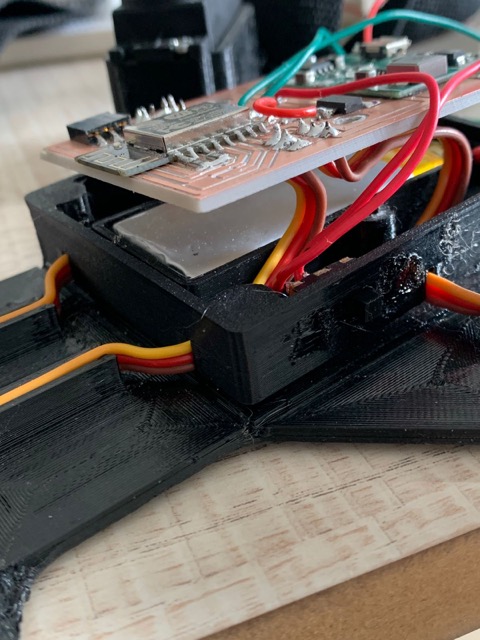
This was my first time doing something like this, and I had to learn a lot about electronics on the fly. But it worked! And I couldn't be happier seeing it all come together. LOL it was a total challenge who am I kidding.
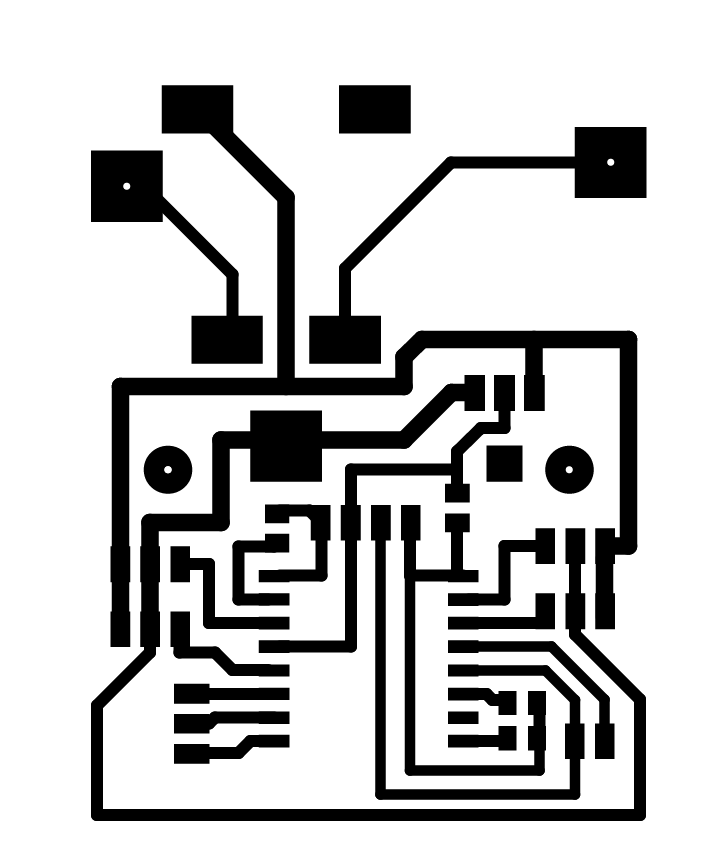
But it payed off... this was the final result of the board
- Interface and apps week ✨
- Molding and casting ✨
-
❥I used a 10:1 ratio for the smooth on silicone and activator. For this step u need precision, darling!
-
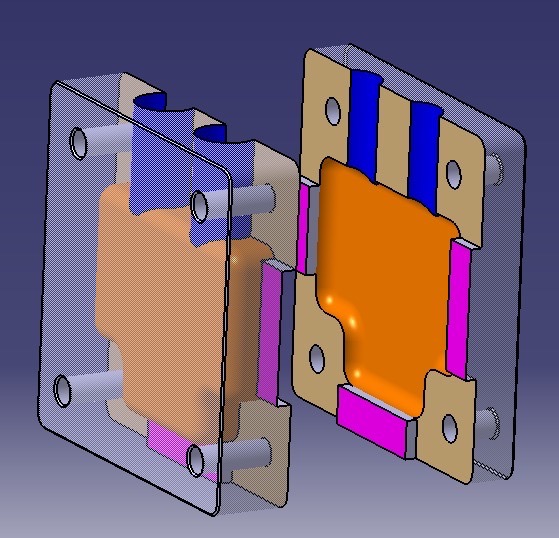
❥So for the Design in CATIA, I started a new Part and used the Sketch tool to draw a sleek Y-shape. I made sure the dimensions were practical and stylish (I measured my back and added 1in side to side so It could perfectly fit anyone).

-
❥After that I used the Pad feature to extrude the sketch to just the right thickness.
-
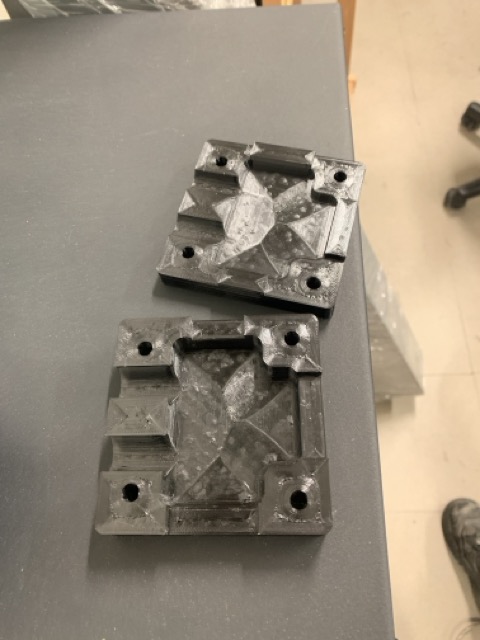
❥To make sure the mold released smoothly, I added Draft Angles to the sides and then used the Edge Fillet tool to round off all sharp edges, making everything smooth and fab.
-
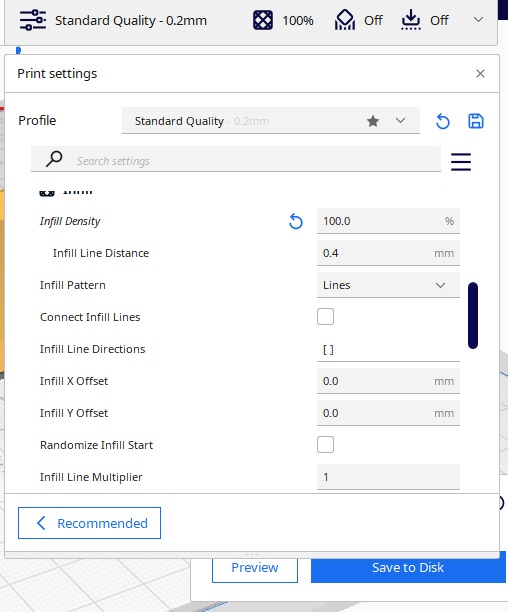
❥I double-checked everything to ensure the mold was perfect and then exported the design as an STL file and prepped it for 3D printing with a 100% infill. This were my parameters:
-
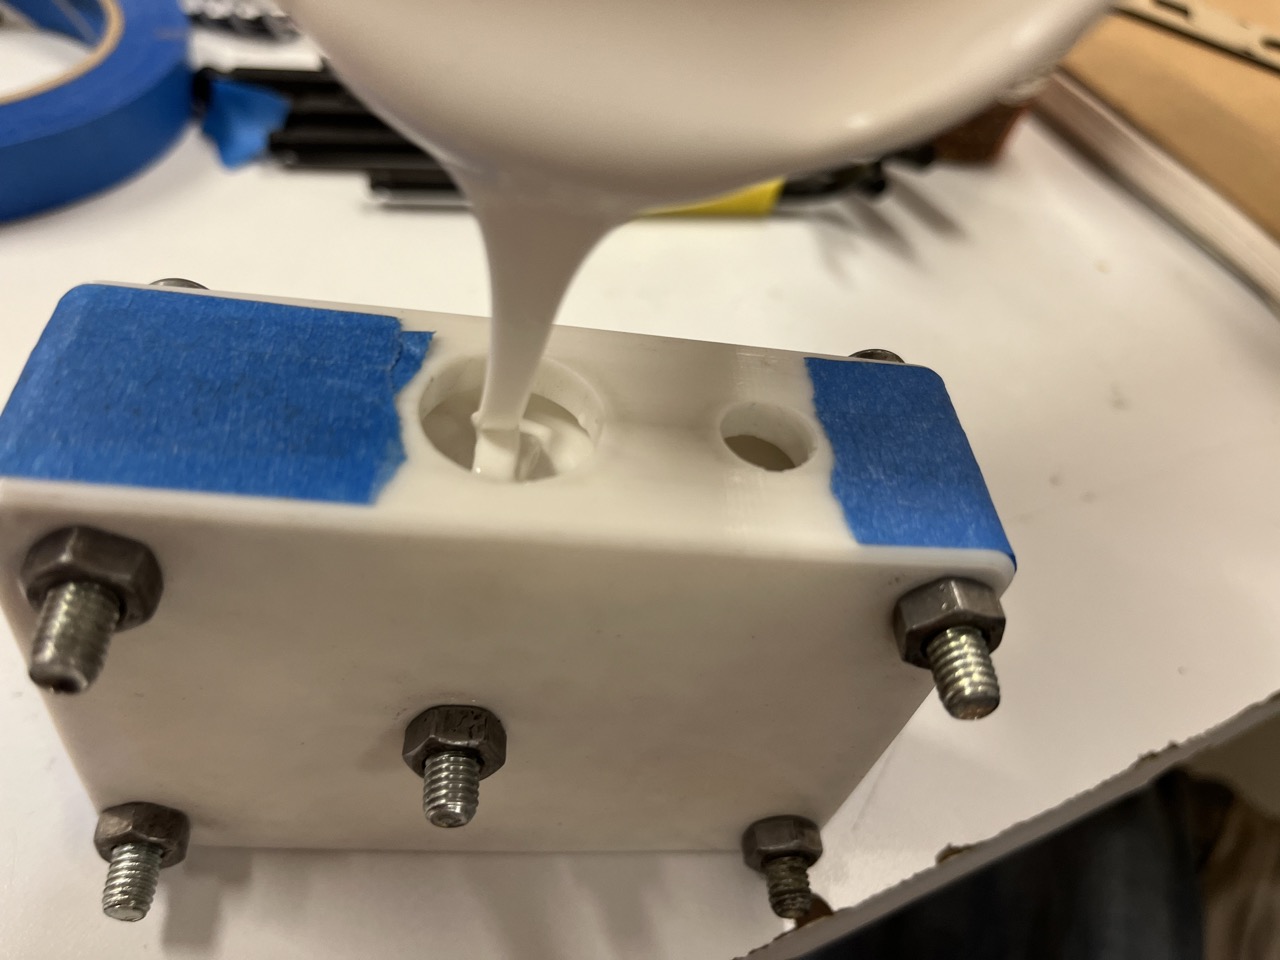
❥The important thing about all this is when pouring the silicone mix into the printed mold always remember to do it from a nice height so the bubbles pop while pouring.
-
❥After I poured the mix I placed the mold on a vibrating uncalibrated CNC milling machine (hello, impro vibration table!) to banish those air bubbles. LOL it totally worked so this is a nice tip.
-
❥Finally I let the silicone set for 8 hours and had my perfect molds ready for sewing process
-
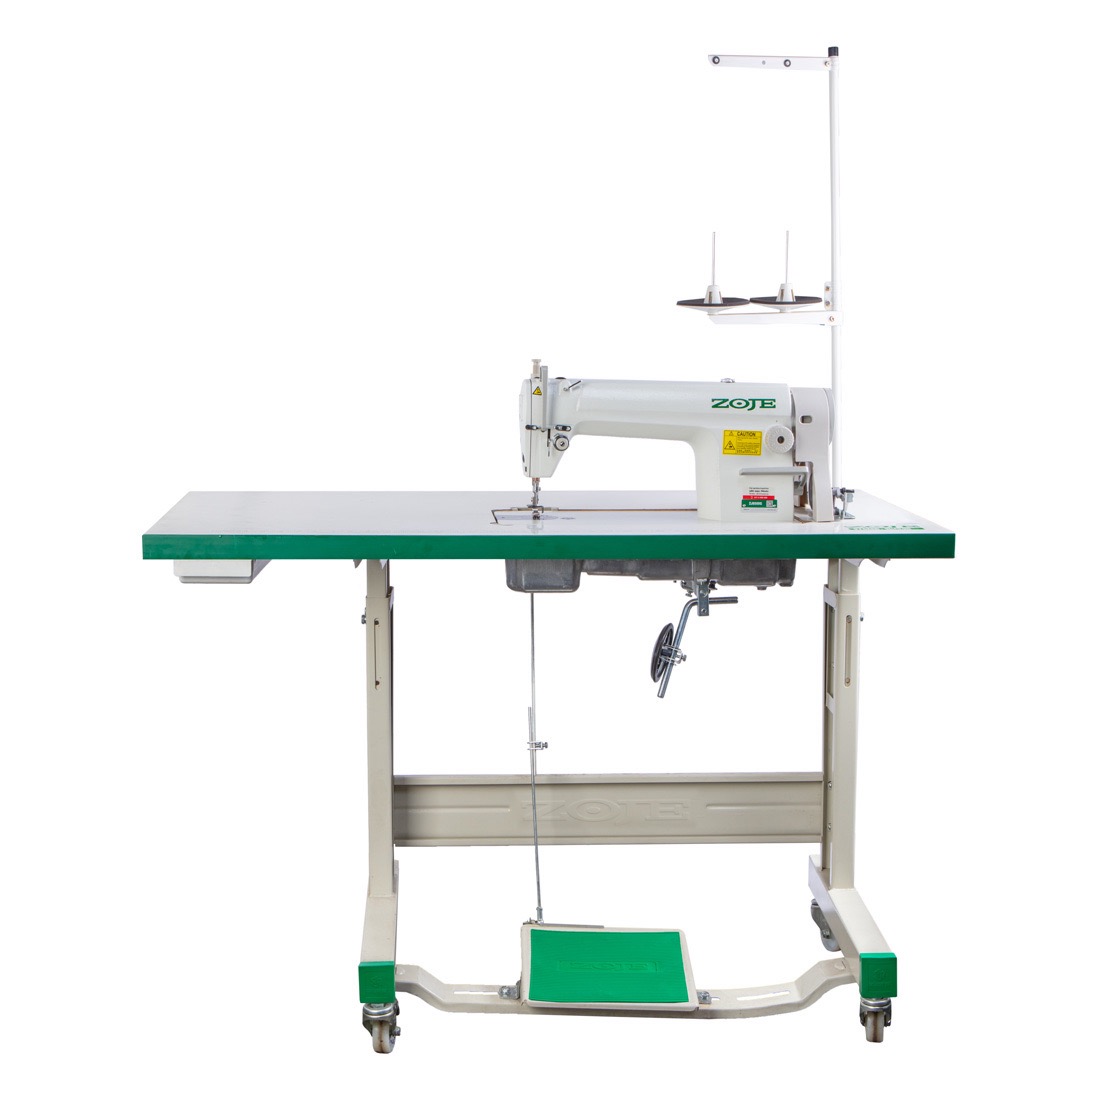
So babe, for this instructions you must know that I used a ZOJE electronic industrial sewing machine, must of the industrial sewing machines use the same steps. That being said…let’s go!
-
Place the spool of thread on the spool pin and guide the thread through the thread guide, down through the tension discs, and up through the take-up lever. This step is super important for all the industrial sewing machines: Thread the needle always from front to back and insert the bobbin into the bobbin case and pull the thread through the slot, under the tension spring using a stitch.
-
Lift the presser foot using the lever and place your fabric under the presser foot, aligning it with the sewing guide on the throat plate, then lower the presser foot to hold the fabric in place.
-
For the settings set the stitch length to your desired setting (around 2.5-3mm for standard sewing) and adjust the thread tension dial, typically between 4 and 6.
-
For the sewing situation you must hold the threads behind the needle to prevent tangling and gently press the foot pedal to start sewing. This is super important to secure the stitches: Sew a few stitches forward, then reverse stitch a few stitches to lock the seam.
-
After you’ve finished lift the presser foot and pull the fabric out and cut the threads.
-
Use high-quality thread to prevent breakage (100% polyester)
-
Practice on scrap fabric to get a feel for the machine.
-
Keep your machine clean and well-oiled for smooth sewing.
-
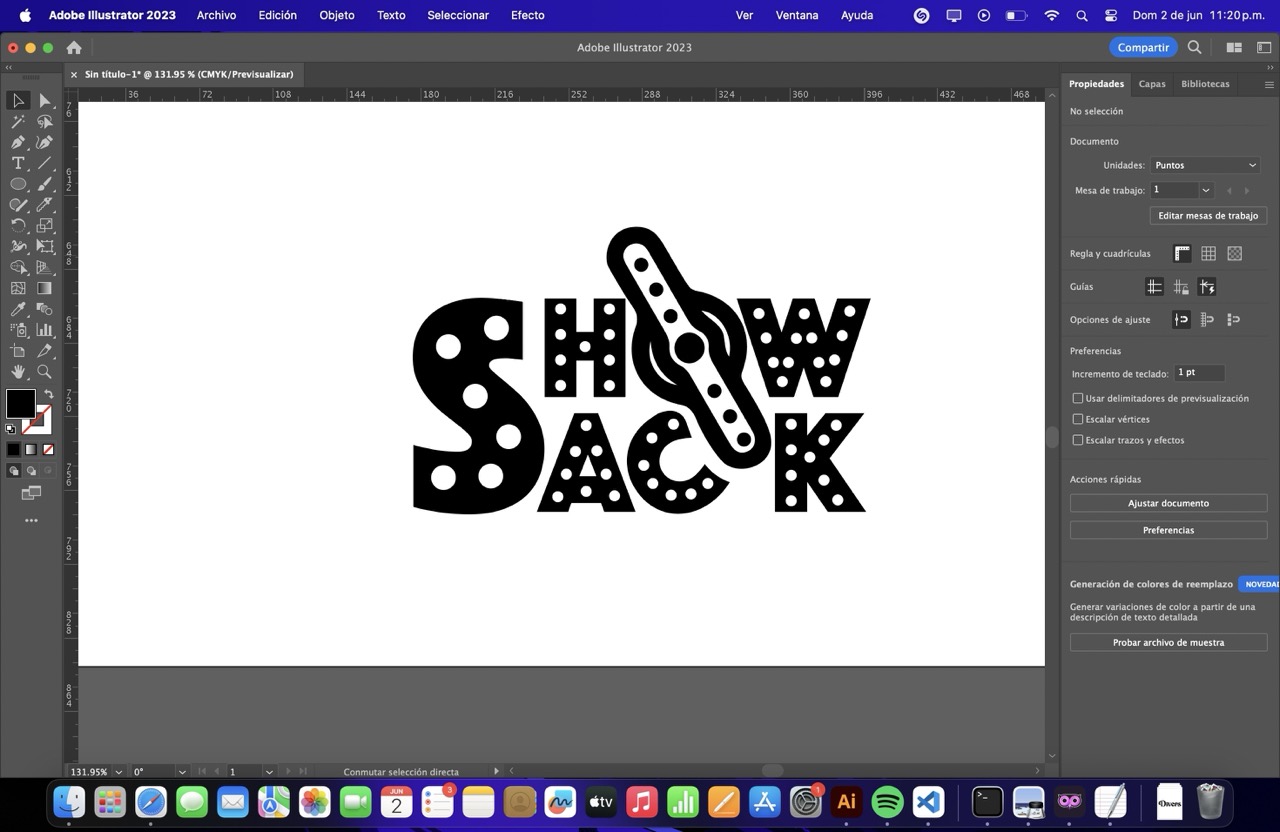
🎀First open Adobe Illustrator and start a new document. Use the Type Tool to craft your chic text. Choose a glamorous font that screams your project (For this part a little tip is to always search the perfect font in the program, but if you do not find it always go for it in Dafont site, all fonts are free and free licensed).
-
🎀Then select the text, open the Gradient panel, and splash on those pink shades from blush to white. Adjust the gradient to perfection.

-
🎀When you are done export it as PNG with a transparent background for that seamless, luxe finish.
- Project management ✨
- Applications and implications ✨
- My showsack logo
- My board rml cut file
- My code file
- Smaller Accesories (2,4)
- High Accesories (1,3)
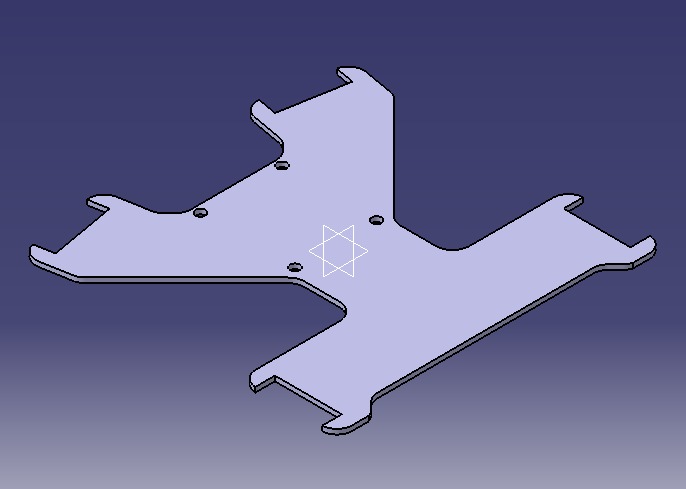
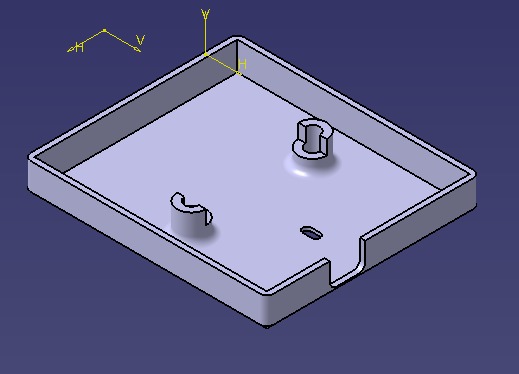
- Bottom top
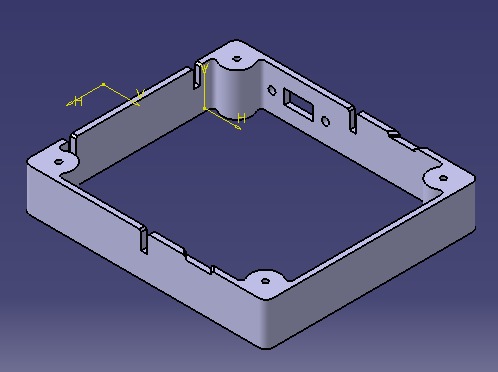
- Superior top
- The x backpack
- INVENTION AND INTELECTUAL PROPERTY✨
I NEED TO: Define size and slots, infuse with foldable grooves. Craft a LiPo battery compartment with precision, adding PCB holes and mounting four servos. Prepare foam layout, remove excess, and construct cover with flair.
How does this work gurl? Give me sum details
So let me tell you about how the magic happens through the synchronized dance of this four Tower Pro MG995 servomotors:
❣️🍓ALL ABOUT THE DESIGN 🍓❣️
Soooo here´s the T honey bee..
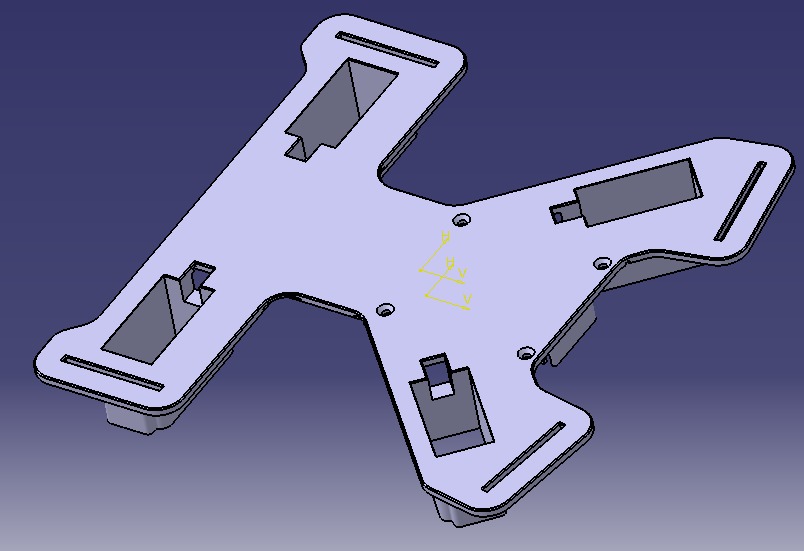
I used Catia for this design because I just love this software, it´s so much easier, here´s all about the design bae step by step
FOR MORE INFORMATION PLEASE GO TO ❥
Main Plate
My Catia´s design little carousel

For the Eva Foam....
✨🌸Electronics production🌸✨
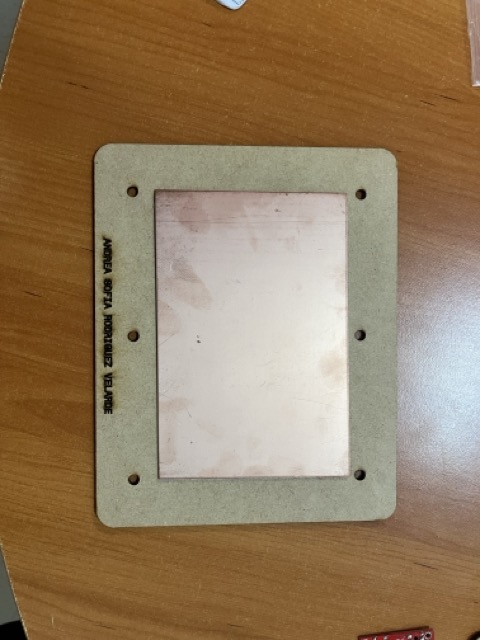
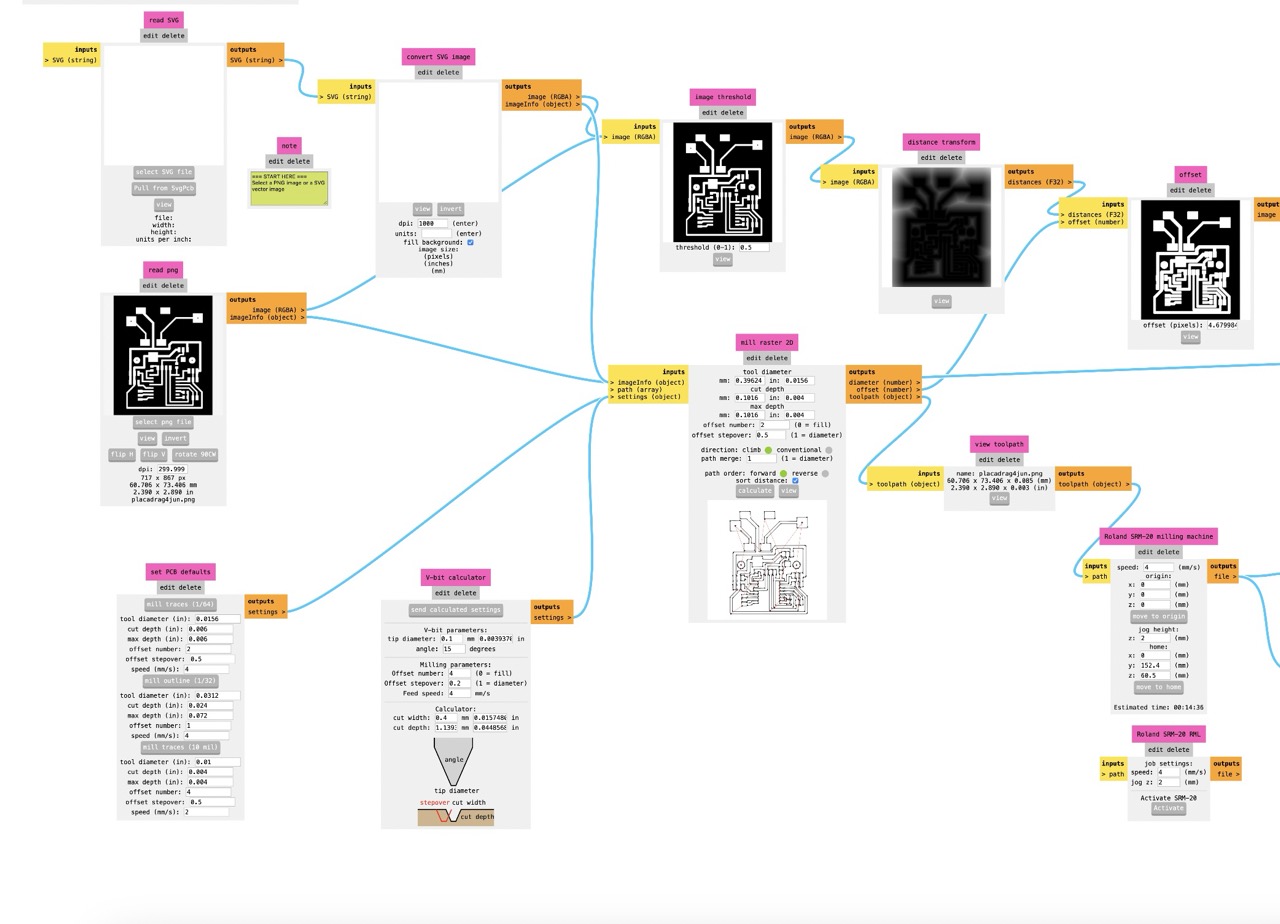
So in this text I will explain what PCB fabrication in a nutshell. Basically, special gorgeous machines that are programmed to do this in G-code take our digital designs and turn them into real-life circuit boards. They use a super fast cutter to carve out pathways on copper boards, making the circuits we need. The minimum trace width on a PCB is like the narrowest path it can take, it is like a little highway for electricity. It's super important because it keeps things from overheating or breaking when carrying current.
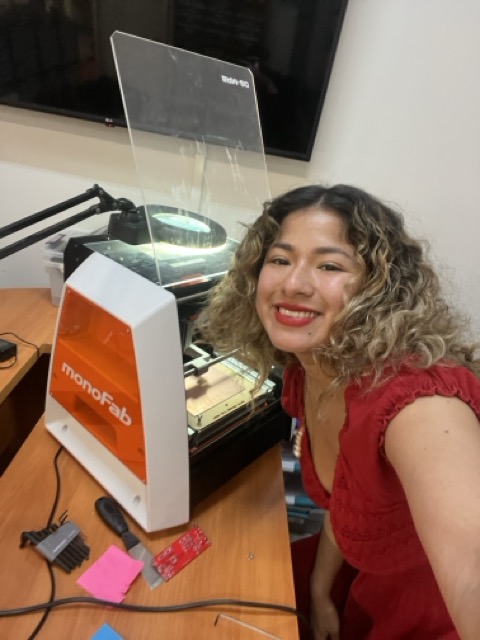
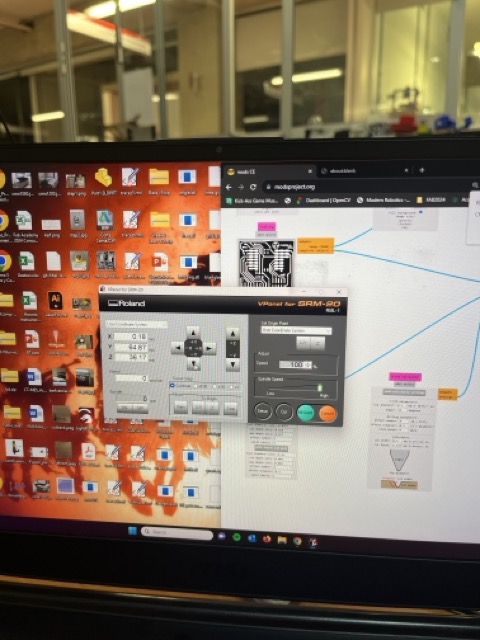
Unlike those big machines that the current industry uses, here at the FabLab Puebla we use Mini-Millst wich are all about detail, thanks to their fancy software. For this assignment I personally used the ROLAND SRM-20 model gurl, AND YES, I NAILED IT AS ALWAYS✨
I will recomend that you read your machine´s guide so you´ll know perfectly what to do, here´s mine:
So for the tools, I used a pretty 15-degree V-bit for engraving and a 0.8mm diameter two-flute end mill for cutting. Also I used this cool software called MODS to make things easier. Trust me, it's a bit intimidating at first, but once you get the hang of it, it gets better!🌺
For managing the Roland I used V-carve software to cut.
In V-carve first, I calibrated in x, then in y, and then the z-axis is where we mark our starting point. Then I swapped out the engraving tool for a V-angle one. After I finshed, I did another calibration, but this time just in z, so I could pop in my 0.8 mm diameter cutting tool. Oh, and always remember, when you're putting your tools in the holder, make sure it's not too tight! Gotta leave it loose so we can do that last bit of calibration by hand and make sure it's all perfect. Don't wanna break the tool when it goes down in z, you know girl...? (I DID)
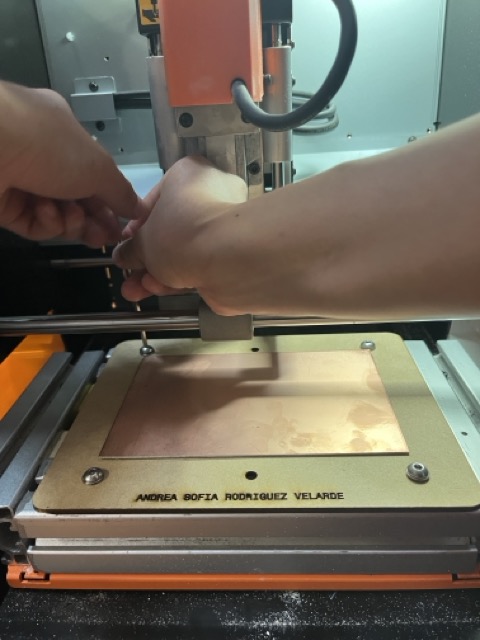
My design and the result
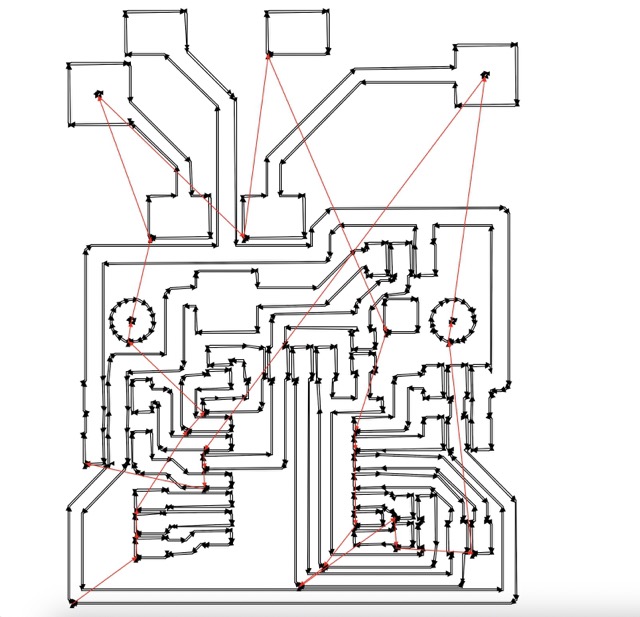
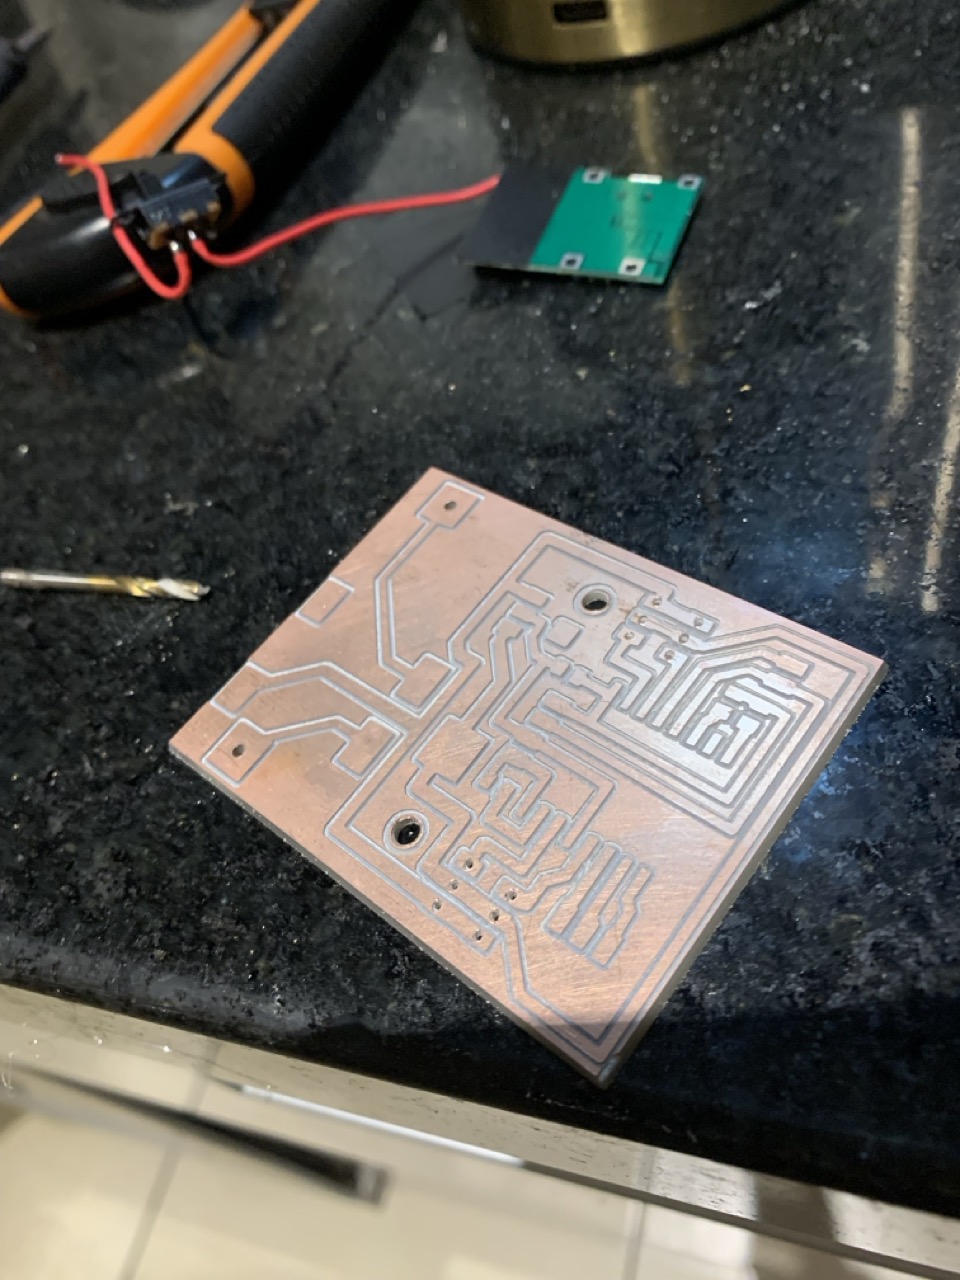
This were all my parameters:
How to make the electronics work (From a Fashion Designer's POV)💋
So, here's how I made this whole ESP8266 12-F setup work, all while figuring out electronics for the not so first time but ish...
FOR MORE INFORMATION PLEASE GO TO ❥
☻Small summary☻
Access Point🛜
Interacting with the Web Page
THE SUPER IMPORTANT VOLTAGE PART
CHALLENGE!!! How did u made 5V servos work with a LiPo battery that maxes out at 4.2V? Girl magic? YAS HONEY!
Why This Battery Works?

Voltage Regulation
★☆All about the programming☆★
FOR MORE INFORMATION PLEASE GO TO ❥
MY PERFECT MOLD (AND THE CASTING SITUATION...)
FOR MORE INFORMATION PLEASE GO TO ❥
✴︎The goal was to make a mold without any locks so it releases like butter so I took clues from molding and casting week, going for a Y-shaped embedded mold to keep those straps comfy and user-friendly.✴︎
My molding and casting 🎀✨gorgeous✨🎀 pics
❀✿REMEMBER THAT THIS IS A CAROUSEL CLICK THE ➤ TO SEE ALL THE PICS!!❀✿

HOW I 🪡SEW🧵AND DIDN´T DIED IN THE PROCESS CUZ BAE WE ALL GOT NAILS💅🏼
Tips for Fabulous Sewing
✴︎✎NOW HOW TO MAKE A PRETTY PNG LOGO IN ILLUSTRATOR 2D SOFTWARE✎✴︎
So, I will tell you in a nutshell how to vectorize a 2D trace in Adobe Illustrator and fade it till perfection⭐︎
THE RESULTING EDITORIAL PICTURES
❀✿REMEMBER THAT THIS IS A CAROUSEL CLICK THE ➤ TO SEE ALL THE PICS!!❀✿


🎀And now... my pretty table of components🎀
SOPHIE´S FABULOUS SHOWSACK COMPONENTS |
Where to buy? | Amount | Price | Total price |
| 1 meter 1-inch strap | Amazon | 1 | $294.62 MXN/unit | $36.82 MXN |
| 1 meter 2-inch strap | Amazon | 4 | $278.00 MXN/unit | $69.50 MXN |
| AMS1117 3.3V | Digikey | 1 | $12.80 MXN/unit | $12.80 MXN |
| 3D printing filament | Mercado Libre | 1 | $147.00 MXN/unit | $147.00 MXN |
| ESP-12-F | Mercado Libre | 1 | $90.00 MXN/unit | $90 MXN |
| Microswitch 1 pole 2 throws 2 positions | Steren | 1 | $5.00 MXN/unit | $5.00 MXN |
| SMD capacitor 1206 10kΩ | Yageo | 4 | $37.00 MXN/unit | $24.66 MXN |
| Servomotor with 10 kgf/cm torquer | Steren | 4 | $174.00 MXN/unit | $696.00 MXN |
| 3.7V 1600mAh LiPo battery | Amazon | 1 | $183.86 MXN/unit | $183.86 MXN |
| 1 pair of 1-inch backpack buckles | Mercado Libre | 1 | $221.00 MXN/unit | $110.50 MXN |
| Smooth-On silicone 3030 activator | Amazon | 18g | $954.00 MXN/unit | $18.86 MXN |
| Smooth-On silicone 3030 rubber | Amazon | 108g | $954.00 MXN/unit | $188.67 MXN |
| TP4056 board with step-up | Mercado Libre | 1 | $69.00 MXN/unit | $69.00 MXN |
| Copper plate | Mercado Libre | 1 | $90.00 MXN/unit | $12.85 MXN |
| Ostrich-style feathers | Mercado Libre | 10 | $88.00 MXN/unit | $88.00 MXN |
| Button | Unit electronics | 1 | $4.00 MXN/unit | $4.00 MXN |
| Total cost | $1757.52 MXN |
FOR MORE INFORMATION OF THE PROJECT MANAGEMENT PLEASE GO TO ❥
FOR MORE INFORMATION OF THE APPLICATIONS AND IMPLICATIONS PLEASE GO TO ❥
MY TIME IS PRECIOUS BAE⏱️🌟
| week schedule | ✨My fab final project✨ |
|---|---|
| Computer Aided Design | Designing the main body |
| Computer Controlled Cutting | Laser cut my Eva Foam cushion |
| Electronics production | Learning about this |
| 3D scanning and printing | 3D scanning nice things |
| Embedded programming | Designing my board ISH |
| Computer Controlled machining | Making my new home´s furniture sooo cute |
| Electronics design | Making the programmer |
| Output devices | Making a wi-fi rele board |
| Mechanical design, machine design | OMG MY TEAM AND I NAILED IT |
| Break, midterm review | Working on documentation for final project page |
| Input devices | Button situation |
| Molding and casting | Making the mold of a super nice organic form + this proyect´s mold |
| Networking and communications | Gurl I made this ESP work here |
| Interface and application programming | This HTML page |
| Wildcard week | I soldered my own TABLE OMG YESSSS |
| Applications and implications, project development | I MADE THIS AWESOME SITE |
| System integration | Programming |
| Invention, intellectual property, and income | FINISHING THIS |
| Project presentations | DEAL WITH IT AND VIBE BAE |
AND NOW MY LAST MONTH´S SCHEDULE...
| Detailed schedule for my last month bae cuz it´s 2 much | DAY | TASK |
|---|---|---|
| 10 may | wednesday | pcb design |
| 11 may | wednesday | buy pcb components |
| 12 may | wednesday | milling pcb |
| 13 may | wednesday | soldering |
| 14 may | wednesday | documenting the electronics production part |
| 15 may | wednesday | documenting edits |
| 16 may | wednesday | putting together video |
| 17 may | wednesday | 3D design the main structure |
| 18 may | wednesday | 3D design the main structure |
| 19 may | wednesday | edits |
| 20 may | wednesday | 3D designing the accesories |
| 21 may | wednesday | edits |
| 22 may | wednesday | Buy feathers |
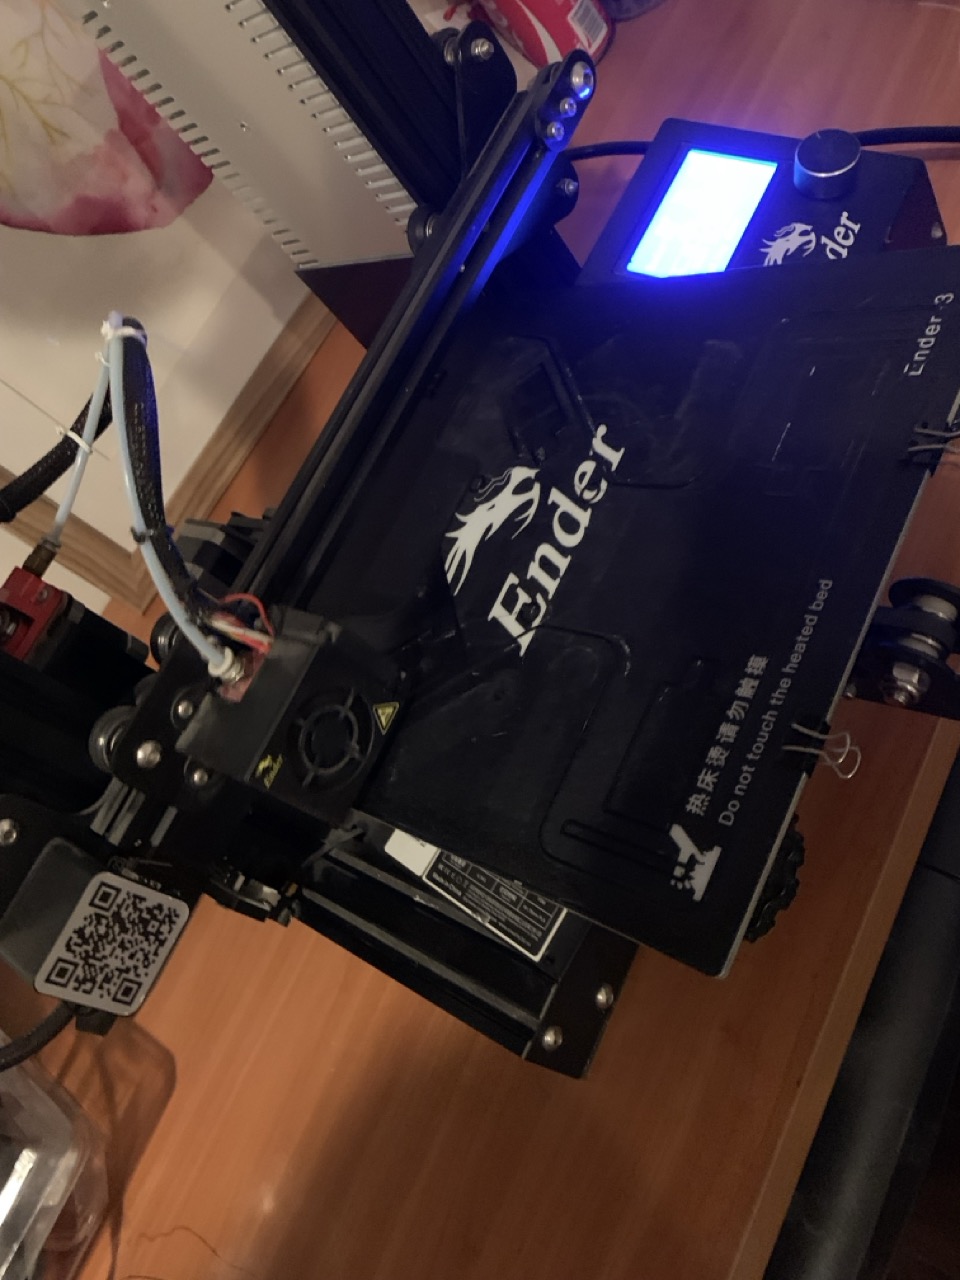
| 23 may | thursday | 3D printing the main device |
| 24 may | friday | 3d printing the accesories |
| 25 may | saturday | Designing the back eva foam cushion |
| 26 may | sunday | Moldering design |
| 27 may | monday | Laser cutting the chusion |
| 28 may | tuesday | Documenting the 3D design process |
| 29 may | wednesday | Casting the mold |
| 30 may | thursday | Coding |
| 31 may | friday | Testing the code |
| 1 june | saturday | Testing the code in the device |
| 2 june | sunday | Edits |
| 3 june | monday | Making the sheet |
| 4 june | tuesday | Documenting images |
| 5 june | wednesday | Presentation png edits |
| 6 june | wednesday | Presentation png upload and video making |
| 7 june | wednesday | Editing video |
| 8 june | wednesday | Documenting |
| 9 june | wednesday | Documenting |
| 10 june | wednesday | Documenting |
This are my fab files DO NOT STEAL THEM GURL LOL..🌸
FOR MORE INFORMATION OF MY LICENSE PLEASE GO TO ❥