PROJECT DEVELOPMENT OF S H O W S A C K
🌟 MY PRETTY Project Overview 🌟 The SHOWSACK is a fabulous, motorized backpack designed to enhance outfits with dynamic movements, perfect for drag queens and fashion designers who want to elevate their ensembles. This project brings together a range of skills from 2D and 3D design to electronics and system integration, creating a truly unique and dazzling accessory.
🌸 Project Questions Answered 🌸
- Cool Backpack with leds
- 🎀✨gorgeous✨🎀 C-PHER MEXICAN DRAG QUEEN
-
So, the back of the Showsack is where all the action's at. We're talking four servos, one in each corner. These little guys are moving whatever we hook up to 'em in the accesories attachments. The servos are hooked up to this ESP thing, which tells 'em what to do. It's like the brains behind the operation. Each servo gets mounted in a corner of the backpack in different heights, nicely so they can do their thing without wobbling around.
-
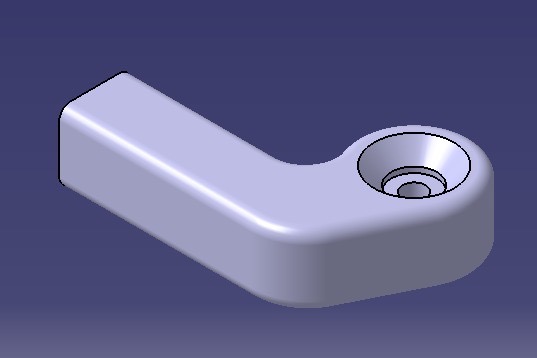
These motors have a specially designed 3D-printed attachments that snap right in, allowing you to insert any material you want to animate.
-
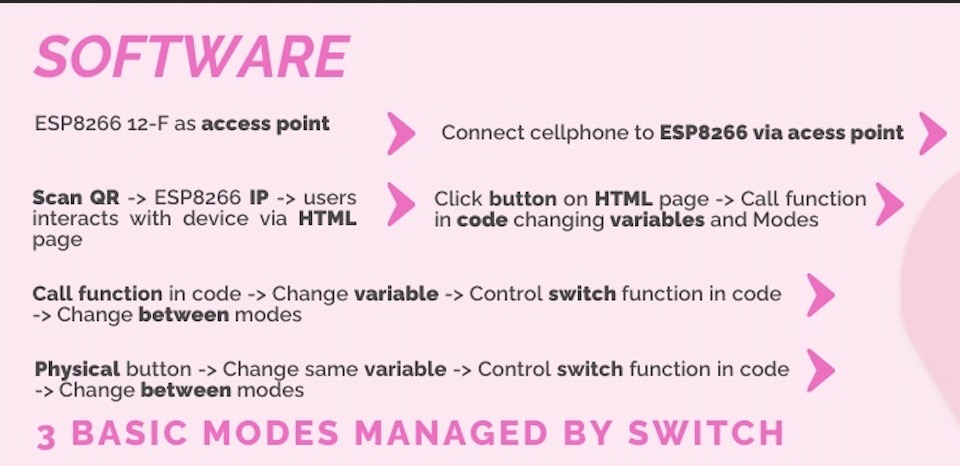
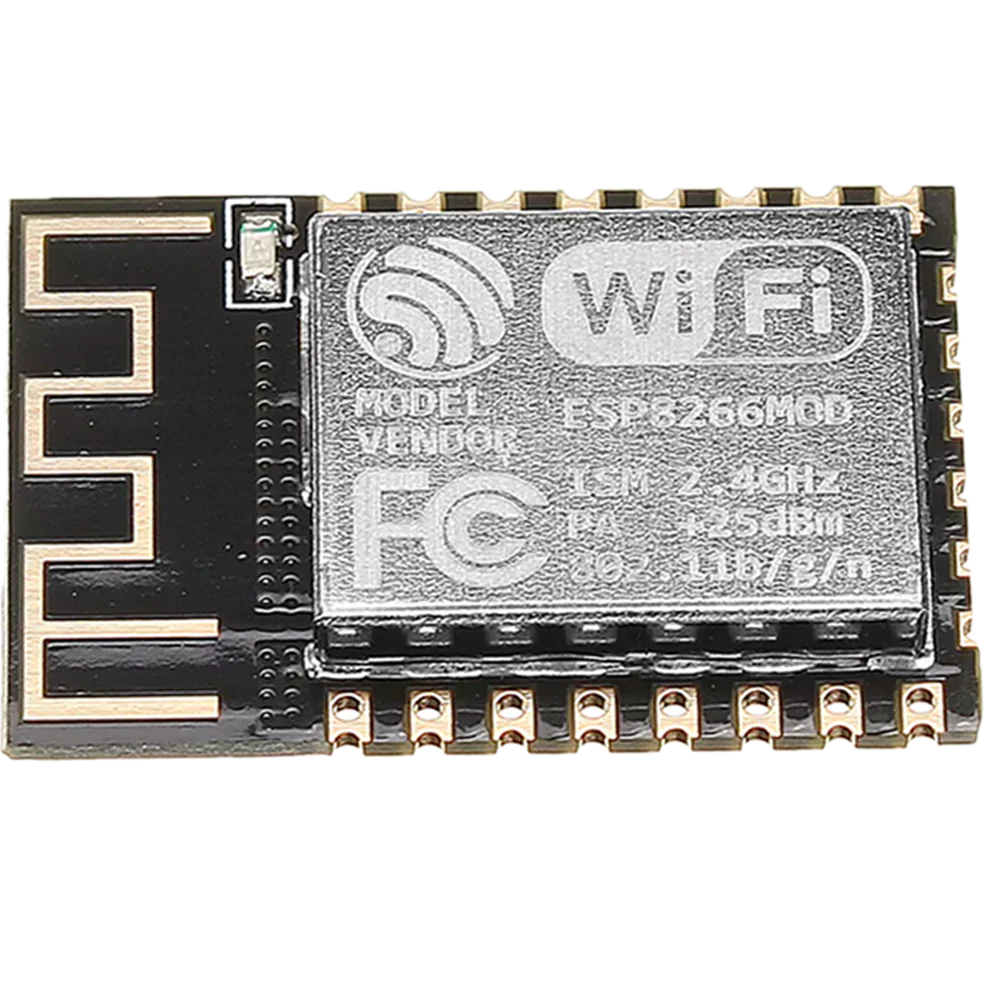
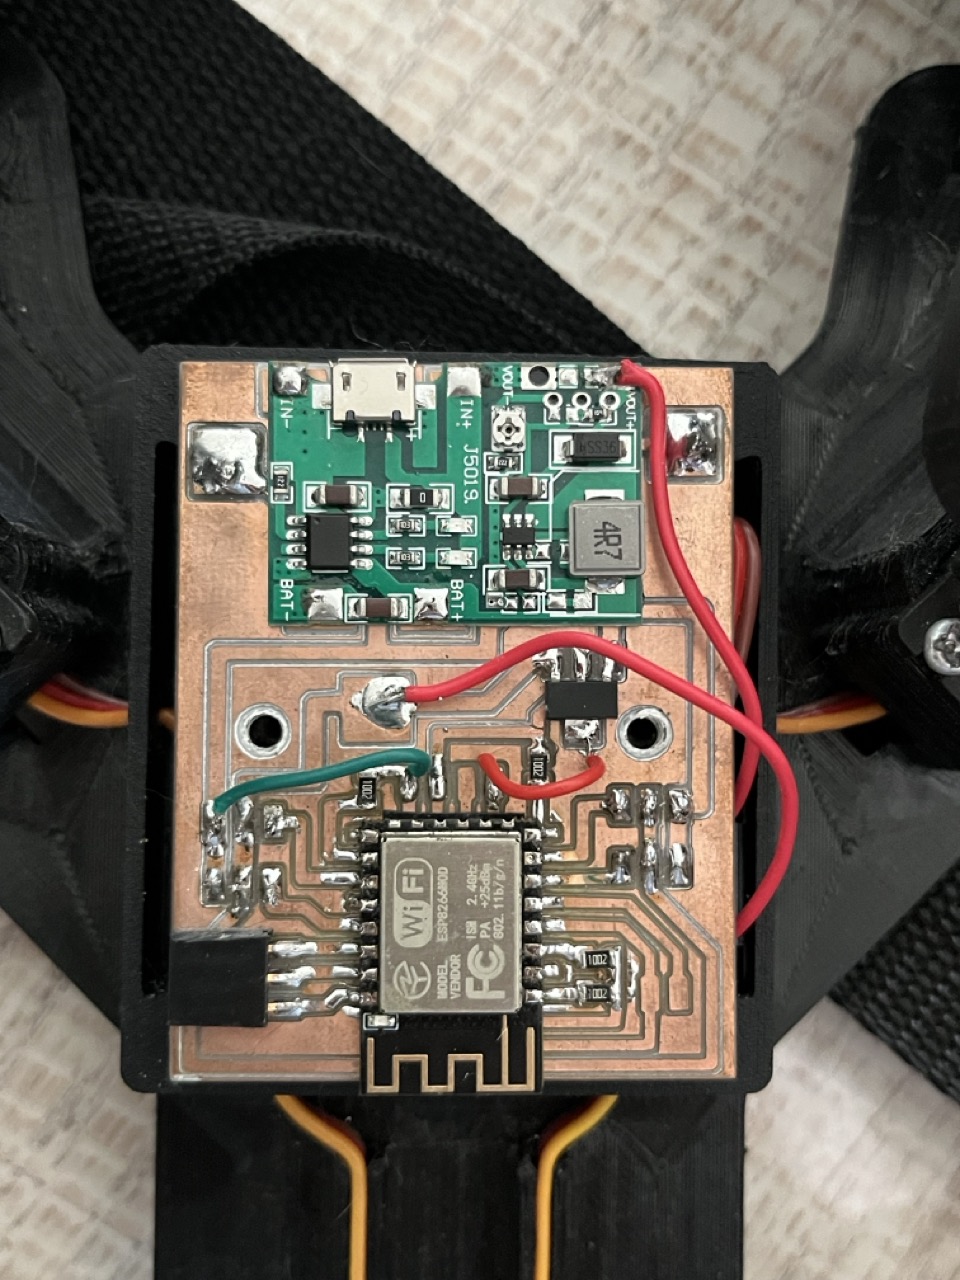
With three fabulous modes that you can switch between with just a button, everything is controlled by an ESP8266 12F microcontroller with built-in WiFi.
-
The inspiration behind this creation comes from the electrifying performances of drag queens, syncing perfectly with the rhythm and lyrics of their music. I researched the most popular beats and crafted three unique servo movements to groove along with them.
-
The base and the chic attachments are all made using 3D printing technology.
-
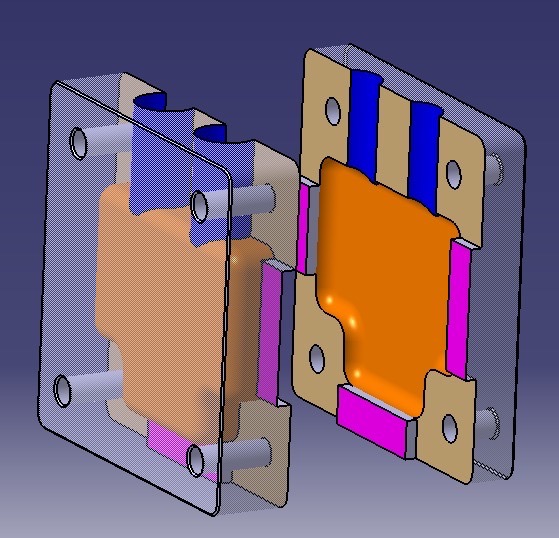
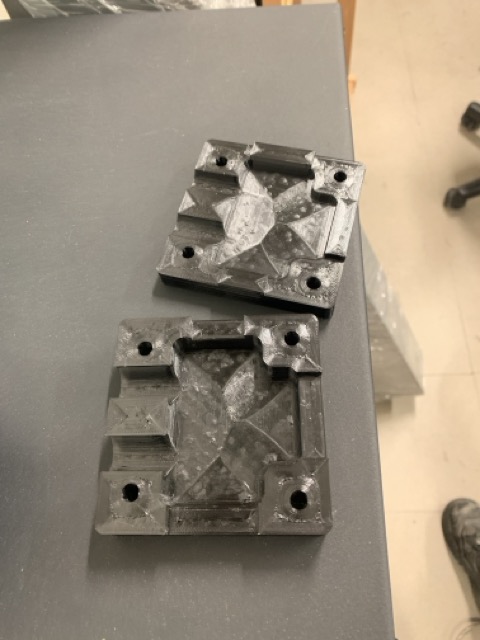
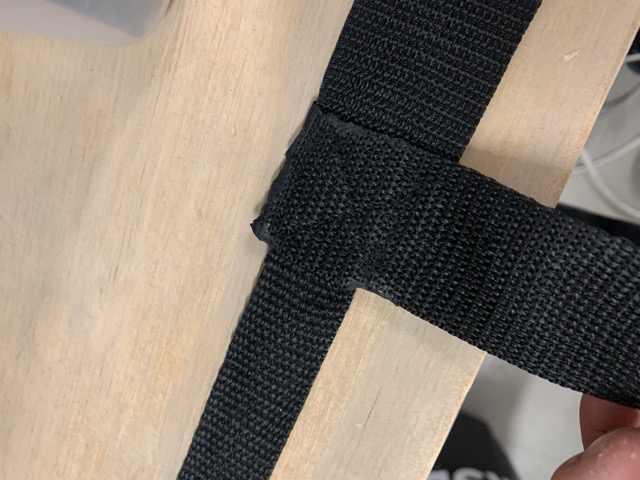
To ensure the backpack straps don’t put too much pressure on the wearer, I designed a Y-shaped mold for the intersection of the three straps on the chest using 3D printing, then casted it with silicone. This brilliant move has made the backpack incredibly comfortable.
-
Also I laser cut this eva foam cushion for the back of the device to give so much more coooooommmmmfort in the user´s back.
-
For this personal project, I filled the cute motor´s attachments with black feathers to test its fabulous capacity hole setup.
- MY FINAL PROJECT💋 What materials and components were used?
Materials include EVA foam for cushiony comfort, 3D printing filament for strong yet lightweight structures, silicone for flexible molds, and various electronic components like servomotors and microcontrollers.
Materials were sourced from Amazon, Mercado Libre, Digikey, and Steren. Each component was carefully selected to ensure top-notch quality and performance.
The total cost for all materials and components was approximately $1757.52 MXN. Detailed costs are provided in the components table below.
Parts made include the 3D printed structure, Sewing machine use for the straps, laser cut EVA foam cushion, silicone molding and casting🎀, and the custom designed PCB for electronics.
Processes used include 3D printing, Industrial sewing machine, laser cutting, molding and casting, electronics production, and programming.
The project explored how to integrate multiple disciplines into a cohesive, functioning product, how to manage power and control for multiple servomotors, and how to design for comfort and style in a wearable tech accessory.
The servomotor control and movement modes worked perfectly, creating a stunning effect. However, there were challenges in power management and ensuring all parts fit together seamlessly. But as always it was nailed.
The project was evaluated based on functionality, design aesthetics, user comfort, and the ability to integrate and operate all components smoothly.
This project opens up new possibilities for wearable technology in fashion, particularly in performance art, allowing for more dynamic and interactive costumes.
Defining size and slots: Ensuring the backpack is fab and functional.
Infusing foldable grooves: For added flexibility and style.
Crafting a LiPo battery compartment: Precision design for power management.
Preparing foam layout: Ensuring user comfort with EVA foam cushioning.
The SHOWSACK operates through synchronized movements powered by four Tower Pro MG995 servomotors, each attached to 3D-printed mounts. These servos are controlled by an ESP8266 12F microcontroller with built-in WiFi, offering three fabulous modes switched via a button or web interface.
CATIA Design: Creating the strap outline, main plate, battery compartment, servo mounts, and cover.
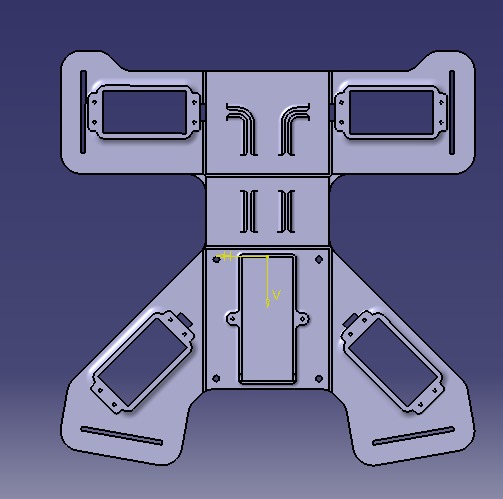
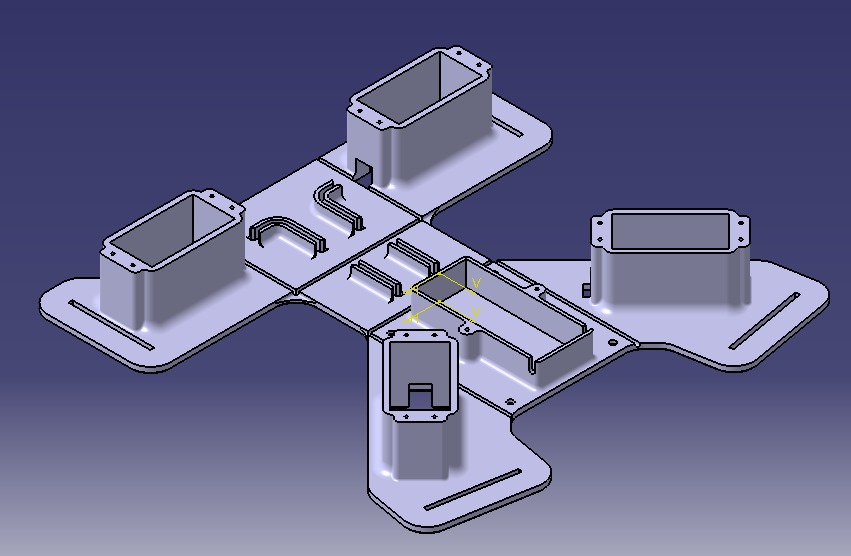

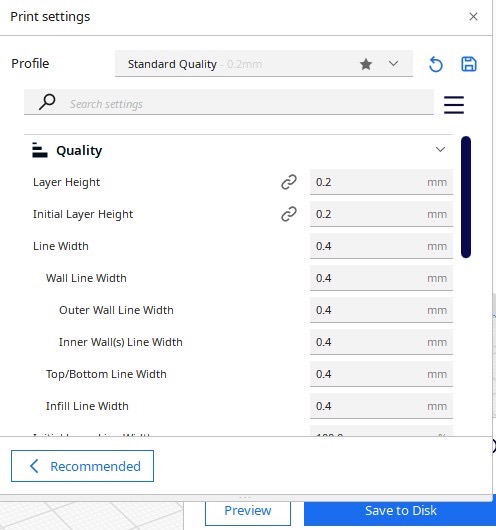
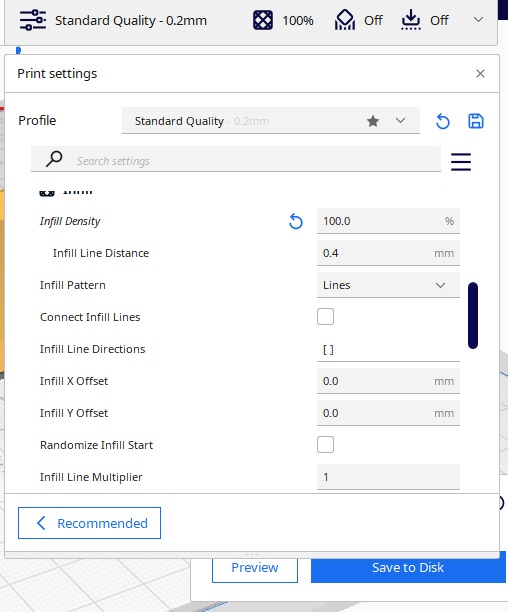
Exporting and Printing: Final design exported and printed with 30% infill for strength and lightweight.
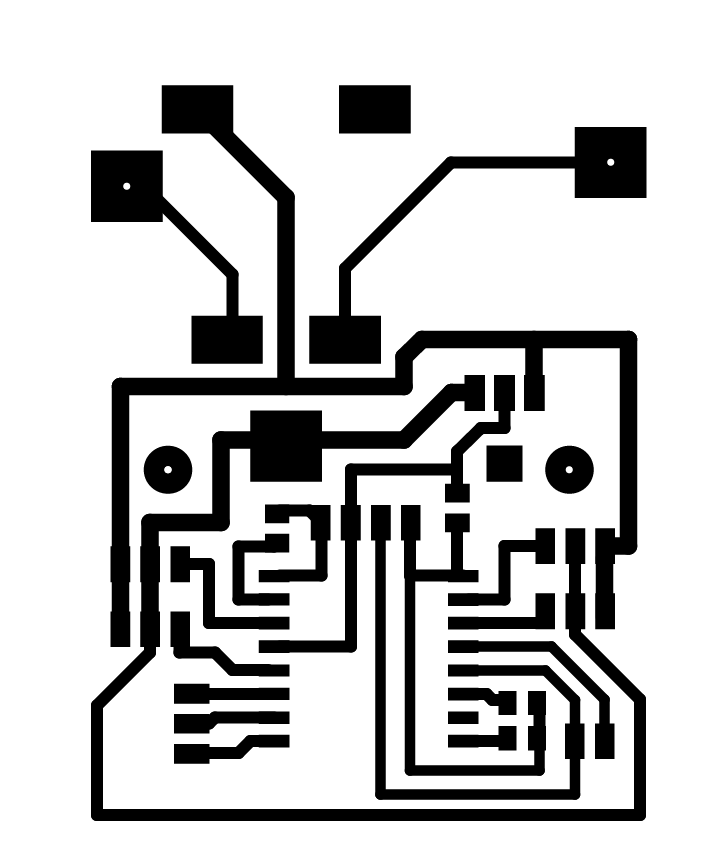
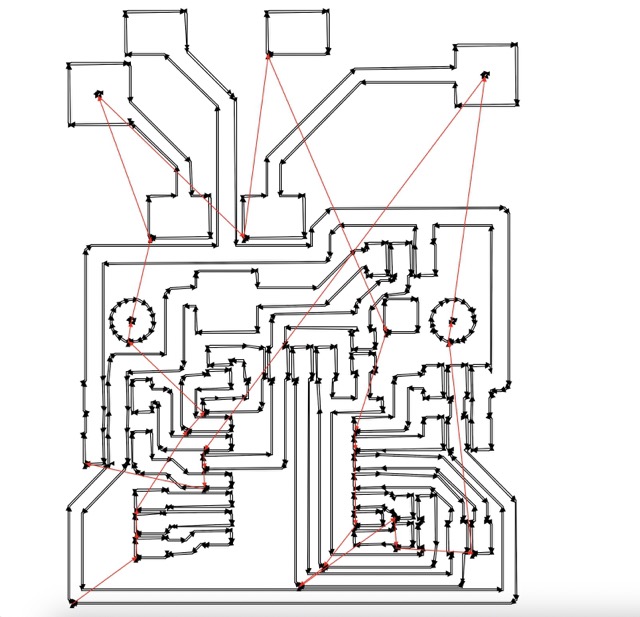
PCB Fabrication: Using a Roland SRM-20 with V-carve software for precision milling.
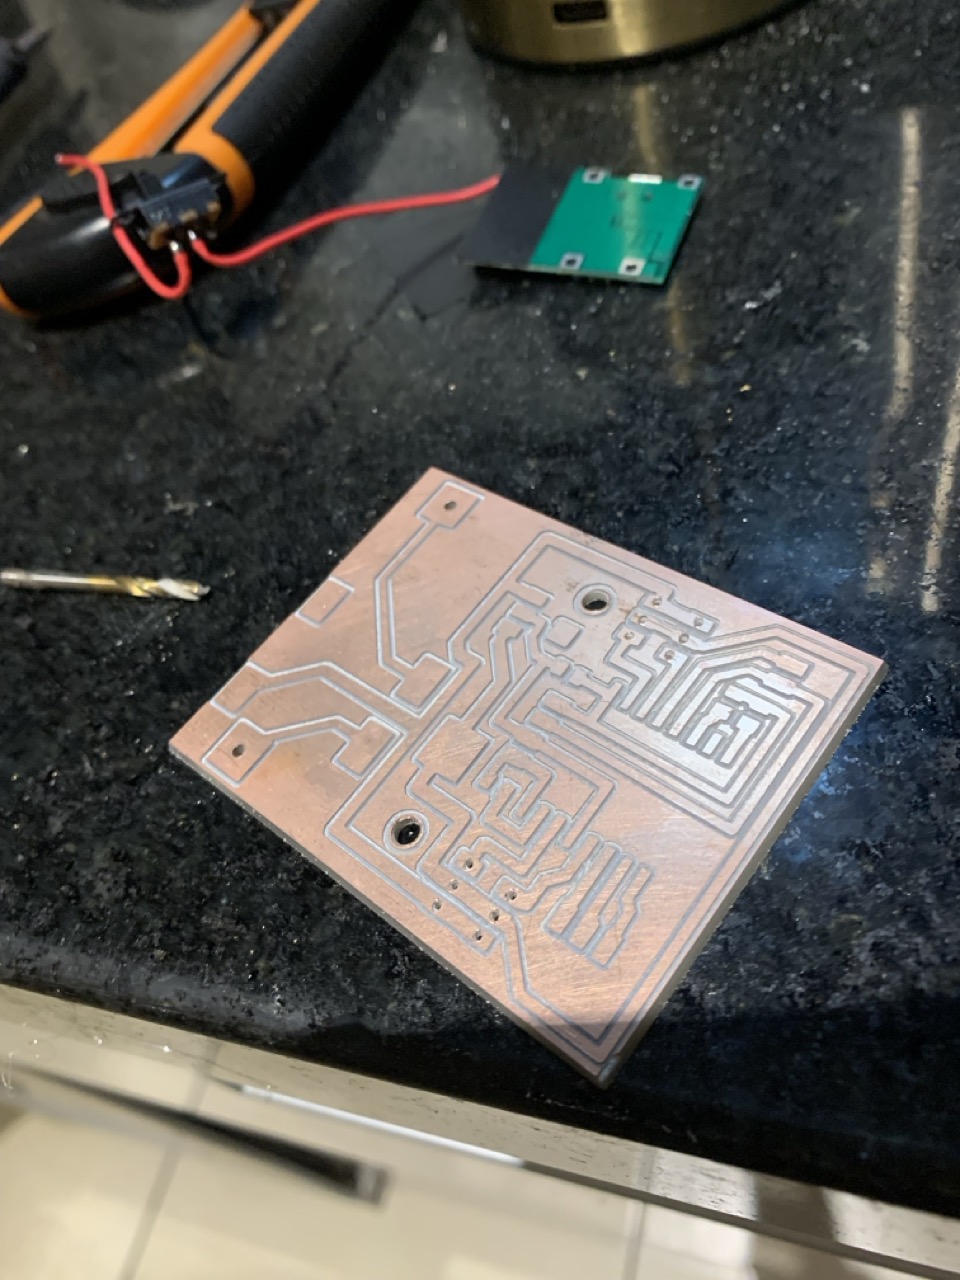
Component Assembly: Soldering and integrating components onto the custom PCB.
Molding and Casting: Silicone Mold Design: Creating a Y-shaped mold for strap comfort, using smooth-on silicone. Casting Process: Pouring and curing silicone to create flexible, user-friendly molds.


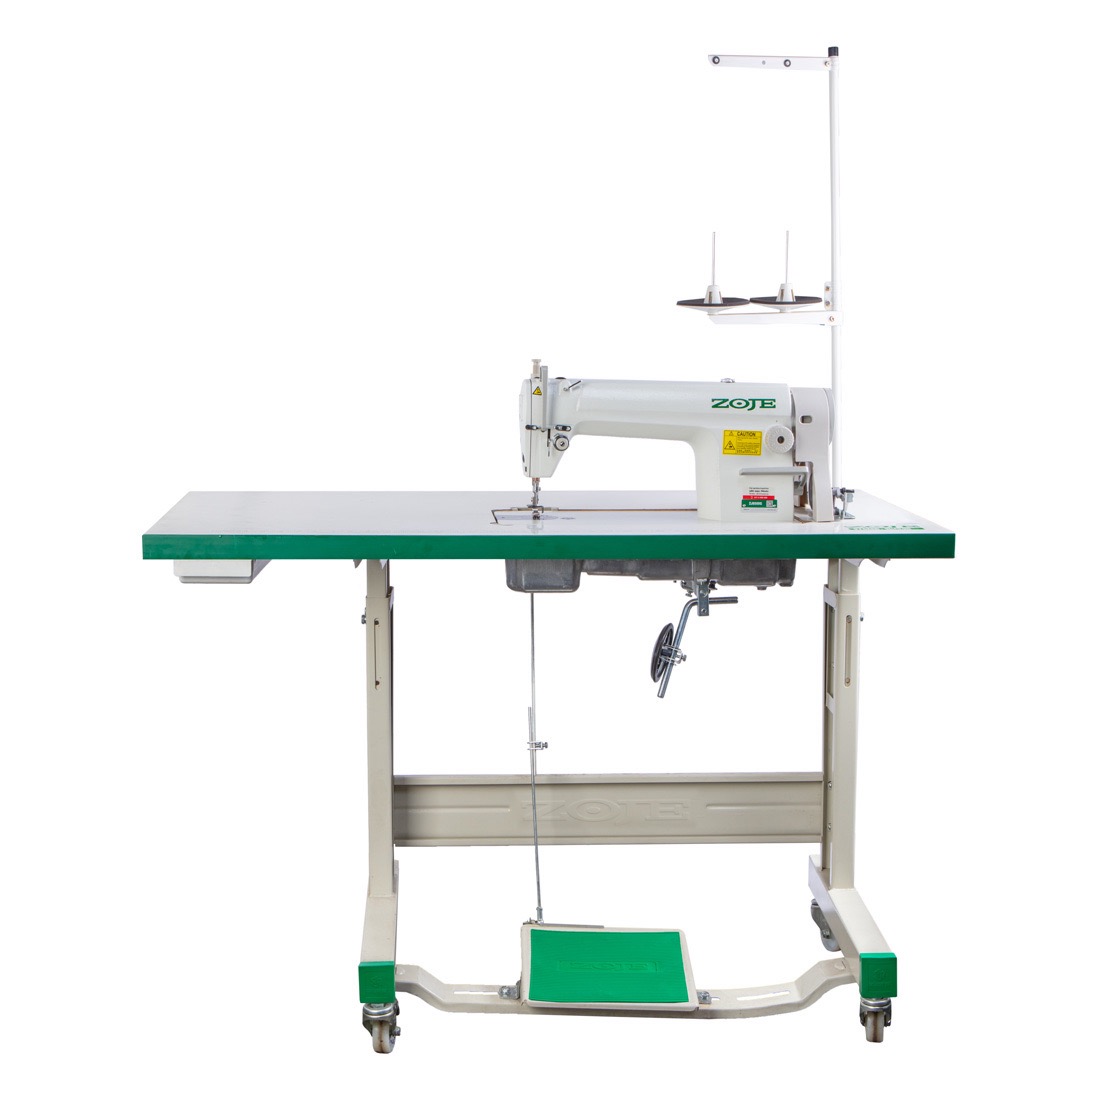
Sewing Instructions: Threading and Setup: Setting up the sewing machine with high-quality thread. Sewing Process: Properly securing stitches and ensuring smooth operation.
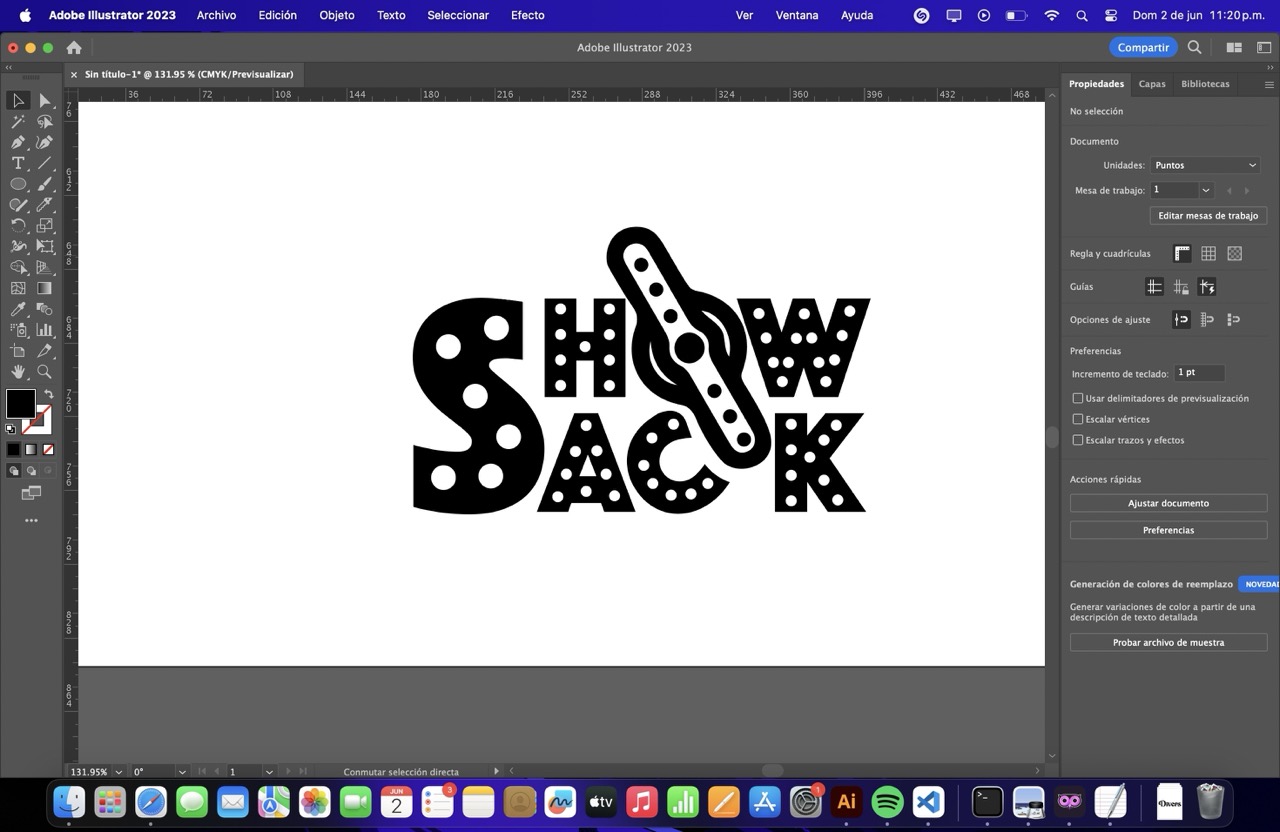
Illustrator Design: Gradient Text Creation: Using Adobe Illustrator to create a chic, gradient logo. Exporting PNG: Ensuring a transparent background for seamless integration.

THE CODE
-
This are my fab files DO NOT STEAL THEM GURL LOL..🌸
- My showsack logo file
- My code file
- Smaller Accesories (2,4)
- High Accesories (1,3)
- Bottom top
- Superior top
- The x backpack
What does it do?
The SHOWSACK moves accessories attached to the backpack using servomotors, all controlled by a chic embedded microcontroller. It features multiple movement modes that can groove to the beat of your music or be controlled via WiFi.
Who's done what beforehand?
While there are other projects with motorized elements and wearable tech, none quite match the glam of SHOWSACK. Inspiration came from a fellow Fab Academy student and various LEDlit backpacks, but nothing else shines quite like this.
Soooooo This particular backpack maybe can be put in here because of the output situation it has going on (kinda like my servos) and wifi access point controls:
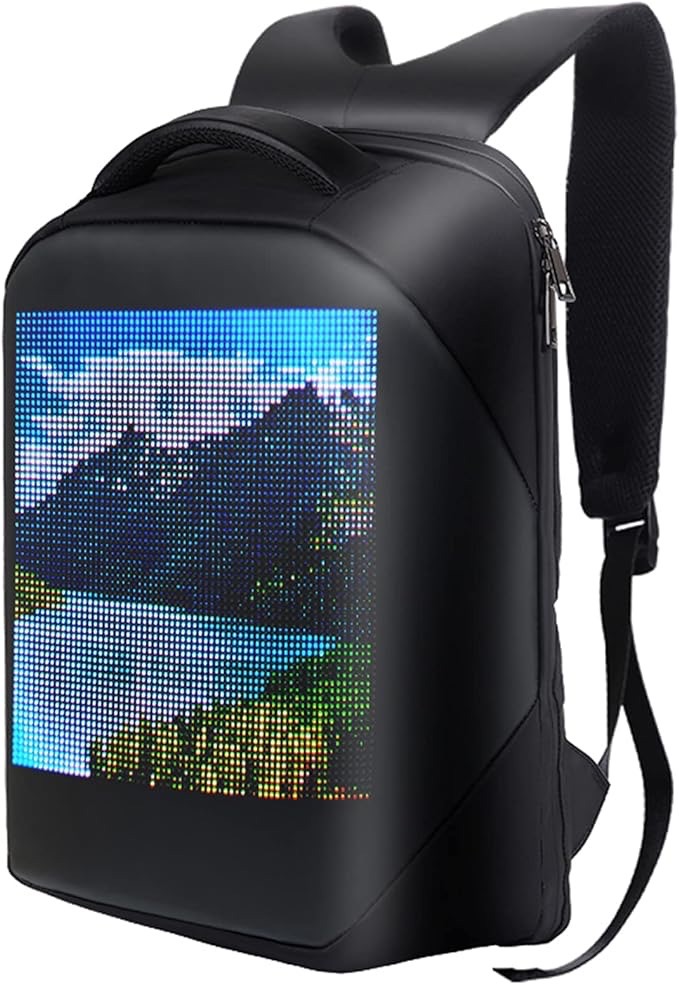
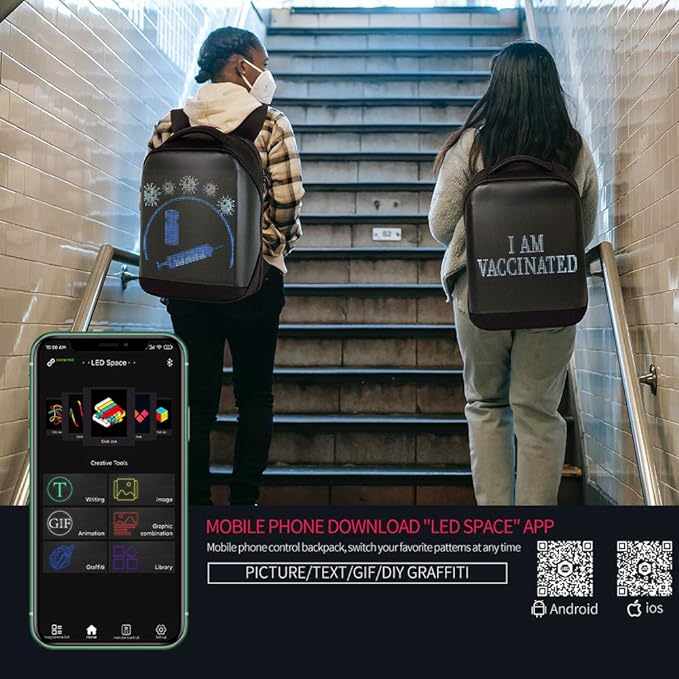
And also take a look! it has a QR situation going on! just like mine awww
Where did the idea came from sis?🌈🔥
❥So, here in Mexico we have a Drag Race of our own, kinda like Ru Paul´s Drag Race but Mexa.
❥It is called La Mas Draga and here you can see the kind of costumes these gurls pull off, that's why I wanted a structure that could move in 4 axis, because I really want to dress them one day!
What did you design?
I designed the backpack structure, servo mounts, and the electronics setup. The design includes 2D and 3D elements, ensuring everything is lightweight, functional, and fabulous.
Structure
Now, I've gotta design and build the structures that the servos will move. Thinking about how to make it look fab and not too heavy is key.
I NEED TO: Define size and slots, infuse with foldable grooves. Craft a LiPo battery compartment with precision, adding PCB holes and mounting four servos. Prepare foam layout, remove excess, and construct cover with flair.
How does this work gurl? Give me sum details
So let me tell you about how the magic happens through the synchronized dance of this four Tower Pro MG995 servomotors:
❣️🍓ALL ABOUT THE DESIGN 🍓❣️
Soooo here´s the T honey bee..
I used Catia for this design because I just love this software, it´s so much easier, here´s all about the design bae step by step
TO SEE THE DESIGN STEP BY STEP GO TO THE FINAL PROJECT MODULE
Where did they come from?
How much did they cost?
🎀And now... my pretty table of components🎀
SOPHIE´S FABULOUS SHOWSACK COMPONENTS |
Where to buy? | Amount | Price | Total price |
| 1 meter 1-inch strap | Amazon | 1 | $294.62 MXN/unit | $36.82 MXN |
| 1 meter 2-inch strap | Amazon | 4 | $278.00 MXN/unit | $69.50 MXN |
| AMS1117 3.3V | Digikey | 1 | $12.80 MXN/unit | $12.80 MXN |
| 3D printing filament | Mercado Libre | 1 | $147.00 MXN/unit | $147.00 MXN |
| ESP-12-F | Mercado Libre | 1 | $90.00 MXN/unit | $90 MXN |
| Microswitch 1 pole 2 throws 2 positions | Steren | 1 | $5.00 MXN/unit | $5.00 MXN |
| SMD capacitor 1206 10kΩ | Yageo | 4 | $37.00 MXN/unit | $24.66 MXN |
| Servomotor with 10 kgf/cm torquer | Steren | 4 | $174.00 MXN/unit | $696.00 MXN |
| 3.7V 1600mAh LiPo battery | Amazon | 1 | $183.86 MXN/unit | $183.86 MXN |
| 1 pair of 1-inch backpack buckles | Mercado Libre | 1 | $221.00 MXN/unit | $110.50 MXN |
| Smooth-On silicone 3030 activator | Amazon | 18g | $954.00 MXN/unit | $18.86 MXN |
| Smooth-On silicone 3030 rubber | Amazon | 108g | $954.00 MXN/unit | $188.67 MXN |
| TP4056 board with step-up | Mercado Libre | 1 | $69.00 MXN/unit | $69.00 MXN |
| Copper plate | Mercado Libre | 1 | $90.00 MXN/unit | $12.85 MXN |
| Ostrich-style feathers | Mercado Libre | 10 | $88.00 MXN/unit | $88.00 MXN |
| Button | Unit electronics | 1 | $4.00 MXN/unit | $4.00 MXN |
| Total cost | $1757.52 MXN |
As you can see hun the total cost for all materials and components was approximately $1757.52 MXN. Detailed costs are provided in the components table above.
What parts and systems were made?
What processes were used?
What questions were answered?
What worked? What didn't?
How was it evaluated?
What are the implications?
Designing and building the SHOWSACK structure involves...
🌸 How Does It Work? 🌸
🌟 Design and Production 🌟
DESIGN PROCESS
Planning
First things first, I'd sketch out what parts I want to move and how I want them to move. Do a little brainstorming and figure out what the backpack is gonna look like. Also it was super important to use everything I learned here, of course I couldn´t use everything but it ended up looking 🎀✨gorgeous✨🎀.
MY TIME IS PRECIOUS BAE⏱️🌟
| week schedule | ✨My fab final project✨ |
|---|---|
| Computer Aided Design | Designing the main body |
| Computer Controlled Cutting | Laser cut my Eva Foam cushion |
| Electronics production | Learning about this |
| 3D scanning and printing | 3D scanning nice things |
| Embedded programming | Designing my board ISH |
| Computer Controlled machining | Making my new home´s furniture sooo cute |
| Electronics design | Making the programmer |
| Output devices | Making a wi-fi rele board |
| Mechanical design, machine design | OMG MY TEAM AND I NAILED IT |
| Break, midterm review | Working on documentation for final project page |
| Input devices | Button situation |
| Molding and casting | Making the mold of a super nice organic form + this proyect´s mold |
| Networking and communications | Gurl I made this ESP work here |
| Interface and application programming | This HTML page |
| Wildcard week | I soldered my own TABLE OMG YESSSS |
| Applications and implications, project development | I MADE THIS AWESOME SITE |
| System integration | Programming |
| Invention, intellectual property, and income | FINISHING THIS |
| Project presentations | DEAL WITH IT AND VIBE BAE |
AND NOW MY LAST MONTH´S SCHEDULE...
| Detailed schedule for my last month bae cuz it´s 2 much | DAY | TASK |
|---|---|---|
| 10 may | wednesday | pcb design |
| 11 may | wednesday | buy pcb components |
| 12 may | wednesday | milling pcb |
| 13 may | wednesday | soldering |
| 14 may | wednesday | documenting the electronics production part |
| 15 may | wednesday | documenting edits |
| 16 may | wednesday | putting together video |
| 17 may | wednesday | 3D design the main structure |
| 18 may | wednesday | 3D design the main structure |
| 19 may | wednesday | edits |
| 20 may | wednesday | 3D designing the accesories |
| 21 may | wednesday | edits |
| 22 may | wednesday | Buy feathers |
| 23 may | thursday | 3D printing the main device |
| 24 may | friday | 3d printing the accesories |
| 25 may | saturday | Designing the back eva foam cushion |
| 26 may | sunday | Moldering design |
| 27 may | monday | Laser cutting the chusion |
| 28 may | tuesday | Documenting the 3D design process |
| 29 may | wednesday | Casting the mold |
| 30 may | thursday | Coding |
| 31 may | friday | Testing the code |
| 1 june | saturday | Testing the code in the device |
| 2 june | sunday | Edits |
| 3 june | monday | Making the sheet |
| 4 june | tuesday | Documenting images |
| 5 june | wednesday | Presentation png edits |
| 6 june | wednesday | Presentation png upload and video making |
| 7 june | wednesday | Editing video |
| 8 june | wednesday | Documenting |
| 9 june | wednesday | Documenting |
| 10 june | wednesday | Documenting |