💫Interface and application programming💫
For this week´s assignment get ready to embark on a coding adventure! 🌟
We were assigned the mission to make an interface and app programming. For this week I will work on the code that my final project will carry in its ESP 12-F
May the code be ever in your favor! 🎨🔧✨
Our group weekly task ---->How will you aproach this assignment sweetie?
First things first, we need to configure the ESP8266 to act as an Access Point (AP). This way, other devices can connect directly to it. (This step is crucial because it allows other devices to connect to your ESP8266 network, enabling them to send commands to control your servos.) for this you need to include the necessary libraries and define the SSID and password for your Access Point.
">
Okay gurl in a nutshell here´s the deal: So, I decided to use the ESP 8266 12-F as an access point making it act as a router so you could connect to it from the wi-fi section in your phone and control the 4 pretty servos. Super cool I know lol.
THE STEPS ARE HERE👇🏽✨
All you need to know about this 🎀✨gorgeous✨🎀 interface and app
Then you will have to #include
IMPORTANT: The WiFi.softAP function configures the ESP8266 as an Access Point with the specified SSID and password.
So now this part prints the IP address assigned to the ESP8266, which is typically 192.168.4.1. This IP address is used to access the web server hosted on the ESP8266.
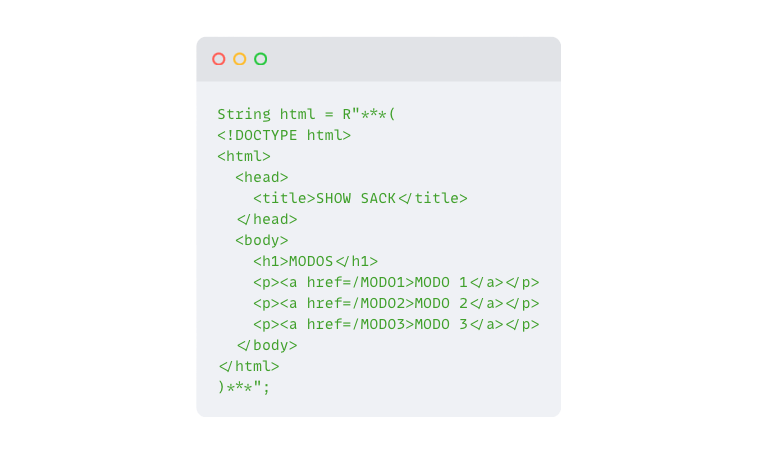
Now you need to define the HTML content that will be served to clients connecting to your ESP8266's network:
Remember that in the loop function, you need to handle incoming client requests.
Checking for cute clients
Reading the pink request
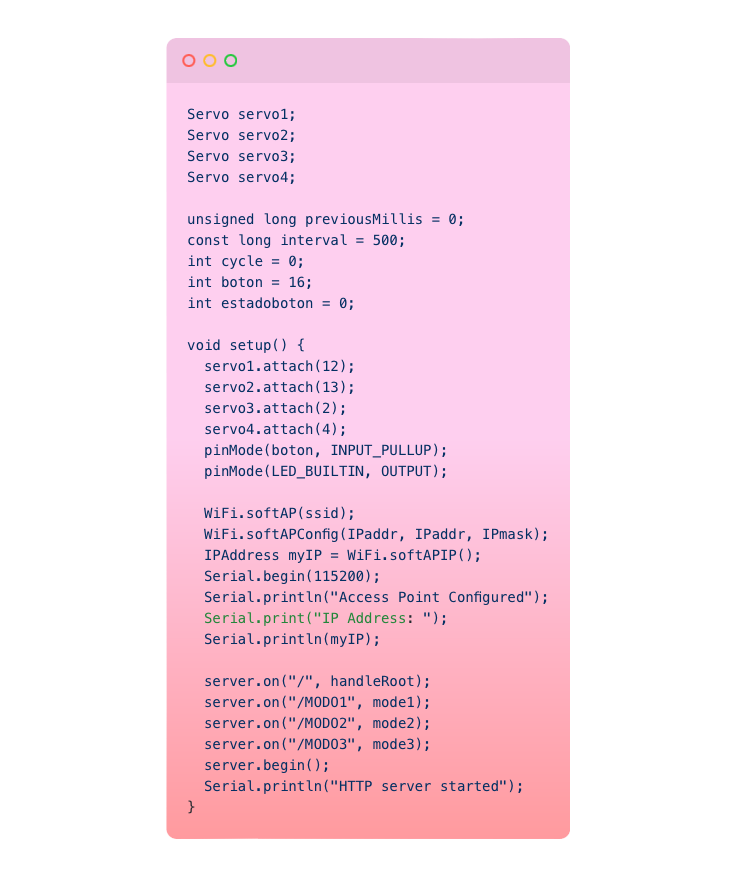
Now let´s configure the servos and set up the ESP8266 as an Access Point
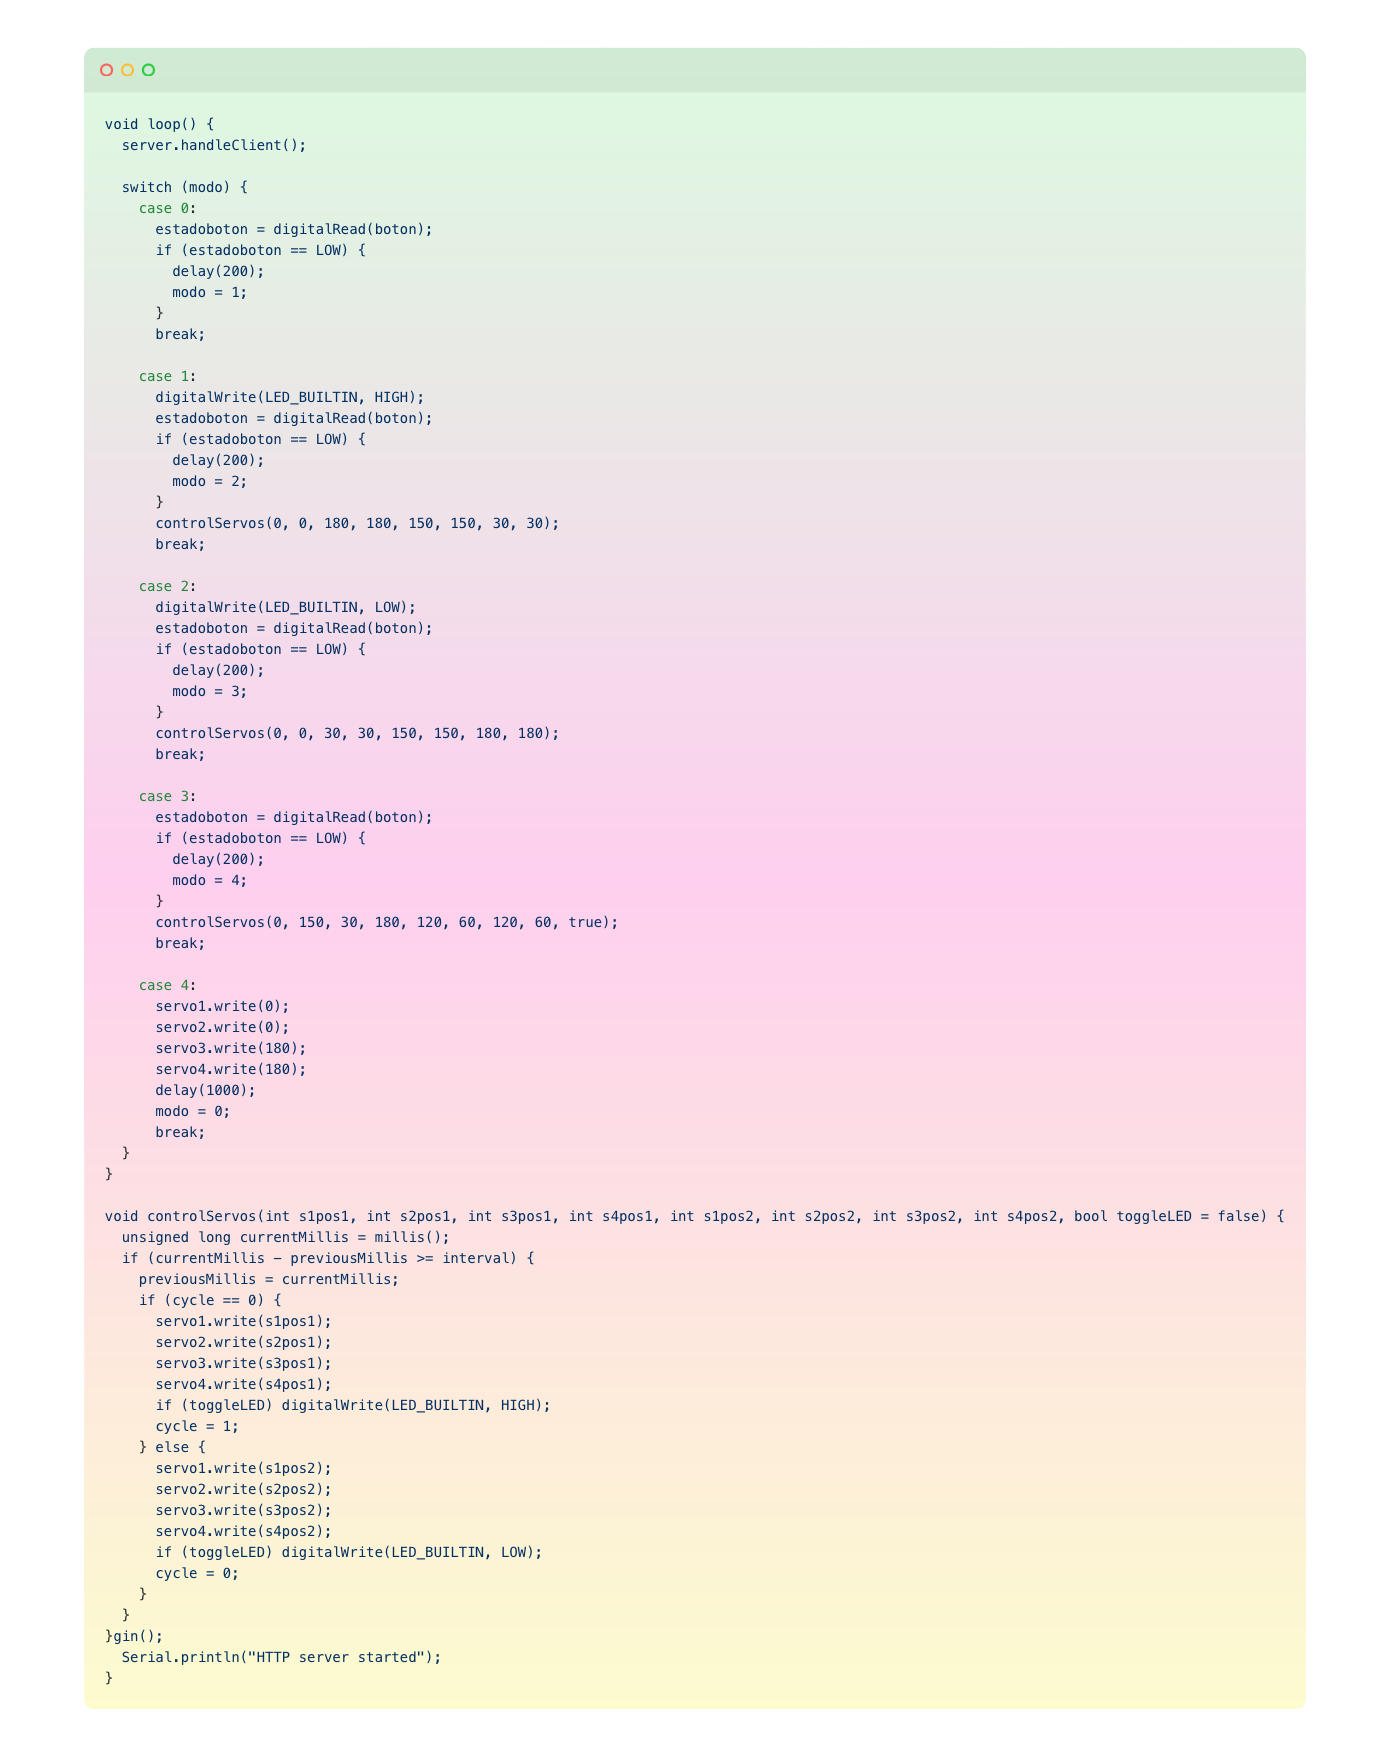
Ant this is the main Loop to handle client requests and control servos to handle client requests and control servos based on the selected mode:
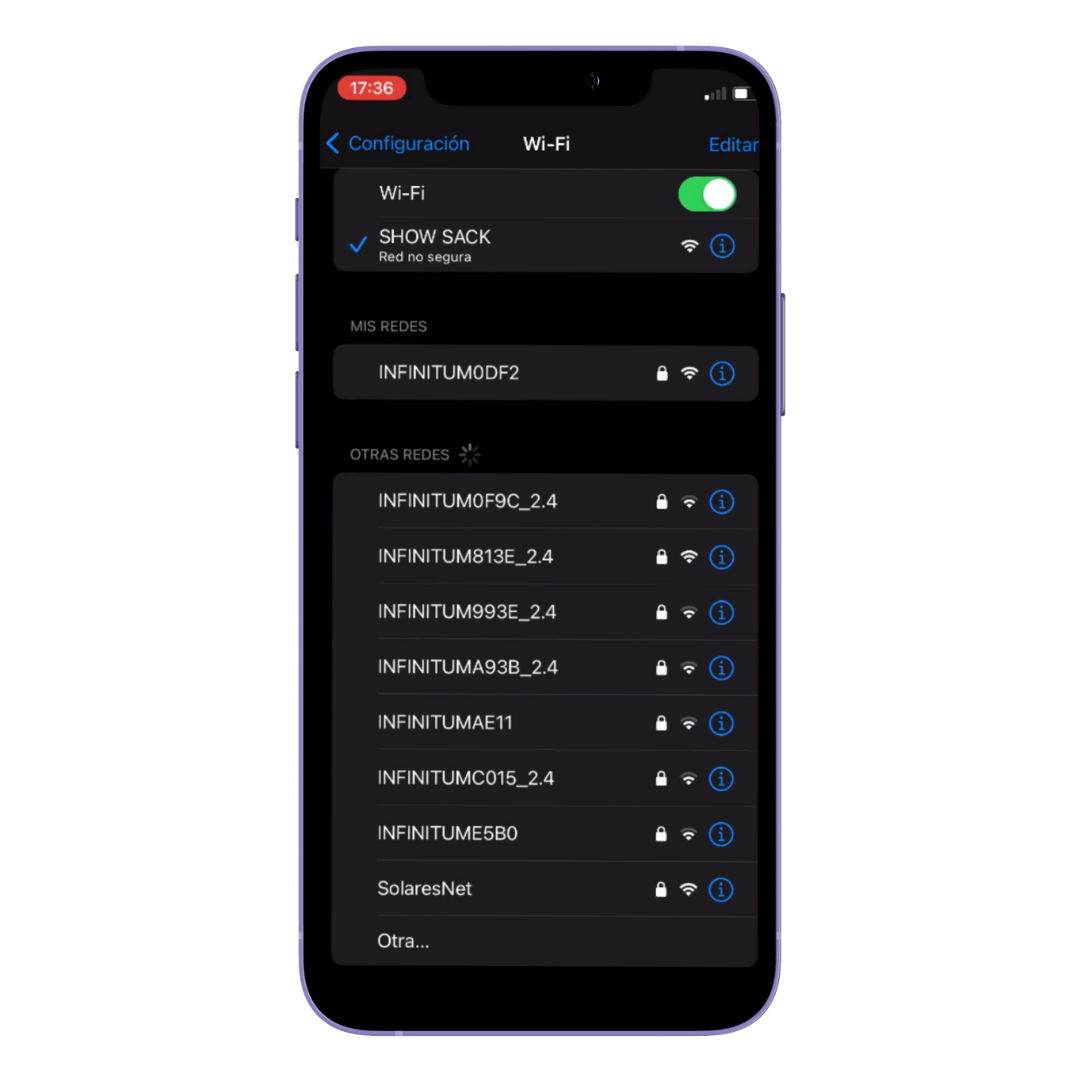
And finally upload the code sweetheart. Follow the steps to upload this code to your ESP8266: Connect your device to the "SHOWSACK" WiFi network using the password "12345678". --------> Open a web browser and go to http://192.168.4.1.
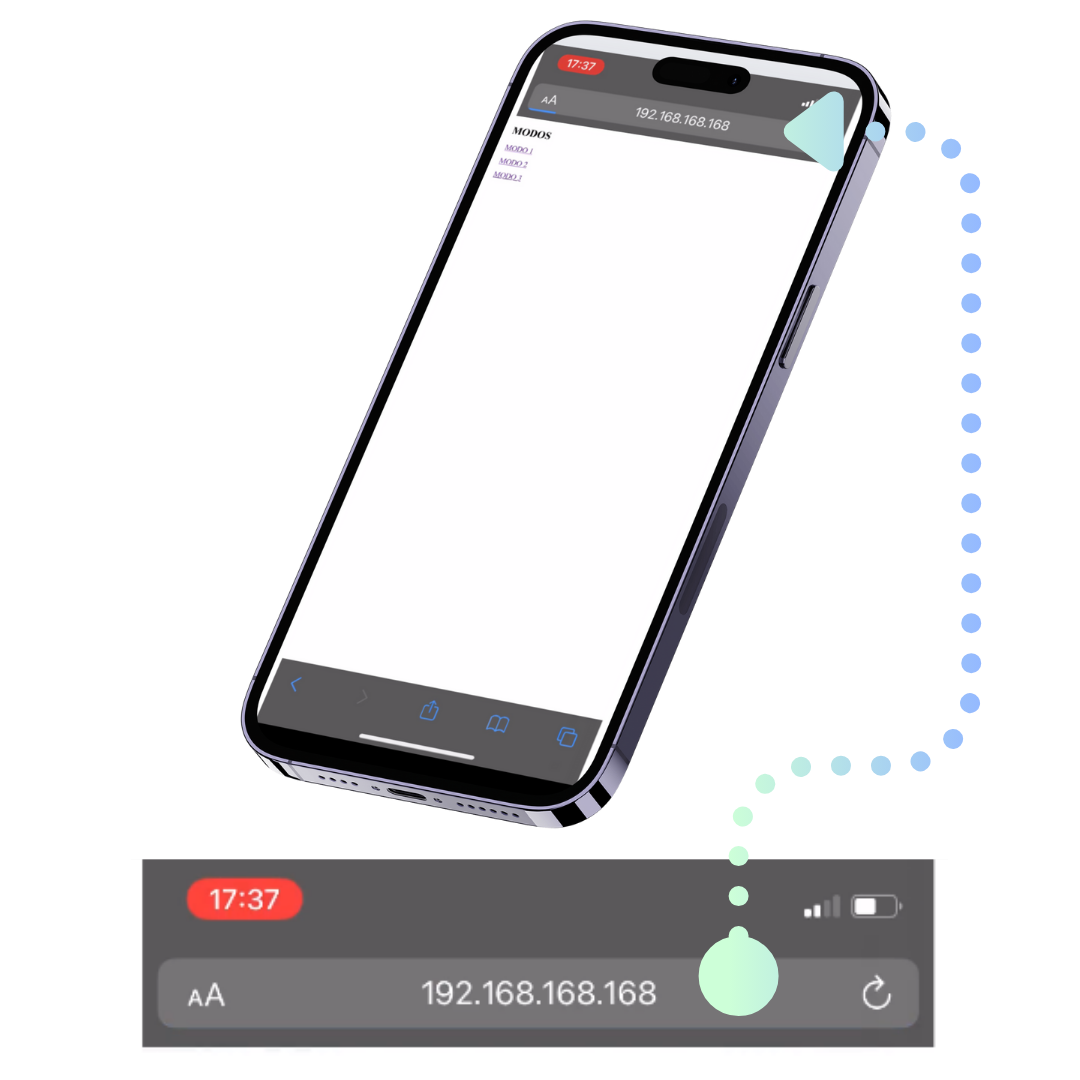
POV OF MY INTERFACE APP OMG I KNOW RIGHT?!!! SO CUTE!!
MY FINAL CODE:
TO SEE MY WORKING ESP AND FABULOUS RESULTS
Amazing girl but can you give me a cheat sheet bout this?
So the summary is:
THE LIBRARIES: First off, we have our fabulous collection of libraries📚 We include the Servo.h library for some sassy servo control, and the ESP8266WiFi.h, WiFiClient.h, and ESP8266WebServer.h libraries to handle all the WiFi and web server.
HTML PART: Next, we have the HTML content – think of it as our stylish webpage! 🌐💅 This cute little page has links to different modes, and when you click on them, they send fabulous requests to our ESP8266. Just like sending love notes HONEY.
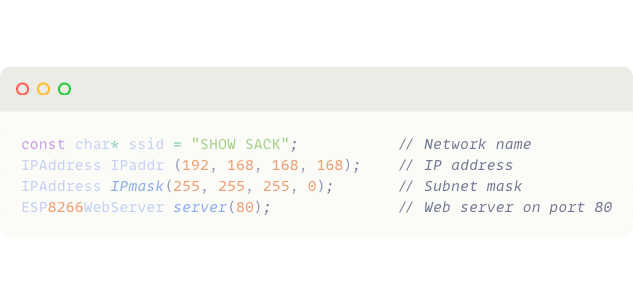
THE NETWORK SETUP: Now, let’s talk about our network setup. We define the SSID (our Access Point’s glam name) and give it a static IP address. Using the ESP8266WebServer library, we create a chic server on port 80.
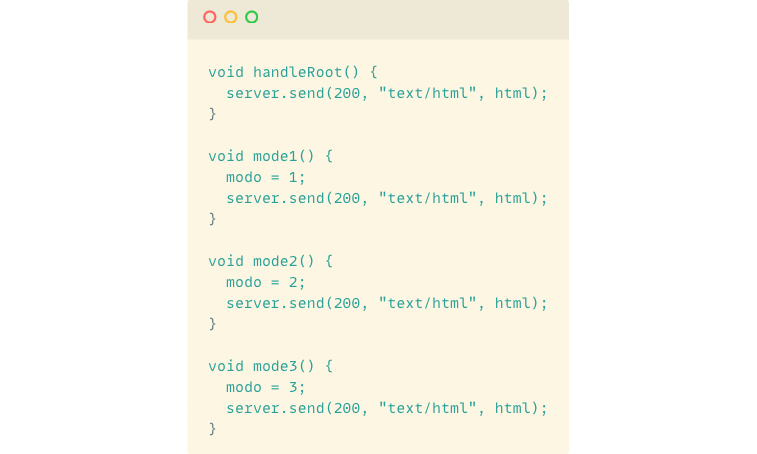
THE REQUEST HANDLERS: Request handlers are like our personal assistants. Functions handleRoot, mode1, mode2, and mode3 handle the HTTP requests and update the modo variable to control our servo behavior. Each function is super organized and knows exactly what to do! 📝
THE SETUP FUNCTION: In our setup function, we attach the servos to their respective pins (think of it as giving them their personal dance floors lol), configure the ESP8266 as an Access Point, set its IP address, and start the web server.
THE MAIN LOOP: Finally, we have the main loop. This fabulous loop handles incoming client requests and controls the servos based on the selected mode. We use a chic switch-case statement to manage different modes and a helper function controlServos to control servo positions.
THE FAB SETUP: This dazzling setup allows you to control the servos through a web interface, with each mode performing different actions on the servos and the built-in LED. Feel free to adjust the servo positions and timing intervals to fit your project’s girl requirements! 💖✨🌟