My pretty Computer-Aided Design🌺
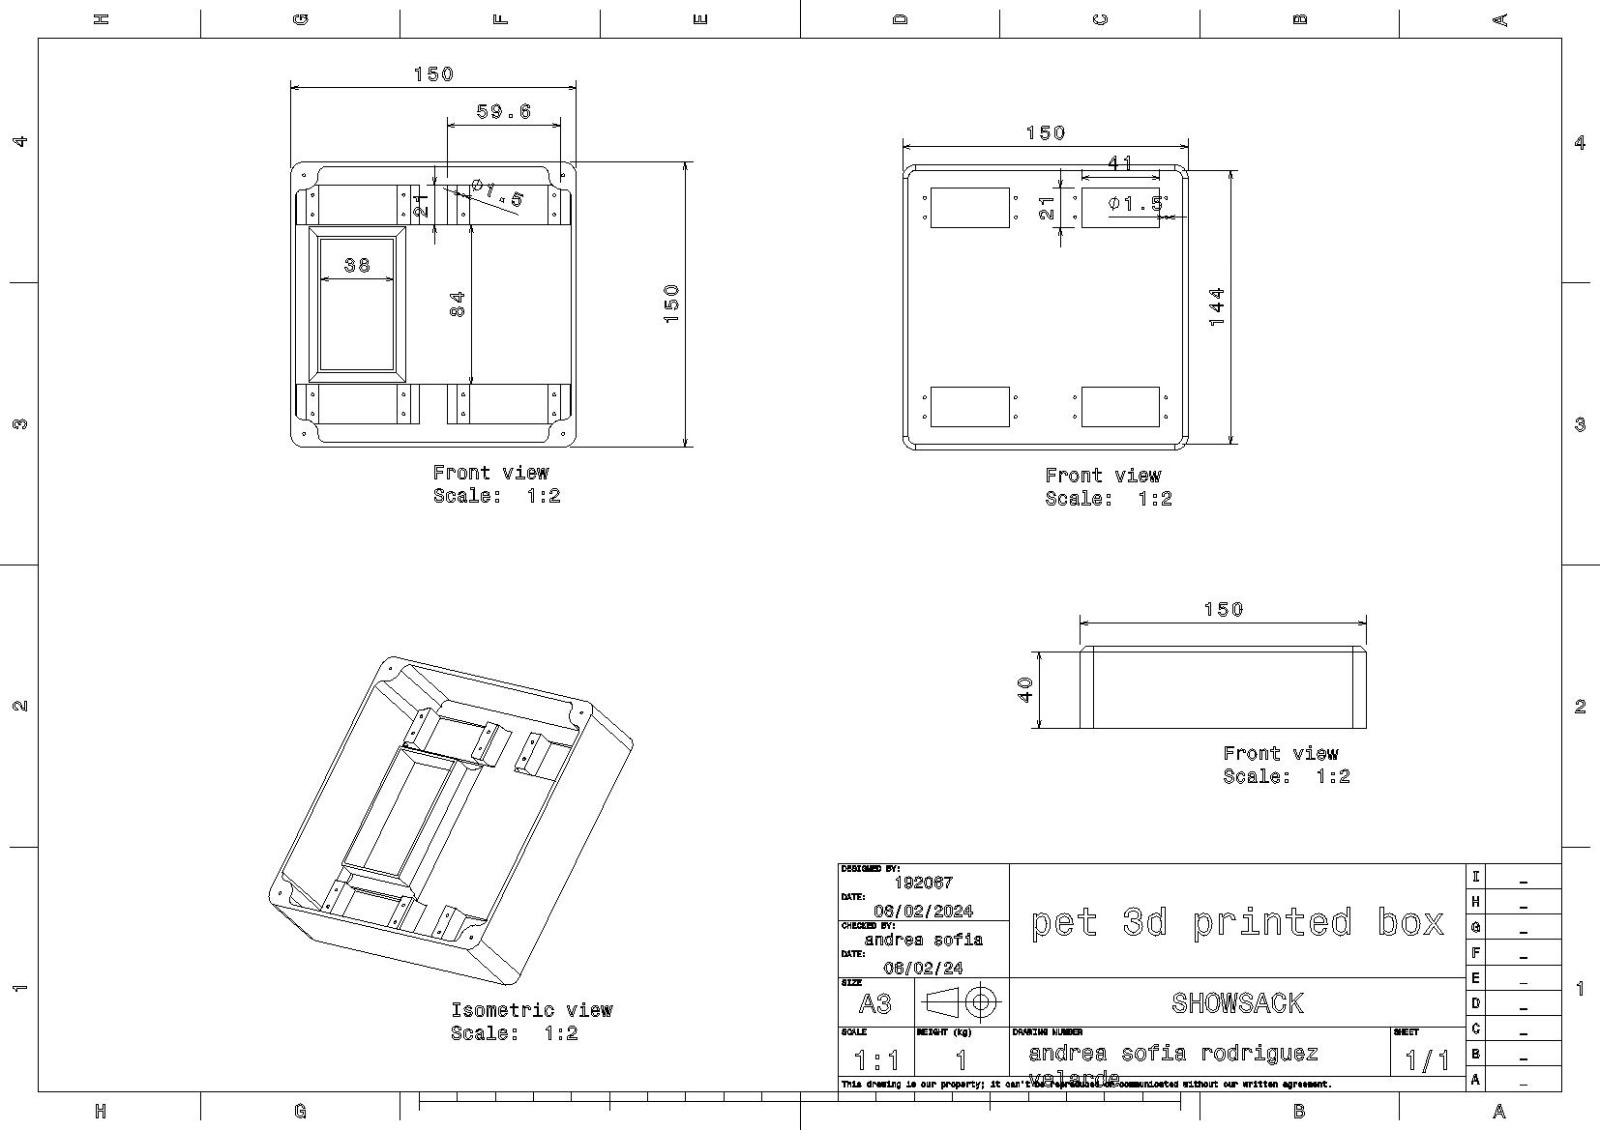
Hey there!✨ So, I'm about to dive into modeling a 3D box that will be printed using PET filament in CATIA. It's my first time doing this, and I'm super excited! I'll be using CATIA to design and visualize every detail of the front and back of my sketched showsack, ensuring it's perfect for printing. Let's get started!
By following this approach, we'll have a sleek and functional mechanism where the acrylic wall and 3D printed component work together to create a secure housing for the battery and servos. Let's get creative! 🚀
How to get started bae
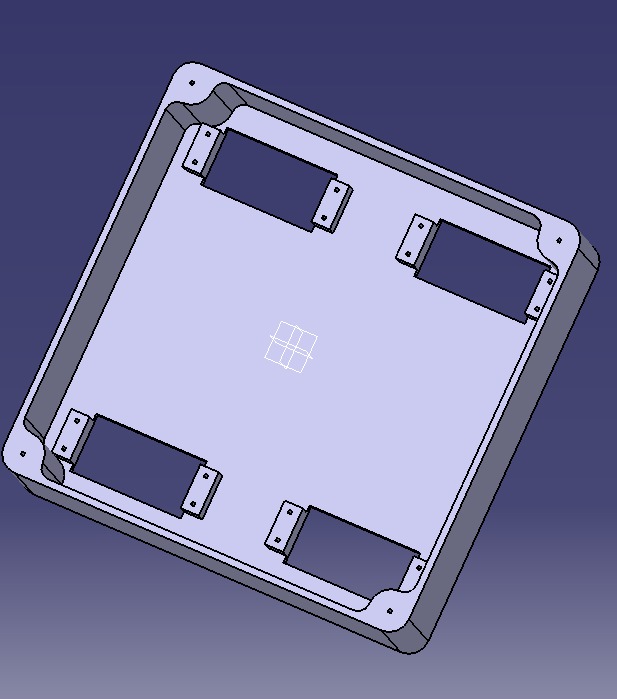
- Hollow Box Design: We'll design a hollow box structure with two main parts:
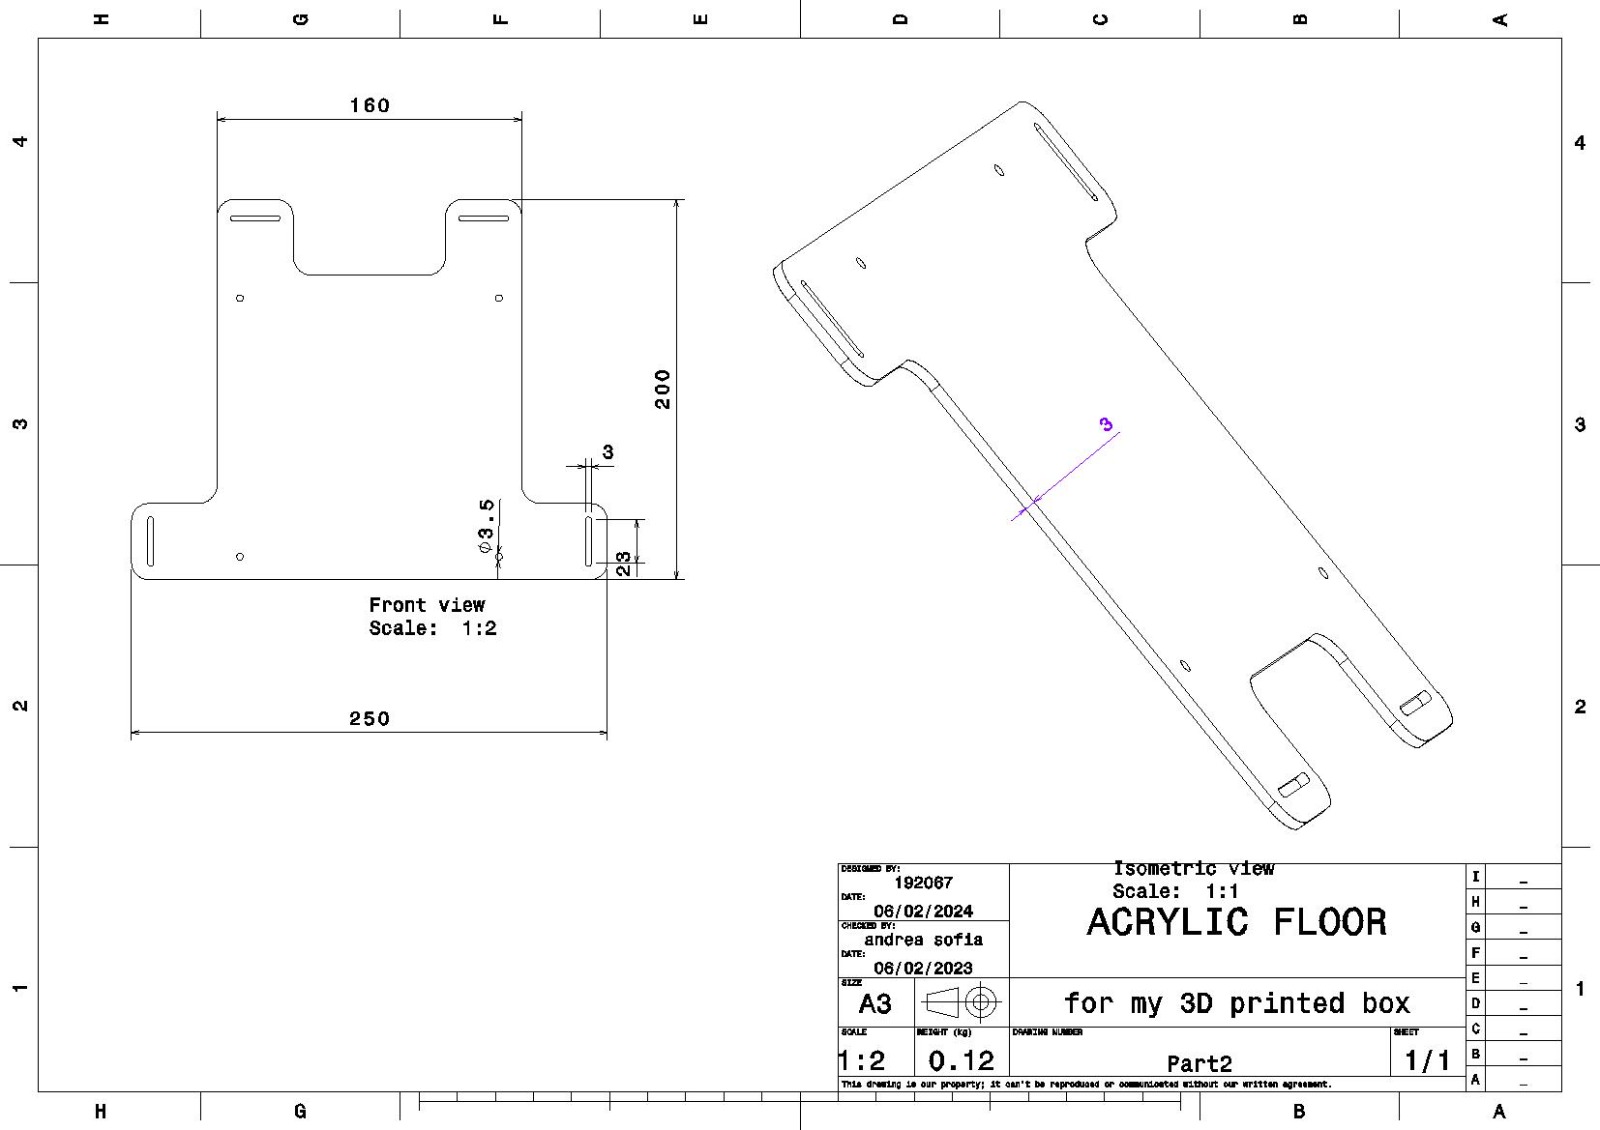
- Part 1: A wall made of acrylic, which will be in contact with the back.
- Part 2: Printed in 3D, this part will contain the battery and the four servos.
- Acrylic Wall (Part 1): This part will serve as the back wall of our box. It will provide stability and support to the entire structure.
- 3D Printed Component (Part 2): This part will be custom-designed to fit the battery and four servos snugly. It will ensure that everything stays in place securely.
Sandwich Assembly: We'll assemble the components in a sandwich-like manner:
- Place Part 1 (acrylic wall) against the back.
- Insert Part 2 (3D printed component) into the hollow space created by Part 1.
This assembly will create a sturdy structure where the battery and servos are safely housed.
By following this approach, we'll have a sleek and functional mechanism where the acrylic wall and 3D printed component work together to create a secure housing for the battery and servos. Let's get creative! 🚀
My process in a 🩰nutshell🩰
- File -> New -> Part: Open a new part document in CATIA.
- Xy horizontal: Start your sketch on the XY plane for printing from bottom to top.
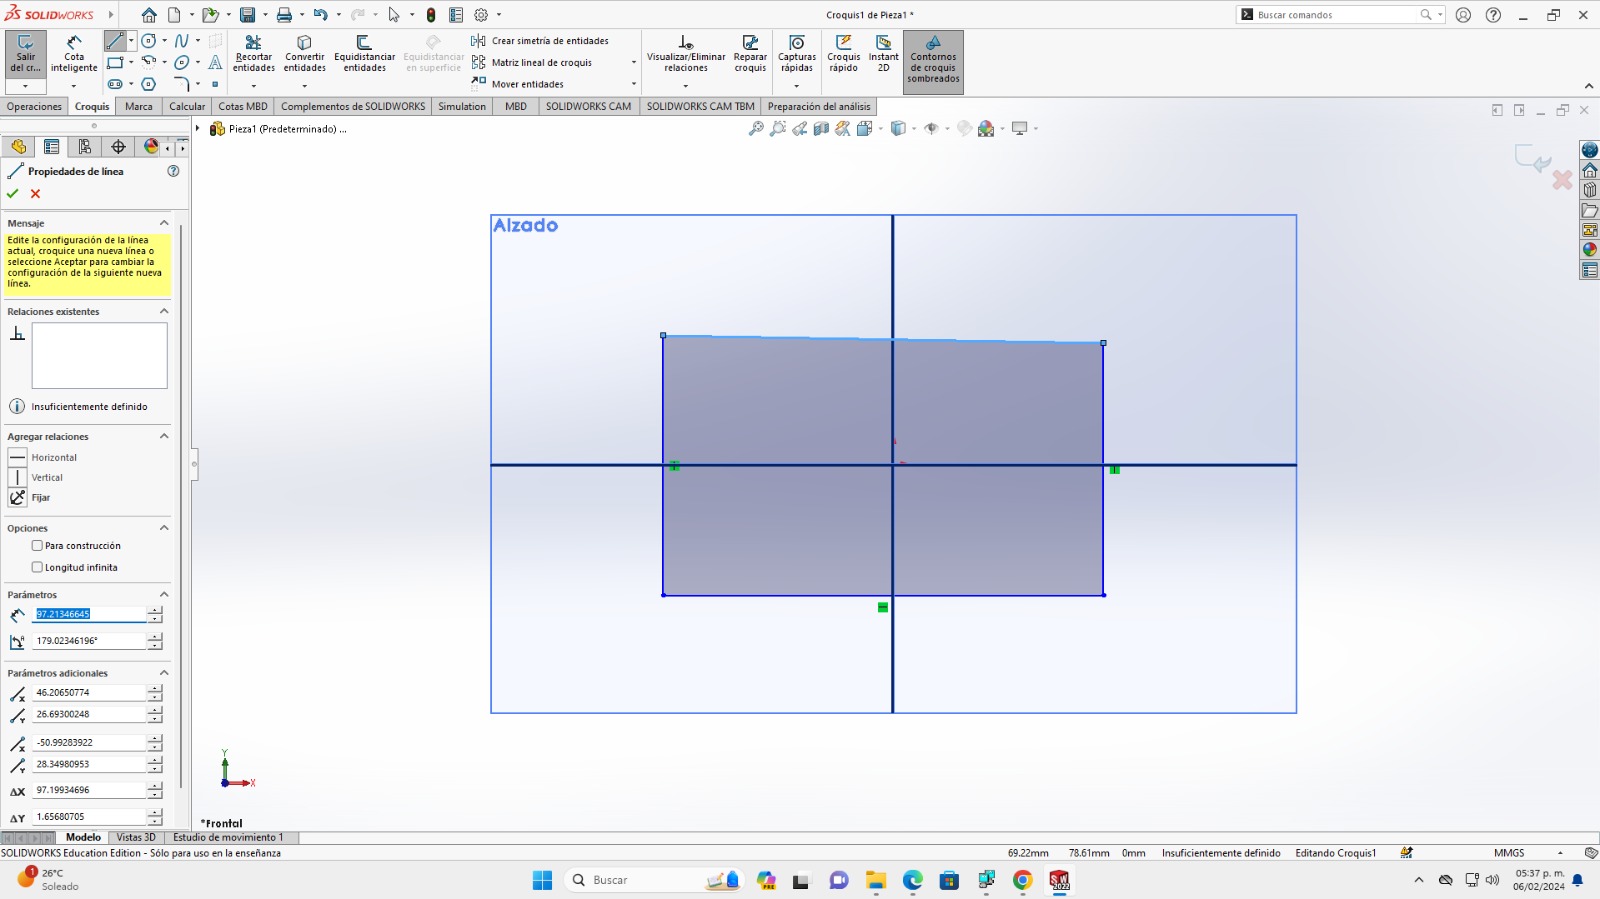
- Sketch: Time to sketch! Create a new sketch on the XY plane.
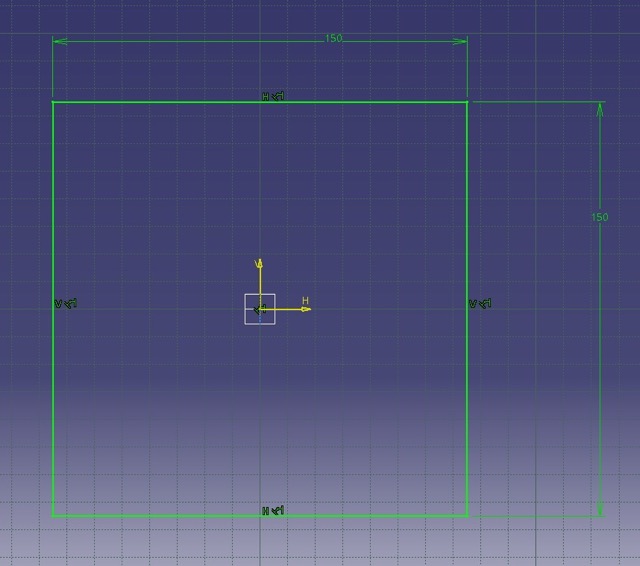
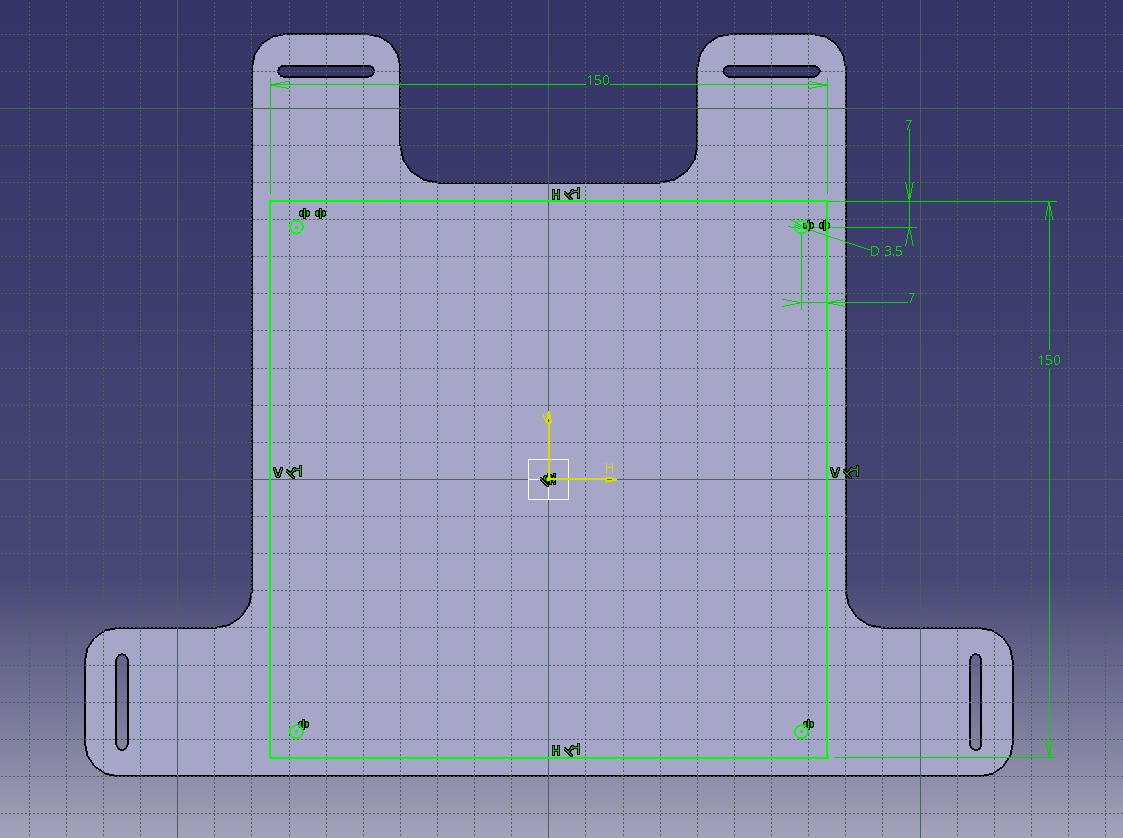
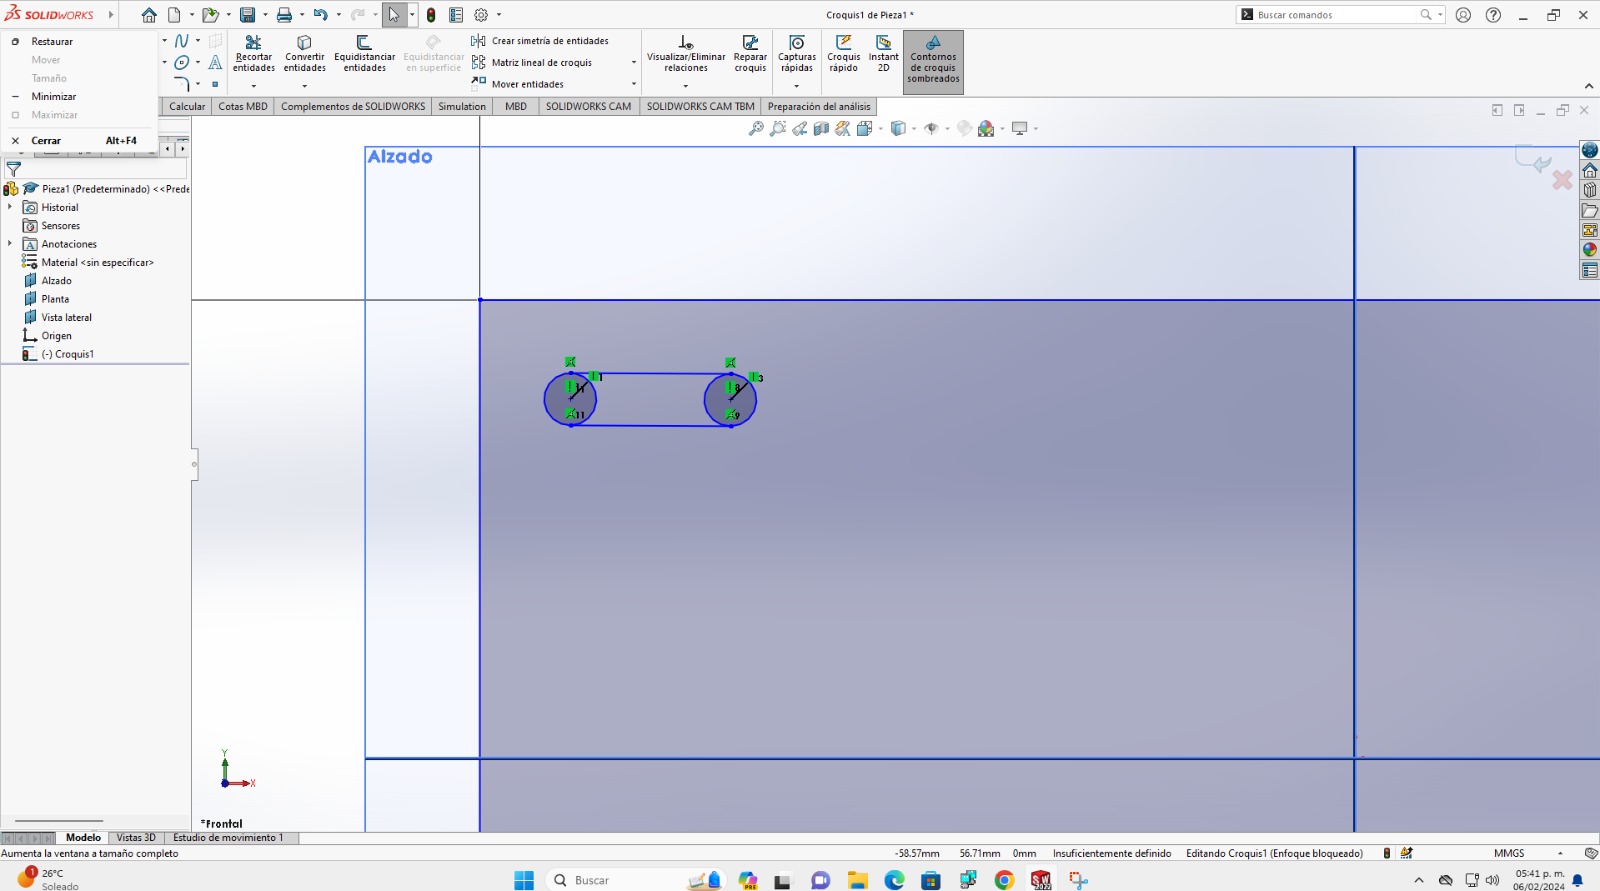
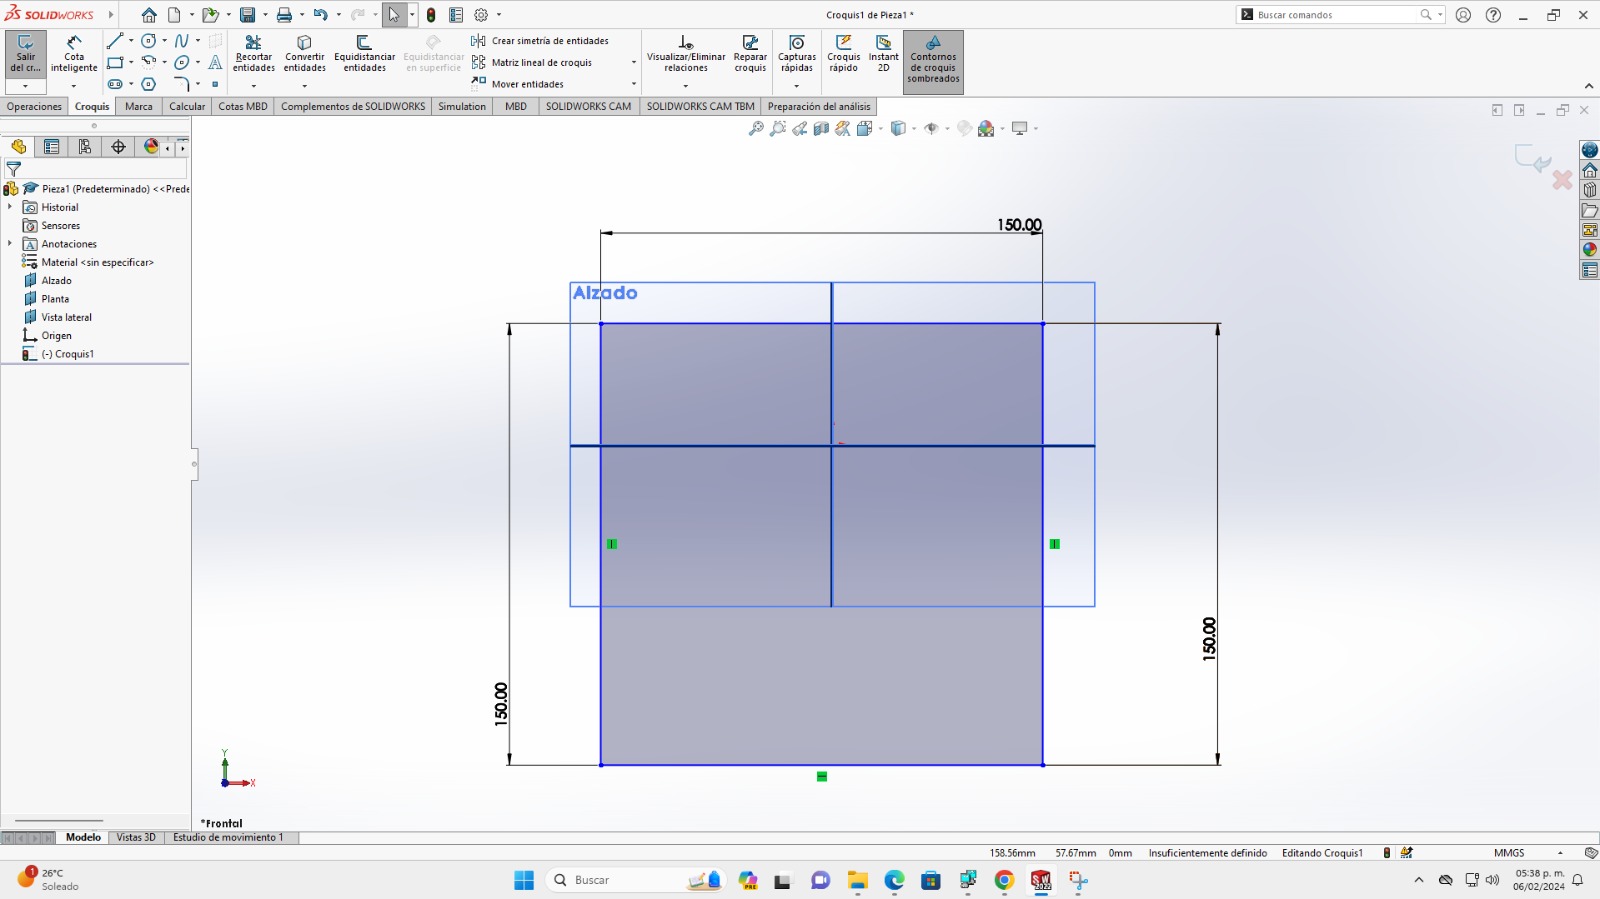
- Centered rectangle: Use the centered rectangle tool to draw the base of your box.
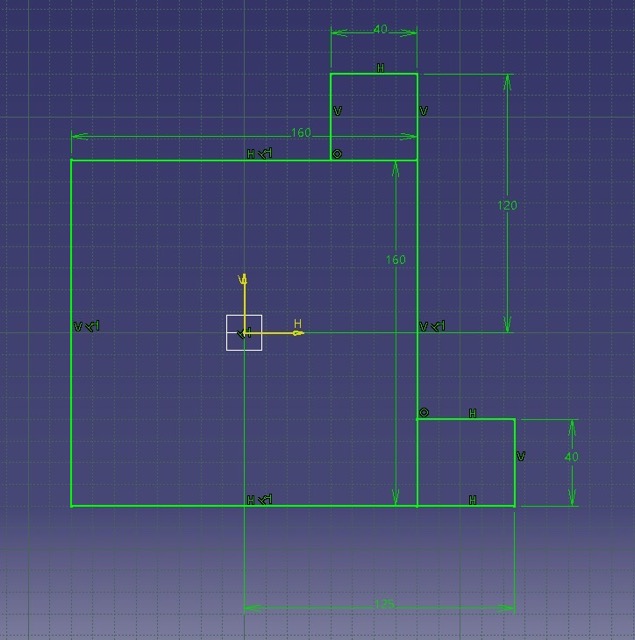
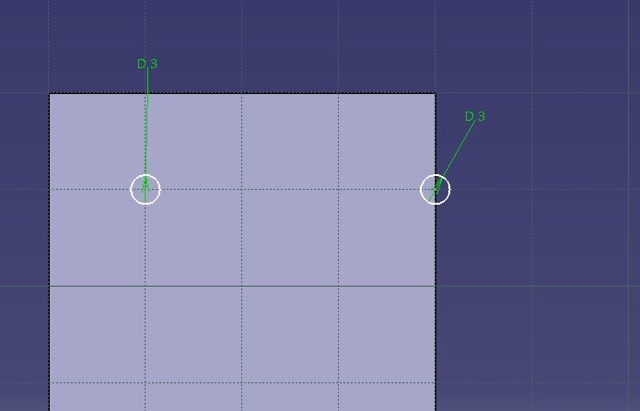
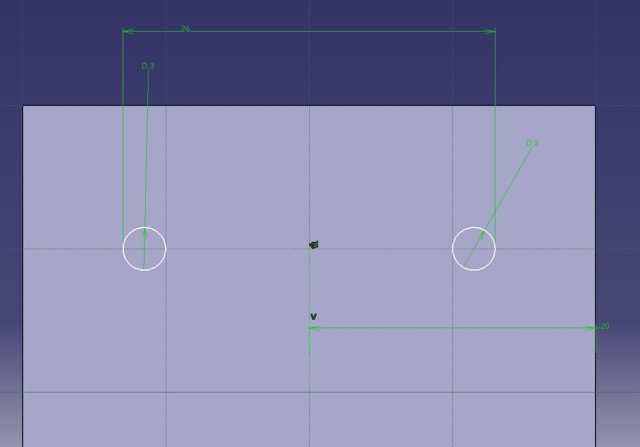
- Constraint (Smart Dimension): Apply a smart dimension of 150 mm for length and 160 mm for width, so the acrylic sticks out a bit.
- Trim: Clean up your sketch by trimming away any extra lines.
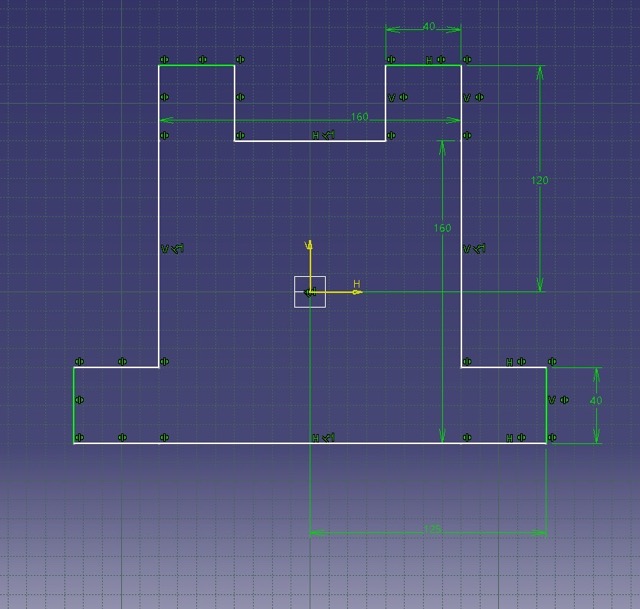
- Mirror: Mirror your sketch to complete the base of the box.
- Exit Workbench: Get out of sketch mode.
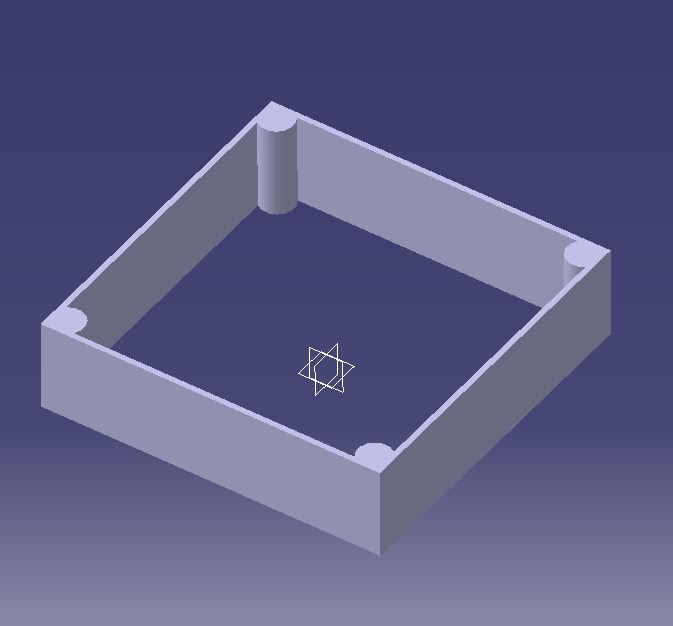
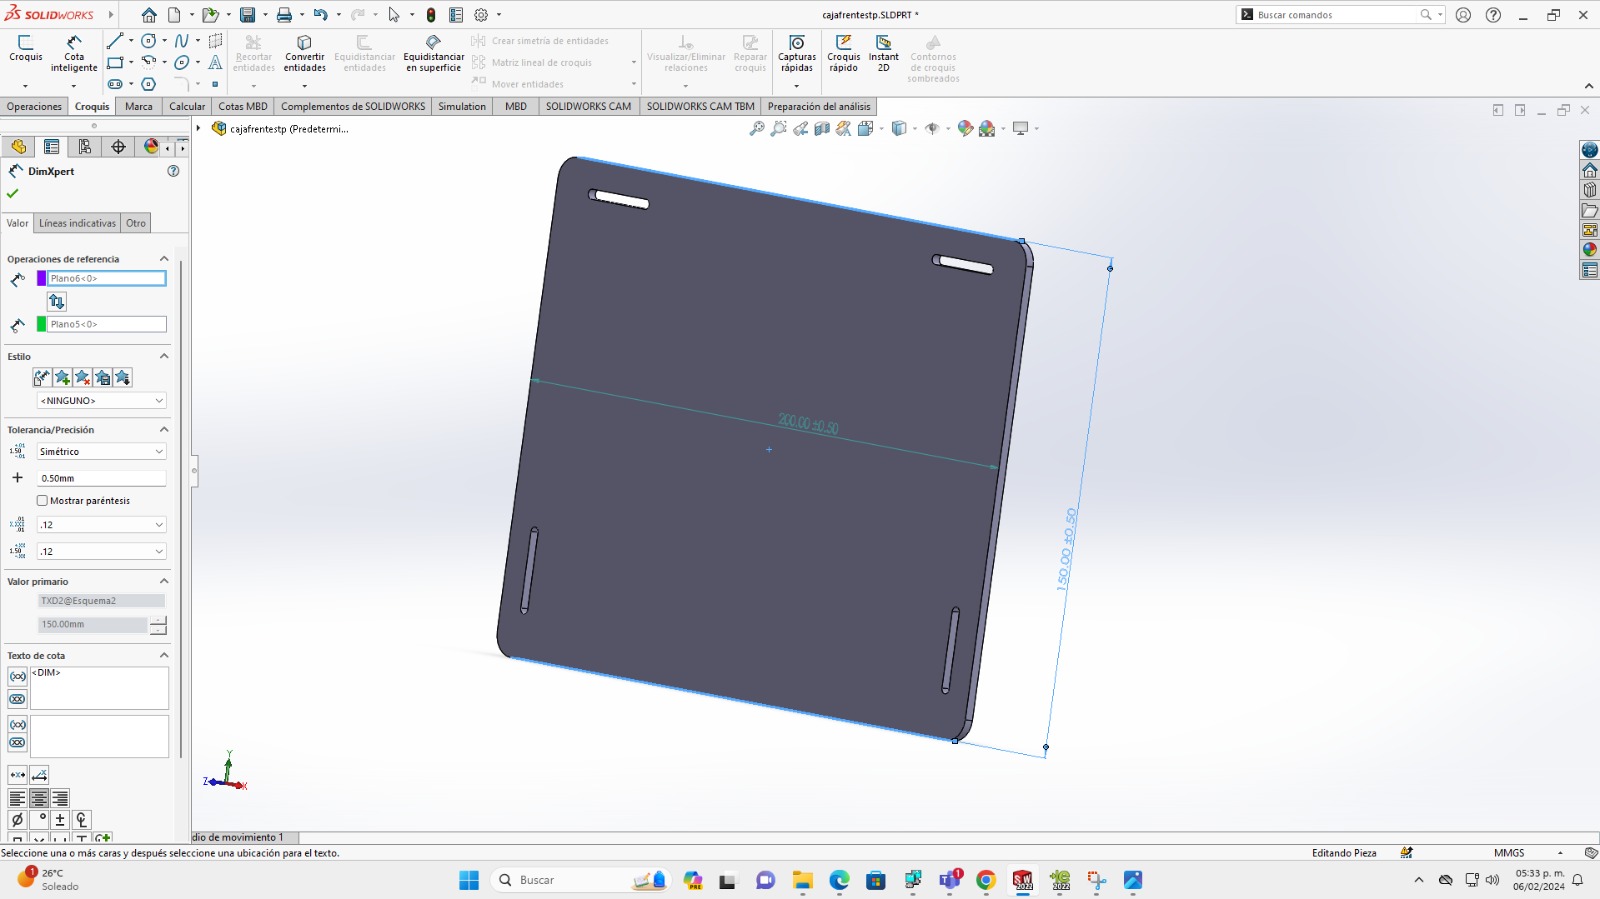
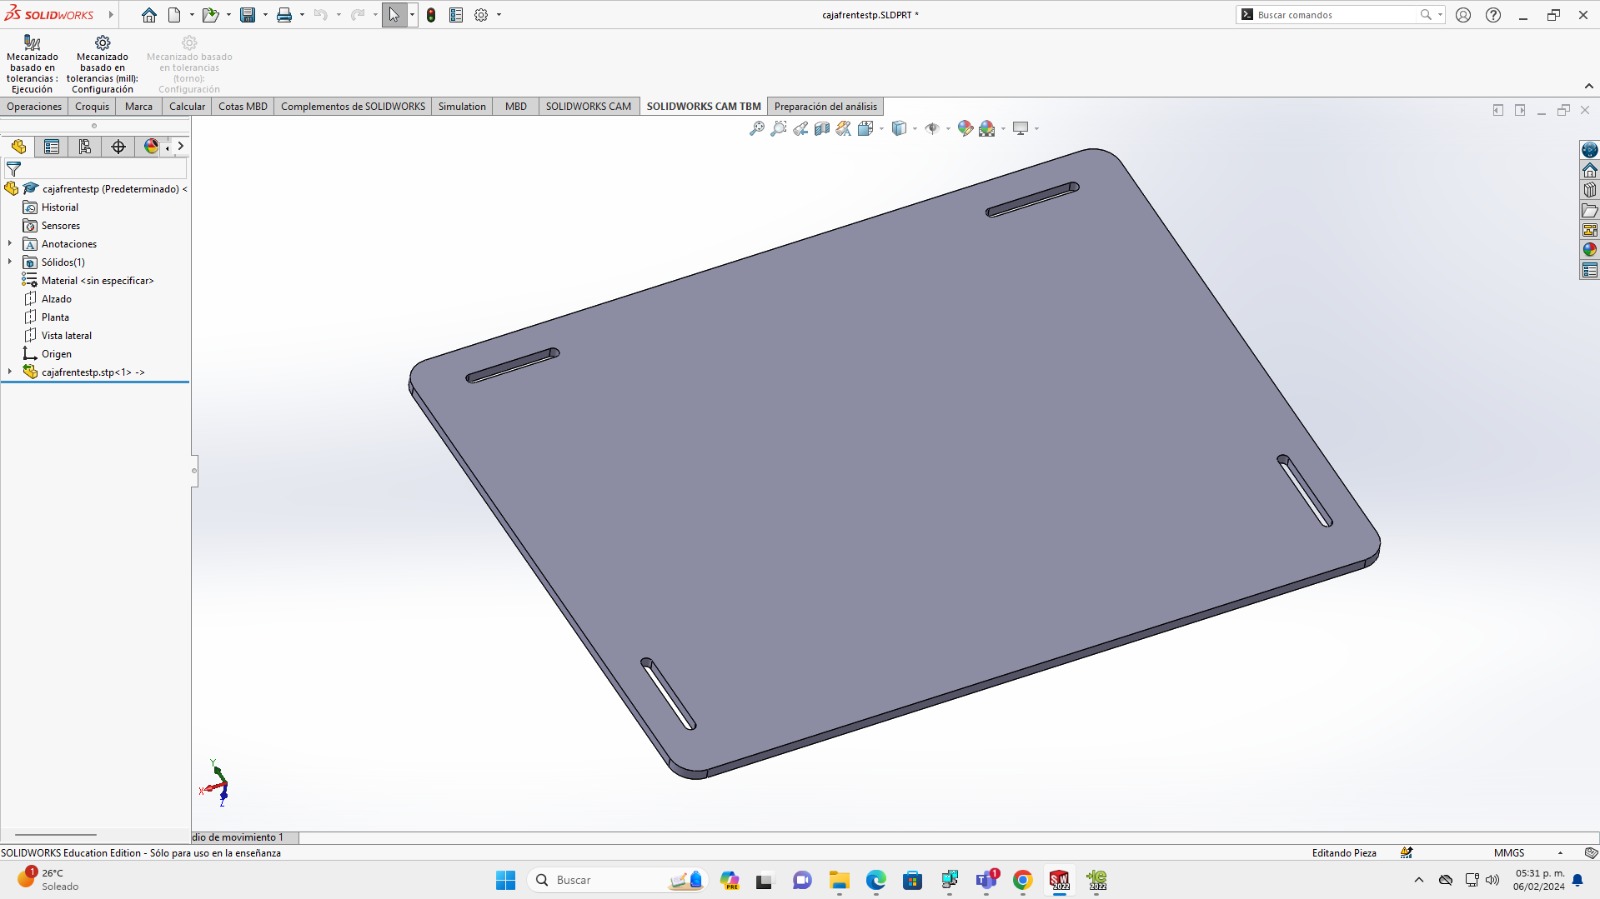
- Pad: Time to pad! Extrude your sketch to create the base of the box with a thickness of 3 mm.

- Edge Fillet: Round off the edges with a 9 mm fillet for a sleek finish.
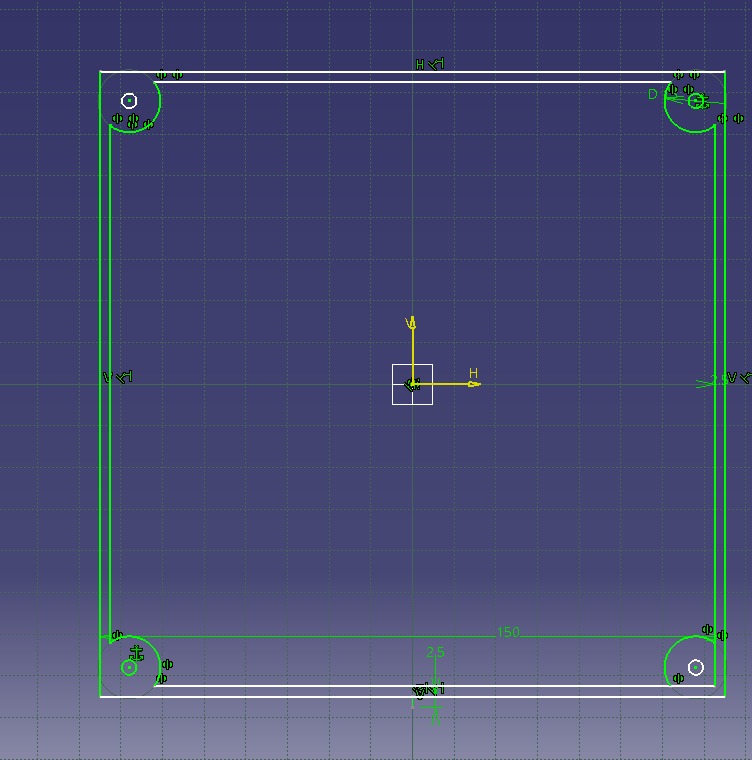
- Material (Acrylic): Apply the acrylic material to your box for that authentic look.
- Shading: Adjust the shading settings to make your box look super realistic.
- Clip (Hole): Create a hole for the screw, making it 1.5 times the diameter of the screw for a perfect fit. And follow the previous steps to make the front part.
My weekly cheat sheet
So i´m gonna describe you the tools that I used for this practice in Catia girl, don´t freak out, you got this!
Part Design Workbench: This workbench allows you to create and modify 3D solid models. You'll use features like Pad (for extrusions) and Hole (for creating holes) to design the box.
Sketcher: Sketcher is where you'll create 2D profiles that will later be extruded to form the box and holes. You can define dimensions and constraints using intelligent constraints and dimensions.
Extrude: The Extrude feature allows you to extend 2D sketches into the third dimension to create solid objects. You can specify the depth or distance of the extrusion using measurements or references.
Hole: The Hole feature enables you to create holes of various shapes and sizes on surfaces or solid bodies. You can define the position, diameter, and other parameters of the holes.
Smart Dimension: Smart Dimension is a tool that allows you to add dimensions to sketches and features. With Smart Dimension, you can easily specify precise measurements for the size and position of the box and holes.
What i did in a 🎀beautiful🎀 and 🌸pretty🌸 carrousel
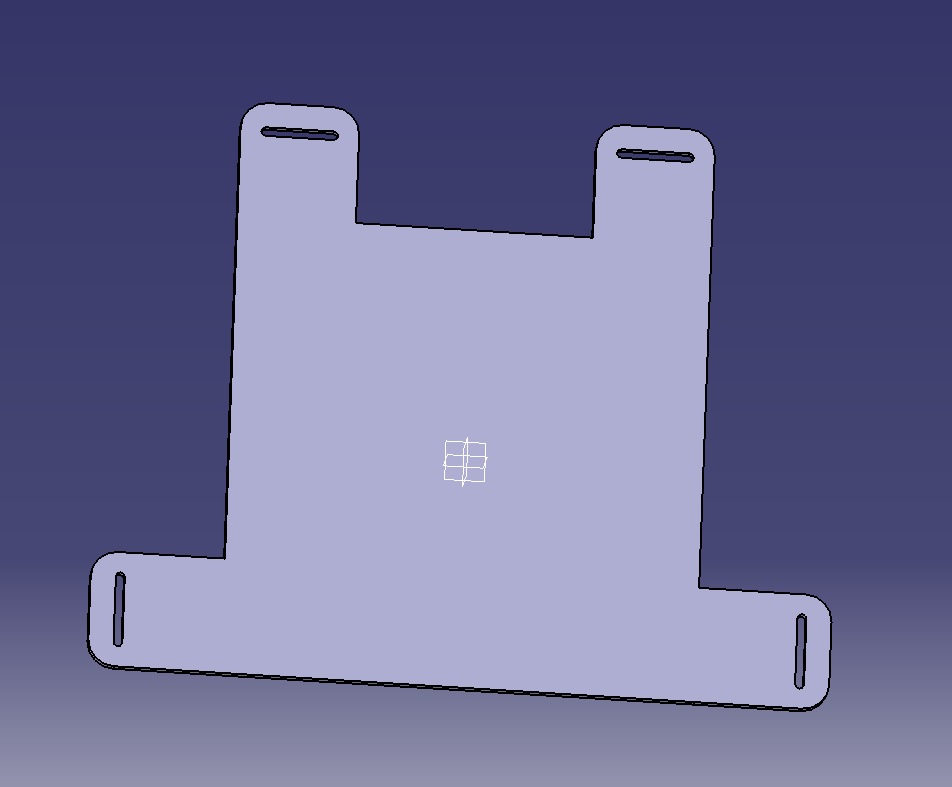
My pretty 2D 💕cutie💕 drawings:
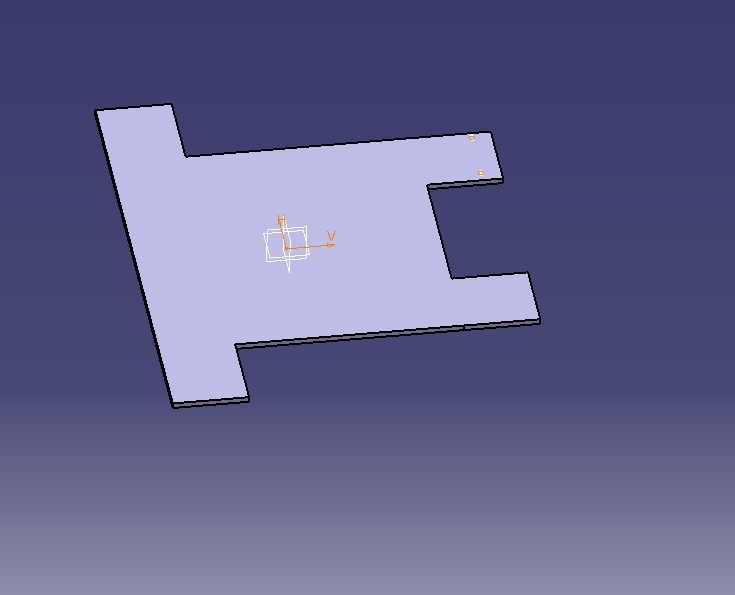
3D box drawing
Acrylic base drawing
2D drawing of the acrylic ready to be laser cut
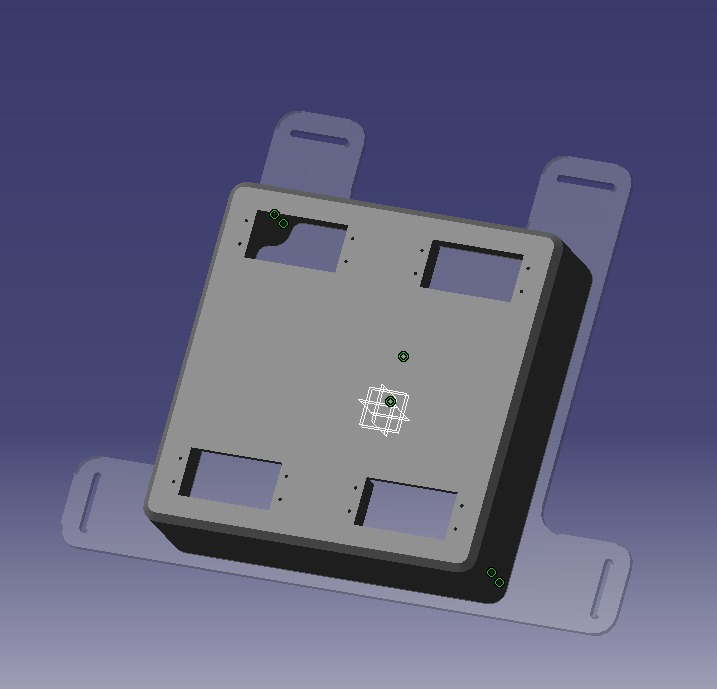
My pretty 3D 🧸baby🧸 model:
How to understand the pretty Catia:
My gorgeous ✨3D✨ model files:
And what about the assembly gurl?
Solid Works File
-
So for this project the school requested to try 2 different 3D softwares and I chose Solid Works vs Catia to model the pieces.
But.....let me spill the "T" why I'm totally vibing with CATIA over SolidWorks for this project!
So, CATIA is like the ultimate boss when it comes to making stuff look awesome. It's super easy to use and lets me tweak things without starting from scratch. Imagine having the power to change stuff on the fly, adjust sizes, and keep things fresh without any hassle!
And girl, when it comes to putting things together, CATIA's like your BFF. It's so chill and organized. I can see how all the pieces fit together like a puzzle and check for any weird overlaps or clashes with just a couple of clicks.
Oh, and let's talk about making things look sleek and fancy. CATIA's got our back! It's like having a magic wand to create all those cool curves and details effortlessly. Seriously, it's like being a digital artist but for designs!
Plus, CATIA loves playing with others. It's super social and can hang out with all our other software and tools without any drama. And if we're working with the squad, CATIA's all about that teamwork. We can share our designs, brainstorm together, and make magic happen in real-time.
And can we talk about how smooth CATIA's interface is? It's like browsing your favorite app - clean, organized, and super cute! I can find everything I need in a snap, which means more time for slaying those designs.
Oh, and the best part? CATIA's got this huge girl gang of users who are always ready to help out. So, whenever I'm stuck or need some inspo, there's a whole crew of girls ready to lift me up and show me the way.
So yeah, while SolidWorks is cool and all, CATIA's totally stealing my heart! It's like the ultimate design bestie, helping me bring all my wildest ideas to life. 💁✨
How I started with Solid
It was basically the same procedure from before so I know you totally already know how to do it and this is going to be a list of the steps I did for your nice reading:
- First things first baby
THE Acrylic Wall (Part 1):
We'll start by making the back wall out of clear acrylic. It's gonna be like the sturdy backbone of our box.
Imagine drawing the shape of the wall, kinda like tracing it on a piece of paper.
Then, we'll make it thicker by pulling it up, just like building a little wall in a video game!
- 3D Printed Component (Part 2):
This part is gonna be totally custom-made to hold our battery and servos snugly.
Think of it like sculpting with digital clay! We'll design little compartments and spaces to fit everything perfectly.
- Putting It Together:
We'll sandwich the parts together, just like making a sandwich with bread and filling!
The acrylic wall is gonna be the bread, and the 3D printed part will be the yummy filling that holds all our stuff in place.
- Checking Everything:
Before we get too excited, we gotta make sure everything fits together nicely.
Like, we don't want any surprises, right? So we'll check if everything fits and moves smoothly.
- Making It Real:
Once we're happy with the design, it's time to bring it to life!
We'll send our 3D printed part to the printer and cut out the acrylic wall.
- Putting It All Together:
Finally, we'll assemble everything, like putting together a fun puzzle!
We'll make sure everything clicks into place and feels sturdy.
- Testing, Testing:
We'll test our creation to make sure it works like we planned.
It's kinda like giving our project a little test drive to see how it handles.
- Celebration Time!:
Once everything works perfectly, it's time to celebrate our awesome creation!
We did it, girl! Our first project together, and it's gonna be amazing!
So for this part I´m gonna show you an amazing tip for you to replicate a PNG image from anywhere without
having to draw it again...
Gurl this saved me hours of vectorizing in Illustrator so let´s keep it a secret between us I know you´ll
love it! xoXo
Open the PNG file in Illustrator
-
Hey girl! So first start up Adobe Illustrator.
-
Go to File and click Open.
-
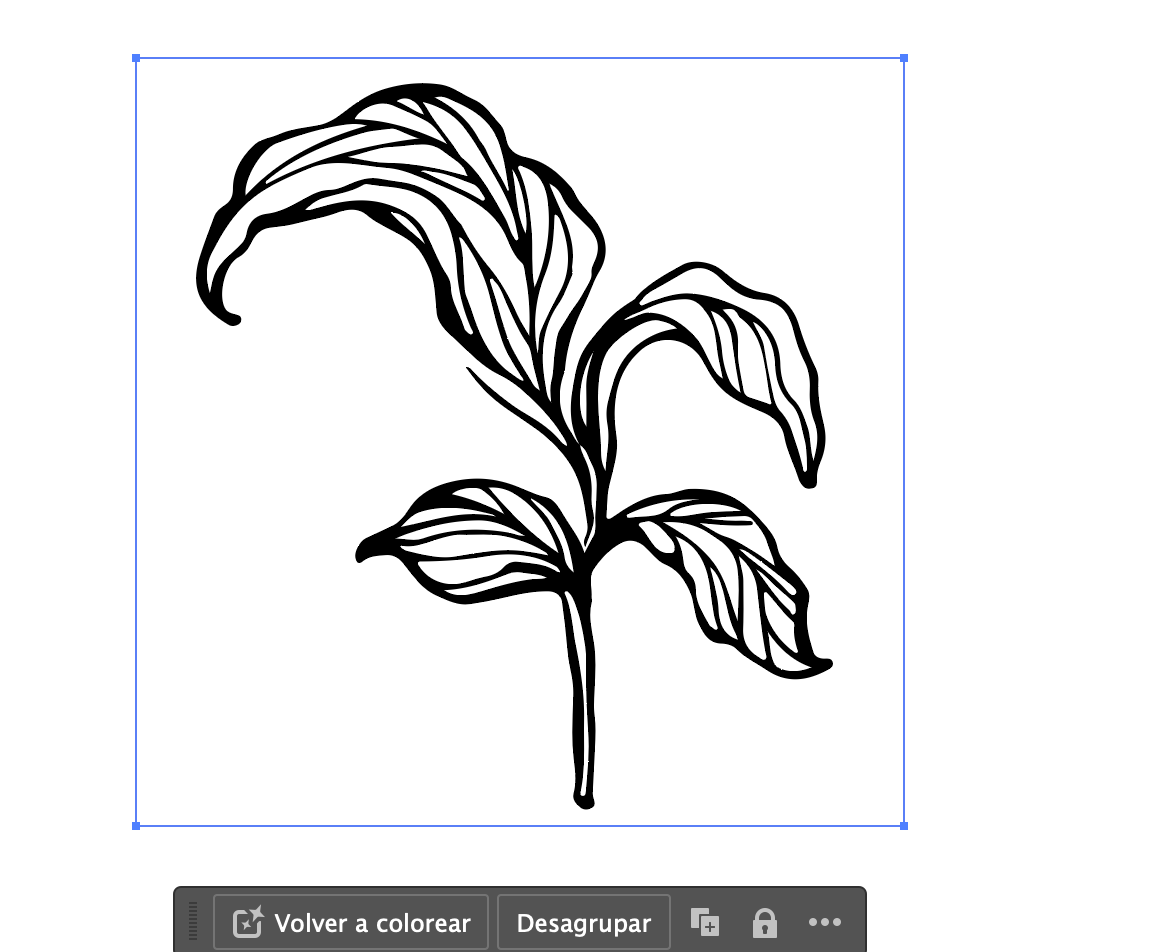
Find your cute leaf PNG file and open it.
Select the image
-
Click on the image to select it. You’ll see a fabulous box around it, showing that
it’s selected.
Access the Image Trace tool
-
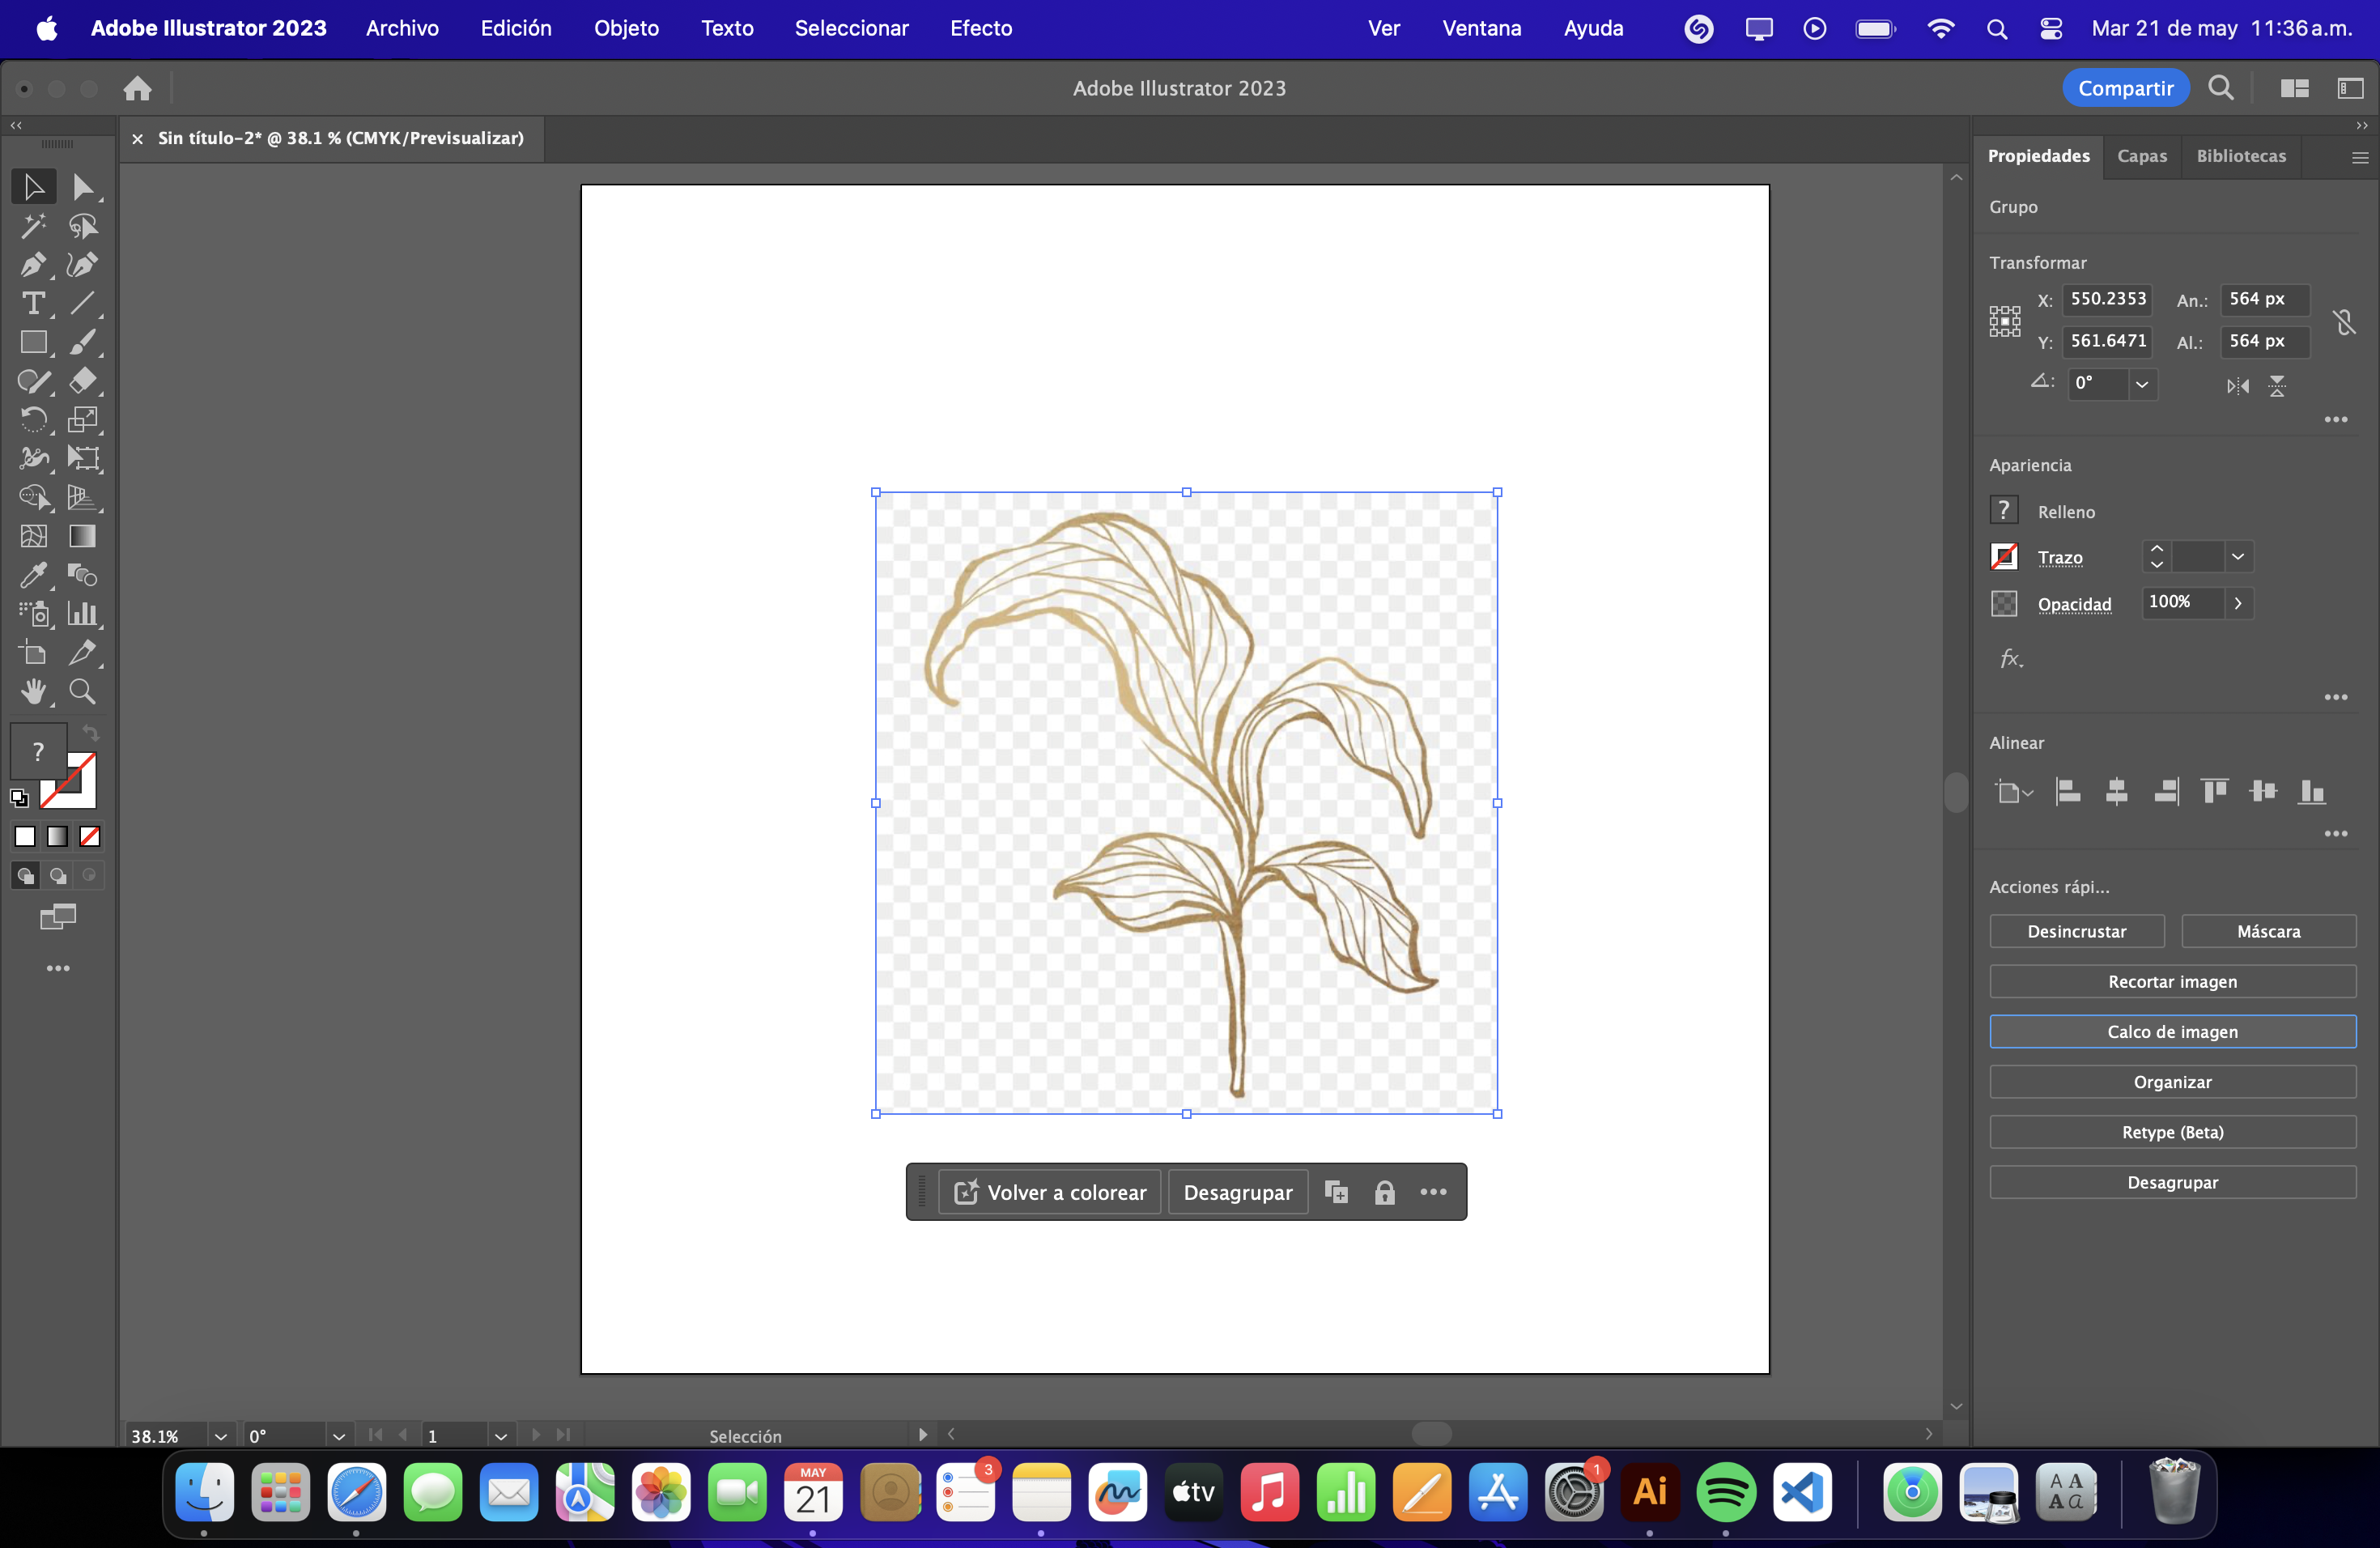
With the image selected, go to the top menu and choose Object > Image Trace > Make.
-
Or just hit the Image Trace button in the top options bar. Easy peasy!
Once you’ve selected Image Trace, a panel of options will pop up at the top.
Click on the preset button (it looks like a cute triangle with lines) and choose Silhouette.
Refine the settings
-
To fine-tune the trace, click the Image Trace Panel button (it looks like a page with horizontal lines).
-
Here, you can tweak the Path Fitting, Threshold, and other settings to get the perfect trace. Play around with these until your leaf looks just right.
-
I decided to give it a little magic by using Fade.
Expand the vectorized image
-
Once you’re satisfied with the trace, you need to expand it to turn the trace into editable paths.
-
Go to Object and select Expand.
-
In the dialog box that pops up, make sure both Object and Fill are checked, then click OK. Yay, it’s vectorized!
Clean up and edit the vectorized image
-
Now your vectorized image is made up of multiple paths and shapes. Use the Selection tool (V) and the Direct Selection tool (A) to tweak the paths and get rid of any unwanted parts.
You can also ungroup (Ctrl+Shift+G or Command+Shift+G on Mac) the elements to edit them individually.
Save your pretty file
-
After you’ve finished adjusting your beautiful vectorized leaf, save your work.
Go to File and choose Save As to save it in your preferred format, like AI, SVG, EPS, etc.