WEEK GROUP
Group assignment
Project Management
Documentation tips
Our tasks for this week are:
Group assignment:
- Do your lab's safety training
test runout, alignment, fixturing, speeds, feeds, materials,
and toolpaths for your machine
Individual assignment:
-
Make (design+mill+assemble) something big (~meter-scale)
- Extra credit: don't use fasteners or glue
- Extra credit: include curved surfaces
CNC Machine SHOPBOT PR ALPHA

The CNC router machine that we have at the Universidad Cientifica del Sur is the SHOPBOT PR ALPHA-MODEL 96 - 48
Characteristics
- CUT / MOVEMENT AREA: 105” x 61” x 8”
- XY POSITIONING SPEED: Variable, max. 1800”/min.
- Z POSITIONING SPEED: Variable, max. 900”/min.
- Impressive cutting speeds of up to 600 inches per minute (depending on cutting bit and material) and rapid transit speeds of 1,800 inches per minute.
- INPUT VOLTAGE: 220v single-phase, 230v 3-phase and 380/460V 3-phase power options are available, depending on tool and configuration.
DO YOUR LAB'S SAFETY TRAINING
march 3
our trainer Vaneza coordinated a virtual training session aimed at engineers, focused on the crucial topic of SAFETY AND HEALTH AT WORK,
with a specialized approach for environments such as FAB LABS. During this training,
we were provided with a thorough explanation of the essential measures that must be
observed to ensure a safe working environment and prevent possible accidents,
emphasizing the importance of safety in the handling of CNC machines. This prior
knowledge is essential to carry out our work efficiently and safeguard the integrity
of all those involved in the process.
TRAINING
Safety experts gave us a detailed explanation of the need for proper signage in our digital manufacturing lab.
The importance of each sign and its specific content was highlighted, with the aim of guaranteeing a safe environment.
It is crucial that all persons entering this space are fully informed of these signs as they play a vital role in preventing
accidents and ensuring safe use of the machines. Clear and understandable signage is an essential measure to promote safety awareness
and protect the integrity of those who work in the laboratory.

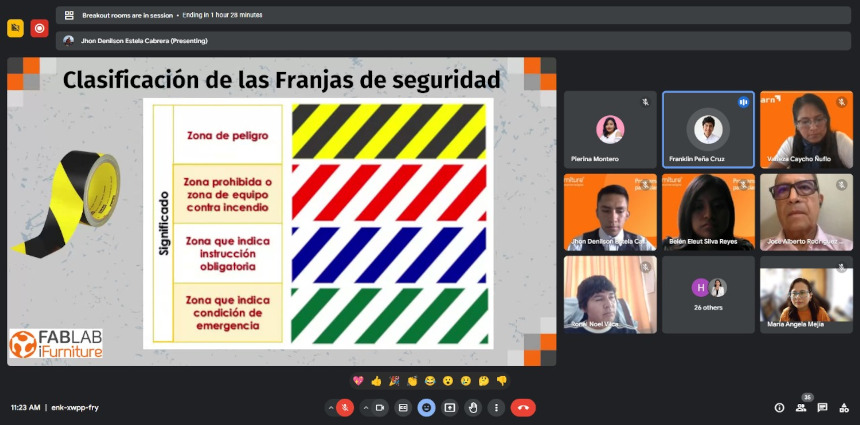
safety strip classification
The classification of safety stripes by specific colors is a standardized practice that contributes to the quick identification of different types of
information in work or public environments. In the context of yellow stripes with black, they are generally used to mark warning areas,
indicating caution and risk. White stripes with red usually denote prohibitions or indicate dangerous situations to be avoided. As for blue stripes with white, they are commonly intended for areas that provide mandatory information or indicate the presence of safety equipment and devices. Finally, green and white stripes usually represent safe areas or evacuation routes, directing people to safe places in case of emergency. Consistency in the use of these colors and stripes contributes significantly to the clarity and understanding of safety information in various environments.
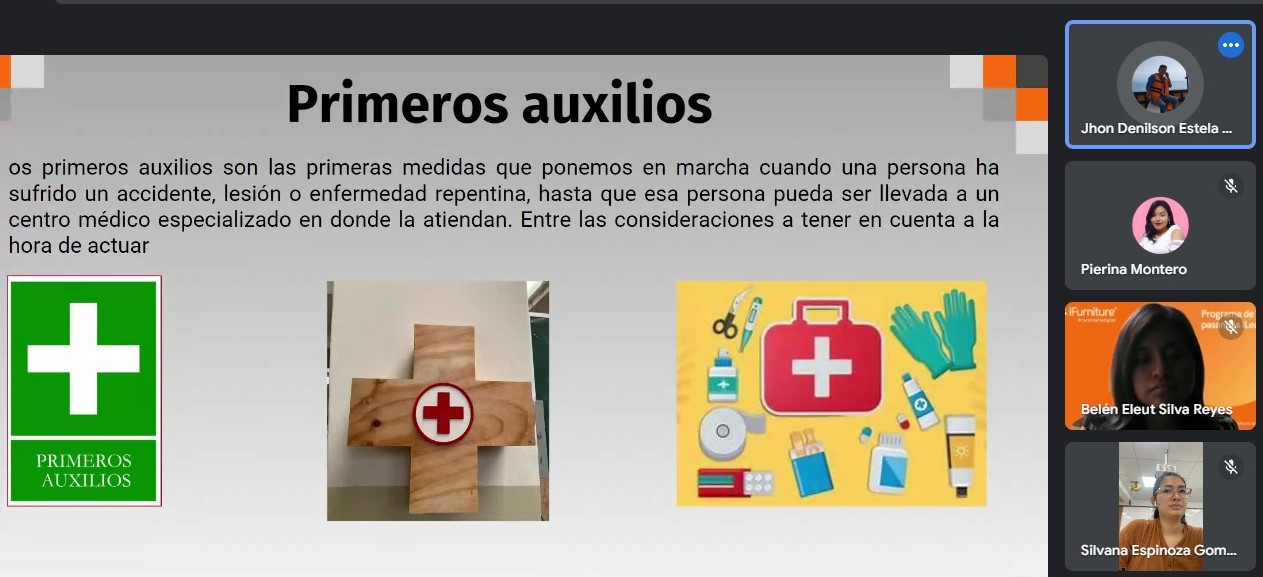
first aid kit
A first aid kit in a digital fabrication lab should be equipped to address potential injuries and emergencies common in that environment. Here is a basic list of items that might be essential:
- Adhesive bandages and dressings: To cover wounds and cuts
- Sterile gauze and bandages: Used to cover and protect larger wounds.
- Antiseptic solution or alcohol: To clean wounds and prevent infection
- Disposable gloves: For personal protection when administering first aid.
- Scissors and tweezers: For cutting bandages and handling small objects.
- Over-the-counter analgesics: To relieve minor pain or discomfort.
- Nonsteroidal anti-inflammatory drugs (NSAIDs): To reduce inflammation in case of injury.
- Antihistamines: To treat mild allergic reactions.
- Burn cream or gel: For minor burns caused by tools or machinery.
- Masks and eye protection: For situations where there may be airborne particles or risk of splashing.
- Emergency contact list: Including telephone numbers for emergency medical services.
It is important that the first aid kit be checked and restocked regularly to ensure that all items are in good condition and ready for use.
In addition, basic first aid training should be provided to laboratory personnel so that they can respond effectively in the event of a medical emergency.
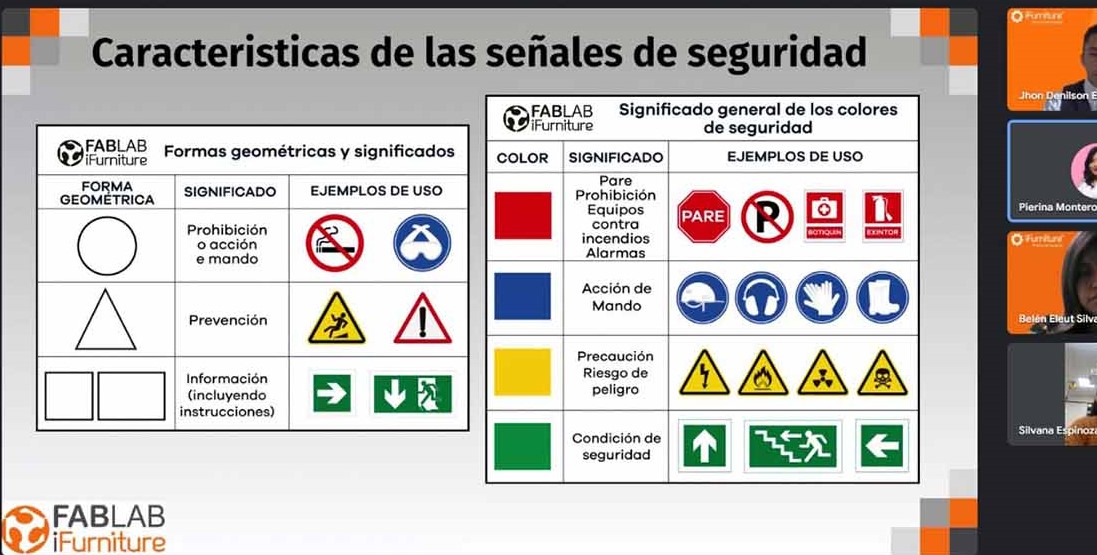
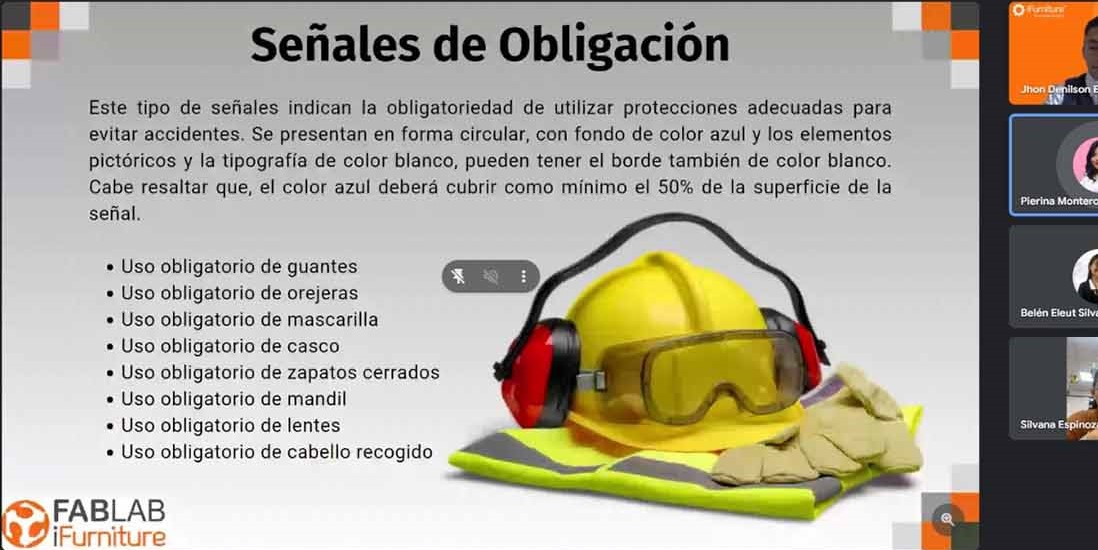
Characteristics of safety signs
Safety signs play a crucial role in conveying important information and warnings in various environments. Here are some key characteristics of safety signs, particularly focusing on symbols and their meanings:
- Universal Symbols: Safety signs often utilize universally recognized symbols that can be understood across language barriers. These symbols are standardized to ensure clear communication of hazards, prohibitions, and other essential information.
- Color Coding: Different colors are used to categorize and emphasize the nature of the information. For example:
- Red: Indicates prohibitions or potential dangers
- Yellow or Amber: Signifies warnings or caution.
- Blue: Denotes mandatory actions or information.
- Green: Represents safety or evacuation-related information.
- Clarity and Simplicity: Safety symbols are designed to be clear and simple, promoting quick comprehension. Complex details are avoided, and emphasis is placed on visual impact to convey messages swiftly.
- Consistency: The use of consistent symbols and colors throughout an environment or industry helps users associate specific meanings with certain signs, promoting a standardized understanding of safety information.
- Pictograms: Symbols or pictograms are commonly used to depict specific hazards or actions. These images are chosen for their ability to convey messages quickly and effectively. Examples include a flame for fire, a skull and crossbones for toxicity, or an exclamation point for general warnings.
safety strip classification
The classification of safety stripes by specific colors is a standardized practice that contributes to the quick identification of different types of
information in work or public environments. In the context of yellow stripes with black, they are generally used to mark warning areas,
indicating caution and risk. White stripes with red usually denote prohibitions or indicate dangerous situations to be avoided.
As for blue stripes with white, they are commonly intended for areas that provide mandatory information or indicate the presence of safety
equipment and devices. Finally, green and white stripes usually represent safe areas or evacuation routes, directing people to safe places
in case of emergency. Consistency in the use of these colors and stripes contributes significantly to the clarity and understanding of safety information in various environments.
Certificate
The successful Safety and Occupational Health lecture, focused on the use of the CNC machine in our digital fabrication laboratory, culminated with the delivery of certificates to the participants.
This document represents the successful completion of the training program, where the safety and hazard measures associated with the operation of the CNC machine were specifically discussed in depth.

We met at the FAB LAB Universidad Científica del Sur to carry out our group work and also to move forward with our individual work. All with the knowledge of safety, to do a good job.
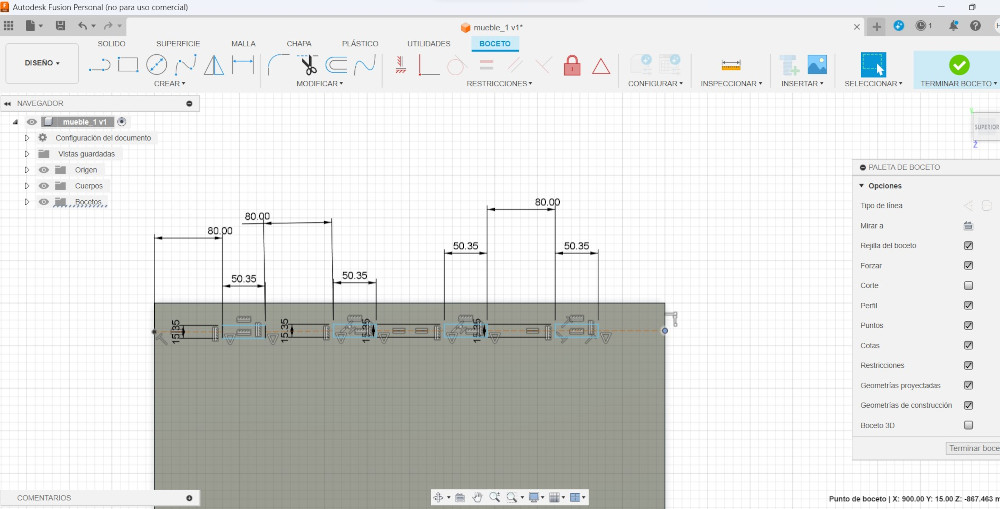
After doing parametric design tests in Solidwork and not having the desired results, I went to Rhino.
At first it was complicated because it was the first time I was experimenting with this software.
I spent a whole day trying to understand each algorithm until I achieved it and I was able to make my first nestable piece.
I managed to do it and have a 3 mm space to fit which I was seeing to be correct with the cutting tests I did previously.
Before starting any project on a CNC machine, it is essential to thoroughly understand the specific characteristics of
the machine you will be working with. Becoming familiar with aspects such as speed and acceleration limits,
maximum working dimensions, and spindle load capacity will allow you to optimize your designs for the best results.

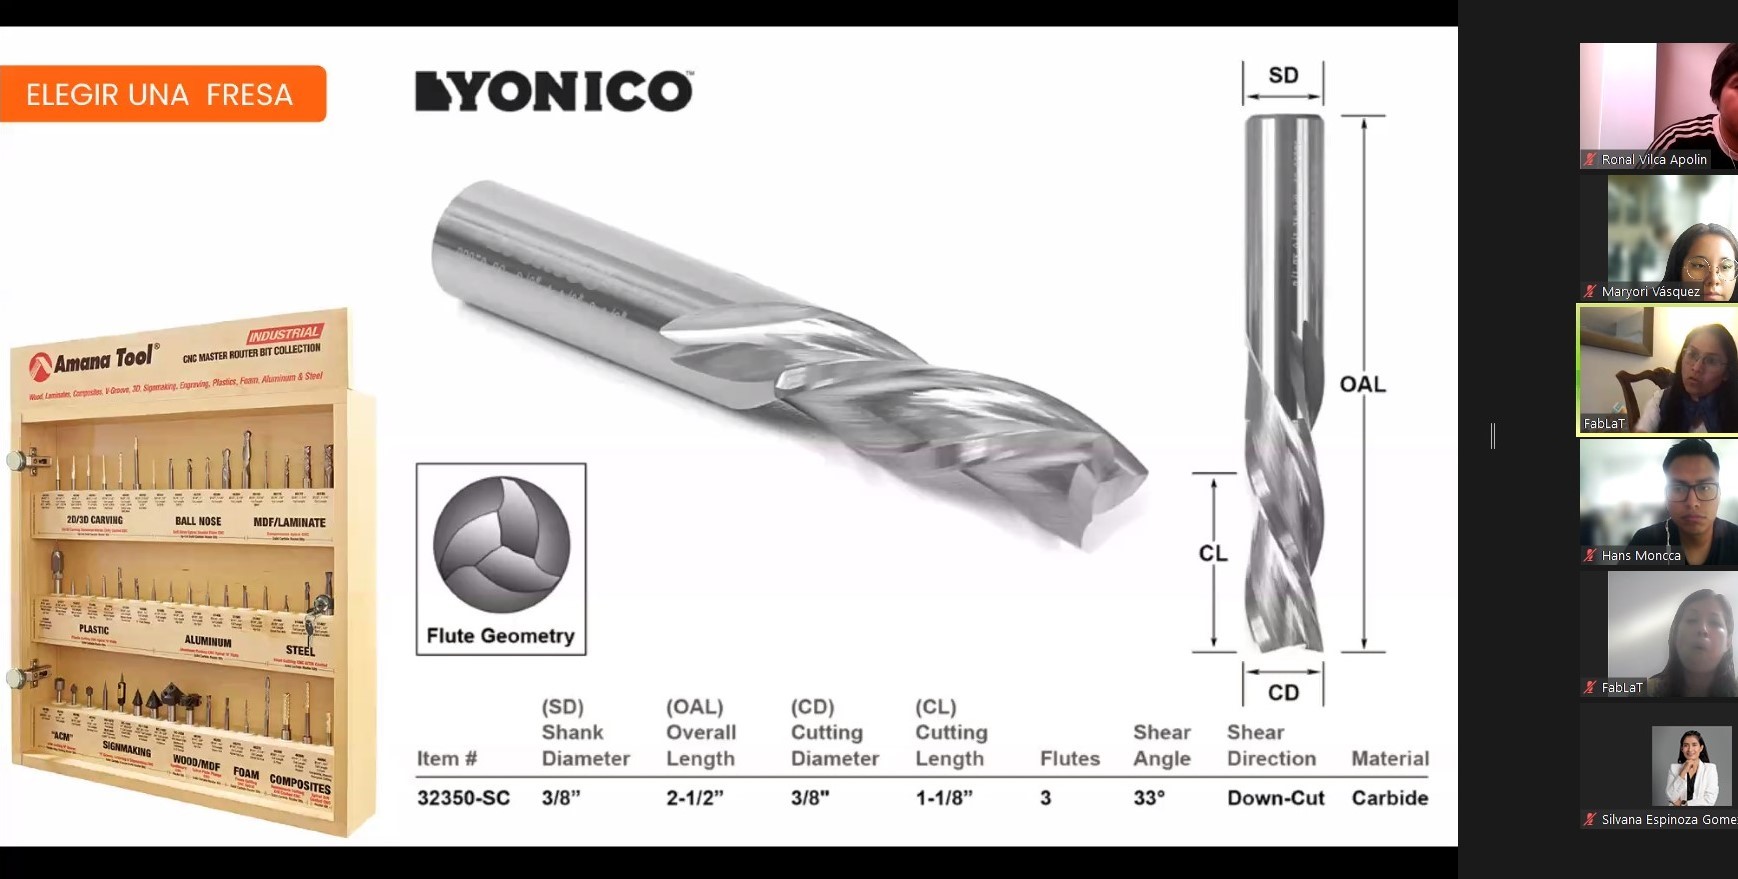
The proper choice of milling cutter diameter on a CNC machine is essential and depends on various factors,
such as the specific nature of the task and the material to be machined. The geometry of the cutter and the type of
material also influence the decision. Experimenting with different sizes and types of cutters will allow you to find
the optimal combination to maximize performance and precision in your CNC machine machining operations.
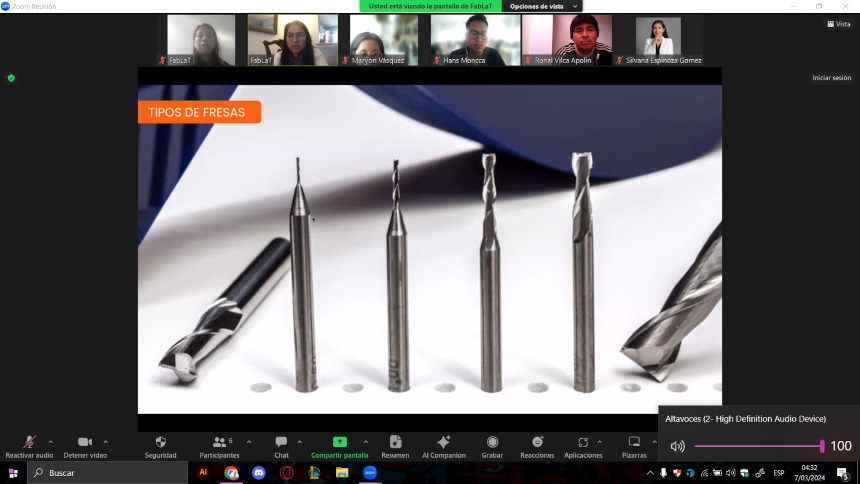
Common types of cuts include rough milling, ideal for removing large amounts of material quickly. Finish milling,
on the other hand, focuses on finer details and smooth surfaces. Groove router bits are ideal for creating straight cuts or
channels, while ball-shaped router bits are useful for curved contours.

Flat end mills are used for cutting flat surfaces, while chamfer milling cutters add beveled edges. Additionally,
countersink burrs create conical cavities. The choice of type of cut will depend on the shape and specific characteristics
of the design, as well as the material being machined, allowing considerable versatility in the CNC milling process
Do your lab's safety training
The size of my material is 266x164x15
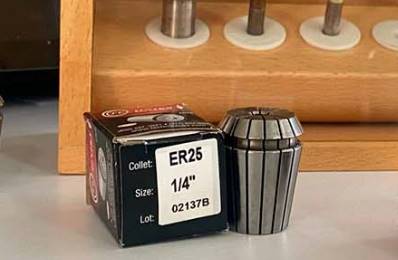
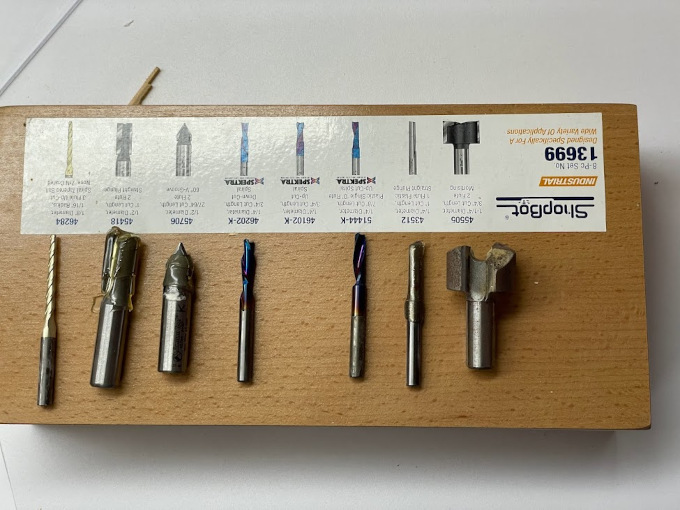
At FAB LAB UCSUR, they explained to us that they have several types of end mills available, and Hans was mentioned as using 1/4"(It is the one we will use for our projects) end mills along with his collet in the ShopBot.
Generally, 1/4" end mills are a versatile choice for standard milling operations, such as contour cuts and engravings. However, the specific cutter choice will depend on the type of work and the material involved. It is crucial to select the correct end mill to ensure optimal results when milling with the ShopBot.
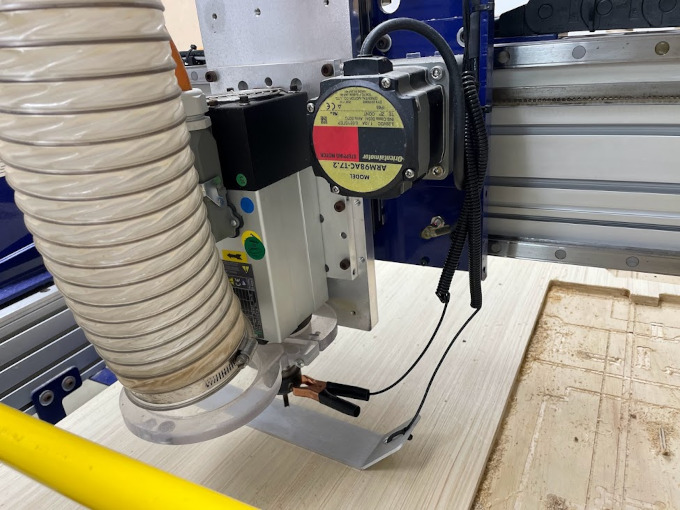
The machine will only calibrate its Z axis to start working. I will try to explain in detail what to do.
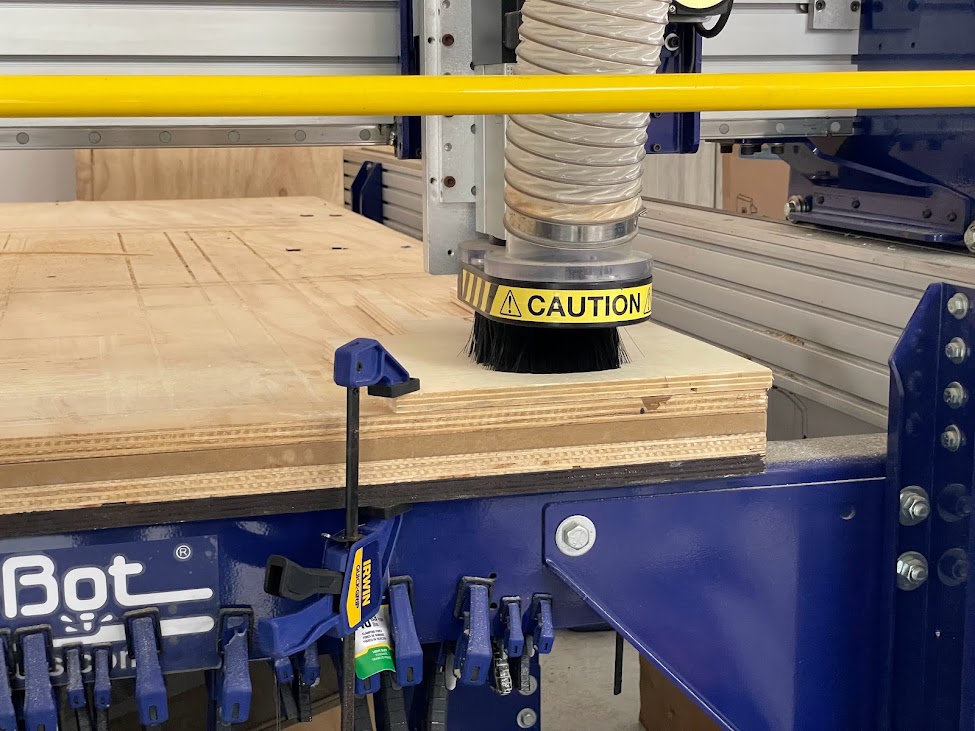
It has been brought to our attention that it is important to place a metal material between the base and the burr in the ShopBot PRSalpha to
ensure the correct functioning of the detection system. Apparently, without this material, there is a risk of the burr sliding to the bottom in a dangerous manner. This process may be related to a probe or height sensor system that requires the presence of a conductive material for proper detection.
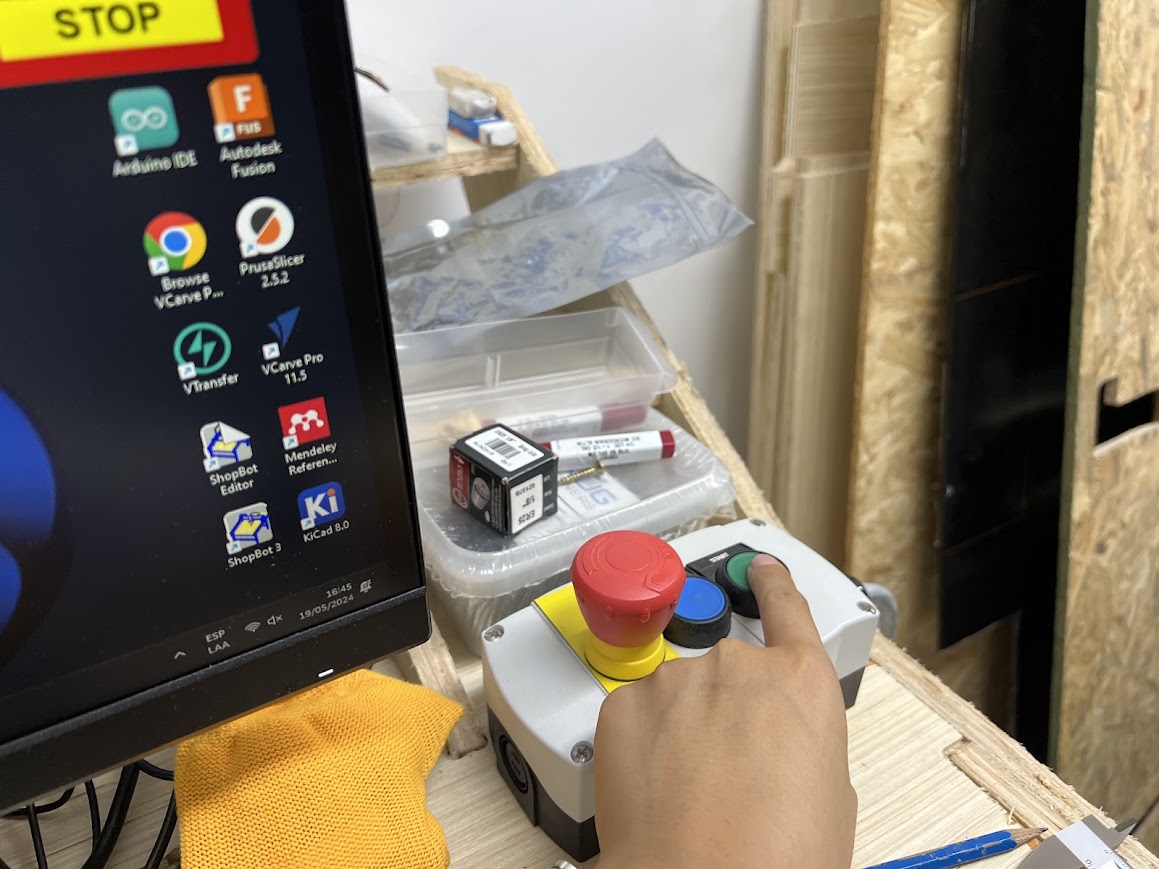
Hans told us that we must preheat the SPLINDER, this step is very important when using the machine, in the training they received they indicated that after cutting some parts, if the machine is stopped for more than 15 minutes, you have to repeat the preheating again, this to extend the life of the machine.
We go to the COMMAND CONSOLE window, go to the CUTTING tab and look for the SPLINDE WARMUP RUTINE button, this is to preheat the machine.
- Material Setup:
Properly align and set the work material on the machine table..
- Verify Focus: Ensure the laser is focused properly for accurate cutting and engraving.
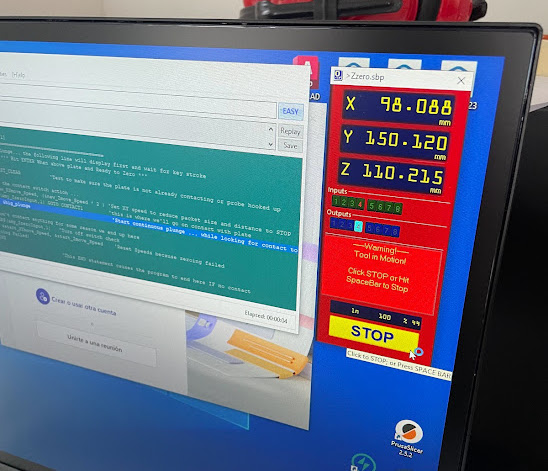
- Z-Axis Calibration:
Adjusts the height of the Z-axis to match the thickness of the material. Uses a caliper or measuring tool to verify the distance between the cutter and the surface of the material.
- Motor Pitch Calibration (Steps per Unit):
This is a critical adjustment to ensure that the machine moves the correct distance in each axis. It is usually done through the CNC control software, where specific values are entered for each motor.
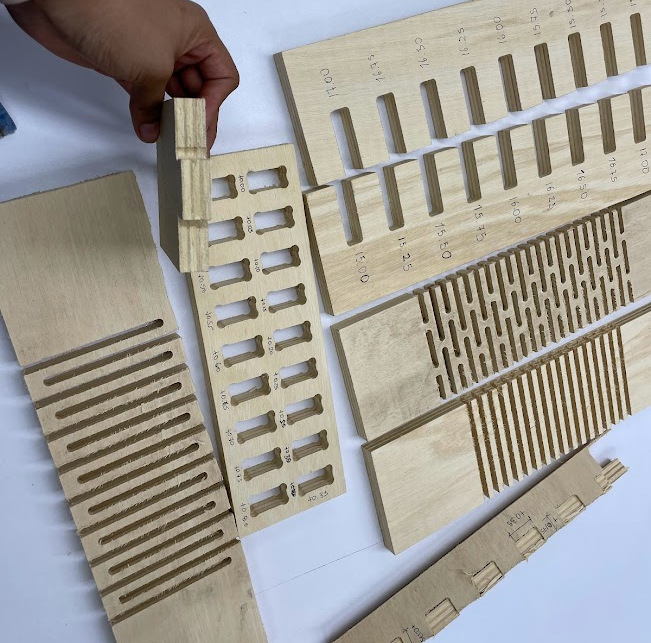
TEST RUNOUT, ALIGNMENT, FIXTURING, SPEEDS, FEEDS, MATERIALS AND TOOLPATHS FOR YOUR MACHINE

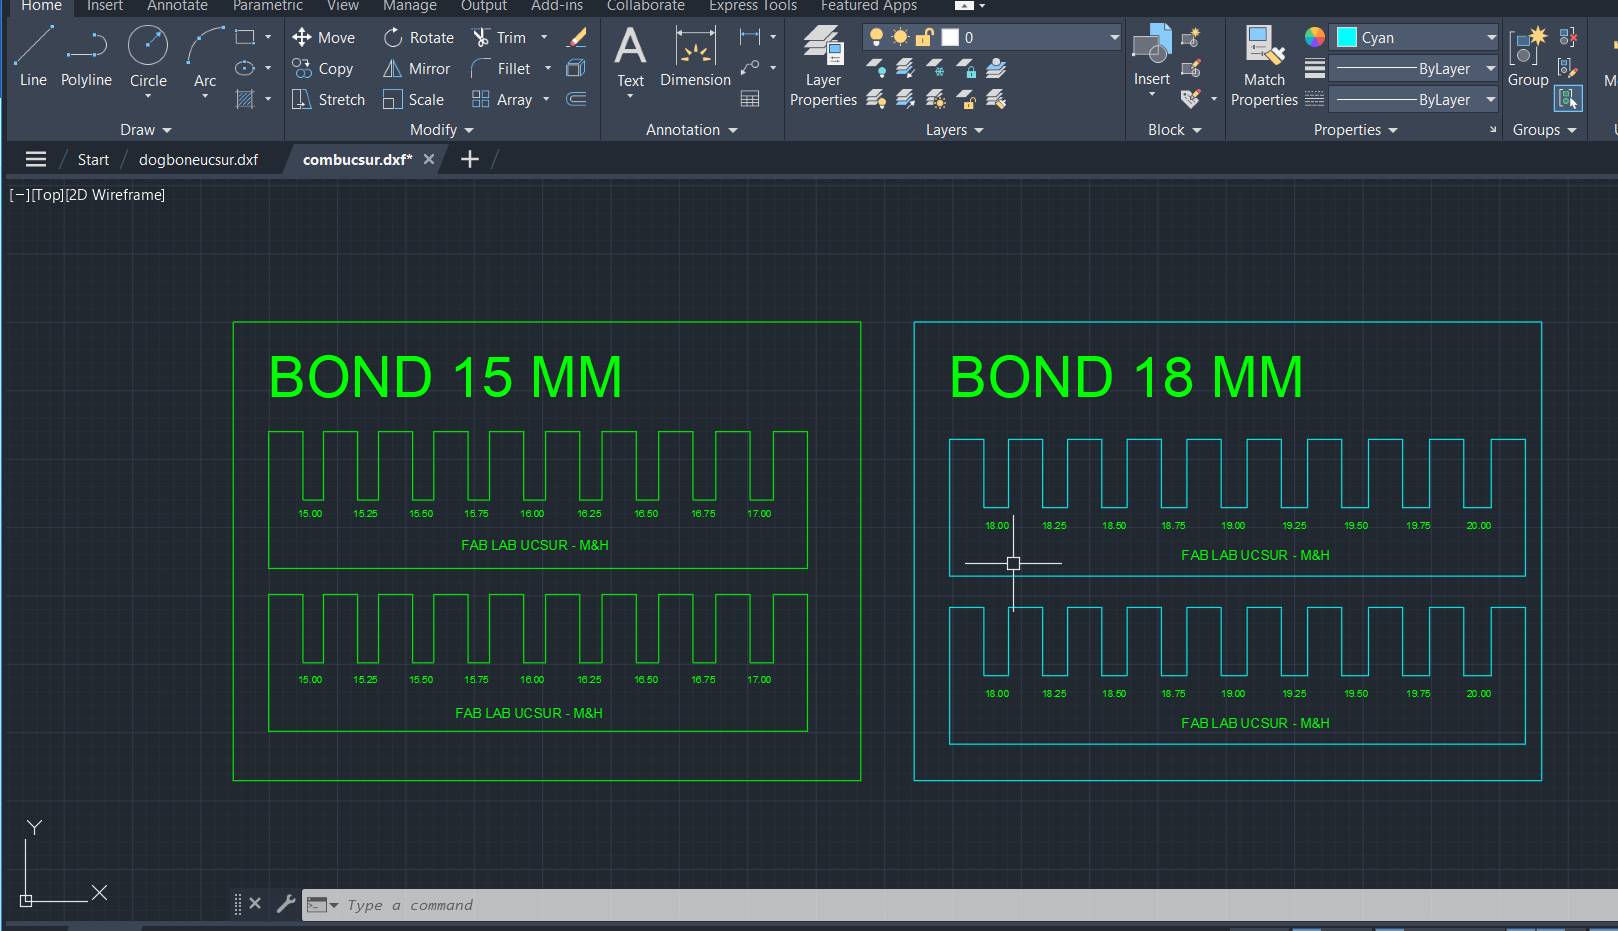
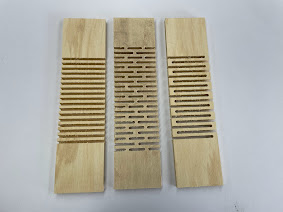
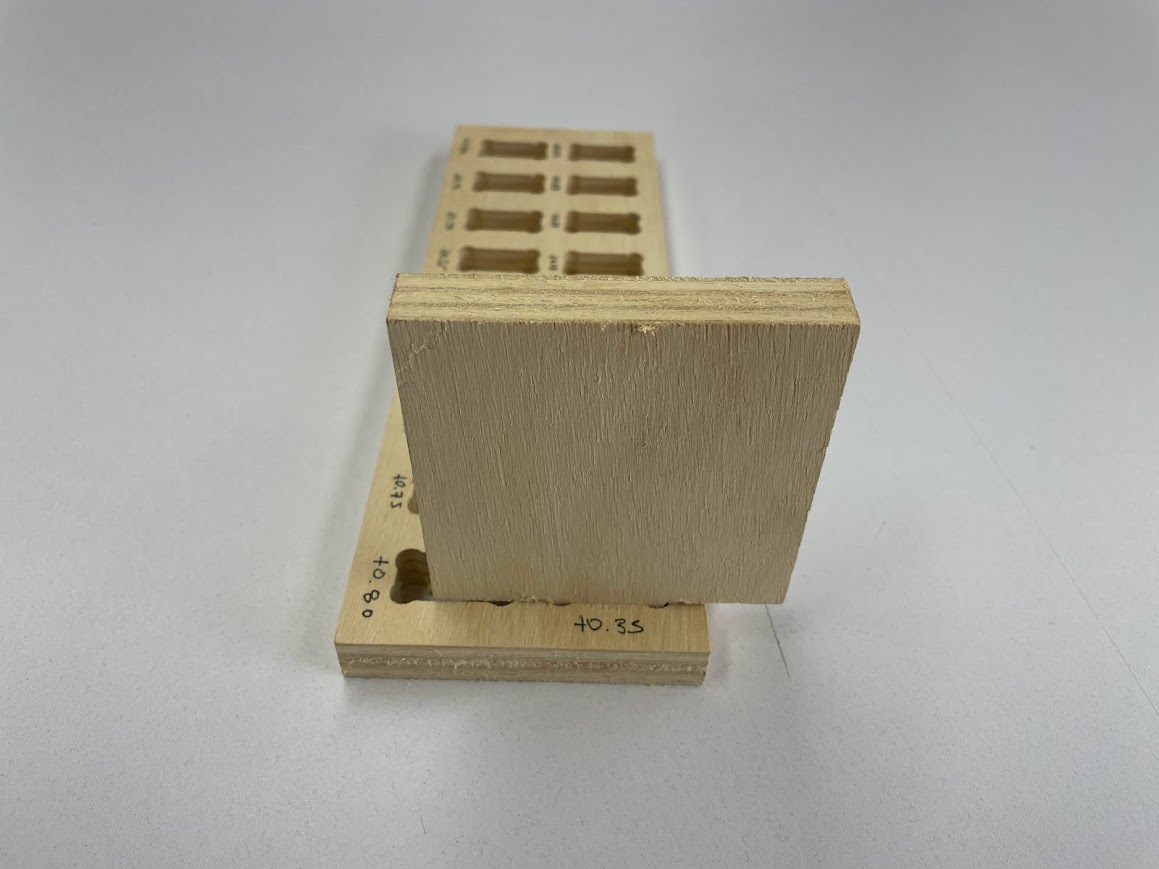
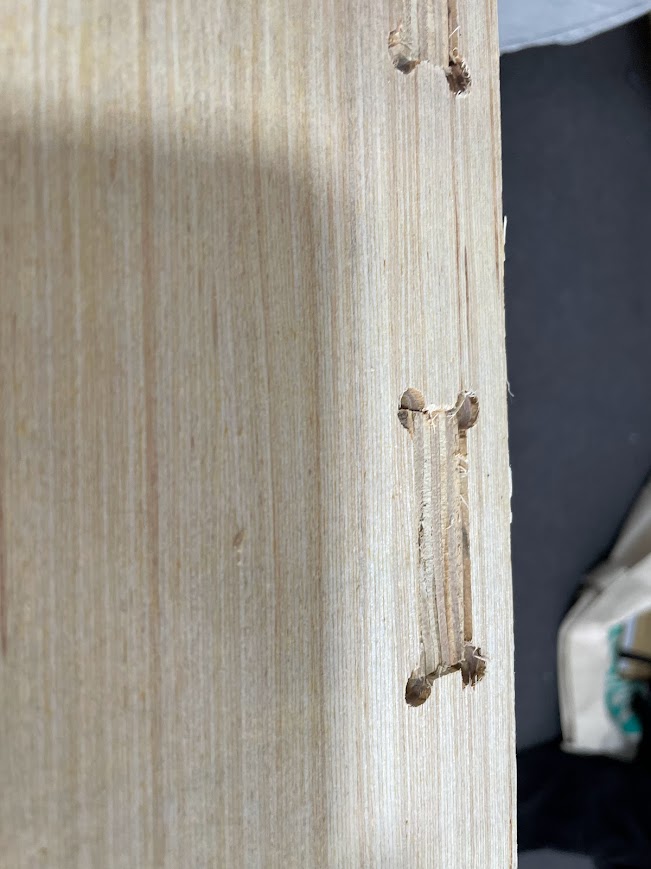
When the comb test was done we saw that the best joint for joints like this is for the cuts to be +0.75 mm of the material thickness.
In this case, for the 15 mm material, the ideal cut would be 15.75 mm for a better fit of the pieces. Here, for example, the Dogbones and the chamfer that the corners should have so that they can be joined more easily were not made.

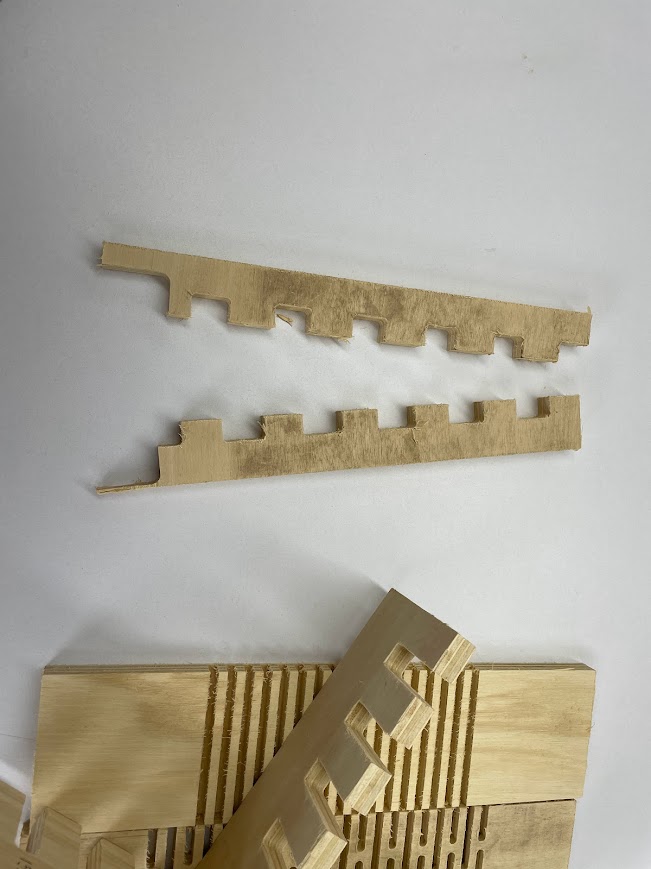
We are doing tests and Jose Alberto connected (thanks for the picture) to the Global Open Time, where they explained how we could
do the tests and Adrian and Rico explained the best ones we could do by showing him our comb test,
but they recommended us to make chamfers and observed the bones in each one of them. those advices helped us to improve our designs.
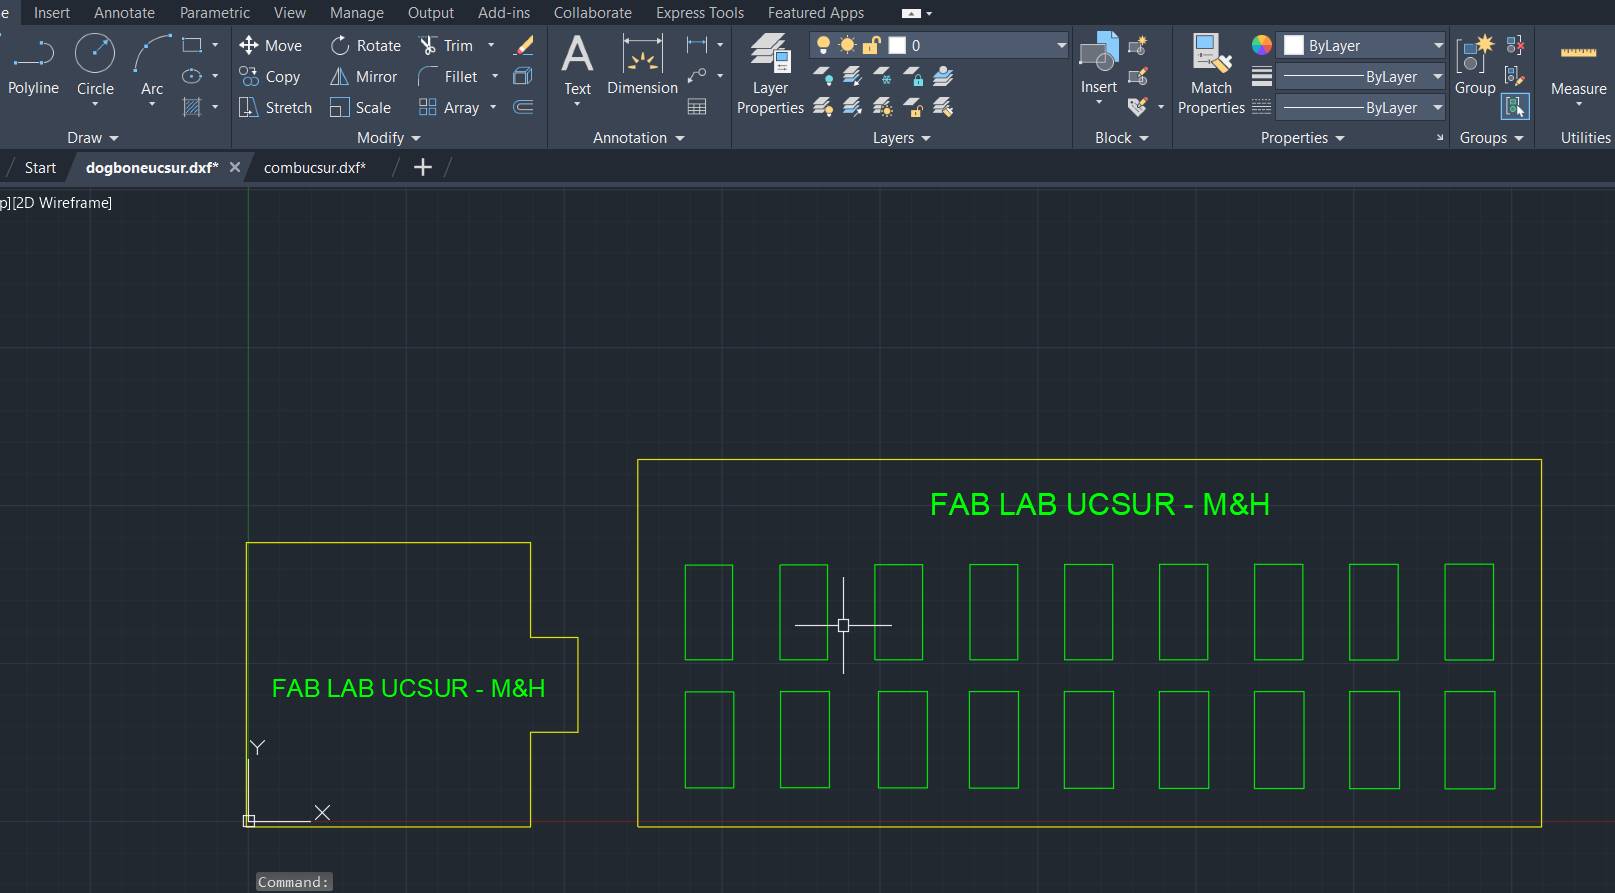
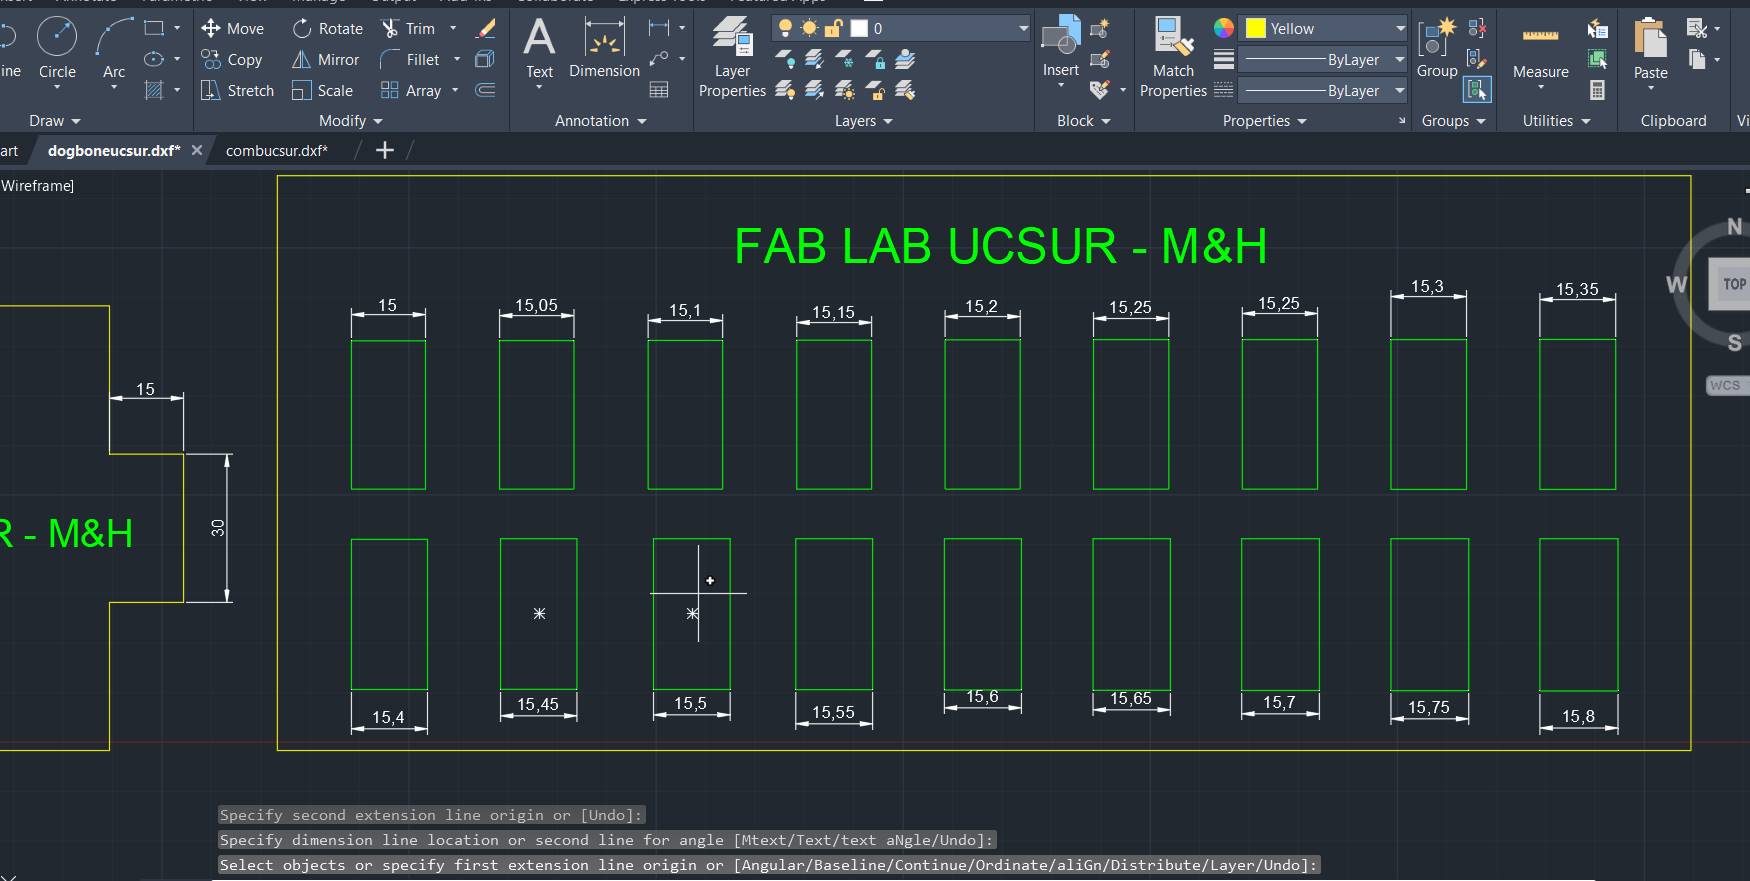
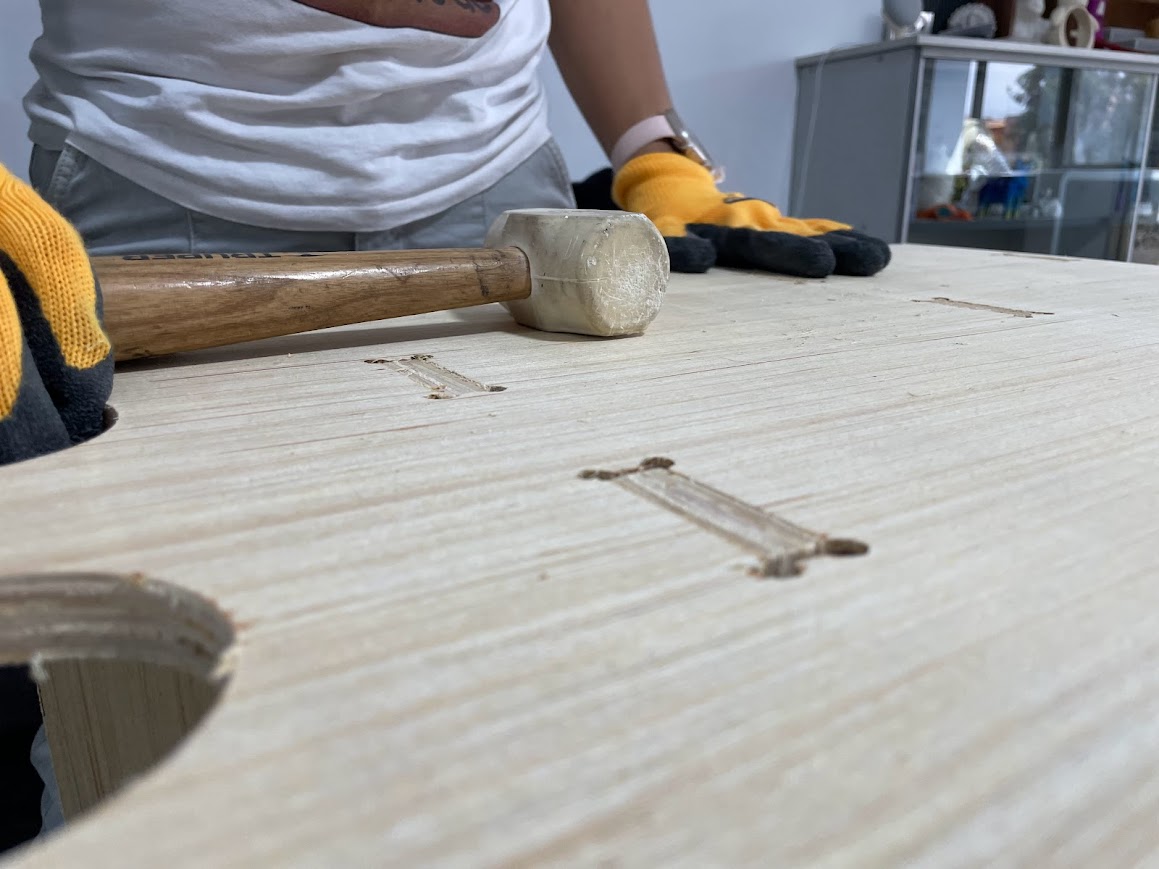
The second test focuses on the fit between the part and the hole, essential for the process on the CNC machine. The DogBone test is performed to facilitate the insertion of the parts,
especially the "female" parts, ensuring a smooth joint at the corners and improving the efficiency of the machining process. In parallel, the bore test aims to determine the precise dimensions of the "female" part to allow smooth entry of the "male" part, without compromising the integrity of the material. These tests are critical to ensure accuracy and quality in the fit of parts during CNC cutting.
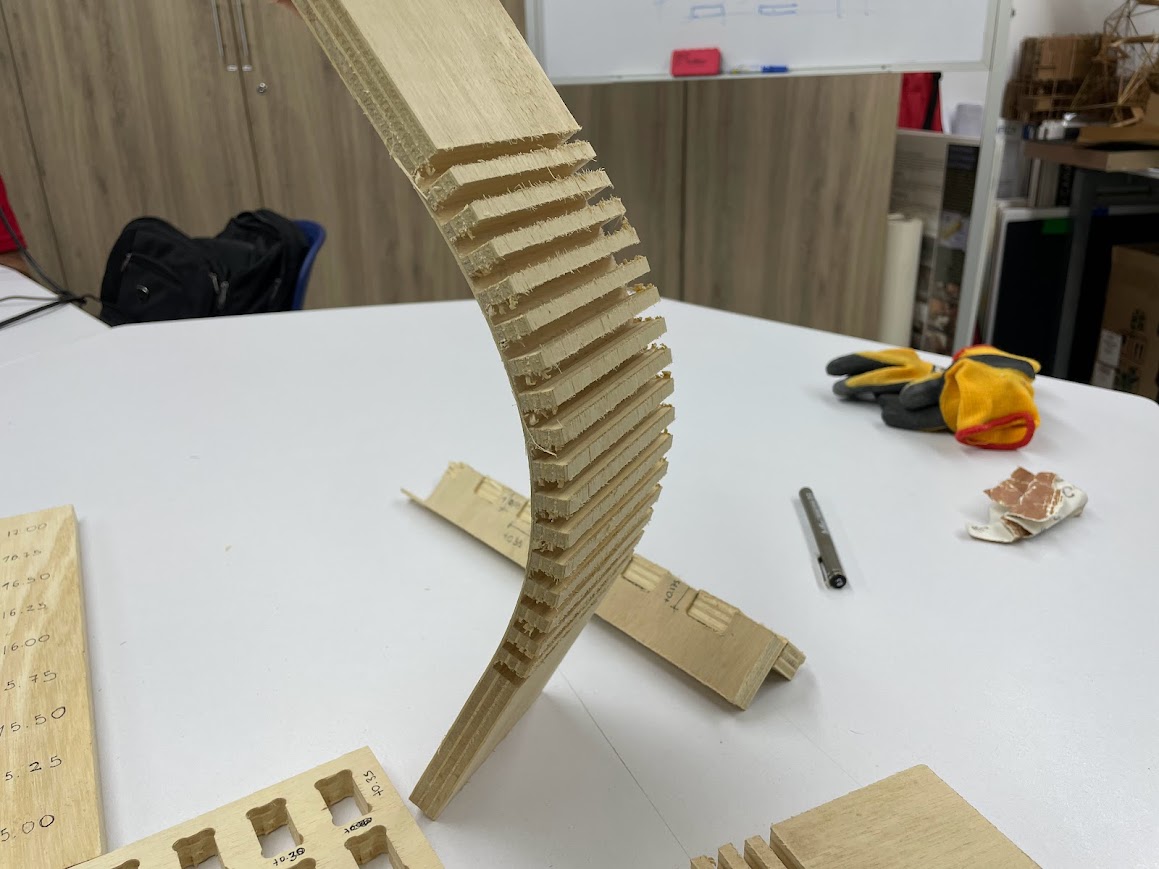
CURVATURE TEST
We used the 15mm plywood material, that is the material I will use for my individual project. To study the flexibility of the material, architect Maryori Vasquez designed some tests.
For the CNC test cutting, Hans helped us by manipulating the machine and explained to us how it works for the shopbot cutting.
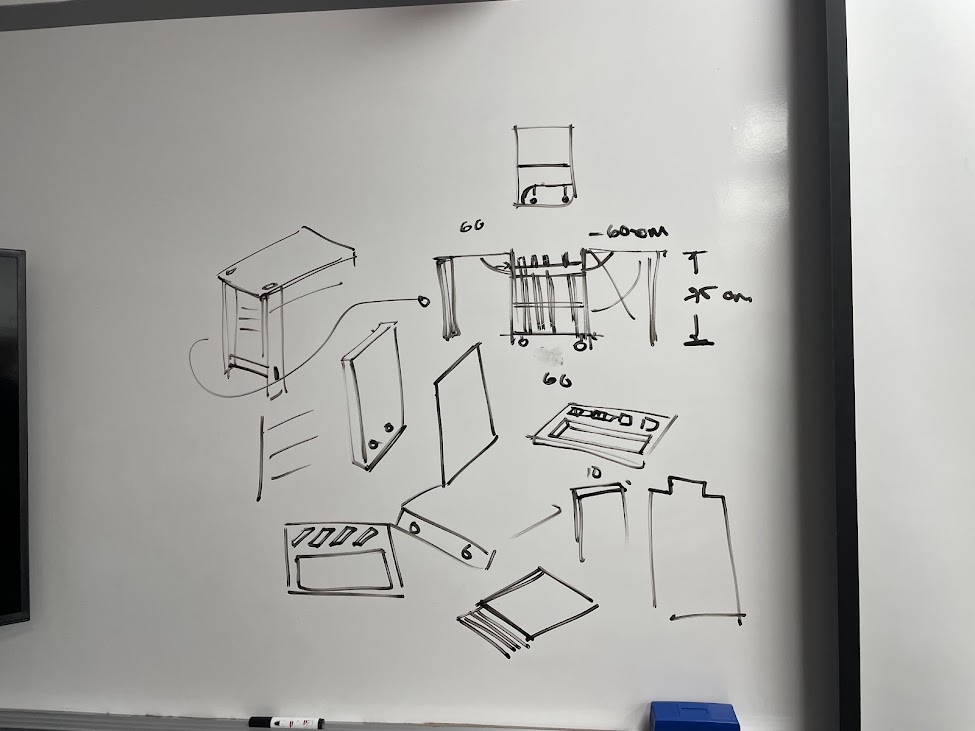
Initial sketches for the design
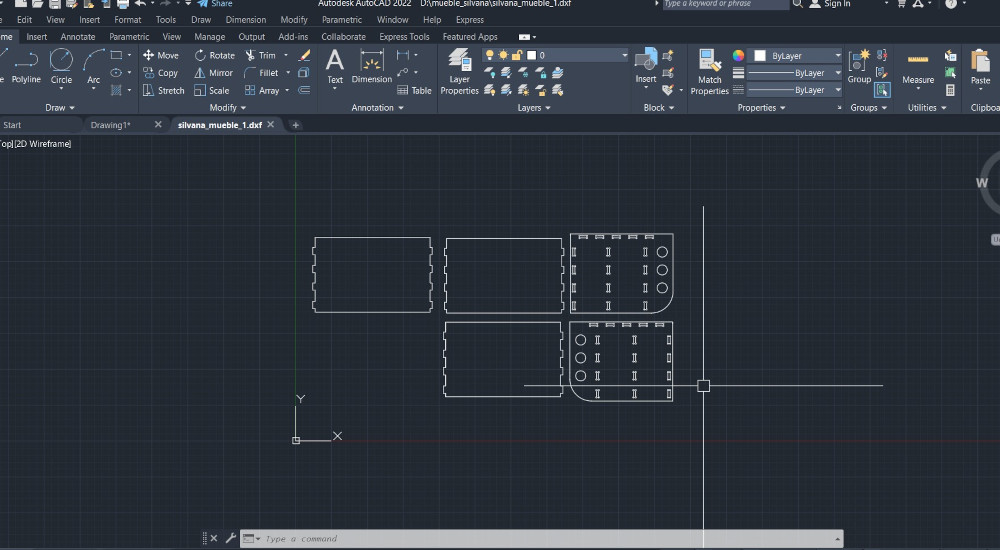
Counting the pieces my furniture will require
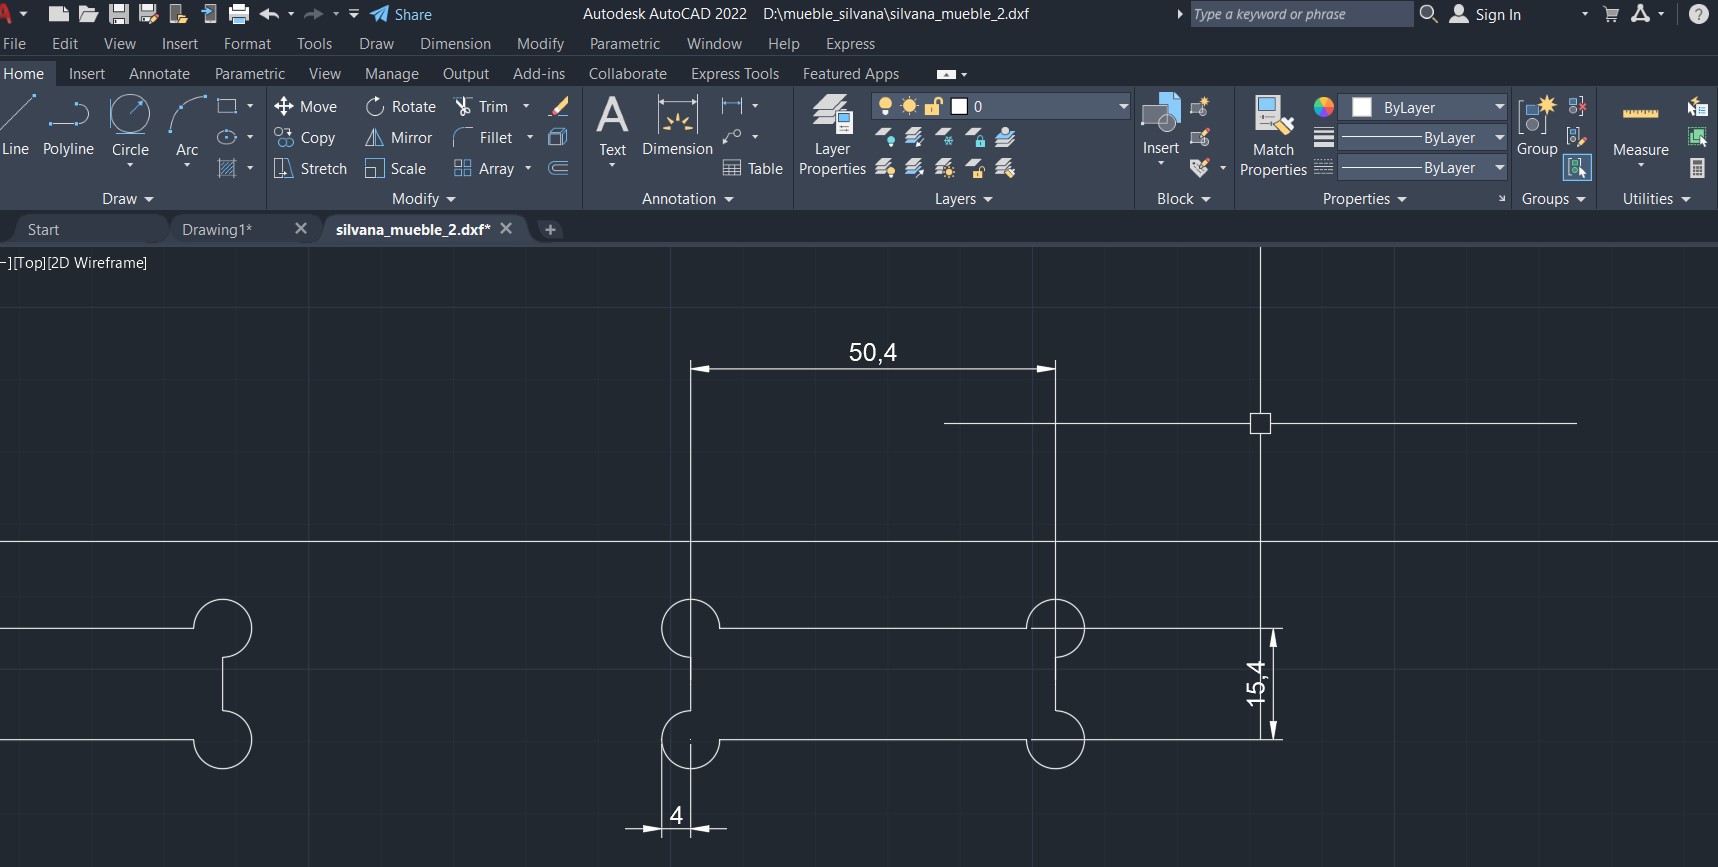
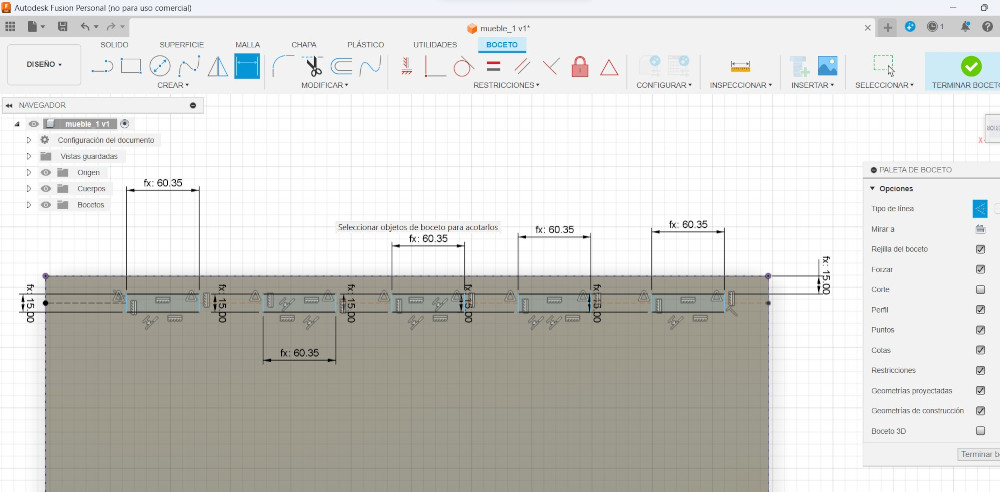
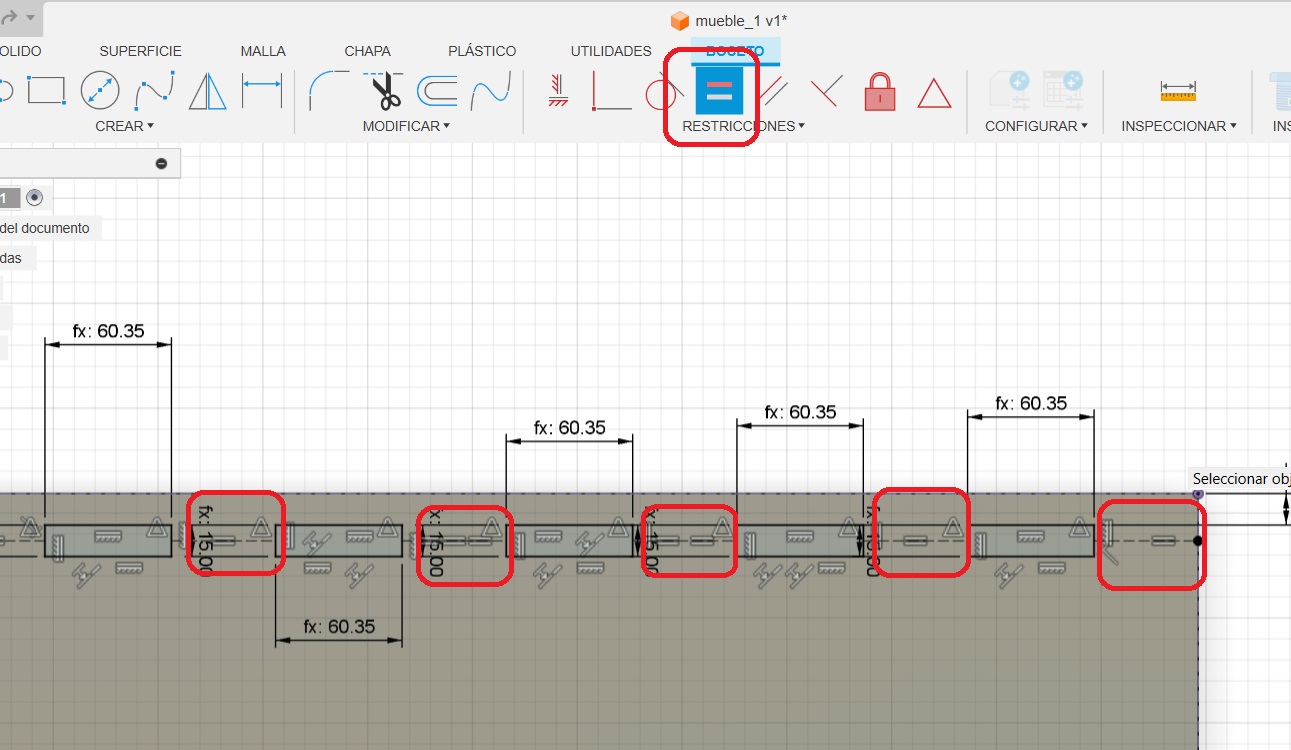
Taking measurements and seeing if the dogbones fit properly

I wanted the circles to be the same size
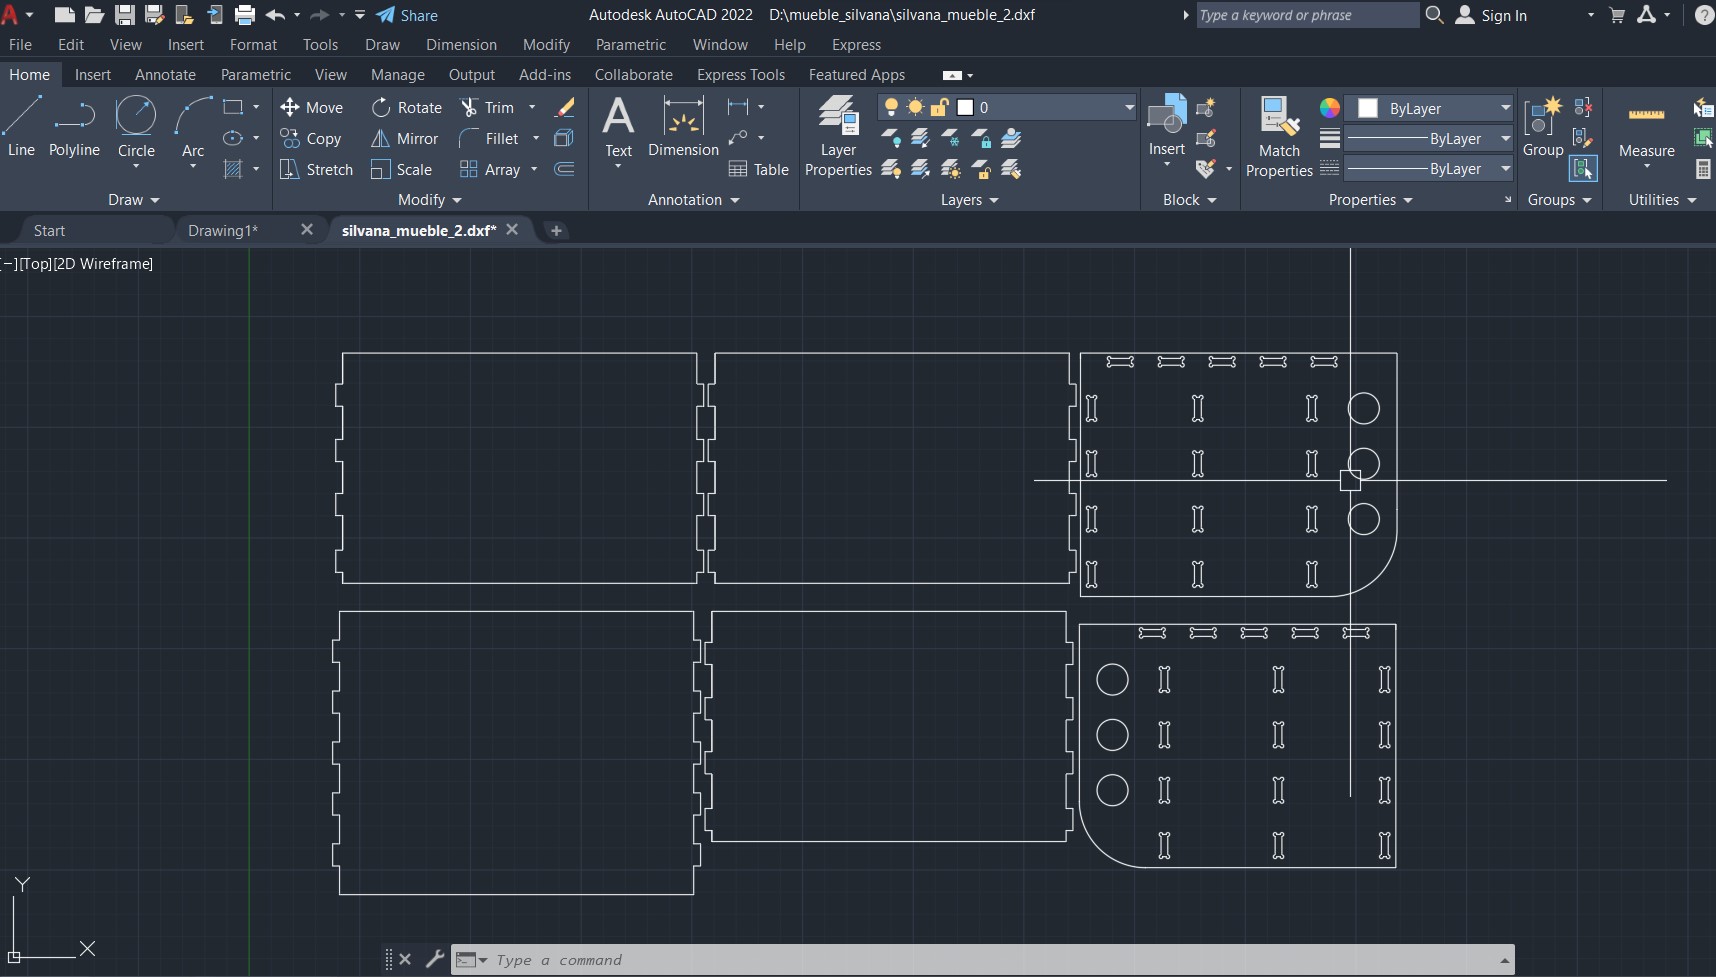
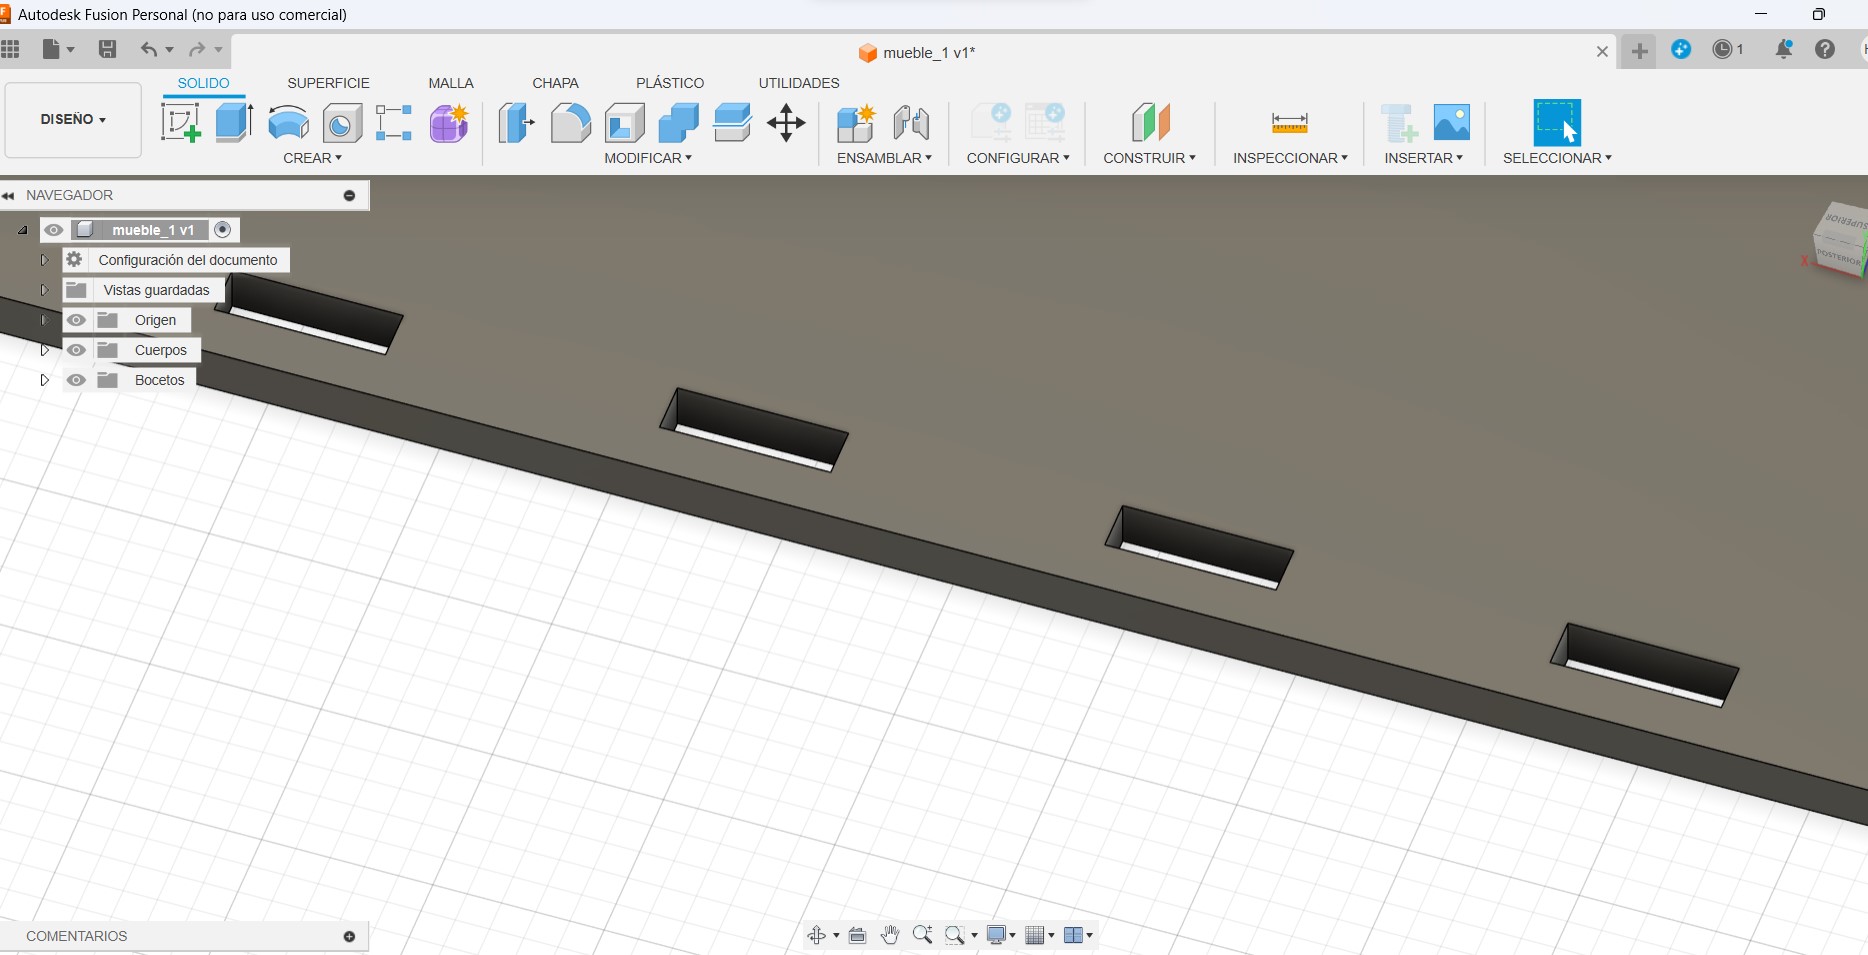
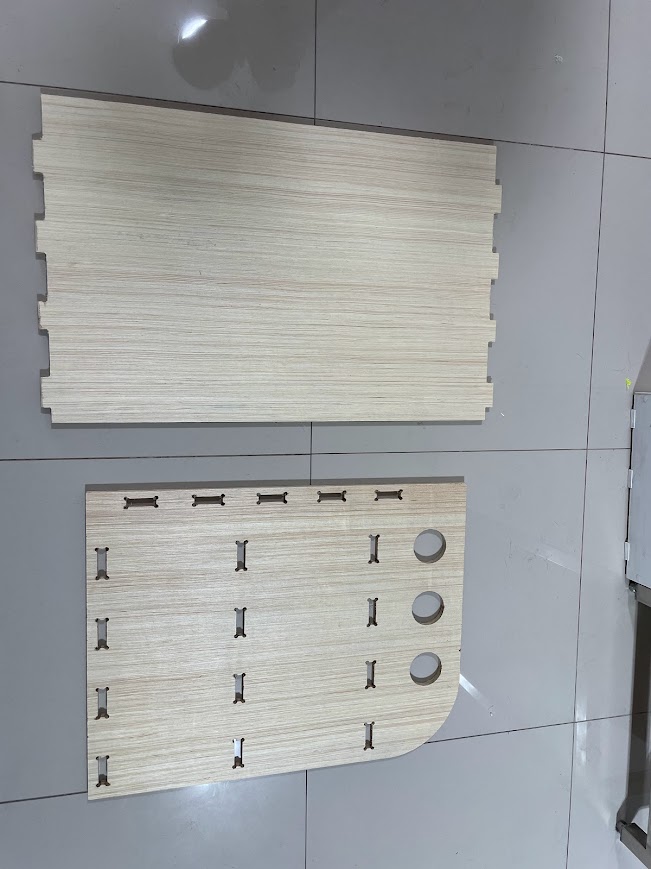
The 6 parts of my furniture ready
Taking measurements and seeing if the dogbones fit properly
I wanted the circles to be the same size

The 6 parts of my furniture ready
Taking measurements and seeing if the dogbones fit properly
I wanted the circles to be the same size
The 6 parts of my furniture ready
Milling process:
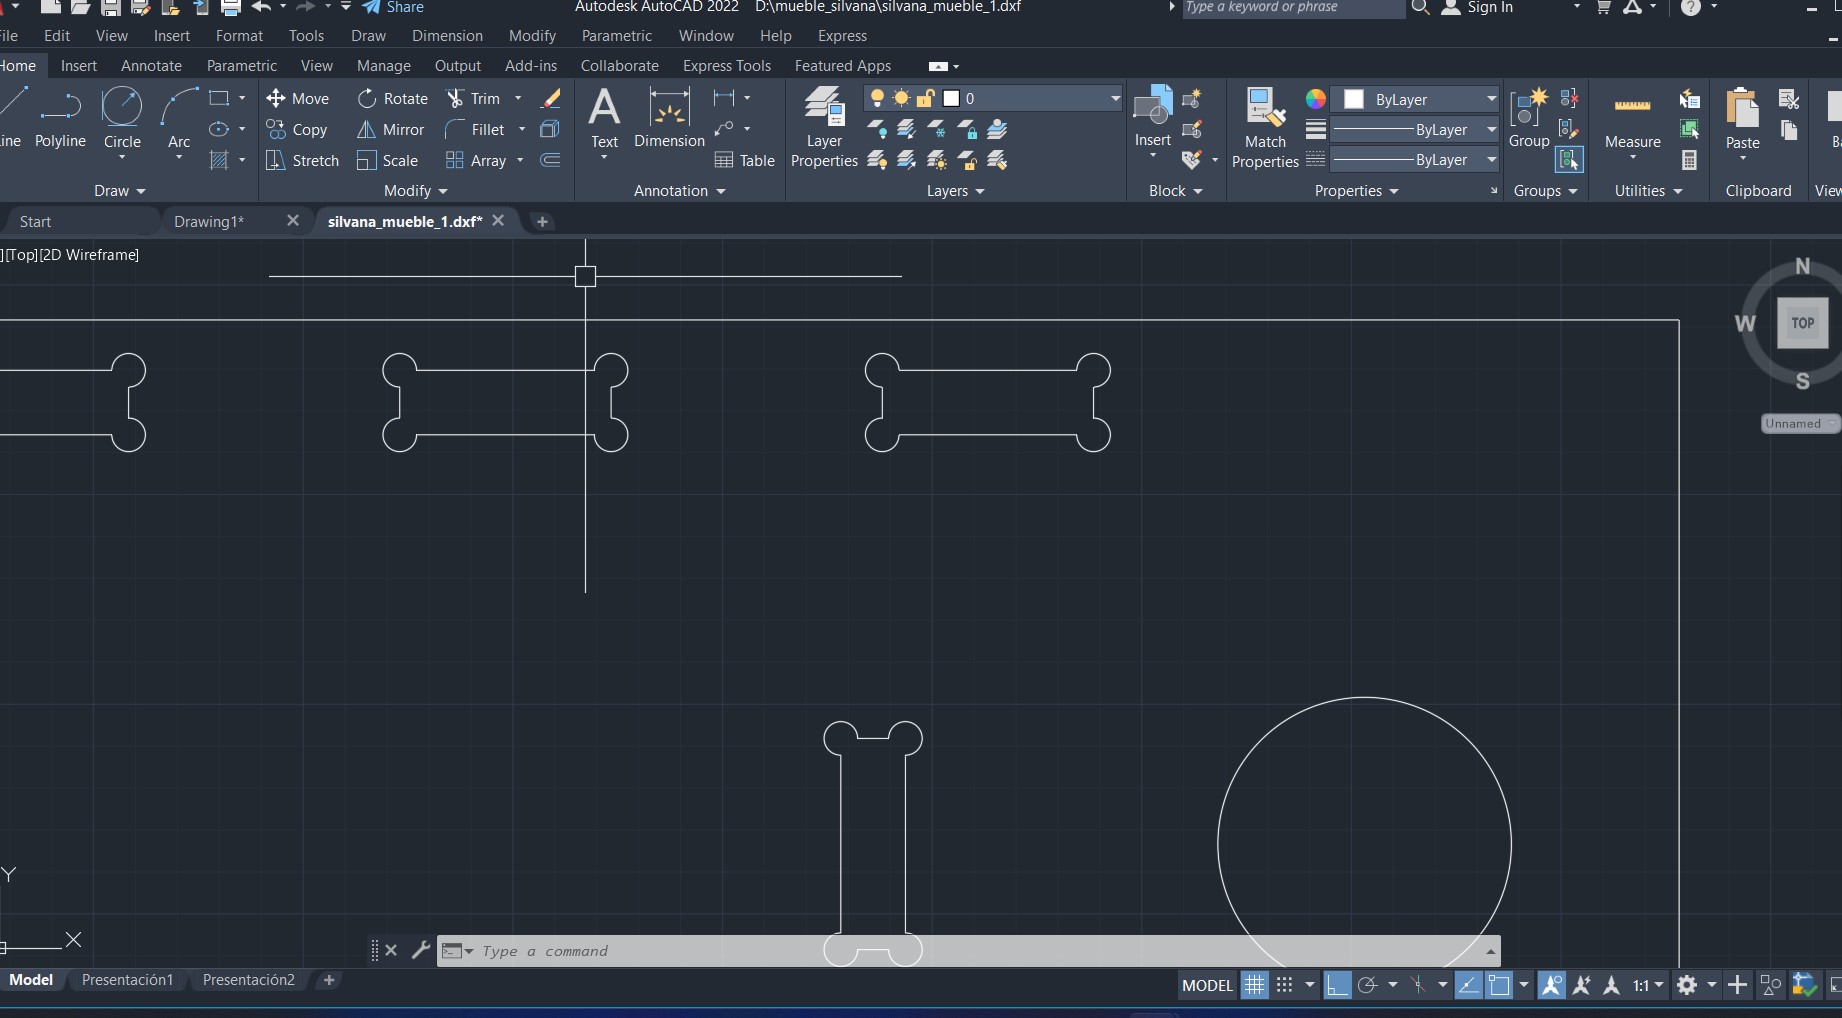
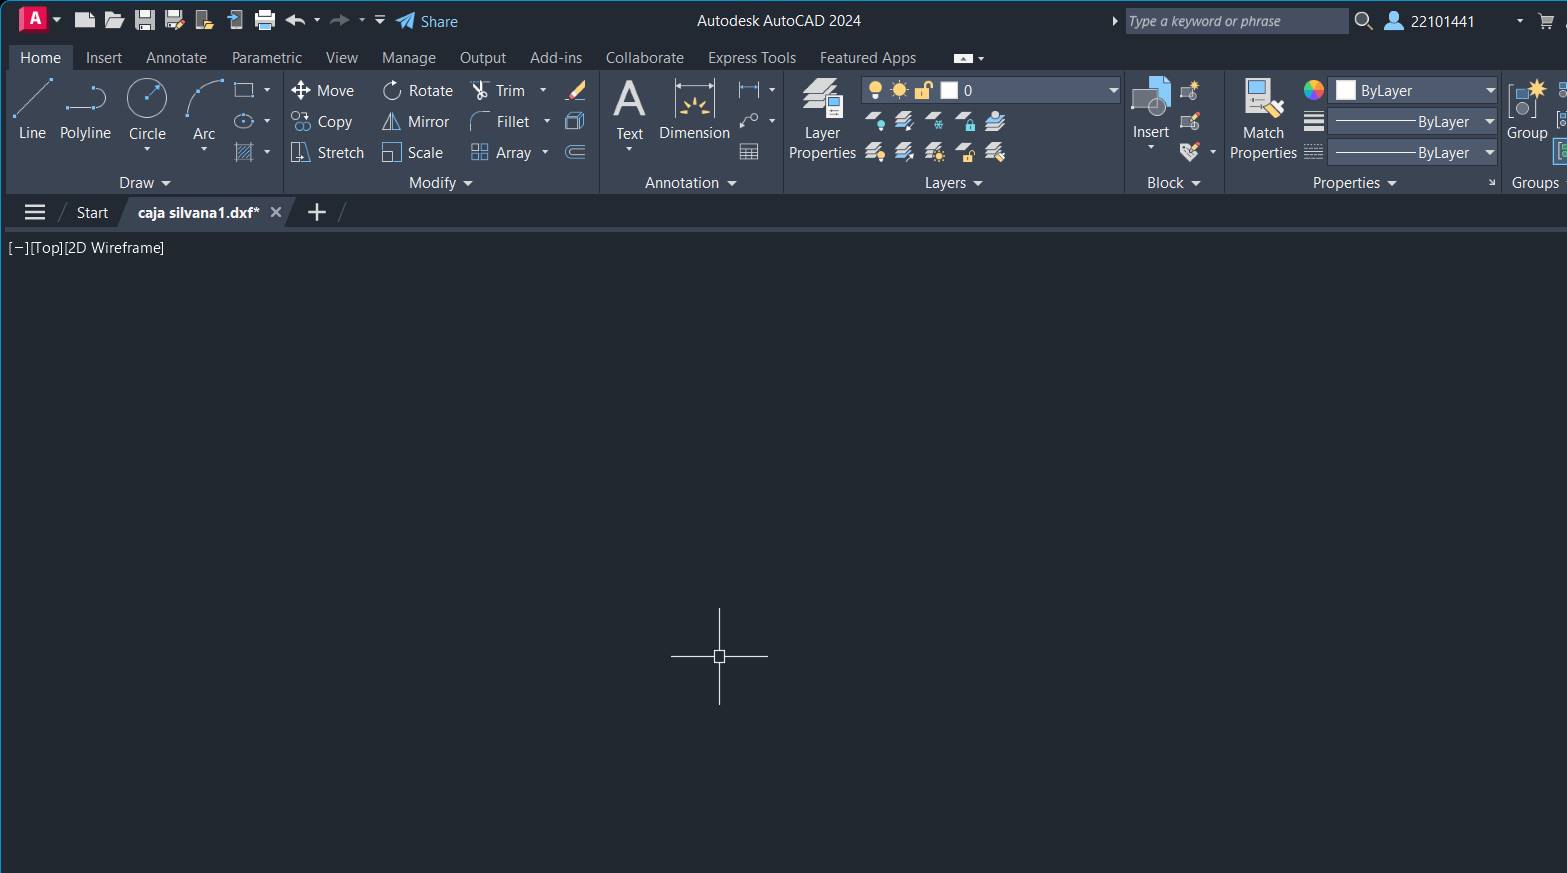
- First you can use any CAD design software, it can be Autocad as what I use, but you can use the one you master the most.
- You have to look at the size of your material, in my case it was 15mm plywood, and the dimensions are 2240x1220.
- To save your file you made in your 2D design program it must be in DWG file.
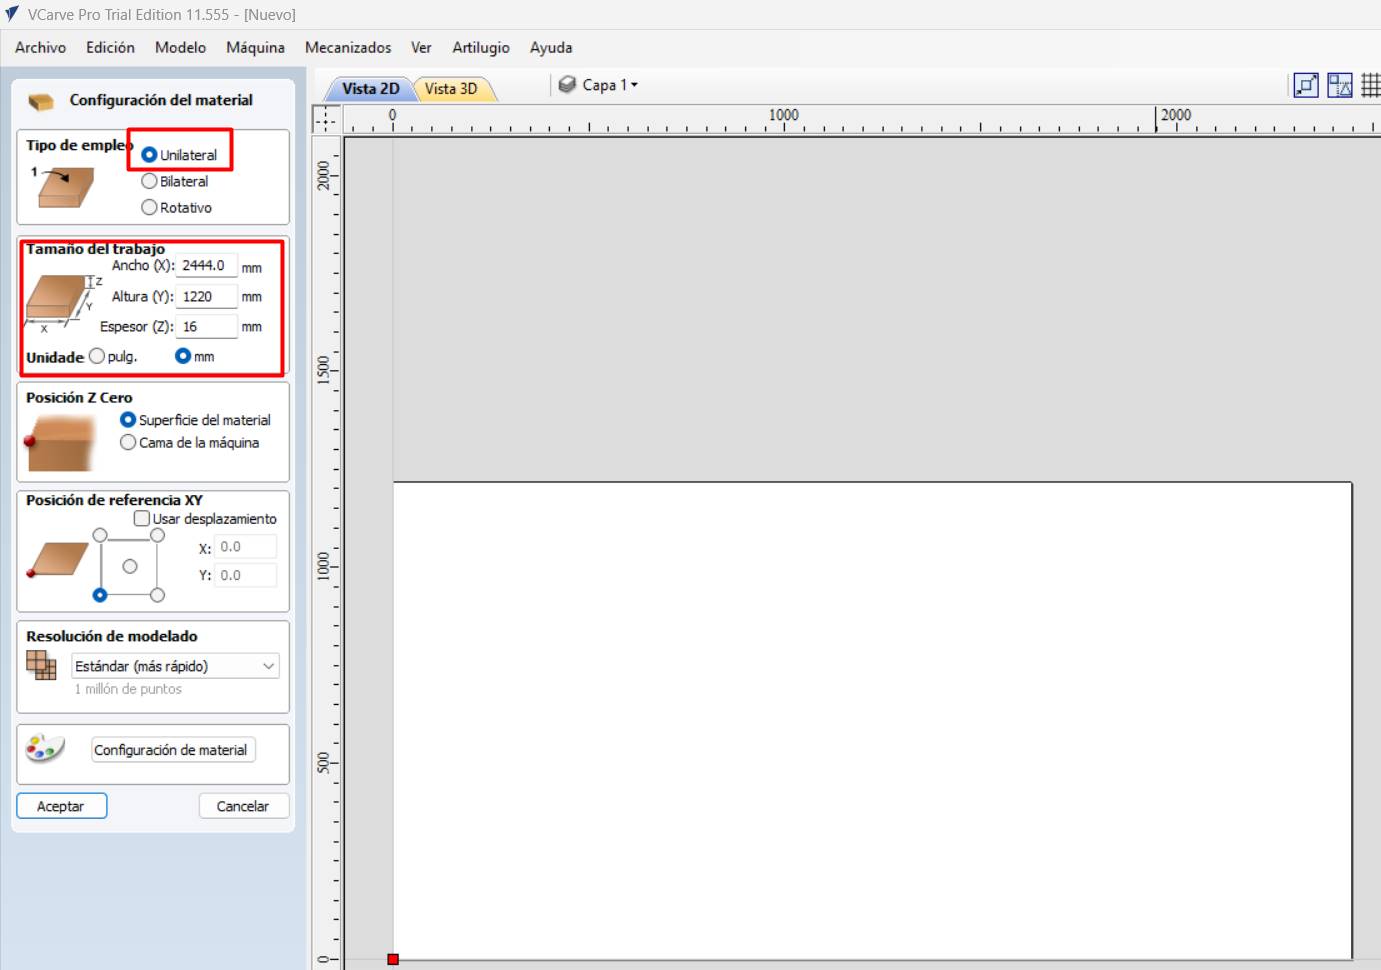
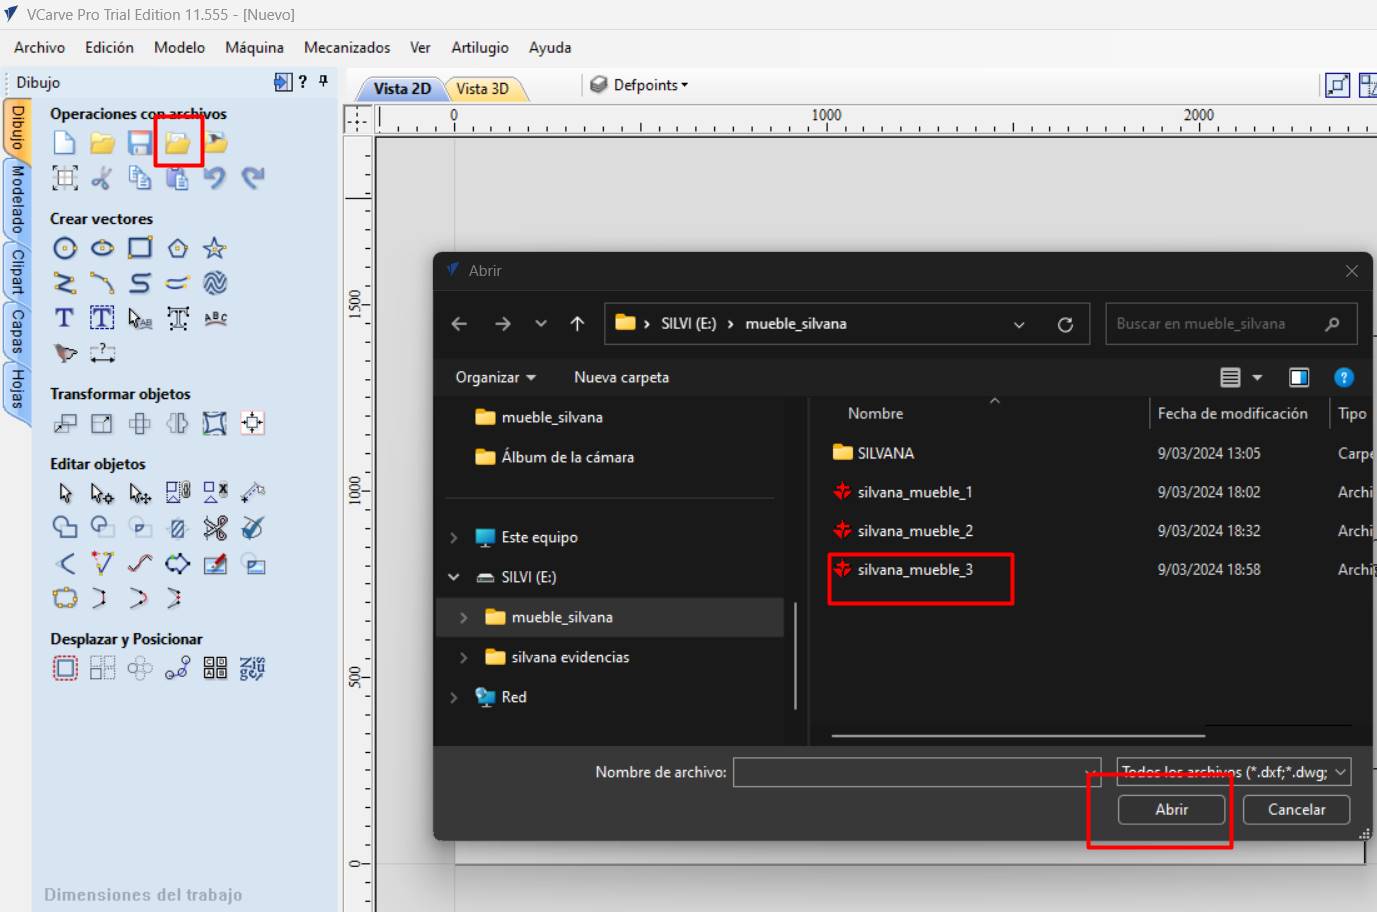
- Open VCARVE PRO , this will be the program we will use for CNC milling and set the dimensions of the material we will use.
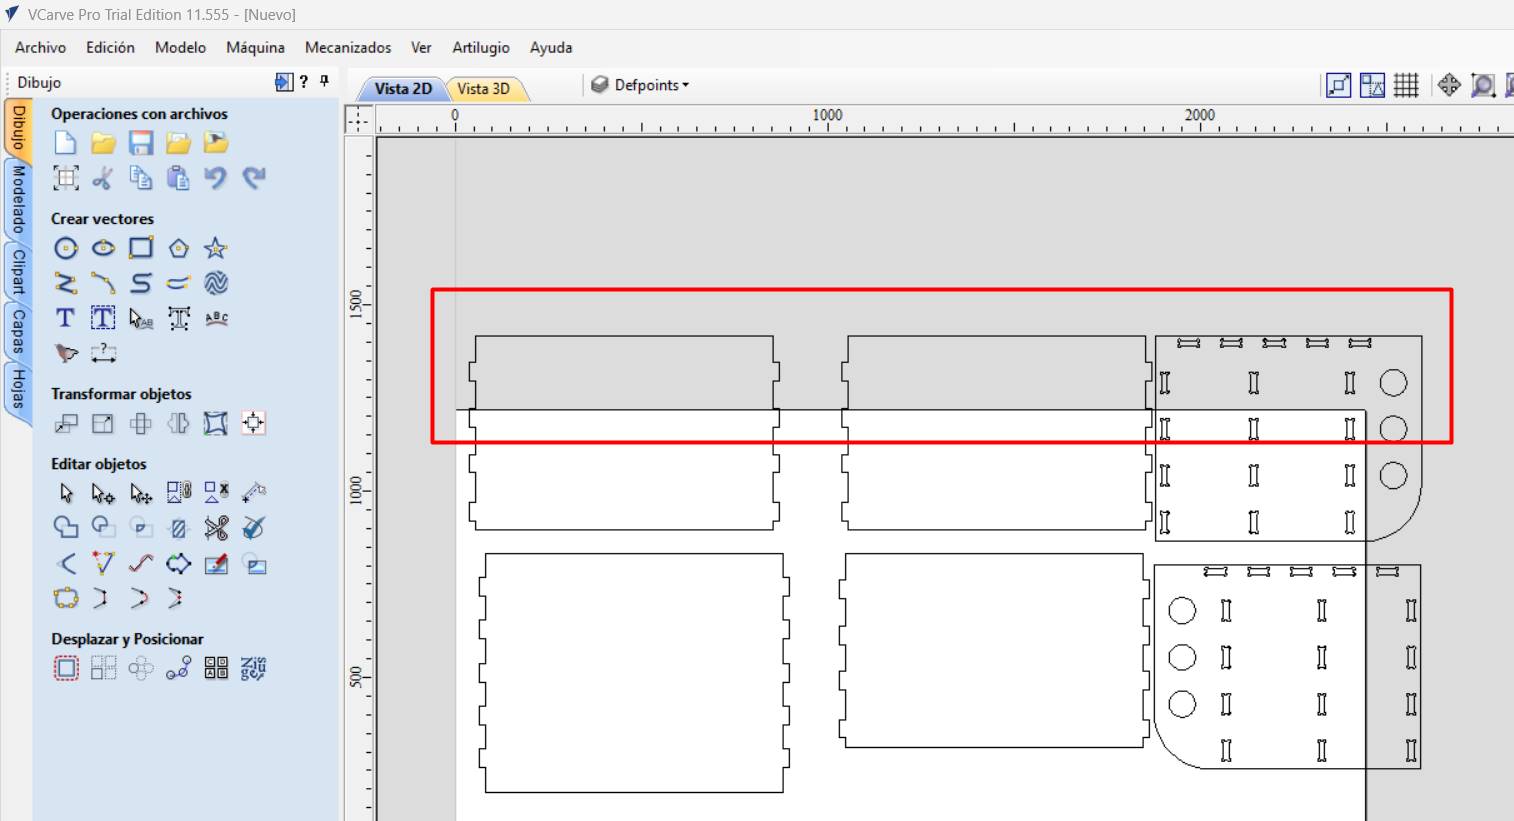
- Go to file operations and open our respective file previously saved in .DWG.
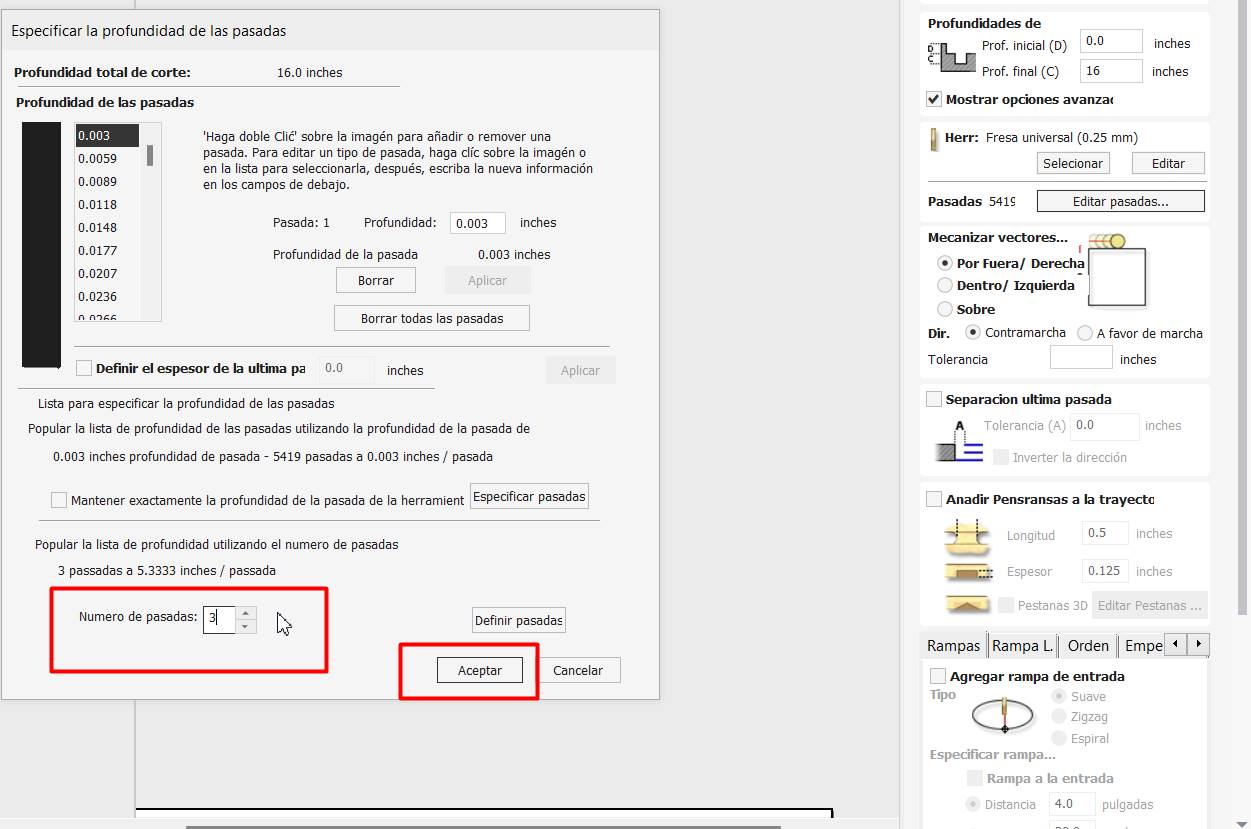
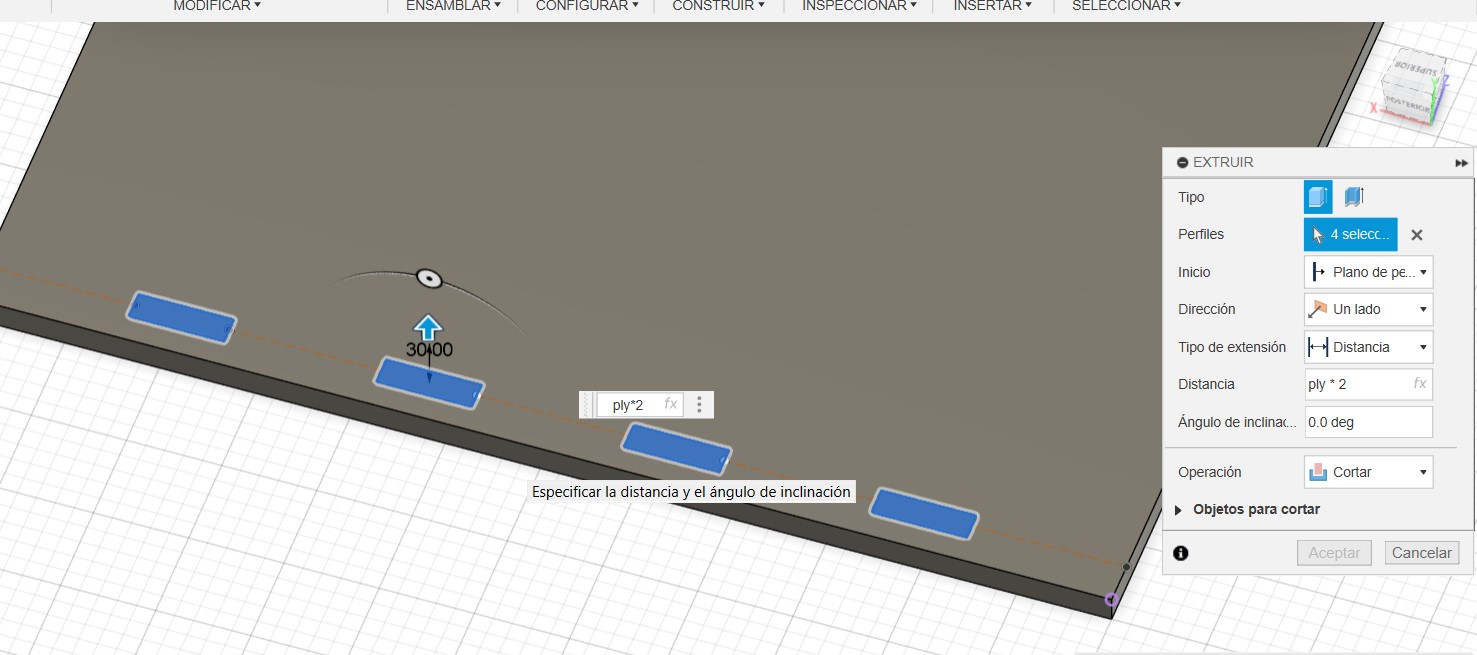
- We go to machining operations and select “Toolpath”, we see the final depth of 16mm, then we choose the number of milling cutter which is 1/4” inches, and the speed of footprint 18000rpm, rate of 4500mm/min, speed down 381mm/min. we set the number of passes, in this case it will be 3 passes.
- Something super important to know the type of cut we need, Cut “OUTSIDE” (Outside): It is used when we want to cut external parts, ie, the cut is made outside the contour line of the design. INSIDE” cut: This is used when we need to make internal cuts, such as holes or cavities inside a part. The cut is made inside the contour line, ensuring that the removed material leaves adequate space.
On Line Cutting: Used to make precise marks on the design line. This is ideal for test fitting or to create assembly guides.
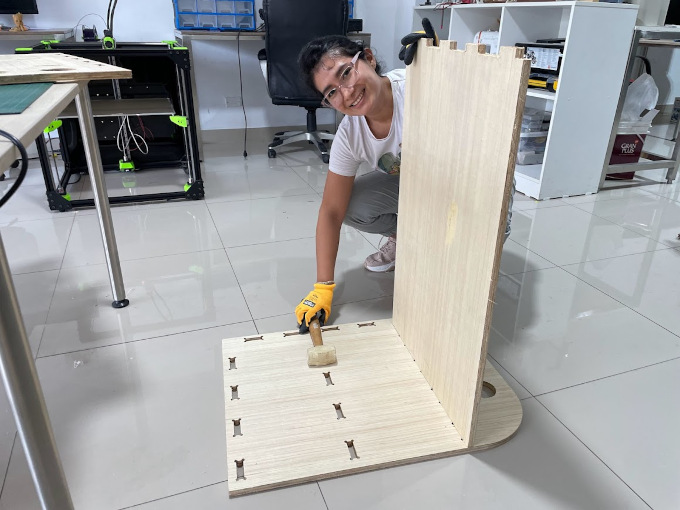
Construction of nestable furniture
CNC
When the pieces came out, I started to see if they fit.

With a little force I put the first piece in and it fit.
When the pieces came out, I started to see if they fit.
With a little force I put the first piece in and it fit.
Now it was just the last piece and it was ready.
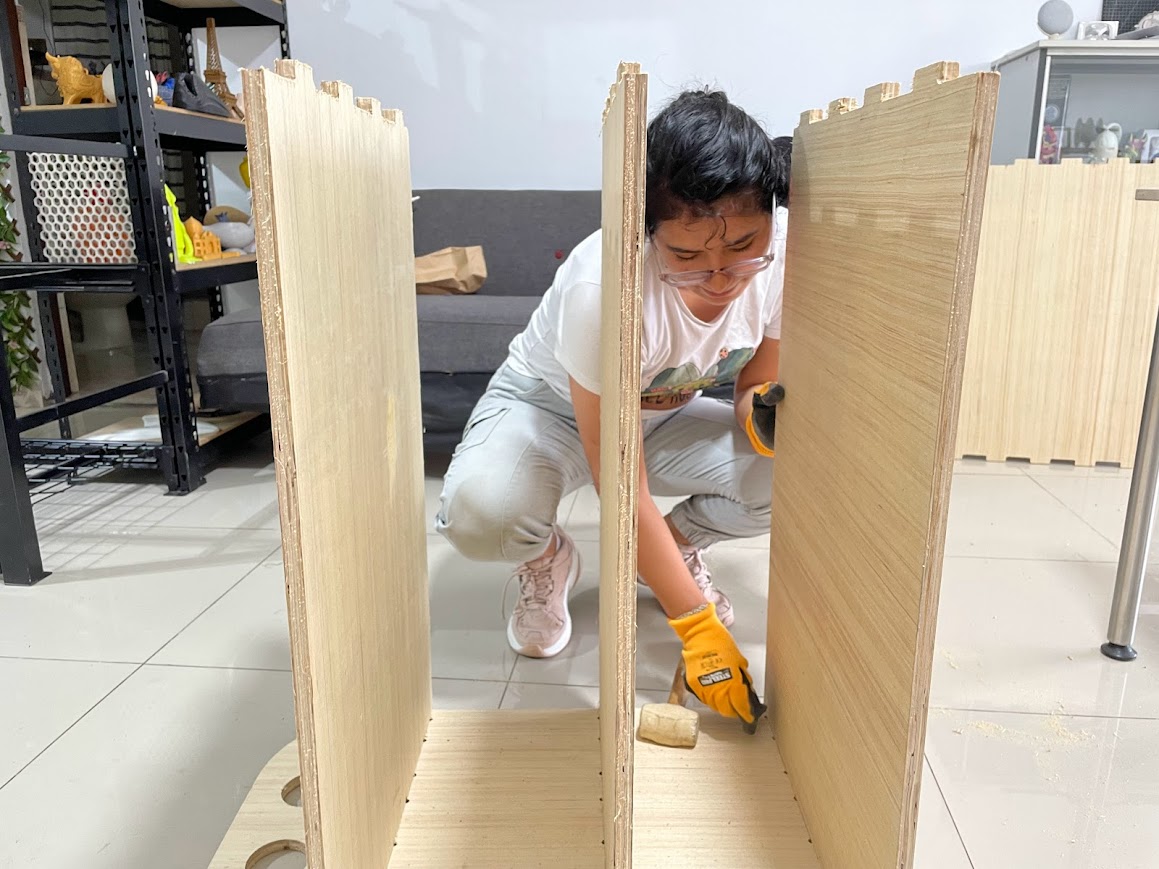
Here the ones that made me suffer when fitting because they had a lot of burrs, so I sanded them a little.
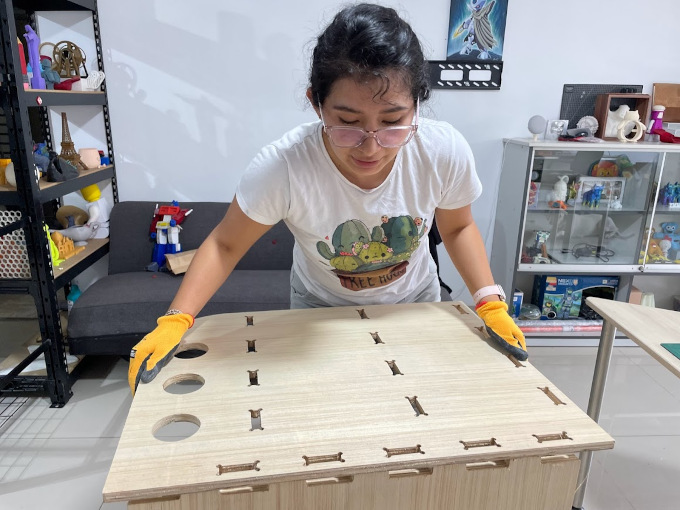
I love it because it fit, but it required a little bit of a bump.
I didn't want it to fit but I sanded it a little bit.
Here a hard blow

It was smooth and beautiful, it fit perfectly.
Left side view
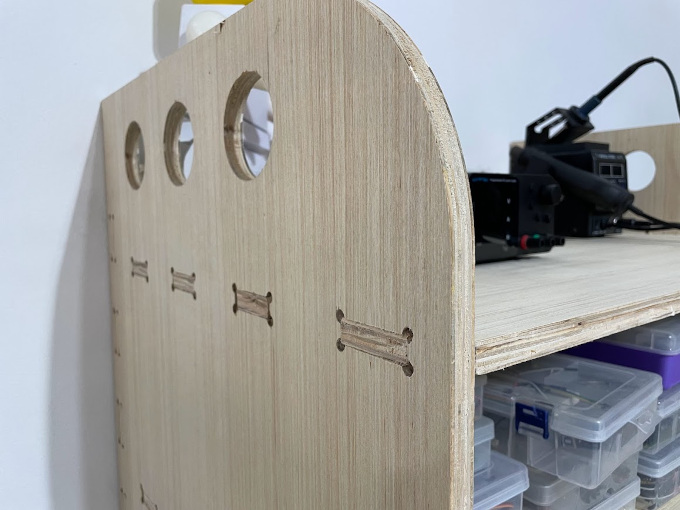
Right side view
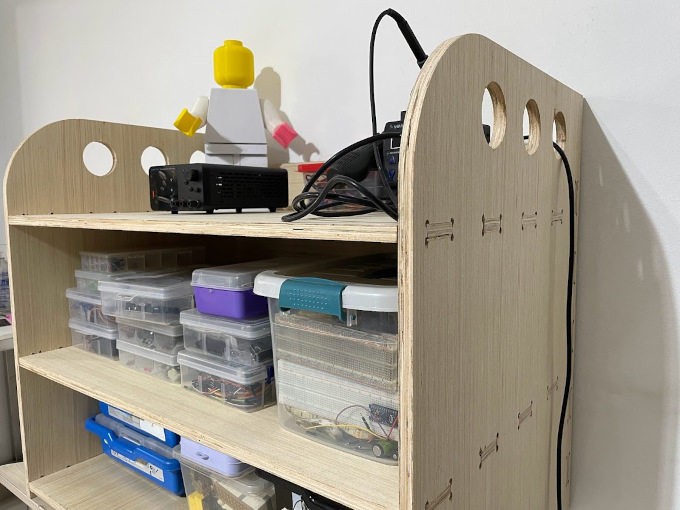
Final result
You must take into account the tolerance of the pieces, and in this case for my nestable furniture, my tripley plywood was 15mm, and in my design I took into account, placing 15.4, having to add 0.4mm for it to fit perfectly.
By using VCARVE PRO it makes cutting much easier and placing the bones from there, editing with the tools that the program offers us.
The implementation of tests like the "DOG BONE" and this helps the pieces fit together better.
Recognition of how material thickness affects the fit between parts highlights an advanced understanding of the CNC process. The ability to adjust the design based on the material used suggests continuous optimization of the process
Link