Results: Computer-Controlled Machining
As an architect, I have made several furniture designs for my clients and my home. Then, I sent these designs to the various suppliers so that they could manufacture them. Finally, the furniture arrived at the place where it would be installed and the work was finished. In this process, I didn't actually make any furniture. That dream came true this week.
First I thought of a design that would work for my office: a piece of furniture to store materials that could also be an area for various sitting activities and that would allow me to use my laptop to work standing up. Then, I studied the joints in which it would not be necessary to use any glue or screws. I drew a lot by first and then transferred my sketches to the computer. Later, I milled the pieces and finally assembled the furniture.
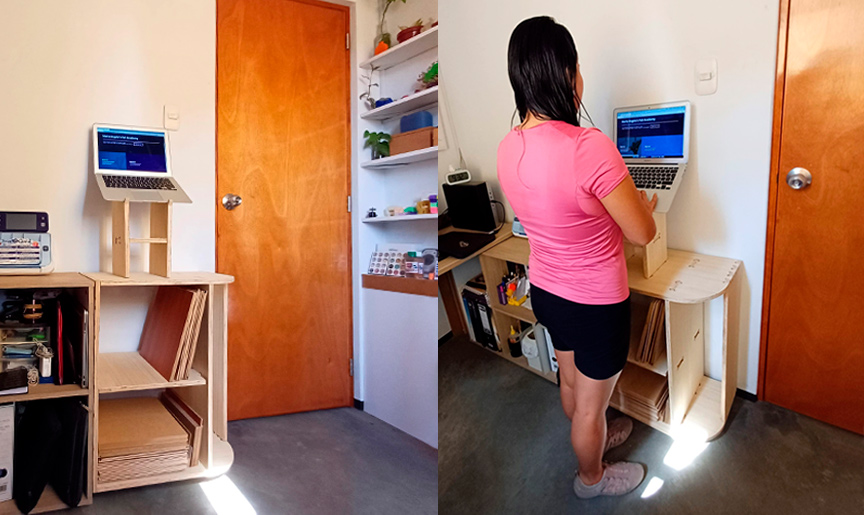
Way of use 1: working on my laptop standing up
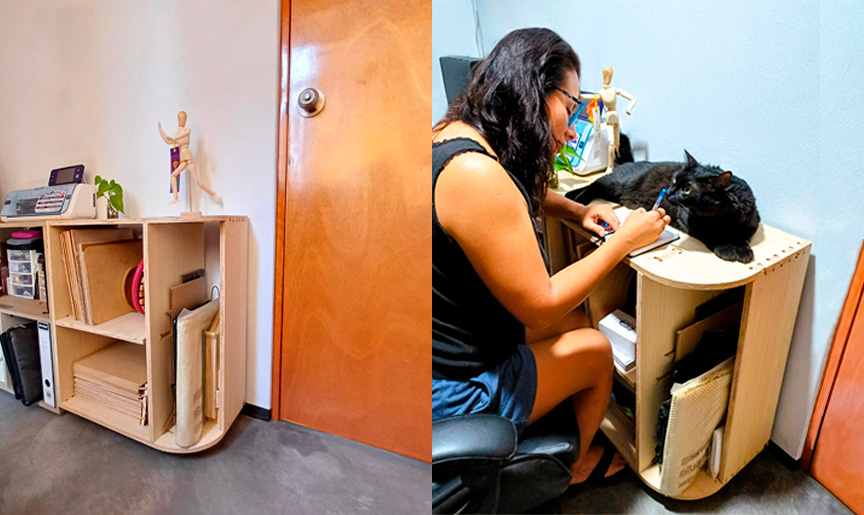
Way of use 2: working sitting down
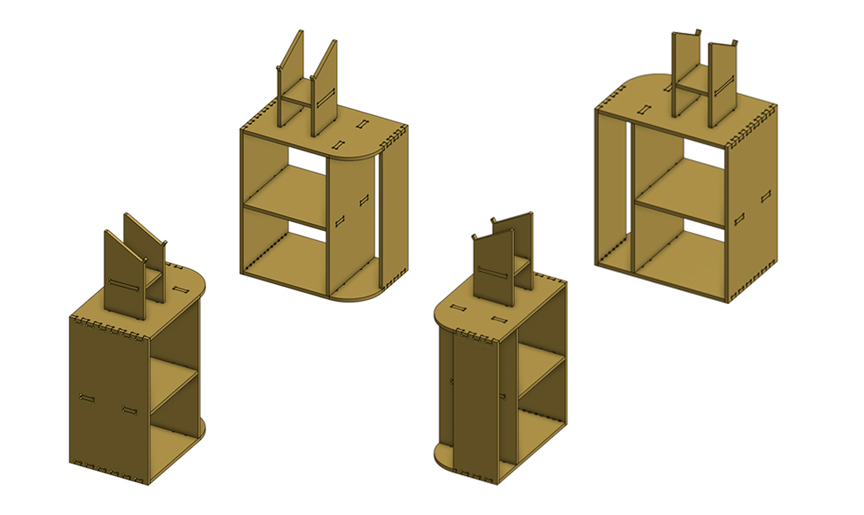
Isometric views of furniture I designed
I am very happy with the result. Since I placed the furniture in my office, I use it constantly. Even Bagheera, my cat, uses it.
Group Assignment: Safety and Tests
The group assignment page is here.
What I Learned From Team Work
For this group assignment, we had virtual safety training and then performed milling tests in the Fab Lab.
Safety Training
On Thursday, March 7 the iFurniture team gave a talk on occupational health and safety for a digital manufacturing laboratory.
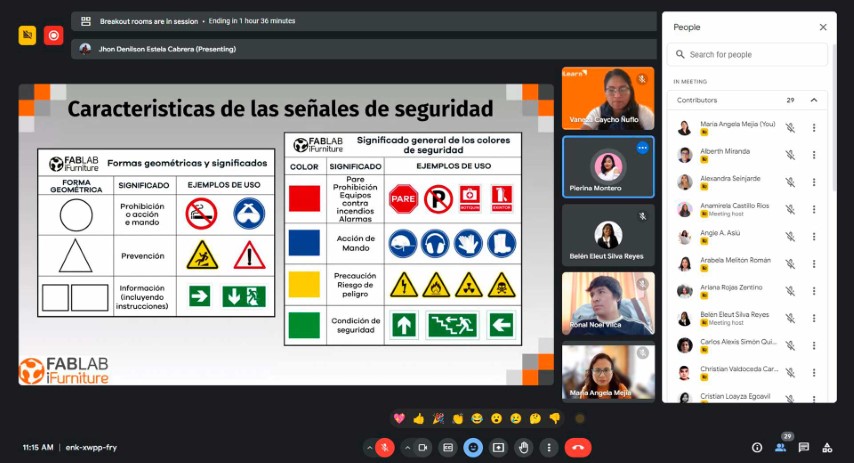
Safety talk given by iFurniture and my certificate of participation
Conclusions:
- Follow the directions and signage in the environment: there are various signs on the floor and walls that you must pay attention to and obey
- Use appropriate safety equipment: wear glasses, gloves, hearing protection and clothing that covers the entire body when using the machines in the Fab Lab
- Effective communication: Inform what work you will do in the Fab Lab, coordinate these activities and follow the instructions of the team in charge
Working in a Fab Lab is fun for me. Which does not mean that I neglect my safety and that of others.
Router Machine
To test the parameters to use to cut my furniture pieces, I went to Universidad Cientifica del Sur (UCSUR) Fab Lab which is located in the architecture faculty of the university, in Chorrillos district, in Lima, Peru.
The machine used was the ShopBot PRSalpha. Using advanced technology for CNC cutting, drilling, carving and machining, the ShopBot PRSalpha deliver rapid transit speeds of 1800 inches per minute and cutting speeds of up to 720 inches per minute. The cut/movement area is 105” x 61” x 8” (2.67m x 1.55m x 0.2m).
At the UCSUR Fab Lab, the protocol for using the ShopBot PRSalpha is to wear glasses, gloves, hearing protection and clothing that covers the entire body.
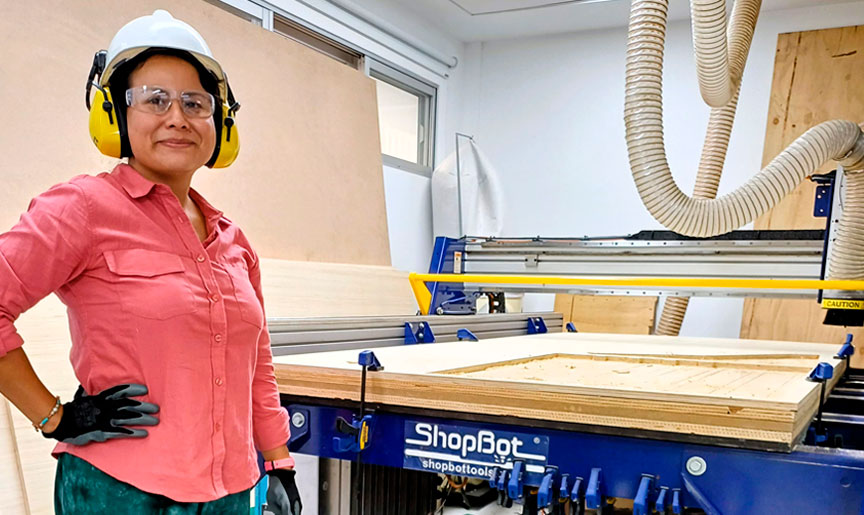

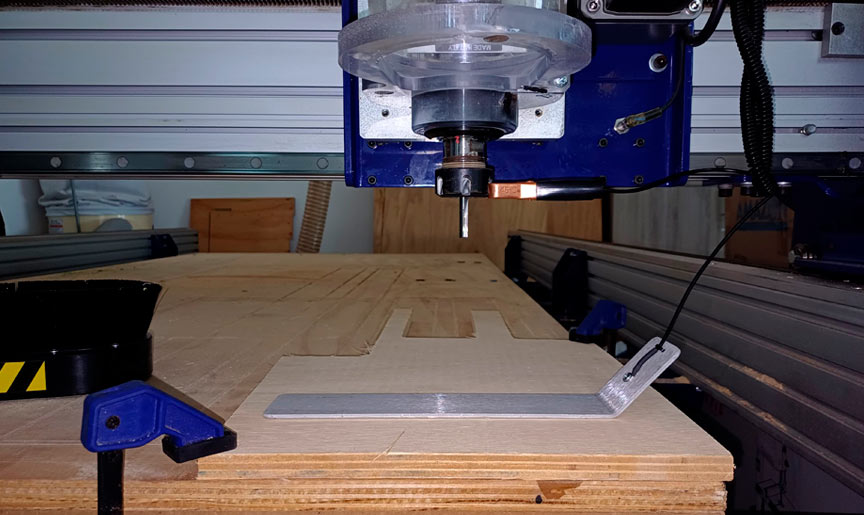
ShopBot PRSalpha CNC Router, mill used (1/4"), other mills and the emergency button
The 46102-K 1/4" diameter, 3/4" cut length, up-cut spiral mill is a versatile and efficient tool for the ShopBot PRSalpha CNC router. Its spiral design ensures cleaner cuts and smoother surface finishes by evacuating chips effectively, while also extending tool life due to reduced wear. This tool is suitable for a wide range of materials and applications, offering increased cutting speeds and minimized heat buildup for enhanced performance and precision in CNC machining operations.
ShopBot PRSalpha Router
Before starting any work on the CNC router, it must be calibrated following this steps:
- Preparation: Ensure safety measures are in place and power on the CNC router
- Zero Reference Point: Set the home position for the router
- Tool Calibration: Install and securely tighten the cutting tool
- Workpiece Setup: Securely fasten the workpiece to the router bed
- Axis Calibration: Calibrate X, Y, and Z axes for accuracy
- Tool Height Calibration: Set the tool height above the workpiece surface
- Speed and Feed Settings: Configure settings based on material and tool type
- Test Run: Run a test program to verify calibration accuracy
- Fine-Tuning: Make adjustments based on test results
- Documentation: Document settings for future reference
- Final Checks: Double-check all settings before production runs
Tests
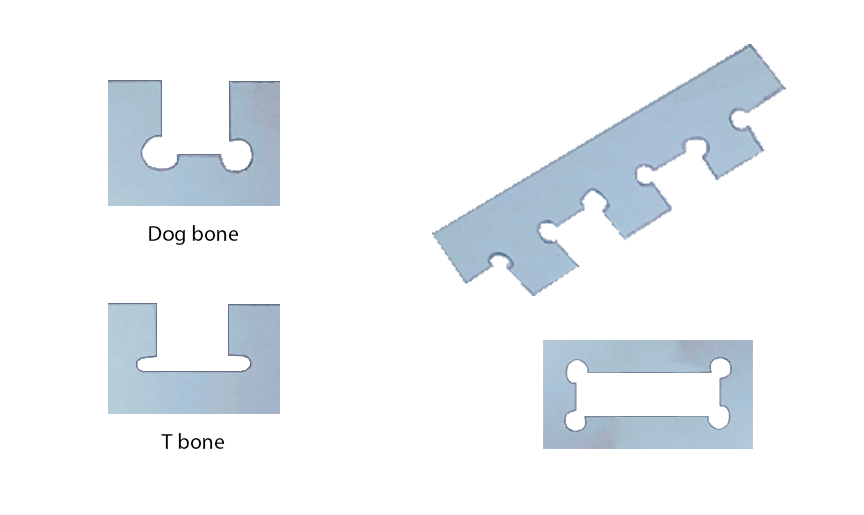
To study the joints in 15mm plywood, we perform the comb test, dog bone test and the finger joint test. For the 15mm plywood in the comb test, the parameter I chose was 15.50mm. In the dog bone test I chose 15.35mm. Finally, in the finger joint test, I chose a width of 15.35mm and a height of 15.175mm. To study the flexibility Maryori Vasquez designed some test.
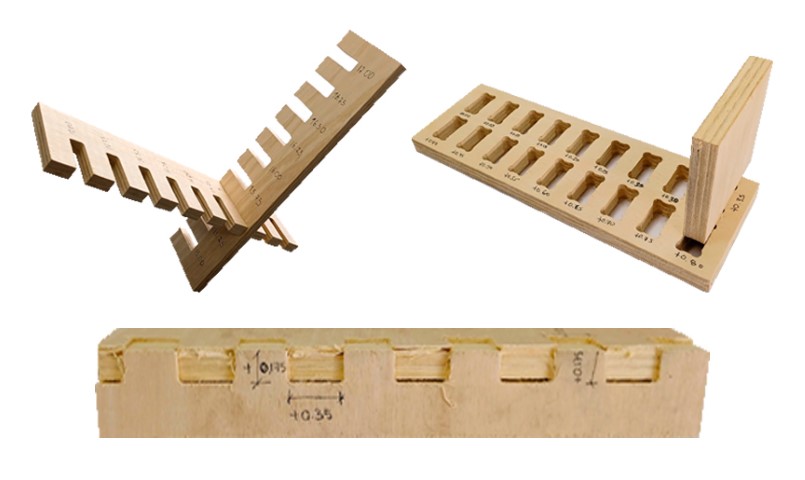
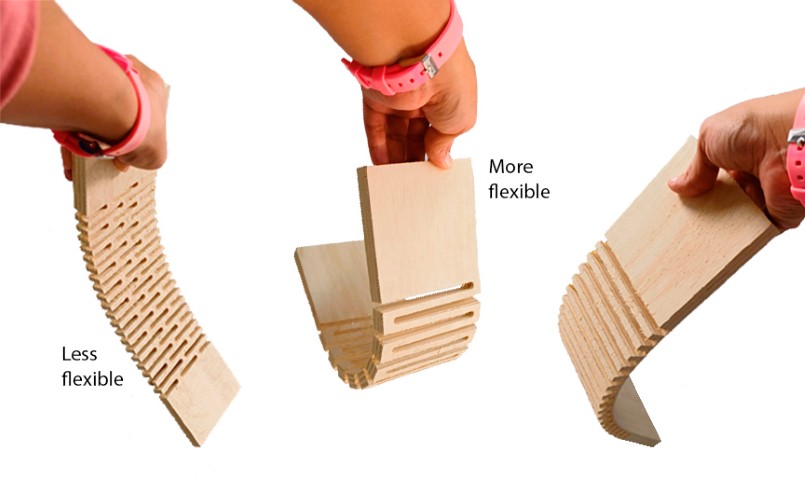
Comb, dog bone and finger joint and flexible tests
For my personal assignment, I did not use any of flexible pieces but it was interesting to study the possibility of flexibility with a rigid material.
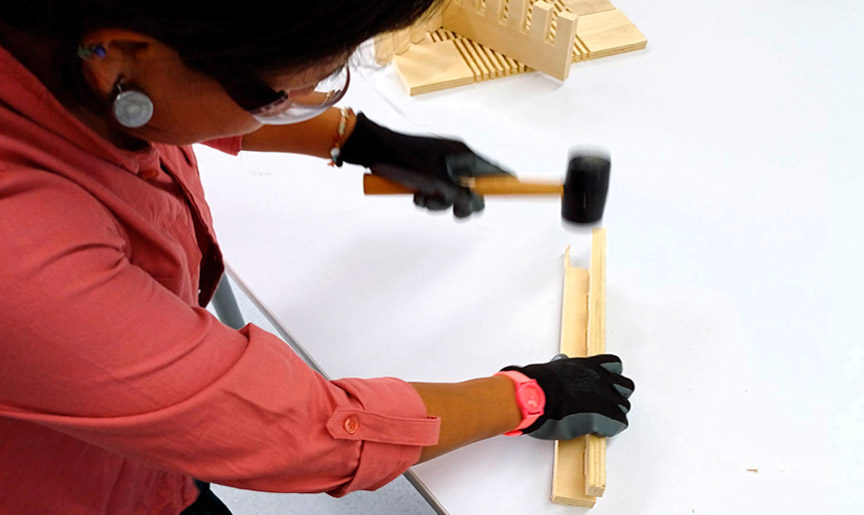
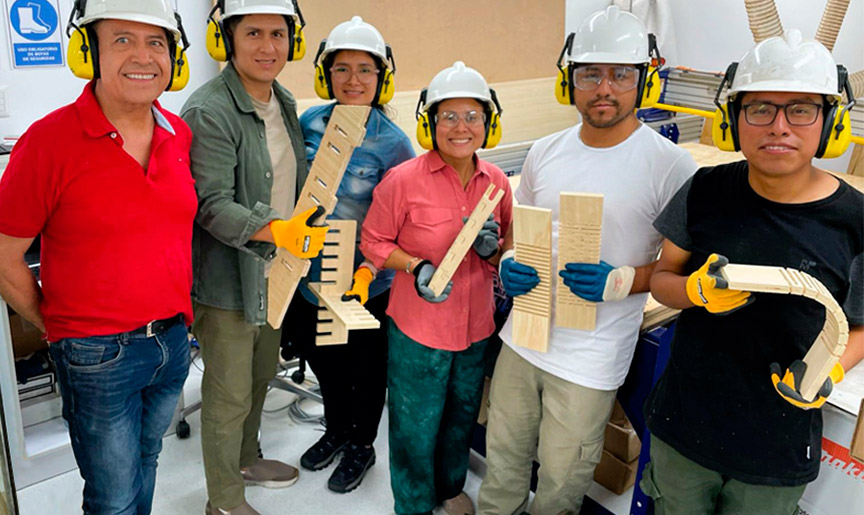
Team work at the UCSUR Fab Lab
Individual Assignment: Something Big
Initially, I conceptualized a furniture design suitable for my office space: a multifunctional piece to store materials, provide sitting work options, and accommodate standing work with a laptop. Subsequently, I examined joint configurations I made in the group assignment that would obviate the need for adhesives or screws. I extensively sketched out ideas before digitizing them on the computer. Following this, I fabricated the components using milling techniques and ultimately assembled the furniture.
Designing my Furniture
First I took measurements of the available space in my office so that the furniture I designed fits the environment. I then drew the general shape of the piece of furniture I wanted, as well as any joints I could use.

Sketches of the furniture design and joints
Later, I digitized my drawings on AutoCAD. So I got a 9-piece furniture that I could make on the CNC router. To better understand the joints of each piece of the largest part of the furniture, I made a small model on the laser cutter with 3mm MDF.
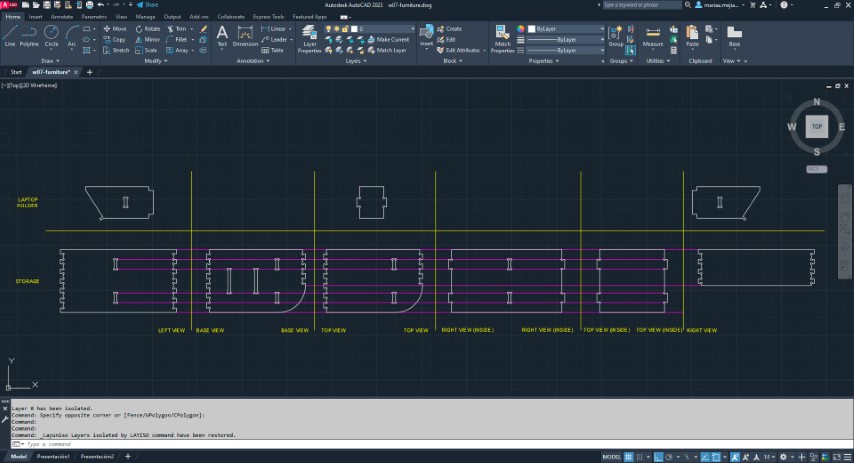

AutoCAD design of the furniture and 3mm MDF model
Finally, I made a model in Onshape to better understand how the pieces would go together, as well as make sure everything fits together.
Digital model of the furniture
With the design ready, I went to the Fab Lab to start milling.
Milling my Furniture
Before starting the milling process, I purchased the material at Martin store, located in the Villa El Salvador district in Lima, Peru.

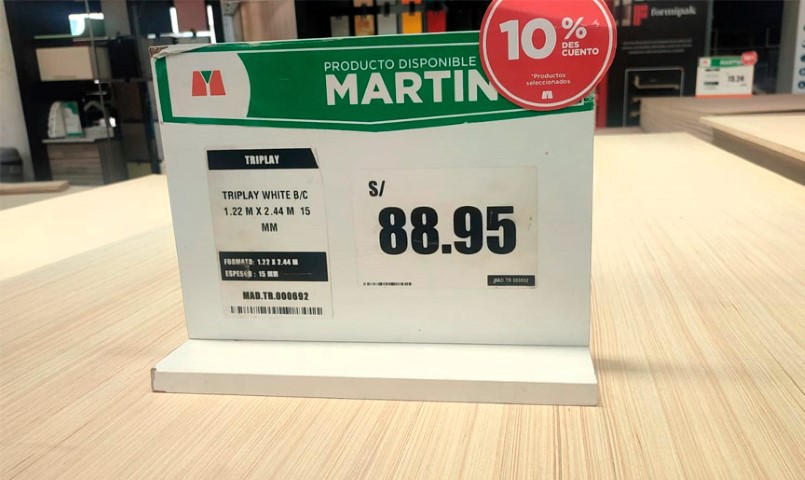
Martin store and 15mm plywood purchased
To mill on the CNC router, I saved my file in .DXF format. To configure the milling options, I used the VCarve Pro program.
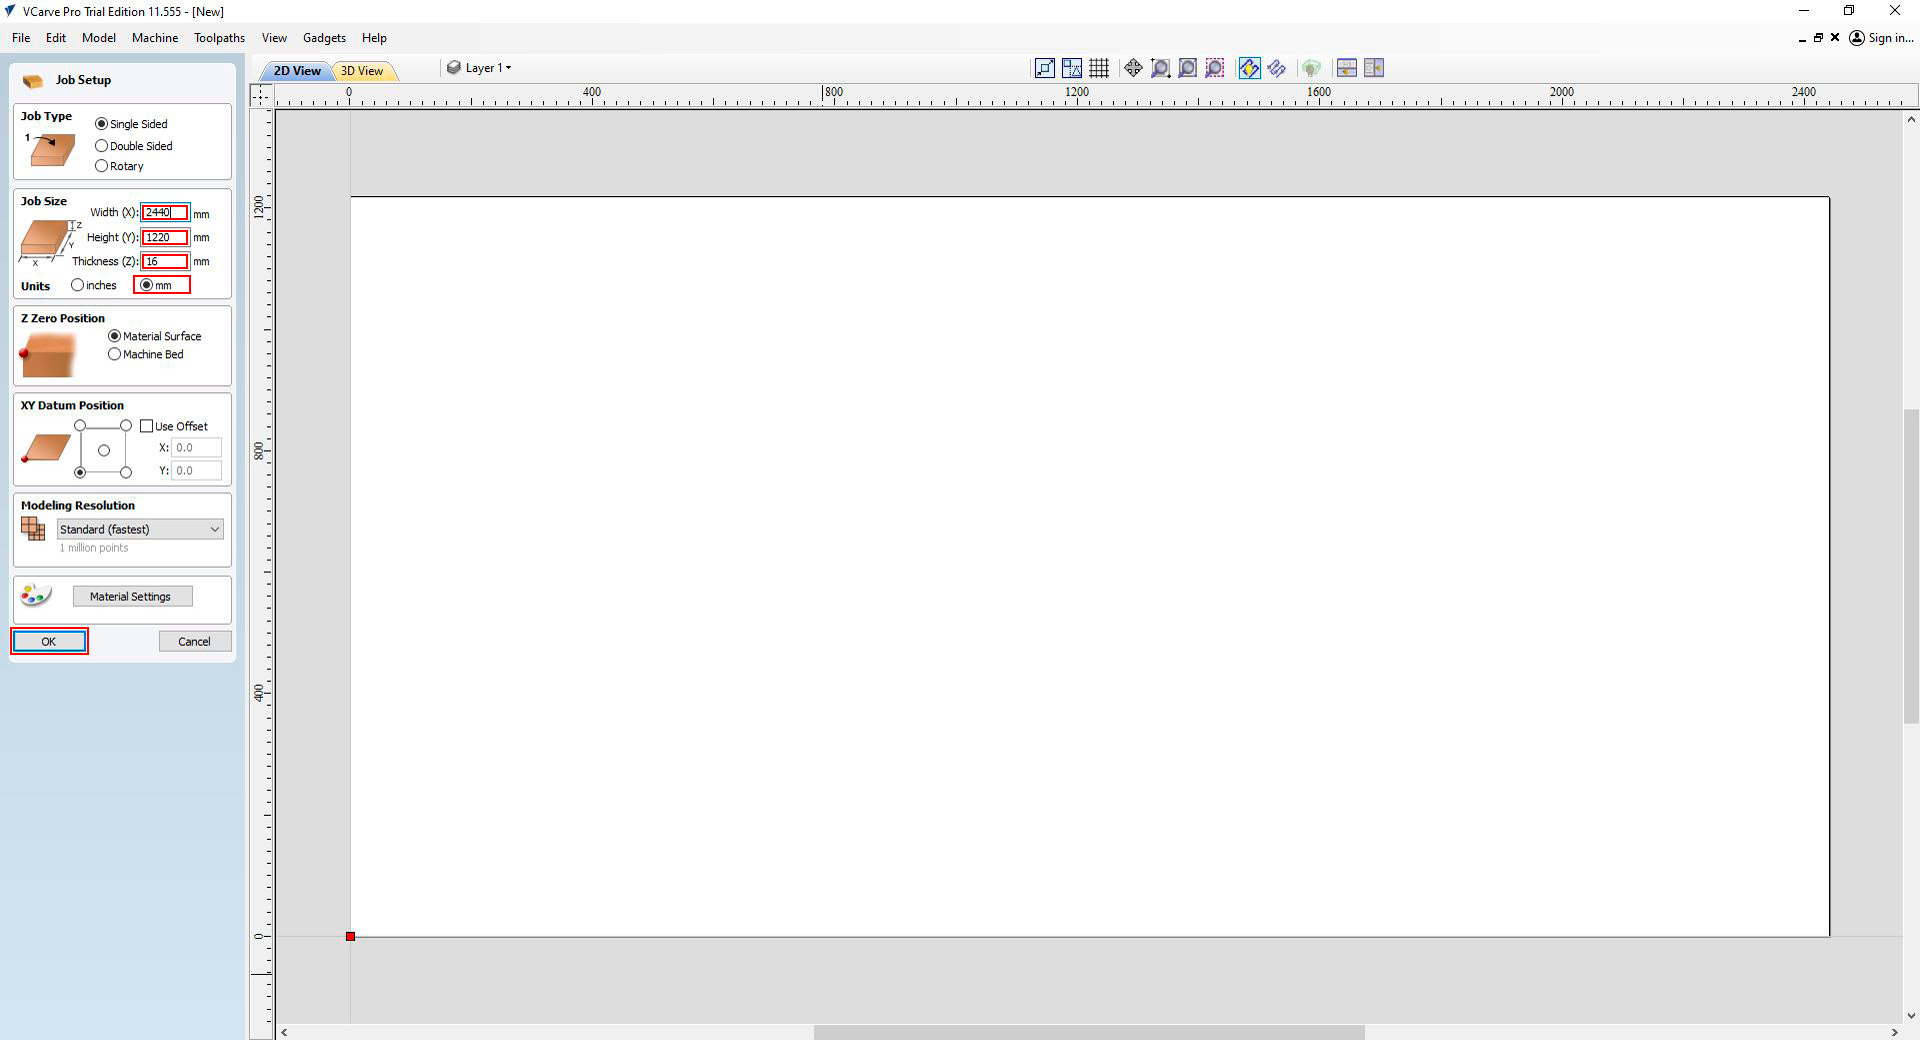

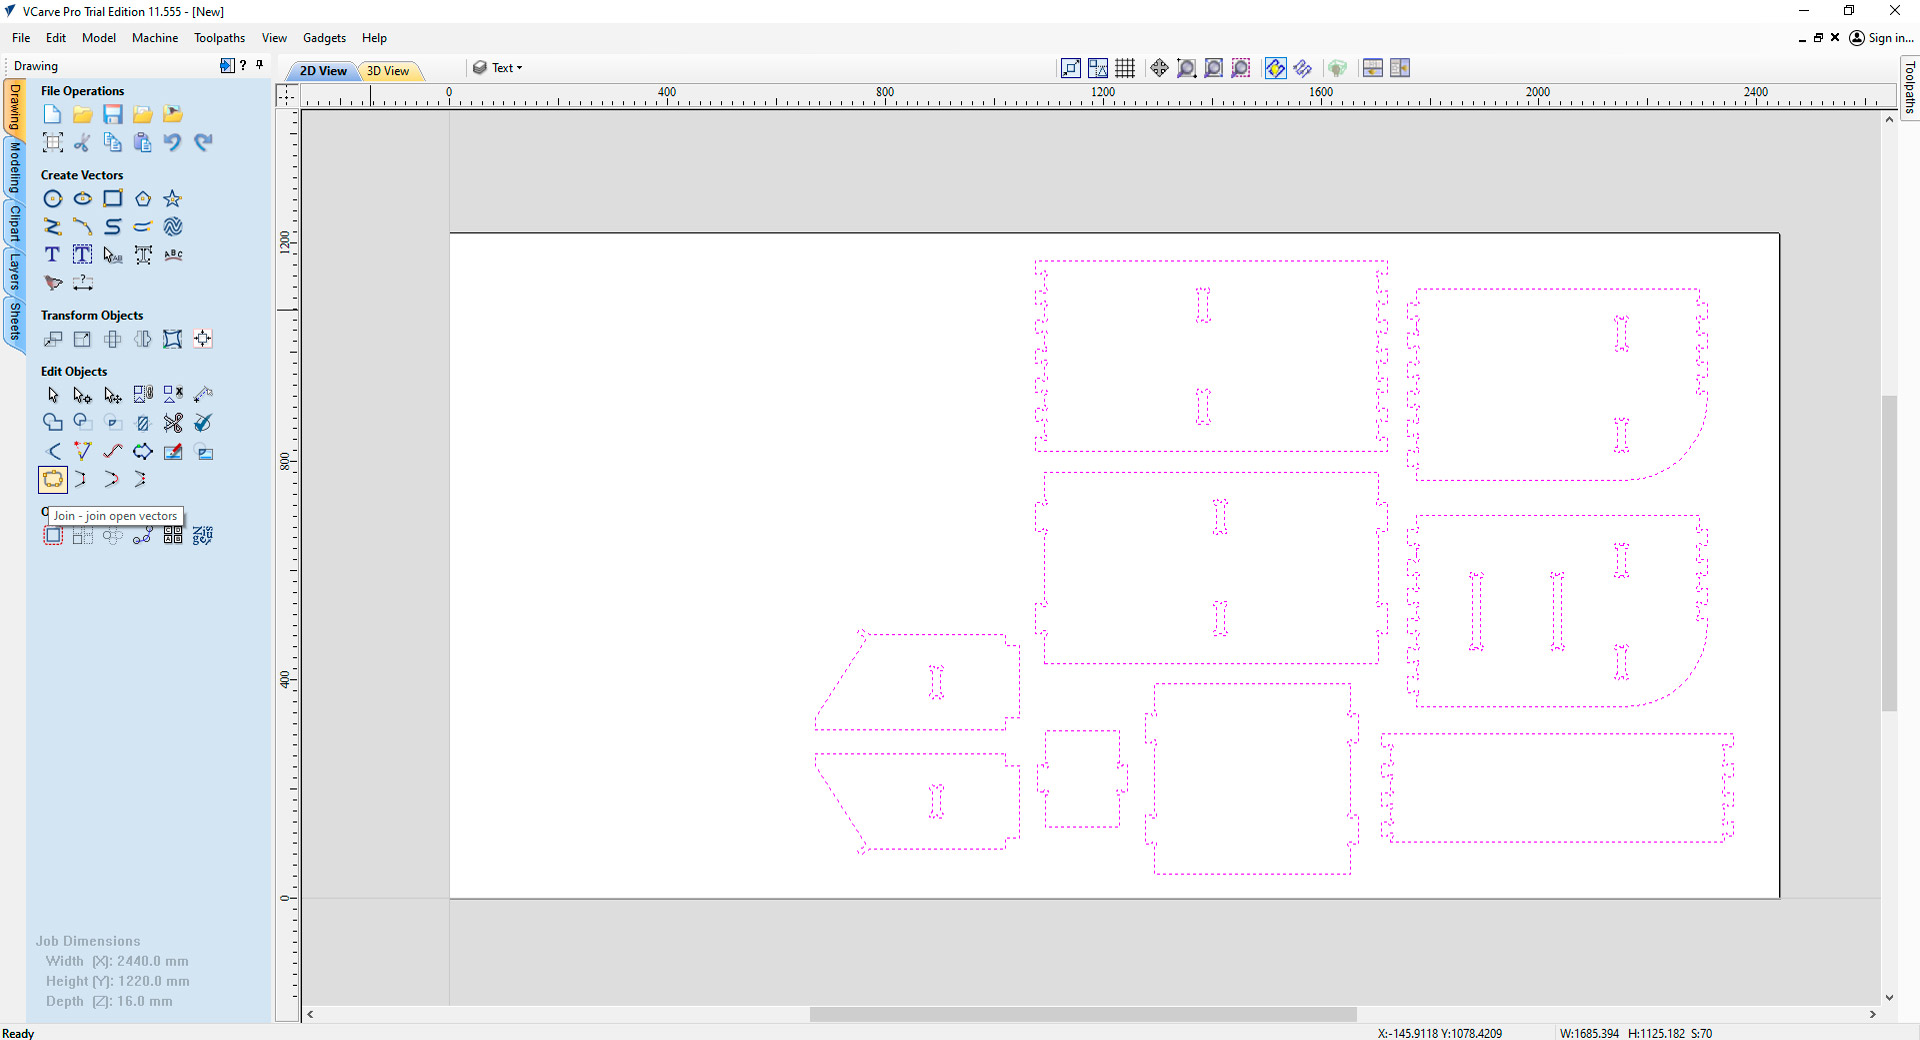
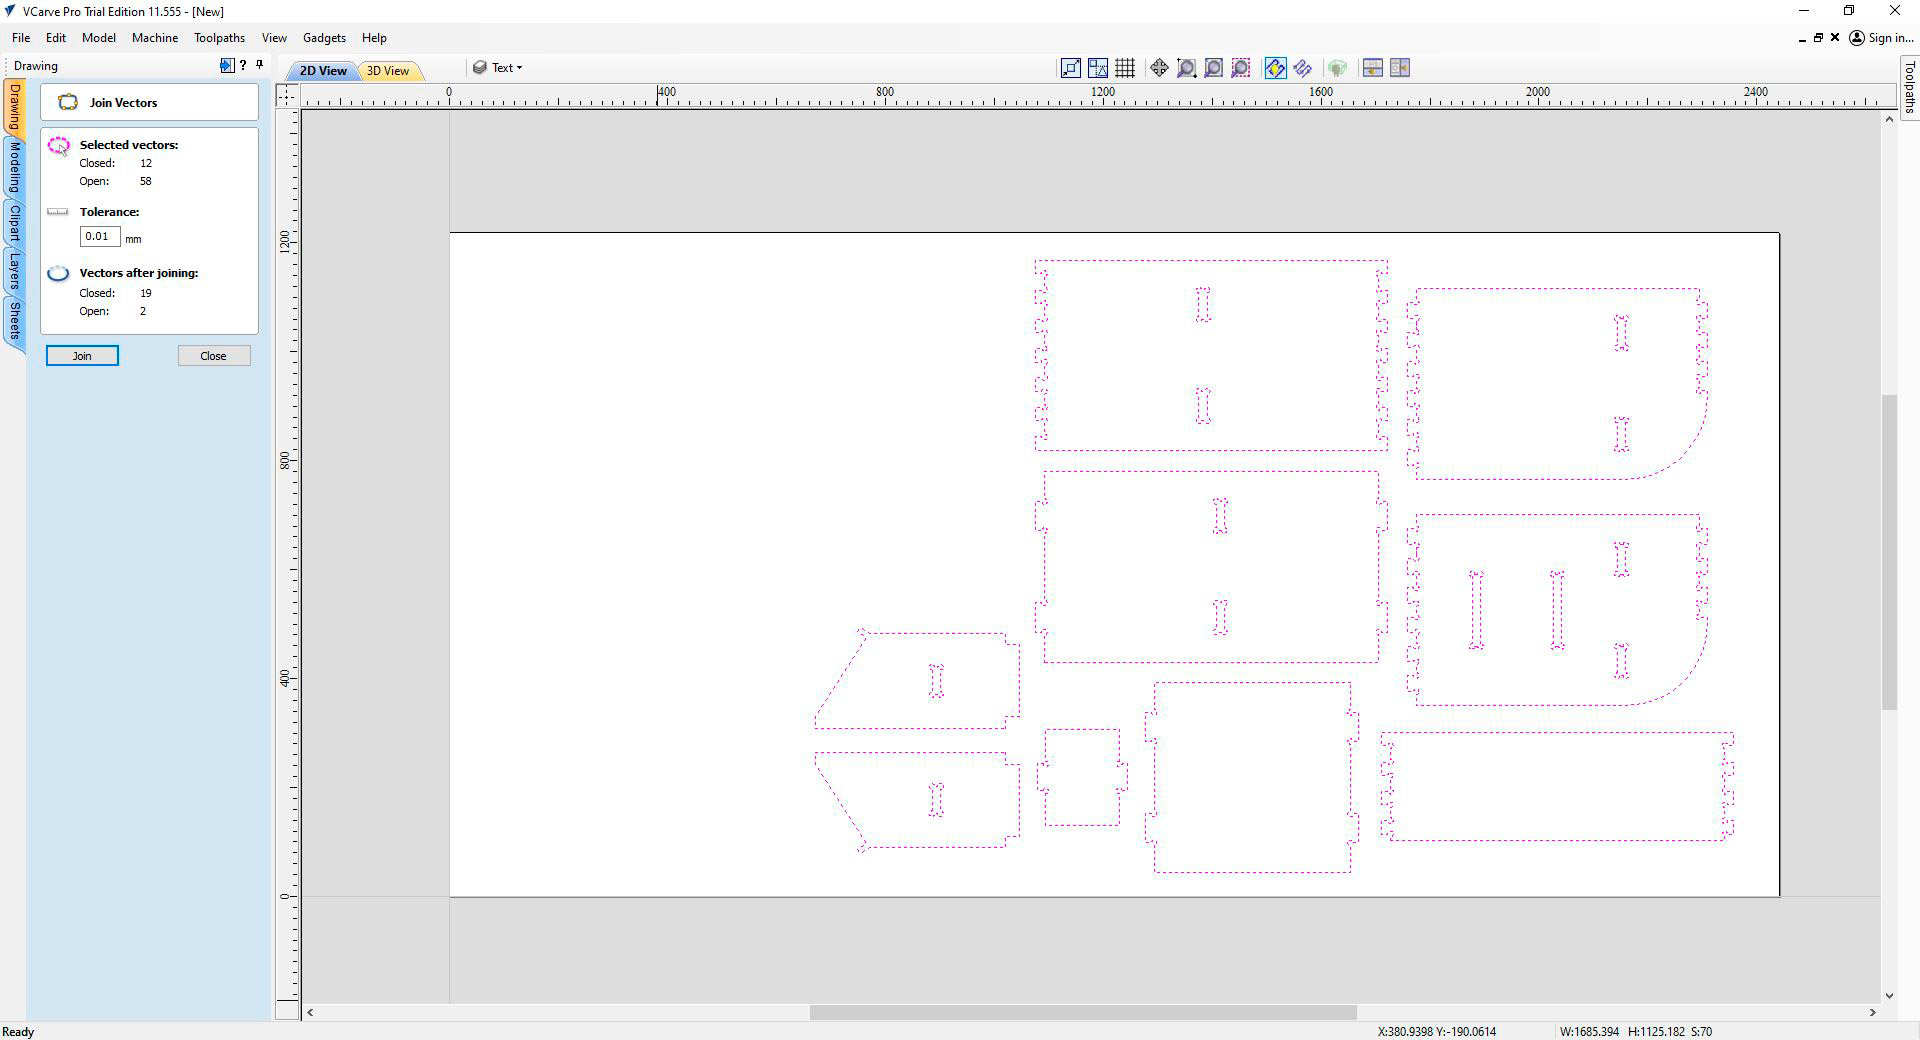
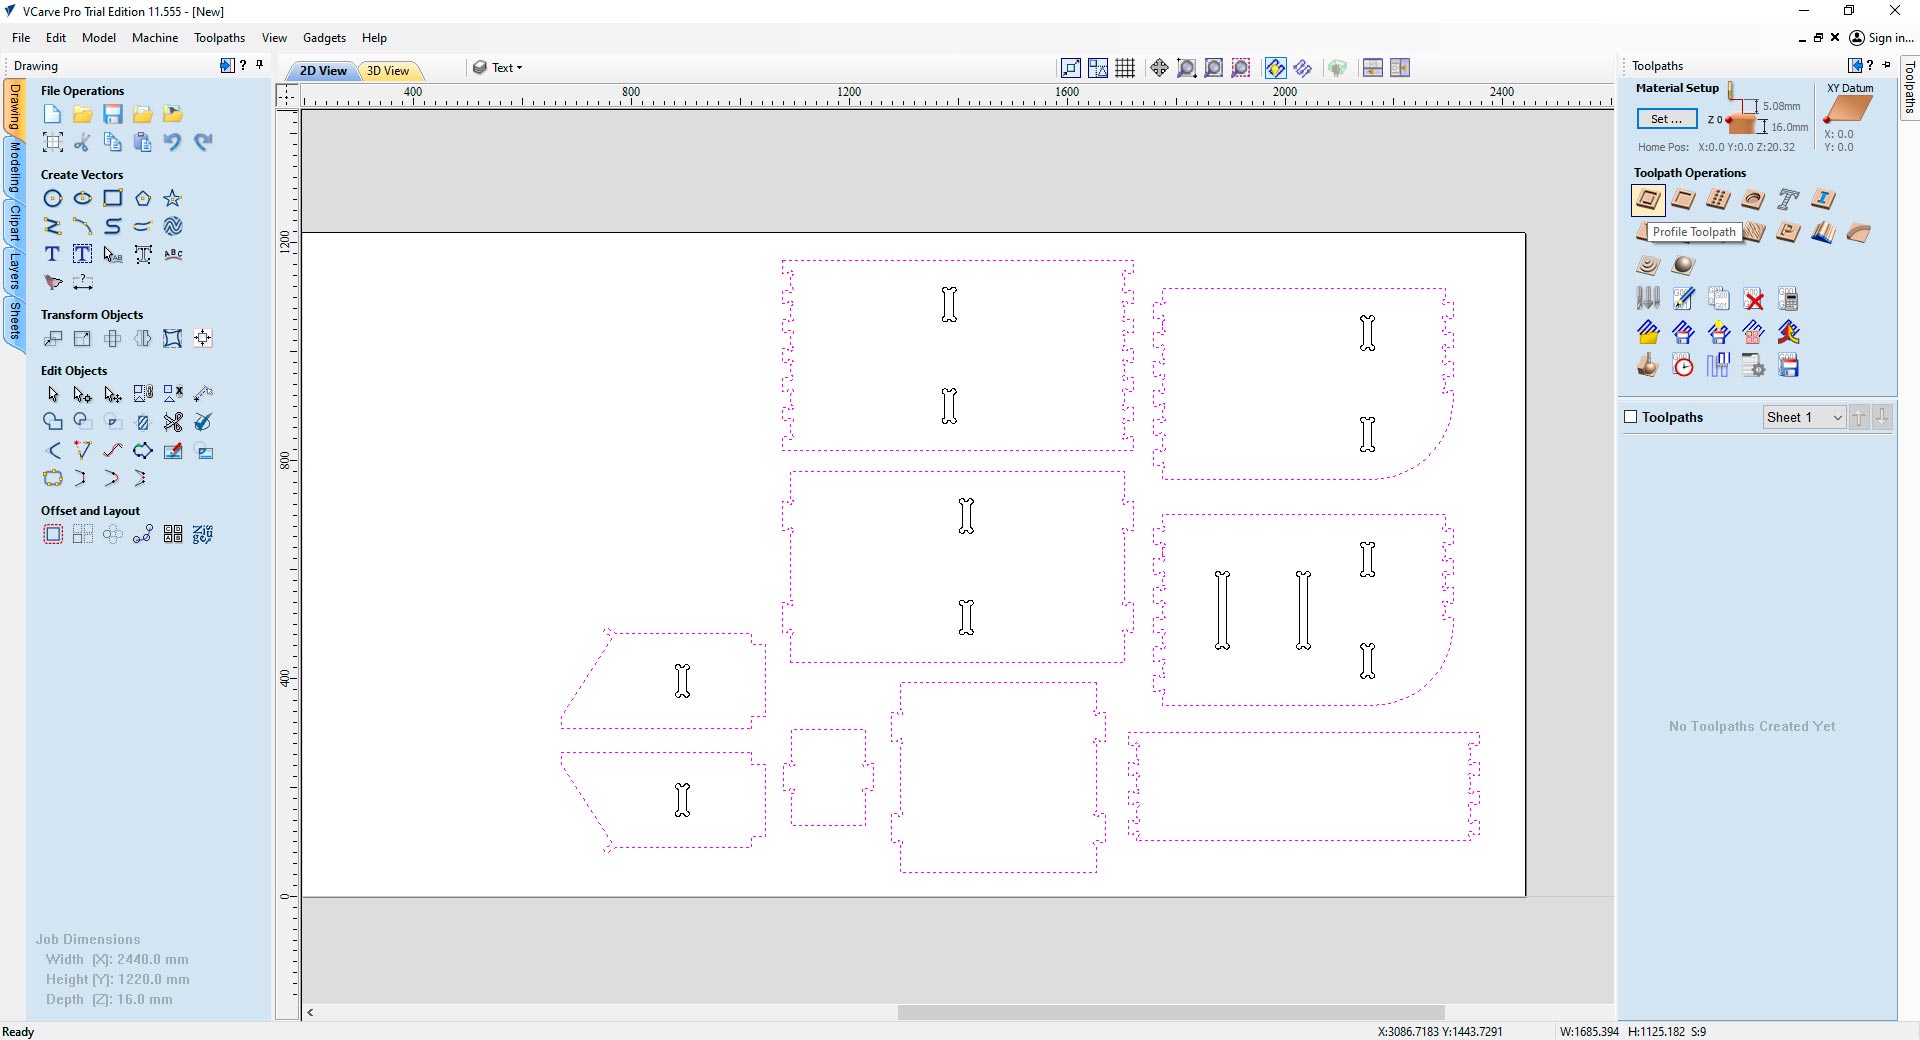
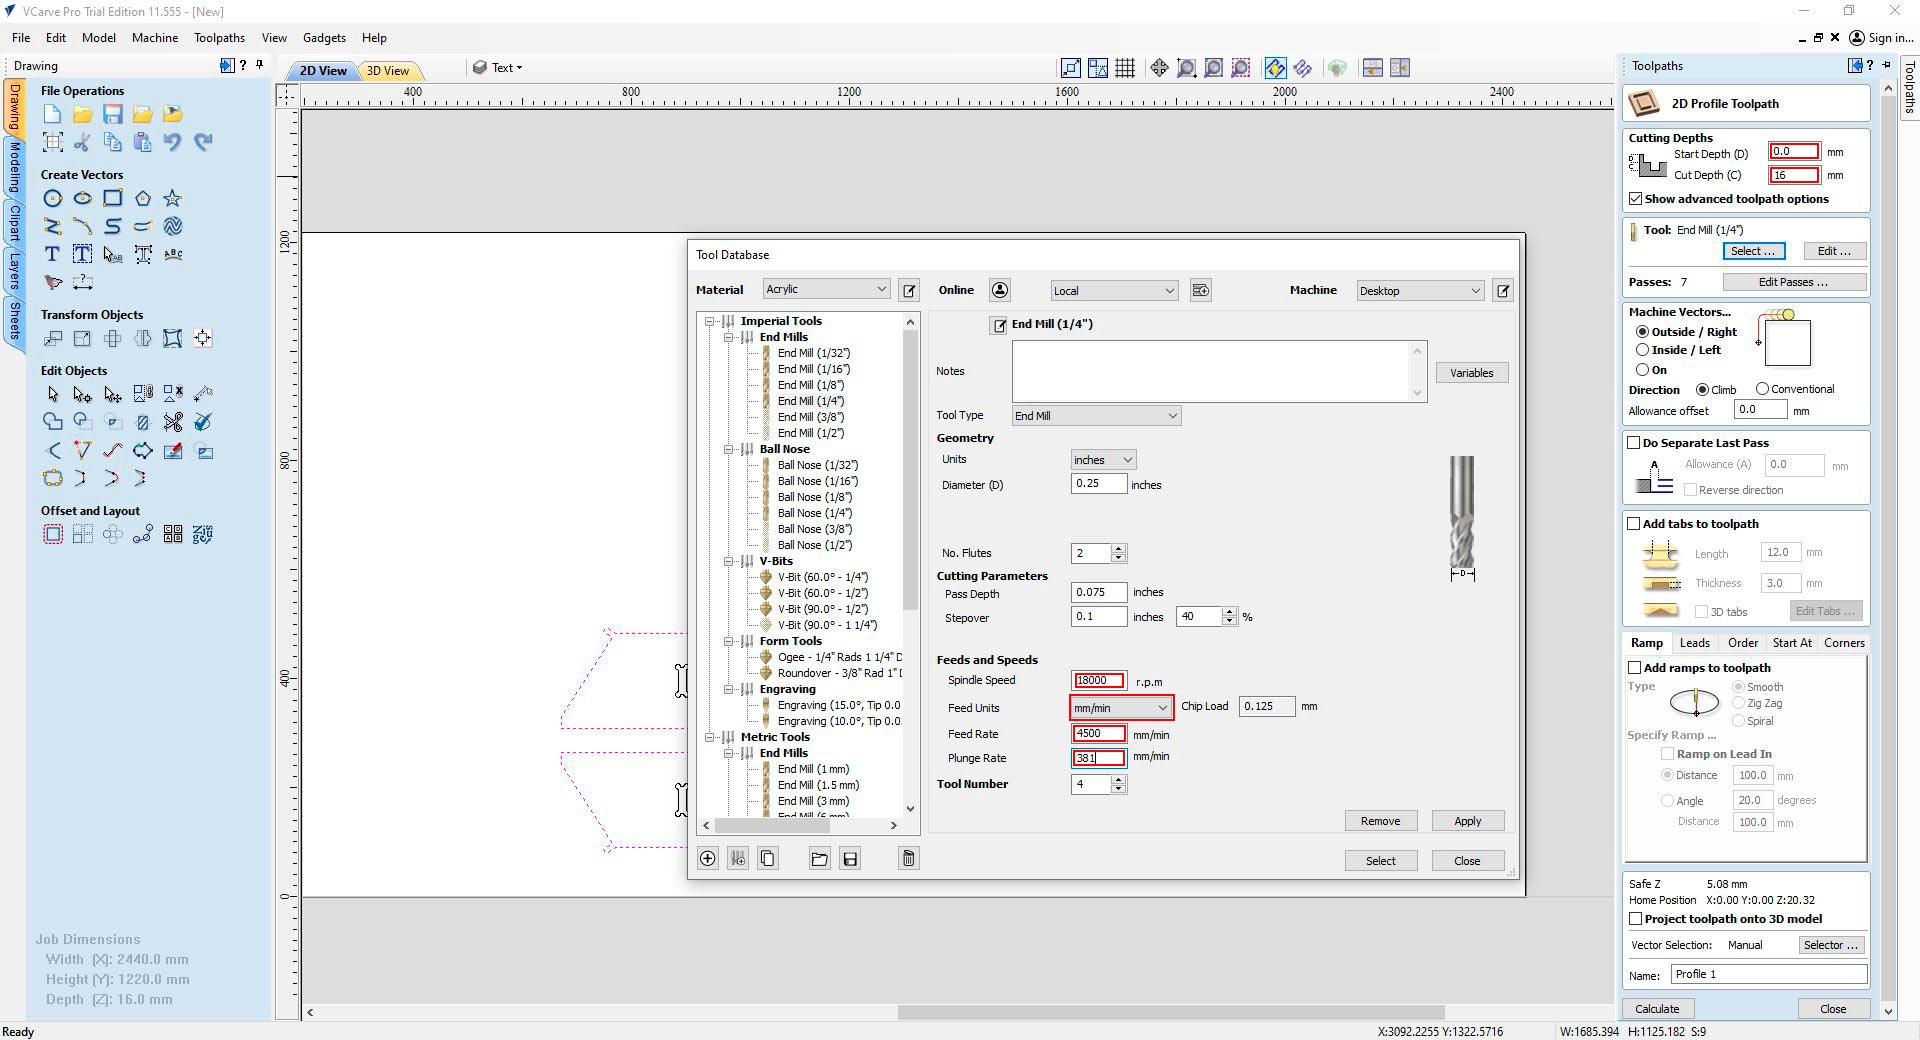
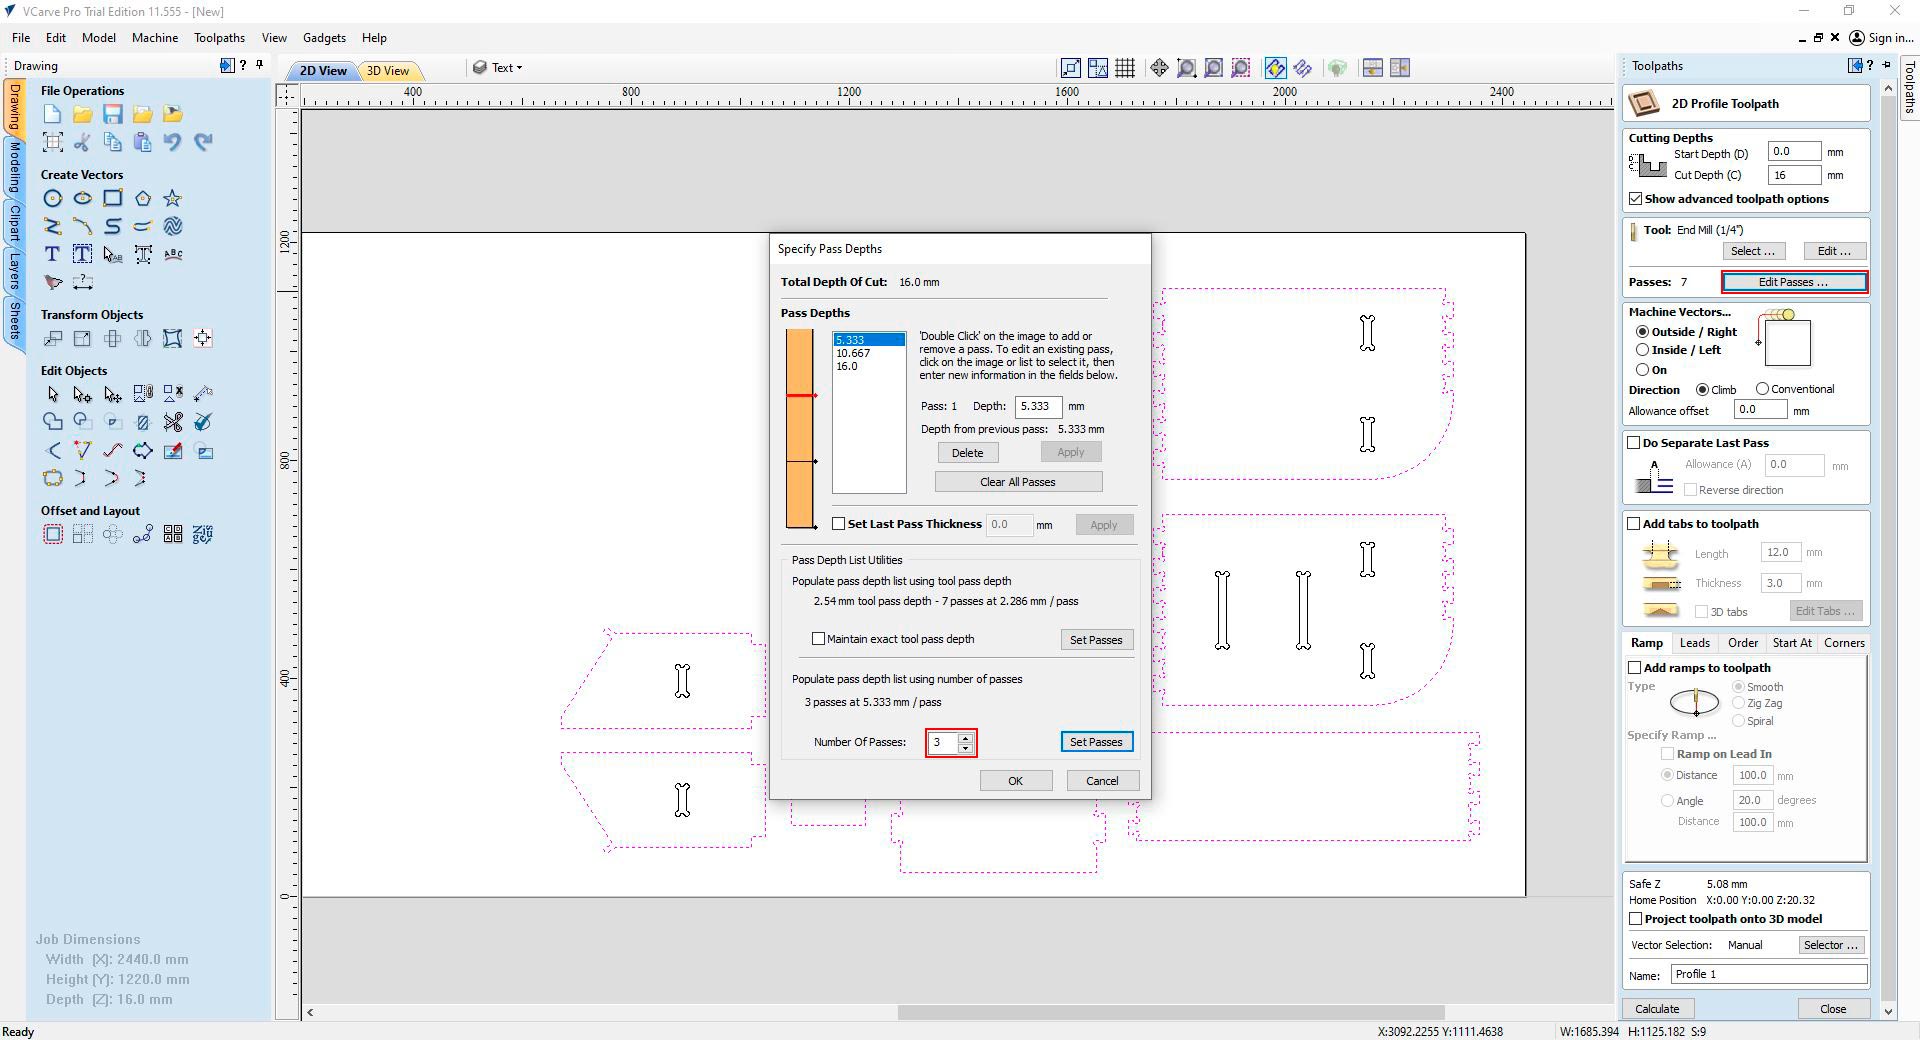
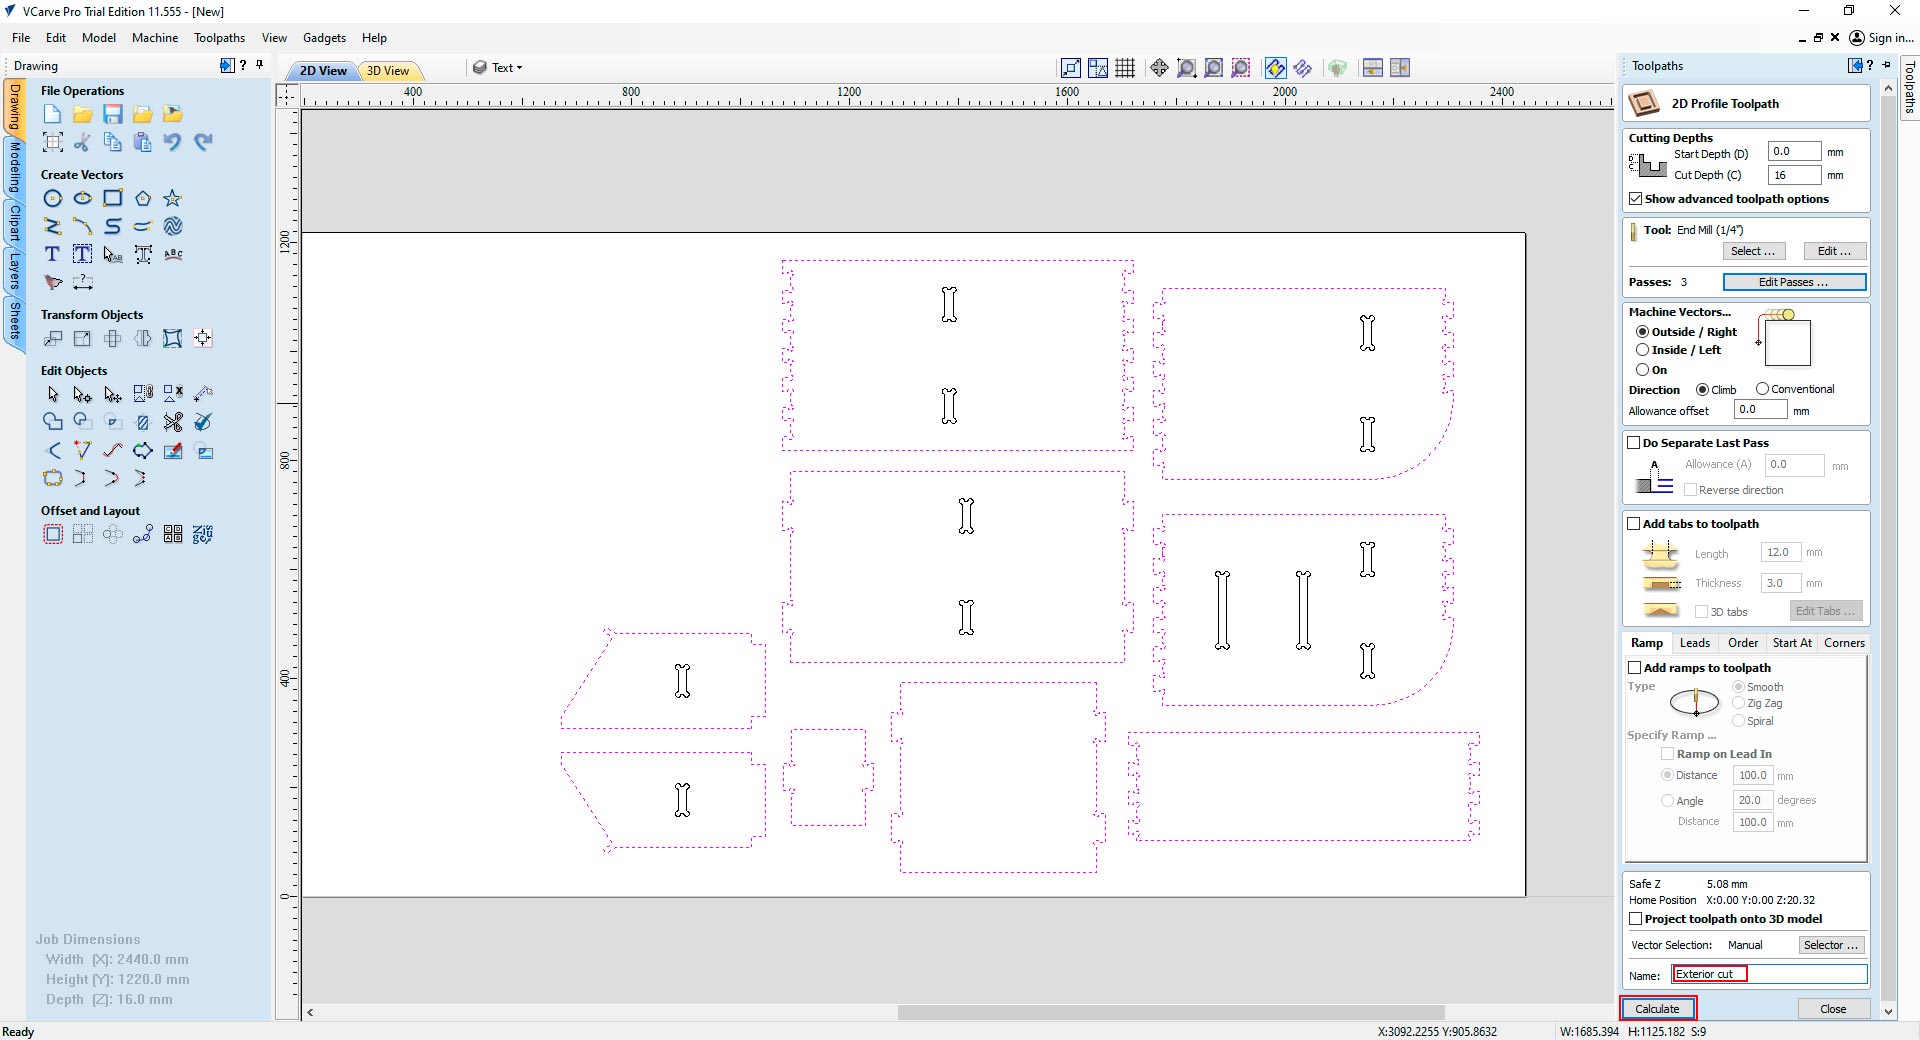
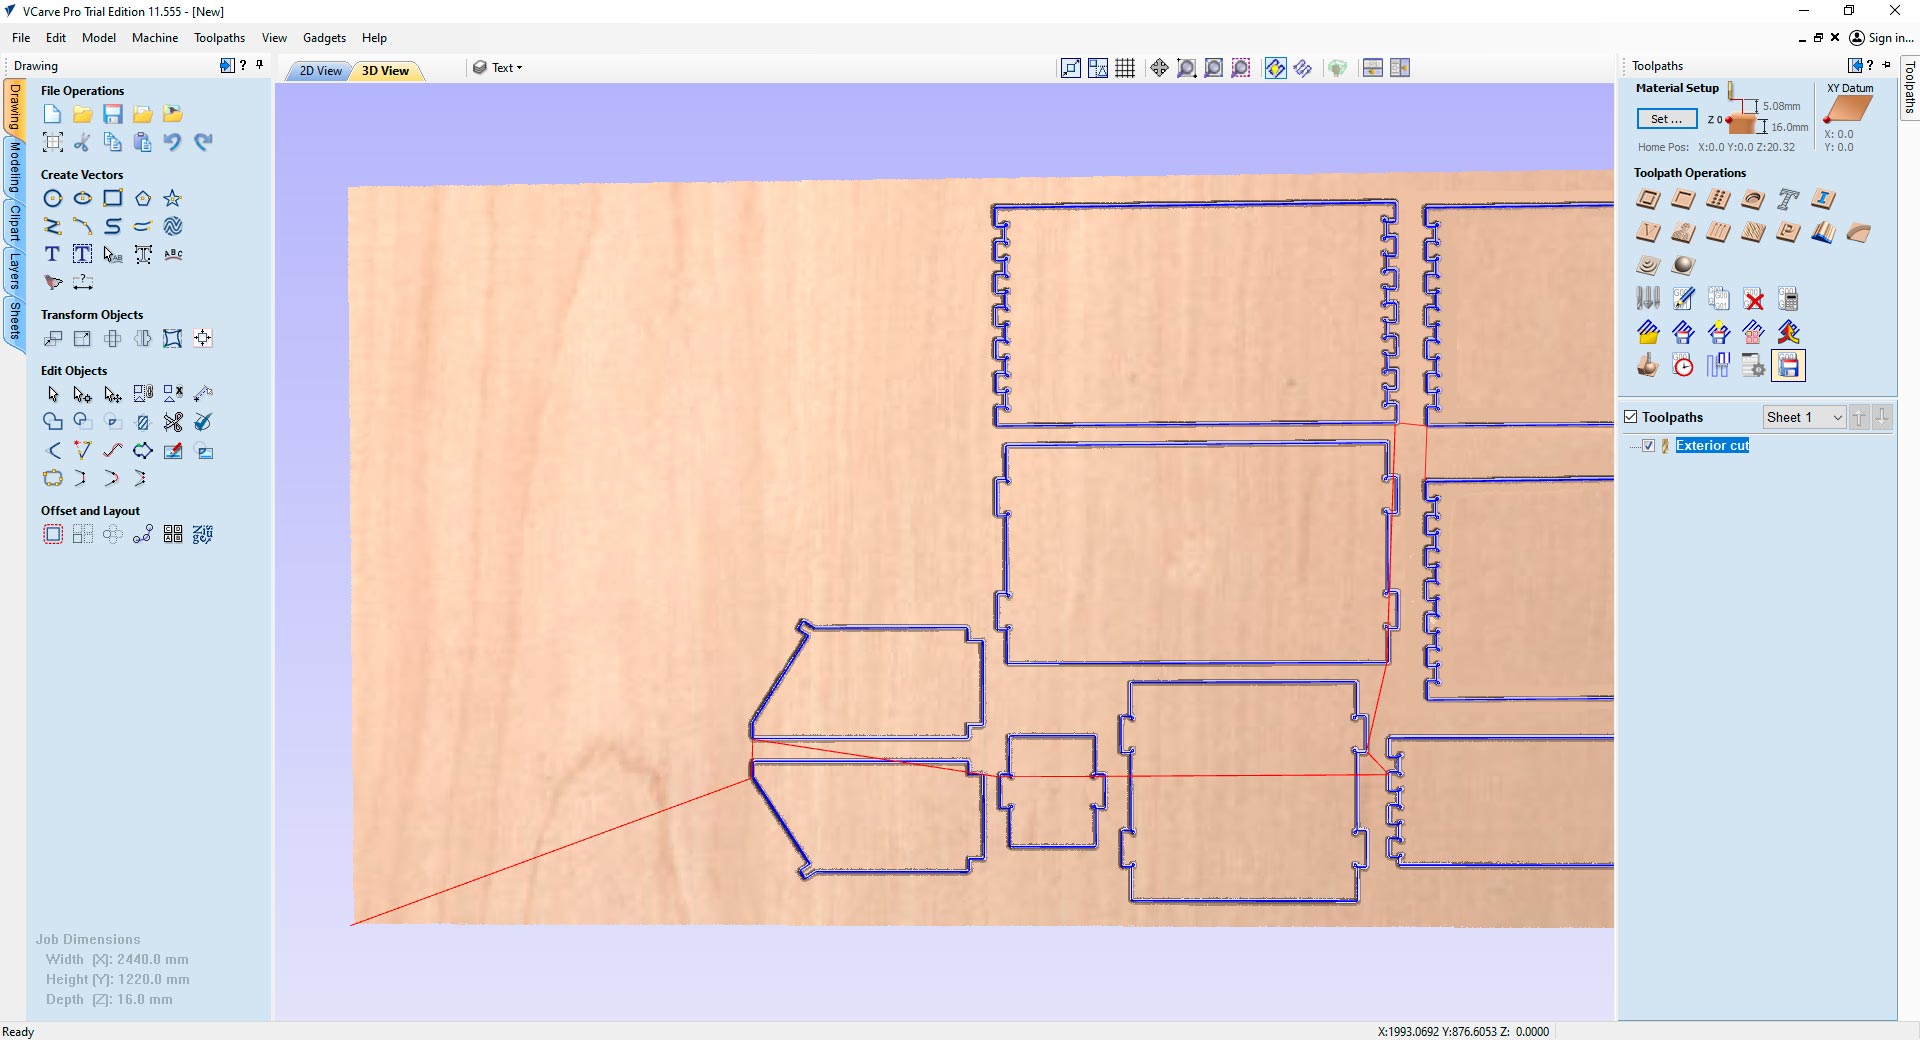
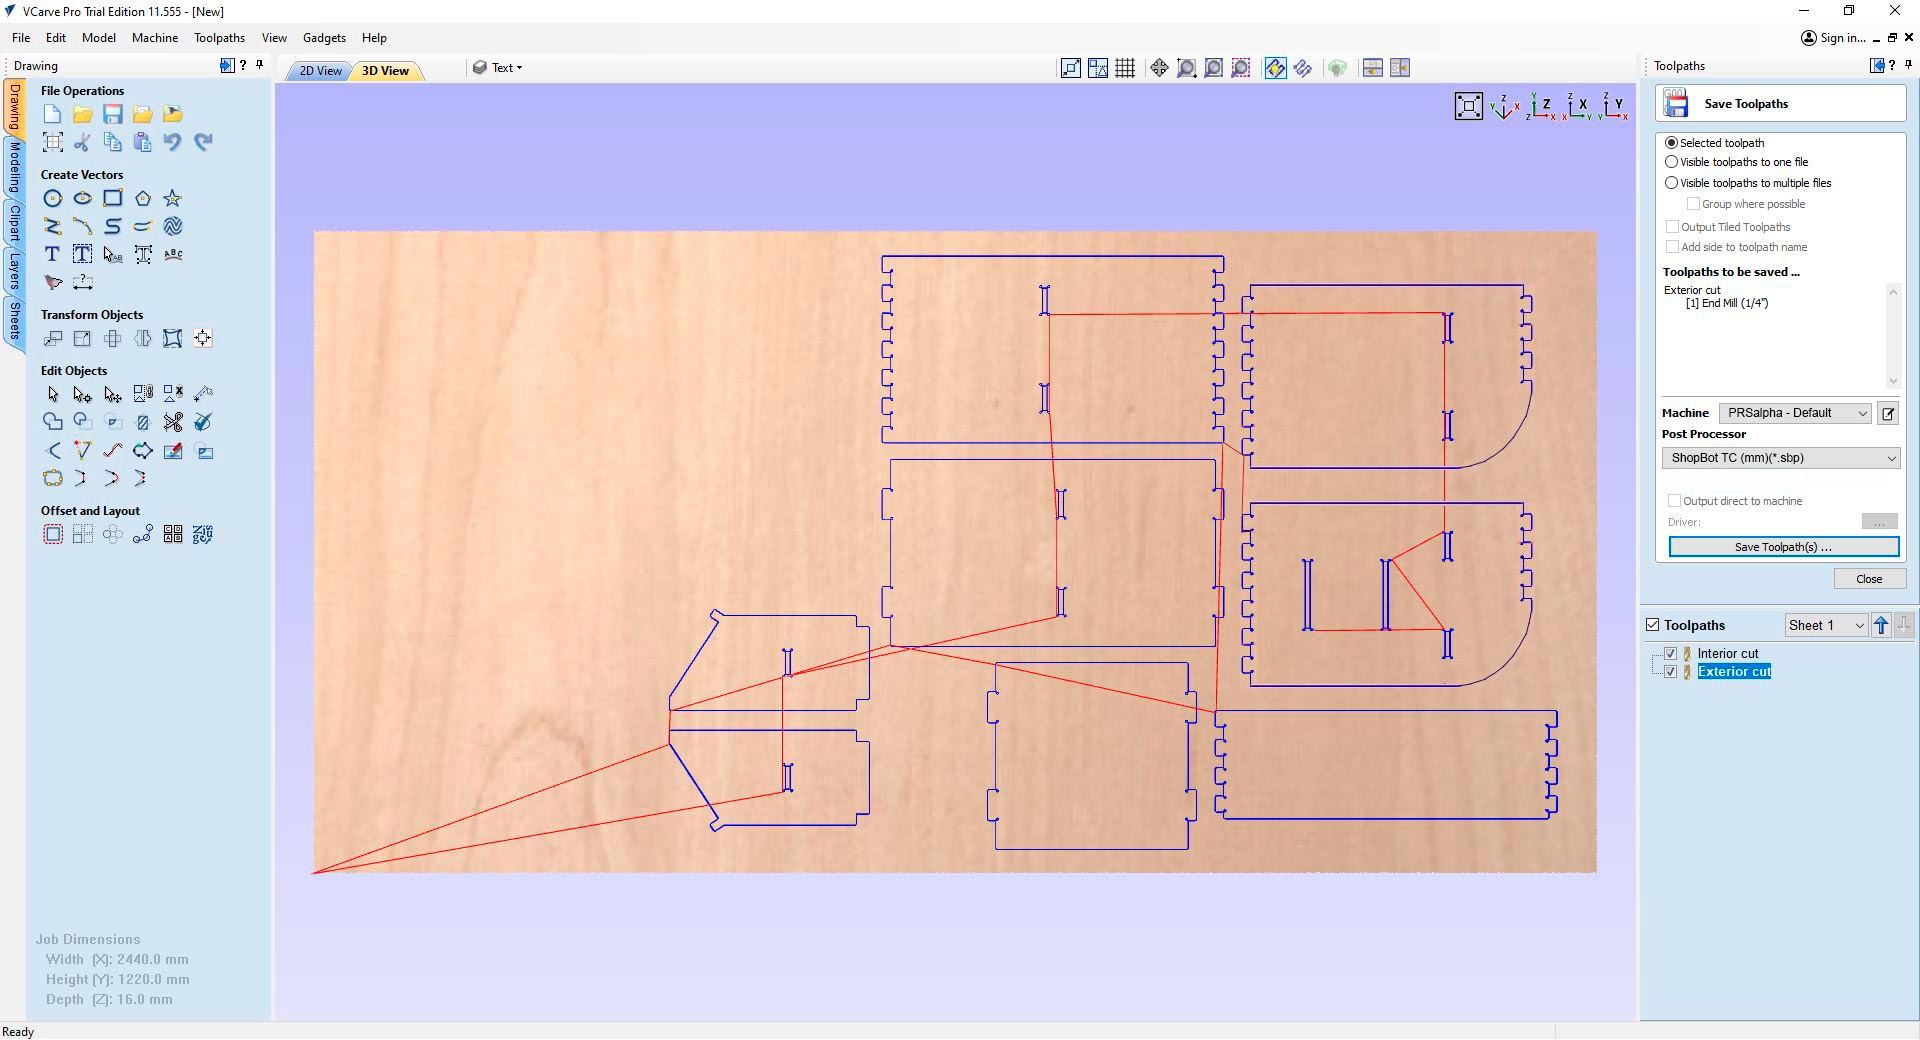
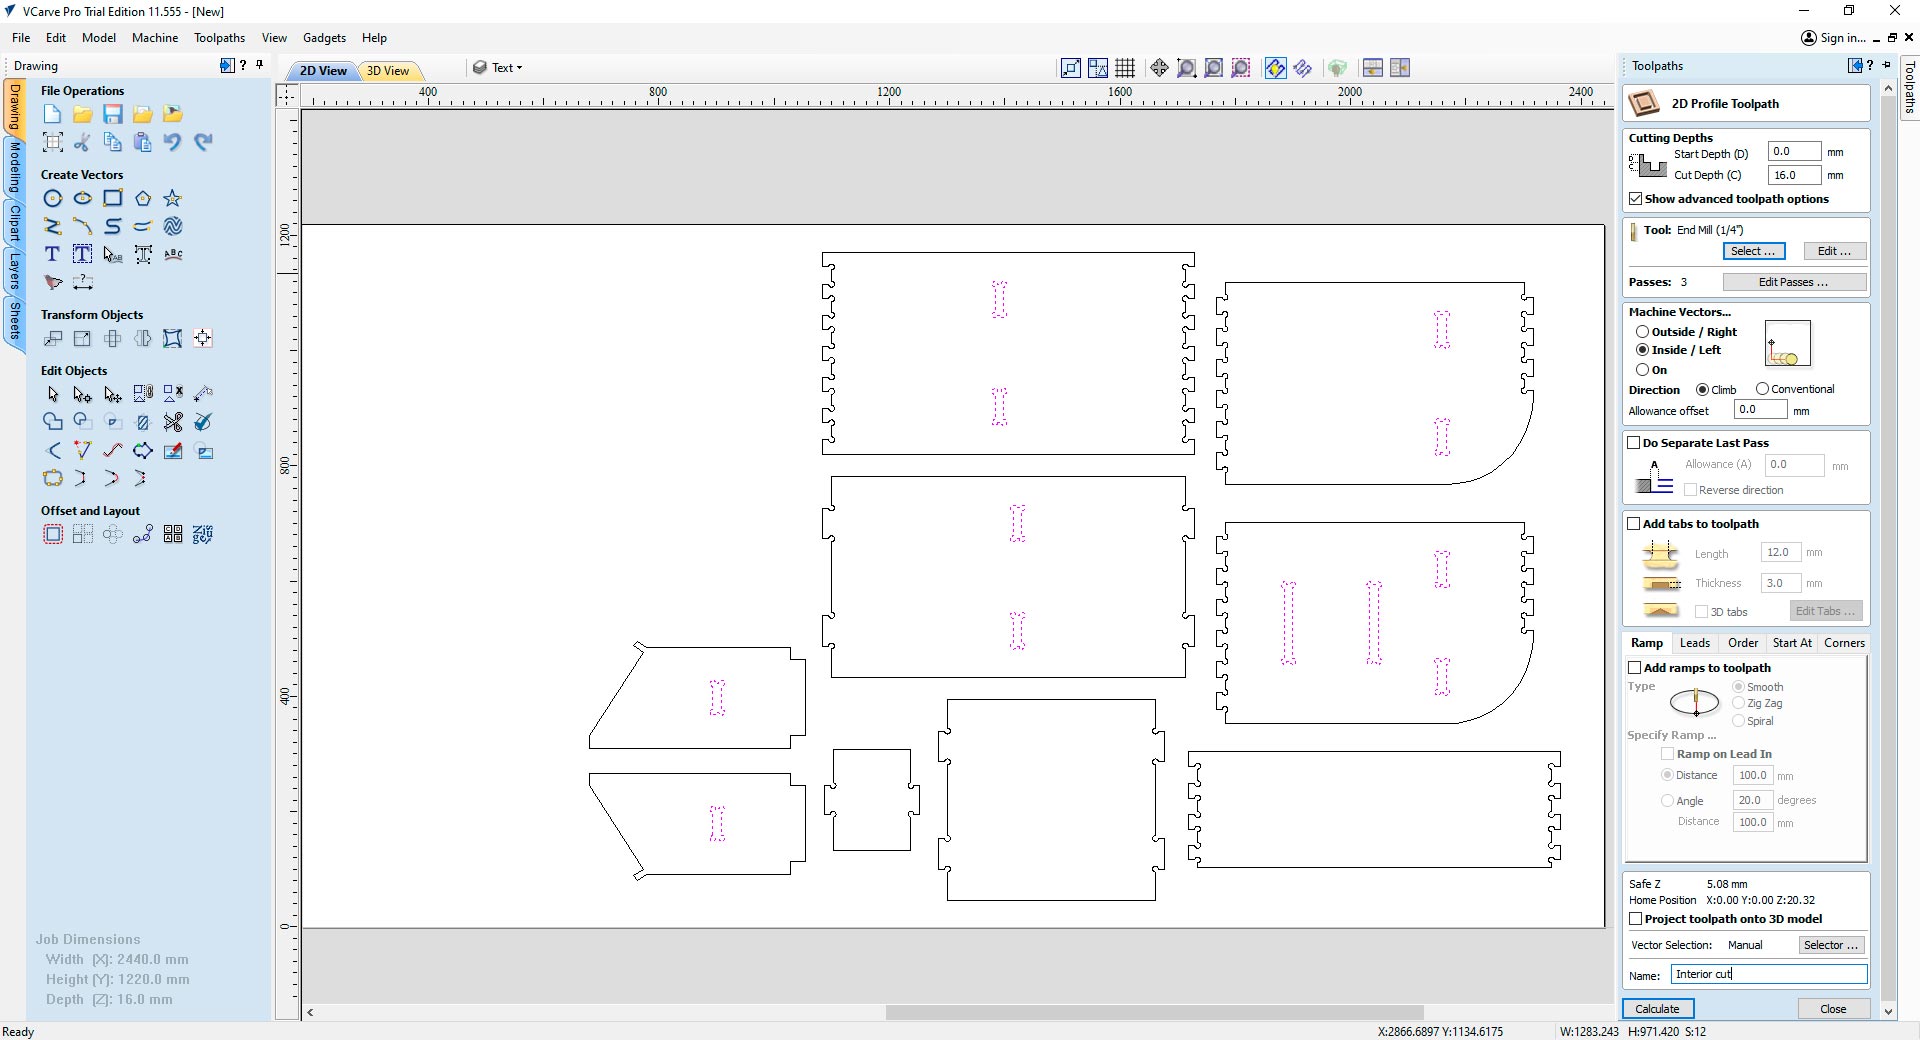
Setup process to mill my design on the ShopBot PRSalpha
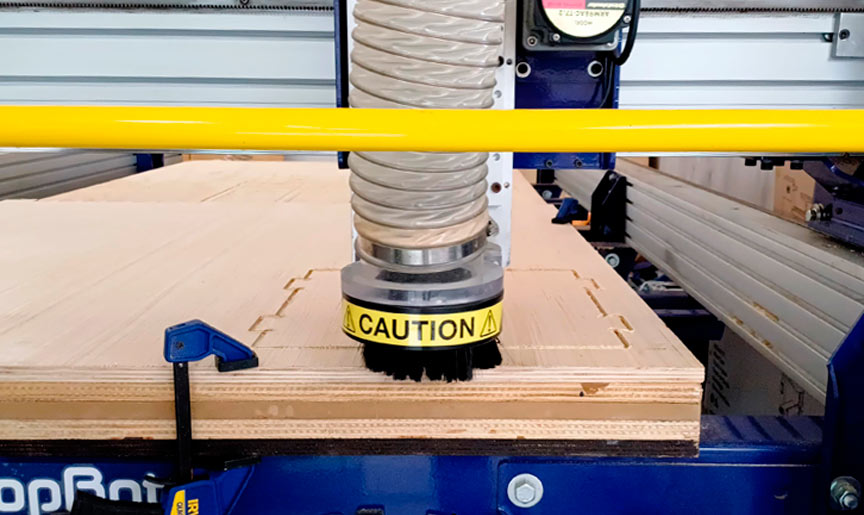
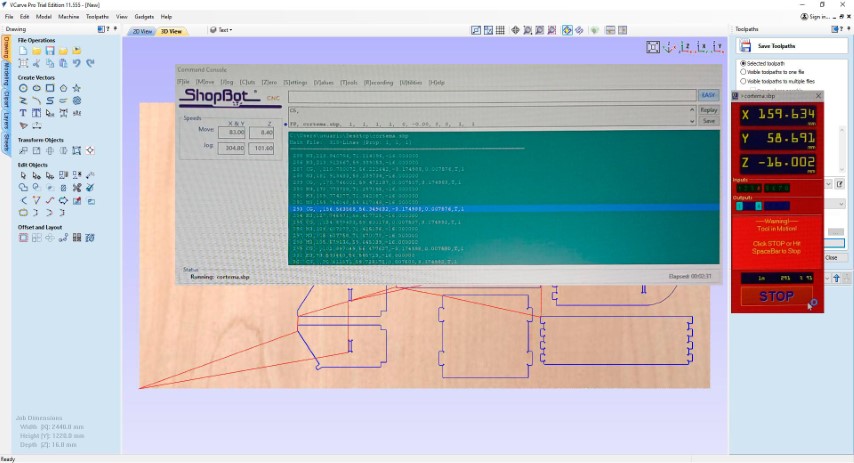
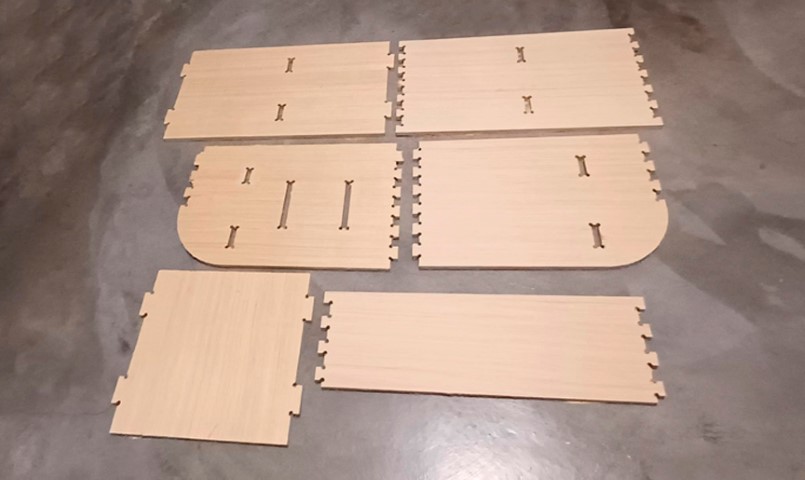
Finally, the milling began. I used 3/4 of a board of 15mm plywood. The pieces were finished in 45 minutes.
I took the pieces home to start assembly.
Assembling my Furniture
At home, I first sanded the pieces and started putting them together. The most complicated pieces to put together were the ones that were joined through the finger joint. The easiest were those that assembled the laptop holder.
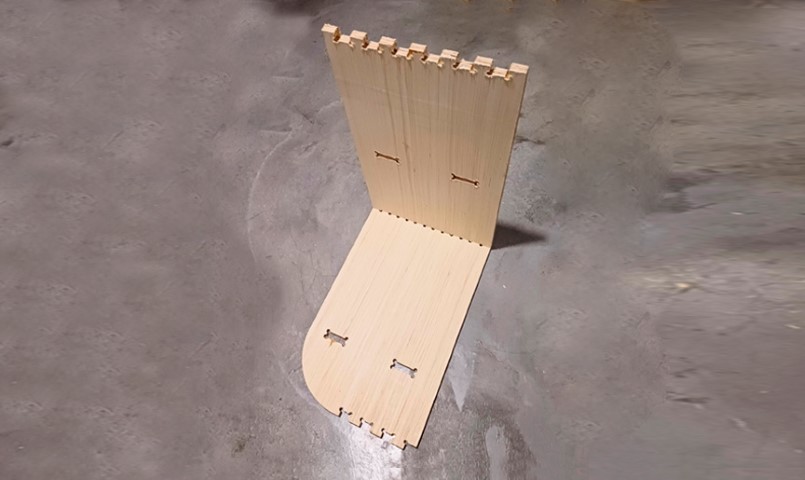
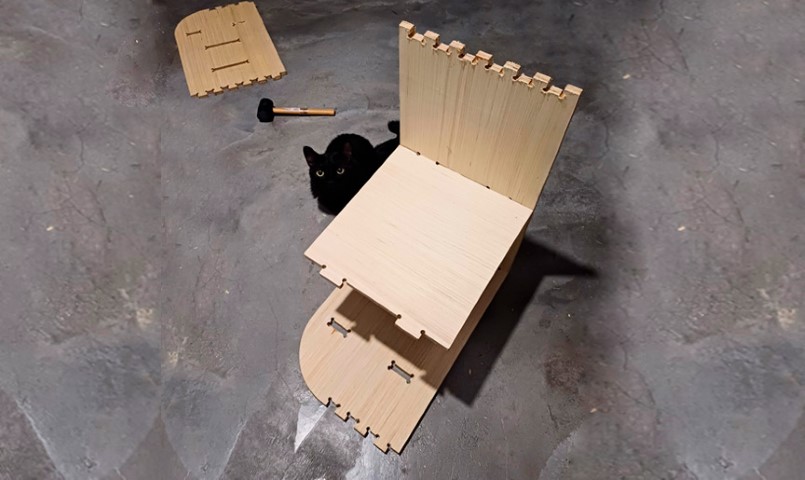
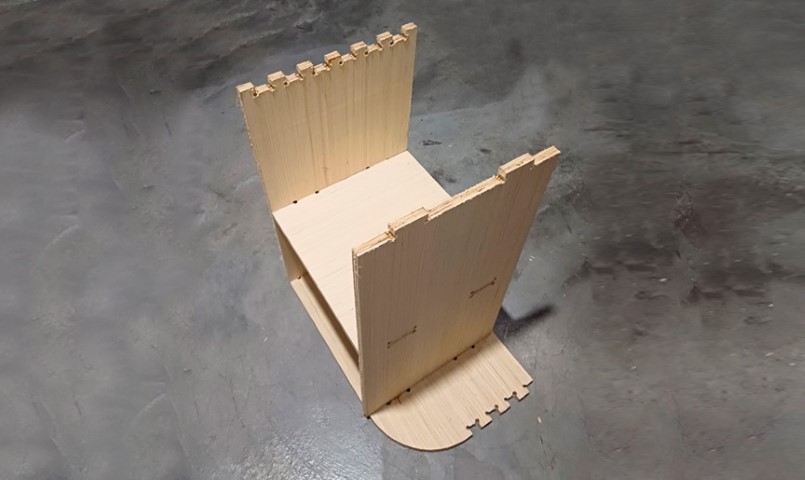
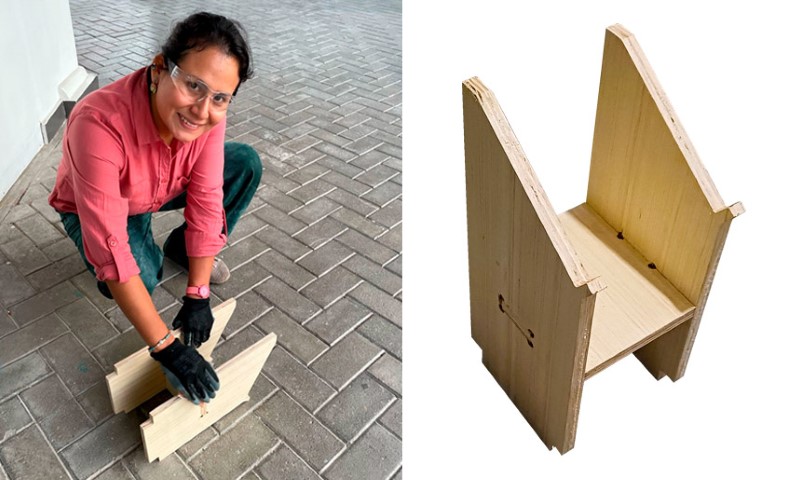
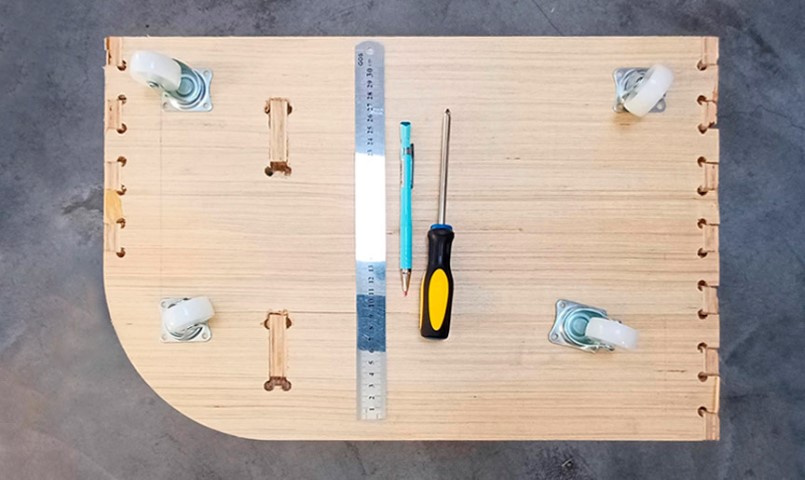
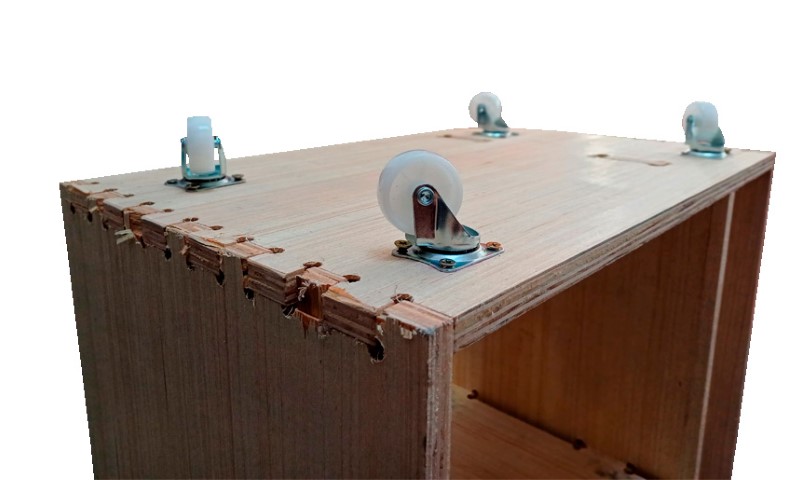
Process of assemble the furniture I designed
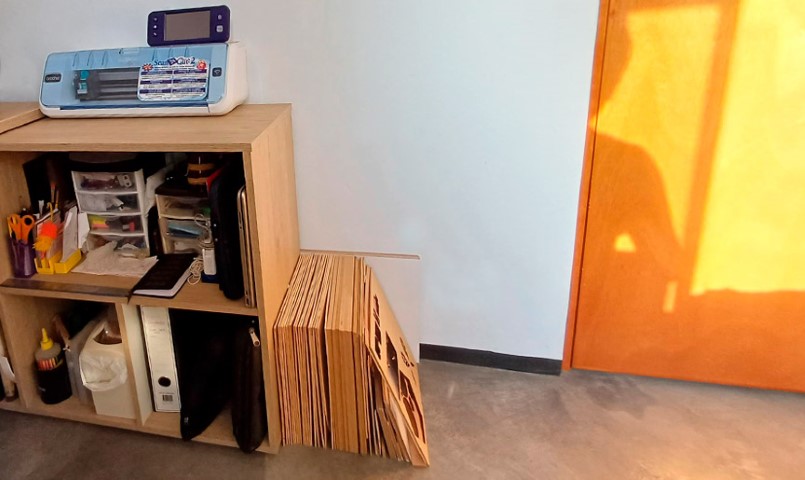
Once assembled, I placed the furniture in my office. It fit perfectly and I have the possibility of using it in two ways.
One way to use the furniture I designed
Another way to use the furniture I designed
Even Bagheera, my kitten, enjoys the furniture as she accompanies me during work hours.
Conclusions
- The design for cutting on the CNC router is not the same as that used for the laser cutter. Thinking that they are similar can make a mistake when assembling.
- Designing in AutoCAD accelerated the 2D drawing of the parts compared to the 3D modeling in Onshape. However, this form of design involved a risk when milling, since I was not sure that everything would fit until I did it.
- Follow the safety protocol of each Fab Lab, especially if you are going to use the CNC router. While cutting pieces of my furniture, I was working 2 meters away with safety glasses on when some wood particles flew into my face. If I hadn't been wearing the glasses I could have damaged my eyes.
- Always wear gloves when handling plywood pieces to avoid splintering.
- To mill the furniture pieces, I used 15.50mm joints (material thickness-mm + 0.50mm) and 15.35mm dog bones (material thickness-mm + 0.35mm). When assembling, some parts of the joints chipped. Next time, I could try 15.75mm and 15.40mm joints.
- To finish this task I thank my fellow students and tutors, especially Henry Sanchez for helping me assemble my furniture, Vaneza Caycho, Roberto Delgado for the guidance in this process, Hans Moncca, and Cristian Loayza for for helping me with the use of the CNC router and valuable tips on the design of the furniture.