In week 5, I explored 3D printing, learning about printing parameters and applying them to a design I created. Additionally, I learned about 3D scanning through photogrammetry.
Document your work on the group work page and reflect on your individual page what you learned about characteristics of your printer(s)
Individual assignment:
Design and 3D print an object (small, few cm3, limited by printer time) that could not be easily made subtractively
3D scan an object
Learning Outcomes
Identify the advantages and limitations of 3D printing
Apply design methods and production processes to show your understanding of 3D printing
Demonstrate how scanning technology can be used to digitize object(s)
Results: 3D Scanning and Printing
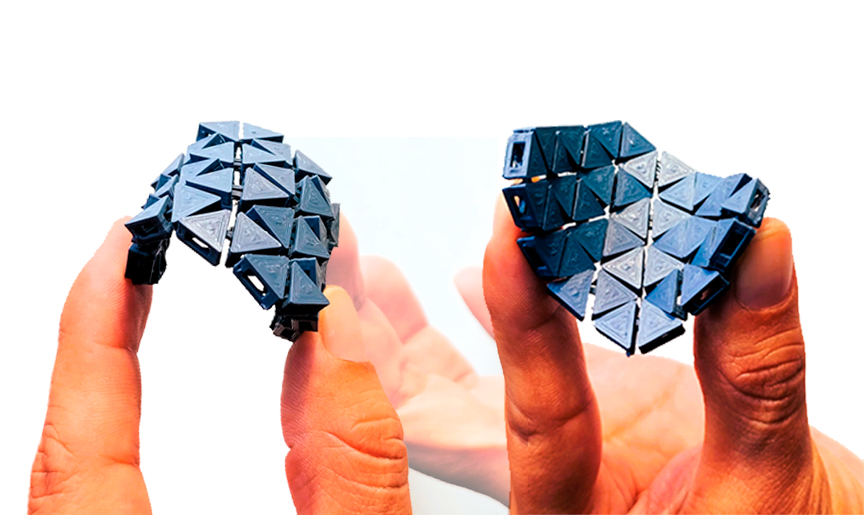
3D printing came into my life when I started making models in architecture school. Later, by working at Fab Lab Peru, I understood the process better. I bought my first printer during the pandemic and am currently manufacturing projects with that machine. It is my hobby: to start designing and testing new models and ways of printing to achieve shapes that I didn't think could be achieved. Therefore, achieving a flexible piece with PLA (normally rigid) is a project that I had in mind several months ago. Therefore, for this week's task I decided to explore chainmail pieces.
PLA chainmail
PLA chainmail top view
Chainmail design in Onshape
I really enjoy the work I did this week, especially because of the creativity applied and because the world of chainmail pieces are very big with many forms and combinations to explore yet.
For this group task, we decided to manufacture the tests on different 3D printers in a distributed manner and then compare the performance of each machine.
3D Printer
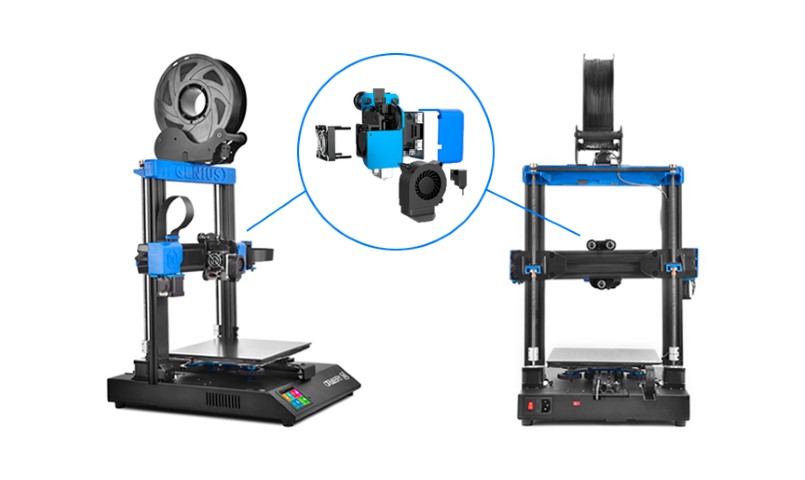
In my case, I performed the tests on the Artillery Genius Pro 3D printer. This machine has a working area of 220 x 220 x 250mm, print speed of 60mm/s to 150mm/s, a 0.4mm extruder, a maximum power consumption of 10V 500W (with the heated bed on) and an XYZ print resolution of 0.05mm, 0.05mm, 0.1mm. The slicer program used was the Ultimaker Cura version 5.5.0, a 3D printing slicing software that offers enhanced performance and features for an optimized 3D printing experience. Based on the basic configuration of parameters offered by the software, I modified the quality, walls, top/bottom, infill, material, speed, and support categories depending on the pieces to be manufactured.
Artillery Genius Pro 3D printer and Ultimaker Cura
Supported Tests
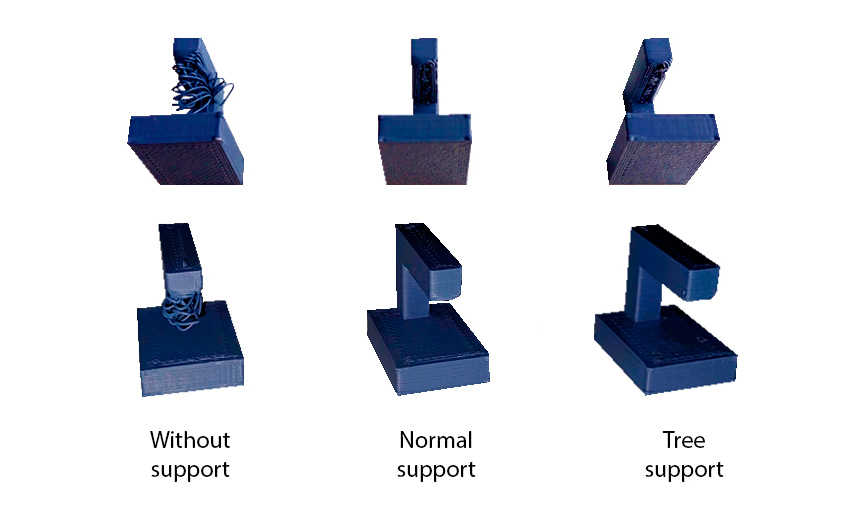
To manufacture a three-dimensional object, a 3D printer deposits material layer by layer. As a result, each new layer must be supported by the layer beneath it. A model will likely drop or even topple if its overhang is unsupported by anything below, so extra 3D printed support structures will be necessary to ensure a successful print. Support structures are a necessary evil in 3D printing. On one hand, they are essential for models with complex overhangs or bridges. On the other side, they raise material prices, require additional post-processing effort, and may harm the surface of the object. Consequently, getting the supports right is critical when 3D printing intricate models. That is why it is vital to perform these support tests prior to applying them to the model.
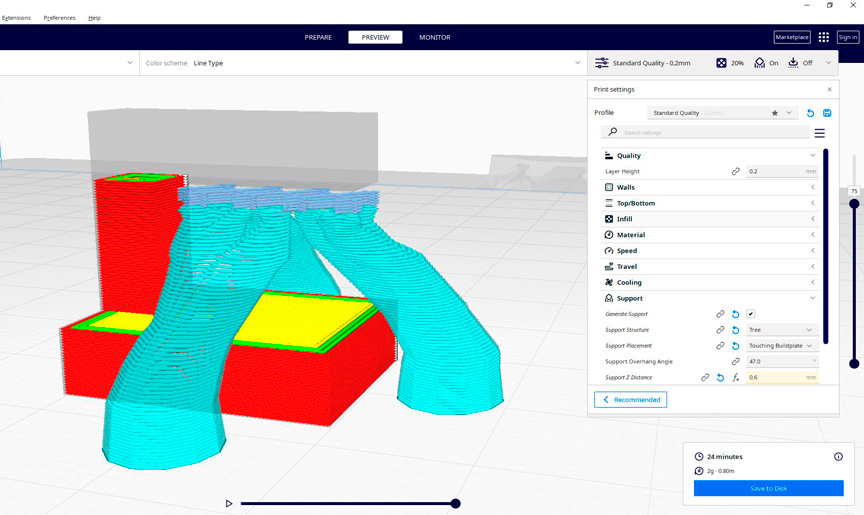
First, the hangover test was done. A version was made without supports, another with normal supports and the last one with organic supports. I went through this guide to arrive at these parameters. The best of the three prints was the one made with supports. The parameters used were Quality: Standard (0.2mm) | Walls Line Count: 3 | Top Thickness/Top Layers: 0.8mm/4 | Bottom Thickness/Bottom Layers: 0.8mm/4 | Infill: 20% | Printing Temperature: 200°C | Build Plate Temperature: 60°C | Speed: 60mm/s | Support Structure: Tree | Support Placement: Touching Buildplate | Support Overhang Angle: 47°
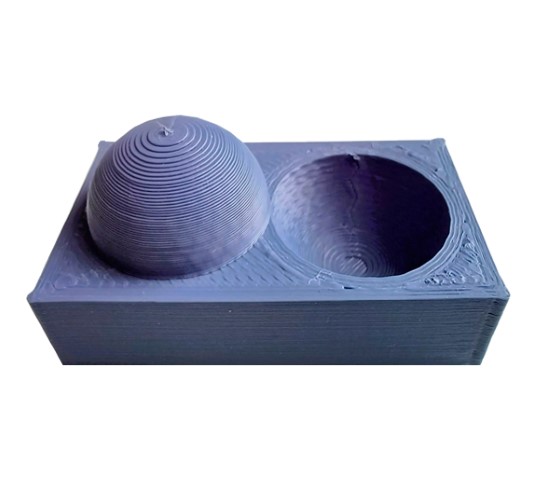
Overhang test
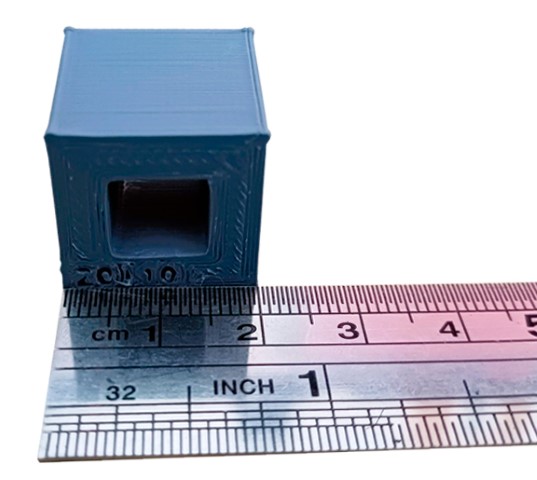
Then the clearance test was performed to measure the minimum gap printable for this machine. For the Artillery Genius Pro, the minimum possible gap is 0.3mm. The parameters used were Quality: Standard (0.2mm) | Walls Line Count: 3 | Top Thickness/Top Layers: 0.8mm/4 | Bottom Thickness/Bottom Layers: 0.8mm/4 | Infill: 20% | Printing Temperature: 200°C | Build Plate Temperature: 60°C | Speed: 60mm/s | Support Structure: Tree | Support Placement: Touching Buildplate | Support Overhang Angle: 47°
Clearance test
Unsupported Tests
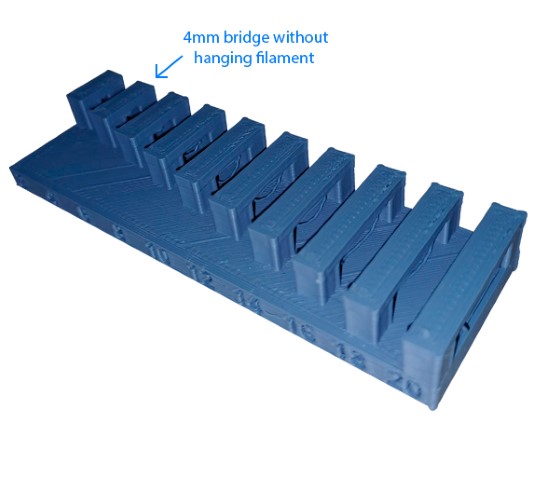
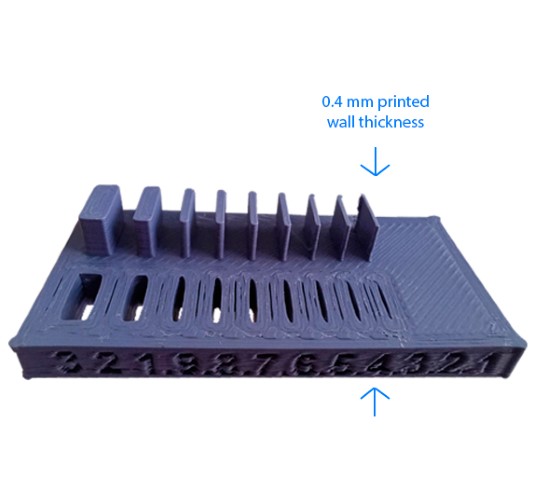
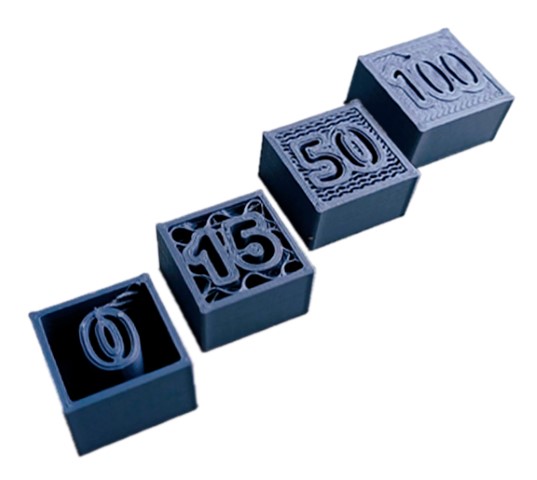
From what we have seen before, it is ideal to work without supports. How is it possible? I think the key is in the design, which is made specifically for production with a 3D printer without supports. The tests without supports carried out were: angle, overhang, bridging, wall thickness, dimensions, anisotropy, surface finish and infill. For the first 8 tests, the parameters used were Quality: Standard (0.2mm) | Walls Line Count: 3 | Top Thickness/Top Layers: 0.8mm/4 | Bottom Thickness/Bottom Layers: 0.8mm/4 | Infill: 20% | Printing Temperature: 200°C | Build Plate Temperature: 60°C | Speed: 60mm/s. For the infill test, I worked with 0, 15, 50 and 100 values.
Unsupported 3D printing tests
From the printed test, the following is concluded for Artillery Genius Pro:
Angle test: the minimum angle that prints well is 30 degrees
Overhang test: the maximum distance you can print without supports is 2 mm
Bridging test: The maximum bridge that can print without generating hanging filament is 4mm
Wall thickness test: The thinnest wall that can be printed is 0.4mm
Dimensions test: the measurement with which it is designed is the one that is printed
Anisotropy test: in the vertical sense, the model remains quite uniform, but in the horizontal sense some variation is observed in the first layers
Surface finish test: The surface flattened over the top and the layering became more evident providing restrictions on the allowable surface angle
Infill test: the choice of the different percentages of infill will depend on how resistant the part to be manufactured is needed
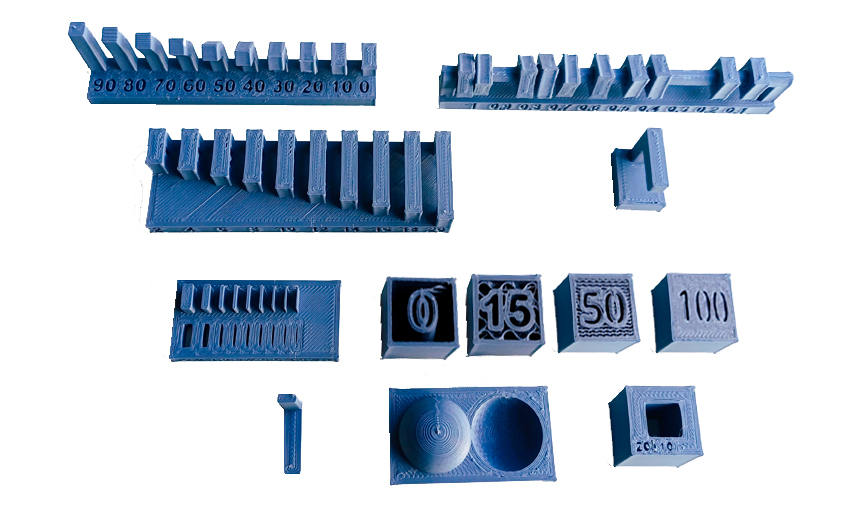
3D print tests worked in the distributed manufacturing grupal assignment
Individual Assignment: Chainmail Print
After exploring the PLA parameters in the 3D printer, I studied the bridging, and wall thickness tests to sketch my first chainmail designs. I also reviewed some work from years past on the topic (chainmail research: 1, 2, 3, 4 and 5) and reviewed this guide to designing and printing flexible meshes.
Chainmail Module Design and 3D Printing
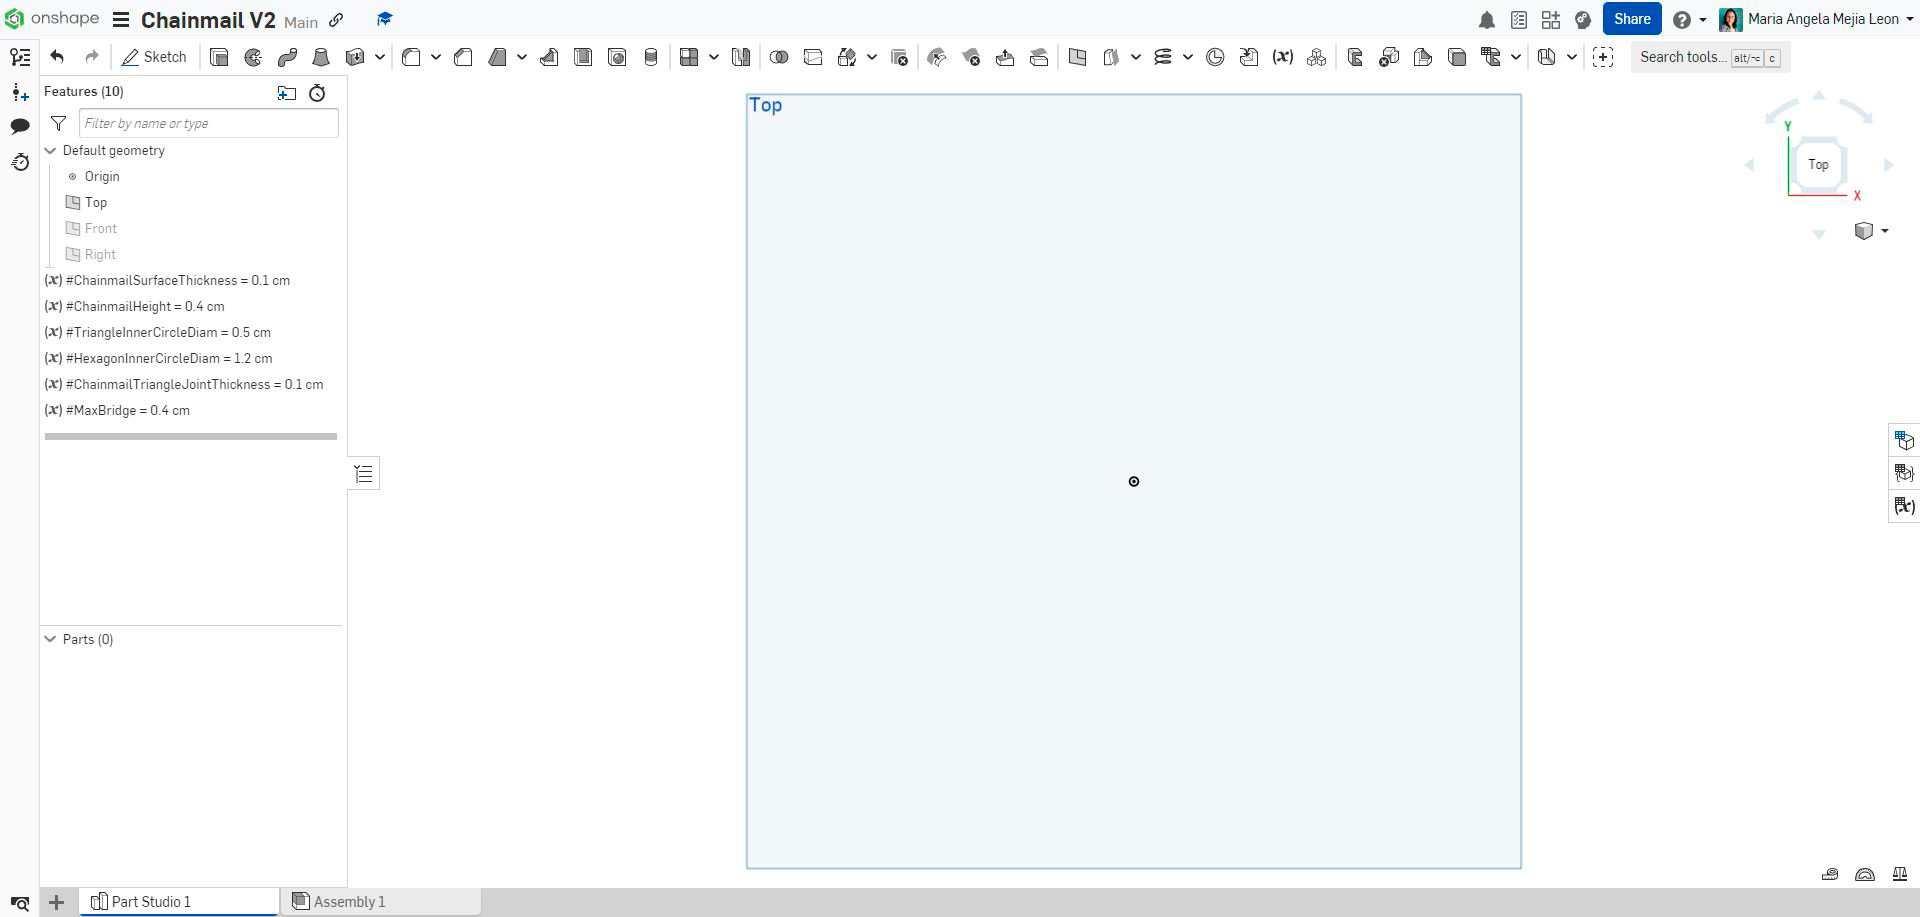
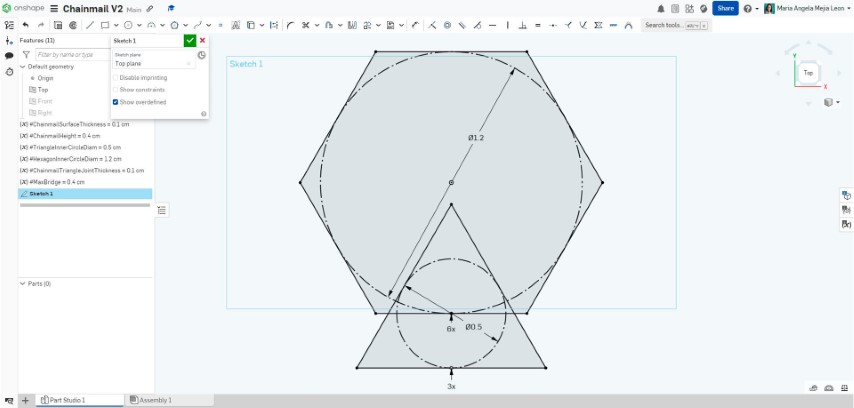
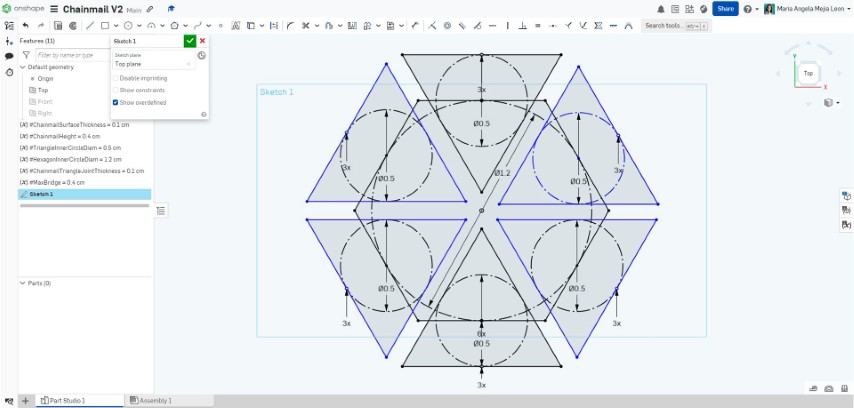
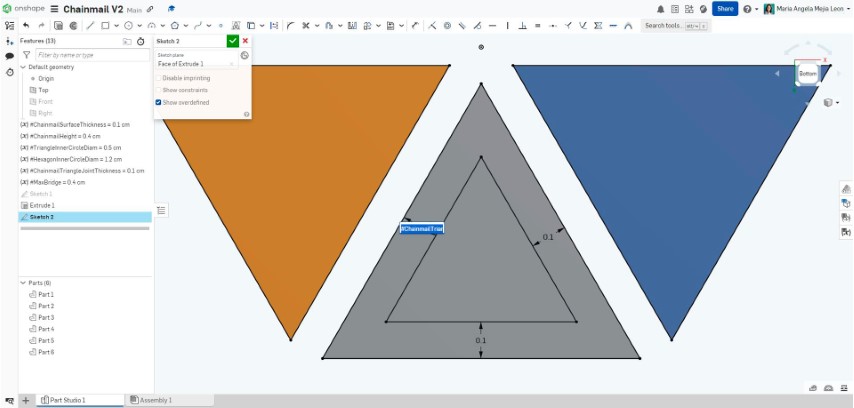
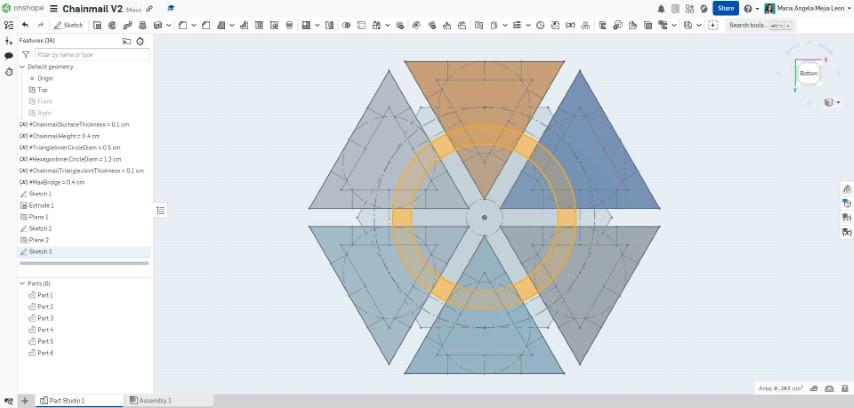
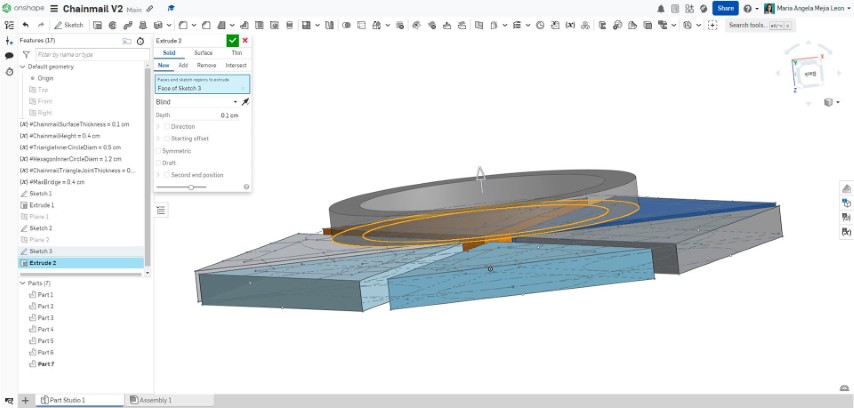
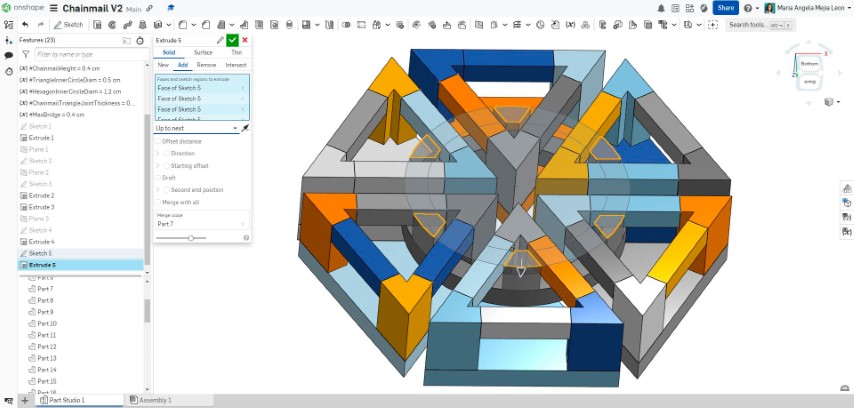
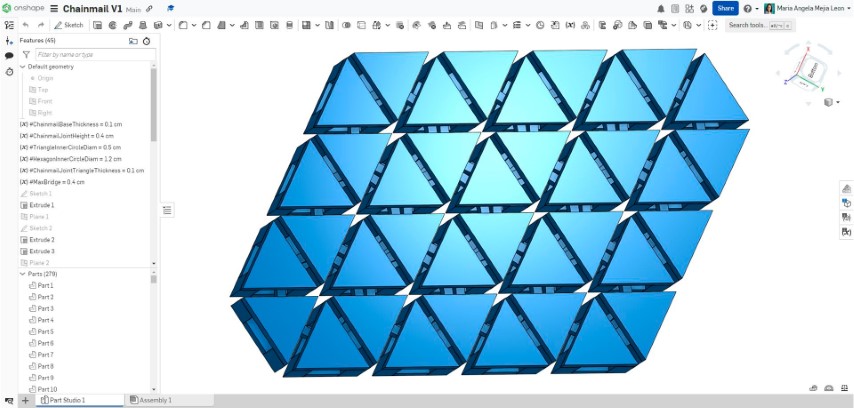
I designed the first chainmail module in Onshape with parametric variables and the file can be seen here.
A chainmail module design process in Onshape
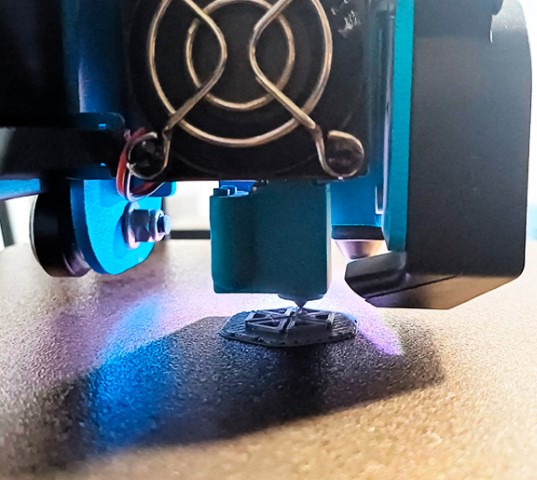
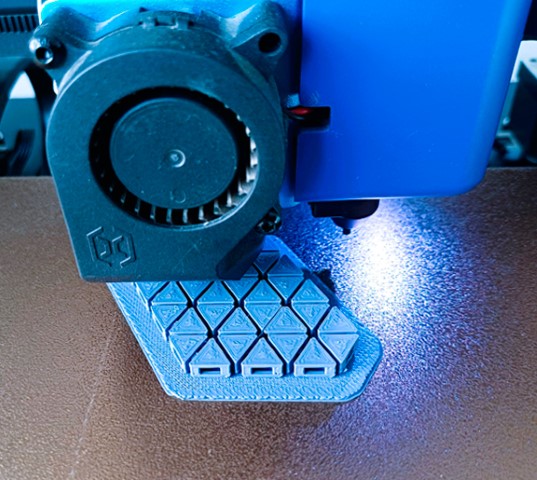
Then I printed it with this parameters Quality: Standard (0.2mm) | Walls Line Count: 3 | Top Thickness/Top Layers: 0.8mm/4 | Bottom Thickness/Bottom Layers: 0.8mm/4 | Infill: 20% | Printing Temperature: 200°C | Build Plate Temperature: 60°C | First 5 Layers Speed: 15mm/s | Rest of Layers Speed: 60mm/s | Adhesion Build Plate: Raft. This module took 10 minutes to be printed.
3D printing a chainmail module with raft plate adhesion
Bigger Area Chainmail
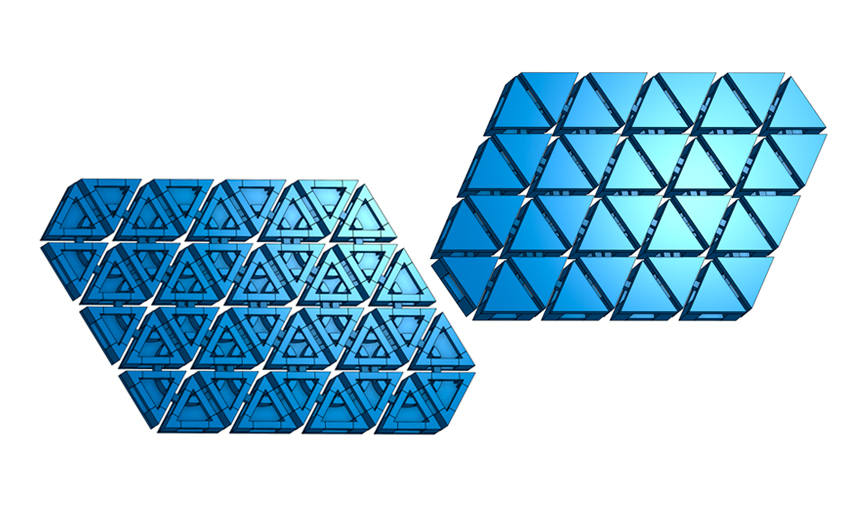
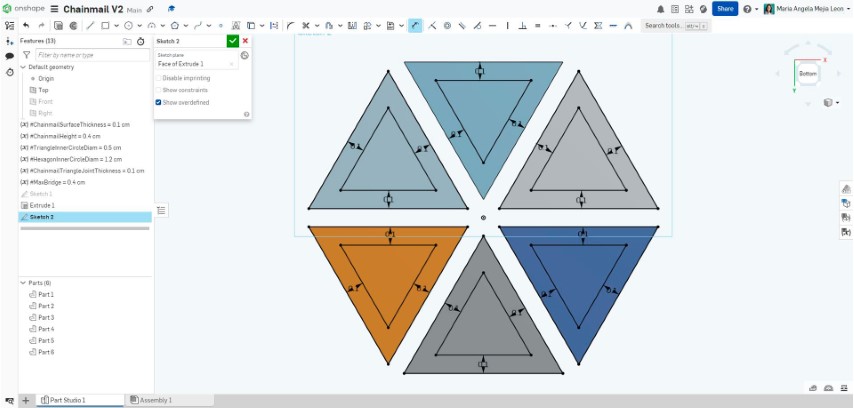
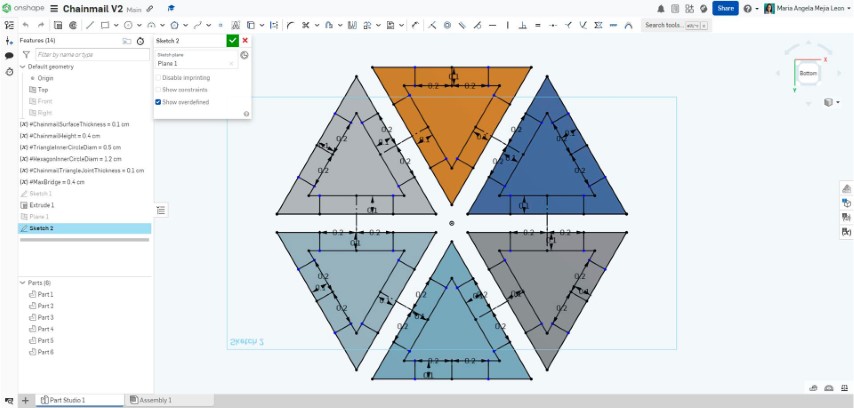
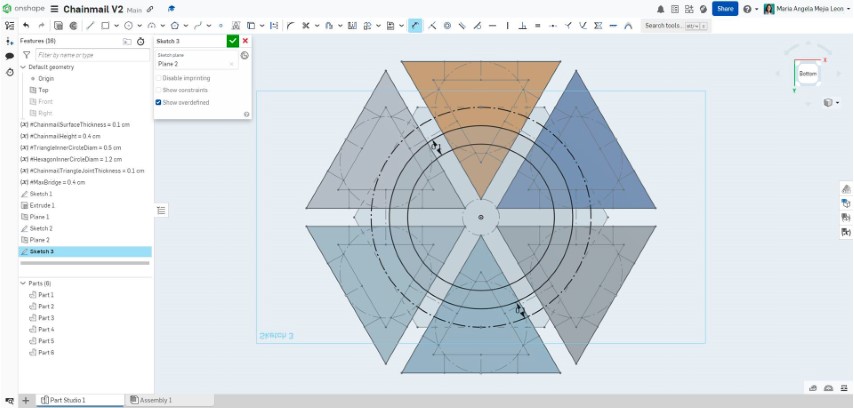
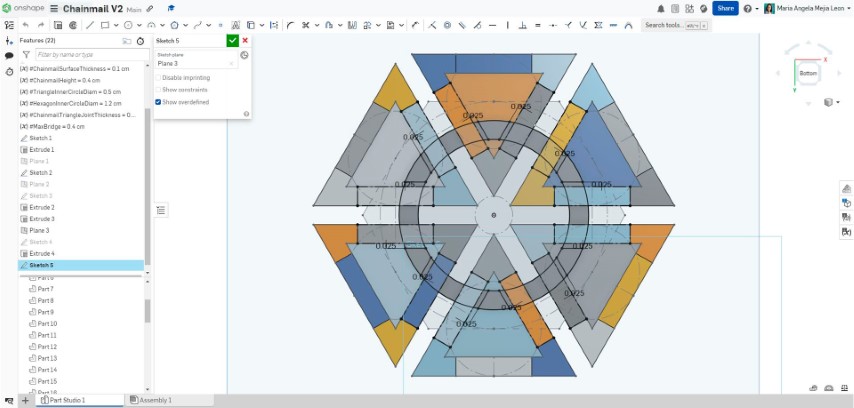
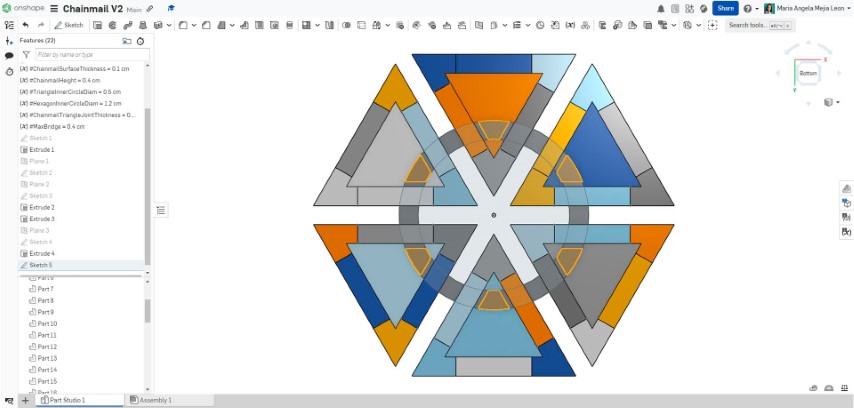
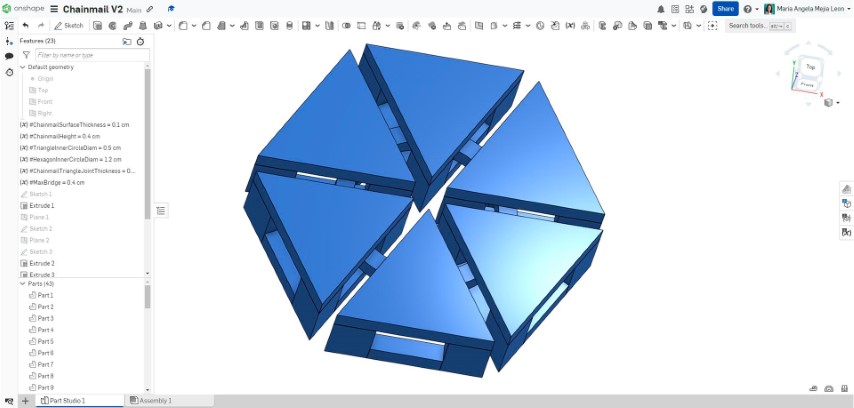
After checking that the module was well printed, I continued with a larger area from that piece.
Larger chainmail area in Onshape
Chainmail design in Onshape
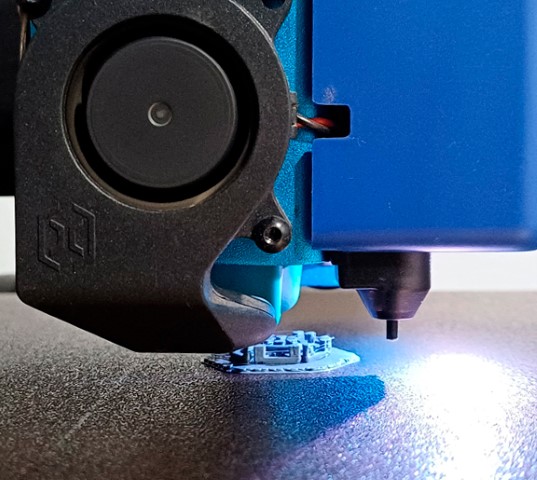
I used the same parameters before used for printing this larger chainmail area Quality: Standard (0.2mm) | Walls Line Count: 3 | Top Thickness/Top Layers: 0.8mm/4 | Bottom Thickness/Bottom Layers: 0.8mm/4 | Infill: 20% | Printing Temperature: 200°C | Build Plate Temperature: 60°C | First 5 Layers Speed: 15mm/s | Rest of Layers Speed: 60mm/s | Adhesion Build Plate: Raft
3D printing a bigger chainmail area with raft plate adhesion
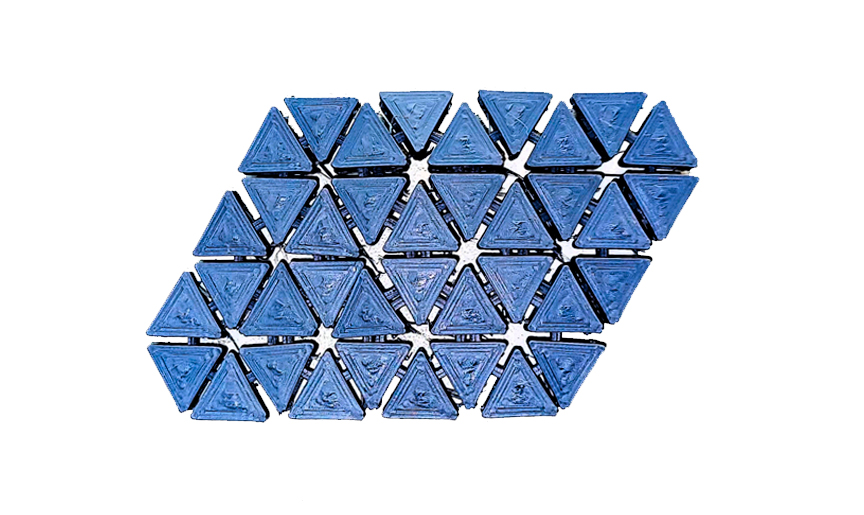
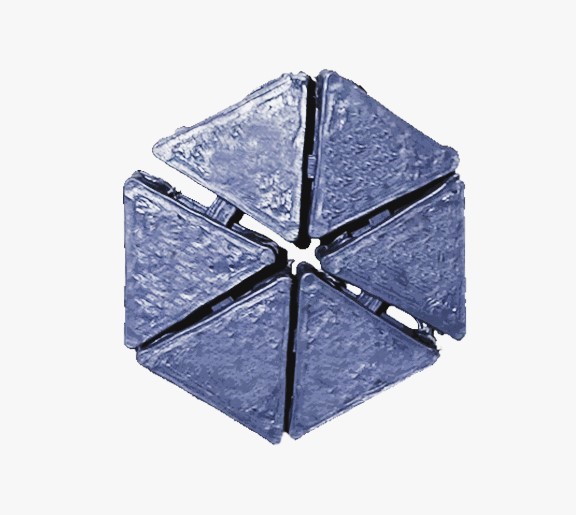
Finally, the result was amazing:
PLA chainmail
PLA chainmail top view
Designing this chainmail was easy once I knew the parameters I can work with on my printer. Furthermore, the possibility of modifying the measurements as it is a parametric file allows me to test and modify as a prototype is manufactured. In this case, I only had to make two versions to reach the final result.
Individual Assignment: 3D Scan
As for the 3d scanning, before this assignment I have used some photogrammetry to obtain models, but until now I have not had good results. I think it happened because I hadn't analyzed the conditions of the shots I took at that time. This week, I was able to see improvements as these conditions improved.
For this assignment, I used the Polycam application on my phone. Polycam is a 3D scanning app for iOS, web and Android. I started doing some tests with small elements that didn't turn out so well, mainly because the objects I chose where small and had a lot of tiny details. I also move along them and I figure that condition was not ideal for the modelling.
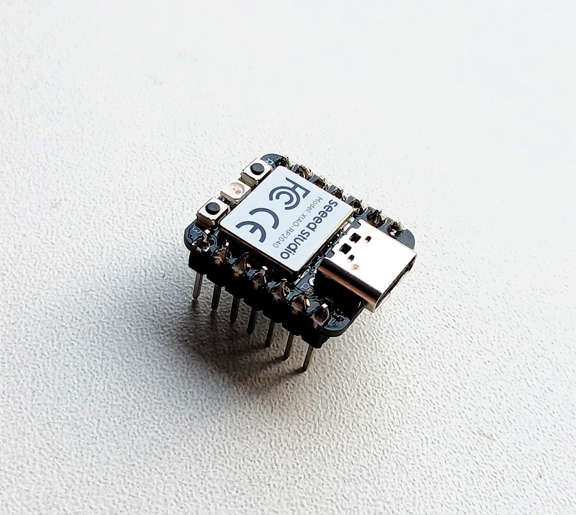
Not so good 3D scan of a Xiao microcontroller
Then, checking the aforementioned bad conditions, I scanned a larger object, found a rotating table so that the object and not the camera moves, and placed lighting at various angles to avoid shadowing. As conditions improved, 3D scanning also improved.
Decorative frog to be 3D scanned
I am happy with the result of this 3D scan. With this exercise I understood that the tool is important and provides both possibilities and limitations. To ensure obtaining a good model, environmental conditions are essential.
Conclusions
Studying and knowing the parameters of the 3D printer helps to design with manufacturing in mind, which ensures a good print.
Supports should preferably be avoided when printing because they can be difficult to remove or slightly damage the surface of the 3D print.
When using photogrammetry to scan in 3D, environmental conditions are essential, as well as choosing a piece large enough to guarantee obtaining a good model.
Working as a team in a distributed manner is a concept that the Fab Academy is strengthening in our node.