4. Computer controlled cutting
This week I learned how to use the vinyl cutter and the laser cutter. I had to use parametrics to design a construction kit. I also learned about kerf
Learning Vinyl Cutting and Laser Cutting
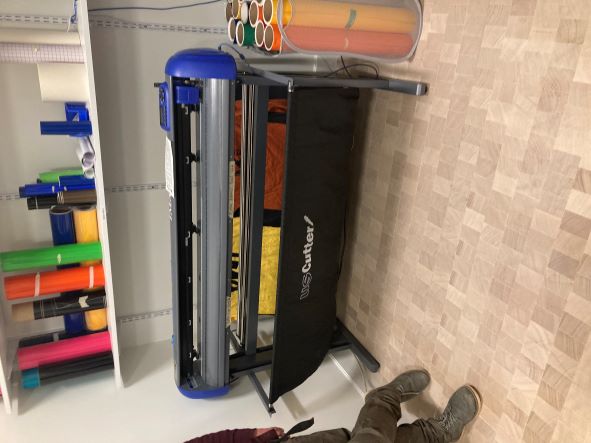
I had previously learned to use both the laser and vinyl cutter, but it was nice to have a refresher on how to use them both since it has been a couple months. One new thing that I learned about Laser cutting was kerf.,To account for the kerf in my pieces I downloaded an add on from Fusion 360 called Save dxf for laser cutting.
Kerf and Parametrics
Kerf is the extra material that is burned away when laser cutting the kerf on the glow forge laser cutter is 0.2 of a millimeter.
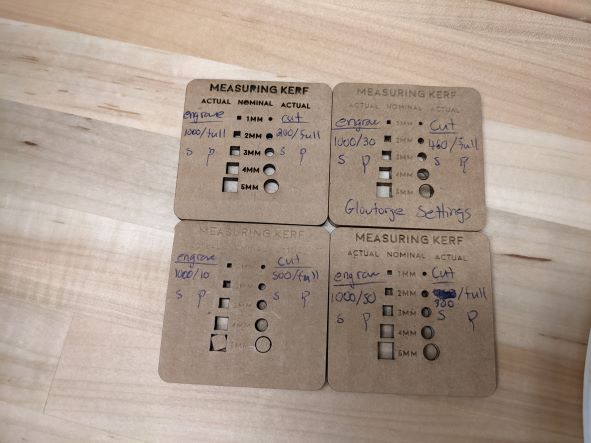 To practice measuring kerf we used a caliper to measure the biggest sqaure of each piece. from top left to bottom right.
-
Engrave:1000/full cut:200/full size of sqaure:5.5mm
-
Engrave: 1000/30 cut:460/full size of sqaure:5.74mm (regular laser cut setting for 1/8 inch cardboard)
-
Engrave: 1000/10 cut:500/full size of sqaure: 5.73mm
-
Engrave: 1000/50 cut: 300/full size of sqaure: 5.74mm
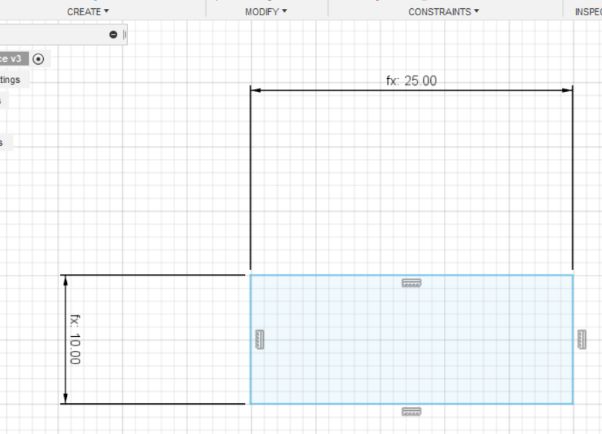
To account for kerf in my project Parametrics are parameters set to help with measuring and scaling
Designing and Cutting the Pieces
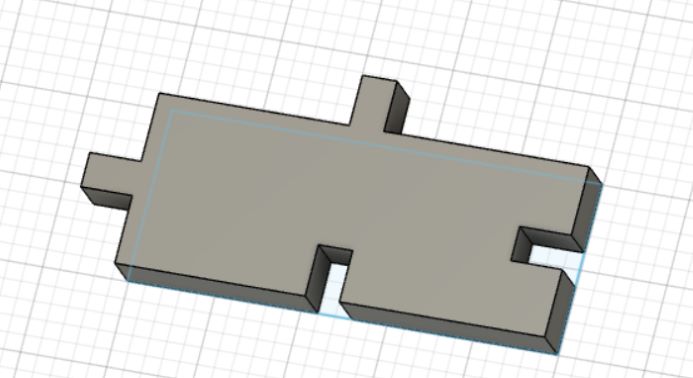
I struggled with coming up with a shape that I wanted my piece to be. So I just decided to do a semi-standard puzzle piece. I set my parametric settings to a width of 10 mm and a length of 25 mm. The first thing I I did was use those setting to create a regtangle
I then created a smaller rectangle that was 2 by 3 milimeters, then copied, pasted, and moved them around. I used the colinear tool to make sure everything was alligned correctly.
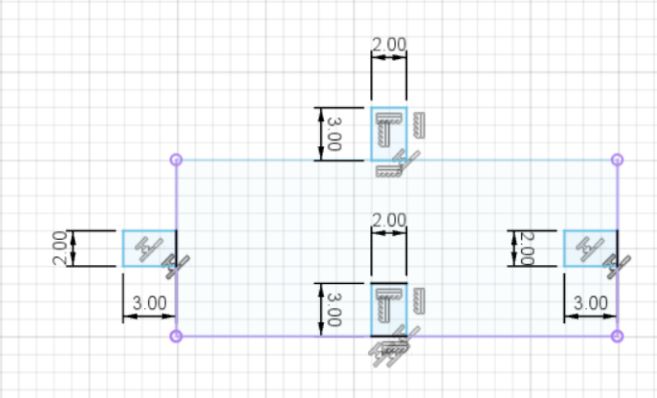
I then extruded the large rectangle and the two outside smaller ones and joined them together. I used the deboss(emboss tool) to make the smaller rectangles empty space
Files
laser cut puzzle piece extruded puzzle piece
Useful
Code Example
Use the three backticks to separate code.
// the setup function runs once when you press reset or power the board
void setup() {
  // initialize digital pin LED_BUILTIN as an output.
  pinMode(LED_BUILTIN, OUTPUT);
}

// the loop function runs over and over again forever
void loop() {
  digitalWrite(LED_BUILTIN, HIGH);   // turn the LED on (HIGH is the voltage level)
  delay(1000);                       // wait for a second
  digitalWrite(LED_BUILTIN, LOW);    // turn the LED off by making the voltage LOW
  delay(1000);                       // wait for a second
}
Gallery

Video
From Vimeo
Sound Waves from George Gally (Radarboy) on Vimeo.