9. Electronic Production
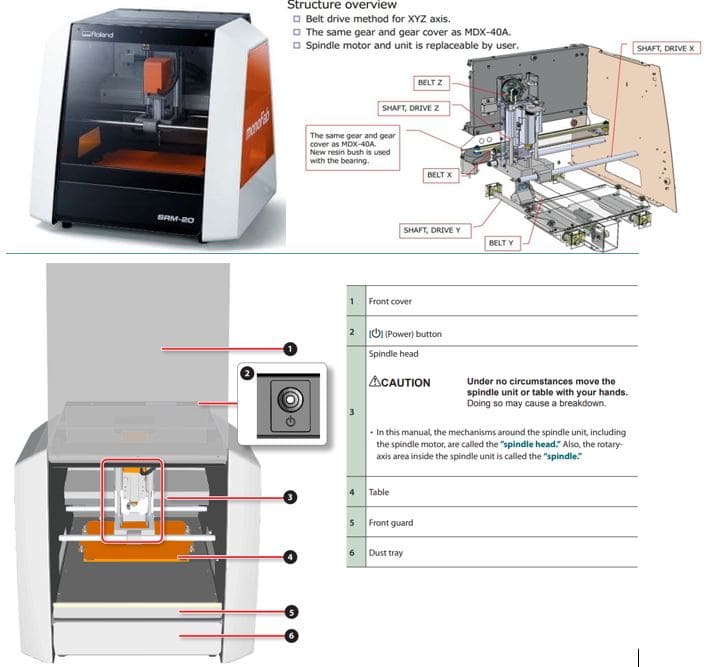
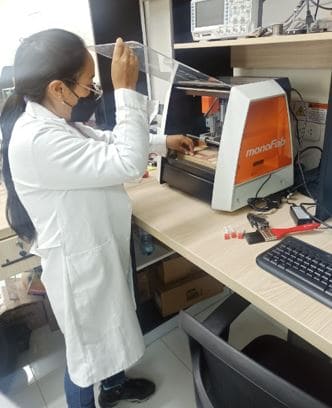
For this activity they asked us to work as a group, they ask us to Characterize the design rules for their internal PCB production process: document feeding, speeds, penetration rate, depth of cut (traces and contours) and tools. Thanks to our instructor for giving us the necessary support and guidance. Now we are going to start by researching the equipment and software that we will use in this task. MONOFAB SRM-20 machine : Is a next-generation tabletop router that features a micro-stepper motor drive system for clean, precise contour cuts, as well as a phenomenal feed rate twice as fast as previous generations. The SRM-20 portable milling machine can precisely mill a wide range of materials including wax, chemical wood, foam, acrylic, polyacetal , acrylonitrile butadiene, styrene (ABS) and printed circuit boards. Let’s get to know the interior and its structure.
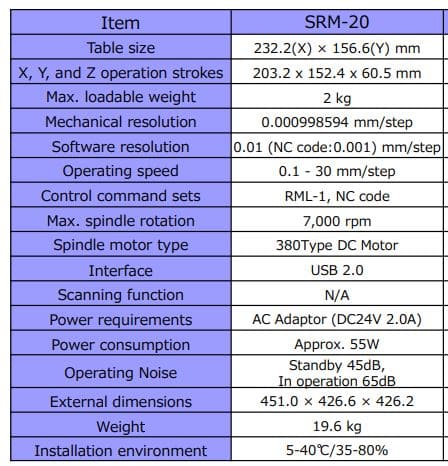
Let’s see the Specifications:

Installation of the controller of the milling machine MONOFAB SRM-20
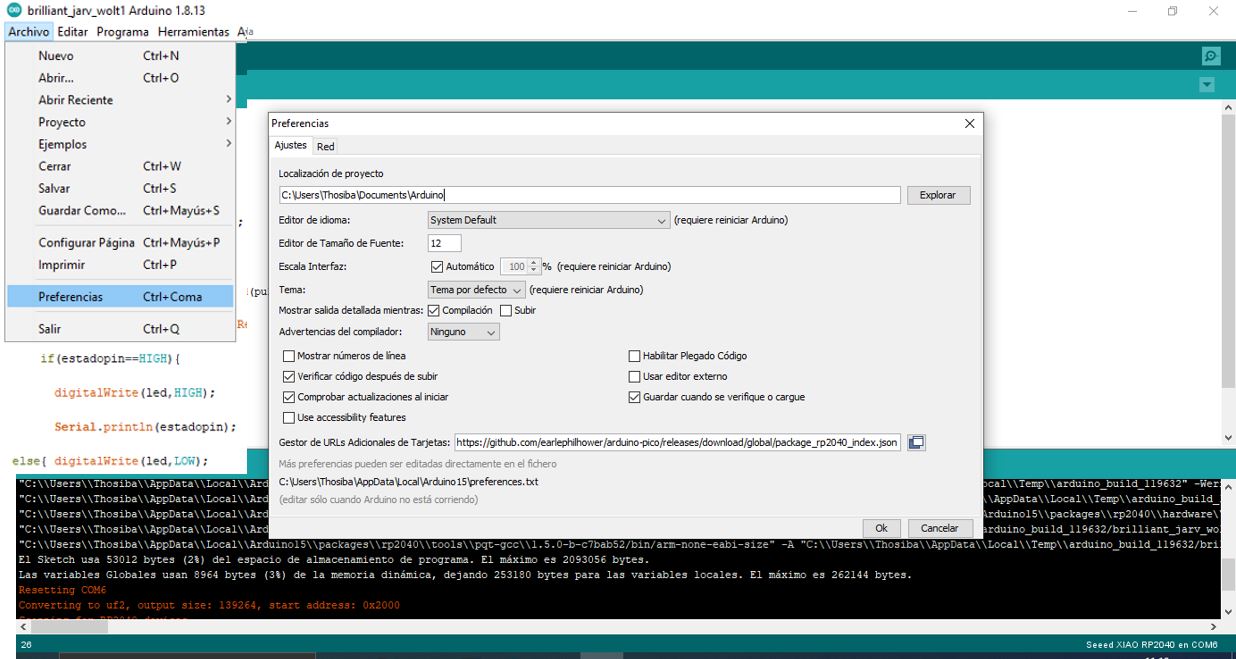
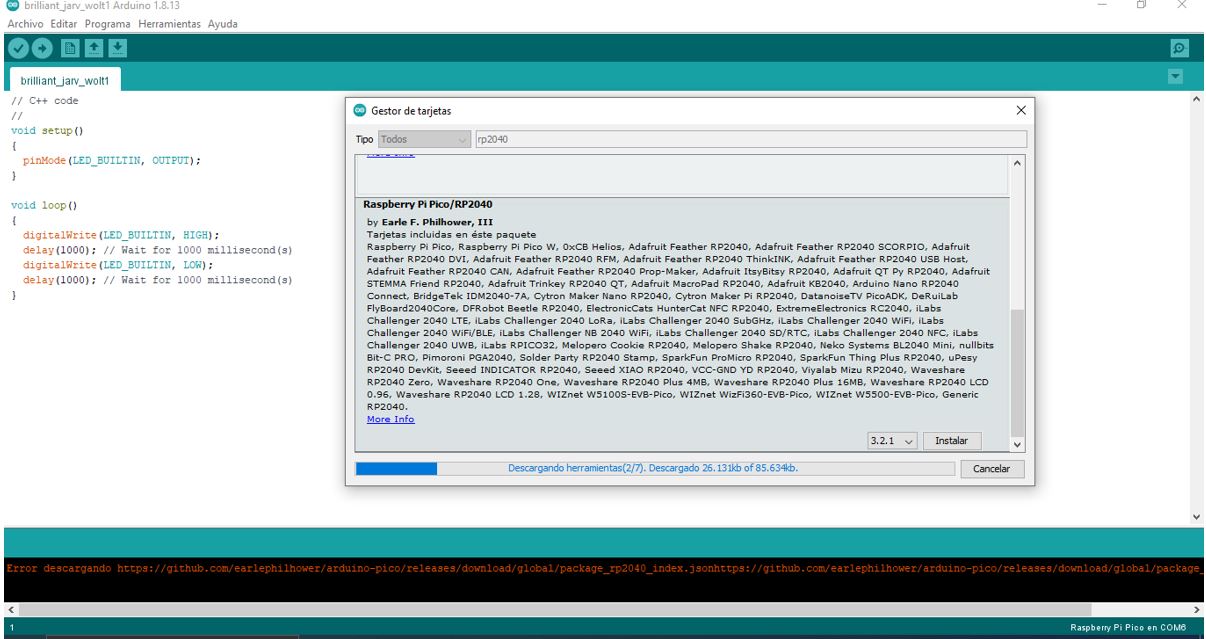
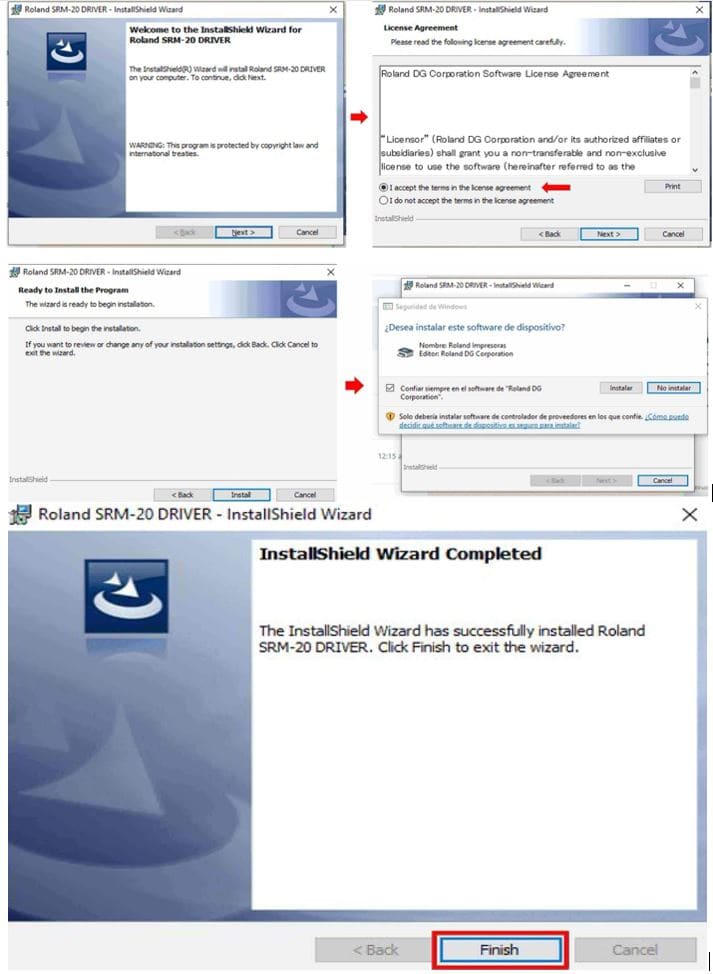
I download the software and unzip to be able to run as administrator, where a configuration window appears and I mark the INSTALL option, then press START to start the installation. We accept the license terms and then click NEXT. It is very easy, it only consists of taking the next step by clicking on the next button, in all the windows the following option is selected and finally you press the FINISH button, and the installation concludes satisfactorily. As can be seen in the following images.
VPanel software installation for SRM-20
In the same way, the same step is followed for the installation of VPanel software , unzip the file and run as administrator, the installation is prepared in the next window, press NEXT to start the installation wizard. We accept the software license terms and press the NEXT button. We start the installation by pressing the INSTALL button.
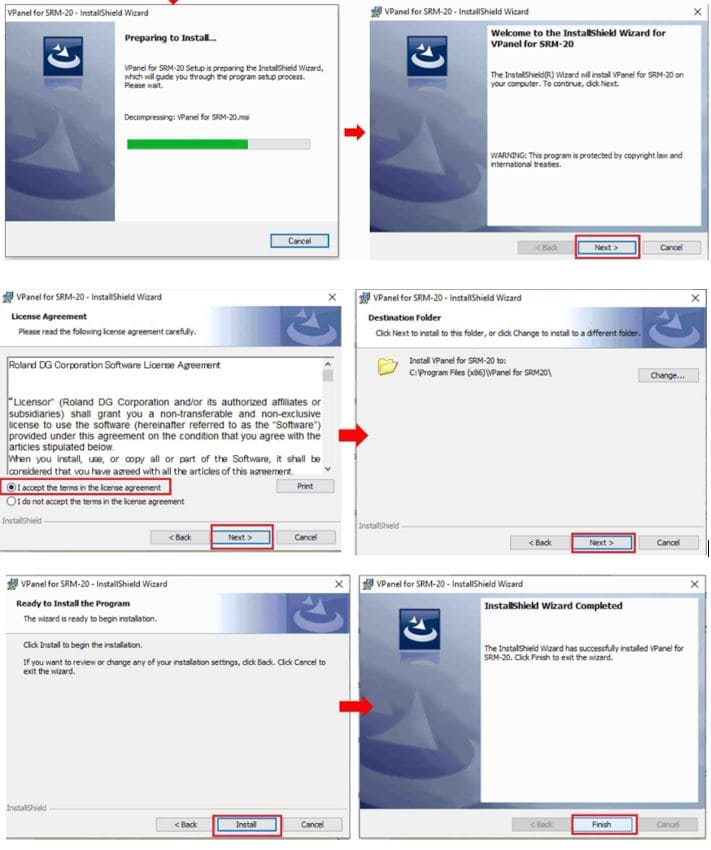
and when finished we press FINISH. We’ll see it on the desk.

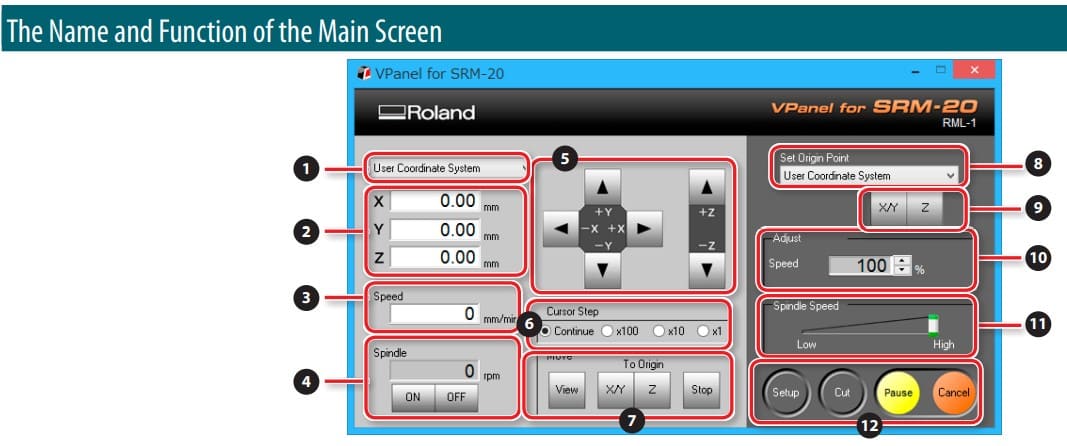
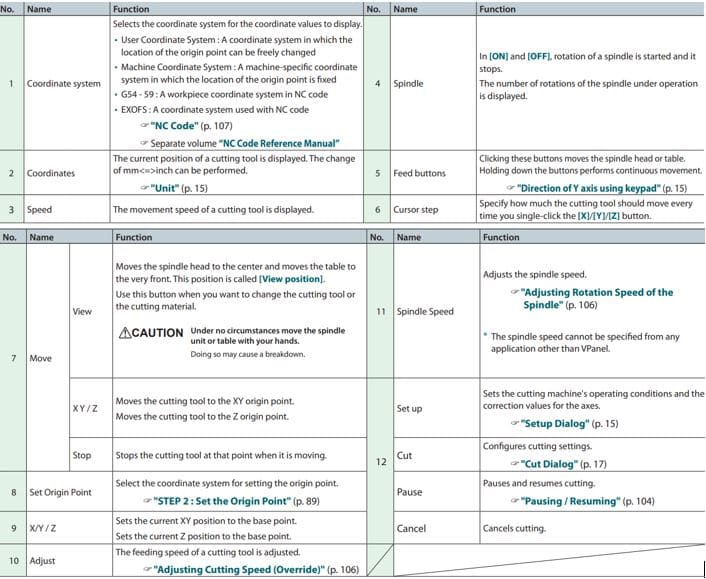
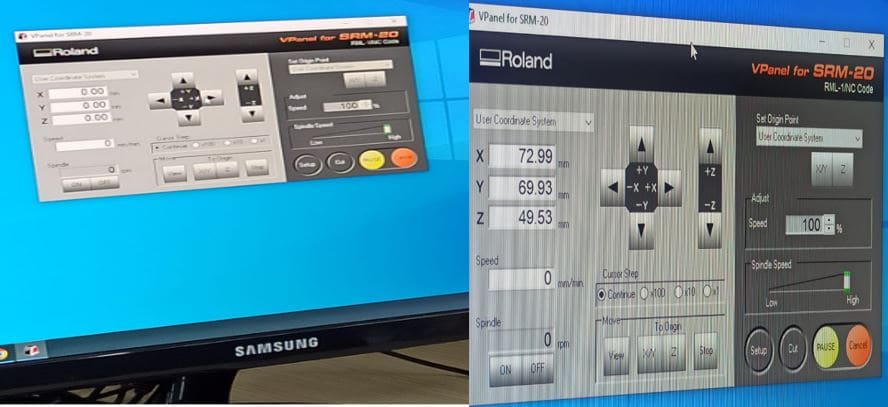
ROLAND VPANEL SOFTWARE FOR SRM-20
VPanel controller for regulating feed rate, spindle speed, and milling in all three axes X, Y, and Z, and a new independent drive system. chuck that allows faster Z-axis base point setup and quick tool changes. This software controls the machine, suggestion to know all the commands, to be able to carry out our work.
Starting our group work
The linear test pattern ( Pattern_Test.png ), we search and select references on the web. This is the picture of our internal PCB production process to test the resolution of the machine.

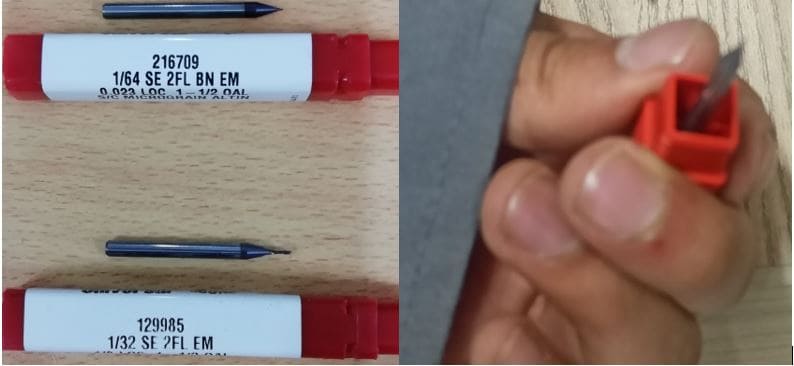
The tools we have at our disposal are: 1/64-inch tracing (or scratching) cutters and 1/32-inch PCB contouring cutters.
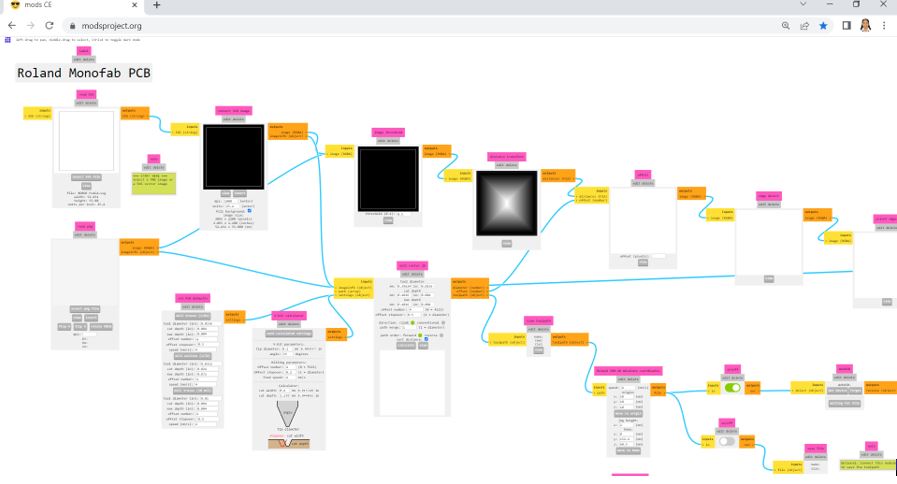
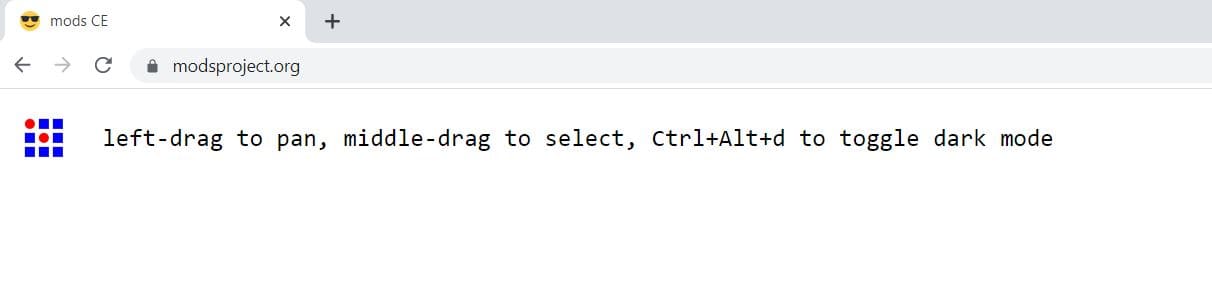
For the creation of the PCB, we have the fabmodules and mods to transform from pngs format a . rml that the SRM-20 uses. For this we will use the following link https://modsproject.org
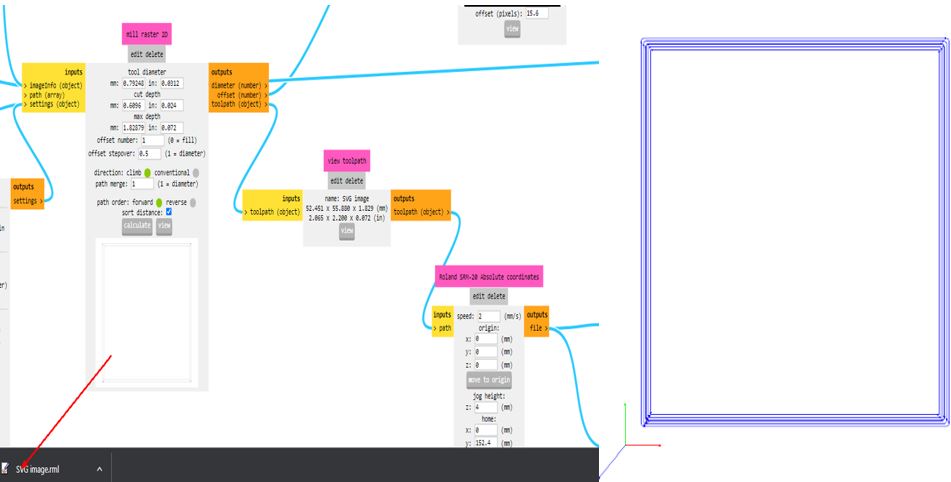
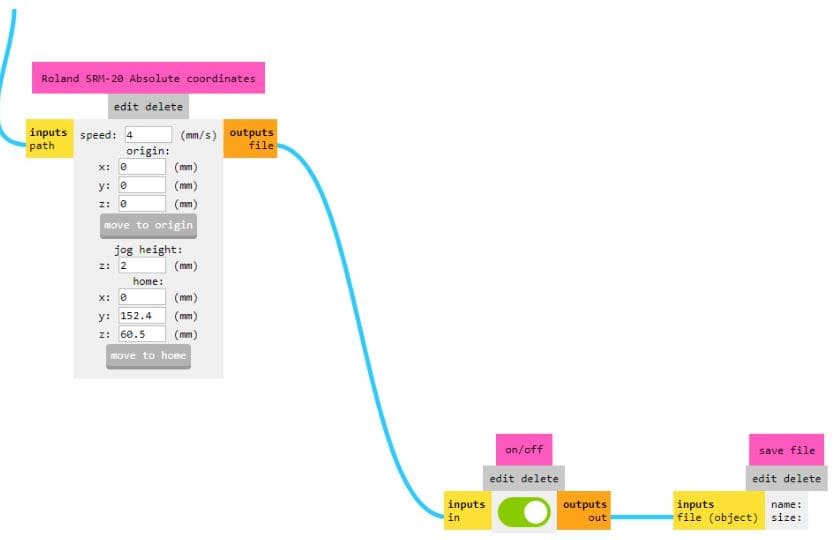
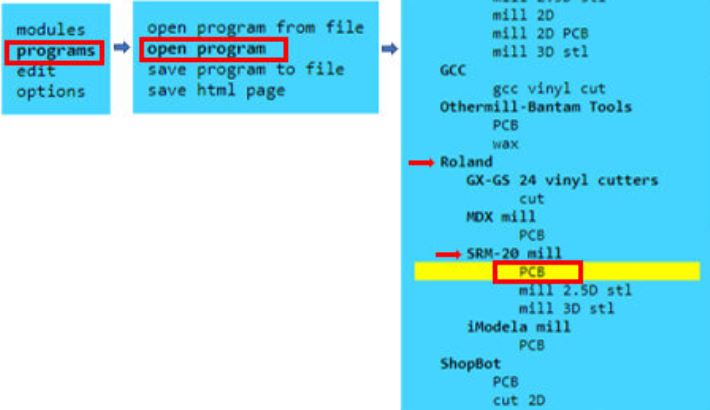
 In the mod environment, simply open Programs > Open Program > Machines > SRM-20 Mill > PCB CBA. In our case, we are not going to network the Monofab , so we remove the WebSocket blocks . We also enable the output to download the . generated rml
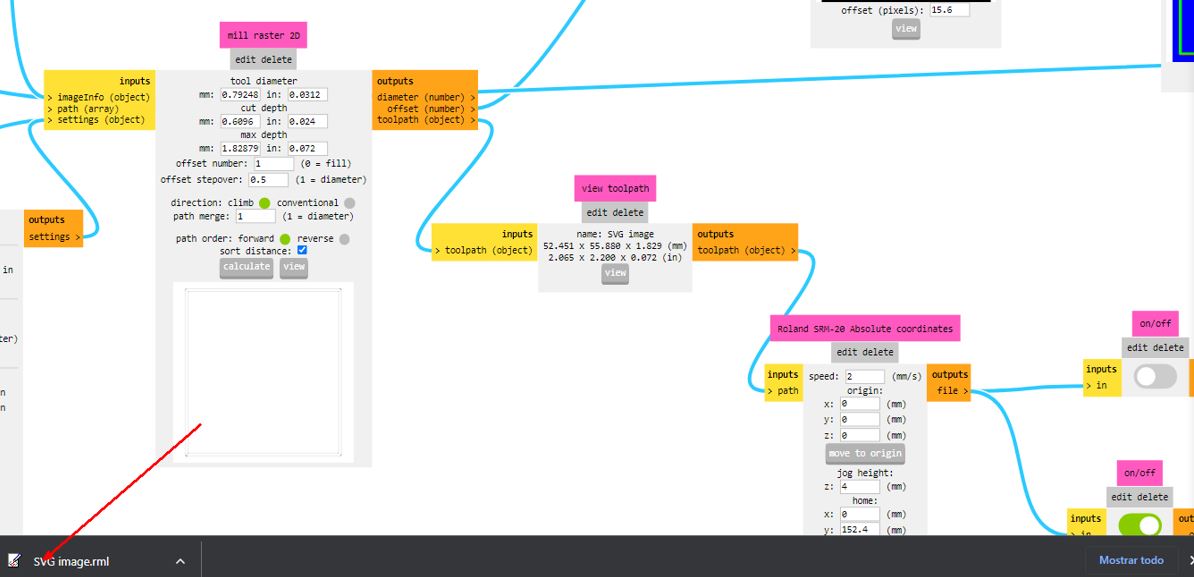
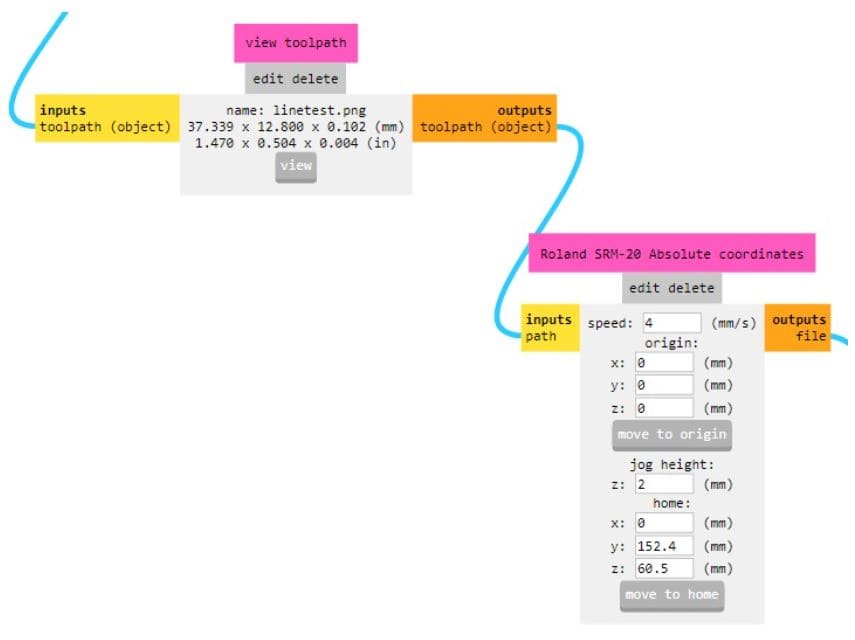
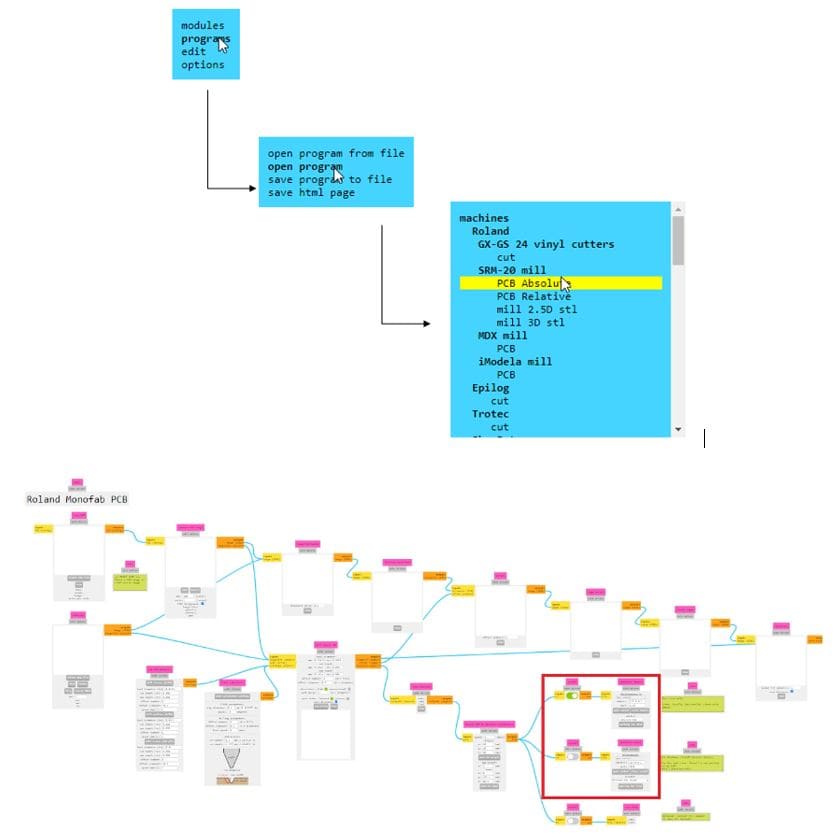 We set the (x, y, z) coordinates to (0, 0, 0) and keep the scroll speed at 4mm/s, the scroll height at 2mm .
RESOLUTION TEST
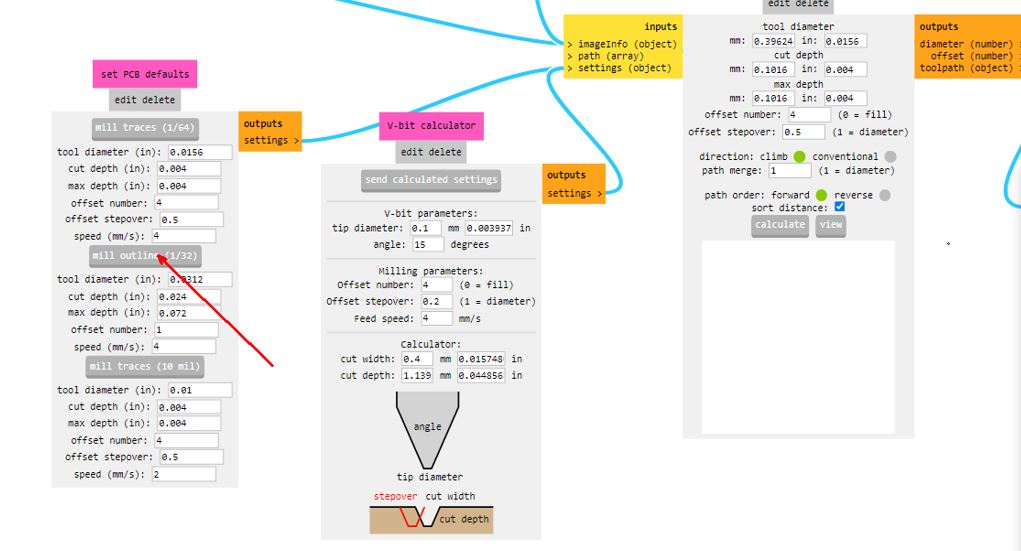
In the read.png block we load the image of the PCB pattern: linetest.png. For the mill traces we use the default configuration of the mods.

We keep the speed at 2 mm/s and the displacement height of the cutter in the air at 2 mm
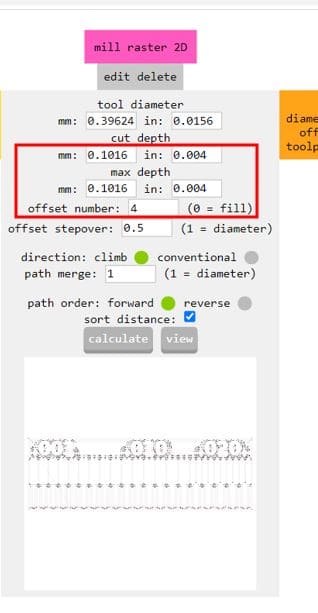
 The 2D frame milling block. We calculate the depth of cut, which by default is 0.1016 mm and the number of passes is 4.
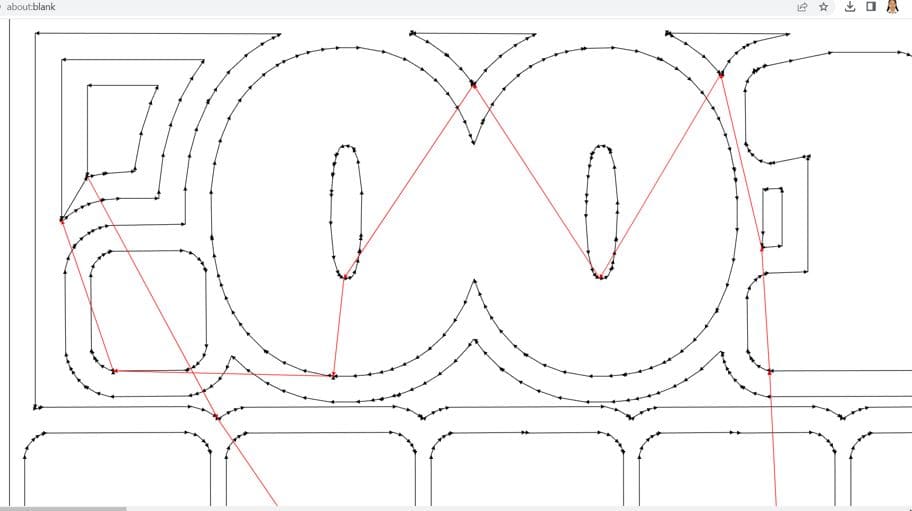
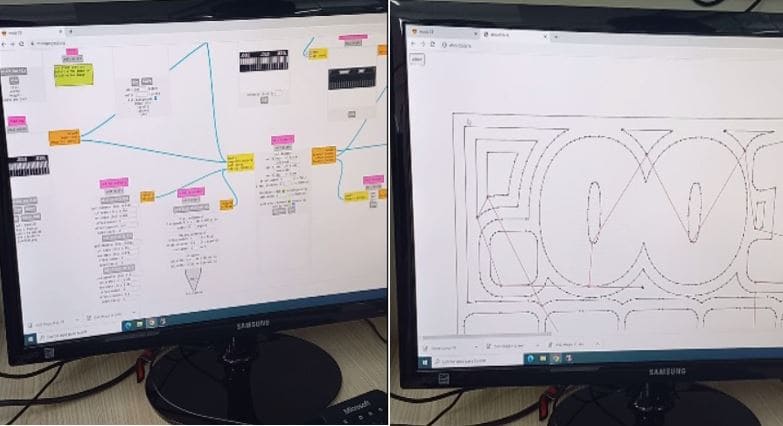
Pressing calculate generates the format. rml that is downloaded to the computer and gives us a perspective of the milling machine parts on the PCB. It is the one shown below
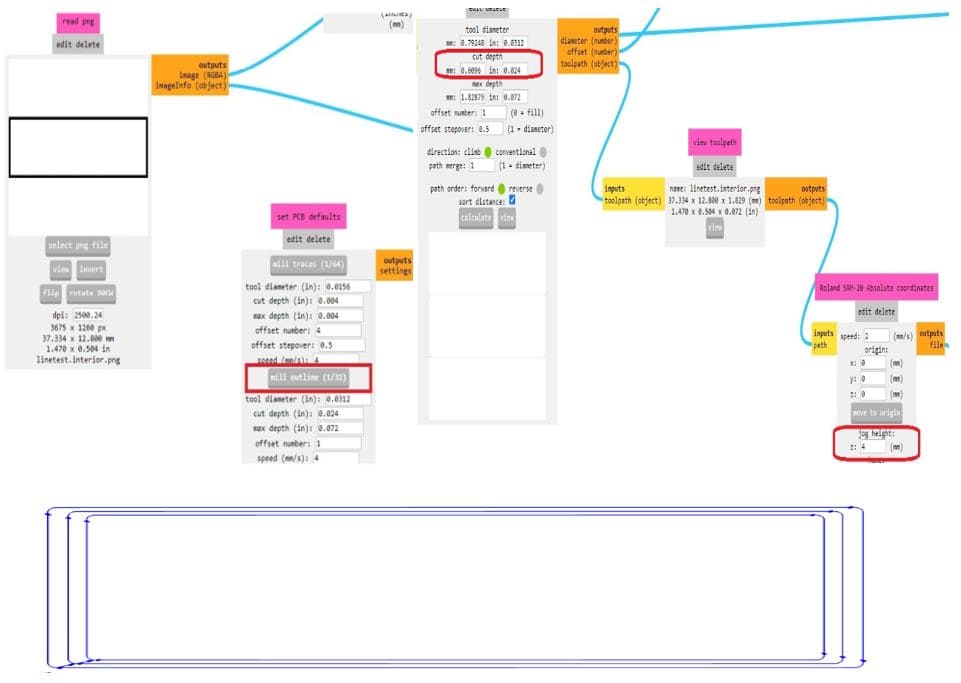
The same steps we perform for the PCB schematic, we load the file: linetest.interior.png in Mods. For this work we have considered a speed of 2 mm/ s and a jog height of 4 mm. The depth of cut is left at 0.6096 mm. As can be seen in the following images.
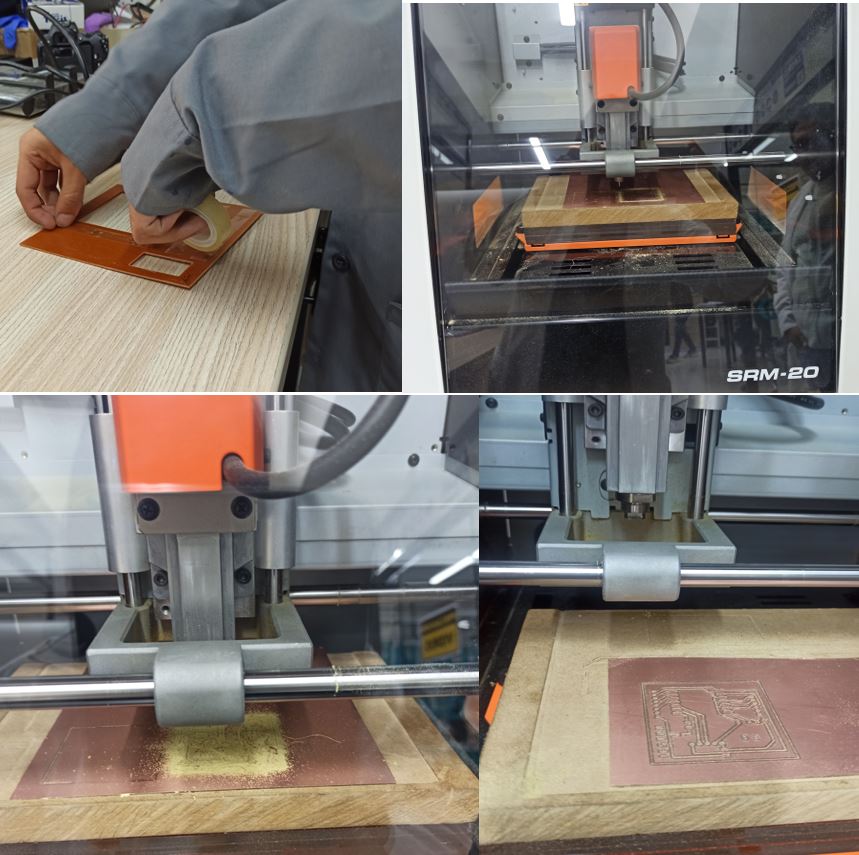
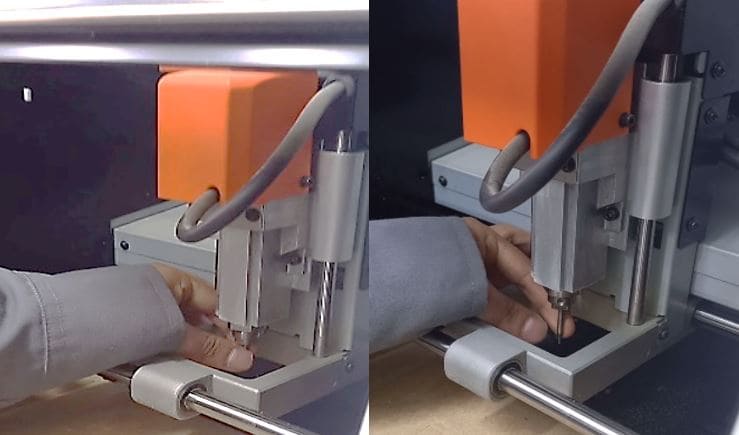
TESTING THE MONOFAB WITH THE INITIAL WORKING POSITION CALIBRATION To do this, we lower the tip of the cutter holder (Z) to the bottom. Then with the hexagonal tool we loosen and drop the dam until it touches the PCB. We go up two positions at x100 steps. Then we adjust the cutter again. In the Vpanel we adjust the positions of X=Y=Z=0. We do the calibration.
Work begins on the Monofab SRM-20, with the placement of the milling machine being very careful when handling.
We load the .rml file and the cutting process begins.
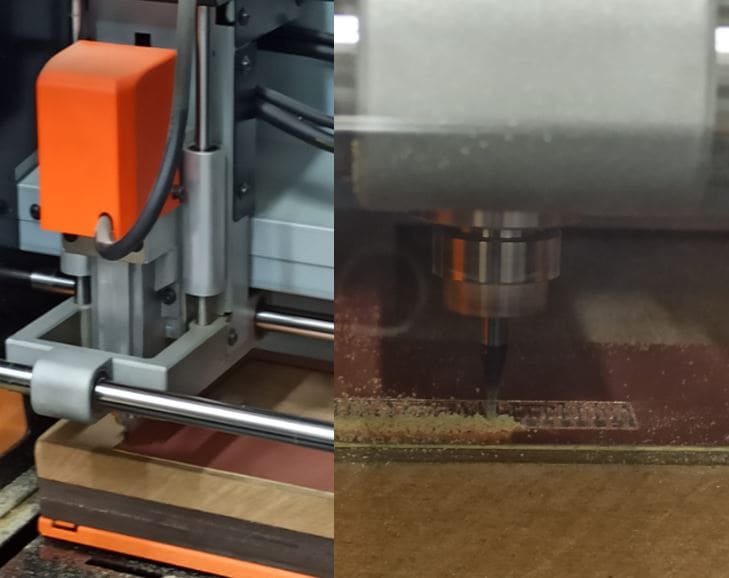
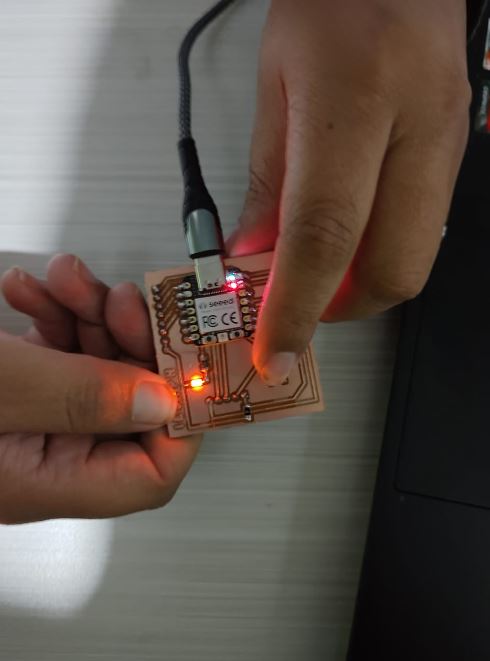
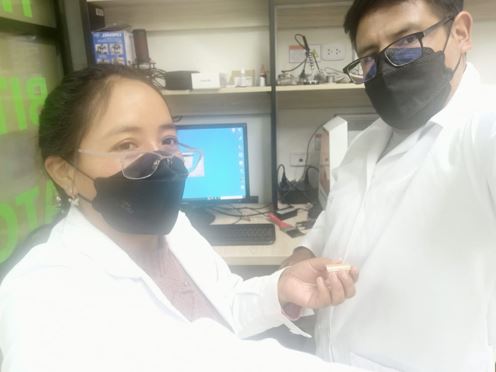
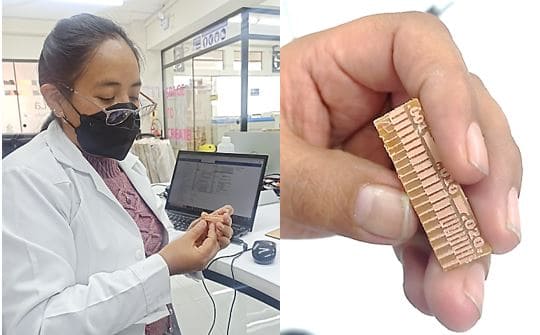
And this is our result
WHAT WE LEARNED IN THIS TASK:
This week we learned to use the Monofab SRM-20, from its internal structure and the software it uses. Thanks to our instructor and the technical team from fab lab continental who supported us to better understand the milling process through the design rules of the PCB production process.
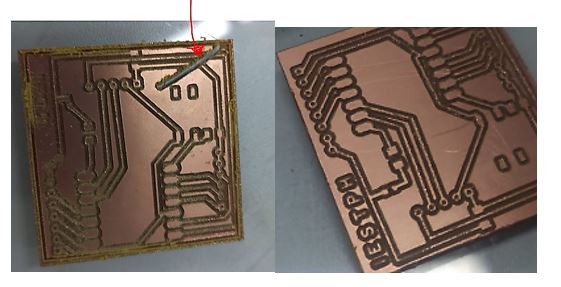
Analyzing the milling parameters, as observed in the images of .001, we can conclude that it is not suitable for milling because the copper comes off as it is very thin, from .10 to .020, it can be worked for the execution of circuits and perform milling on the PBC boards, we conclude that milling can be done from .020 because it is more resistant to assemble the circuit and solder on it.
Our first PCB (test pattern) that we made, we saw that it came out excellent. We now turn to carry out our individual work.
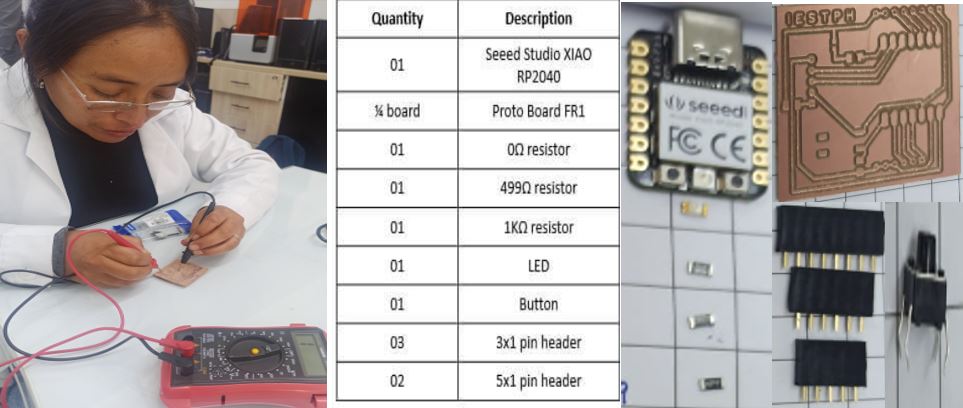
Individual assignment:
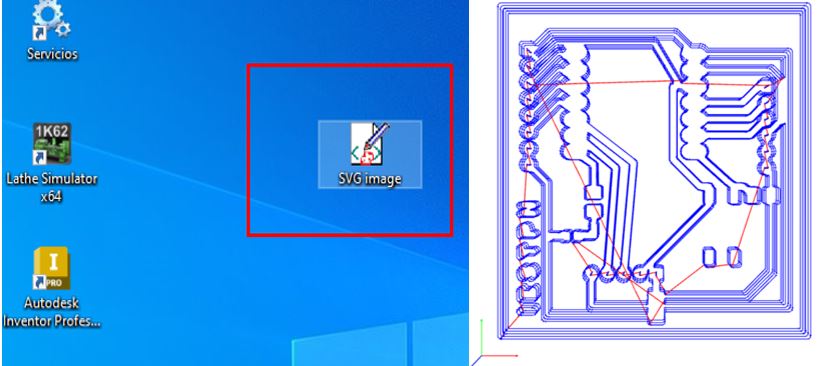
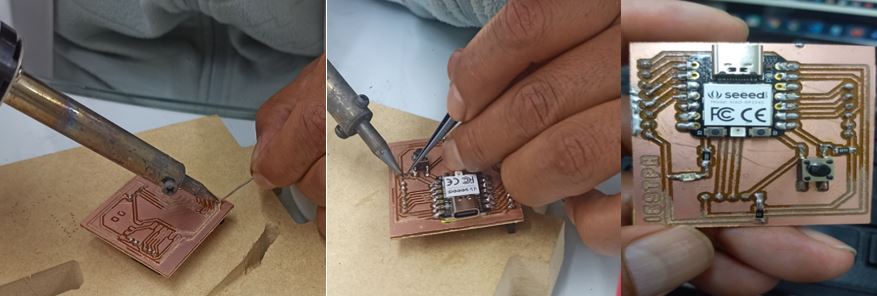
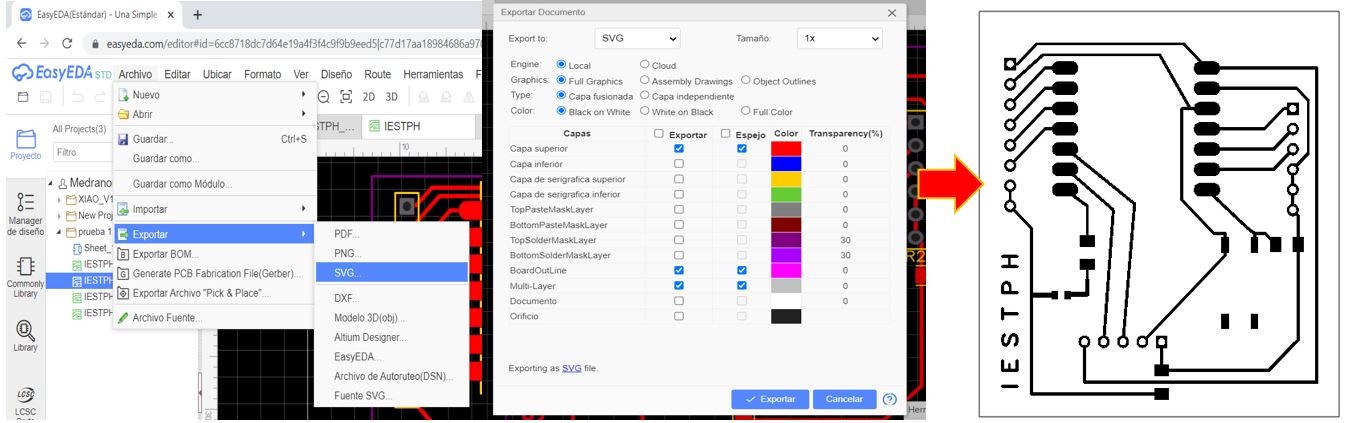
Starting Plate Milling We use MODSPROYECTO as software to parameterize the PCB svg files, and to be able to work it from the milling machine. The steps are the same as those made in the design rules, only this time we will work in .SVG.
Starting the milling of our plate In a new browser tab we enter the following link. https://modsproject.org/. When entering the following window appears, we right click on the work area; follow the steps below.

Pressing calculate generates the format. rml that is downloaded to the computer and gives us a perspective of the milling machine parts on the PCB. It is the one shown below
WORKING ON THE VPANEL FOR SRM-20
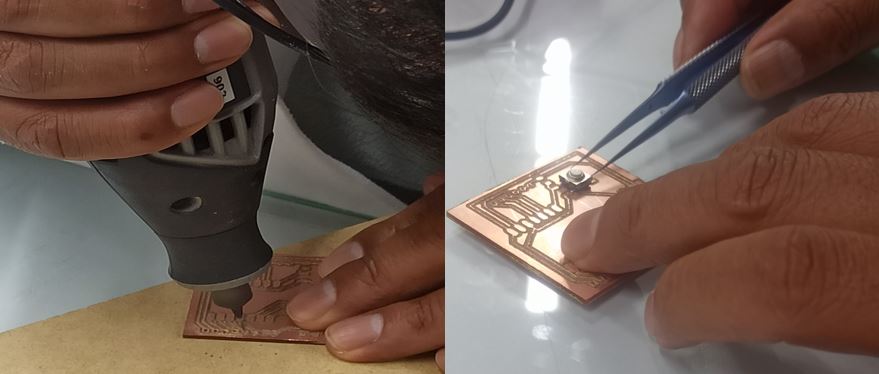
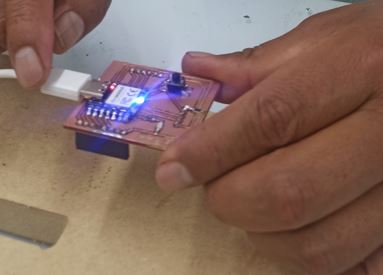
Immediately we proceed to the cut and obtain our first PCB.
The following window will appear, it is there where our file will be loaded.