4. Computer controlled cutting
WORKING IN GROUP
Each assignment is a learning challenge and the best way to learn is by documenting, for example, What is a laser cutter? It is a computer numerical control machine, better known as a laser cutting machine or CNC machine. We are talking about a cutting tool that is controlled by a computer. Therefore, the cutting and engraving designs on materials such as wood or metal are embodied thanks to the digital software of the machine.
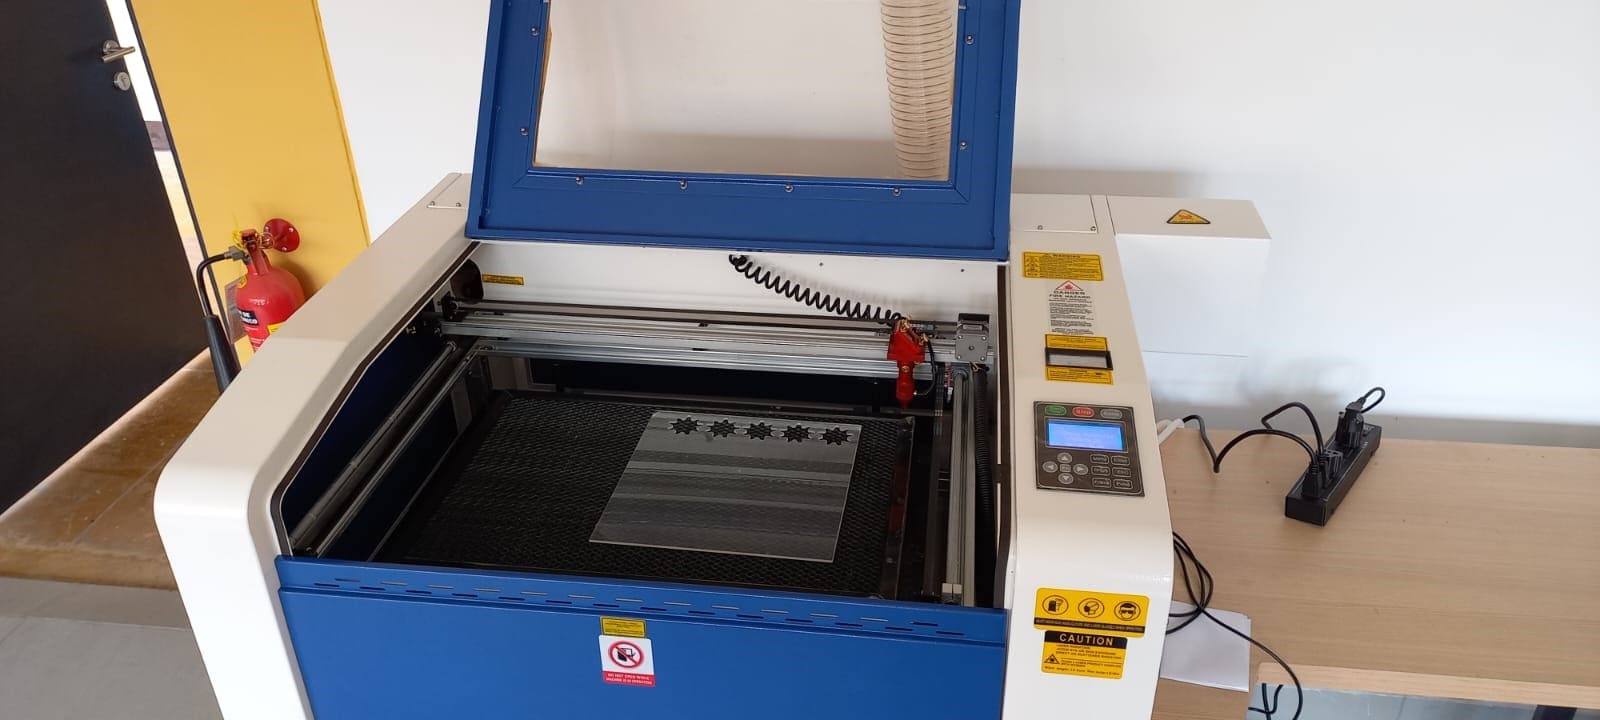
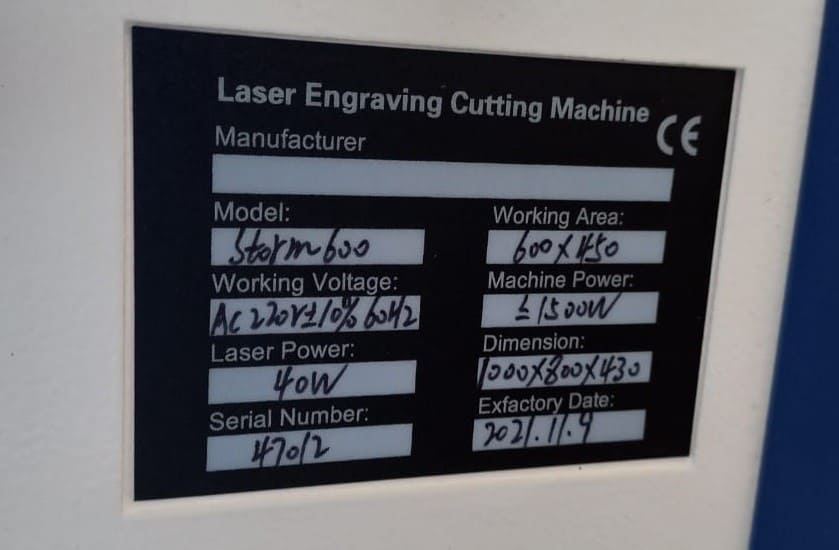
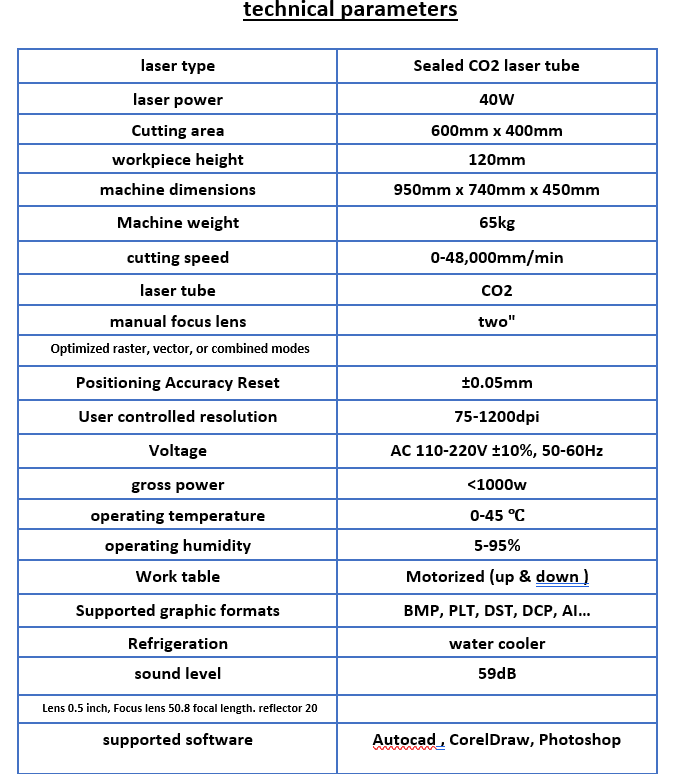
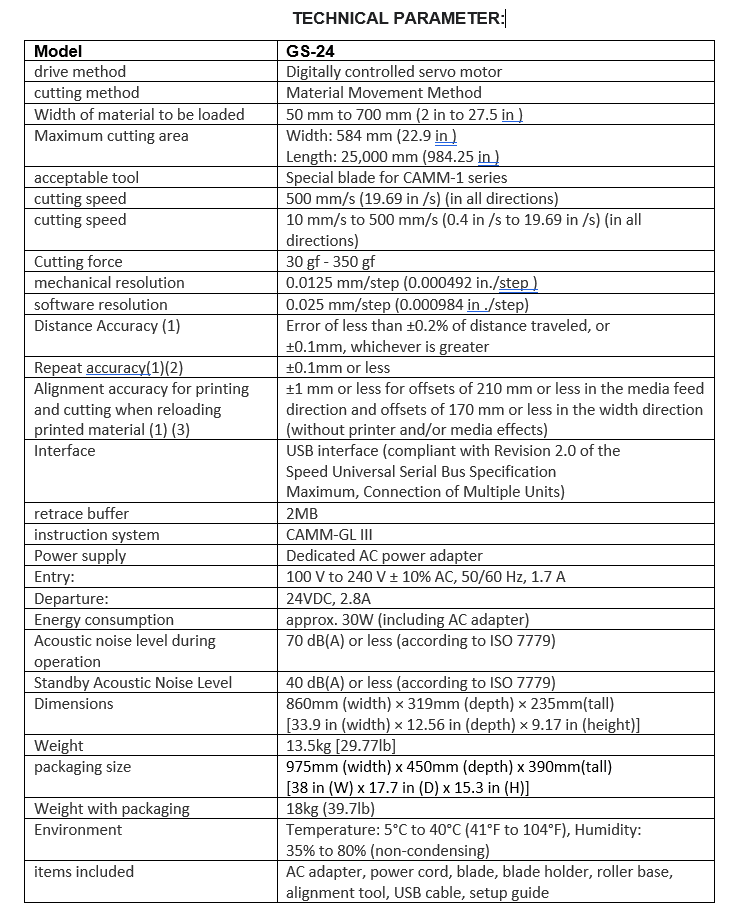
The next step is to verify if our laser cutter that has our IESTP-HUANCAVELICA model STORMBOO SERIE 47012, brand MicroStep6040, complies with the following technical description and parameters.
Something very important to be able to use the laser cutter is necessary to take into account the safety precautions for laser cutters / engravers.
Know how the laser works
Beware of fumes
Avoid unnecessary fires
Clean the laser engraver regularly
Protect your eyes.
CD LASER SOFTWARE
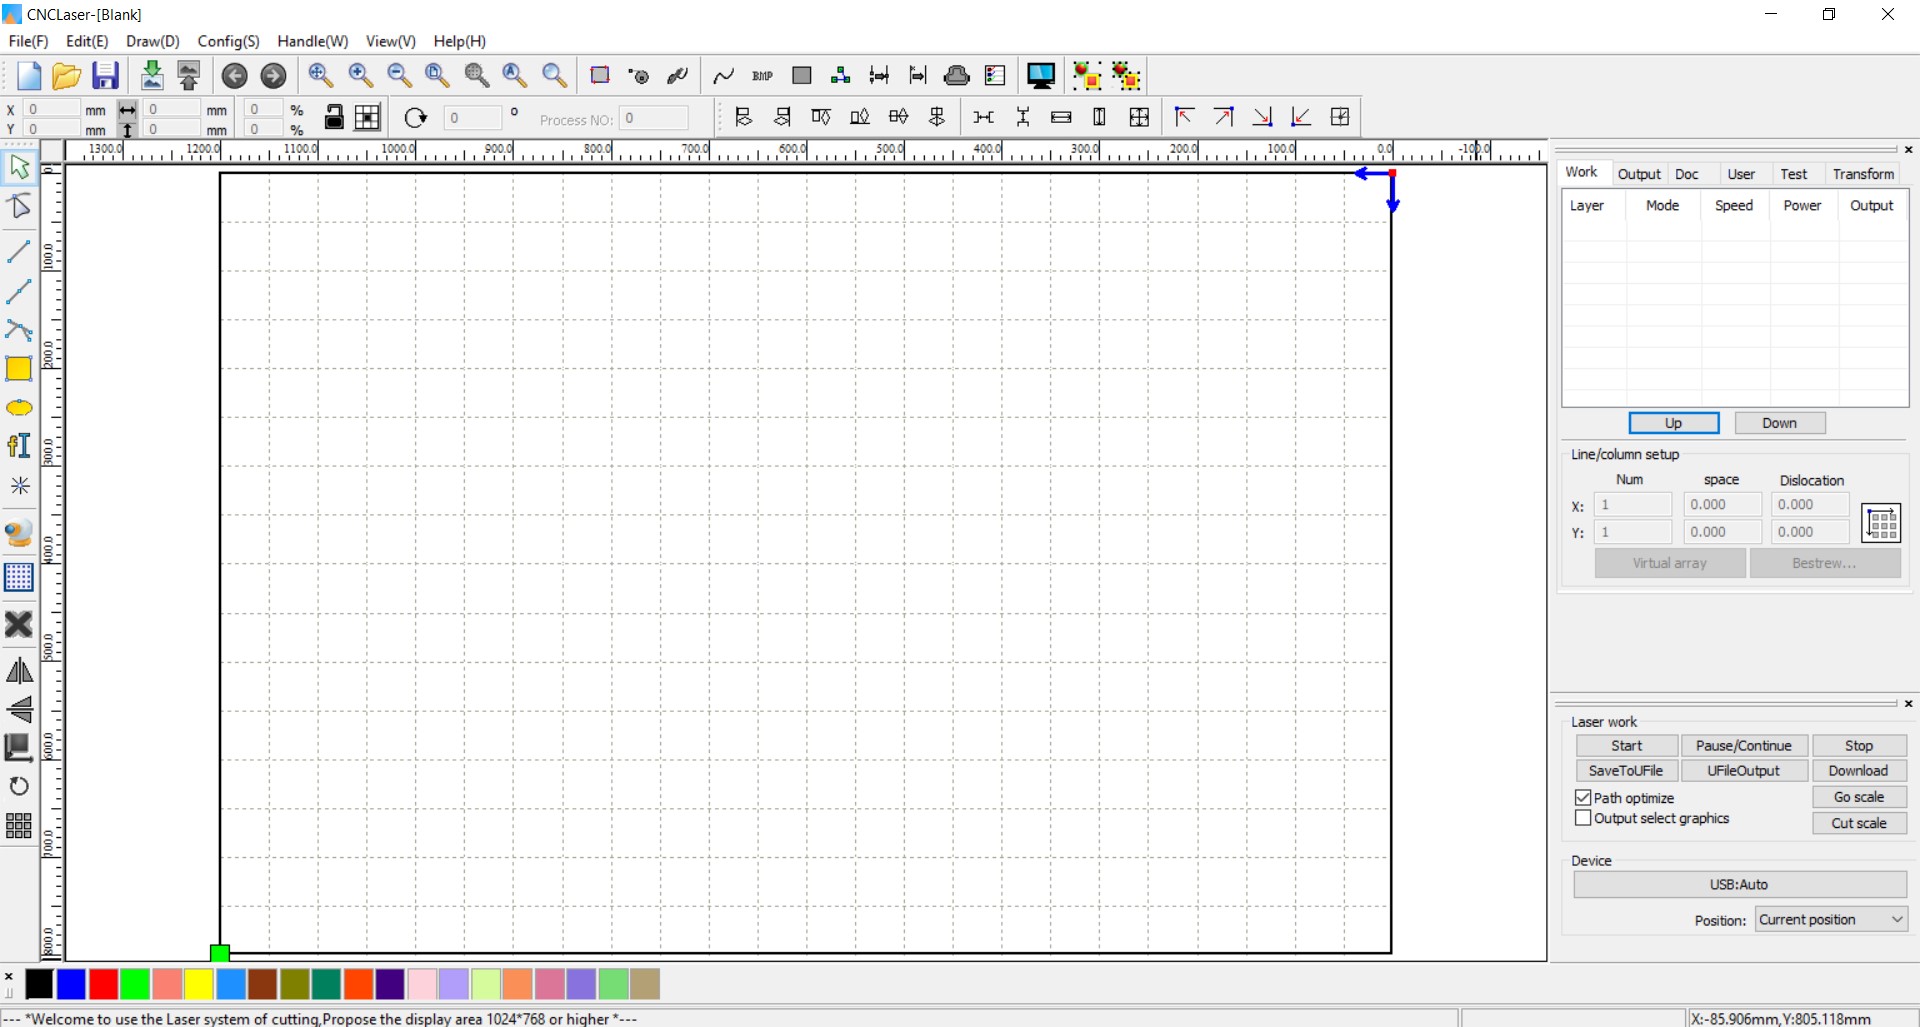
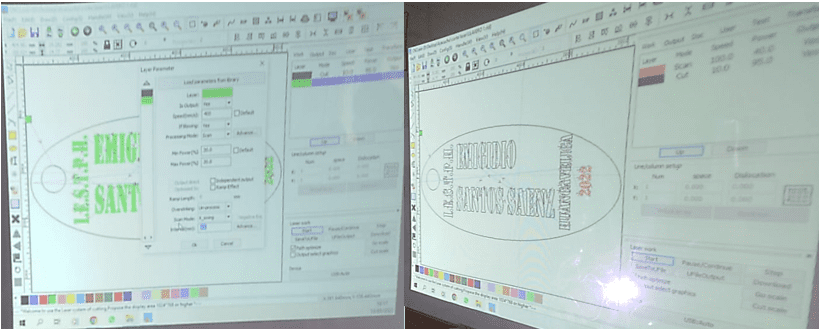
The software used is CNCLaser , the interface is shown in the following figure. With this software contains different option tabs like File, edit,draw , config , handle , view , help . As shown in the work done below.
WORK APPROACH
Taking into account the approximate dimensions of our work area, what is recommended is (width x height x depth) 730 x 562 x 298 mm. Minimum work area 406 x 305 mm. minimum height of the workpiece 114 mm. In addition, mentioning that this parameter (focal distance) influences the result of the work, the correct distance between the material and the working lens must be considered in the measure of 53, if the lens is very far from the material, the laser will be it will open and lose focus, spoiling our work. If it's too close, the laser aperture will be high and we won't have good power control.
2. INDIVIDUAL ASSIGNMENT
I have made the vinyl cut as well as the description, parameters, see the process below:
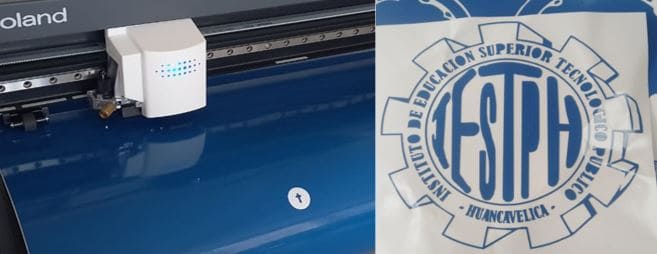
VINYL CUTTER
It is a device similar to a printer whose function is to cut designs instead of printing. This blade is used to cut shapes and letters from thin self-adhesive plastic (vinyl) sheet. The vinyl can then be stuck to a variety of surfaces, depending on the adhesive and the type of material.
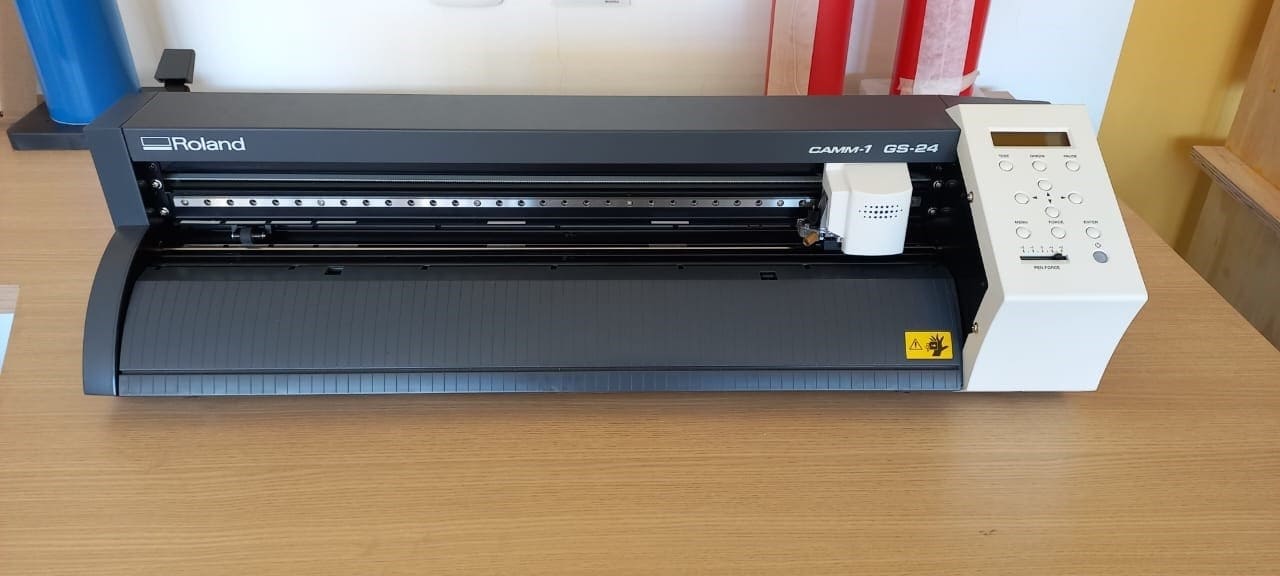
There are many types of vinyl cutters. At the Huancavelica institute, they have provided us with the following:
The Vinyl Cutter Model is as follows: GS-24 Serial No. NEW2594
BRAND: ROLANDO
The working area of the vinyl cutter is: Maximum cutting area of 584 mm (22-15/16 inches) wide and 24998 mm (984-1/8 inches) long Dimensions of 855 (width) x 315 ( depth) x 240 (height) mm
DESIGN PROGRAM
First step:
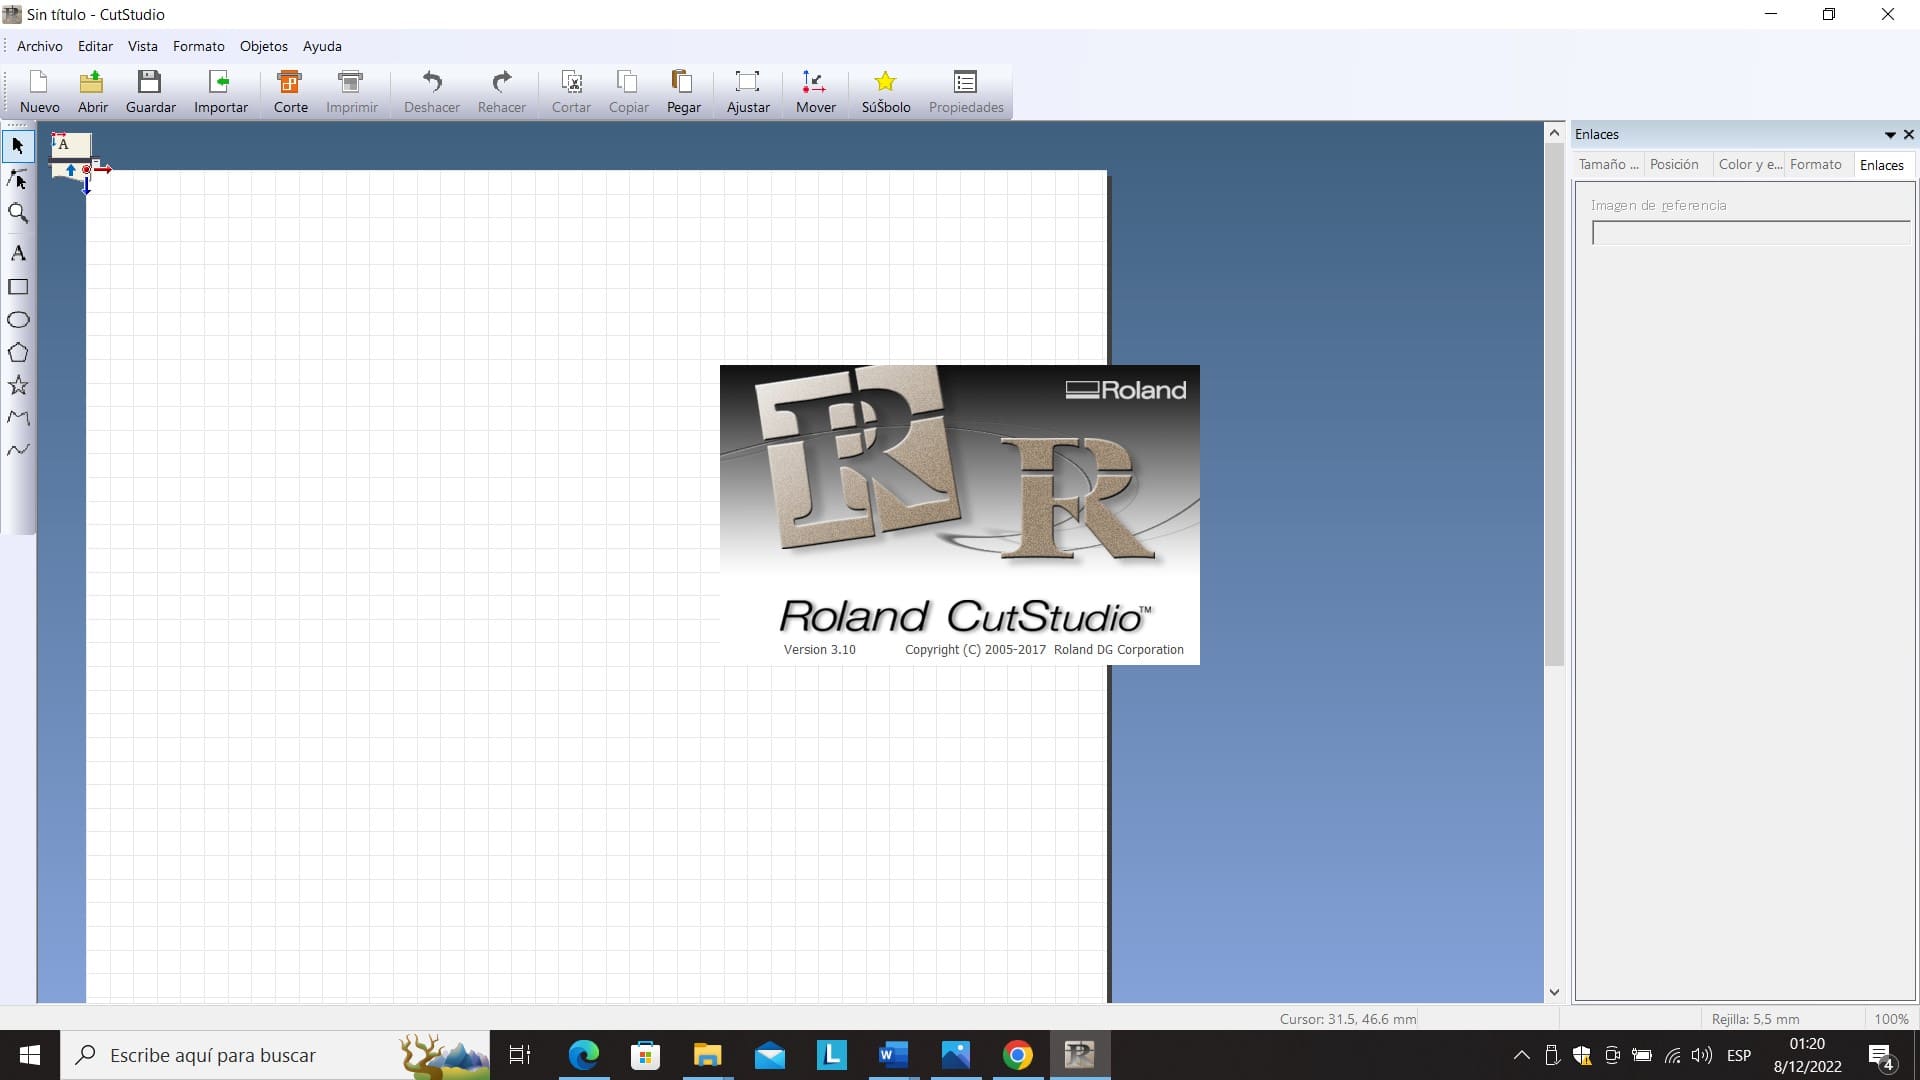
We launched the Roland CutStudio program which gives us the tools to design and produce professionally cut and custom graphics for a wide variety of applications, including signage, apparel decoration, vehicles, POS materials, backlights and much more.
Second Step:
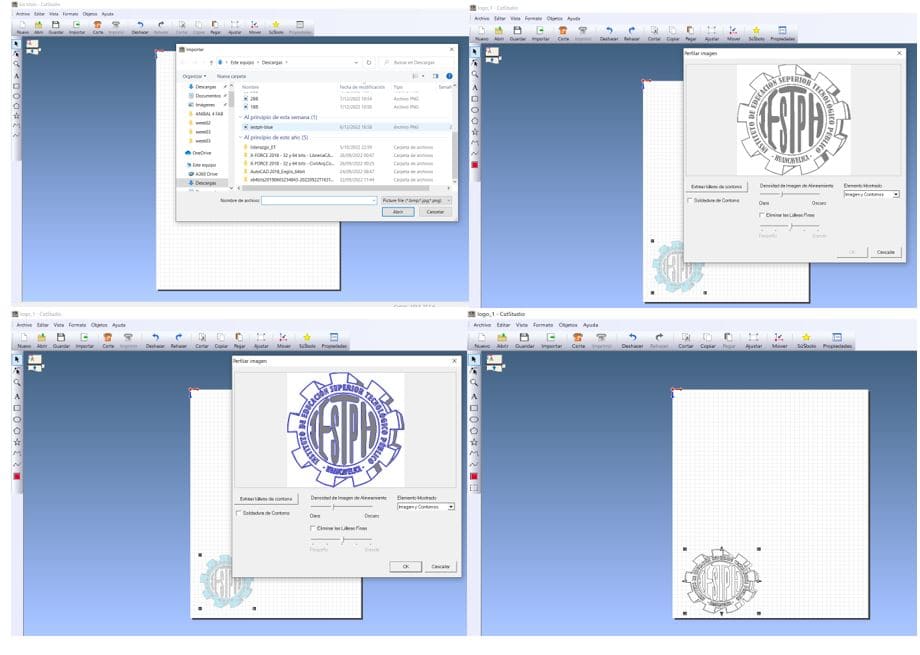
We go to the File tab and select the import option, then we look in the folder that contains the image that we must work on, modifying the lines of the object . In this case, it will be the logo of our institution.
SETTING UP THE VINYL CUTTER:
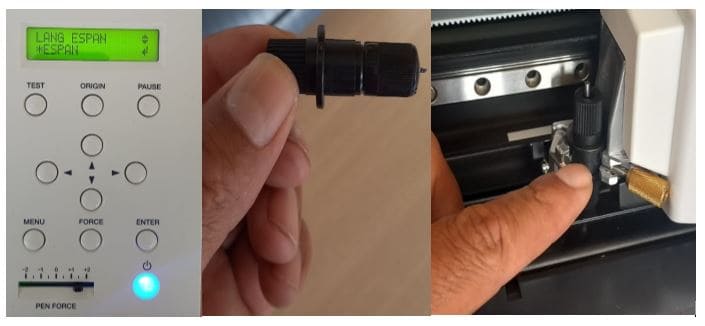
Step 1:
We install the knife to cut the revealed images
Step 2:
It is verified in the equipment if the sensor detects the material to be used, then the vinyl is inserted and the blade is graduated to make the cut.
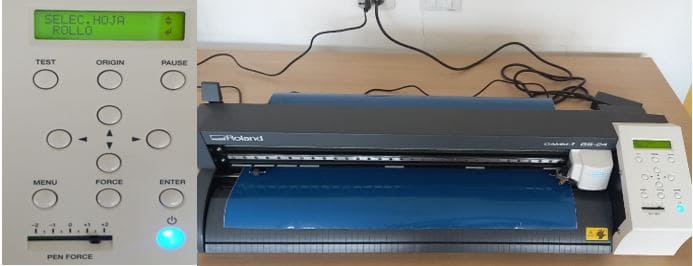
Step 3:
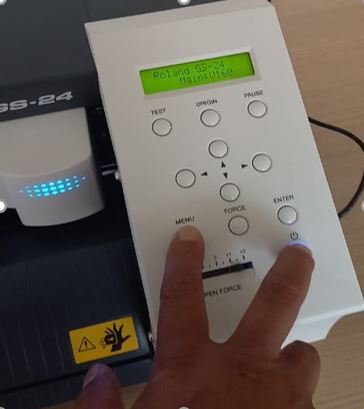
Placement of the vinyl roll and we select roll and then enter .
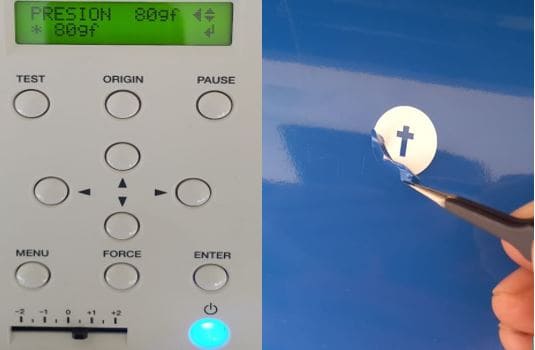
Step 4:
Then the vinyl cutter is calibrated at 70gf, where it is observed that it does not cut, this is our first test, immediately we calibrate at 80gf, the cut is done correctly as seen in the image.
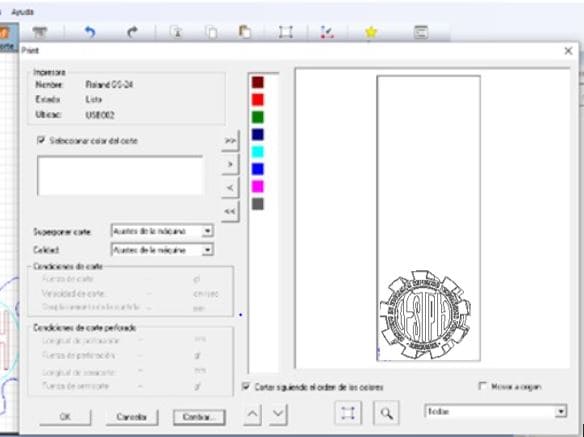
WE PASSED TO OUR PRINTING ON THE VINYL CUTTER
We chose in the Roland CutStudio program the option cut and processed to print our logo as shown in the images.
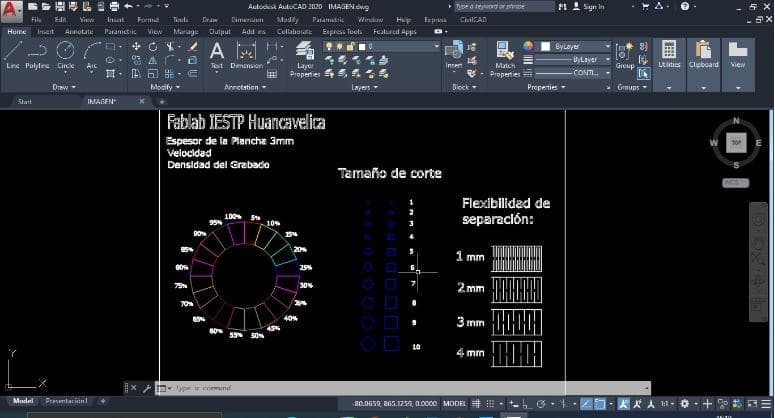
DESIGN IN Auto CAD FOR LASER CUTTER
For this process, the Auto CAD software was used, the measurements of the objects were taken for cutting and engraving, then they were saved and imported in .DXF format.
As a next step we worked on the CNCLaser program
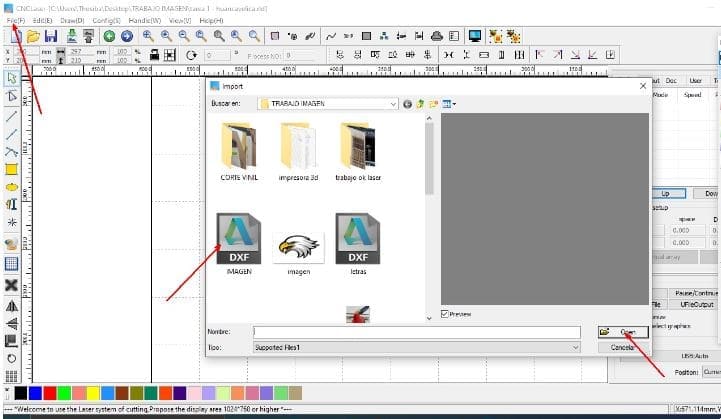
USING THE CNCLAser PROGRAM
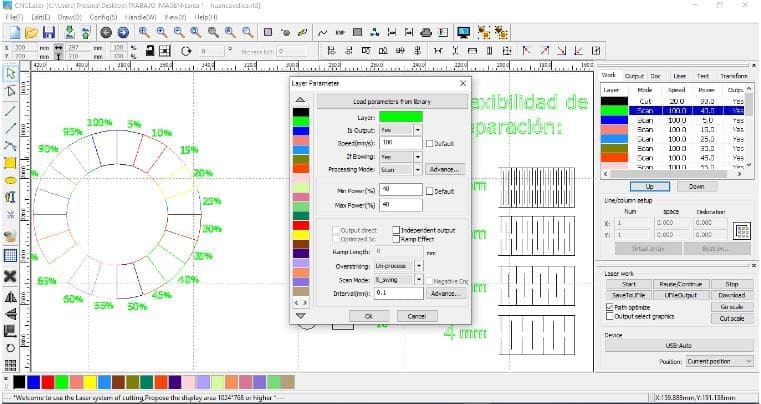
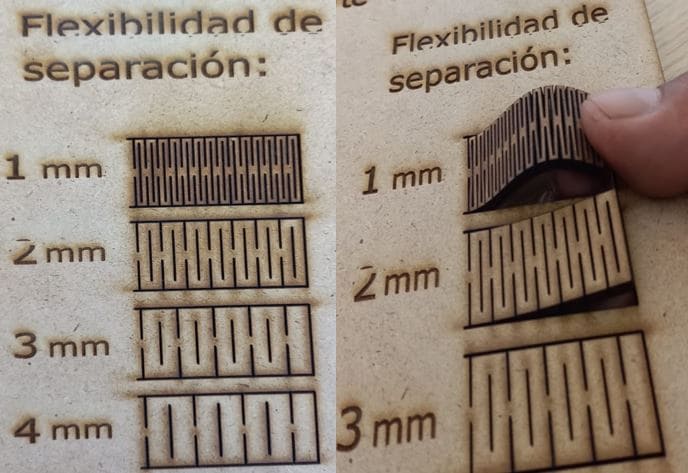
In the CNCLAser program we go to the file tab and select the import option, then look for the folder where the file was saved once the file is opened to adjust the cutting and engraving parameters. Inside the circle we have parameters of 5%, 10%, 15%, 20%, 25%…. up to 100% to scan or register. In the cut we have squares from 1 mm to 10 mm, circles from 1 mm in diameter to 10 mm in diameter. For the next cut it is flexibility with a separation of 1 mm to 4 mm.
WORKING ON THE LASER CUTTER
I found it very curious why use MDF plates for laser cutting. An MDF is a wood product that has been processed. MDF wood is produced by breaking down hardwood or softwood residues into wood fibers and mixing them with wax and resin glue. In this way, the panels are formed by applying high temperatures and pressure. The result is a panel with a light beige aesthetic and a fine texture.
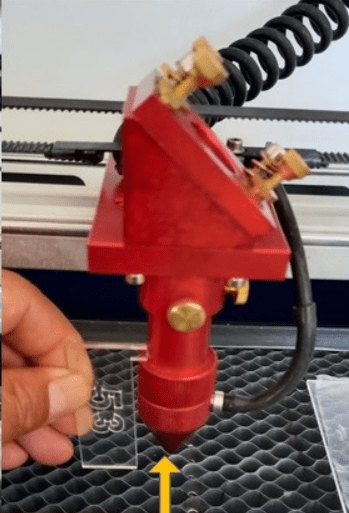
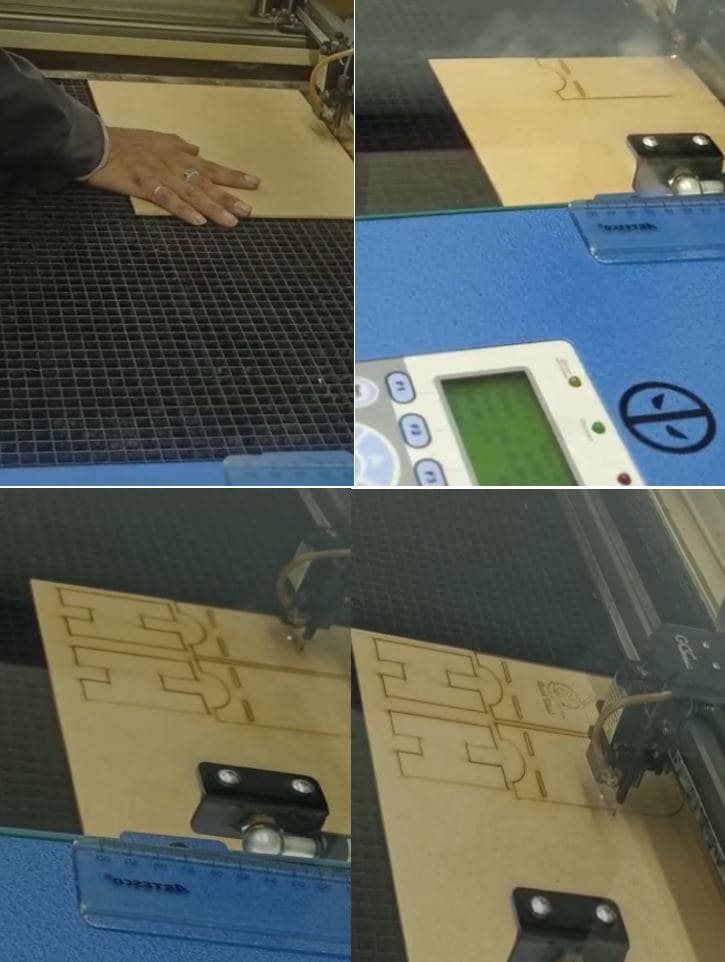
Let's start working by starting with turning on the equipment and then calibrating the focal point of the LED. The material that is MDF is accommodated. To carry out the cutting and engraving on the MDF material, it is sent to the cutter through the CNCLaser program so that it can carry out the work. As evidenced in the following images.
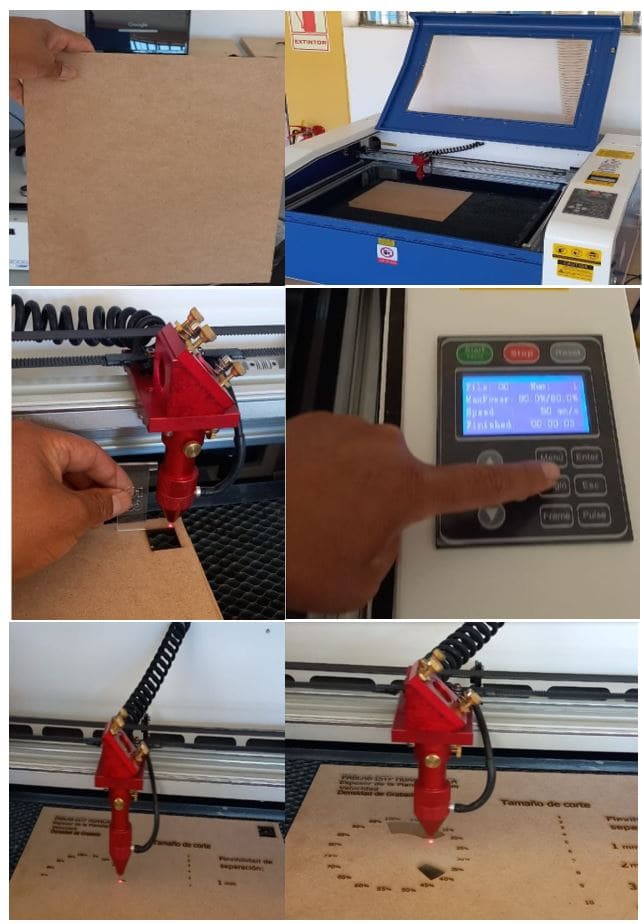
Images of the work completed with the laser cutter

Our results:
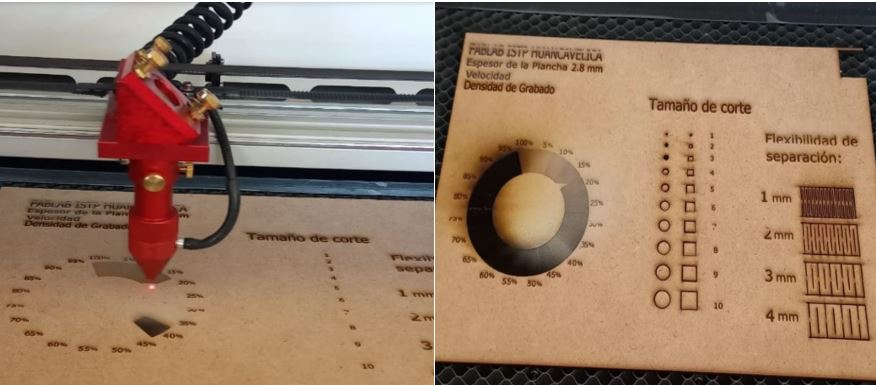
• When programmed at a speed of 100 mm/ sec . with a minimum power of 40% and a maximum of 40. The engraving in the larger circle where 5%, 10%, 15%, ……. Up to 100%, each power can be defined to be determined by the thickness of the material or the work that can be done. In this case, a 2.mm thick MDF was used.
• Looking at the print from 5% to 15% it's not very deep, from 20% to 40% it changes color, it's a little bit darker and the depth is noticeable. From 45% to 100% it can be seen in the engraving that it is deeper, it can be deduced that at 50% or more the engraving would be on thicker materials, we would have a better engraving quality.
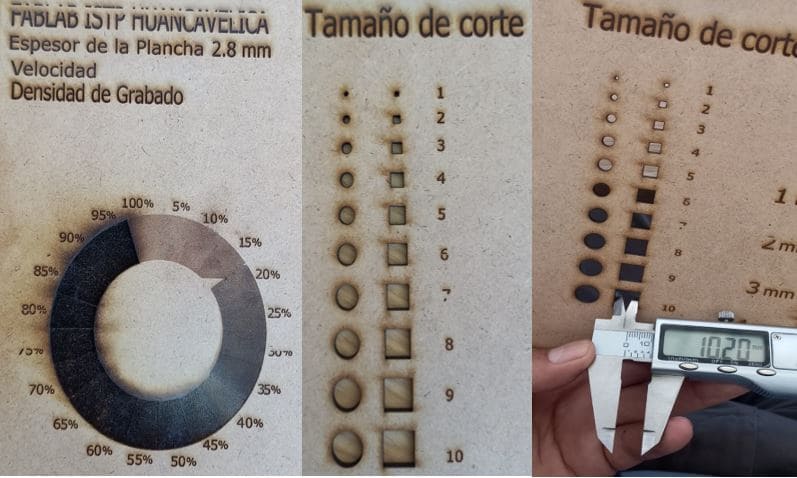
• If the parameters are as follows: speed of 20mm/ sec , minimum power of 90% and maximum power of 90%. The cuts made from 1mm to 10mm in diameter and square are observed. It is observed that the cut material does not have the indicated measurement, it can be deduced that at the moment of making the cut the material decreases in Size and the length is by laser. This was worked with a 2.8mm thick MDF.
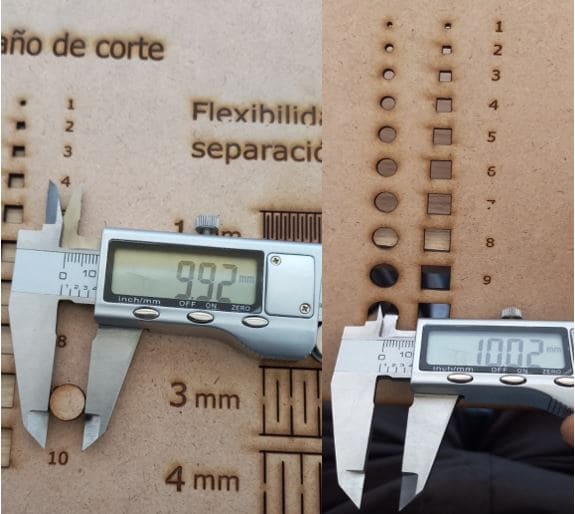
• Regarding the flexibility of extension in the cutting work, a 2.8 mm thick MDF was used. So if the cut is made according to the following parameters: speed of 20 mm/ sec ., minimum power of 90% and maximum power of 90%. The cut is observed with 1mm of separation, the material is more flexible and manageable. In the cut at a distance of 2mm, it can be seen that the material is a little harder. The cut with 3mm separation shows that the material is hard and not very flexible. When the cut is separated by 4 mm, it is observed that it is more resistant to flexibility. As shown in the following pictures.
• Remember: Each cut or engraving indicates what work we can do with the laser cutting machine.
Building our first design
Useful links
Last update:
December 9, 2022