3. Computer Aided Design week
The plan for Computer Aided Design (CAD) week was to explore 2D and 3D CAD programs and attempt project designs on them.
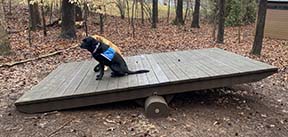
With the 2D program called CorelDRAW, I choose a design to be part of the final project in which I would create a miniture version of the real thing. That real thing, being a team building challenge course element called the Whale Watch as seen in the pictures below. The actual platform on the challenge course is approximately 8 feet wide by 14 feet long. A group of people ranging in size from 8 people to 20 people get on the platform one by one so eventually all are standing on it. There are many other challenges for a group to achieved however this is the first tiered challenge for them to solve. More detail will be given in the project page. So this 2D CorelDRAW design of a mini Whale Watch will give me the ability to test sensors to gain data of what may or may not work. This is ideal instead of having to be on campus, in the woods to the real Whale Watch to do a diagnostic test.

2D Model - CorelDRAW
Downloaded Inkscape and attempted to explore, however with pressing time, felt the need and desire to get moving on the project more quickly. Shifted to using CorelDRAW program that I am only SLIGHTLY familar with. And if the Charlotte Latin Lab Laser Cutters are already paired with CorelDRAW, it makes sense to me to stay in that format for now. Branching out and experiencing can come a little later.
Thankfully, already had CorelDRAW loaded on a borrowed laptop and have used it only one other time for a 3rd grade teambuilding idea. That previous project never got laser cut. YET. Other than this, no experience with CorelDRAW and wanted to see if I could create a design for the mini Whale Watch. Aside from purchasing than a Dowel Rod, its my hope to build the mini Whale Watch with only wood by using a sheet of 1/4” 36”X48” from the Fab Lab and some glue.
If I remember correctly, lines created in the 2D program listed as “hairline” in size the laser will cut through the wood. Any line thicker on the design, the laser will engrave.
A screen shot of the Corel Draw design.

There are four major items from the screen shot picture. First is the tipping platform known as the “Whale Watch” in the Challenge Course industry. Planning to engrave the words “Whale Watch” on the top of it. The platform has curved corners so not 90 degree angles to show I could design roundness. It is about 18.5 inches long by about 9.5 inches wide.
The smaller plank with nothing but a center line on it is the base. 10 inches long by 7 inches wide. I added “made by SDMoulton” to be engraved.
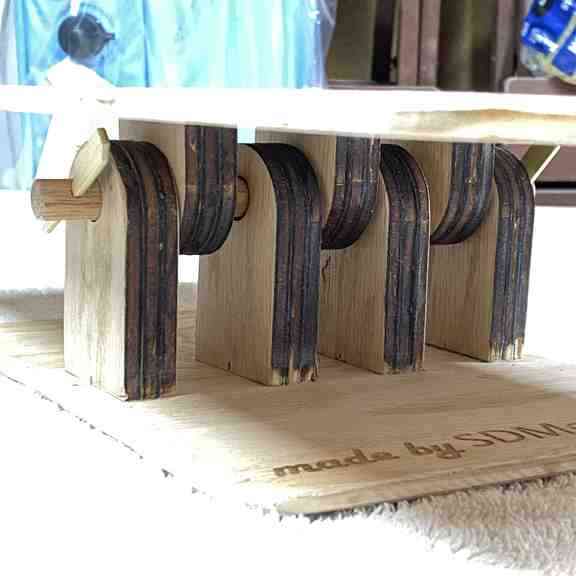
There are two sizes of what looks like either tombstones with a circle on it or the alien from the game Among Us. Those are to be used as the “hinge” for lack of a better word at this moment. I will glue the larger aliens in sets of 6 which should be an inch and half thick. Those large ones will also be glued onto the platform base. The smaller ones I will glue in sets of four giving me one inch thick opposite hinge part that will be glued underneath the Whale Watch Platform. The dowel rod has been measured to fit into the holes that are slightly larger than the rod itself so the Whale Watch platform will tip from side to side.
After doing the Parametric kit and having the Lab to myself, I decided to try the design on the laser cutter on some scrap wood laying around. The results in the picture below


3D Model - Fusion 360
I attempted to explore some of the 3D CAD programs like FreeCAD, and Solidworks but just could not get anything started. I need friendly and a little more intuitive vs. Solidworks. After a while of experiementing with other CAD programs and feeling the need to get started, much like CorelDRAW, I returned to Fusion 360 with the promise to self to try other programs. Fusion 360 is supported by many people posting videos on YouTube that is able to help in the learning process this CAD software.
I decided to listen to the Kevin Kennedy tuturial of his “day 19 - hinge box” project to learn and create what MIGHT be a possible box for the electroics to be housed and transported in. Its a two part YouTube Video.
This video demonstrates using the Parametric system within Fustion 360. Parametric Designing enables the creator to design the project using a pre-sized measurement parameter entered into a data spreadsheet that improves time managment and workflow. Not only that, using a Parametric data table allows the creator to go back an alter a particular dimension, and the changes are automaticlly changed across the design which is a HUGE time saving method.
At this time, this is not the waterproof or water resisitant final box I am intending to make for the electronic transport and storage. Right now its hard telling what the actual size of the electronics of the final project will be. I had visions of a 5 inch wide by 8 inch long by 3 inch high however Adam Harris suggested it could be half the size of an iPhone if not smaller. The actual box may be made during molding and casting week to achieve that waterproofness to protect the electrical equipment.
Used Fusion 360 and listened to Kevin Kennedy’s lesson on creating a box with a printable hinge system. As mentioned, this particular lesson also covers using Parametric Data to help create the project. I spent about 7 hours learning to create his design of the hinged box. Some of this time is simply learning and exploring how Fusion 360 works and replaying LOTS to hear what I miss due to my hearing loss. The result on computer from a design standpoint was a success.
My modification in the picture below of the box to make a electrical storage / transportation box for my project. This was tweaked AFTER creating Kevin Kennedy’s two orginial design shared below.
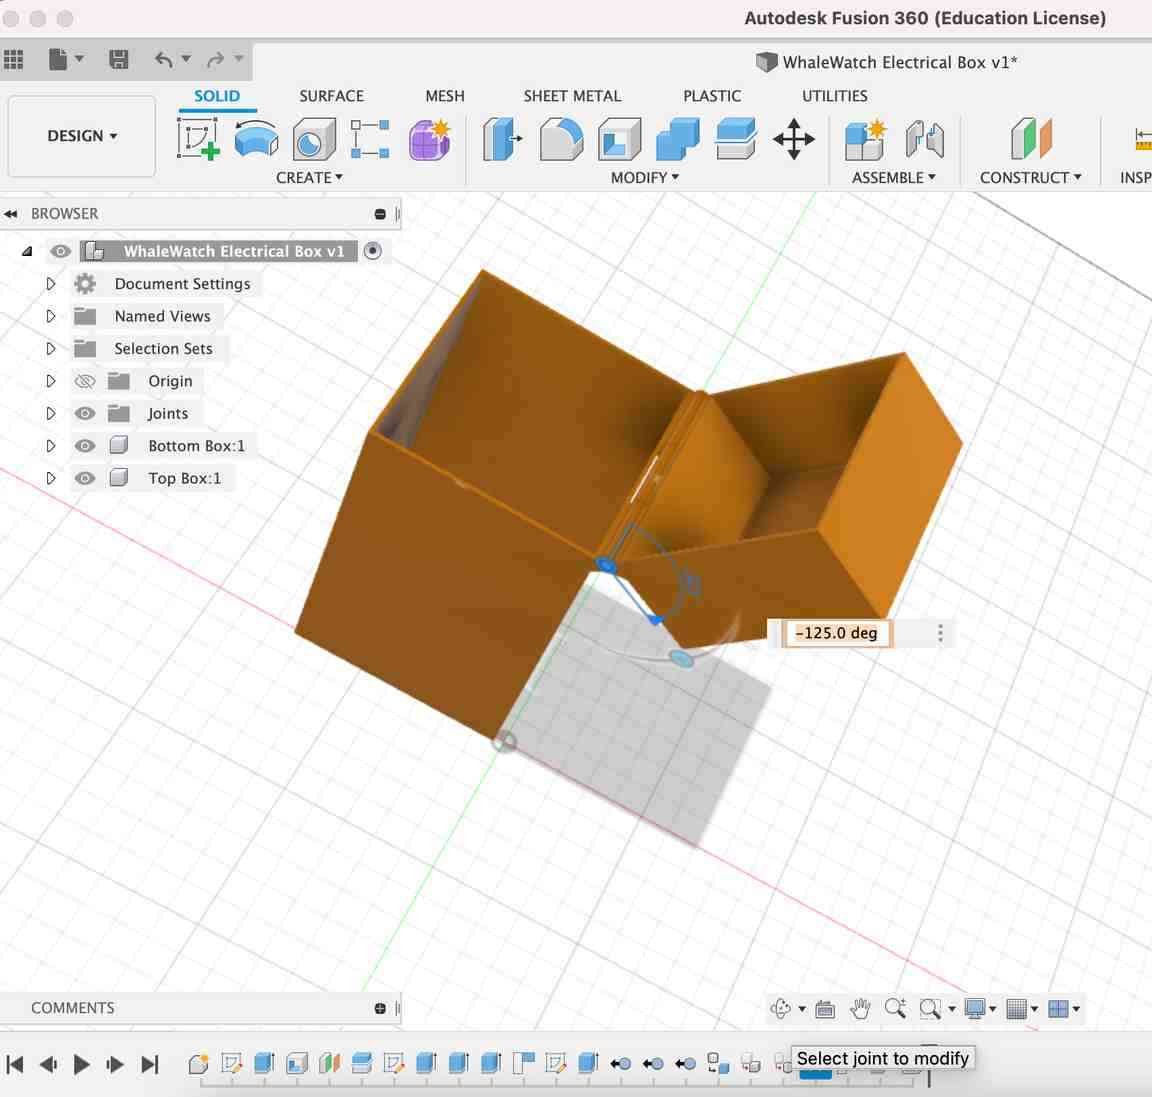
Kevin Kennedy’s orginial project I made.

At the end of Kevin Kennedy’s lesson, he suggest making a smaller model to test to make sure the hinge system works before printing the actual size made in the lesson so modified the Parametric data to make a quick print sample.
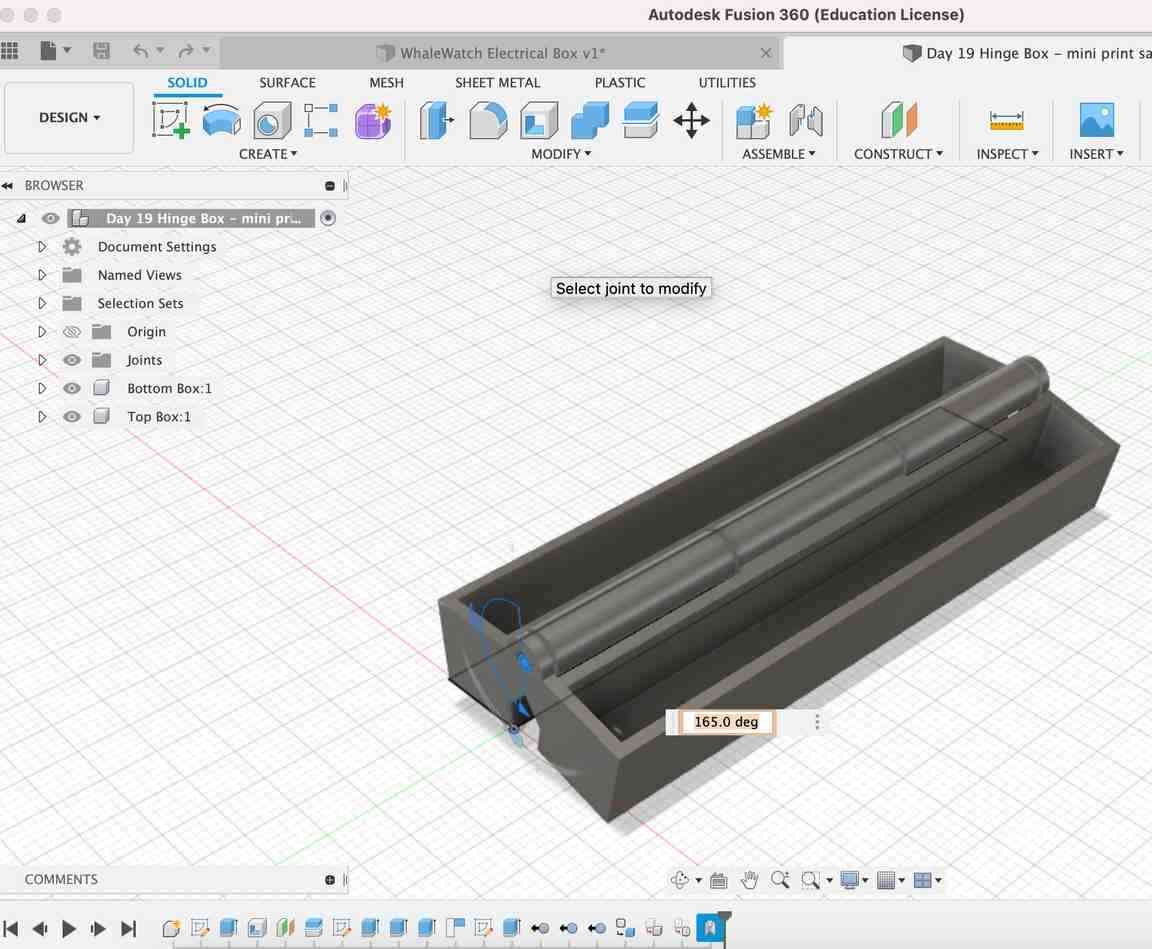
Note: It appears that Kevin Kennedy’s box has a flaw in the hinge so therefore my box will as well. I confirmed this with Barbara who says her students have attempted to print a box using his hinge system as well. Bummer!!!! Two options, I either manually cut using a dremel tool on the plastic where the fault is or learn to “cut” on the design before printing the box OR see if there is another design to try.
There is another 3D printed design which other Makers have said works from a designer named Hobbee. His design, the lid of the box even has a clasp to keep the lid closed. However further reports has it that the clasp breaks off after a while. I have also read, where plastic hinges that are thin in their design, break apart due to friction of plastic on plastic. So it appears that during molding and casting week is when I may want to make a customed box??
FAB Assigned Questions for the week:
Have I answered these questions for the week?
- Modelled experimental objects/part of a possible project in 2D and 3D software - Yes, used Corel Draw to design the mini Whale Watch - Yes, used Fusion 360 to create a temporary electrical box
- Shown how you did it with words/images/screenshots
- Words - Yes, however a lot of my “words” were used to talk about a variety of sensors to examine which will be best for this project.
- Images & Screenshots - Sorta. Still working on that. My resolution was so low that the pictures were not as sharp as I would like them to be.
Attempted a new program (for me) to use, XnConvert. However got really annoyed cussing out the program and computer to the point my kids decided it was best to slip out of the room for a while. Will retry at a later time.
- Included your original design files - Yes as seen in the screen shot below however with the change up of the sensor placement, its not completely valid other than to show the intent. The change up is, instead of having a sensor on the ground to recieve the impact from the Whale Watch impacting the ground, the sensor will be MAYBE placed at the top and so I need to sketch out a new rough draft concept.
