Computer-Controlled Cutting
-
characterize your lasercutter’s focus, power, speed, rate, kerf, joint clearance and types
Laser cutter characteristics - group assignment
Focusing
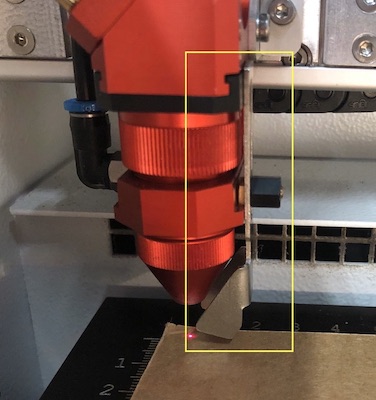
Focusing the laser to the material that you are going to be using is so that you can get the most accurate cut possible. You can also change the focus of the tool because this can sometimes give off a better effect for example when engraving getting the Z-off by a few mm can make the outcome better as it is less harsh on the material. To focus you use a tool which you can see in the image below in a yellow box and the other image is me moving the bed upto the laser to get it the correct distance away.
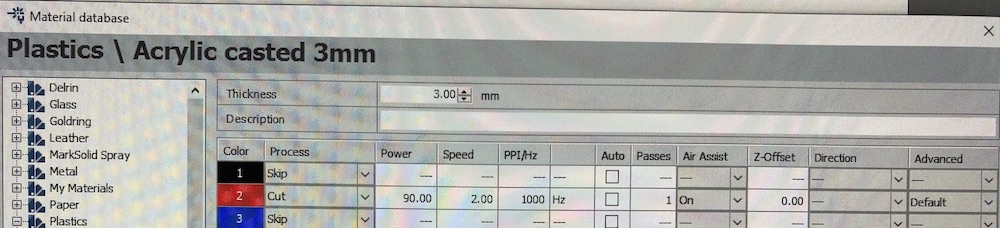
Acrylic cutting settings
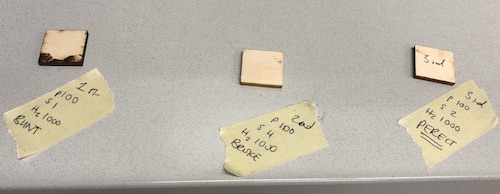
Power= 90 Speed= 2 PPI/ Hz= 1000
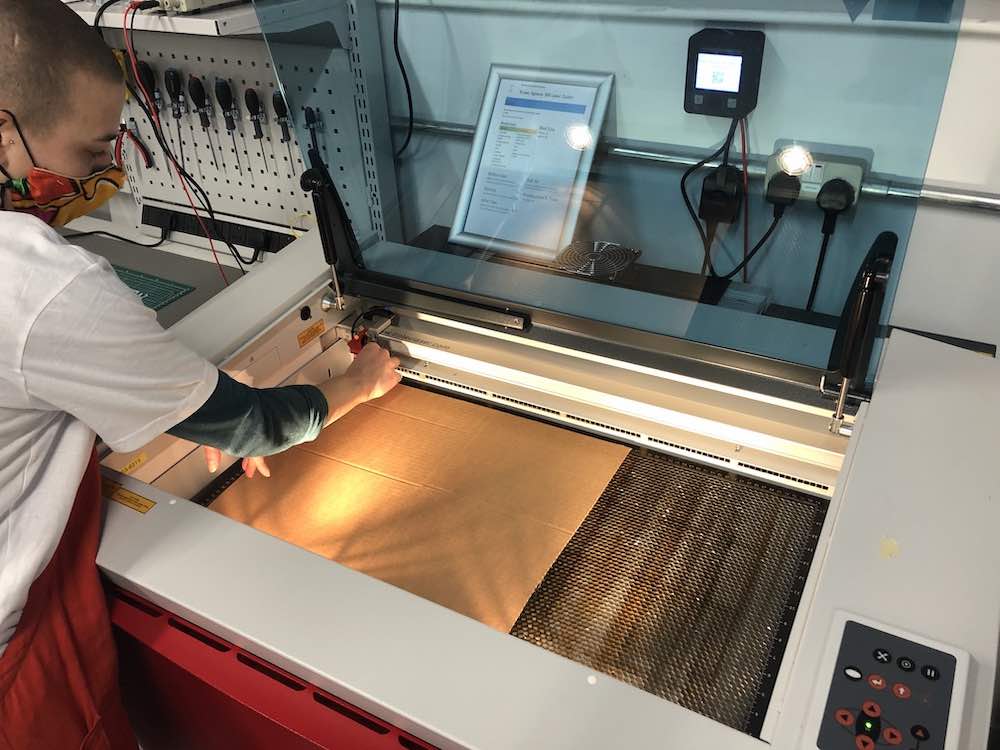
We started by looking at acrylic and the correct settings for cutting it on the laser so that it wouldn’t metal, burn or stick back together. Acrylic was the hardest of all the materials as I had not used it very much before to test the different settings. In my note book Katie wrote down each setting we used and then on the acrylic square we wrote the number that it corresponded to.
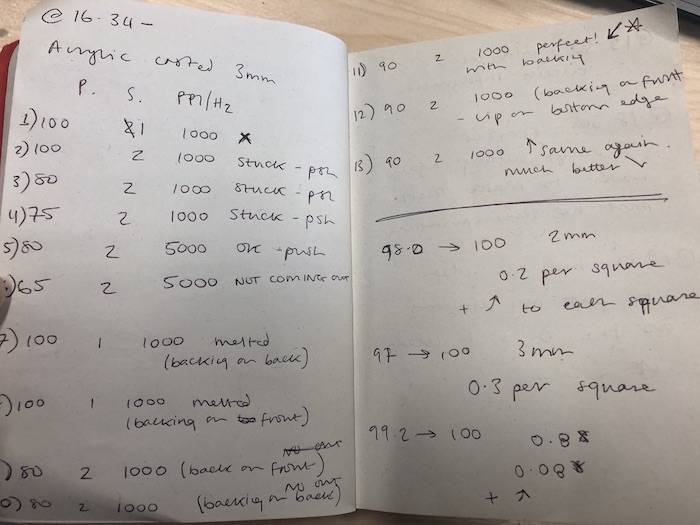
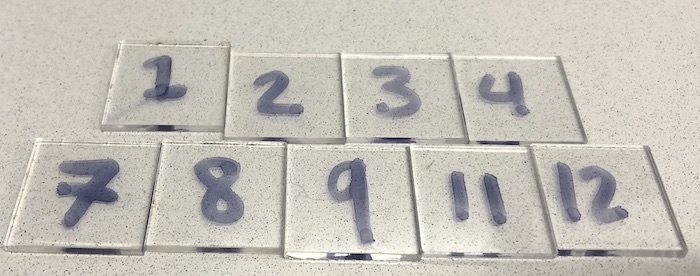
In the end number 11 was the best, we also tested it with and without the backing on. With the backing you don't get the frosting on the edges which is coursed by the laser reflecting on the metal bed. You can just wash this off with IPA if you really did haven't backing on the sheet already. So the outcome is:
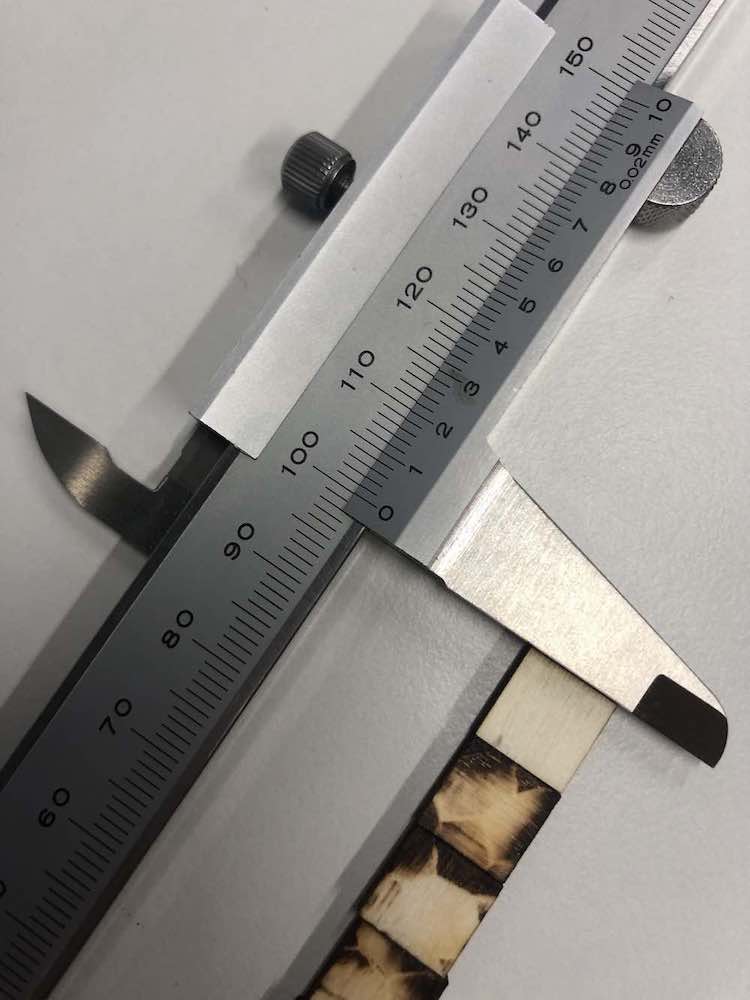
Acrylic kerf
Kerf = 0.175 mm
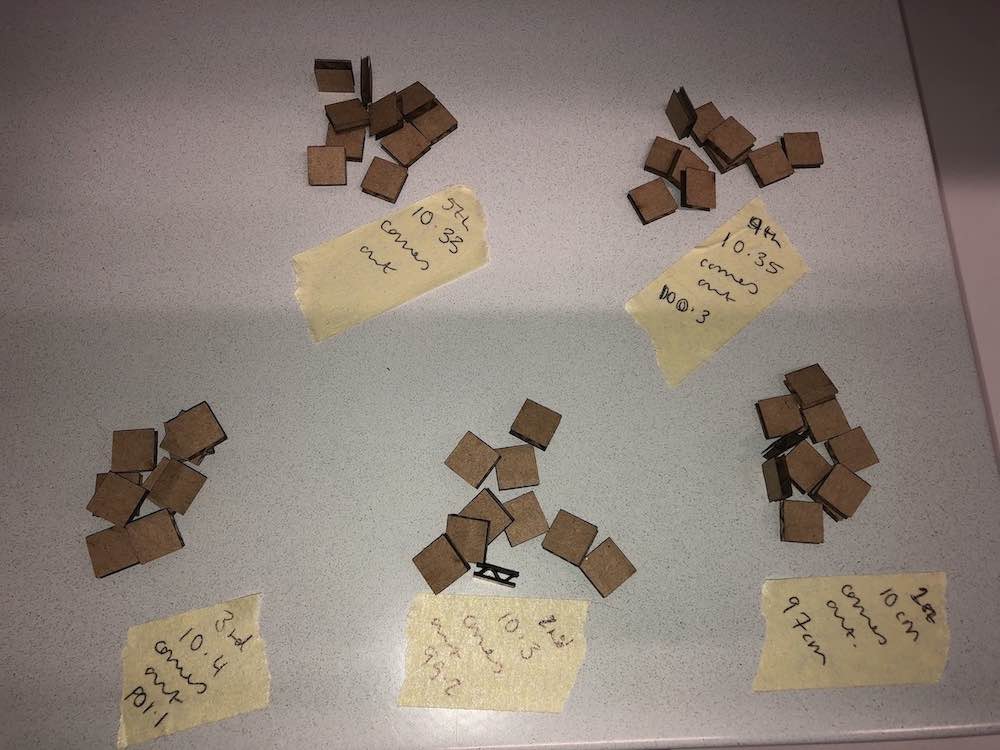
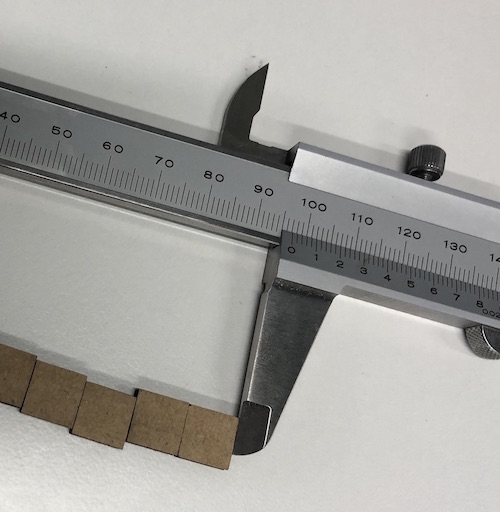
We then did the kerf for acrylic, Andrew had a good idea of making 10 squares all 10 mm x 10 mm and 3 mm thick. This is so that we can see what the kerf would be in a larger way rather than a very small kerf on one square. It worked really well and we managed to find it very efficiently. We got into a routine of me getting the squares ready on Inkscape, Jonny in that time would be getting the material ready for me to line it up on the screen to press print. It would then be cut on the laser cutter and Jonny would bring it out, we would then both line them up and get the backing off the acrylic and then I would measure them with the callipers. Katie then did the measuring for all the other materials so it was a fair test.
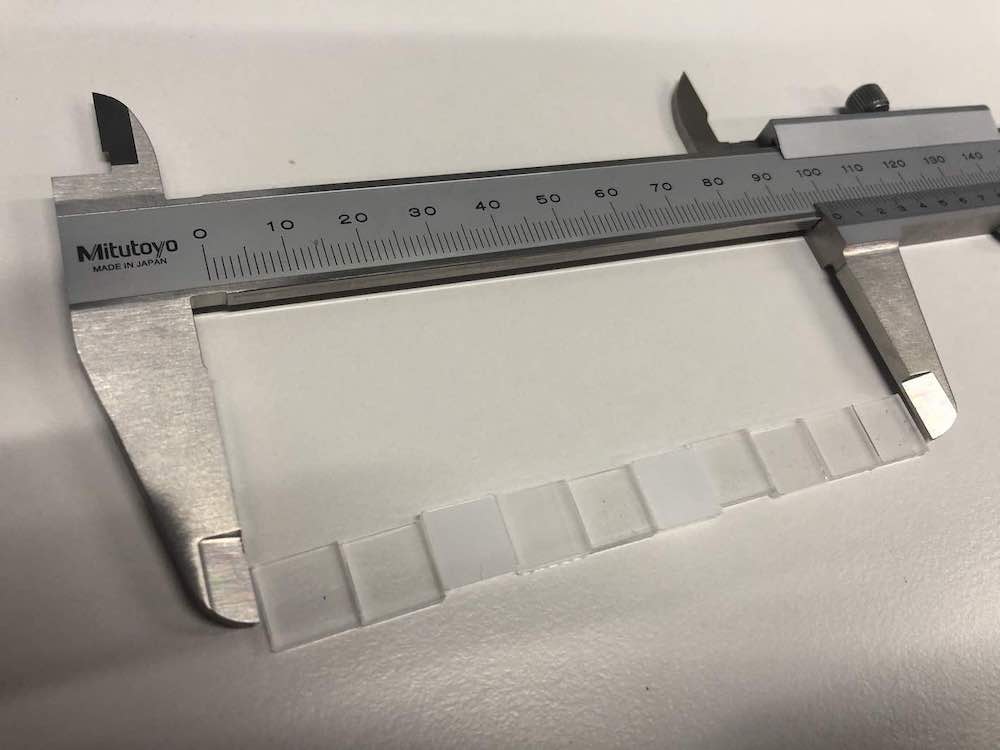
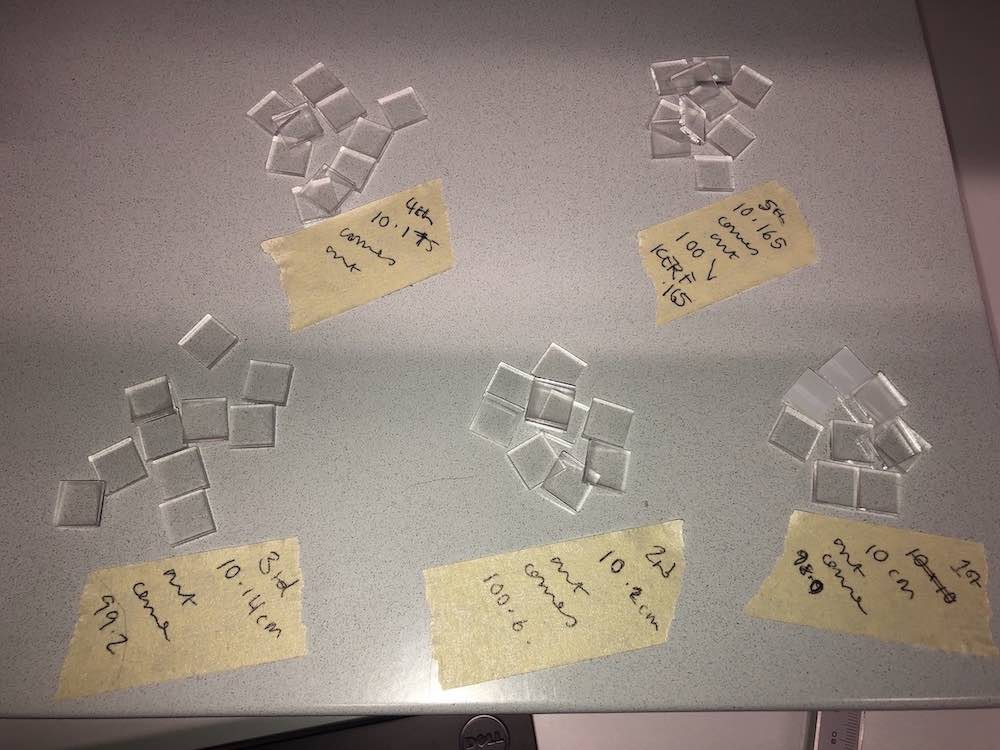
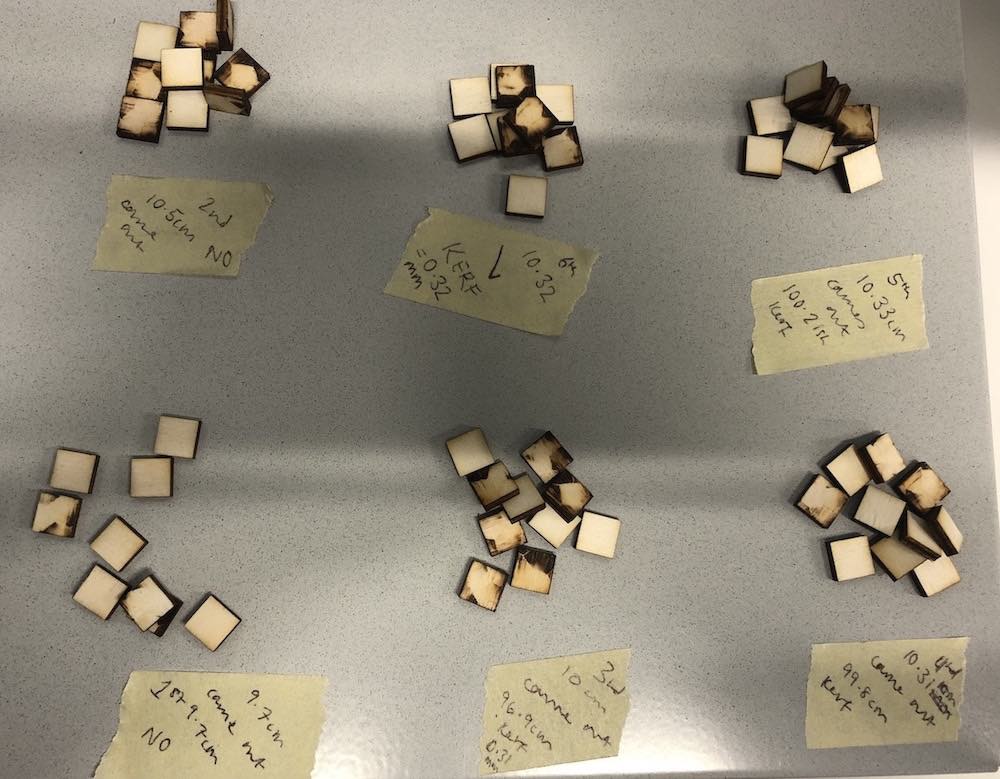
As we where doing this Katie made a pile of each print we did so that we wouldn't forget what we had done and also it made it much more visual which really helped me. What we did was cut the first 10 squares to get the kerf and then we went back on ourselves to make sure it was correct. This worked very well and more sense to me in the long run.
Cardboard cutting settings
Power= 100 Speed= 4 PPI/ Hz= 3000
Cardboard was easy as the settings Katie had already got down from members in the space but we decided not to change them as cardboard is very dangerous if you get it wrong.
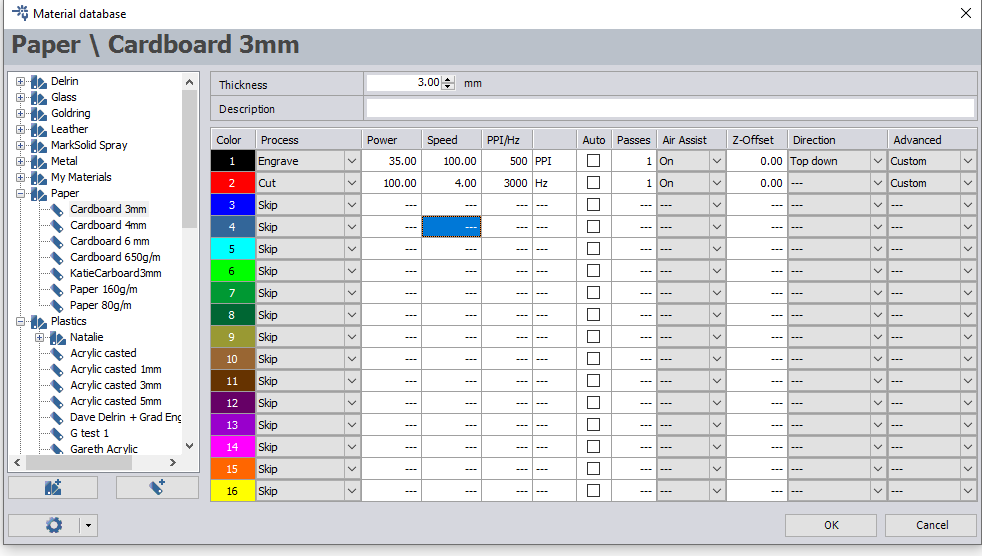
Cardboard Kerf
Kerf = 0.33 mm
Again we did the same technique as before and cut out 10 squares all measuring 10 mm x 10 mm and 3 mm thick. This was a lot harder to line up and get the kerf as the cardboard is a lot more fragile and can be easily pushed together. Katie made sure not to apply too much pressure to the square as they would push up if not careful.
Plywood cutting settings
Power= 100 Speed= 2 PPI/ Hz= 1000
With the ply wood did the exact same thing, we did have to do a couple of test to avoid the burning on the back and the sides of the wood. But luckly again we had used the plywood on the machine before so we knew what the settings should be around.
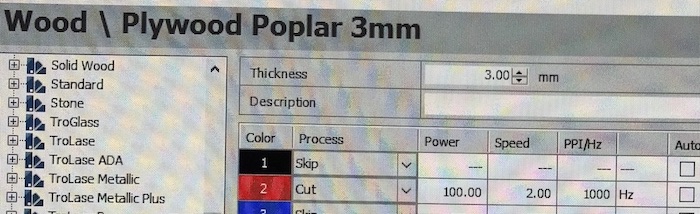
Plywood Kerf
Kerf = 0.32 mm
To find the kerf on the plywood we did the same test as above 10 squares all measuring 10 mm x 10 mm and 3 mm thick. This was the easiest as they cut very well and very flat which really helped in measuring the squares. We also did the piles of the small squares so that we could remember what each one was.
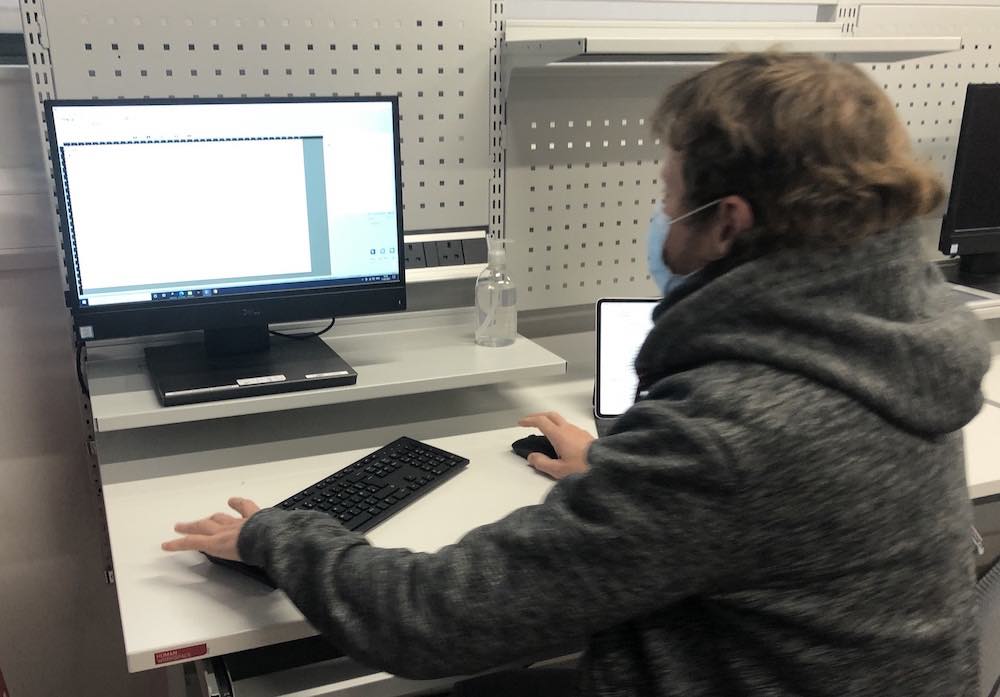
Extra photo of Jonny using the computer to connect to the Speedy 300.