3D Scanning and Printing
-
test the design rules for your 3D printer(s)
Testing Design Rules
We started with the group project to test the rules of the printer, the tests we chose where the angle test, bridge test, wall thickness test, clearance test and a finish test. I will explain on each one what we were going to be asking as we did this test and what the answer was to these questions we had.
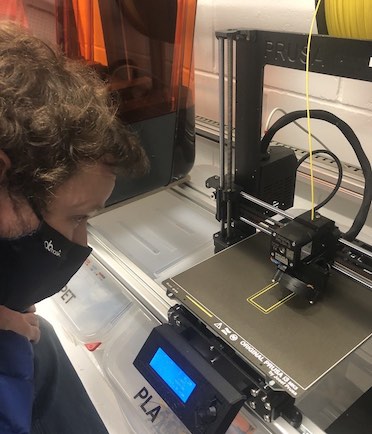
We have Prusa Mk3s printers which are great, before working at Plus X I had never see a 3D printer before so whne I first saw these it was a very exciting experience for me. They are self leveling which is very handy, their very fast and quiet printers which is also very nice in a workshop.
Here is Jonny sat by the printer as we started doing our group project.
For these prints we started with Jonny using Cura which is a software that slices your design into the required layers for the printer. Katie normally uses Prusaslicer but Cura does the exact same thing which is what Jonny uses, it was very interesting as you will see that some of the settings for the tests didn't work. Some I ended up doing on Prusa slicer as it came out better which is very interesting, what we realised is that you need to alter the settings for each test.
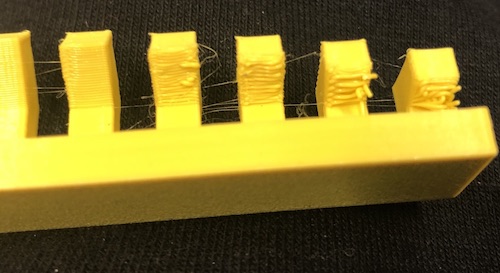
We were having issues on the printer with stringing, this is something to do with the printer or in the slicer settings so something that needs to be addressed in the future.
After doing more research into stringing we realised we needed to test this out more, as Katie was having more issues with this visit her webiste to see how to avoid stringing.
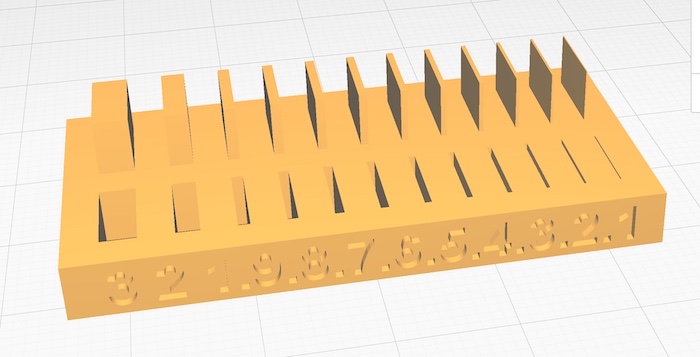
Angles Test
Angle testing in Cura.
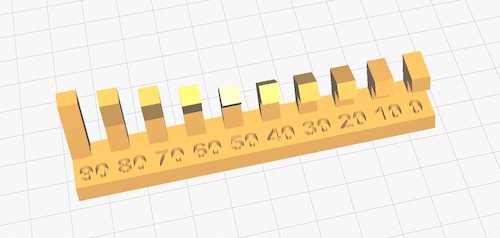
We went from 90 degrees to 0 degrees (look at image).
Questions
1. What angle can you get to before the finish of that print isn't good enough?
Answers
1. You can go from 90 to 40 degrees and the finish of your print will be good, then you get to 30 degrees and you start to get the filiment not attaching the previous layer very well. But it does still hold the angle, so from this you could go down to 10 degrees but the finish of your print wouldn't be a good, but if this is on the inside then you will not see it that wouldn't matter too much.
Bridge Test
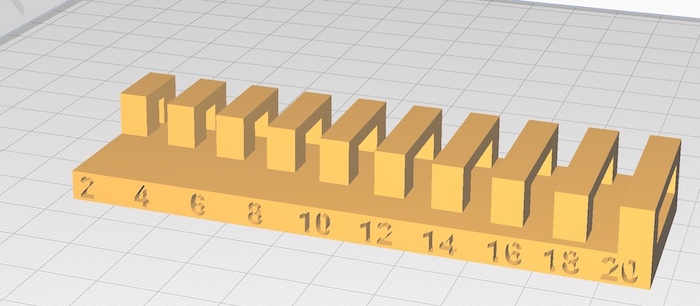

We went from 2 mm to 20 mm (look at image).
Questions
1. How far can you birdge without the print having a bad finish?
Answers
1. With this print it all went very well, we had no issues with the bridging.
But we did think because it was so easy, could we now push this further and see if it can go up to 30 rather than just 20?
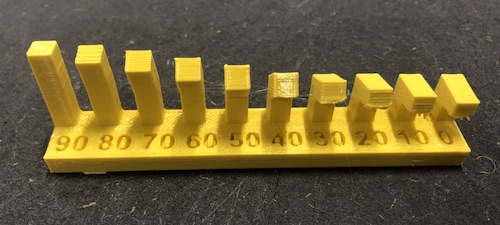
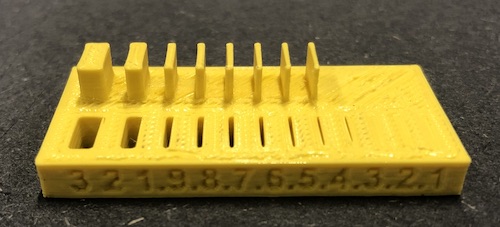
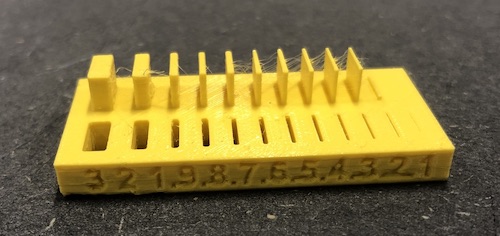
Wall Thickness Test
Wall thickness test in Cura.
We went from 3 mm to 0.1 mm thickness of walls. (look at image).
Questions
1. How thin can a line go with a 0.4 mm nozzle?
Answers
1. With this test we noticed that our first print was not good at all! It didn't come out with a nice finish the last few lines didn't even print and overal the angles weren't very good either.
So Katie suggested we try do it on the Prusa slicer, one of the things to check was to see if there was a setting for thinner lines. There was a setting (see image) this made a huge difference to the print and the last few walls did print.
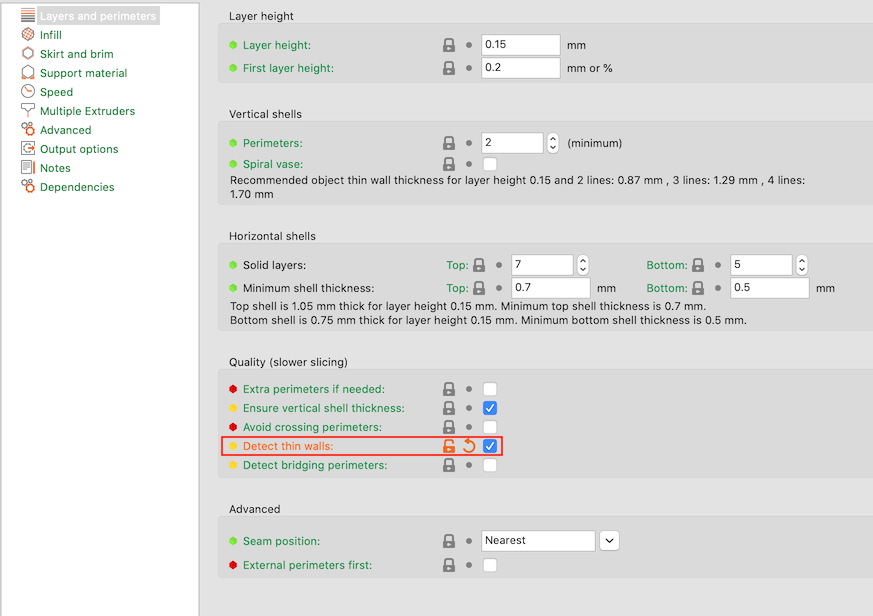
This is a before and after of me adding the settings above, so now you can actually see the lines of the print rather than them disapreing as prusa knew it wouldn't be able to print them on the other setting.
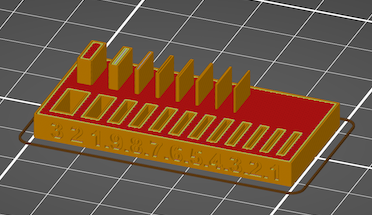
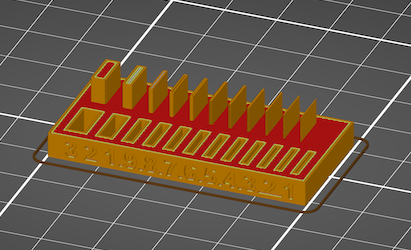
Image of the print after Katie had altered the settings in prusa slicer. The walls though where coming out as 0.5 mm even with layer height as 0.15 mm which is what the default settings are for these printers. You can change these settings to make your layers thinner but not sure that would make a differene to the thickness otherall. This would be something to consider when making your work as you would know that your walled wouldn't be any thinner than 0.5 mm.
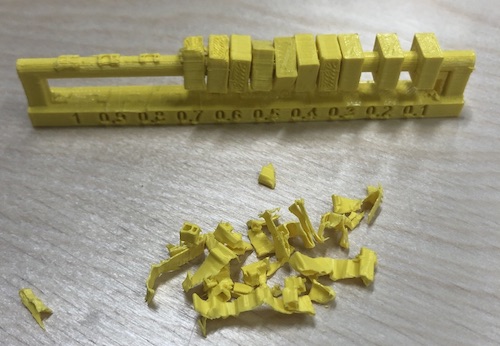
Clearance Test
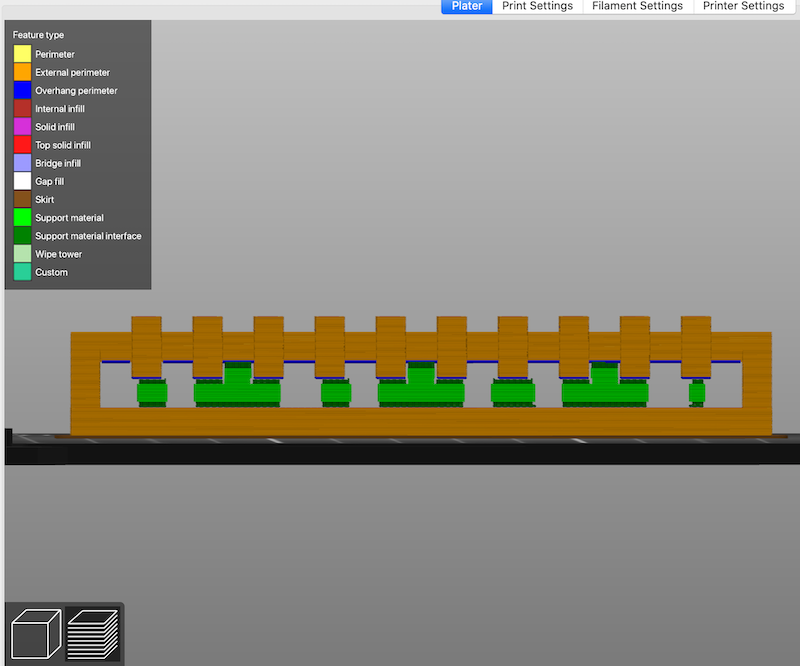
Clearance Test in Cura.

We went from 3 mm to 0.1 mm thickness of walls. (look at image). For this one I had to try to understnad what this meant, I found a quote online which helped me 'clearance is the distance between a door and the door frame when the door is shut' so it is the gap that we are measuring in this test.
Questions
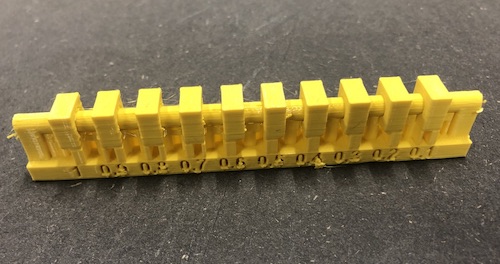
1. How much of a gap between the bar and the square is needed?
Answers
1. The 0.1 mm, 0.2 mm and 0.3 mm were all stuck to the bar whereas the others were all fine and moved freely when I changed the settings in the Prusa as you need supports on this test.
With the supports on this test it was very hard to get them to come out easily and without destorying the test. They were also added between the wholes so that the clearance was actually changed. Katie ended up breaking it down and getting all the supports out so that they moved smoothly. We would not recomment doing this as it took a long time and by the end of it the clearance was definatly different.
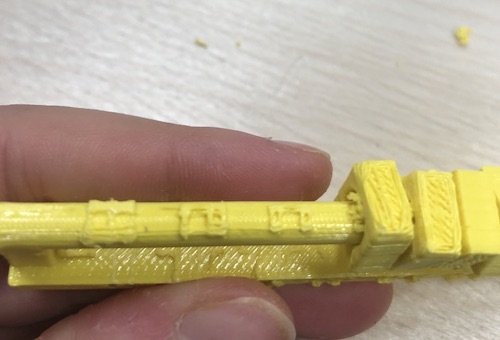
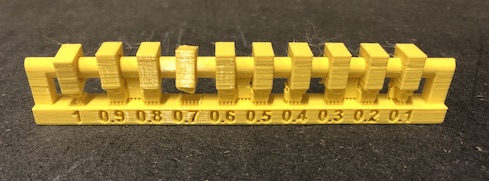
What we ended up doing was going onto prusa slicer and adding my own supports, this is a very simple and great way to get the supports in the areas you want. What you need to do is right click on the print and a list come up, go to 'add support enforcer' there is also the option to add a shape to prevent support from printing in a specific place. We chose to use a cylider and add it under the boxes and on the bar a few times.
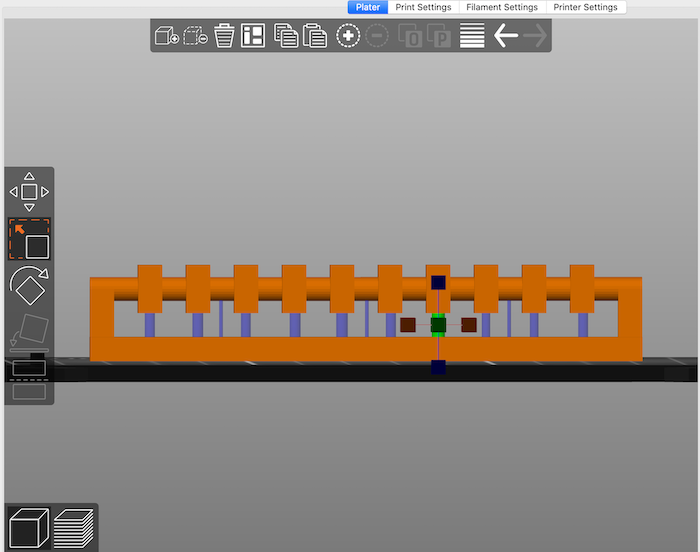
This really worked and we were very pleased with the outcome of the piece. The supports were a lot easier to get out and all the parts moved exactually the same as the other print just with less mess.
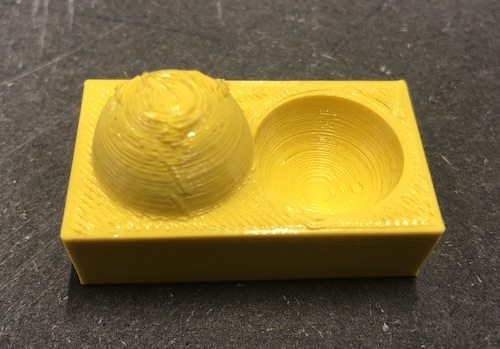
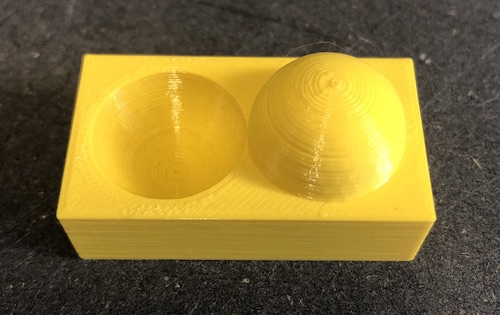
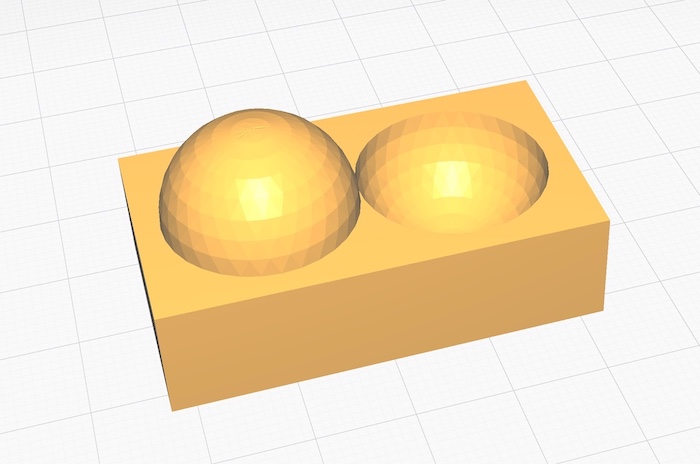
Finish Test
Finish test on Cura.
Questions
1. How to get the best finish for your printer?
Answers
1. This was an intersting print as when Jonny printed the first one it came out so so bad! Then again I did it on the Prusa slicer just with the default settings on 0.15 mm layer height. This came out a lot better and I think with a 0.4 nozzle the finish is smooth and quick.