12. Output Devices
This week I worked on DC motor as output device with motor driver board and ATtiny 3216 breakout board and sound sensor board, which would be used for my Final project work.
My final project robot will be starting move by switched by sound. So I also continued to work on sound sensor. This time MEMs analog sensor.
I was in charged of mathematical calculation of the power consumption of the circuit in Group assignment work.
Board creation and Tests
ATtiny 3216 breakout board
This was created to do individual assignments and my final project work. In order to meet I2C requirement and can use next week of Networking n Communication, I added two pull-up resistors to this per my instructor’s advice. I referred to the 3216 pinout diagram frequently since my board had no pin names. I think, if it’s possible, printing pin names would be help for work efficiencies.

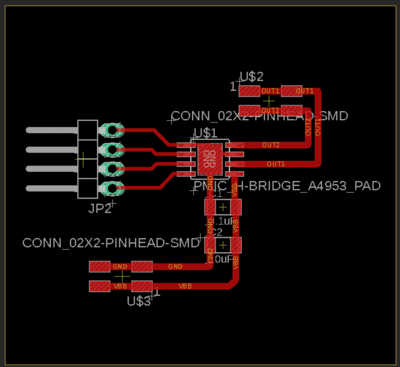
A4935 Motor Driver Board
I referred to the sample board for motors in Out device class. It was used t44 for IC but I’d like to use my t3216 breakout board instead.
Below is the image from class page. Pink rectangles should be included in my motor driver board.
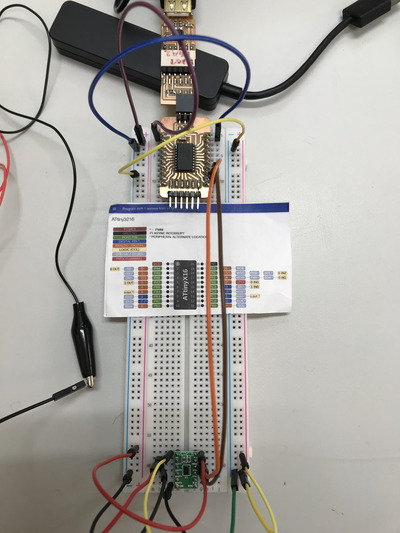
At the beginning, I had several errors when I tried t3216 breakout board and motor driver board, such as ” No connection to board” upon trying to upload programs from Arduino IDE.
So I decided to do step by step approach by using commercial board and then replacing mine. The results are in ().
- Arduino UNO + DRV8835 + Battery 3V (Good)
- Arduino UNO + A4935 + Battery 3 V (NG)
- T3216 Instructor’s + DRV8835 + Battery 3V (Good)
- T3216 Instructor’s + A4935 + Battery 3V (NG)
- T3216 Instructor’s + A4935 + Battery 9V (Good)
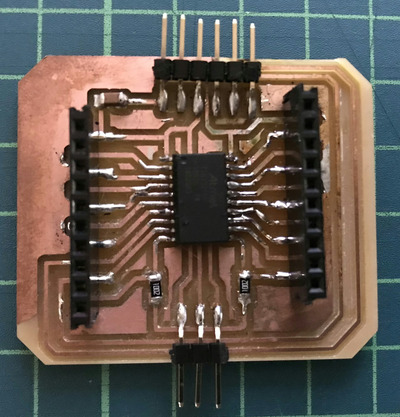
- T3216 my production + A4935 + Battery 9V (Good)
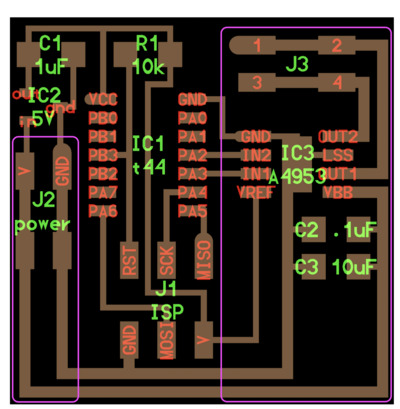
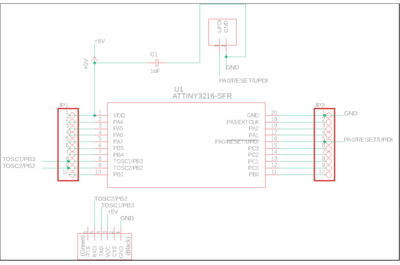
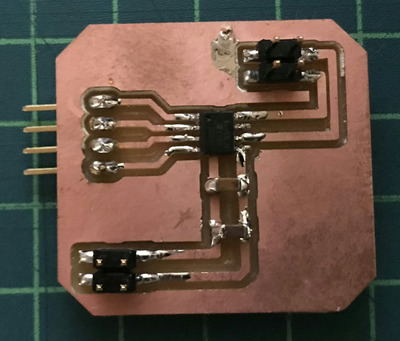
EAGLE schematic and board
Stuffed
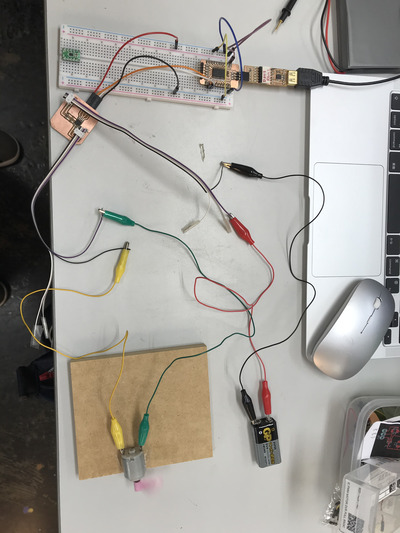
A4935 cabling
Code
Result
The motor turn clockwise, turn counter-clockwise and break. Successfully operated.
reference : pre-work with DRV8835
I used the same codes as that of A4935.
Learnings
- Voltage to work motors differ from motor drivers, even though the motors run when connected directly to 3v battery.

    - DRV8835 work with 3V to turn motors.
    - A4935 requires 9V to turn motors

-  Need double check about wiring of bread board. Depends on supplier, pin size is not the same and some are fit to the socket and others are a bit thin.
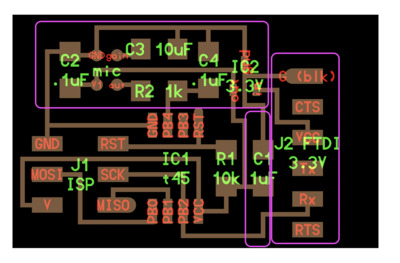
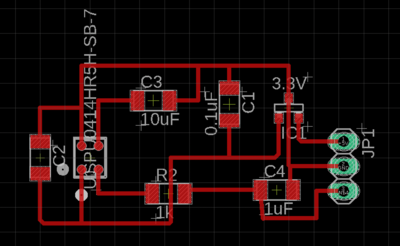
SPU414 Sound sensor Board
The same as Driver board, I referred to the sample board in class page of Input Devices about Sound sensor in Input Devices. I used MEMs Digital sound sensor in Input Devices. SPU414 is the MEM analog sound sensor which can be working without I2S protocol.
The sample from the Class.
Parts in pink rectangles should be included in my sound sensor board.
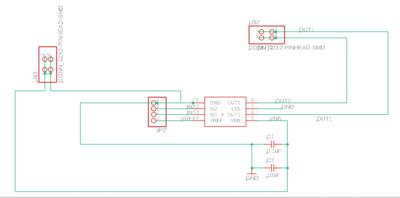
EAGLE schematic and board

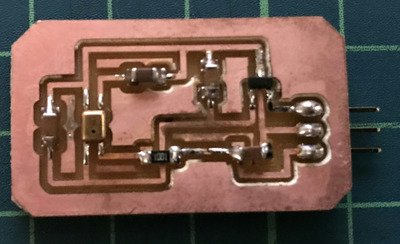
Stuffed board(this is 2nd version. 1st version was broken during testing )
Code
If sound sensor catch sounds, LED blink.
Result
LED blinked when Sound sensor caught clicker sound. Successfully blinked.
Learnings
Sound sensor picks up all sound around. So if we make sound sensor pick specific sounds such as Clap, we need take care of surrounding condition or very close to give the sound to the sensor.