3. Computer controlled cutting
This week I used a Laser cutter and a vinylcutter and brought back a very charming glass to home.
Individual Assignment : Design, lasercut, and document a parametric press-fit construction kit, which can be assembled in multiple ways. Account for the lasercutter kerf.
Lasercutter
I used Universal VLS 2.3, 30W CO2 laser cutter and Corel Draw to create cutting & engrave data which is sent to the laser cutter.
Steps to use the lasercutter - At first, I exported fusion data as SVG format by using Shaper, add-on of Fusion360.
-
Then import it in Corel Draw. Make sure to use Import, not use Open Files.
-
In Corel Draw, select objects, changed fill to none, line color to red and line width to hairline. Red means Cut and blue means Engrave.
-
Then print. Ctl + P
-
The data is transferred to Universal software.
-
We can find Universal software as red lozenge icon.
-
We need set materials and parameters in the software. If the material is used quite often, it can be found in the list from which import standard setting for certain material. This week’s group assignment founds appropriate setting for 3mm thick card boards. We can refer to it. Once finished setting, press OK bottom. If you changed Speed, Power or PPI manually, you need to press big round red bottom to apply for each changes.
-
Universal Control Panel has a turn on swhich on the screen.
-
On top of that surrounding of the laser cutter, there are several switches to turn on. Actually they are making big noises. However we need make sure to turn on them. Otherwise, we may have fire inside of the lasercutter.
- Converter of the lasercutter
- Air cleaners
-
Before starting cut, we need to adjust focus of a lens of the lasercutter with a focus tool. Although the lasercutter looks very tough machine, actually it is very fragile because it’s required very fine turning of Z axis of the lens.So you might be very careful to use the focus tool so as not to make no stress to the structure.
-
Confirm if data to cut is all on card board placed in the lasercutter to move point of Focus bottom.
-
Everything got ready, then press big Green bottom on the Univesal Control Panel to start cutting.
-
The kerf is 0.16mm from Group assignment work.
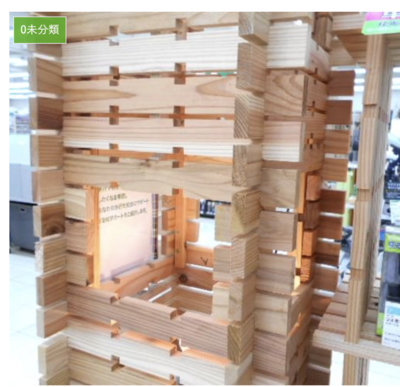
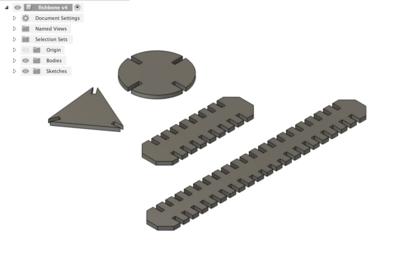
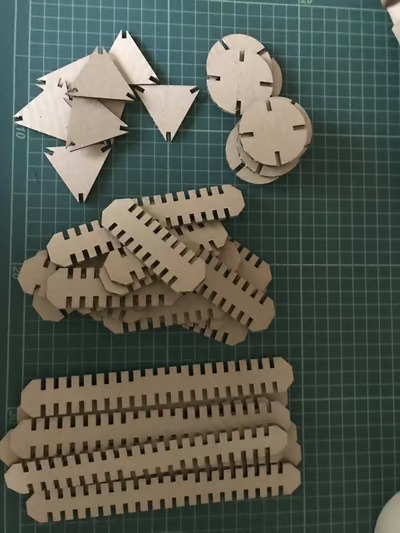
My construction kit
For laser cutting, I designed fishbones in Fusion 360. I applied parametric setting to width and length of each slit, width between slits and width of the end of objects. The idea of fish borns was coming from “Kudeju” , which used in refuges and built up to walls, shelfs, beds, and so on.
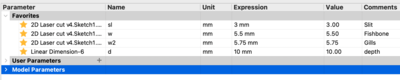
I used card boards packed with books/goods in Amazon delivery boxes. Actual thickness was approx. 3.2mm. By considering 0.16mm of the width of slit should be designed as 3.04 mm. Applied 3mm.
I set parameters as below so that slits of each fishbones are interlocked to built something well. After test-cutting, the interlocking is loose or tight, I would adjust the parameters to have best fit. The test-cutting was good. Then I used the parameter numbers.
sl = width of slit = 3mm w = width of bone = 5.5mm d = depth of slit = 10mm w2 = length of gill(end of bone)=5.75mm
During construction of the kit, some slits were a bit loose. Since a card board has waving inner layers, the contact of slits varies depending on which part of card board to cut.
Cut card boards by the laser cutter.
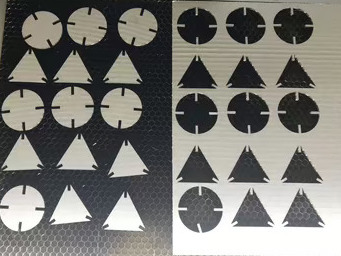
Kit parts.
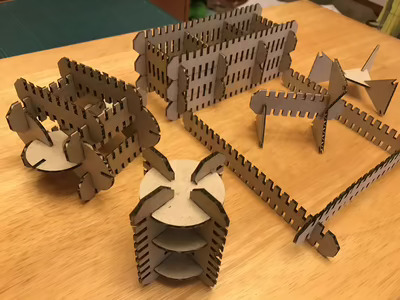
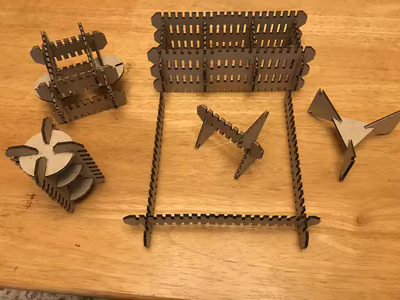
Assembled to a cow, cowshed, a silo, a water drinking station and a mower.
Files
Vinylcutter
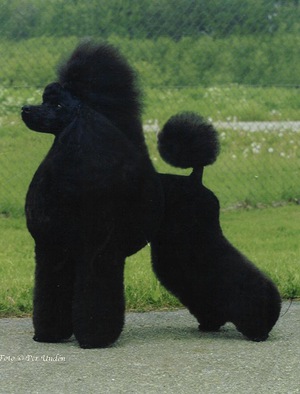
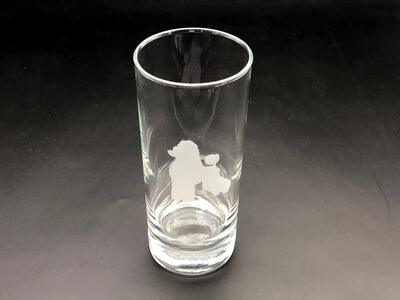
Vinyl cutter was Silhouette CAMEO. I used a picture of a dog.
Steps to use the vinyl cutter
-
Install software Silhouette Studio for Silhouette CAMEO
-
Import the picture and trace an outline of the dog into Silhouette Studio
-
Make Adjustments in design view of Silhouette Studio.
-
Set the parameters
Materials : Cutting Film Gross Action : Cut Tool :Ratchet blade Cutting pressure :4( Don’t forget to change it from the both of setting on the software and adjuste dial of the machine) Force :10 Path :1
-
Then press Send bottom to start cutting.
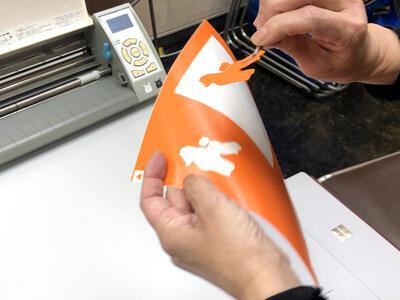
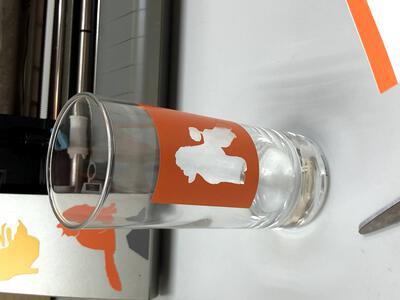
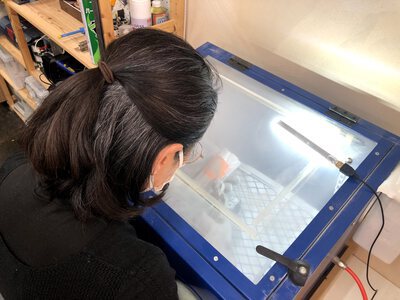
Then put it on a glass, covered with papers other than poodle shape. Put the glass in sand blaster machine.
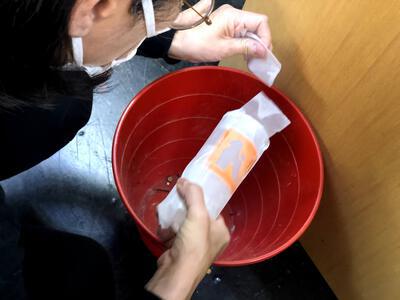
A very charming glass appeared.
I used vinyle cutter and sand blaster very first time but it was very fun.