"Hi everyone ,Week 15 moulding and casting.This moulding and casting week might be very challenging for me.As i am new to 3D design and all .So i am looking forward to learn more about 3D design and then most important thing is how to do mould and cast the given design.Again in this week i will learn the another angle of SRM-20 to used for moulding.Also the material used for moulding as well.Overall this week is one of the challenging for me .So lets start .....!.
- Review the safety data sheets for each of your moulding and casting materials, then make and compare test casts with each of them
Group assignment
- Design a mould around the stock and tooling that you'll be using, mill it (rough cut + (at least) three-axis finish cut), and use it to cast parts
Individual assignment
Introduction
moulding & Casting
moulding is the process of of manufacturing by shaping liquid or pliable raw materials using a mould or matrix, which have been made using a pattern or model of final object. But, Casting is a manufacturing process in which a molten metal is injected or poured into a mould to form an object of the desired shape.
So just to simplify i classified this week work in four categories.Read more...
Designing a mould (Solid work 3D design)
The 3D model which i am going to design is an 3D dimensional object that i want to reproduce with the mould making and casting process.Actually from this 3D object i design mould and cast are made.One thing i need to point out here that how complicated the model is determines the kind of mould technique that must be used to successfully cast the object.In other words,if you look into a mould straight from above, you should be able to see the whole inner surface, with nothing hidden “behind a corner”. These overhangs could later cause the master model or final cast to become stuck in the mould.
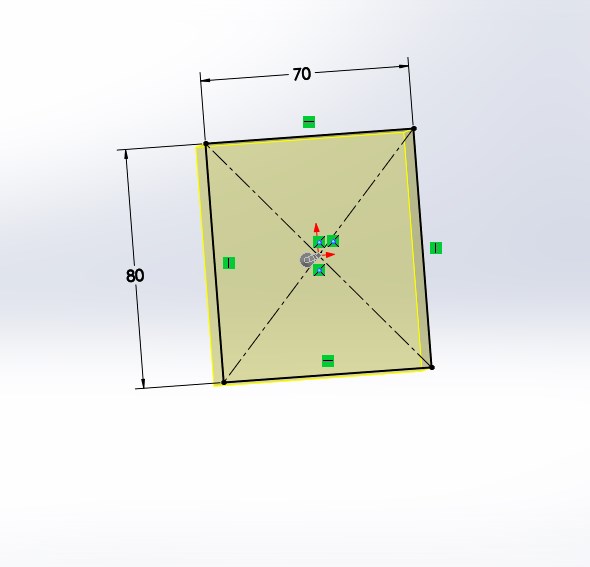
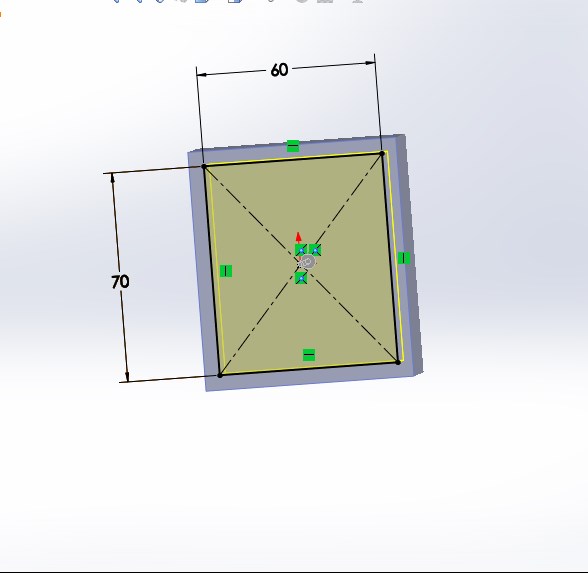
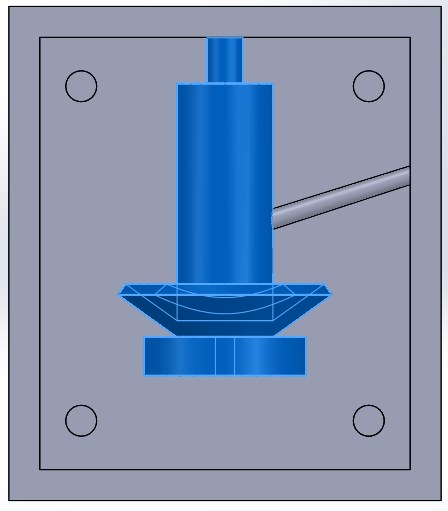
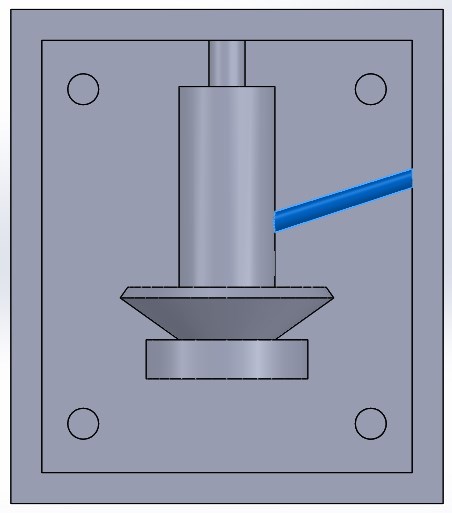
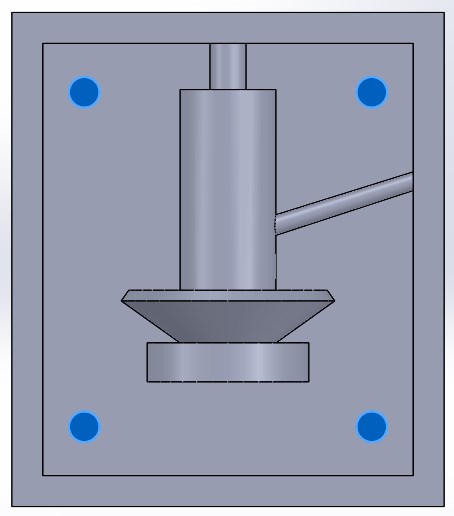
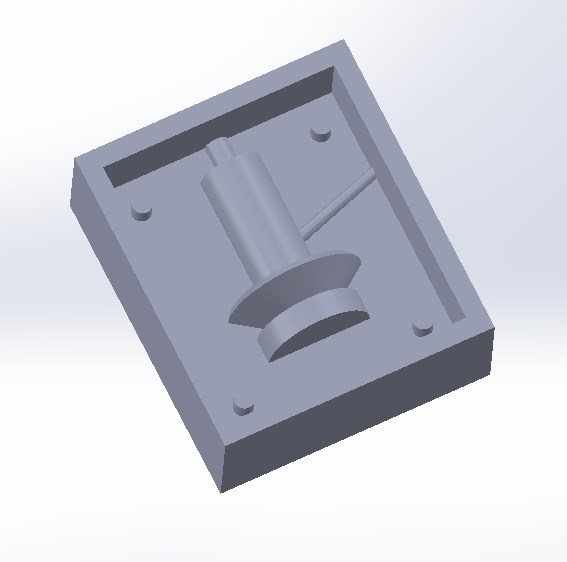
The first step is to design a 3D object.So i decided to used solid work for my 3D design since i used it before.I planned to 3D sketch of Piston.To decide this design my co-fab mate Tejeswini helped me .She shown me actual where we used this piston and told me application of in valve used in water flow design.So first i need to draw the sketch considering the dimension of mould.I brought my mould and measured it first and accordingly start sketching my 3D design.So lets see the screenshot which i have taken.
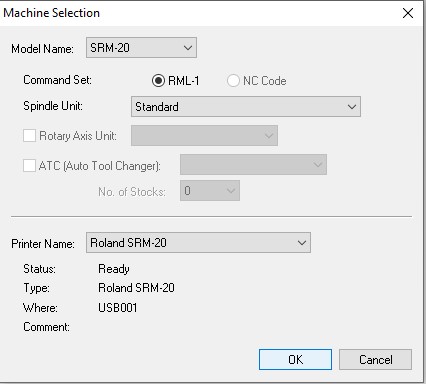
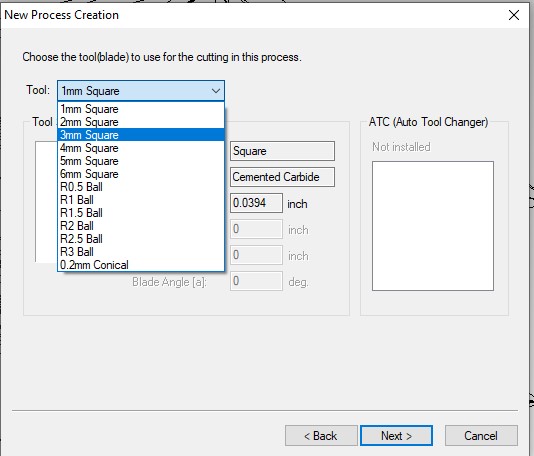
Procedure to Mill wax on SRM-20
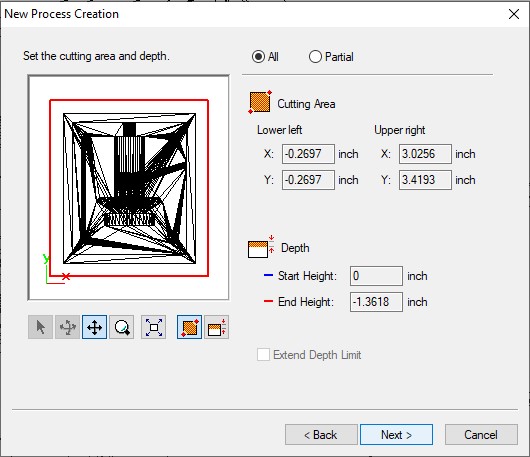
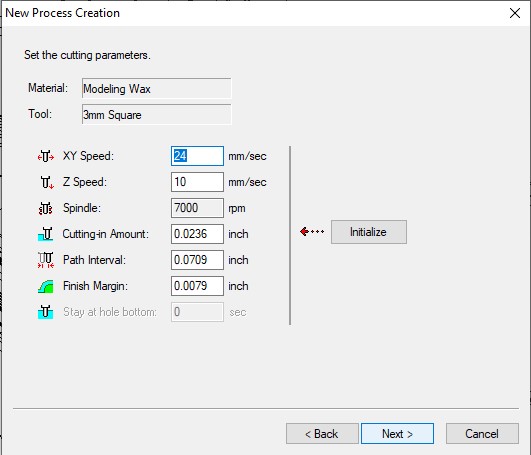
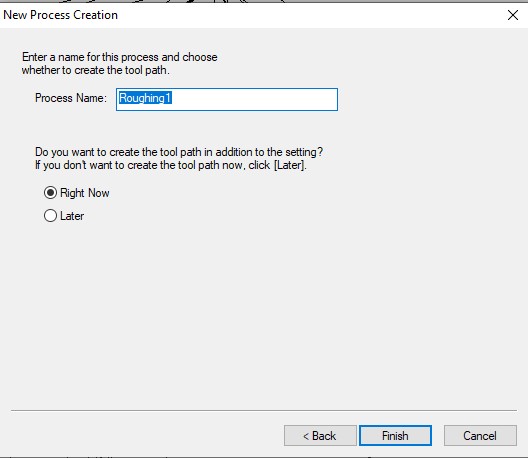
After i design the 3D sketch in solid work now the second step is to mill the sketch.The procedure to milled the 3D sketch is such that first i need to configure the V-Pannel of SRM -20 i.e.Set the XY and Z origin.Then open the Modella software to create the rml file for SRM -20.In short this part is classified into two sections
SRM-20 Compact Milling Machine Features
The SRM-20 portable milling machine can mill a broad range of materials, including modeling wax, chemical wood, foam, acrylic, poly acetate, ABS and PC board. The following items are just some of the prototypes and applications made possible:>
The wax block is properly placed on sacrificial surface of SRM-20 milling machine with single sided tape underneath and used glue gun to tapped the wax to fixed the block.
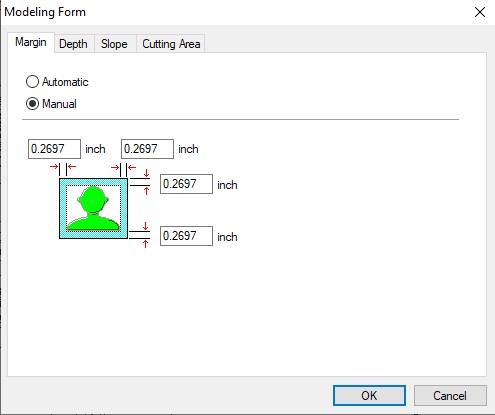
Design steps in Modella
As Modella software is used to generate the toolpath for the SRM -20 machine.I need to go through following three steps here
Repeat the following steps for surfacing,roughing and finishing


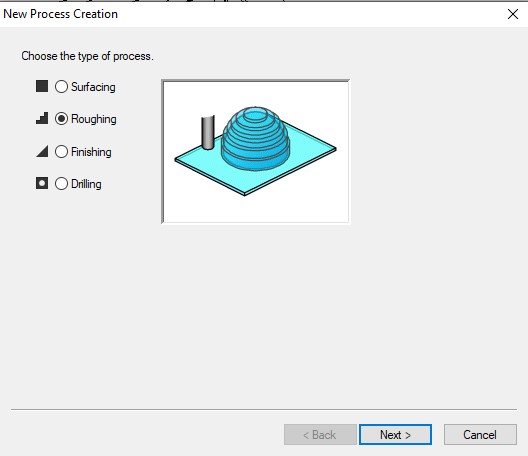
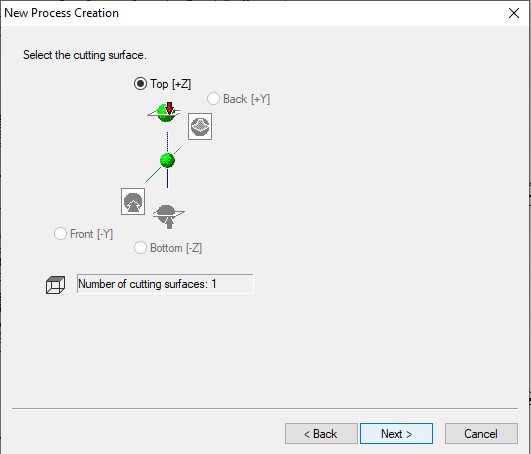
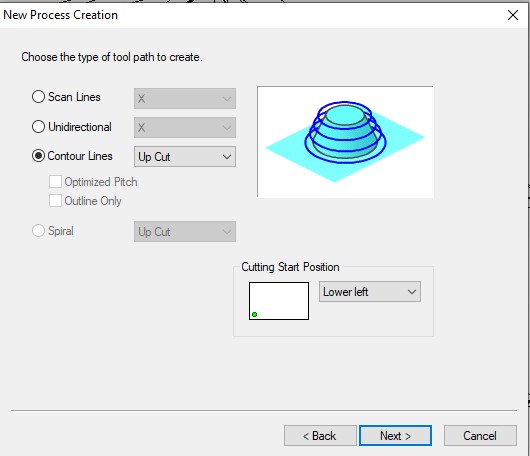
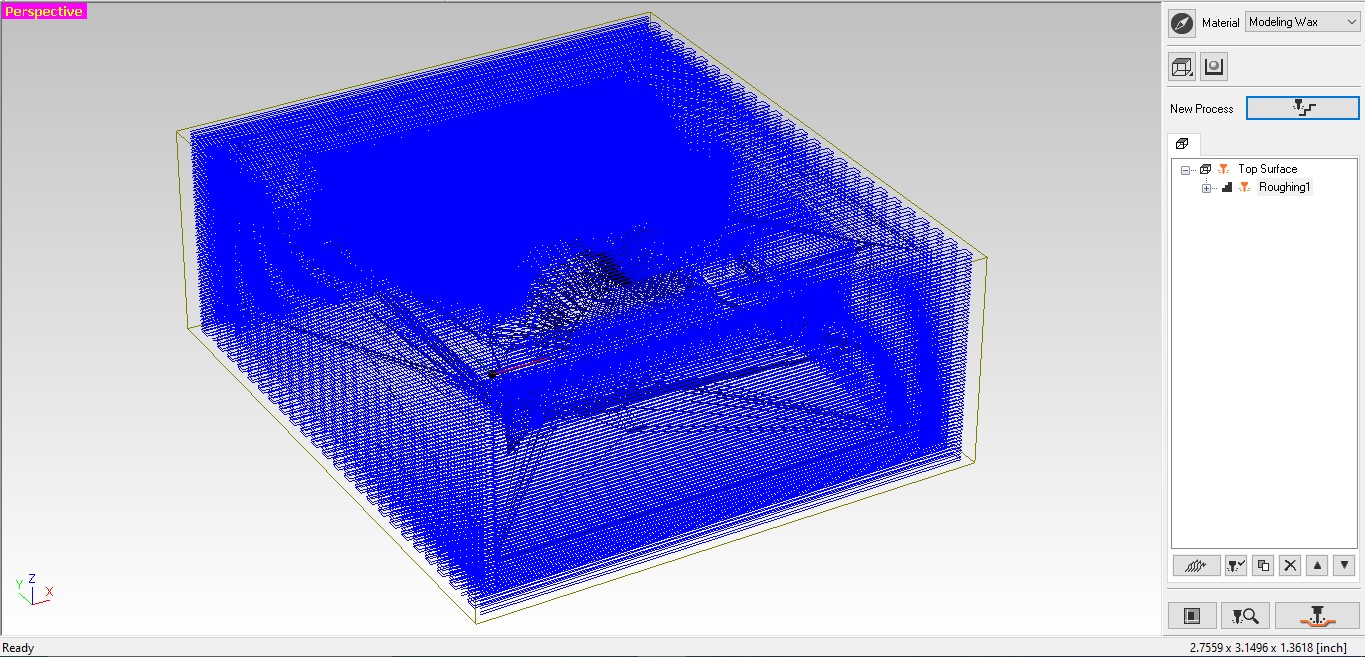
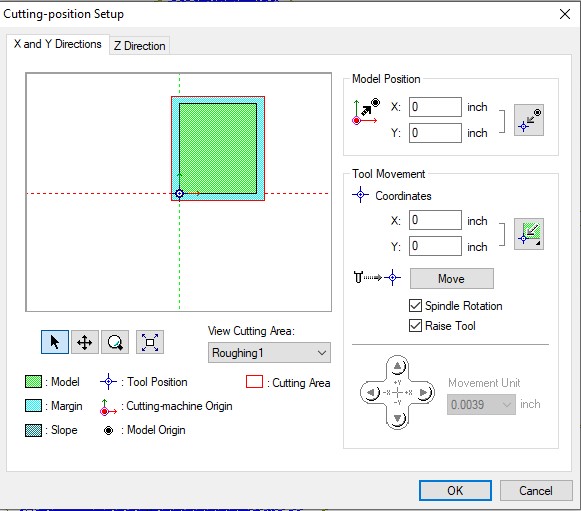
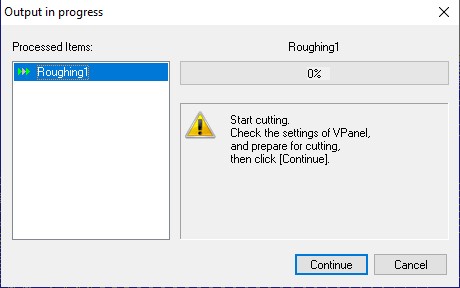
Carving the mould in wax
In the following video you can see the two mould (side 1 and side 2) getting surfacing,roughing and finishing as well.
#1.Video demonstration for surfacing the mould:
#2.Video demonstration for roughing the mould:
#3.Video demonstration for finishing the mould:
roughing the mold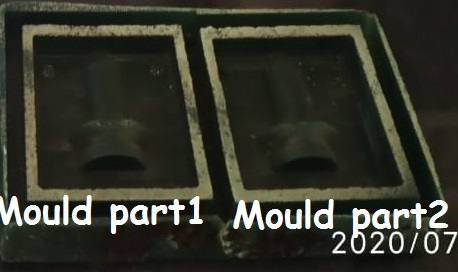
Making the mould with silicone rubber
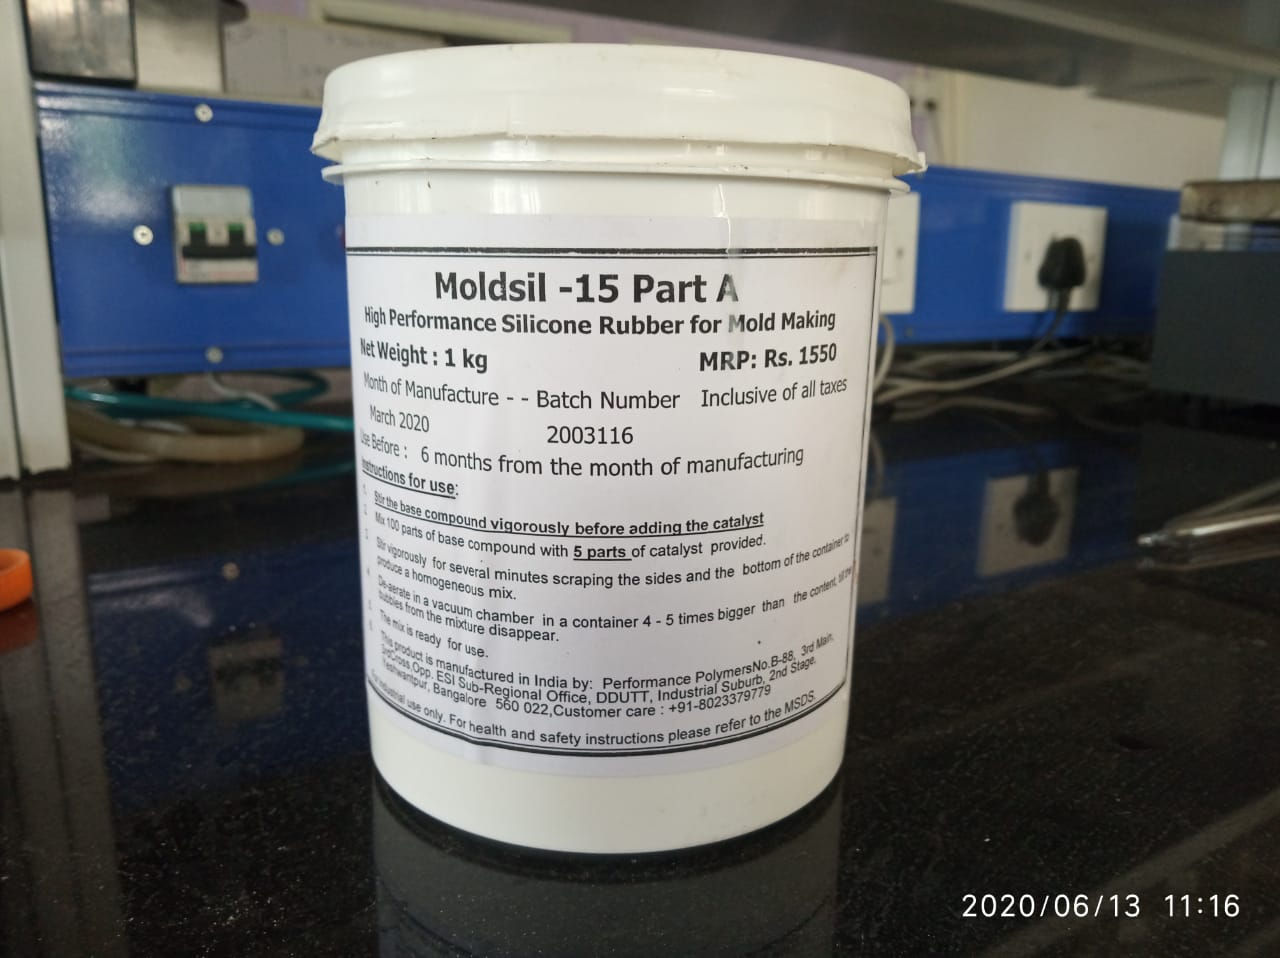
Here is mouldsil 15 part A which i am going to used.

This is Catalyst 16 part B which is being used as hardner.
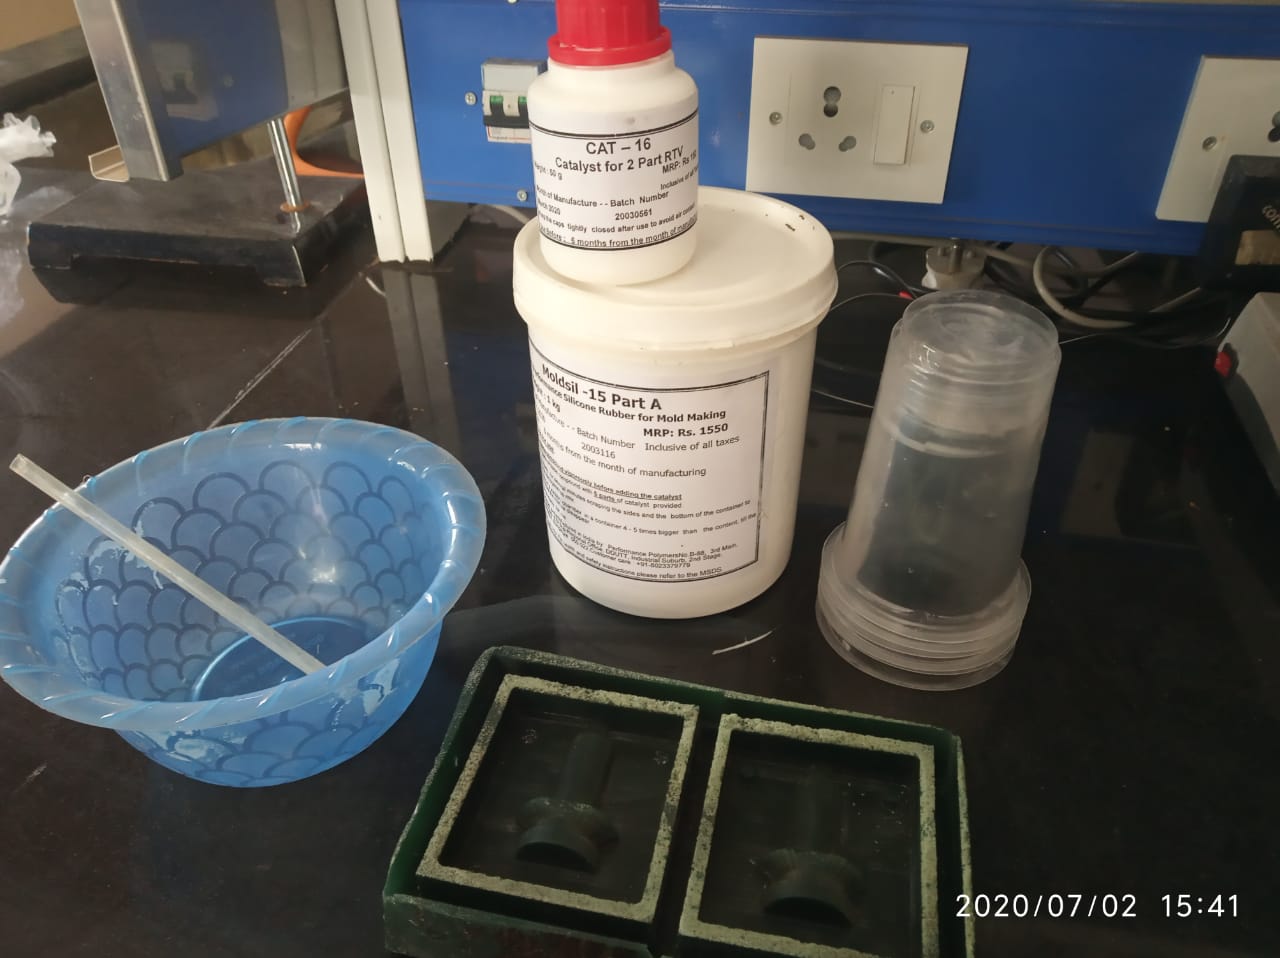
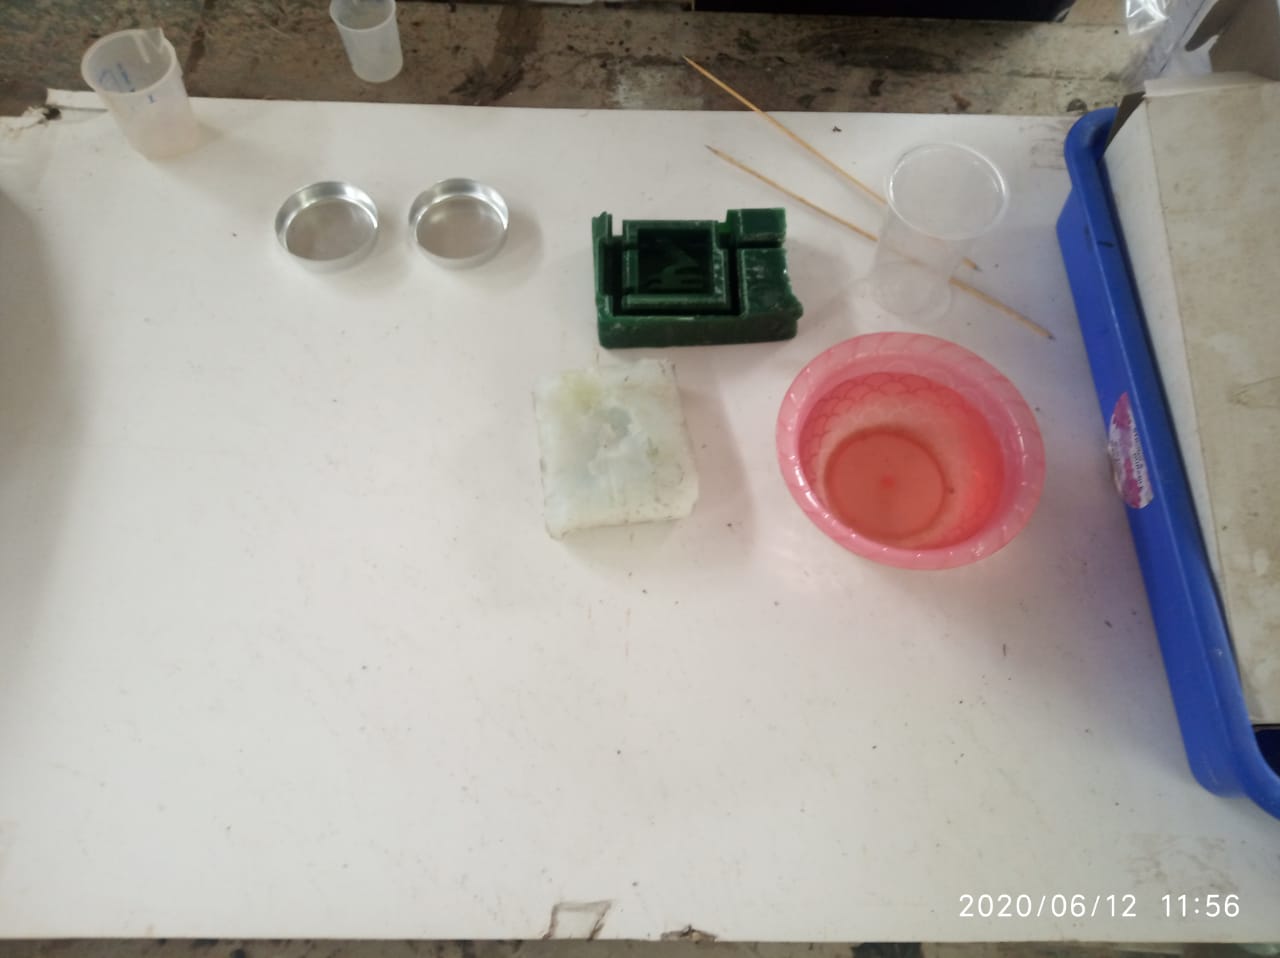
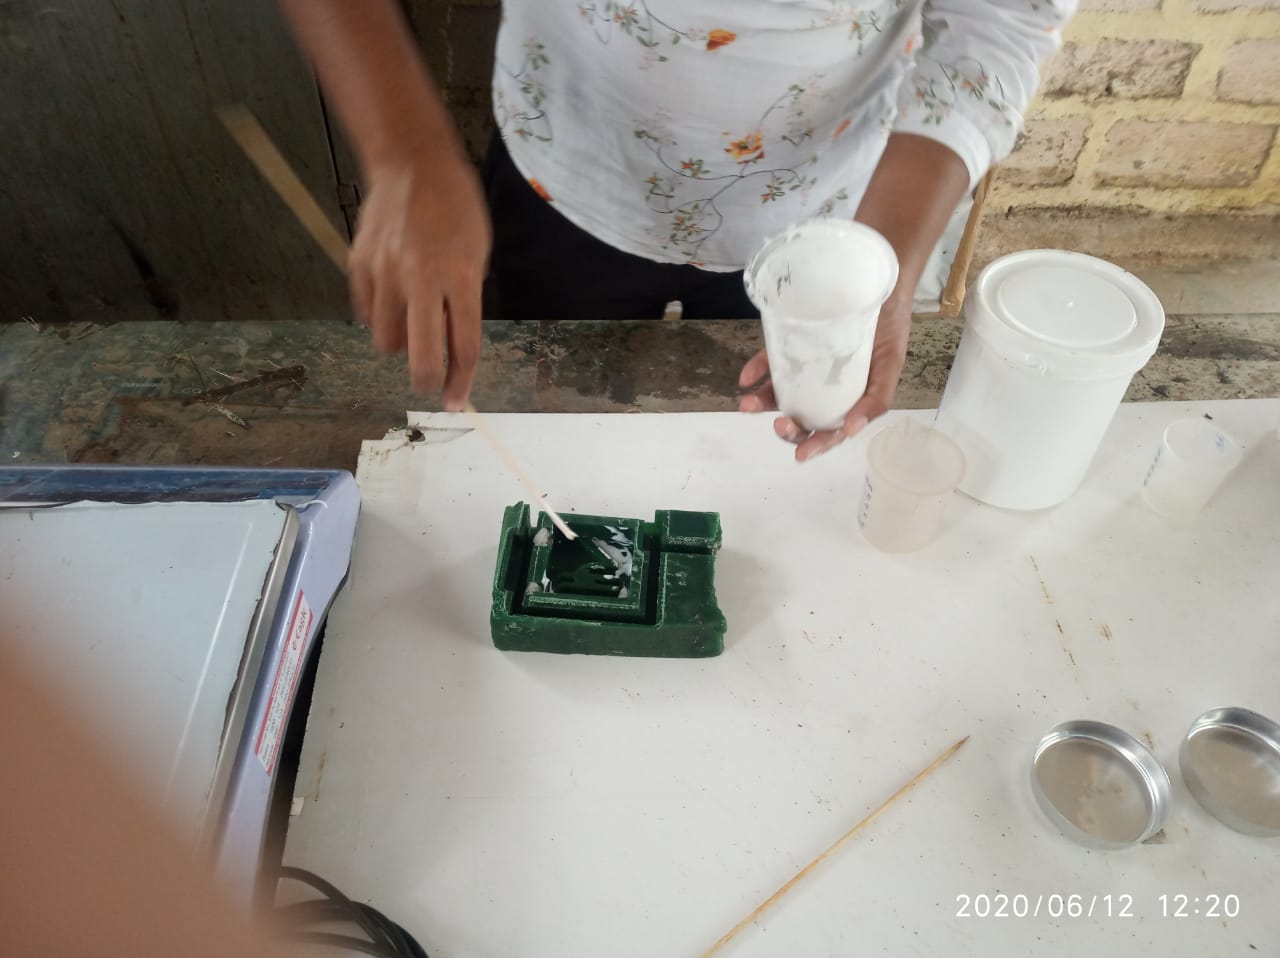
Then i put all necessary things on one platform like mould,silicon rubber,hardner,cups,water,pot etc.
So first i put the water into the mould to understand how much total liquid material(mixture of silicon rubber and hardner) is enough to cover whole mould area.
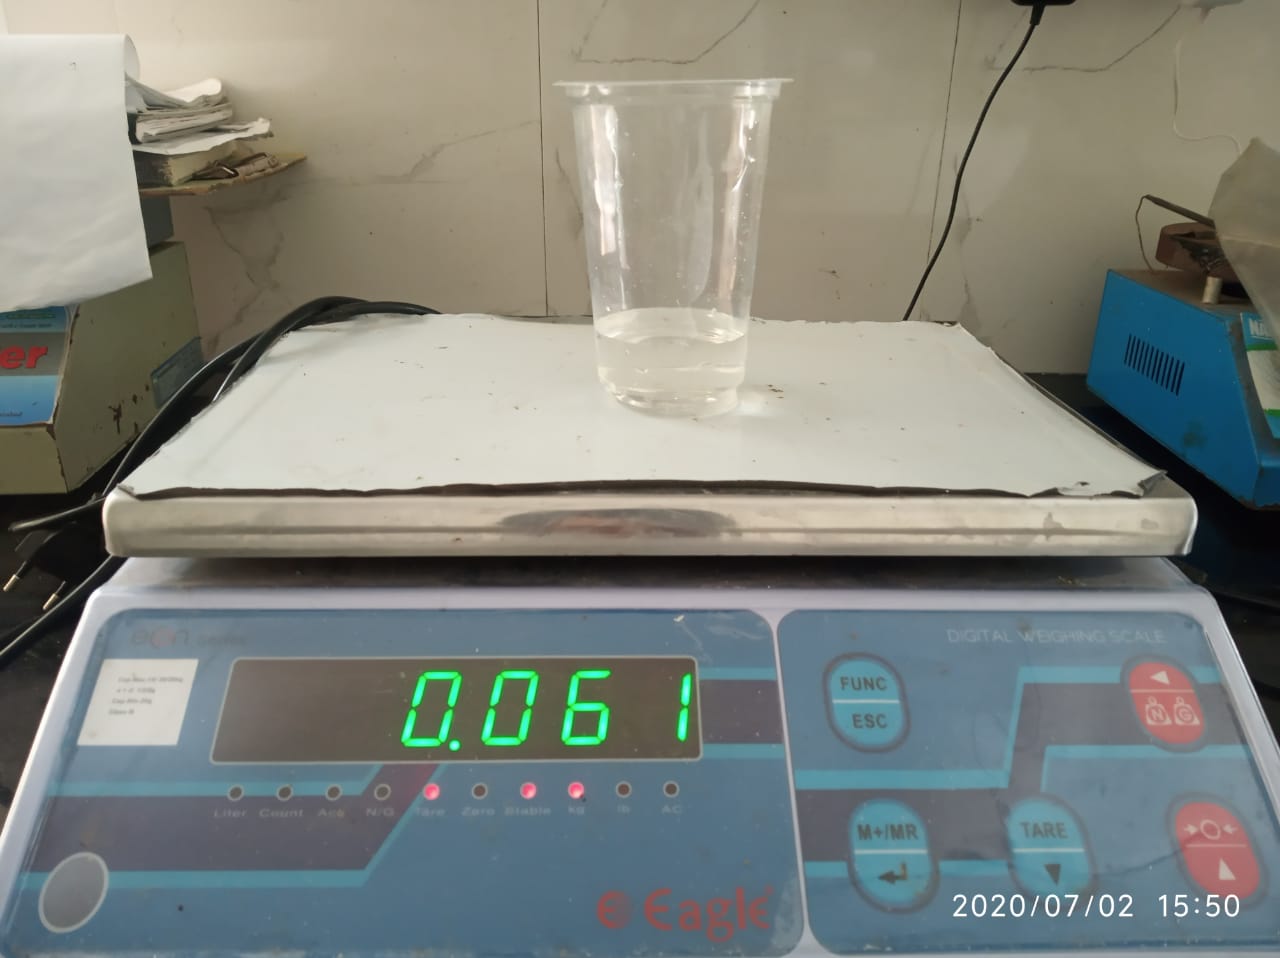
61gm water ie required to fill the whole area.
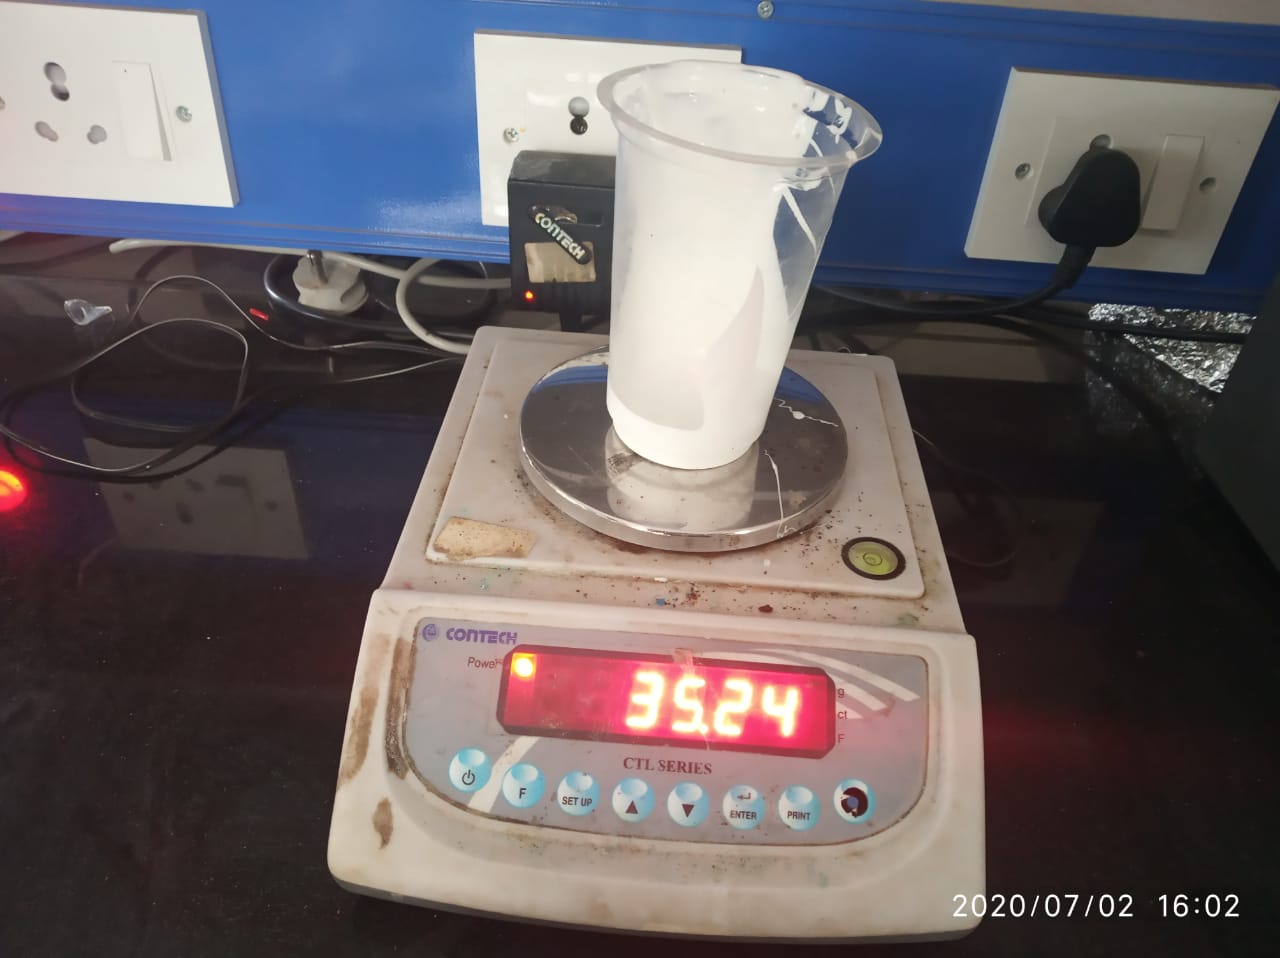
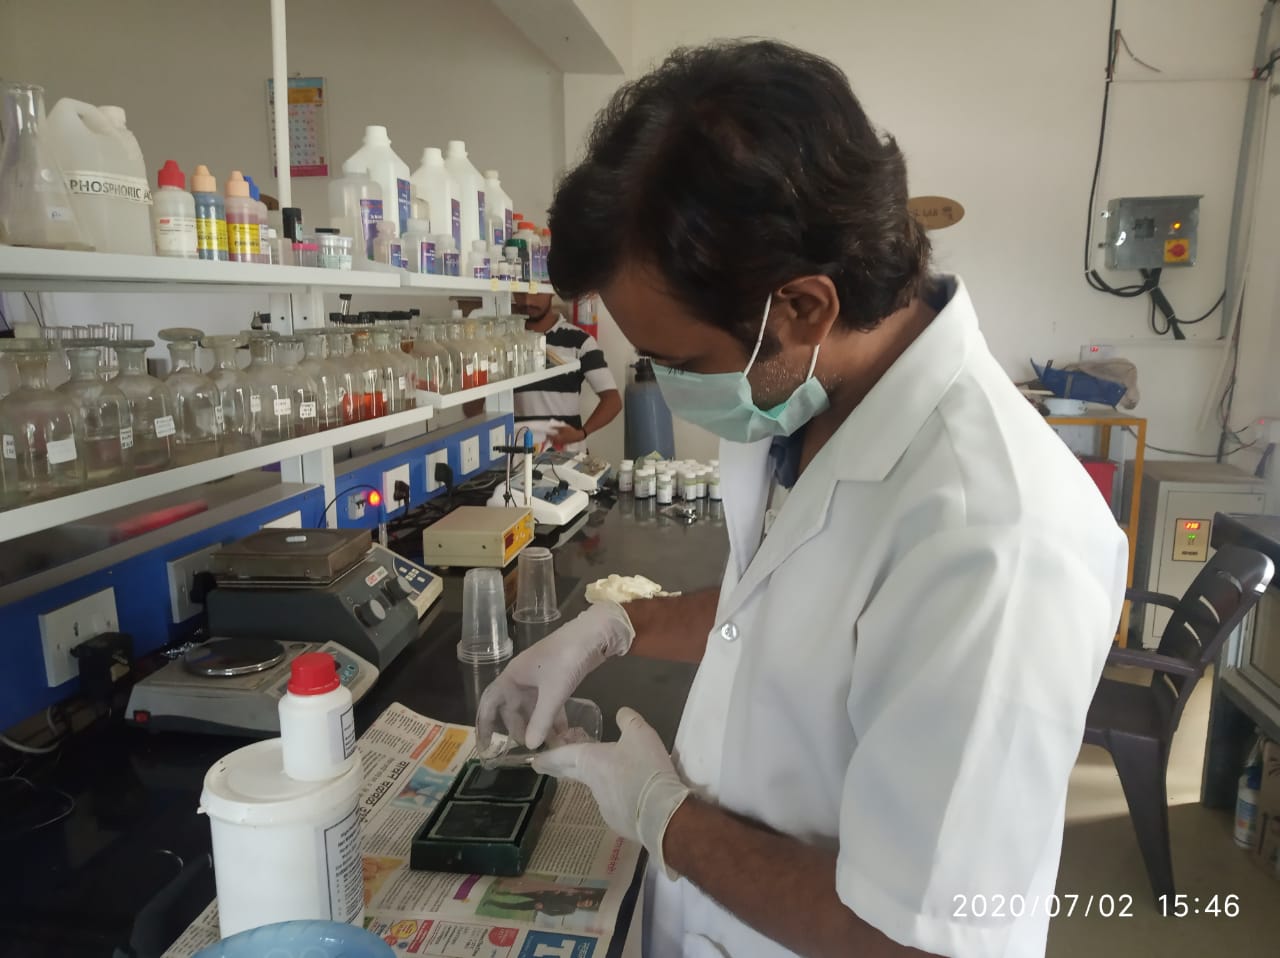
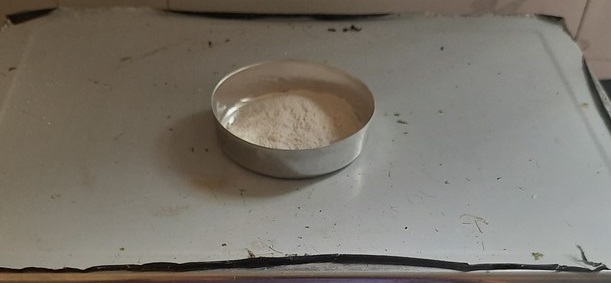
Then take 60% of 61gm mouldsil first into the glass.
Immegiately take 40 % of 50 gm catalyst as herdner and put them into mouldsil and sturred it fast.
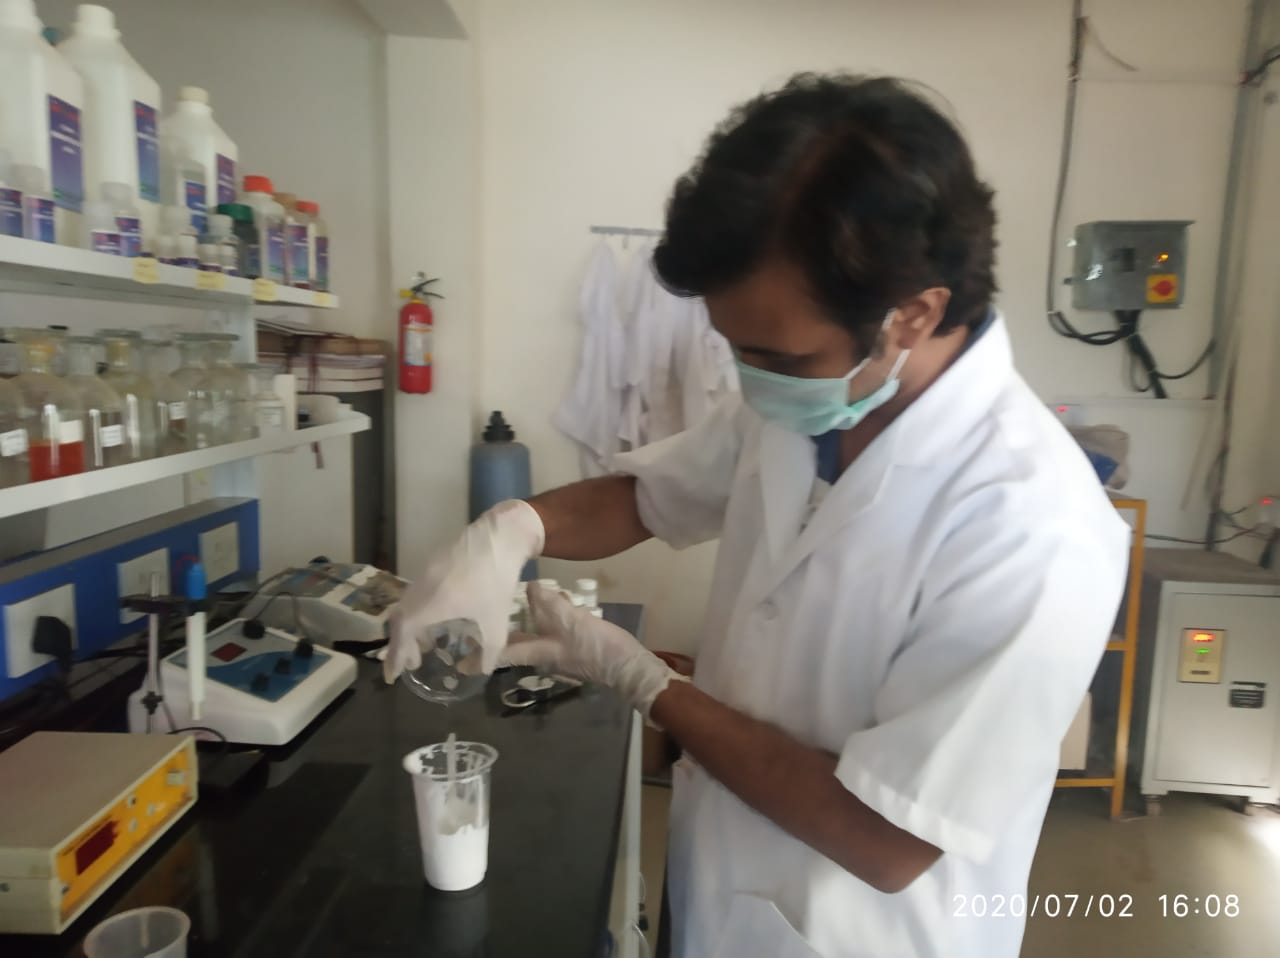
Mixed hardner i.e.catalyst 16A into the mouldsil.
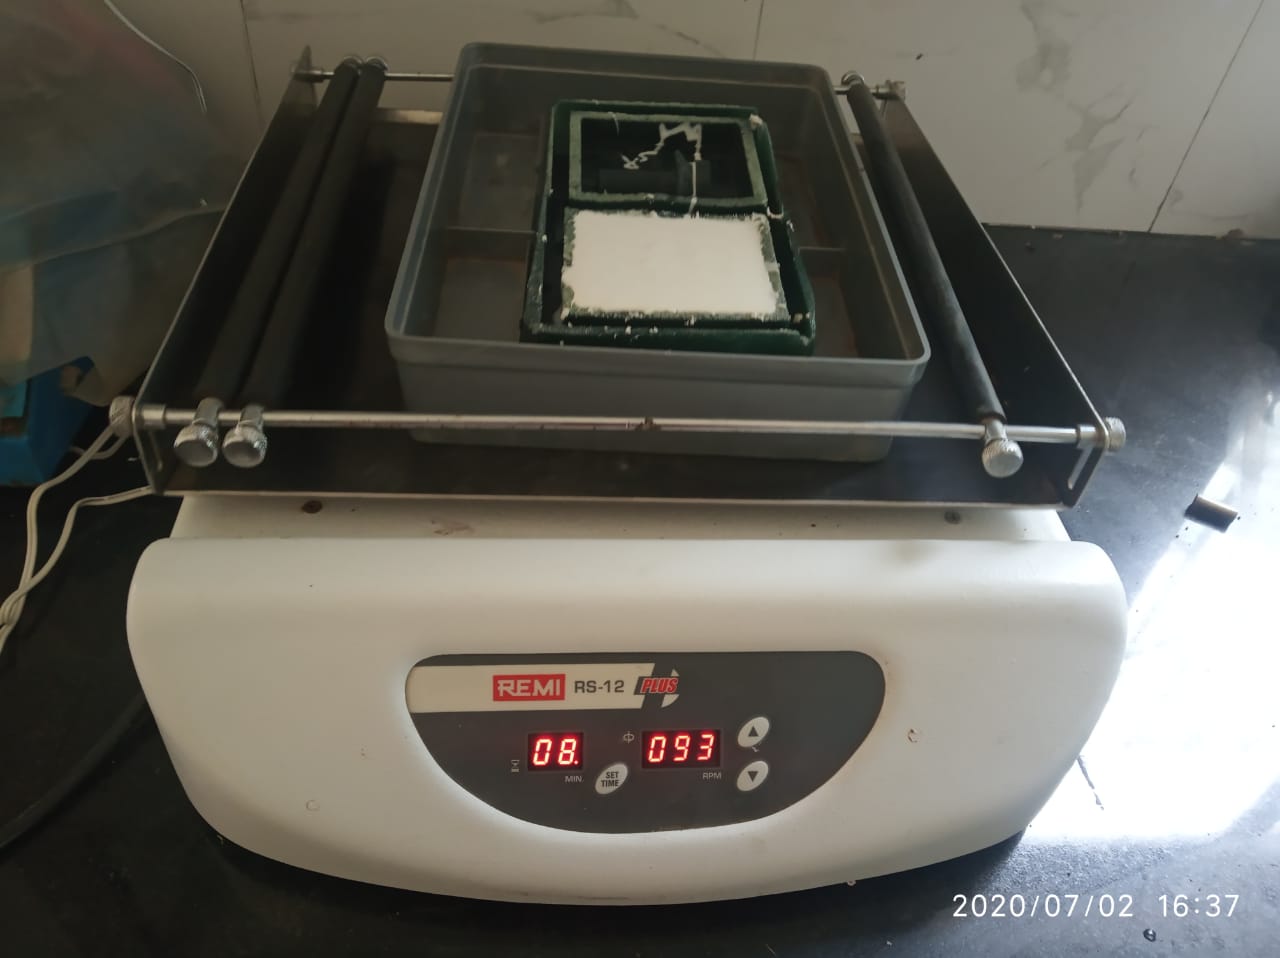
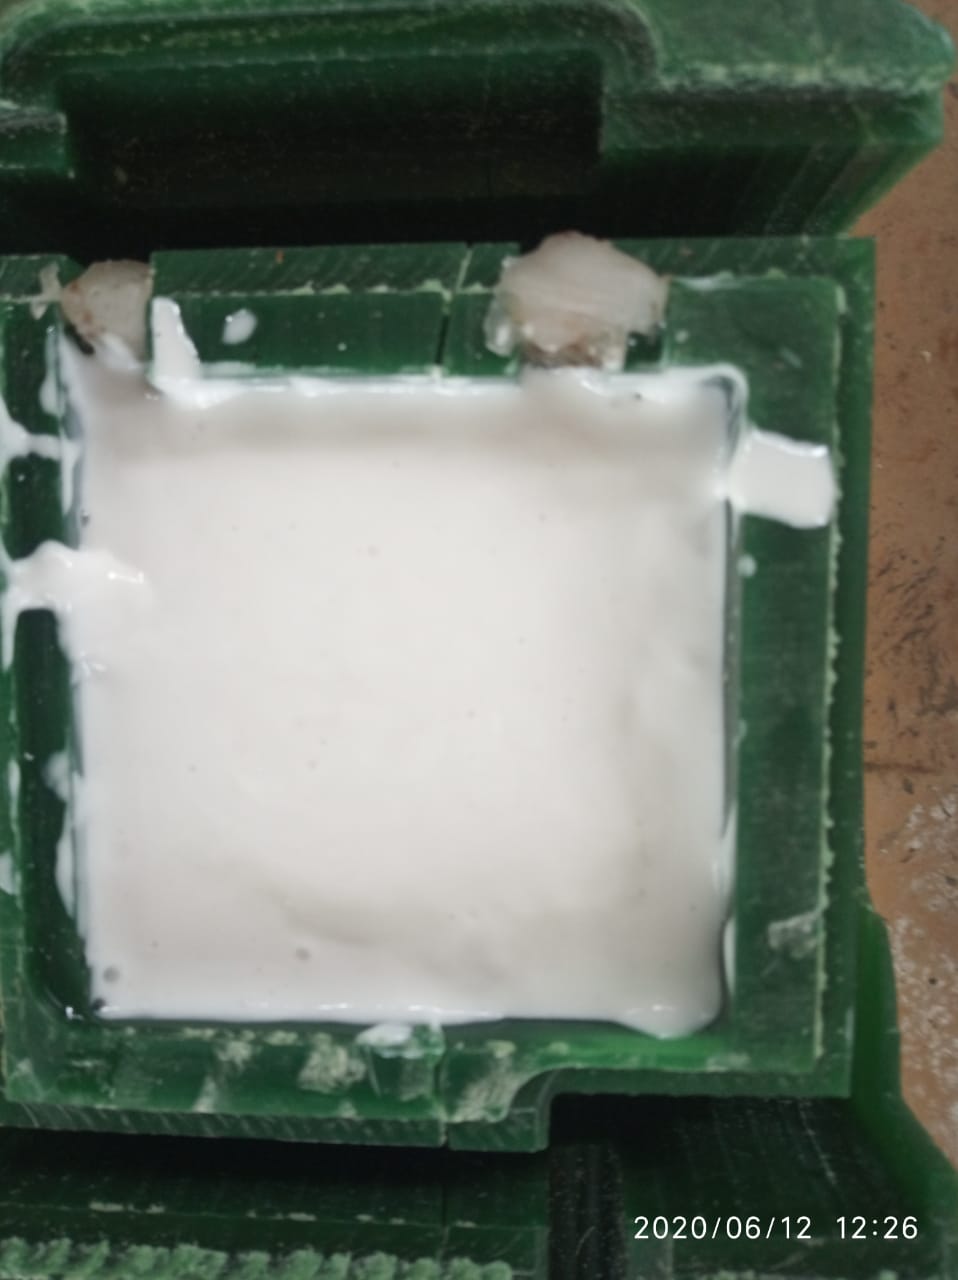
Immediately filled whole mixture into the mould and then put it into the sterrer to remove the bubbles.

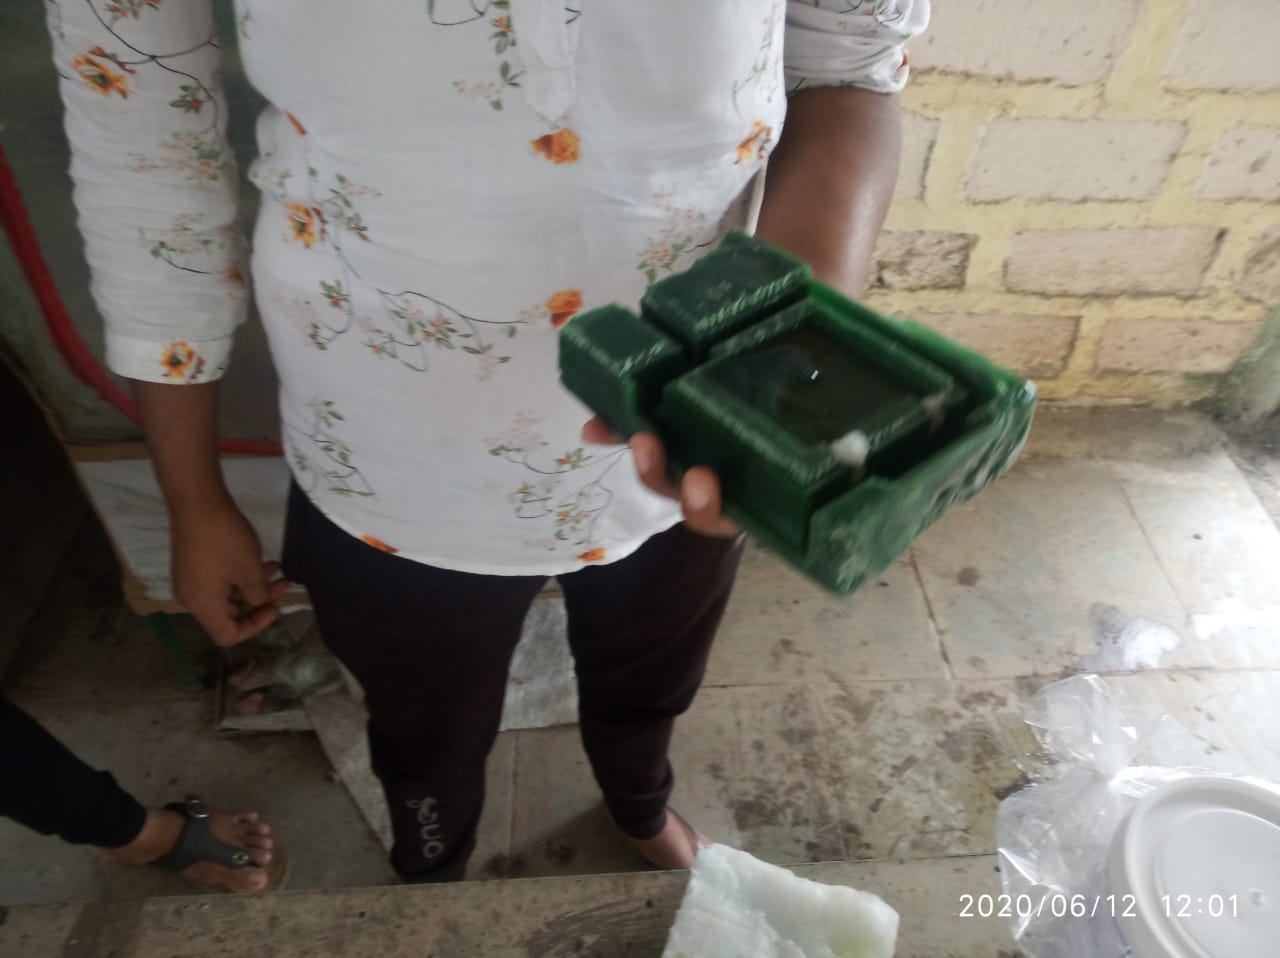
After keeping it for few hours f inally i removed it from mould and and it is perfectly clear.
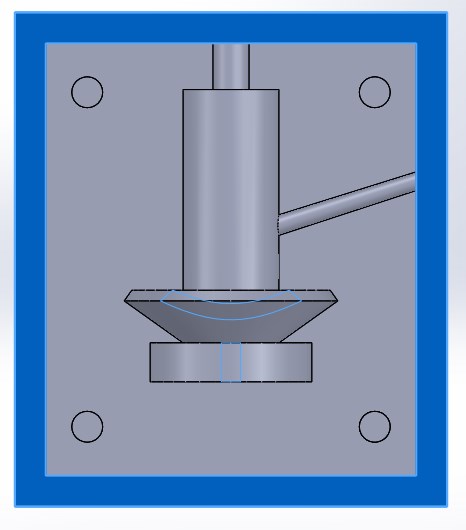
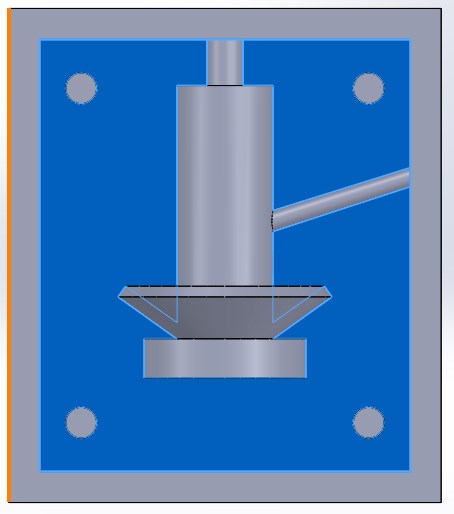
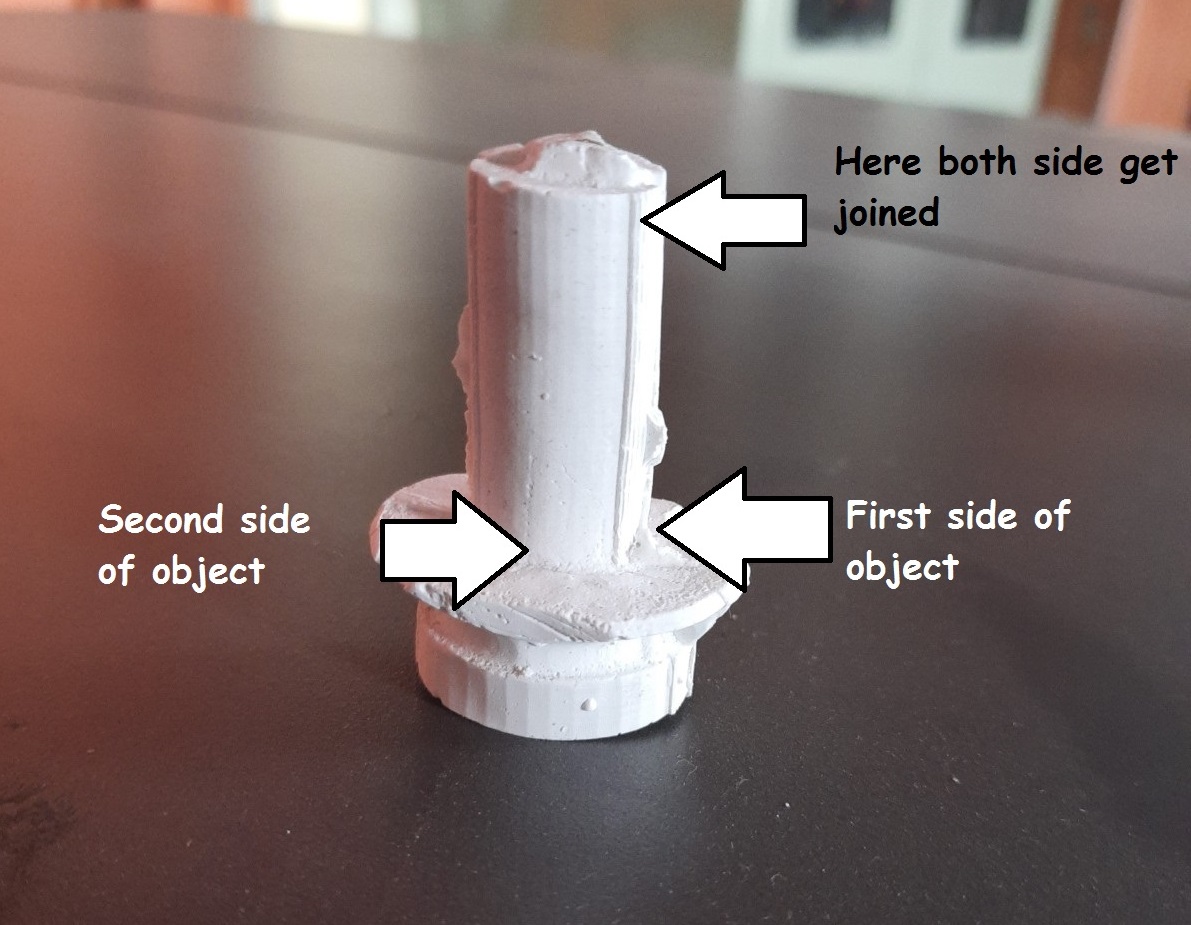
As you can see i have made two rubber part.After pouring the materail this part need to be fixed over each other. To fixed the part properly i extrude the hole below the surface for first part and for the second one i extrude the hole above the surface which you can see in the image as well.
Casting
Now time for casting the mould.To do casting we need to folow some steps as well.So i listed out what we need to do proper casting of mould?

.
.
Hero shot:
Learning outcomes
Group assignment
On Thusday morning, our week mentor give us brief idea about this week.During this discussion she actually introduce us about different material ,What is moulding and casting,Design,installation procedure and the process as well.After this brainstrorming she asked to do our group assignment work for that i need to read the datasheet of silicone rubber and thentry to explain others mates as well.So i start reading the things about silicone rubber which i mentioned below.
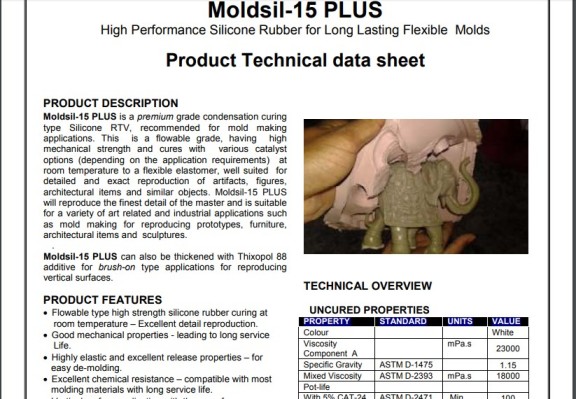
What is silicone rubber?: Silicon rubber is a thrmoset process that actually combine two compound together and later you need to heat cured in the mould using different catalyst options which i mentioned below.After doing all this exersize it will result into liquid silicone rubber.Now to undestand in detaled about the silicone rubber i finally go through the data sheet mouldsil-15 PLUS i.e.High Performance Silicone Rubber for Long Lasting Flexible moulds )
mouldsil-15 PLUS(High Performance Silicone Rubber for Long Lasting Flexible moulds )
Introduction:mouldsil-15 PLUS is a premium grade condensation curing type Silicone RTV, recommended for mould making applications. This is a flowable grade, having high mechanical strength and cures with various catalyst options (depending on the application requirements) at room temperature to a flexible elastomer, well suited for detailed and exact reproduction of artifacts, figures, architectural items and similar objects. mouldsil-15 PLUS will reproduce the finest detail of the master and is suitable for a variety of art related and industrial applications such as mould making for reproducing prototypes, furniture, architectural items and sculptures.
Features:
CATALYST OPTIONS:There are three types of catalyst options.
METHOD OF USE
How to mix silicone rubber?
HANDLING PRECAUTIONS AND SAFETY:mouldsil-15 PLUS contains constituents that have been found to be safe. Hence special handing precautions except general industrial hygiene need to be followed. Catalysts (CAT-24, CAT-16 and CAT-04) contain organo-tin compounds and are flammable and might cause irritation upon contact with eyes and skin. Adequate protective measures are recommended. Refer to Material Safety Data Sheet (MSDS) for safe use of the product
Procedure to used mouldsil and catalyst
Here is mouldsil 15 part A which i am going to used.
This is Catalyst 16 part B which is being used as hardner.
Then i put all necessary things on one platform like mould,silicon rubber,hardner,cups,water,pot etc.
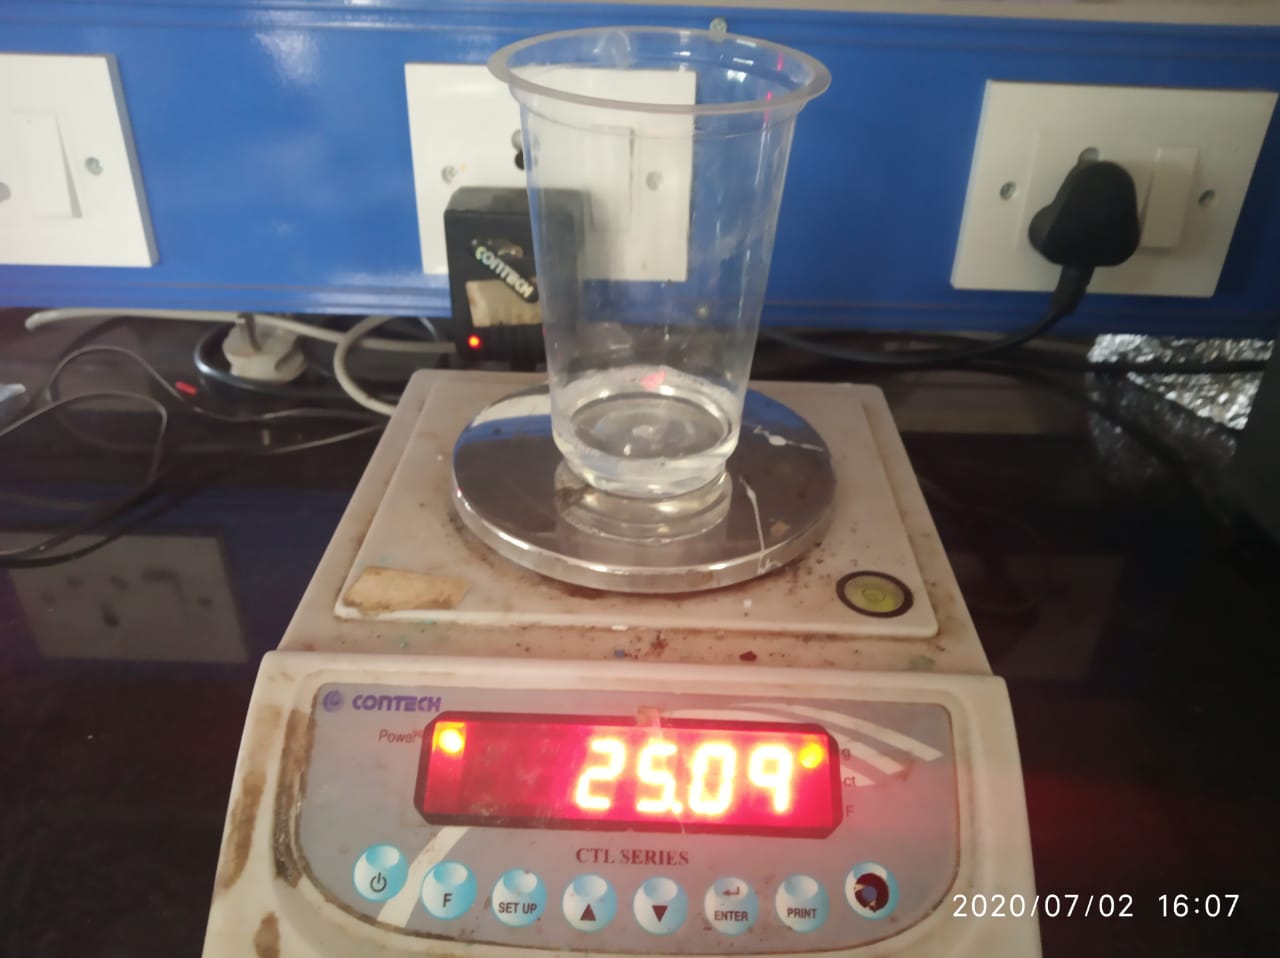
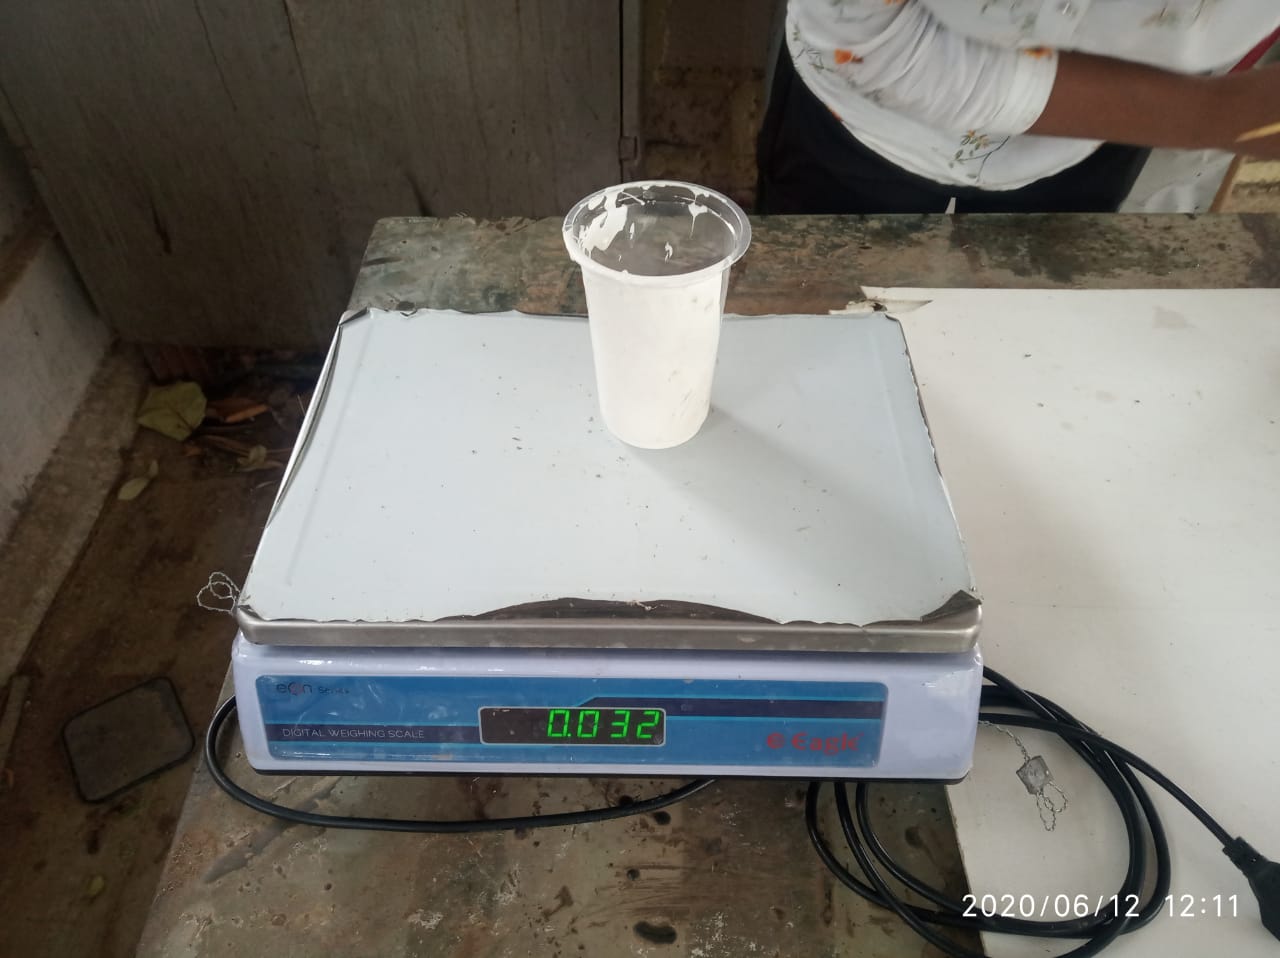
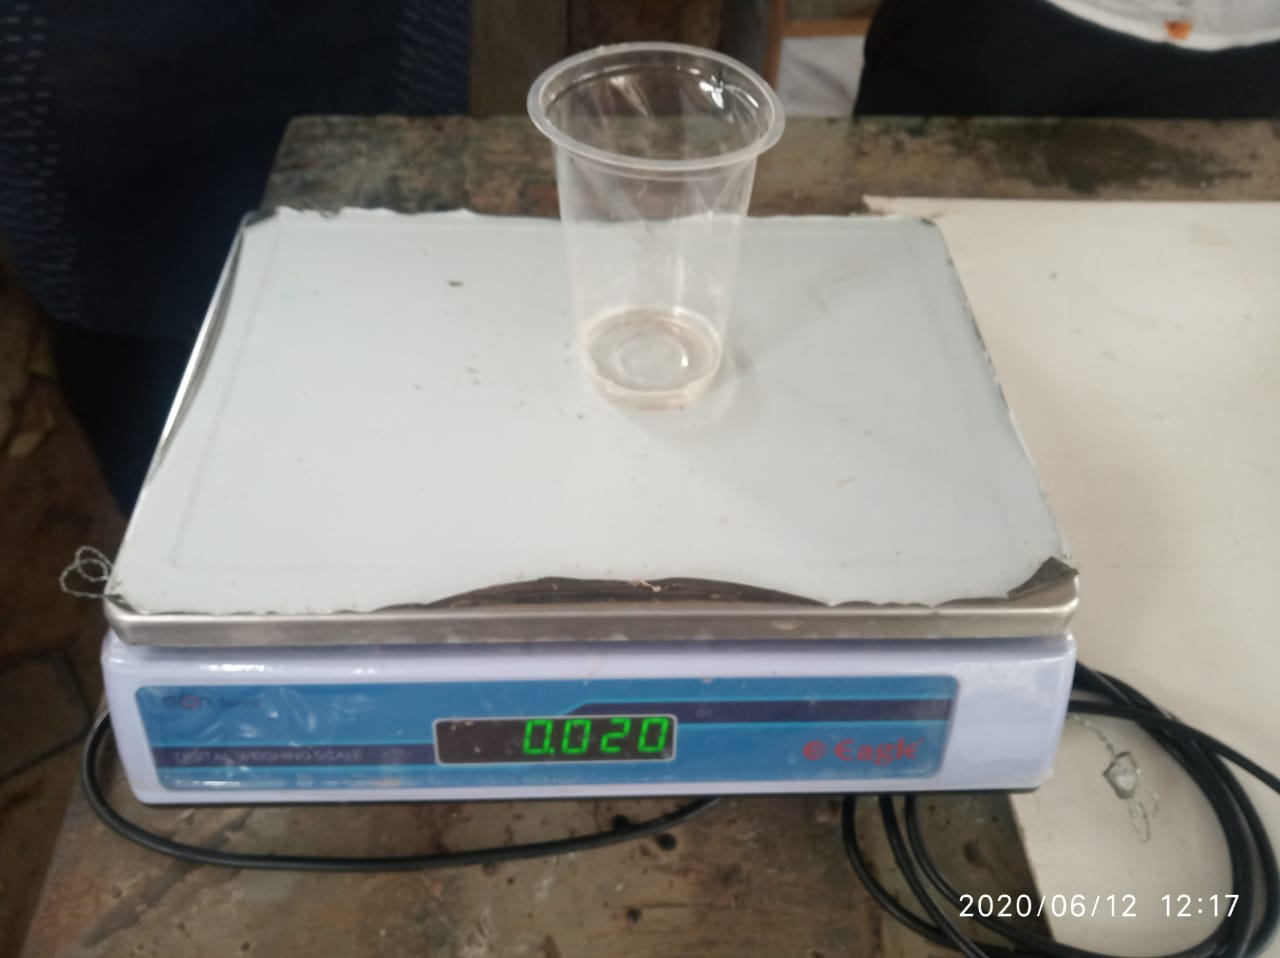
So first i put water into the mould and measure it as well which is 50gm(100%)
Then take 60% of 50gm mouldsil first into the glass.
Immegiately take 40 % of 50 gm catalyst as herdner and put them into mouldsil and sturred it fast.
Apply the mixture first into corners
And finally put all into required area of mould.
Removing few bubbles using sterrer.