13. Interface and application programming
Introduction
We were assigned two assignments this week, with one being a group assignment and one being an individual assignment. The group assignment for this week was to compare as many tool options as possible. The individual assignment for this week was to write an application that interfaces a user with an input and/or output device that you made.
Individual assignment
This week, I started off with the individual assignment, like previous weeks, as the group assignment was not possible to do due to COVID-19. The individual assignment for this week was to create an application that interfaces a user with an input and/or output device that we made, so I decided that I would use my BLDC motor device (output) for this week. I did not know where to start this week as I did not have much experience with interfaces, but after watching the lecture, I decided to look into Processing as I had already started with the basics in Processing, doing things such as creating shapes and using conditions such as if mouseClicked, I decided to use this language for this week.
Processing
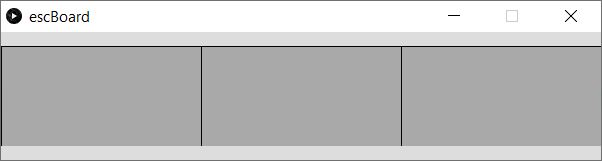
After selecting Processing as my language, I decided to see how I could actually use this language in order for me to create an interface for this week. My thoughts for this week were to create an interface like a switch or buttons that would set different speeds for my motor, so I had to get think about how I could do that. I decided to start with what I knew, which was to set up some boxes which would change color when clicked. After coding for a little bit, I got the shape that I wanted and the visual look that I wanted for the program.
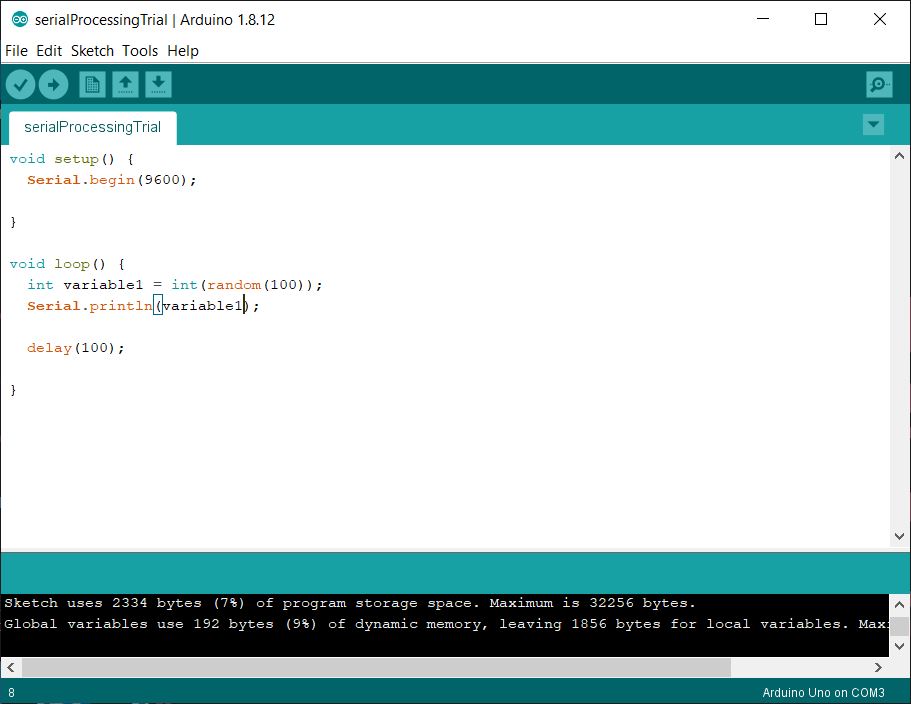
After doing this, I wanted to experiment with serial communication between Arduino and processing, so that I would be able to pass serial data from my Arduino Board into a processing sketch. So I searched across multiple sources on the internet and I found bits of information on each source, but eventually, I found this video which helped me understand how I could test our serial communication. I tried a test program that printed random integer values to serial on Arduino which is shown below. The only thing that was required for this was an Arduino Uno plugged into my computer.
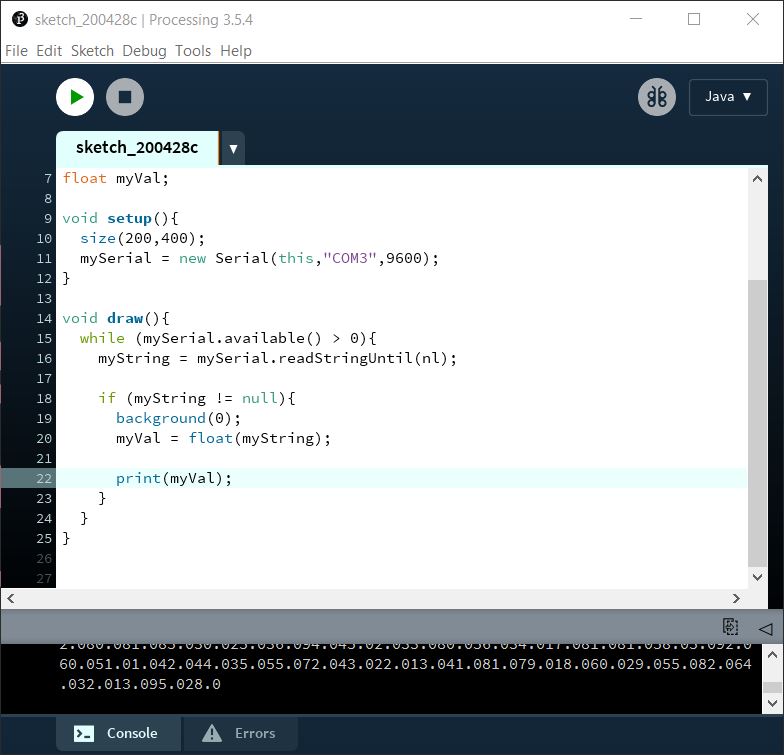
After I did this, I created a corresponding program on processing, which first printed the serial values, but later I adjusted it so that there would be a rectangle with alternating height values that were based on the serial reading.
After I did this, I proceeded to continue with my main motor code, so that when I click the boxes, the motor will go at different speeds.
Creating functionality in Processing
Since I had already completed the visual side of my interface, all that was left to was to create functionality to my buttons. In order to do this, I first had to import the serial library which can be done by adding this line of code before the setup import processing.serial.*;. After I did this, I had to make sure that the com port and the baud rates were set as they are in Arduino, so I had to add the line myPort = new Serial (this, "COM29", 115200); in the setup. Finally, now that everything should be connected, I assigned a value to each of the buttons, which would send over serial if the button was clicked, and that was done with the line myPort.write("1200");.
Hooking up the board + Test
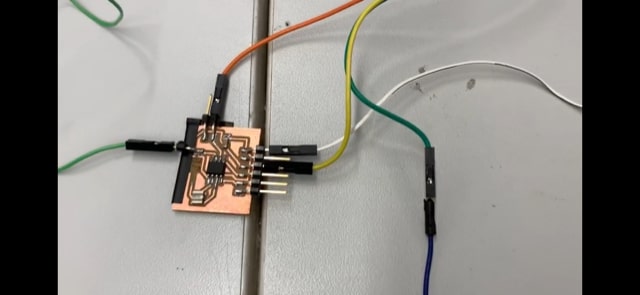
I got my output board from last week, and I got my UPDI programmer board in order to upload the code. Down below is a picture of my output board (which is connected to the ground and signal of the ESC, as well as power, ground and UPDI of the programmer):
After everything was set, here is how everything turned out:
My code
Down below is the Arduino code and the Processing code that I used in order to create my interface
Arduino:
#include <Servo.h>
Servo ESC;
int pwm = 0;

void setup() {
    Serial.begin (115200);
    ESC.attach (9);
}

void loop() {
    if(Serial.available()){
        pwm = Serial.parseInt();

        Serial.print ("you typed ");
        Serial.println(pwm);
        ESC.write(pwm);
        delay(2000);
    }
    ESC.write(pwm);
}
Processing:
import processing.serial.*;

Serial myPort;
int r1, g1, b1;
int r2, g2, b2;
int r3, g3, b3;

void setup(){
  size (600,100);
    r1 = 169;
    g1 = 169;
    b1 = 169;
    r2 = 169;
    g2 = 169;
    b2 = 169;
    r3 = 169;
    g3 = 169;
    b3 = 169;

  myPort = new Serial (this, "COM29", 115200);
}

void draw(){
 background(255);
 stroke(0);
 rect(0,0,200,100);
 fill(r1,g1,b1);
 rect(200,0,200,100);
 fill(r2,g2,b2);
 rect(400,0,200,100);
 fill(r3,g3,b3);

}

void mouseClicked(){
  if ((mouseX > 200) && (mouseX < 400)){
    r1 = 0;
    g1 = 255;
    b1 = 0;
    r2 = 169;
    g2 = 169;
    b2 = 169;
    r3 = 169;
    g3 = 169;
    b3 = 169;
    myPort.write("1200"); //medium


}else if (mouseX > 400){
    r1 = 169;
    g1 = 169;
    b1 = 169;
    r2 = 0;
    g2 = 255;
    b2 = 0;
    r3 = 169;
    g3 = 169;
    b3 = 169;
    myPort.write("1400");  //highest


}else if (mouseX < 200){
    r1 = 169;
    g1 = 169;
    b1 = 169;
    r2 = 169;
    g2 = 169;
    b2 = 169;
    r3 = 0;
    g3 = 255;
    b3 = 0;
    myPort.write("1000"); //lowest
  }
}
Summary
This week I learned how to use processing in order to create a functioning interface, which I think is very helpful and useful for projects that I can create down the road. It was interesting to use serial communication in order to create my interface, and I learned a lot of other things about processing that were not even included in the code, such as the controlp5 library, which can be used in order to make things such as sliders, which I believe is the next step in creating an interface towards my final project.
Group Project
The link to the group project can be found here
Files
All of my files from this week can be found here