GROUP ASSIGNMENT
Due to the coronavirus situation, i could not do the group assignment.
ASSIGNMENT
In this week's assignment, we have to read a sensor and do something with the result.
INPUT DEVICES
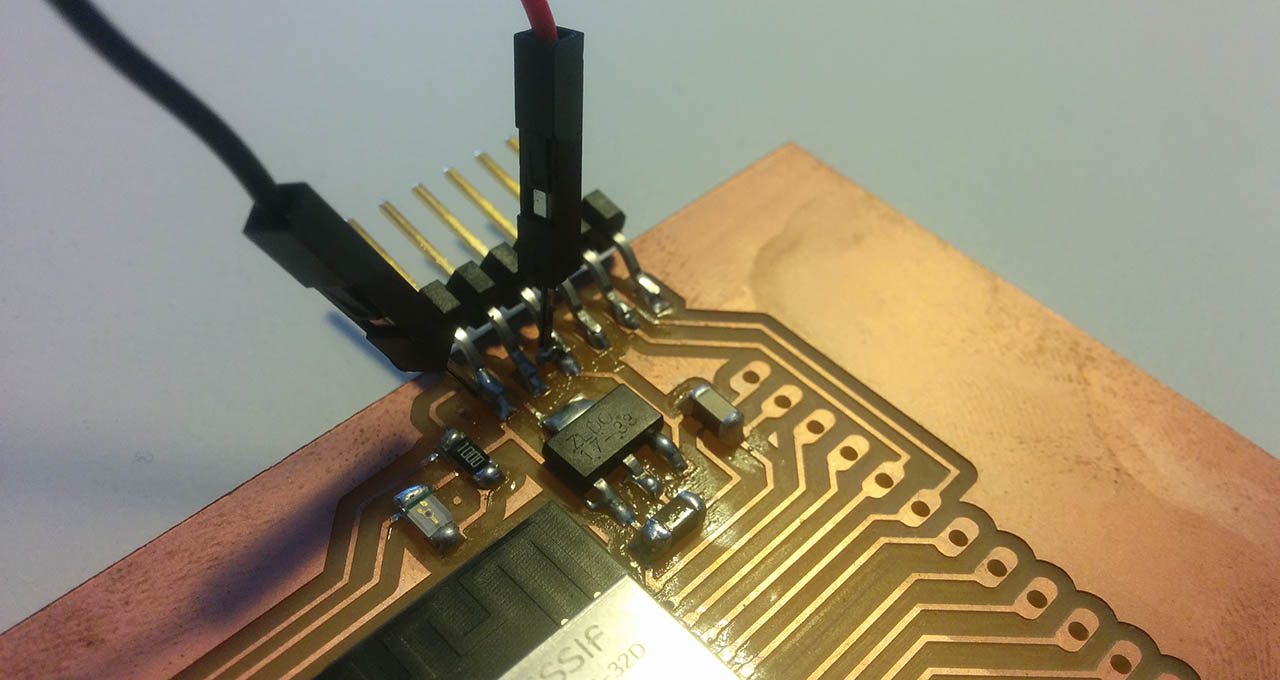
In order to read sensors from my ESP32 board, the first thing that i did was to solder a couple of cables from the FTDI connector's GND and 5v so that i could use it on the breadboard with the sensors. In this way i don't have to hold many cables by hand on top of the board. I also don't want to solder pins yet because i have the feeling i will need them for my project or for future tasks and doing so would start degrading the board.
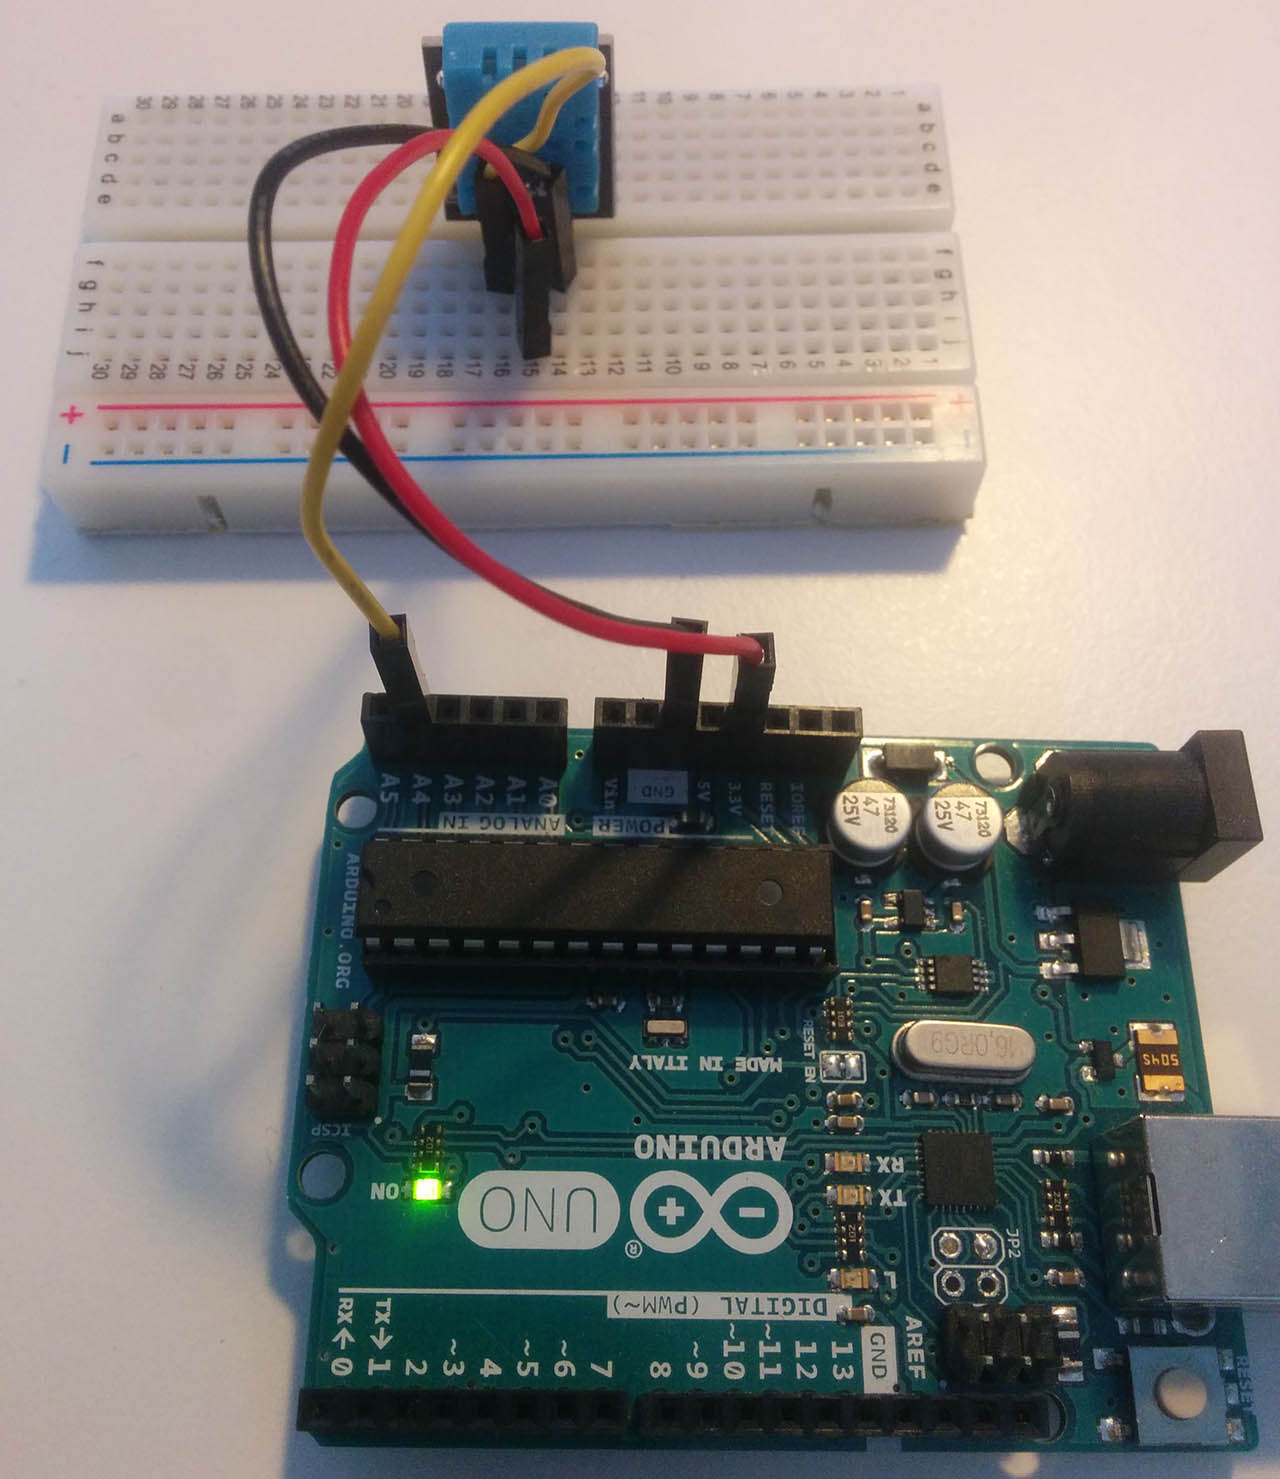
Since the covid-19 situation exploded, we all got cut of the electronic supplies so i bought a sensor pack. The first thing that i wanted to try was the temperature and humidity sensor. My sensor pack had the DHT11, it already came with the resistor in a small board, and 3 pin connection, since one of the 4 it has is not used.
My idea was to create a Unity visualization with a particle effect to visualize the data coming in from the sensor. The sensor would send the data to the ESP32, which in turn, using last week's code, would send it as OSC messages via UDP over WIFI to Unity, who would display it somehow.
I started looking for documentation on the specific sensor and this page was the first i tried.
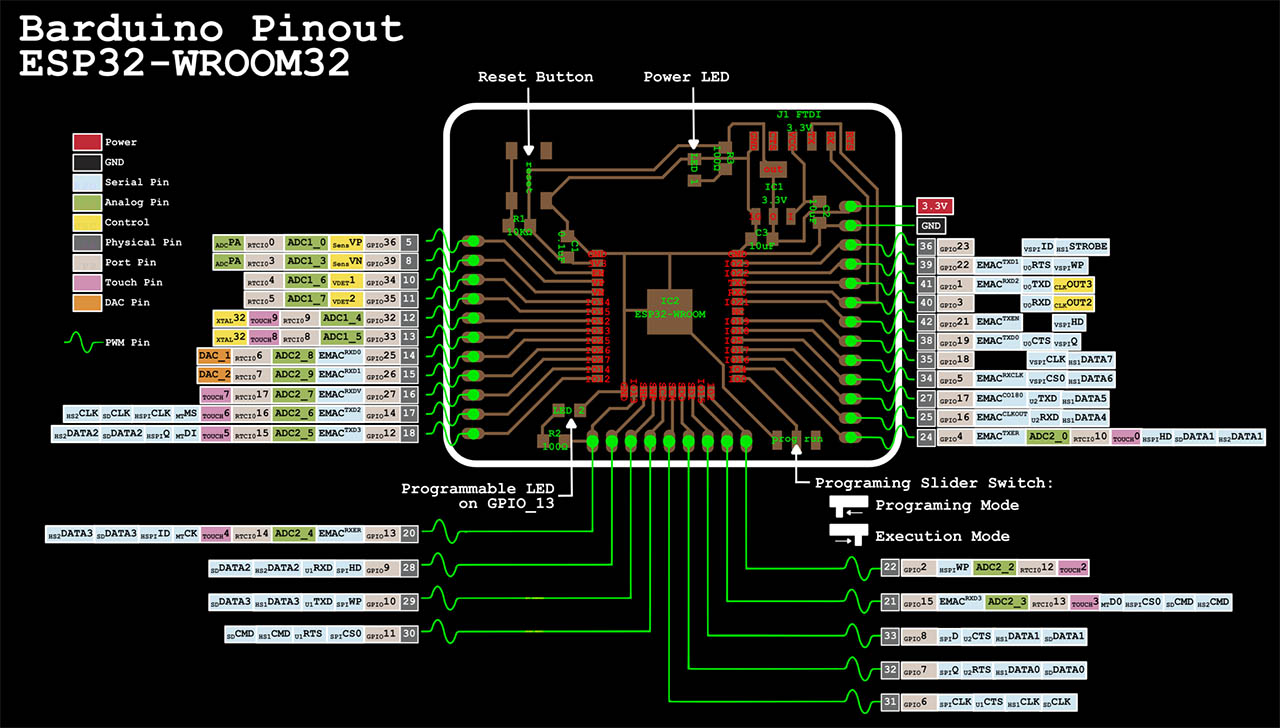
To read the analog signal, i had to locate a pin on the esp32 that would understand analog signals. Looking at the datasheet picture below, i decided to use pin with GPIO12
So after pluging in all the cables through the breadboard, i adapted the code to read from the sensor and print the temperature and humidity on the serial monitor. I had to install this DHT library that i found on the same page, which i think is just a wrapper from something else that makes things easier.
          #include "dht.h"

          #define dht_apin 12 // Analog Pin sensor is connected to


          dht DHT;


          void setup(){


             Serial.println("HOLA");

              Serial.begin(115200);

              delay(1000);//Wait before accessing Sensor


          }


          void loop(){


                DHT.read11(dht_apin);


                Serial.print(DHT.humidity);

                Serial.print(DHT.temperature);

                Serial.println("------------------");


                delay(5000);//Wait 5 seconds before accessing sensor again.


          }// end loop()
After opening the arduino's serial monitor, loading this code into the ESP32 and switching to execution mode, i started getting readings of 0.00 no matter what.
          HOLA

          0.00

          0.00

          --------------------

          0.00

          0.00

          --------------------
The next thing i tried, after mingling with the cables, was to set the pin as input and use the raw analogRead function of the arduino IDE on pin 12. In this case, the serial monitor would print a constant value of 4095. When unplugging the data cable, without having anything connected to pin 12, i would get variable values between 100 and 200. I assume noise - Also meaning that the pin probably works.
I decided to try another page for further information and found this one within the ardunio domain which looked good. It uses a different library, in this case by github user adidax. I assume it was internally very similar to the other, just a wrapper, but it was worth trying... But it didn't work either.
At this point i decided to switch to the Arduino Uno board and try it there, with the same code, just changing the ESP32 pin for an analog one A4. But same results. Switched to a PWM digital pin, nothing. Digital pin, nothing...
After more googling i found a library that was supposedly prepared for the ESP32, which had a handful of information on the internal working of the sensor under the ESP32 and all. But still the sensor would not return a thing.
So i finally gave up. I'm gonna assume the chip is broken for now. Maybe i burnt it?
And decided to try something else. I reached for the sensor box and grabbed the ultrasonic sensor. After googling for references, i found this page with a handy explanation of how it works and a sample code to test it. I followed the same protocol as before, plug cables, open terminal, load code and it worked instantly on the ESP32. Yay ! The serial output was straightforward:
          Distance: 10

          Distance: 10

          Distance: 10

          Distance: 9

          Distance: 9
There's one thing in the code worth noting: A function i had not seen before, pulseIn. From the documentation:
Reads a pulse (either HIGH or LOW) on a pin. For example, if value is HIGH, pulseIn() waits for the pin to go from LOW to HIGH, starts timing, then waits for the pin to go LOW and stops timing. Returns the length of the pulse in microseconds or gives up and returns 0 if no complete pulse was received within the timeout.
So it basically counts how long it takes for the sound to get back. Full documentation is here
So the first thing i did, was to merge the code from last week that would get the value and send it over wifi, and tried to capture it on vvvv. Here you can see the process working. When moving the hand back and forth, the value on vvvv on the top left of the screen changes accordingly giving us the distance in cm.
I changed the OSC package i used to send data from the esp32. The one i had used last week was very simple and convenient, but it only allowed for 8 different messages to be sent. I switched to this one which seemed much more complete CNMAT/OSC. It also had specific examples for the ESP family.
So now i just had to grab the data from Unity and turn the value into a changing visualization. For this i found this package from Keijiro. Not surprised. Keijiro is one of my Unity heroes and he always does the coolest stuff. The package comes with very easy to use examples as usual, but after plugging everything together, i was not receiving any value on Unity.
I decided to switch to another OSC package to see if it made a difference. I found this one by Thomas Fredericks, which seemed pretty similar. Not as easy to use but still simple, and after giving it a go, nothing... Keijiro's code wasn't the issue, not surprisingly.
In the meantime, i opened back vvvv to see if i was still getting the OSC messages there from the ESP32, and there they were, so clearly in my opinion the problem is somewhere in the format that Unity expects and the format that the ESP32 sends. Probably vvvv's OSC receiving library is very accomodating to all kinds of formats (bundled or not, type specificied...)
So without time to dig deeper into it at the moment (although i certainly will), i chose to reroute the OSC packages from vvvv into Unity, to see if Unity liked the vvvv's messages, and yes it did.
The flow of information actually goes like this:
- Data is captured by the sensor and sent to ESP32
- ESP32 grabs de data and sends it via wifi to my PC
- On my PC, a vvvv patch grabs the data and forwards it to another address on the same PC
- In Unity, vvvv's message is grabbed, and displayer
As for a visualization, i chose to do a spherical-ish particle system that would grow or shrink depending on the distance measured by the sensor. The value coming in (the distance) will be mapped to an appropiate range for 3 parameters on the particle system, like intensity or radius.
After the first try, happily seeing that it was working, i realized the little jumps on the data, the noise, coming in from the sensor would make the particle system 'shiver' too much, particles would all of a sudden jump far and come back instantly after detecting a false spike on distance, so i made a simple moving average using a buffer of 10 positions, where every new value is queued into a list and the the value that's displayed is the average of the 10 values.
Here's the final video where you can see:
- The esp32 board with the ultrasonic sensor attached on the breadboard.
- vvvv receiving the data on the right and forwarding it to unity.
- Unity controlling the particle system with the data from vvvv.