Assignment 15: Interface and Application Programming

Project Description
Write integration code for microcontollers
Assignment Details
- Group Assignment:
- Compare as many tool options as possible
- Individual assignment:
- Write an application that interfaces with an input &/or output device that you made
Group Assignment: Compare tool options
I am going to interpret "tool options" as a combination of IDE, language, library and device. At the end of the day any project is a combination of these, so I tried to sample a variety of combinations (but mostly related to Python).
AdaFruit Mu, Circuit Python, and Circuit Playground

My first "tool option" used Ada Fruit's IDE Mu to interact with their Circuit Playground board. The Circuit Playground mounts as a USB volume. Code deployment leverages USB oriented file transfers. When the device boots, by default it executes the main.py file. A cntl c command is used to exit the program and to enter Python REPL. "
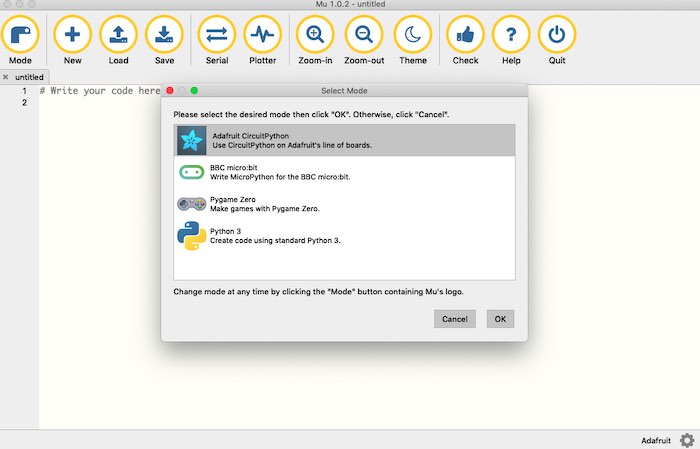
Mu can be used to program several types of languages. In this case I am using the CircuitPython option. CircuitPython is a fork of the lightweight MicroPython language. It allows Python programming on some larger microcontrollers.
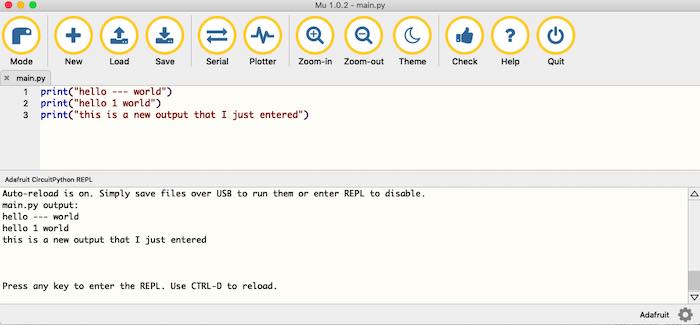
This figure shows a simple Hello World program in the file editor and the result of execution in the Serial Console below. Each time main.py is saved to the device, it reboots and executes, directing output to the console.
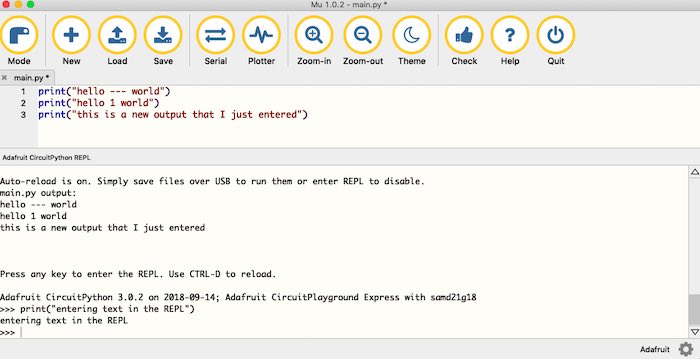
Pressing cntl c stops the executing program and start the REPL as shown in the console. Python's REPL allows language commands to type typed directly on the command line and are executed in realtime. This figure shows an alterative way to execute Hello World.
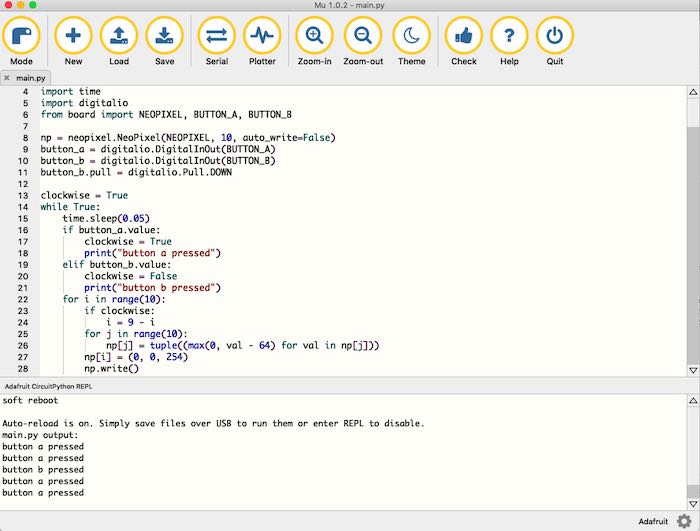
This figure shows a more complex Python program which starts the NeoPixels lighting in a clockwise or counter-clockwise direction based on pressing the right or left button. The earlier picture shows the NeoPixel cycle starting.
OpenMV IDE, Micro Python, and OpenMV H7 CAM
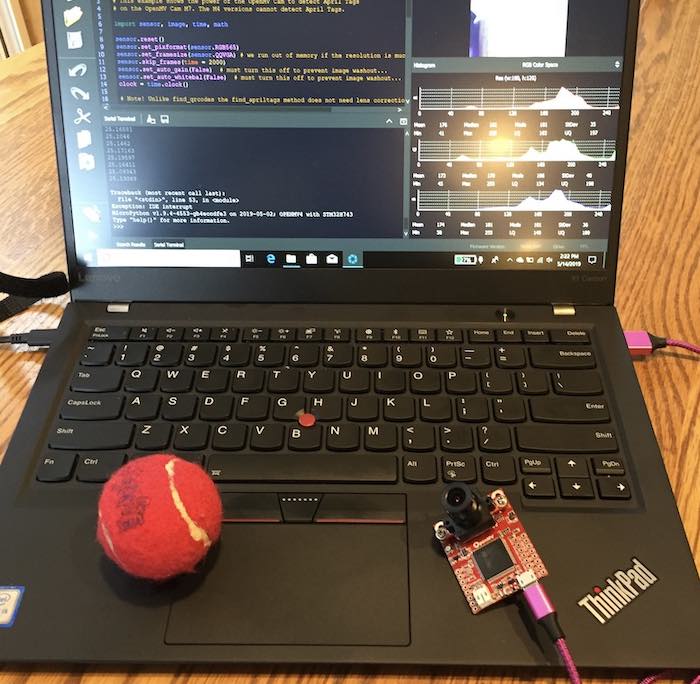
I backed a kickstarter from the OpenMV folks. I just got the newest version of the OpenMV H7 Cam in the mail. This device also runs MicroPython, but has a much more powerful chip, so it can actually run small Neural Networks natively on the board. This makes this board an ideal choice for Image/Pattern Recognition applications.
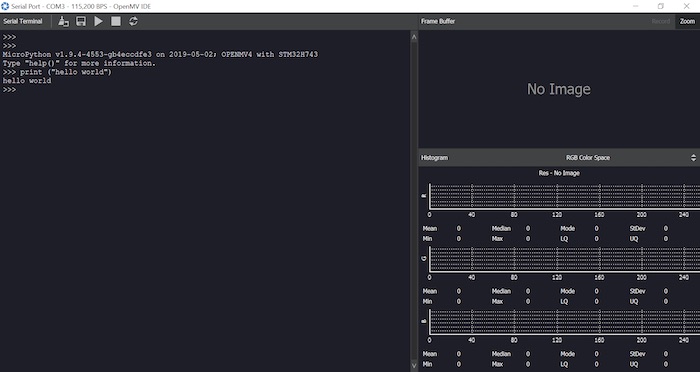
The OpenMV IDE provides a serial console that connects to the REPL running on the board. The figure shows a simple Hello World example using the IDE and the OpenMV board.
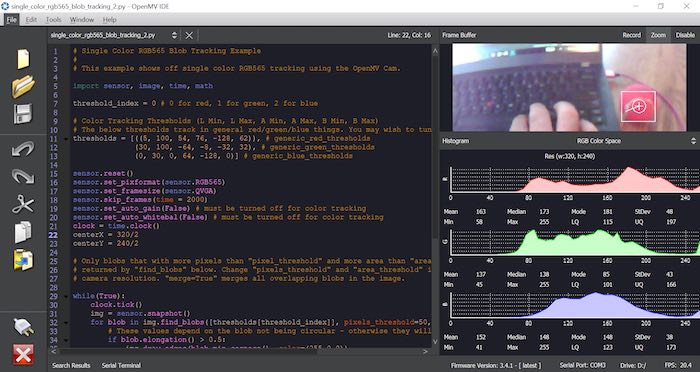
A more interesting application of the board is to object tracking problems. The figure shows a straight forward Python implementation of a color tracking application. The version of MicroPython is enhanced with a set of Blob detection modules that make it easy to implement this application. Using a RaspberryPi, OpenCV and normal Python takes a lot more code and development effort.
Jupyter, Python, Keras / TensorFlow
I have spent the majority of my career in software development. One of the first things that you learn is that the debugger is key to software development. You are either there because you plan it or there because you don't. Software development is all about fixing bugs. The debugger is the key to this effort.
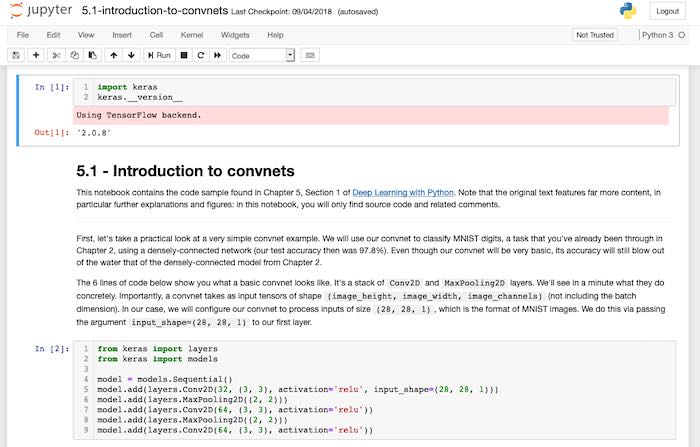
Although Python provides the REPL, the best and most repeatable way to debug is to use Jupyter. Jupyter is like a union of a interactive web browser and an IDE. You can use it to document instructions and also to execute code. Context is maintained, so you can write programs in a series of code snipits. In this case I was reading a book that explained how to use Keras and TensorFlow. I executed the the code examples in Jupyter notebooks that followed the book. The key to Jupyter is the ability to change the code and re-execute it in place to validate that you understand what the material really means. Making an change and getting the predicted result is critical to really understanding the material.
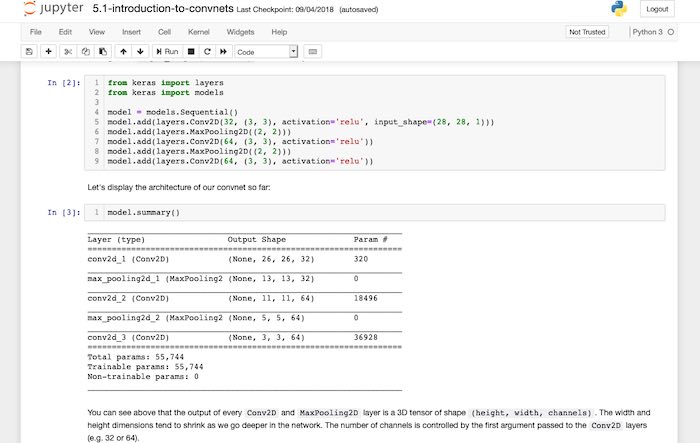
This example showed how to create a Python CNN to detect text characters from the MNIST dataset.
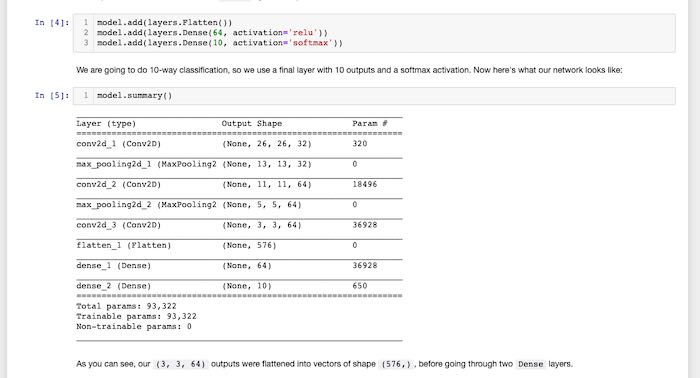
These screens show building the layers in the CNN in Keras and then interactive browsing the result.
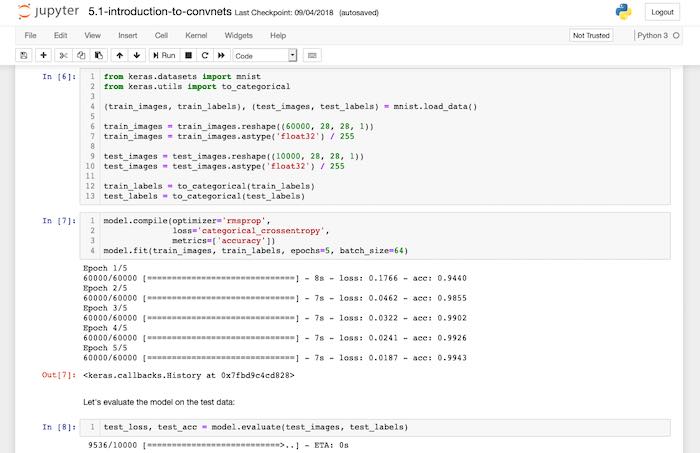
Finally, the set of test data is divided into a training set and a test set. The CNN is built with the training set and then tested with the test set. The key to successful Machine Learning is isolation of training and test data. It is easy to build a CNN that tests well on training data and fails with real world data.
Jupyter, Python, OpenCV

OpenCV is another valuable Python library. Getting the program to work in many cases is an iterative progress, tweeking parameters to filter images to get the desired results. Coding OpenCV in Jupyter is a great way to interactively debug OpenCV programs. This is an example that we used with our high school FIRST Robotics Competition (FRC) kids to build an autonomous line tracking program for their robot. Jupyter allowed we mentors, to show what each command did and to allow the students to "play" with changes and rapidly see the results.
Individual Assignment: Application that interfaces with an input &/or output device
Remember why the good Lord made your eyes, So don't shade your eyes, But plagiarize, plagiarize, plagiarize... Only be sure always to call it please, "research".
Stand on shoulders not on toes
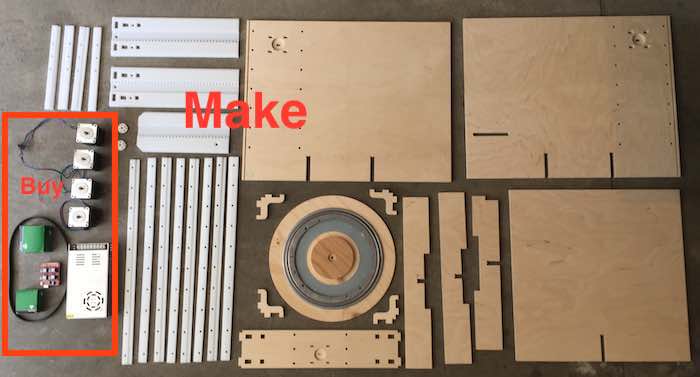
First, this effort is only possible do to the work done by others that I have leveraged. This previous work makes the amount of code needed to complete this activity a straight forward activity. This would be a very complex journey if I needed to develop each piece myself.
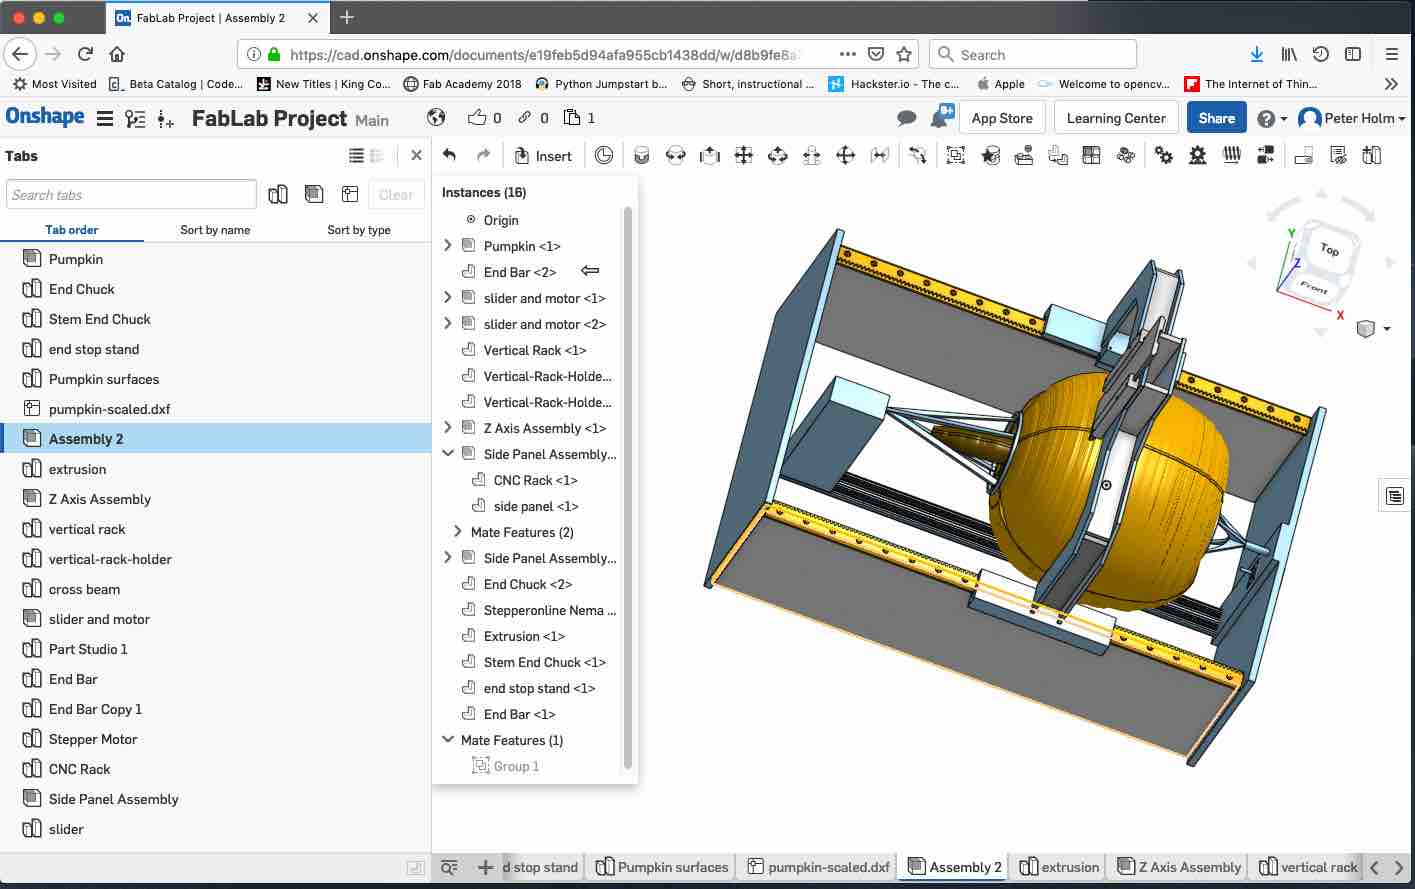
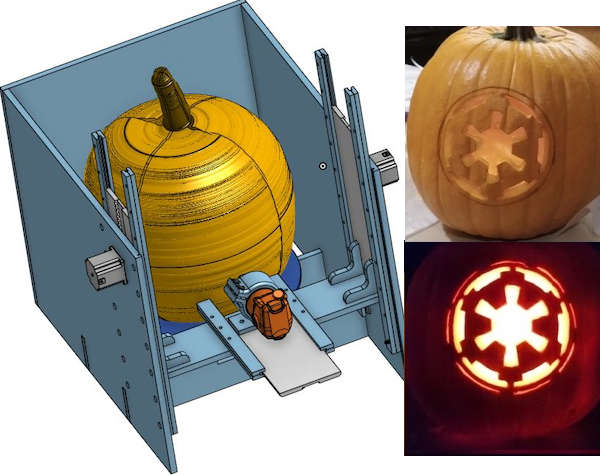
The objective for this week is to complete the activities started in Assignment 9: Molding and Casting, Assignment 10: Input Devices, and Assignment 14: Mechanical Design. The objective is to read a button press from the Jog Controller built in Weeks 9 and 10, read input from the Serial interface from a Python program and then send REST (GET) commands to a Universal G Code Sender (UGS) REST server which then sends G-Code to my Pumpkin CNC Lathe.
The other key to successful software development (and engineering in general) is to break big problems into a serial of small problems. This this case the problem was broken down into four smaller tasks. The first task was to reverse engineer the UGS REST interface to determine the API. The second step was to write a protoype program that could read which button was pressed on the Jog controller. The third step was to write a prototype program to invoke the REST API commands. The fourth step was to integate all these pieces into the final application and integrated workflow.
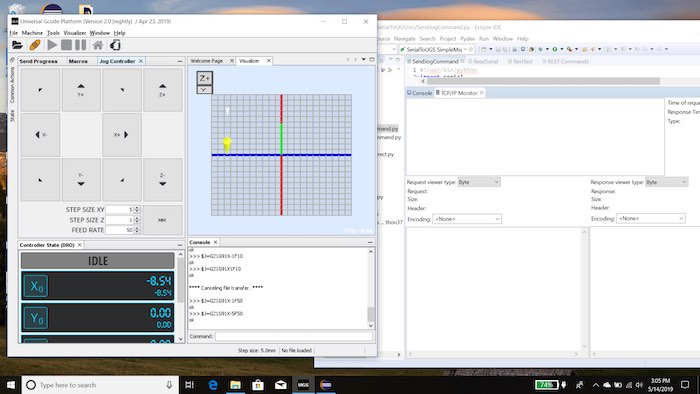
The figure above shows the UGS application UI on the left and the Eclipse tooling on the right. The Eclipse IDE tooling provides a view called TP/IP Monitor. This tool works as an intermediary to sniff messages going between two TCP/IP ports. The view is divided into a list of intercepted messages and for each message, request data and response data.
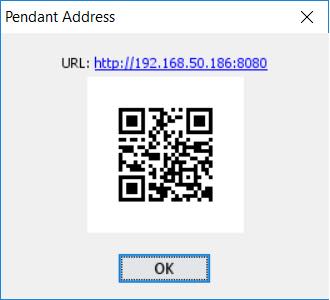
The key that allows this approach to work is that UGS provides a web based interface to it's commands. The web server is exposed via a Pendent address. This is the address that exposes the REST API. The web app sends REST commands back to this exposed API.
This figure shows the Web App UI that makes use of these REST commands. Each button on the Web UI has a corresponding REST command that can be invoked on the UGS API. The services then result in G-Code calls to GRBL running in a microcontroller on the CNC.
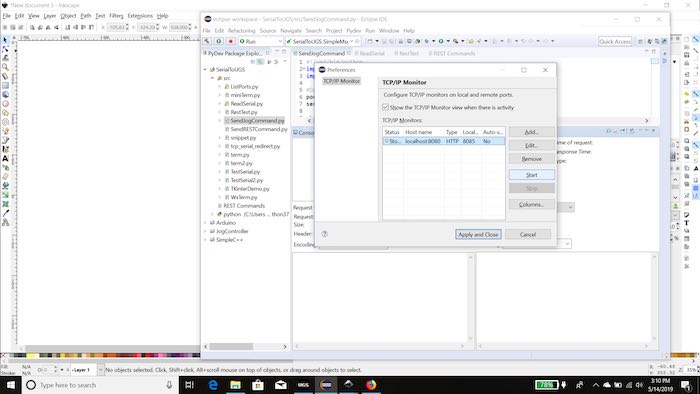
Because there is no publicly documented API, work was needed to reverse engineer the REST API, based on interactions between the Web UI and the REST server. The intermediary was started on port 8085 and forwarded calls to the server on port 8080.
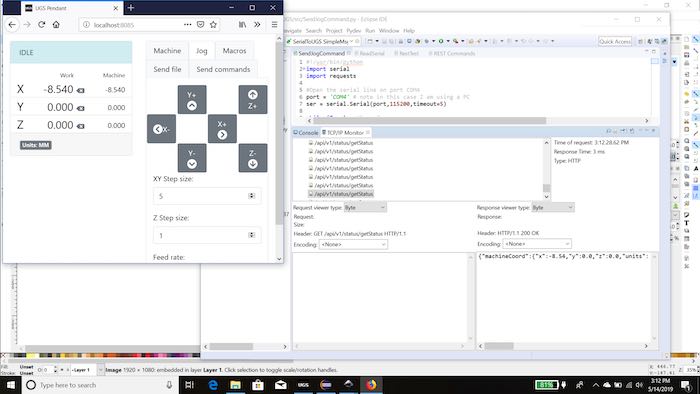
This figure shows several of the messages that flow from the Web UI to the REST server. In this case the GET command getStatus returns the current machine coordinates. This information will later become useful to determine the point cloud for the surface of the pumpkin.

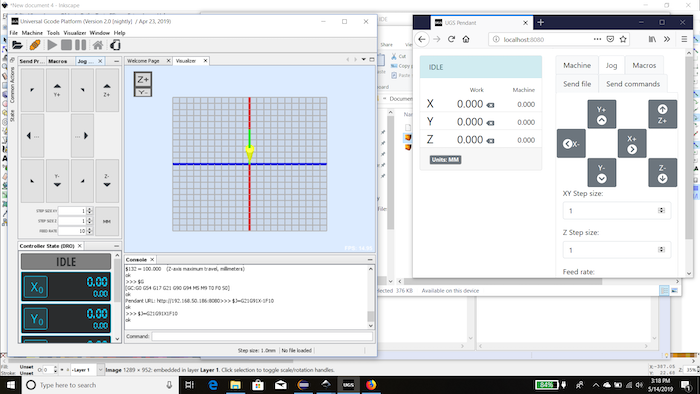
In this case the key command is the GET machine/job command. This is the command that our Python program will leverage to jog our CNC. The GET command line includes parameters that indicate which axis should be moved. For example x=1&y=0&z=0 means that a G21 G91 Xnn command should be executed. This moves the CNC along the X axis "nn" distance where "nn" and the feed rate are set as default in UGS. (Note there are other REST commands to change these values.)
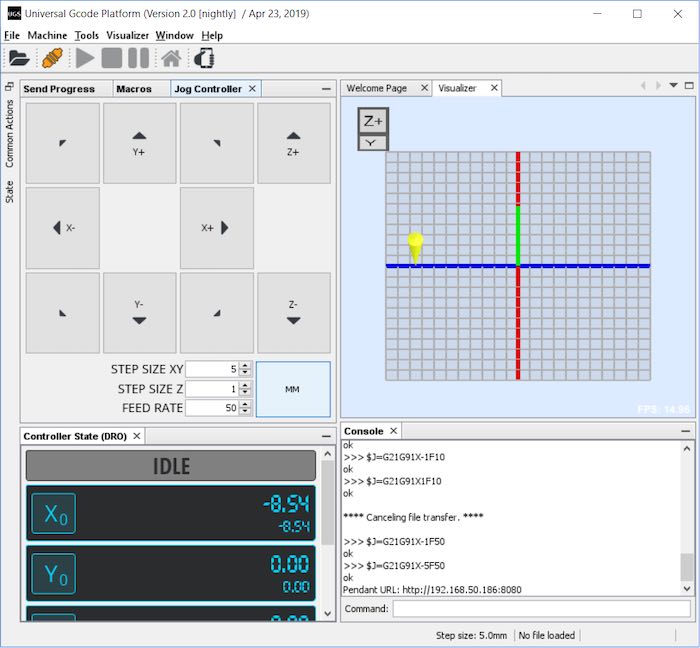
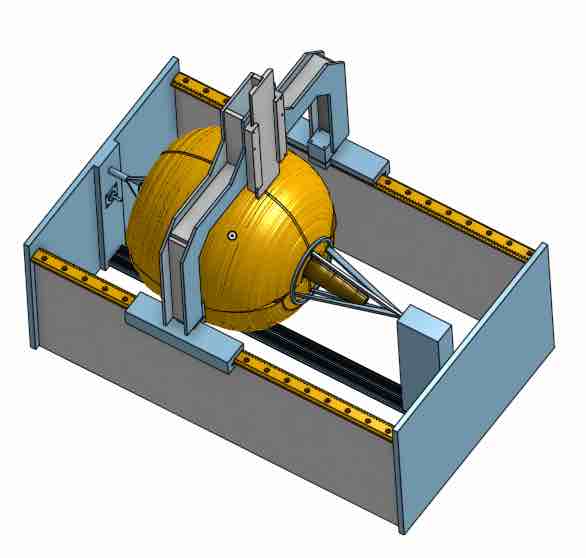
The figure above shows the result of UGS receiving the REST command in the console window. The simulated interface above shows the tool head moving to the left.
Now that we understand the API, the next step is to write the interfacing Python code. The first step was to write prototype serial interface code to read the output from the ATTiny 44 on the Jog controller.
import serial
import time

#Open the serial line on port COM4
port = 'COM4' # note in this case I am using a PC
ser = serial.Serial(port,115200,timeout=5)

while (True):  #loop forever

    # Serial read section
    ser.flushInput()

    msg = ser.read_until() # read until a newline char
    if (msg != b''): # ignore blank lines
        print ("Message from JogController: ")
        print (msg) #print what was received from the Jog Controller

else:
    print("Exiting")  # Can't get here
exit()
This prototype code opens a serial connection and then reads messages up to the newline character and then prints the message to the console.
The next prototype code tests the REST interface from UGS. This validates that our program can invoke the same commands that originate from the Web App.
import requests

response = requests.get("http://localhost:8080")

if response.status_code == 200:
    print("Success")
else:
    print("failure")

print(response.text)
exit()
This code is much like a REST hello world example. It simply invokes a GET command on the default web interface. In this case the HTML used to build the Web UI is returned.
The last step was to combine all the pieces into the final code that integrated the complete workflow.
#!/usr/bin/python
import serial
import requests

#Open the serial line on port COM4
port = 'COM4' # note in this case I am using a PC
ser = serial.Serial(port,115200,timeout=5)

while (True):  #loop forever

    # Serial read section
    ser.flushInput()

    msg = ser.read_until() # read until a newline char
    if (msg != b''): # ignore blank lines
        print ("Message from JogController: ")
        print (msg) #print what was received from the Jog Controller

        #set the direction for travel based on the button that was pressed
        # Note:  The feed rate and the default jog amount are set as defaults in UGS.  This just sets a + / - direction and which axis should move
        if msg == b': in\r\n':
            direction = "x=0&y=1&z=0"
        elif msg ==b': out\r\n':
            direction = "x=0&y=-1&z=0"
        elif msg == b': down\r\n':
            direction = "x=0&y=0&z=1"
        elif msg == b': up\r\n':
            direction = "x=0&y=0&z=-1"
        elif msg == b': right\r\n':
            direction = "x=0&y=0&z=-1"
        elif msg == b': stop\r\n':
            direction = "x=-1&y=0&z=0"
        elif msg == b': run\r\n':
            direction = "x=1&y=0&z=0"

        # create the REST GET string
        command = "http://localhost:8080/api/v1/machine/jog?" + direction
        print (command)

        # send the GET request and wait for a response
        response = requests.get(command)

        if response.status_code == 204:
            print("Success")
        else:
            print("failure")

        print(response.text)


else:
    print("Exiting")  # Can't get here
exit()
This code reads the button press from the serial connection, formats a parameter string and then makes the REST call back to the UGS server.
Again, based on leveraging the work on many others, with a very small Python script, all the power of UGS, G-Code and the connected CNC can be invoked with little effort.
The short video shows pressing the in and out jog controller buttons to move the gantry with the attached router closer or further away from the simulated pumpkin.
The short video shows pressing the up and down jog controller buttons to move the gantry with the attached router higher or lower on the simulated pumpkin.
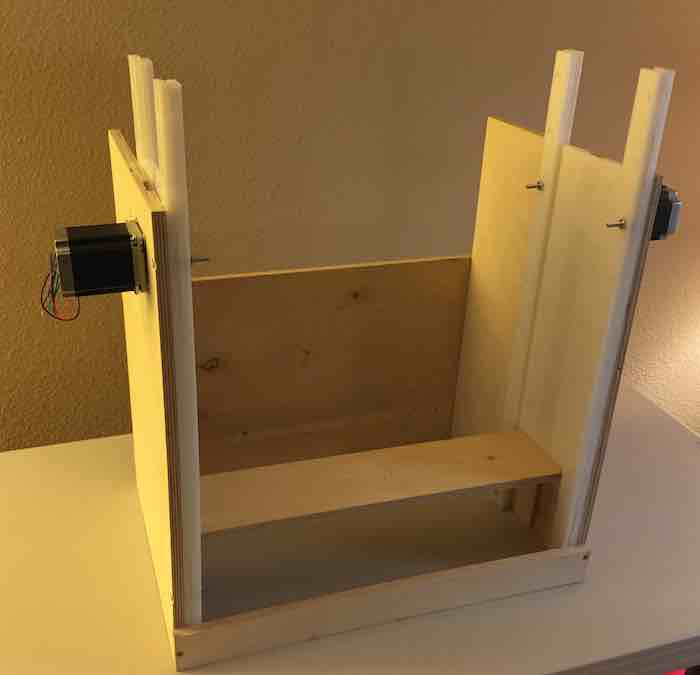
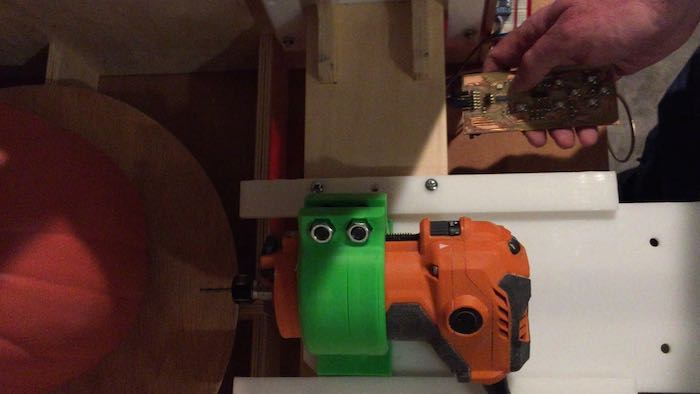
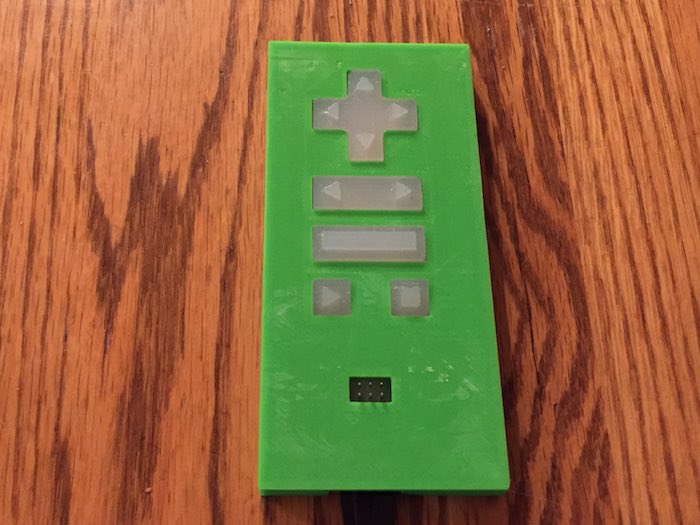
The following figure shows the finished Jog Controller Assembly
Reference Files
Related Projects