Interface and application programming
For this week I use Processing for create a simple interface, that with a click turn on/off a led. The board that I use was the same of the networking and communications week .


How Does It Work?
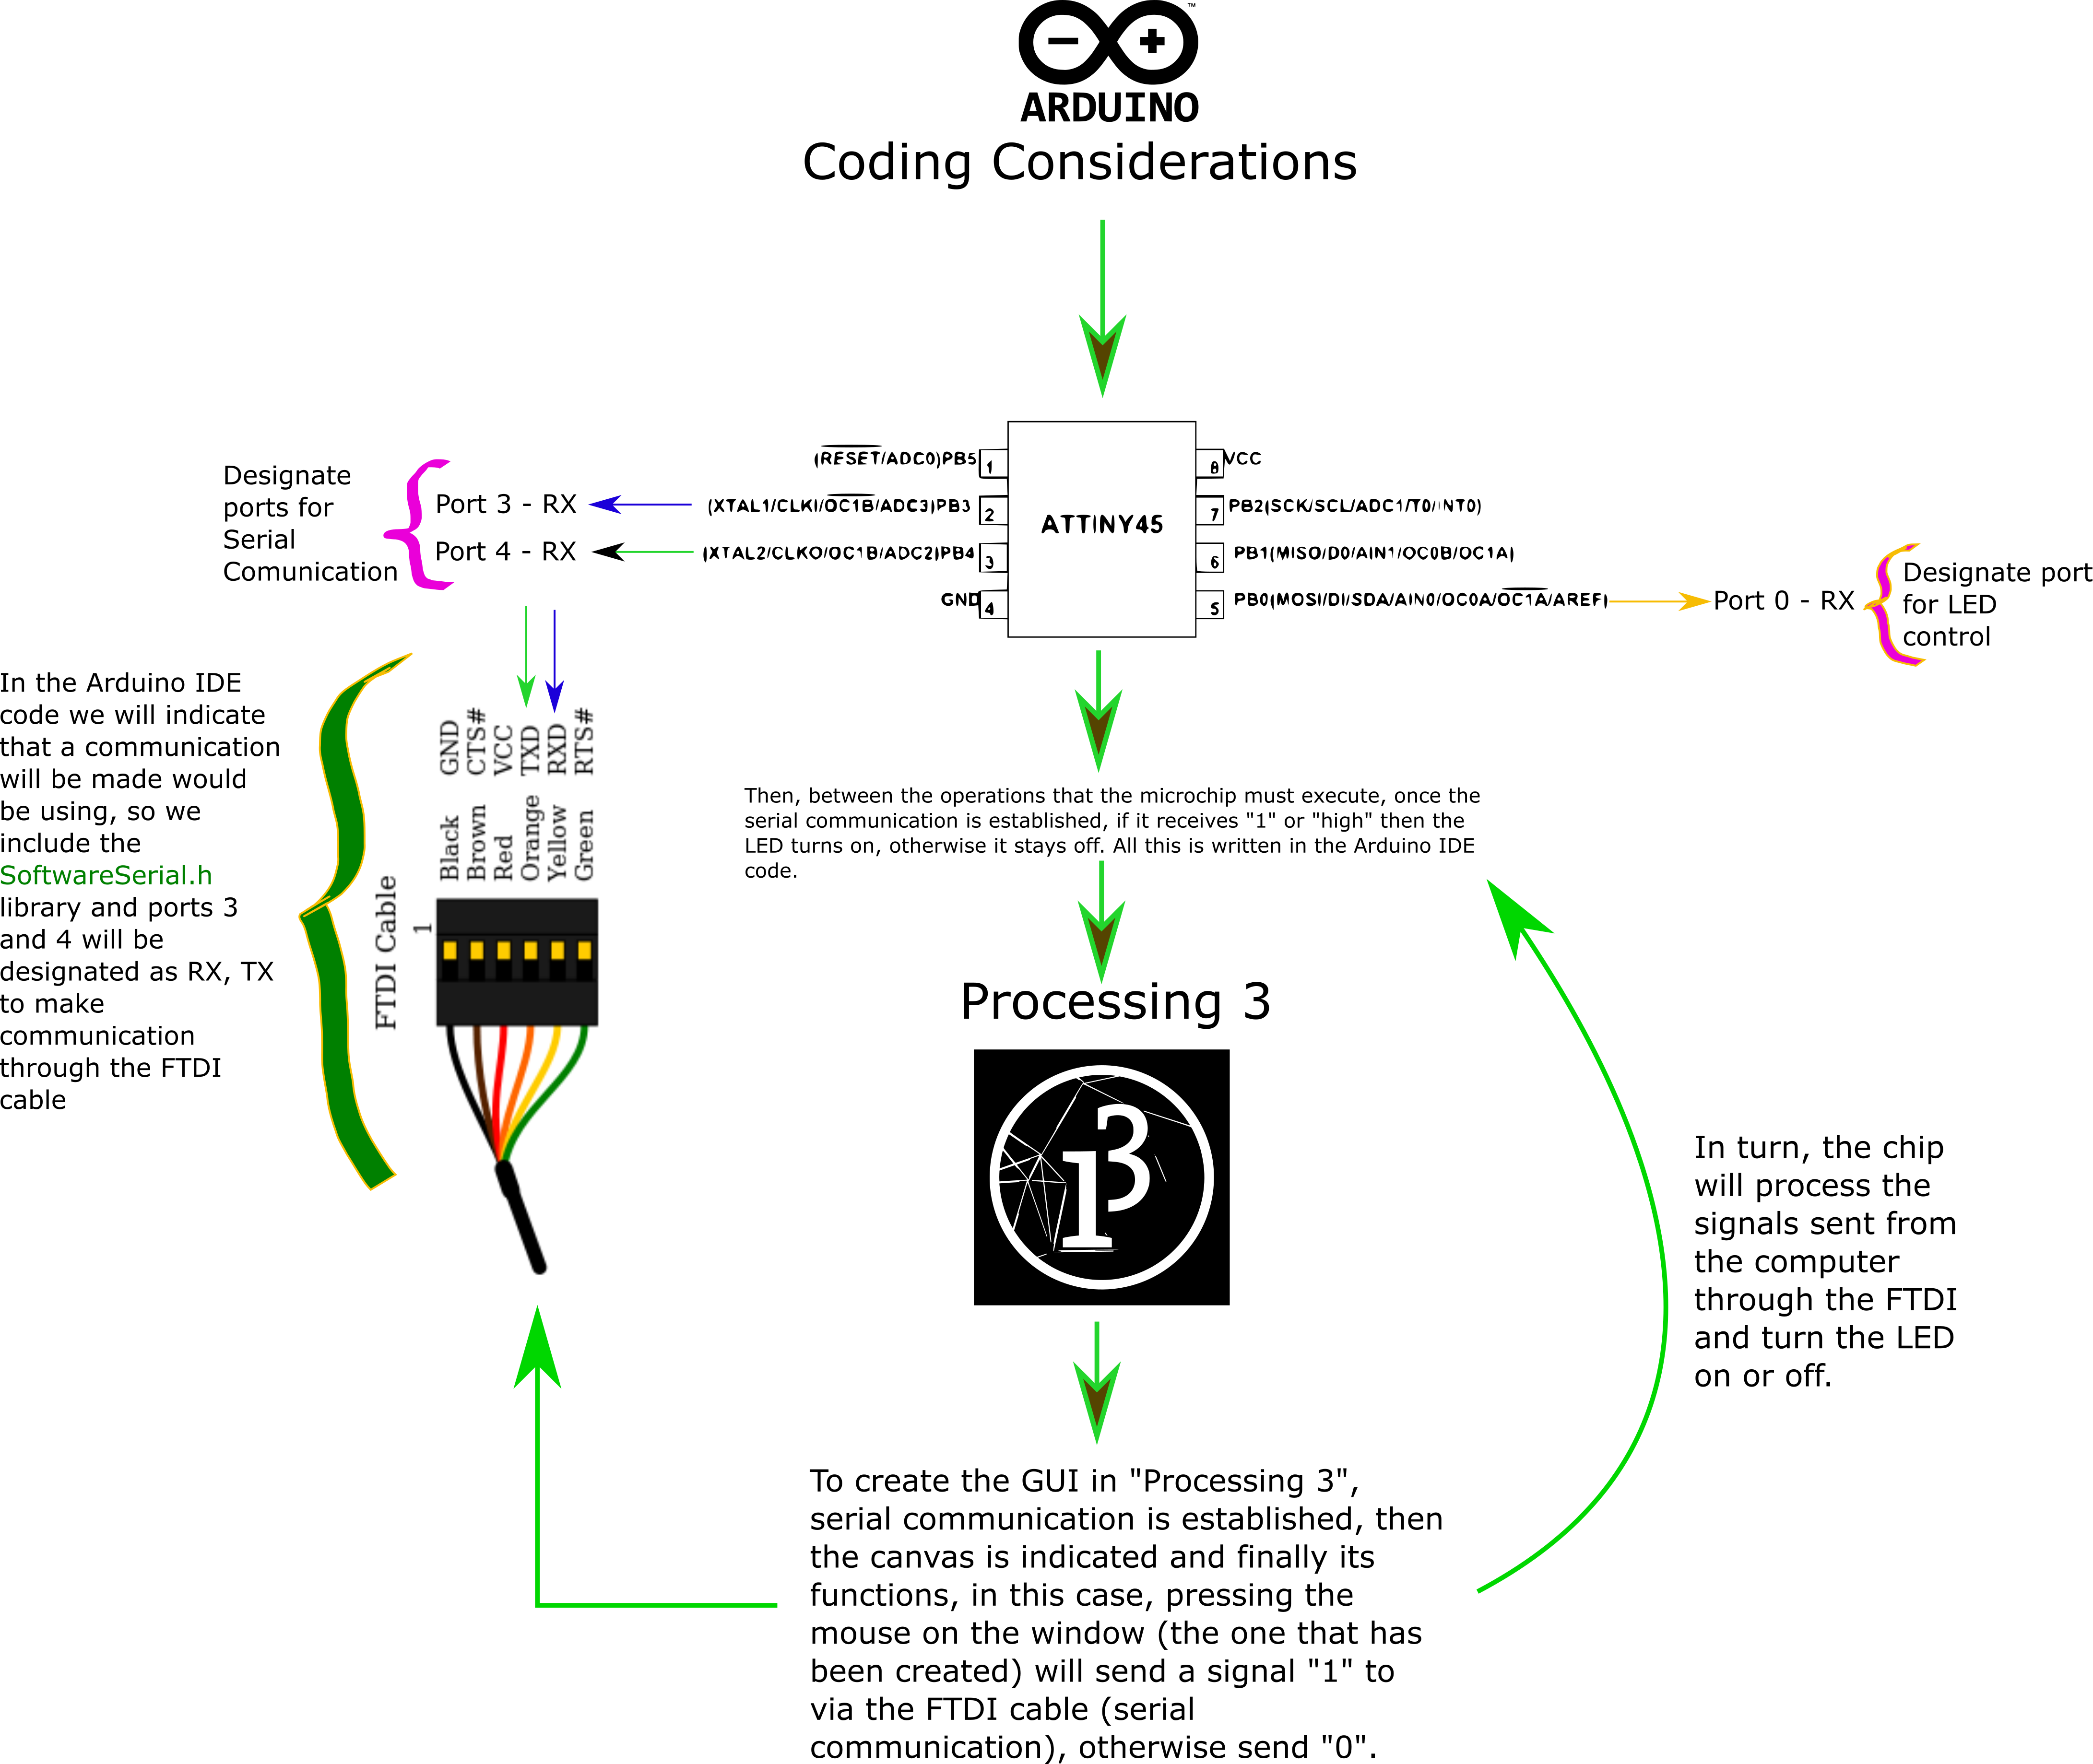
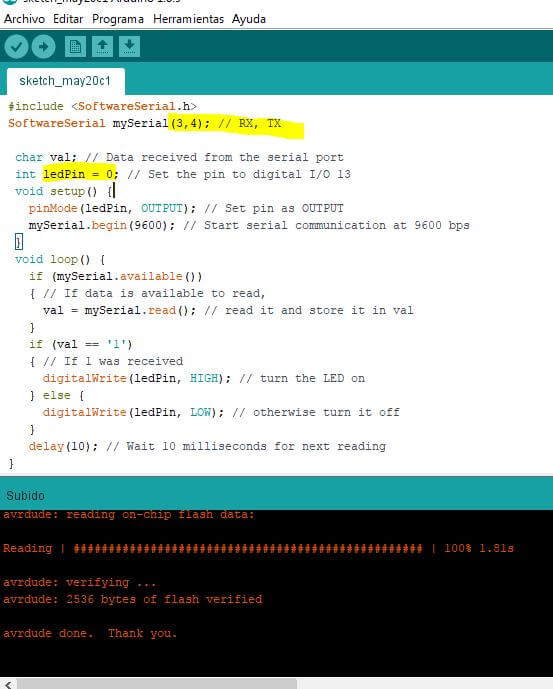
Arduino IDE and Attiny 45The Arduino IDE and the Processing IDE will communicate with each other through serial communication. The Processing IDE has a serial library which makes it easy to communicate with the Arduino. As I am going to program an Attiny 45, then it is necessary to include in the code the SoftwareSerial library that allows serial communication through the FTDI cable (in this case it is the simplest way to establish serial communication). The connection diagram is shown in the figure above and how free pins are assigned for this purpose. They are also explicitly declared in the code (RX, TX - Port 3, Port 4 respectively) so a serial port is created through them (called mySerial in this case).
Then, the microchip must process the data that's already arrived and stored in the serial receive buffer (mySerial.available( )). The following instructions are for reading (val = mySerial.read) and executing the information that arrives at the serial port ( val=="1" ...). In this case if "1" arrives (it would be the signal sent from the interface generated with the processing IDE, which is the other part of the system, the same that is generated from clicking with the left mouse button) then it turns on the LED, otherwise nothing is done.
From Processing 3.0
First, for sending and receiving data using the serial communication protocol set the class Serial. Then, define initial enviroment properties such as screen size and to load media such as images and fonts as the program starts with setup ( ). If the sketch is a different dimension than the default it's used size( ). Then, String class for examining individual characters and list ( ) to list of all available serial ports, then match with the current port and then open this port. In our draw( ) loop, we're going to listen in on our Serial port and we get something, stick that something in our val variable and print it to the console. So, the mousePressed( ) function is called once after every time a mouse button is pressed, and write ( ) writes bytes to the serial port, so that, when you click on the left mouse button (by default) a "1" will be sent to the serial port, or a "high" signal, which will be interpreted by the Attiny, and according to the instructions it has, must turn on the LED, otherwise a "0" or low signal is sent and nothing is turned on.
In conclusion, in both codes (Arduino IDE and Processing IDE) everything focuses on leaving and collecting indications through the serial port.
Tricky problem faced
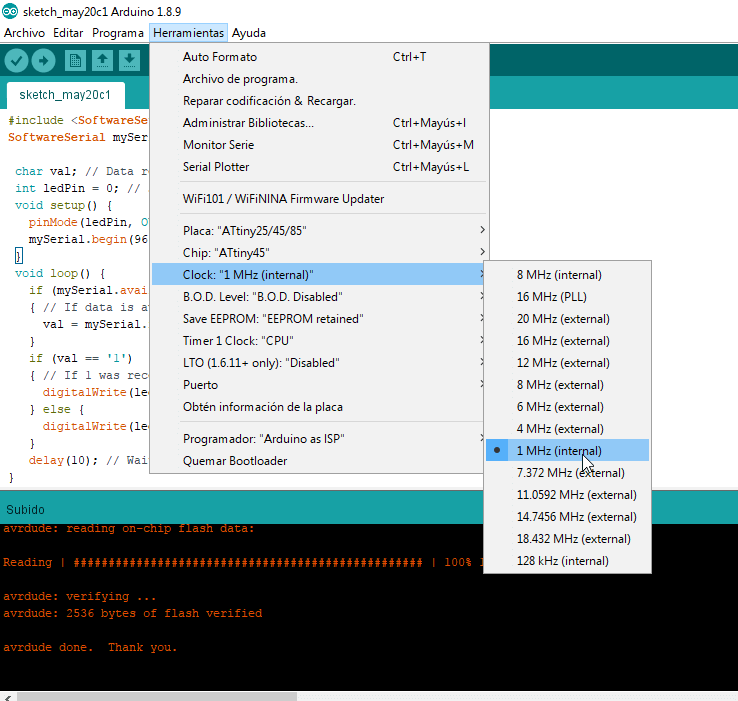
Really the code, both to program the microchip using Arduinio IDE and to program the interface with Processing 3, is not so complicated, but it took me a long time to get it to work. The problem was that at the time to setting the Arduino IDE, I put the Clock (internal) at 8 Mhz, because many previous works had used that configuration without problems, besides when compiling and loading the code there was no error. The problem was when I tried to connect to the Processing interface, and I clicked on the screen (the program was supposed to be made so that the LED on the board turned on when I clicked on the window generated by Processing) nothing happened. So, since I did not see compilation or loading errors in the Arduino code or errors in the Processing code, it was a headache to look for the fault, and it took a long time to find the error. After a long time trying to fail a colleague (I don't remember who) it occurred to him to change the internal clock from 8 MHz to 1 MHz, and after that it worked. Now, perhaps this problem would be solved much faster if I had gone directly to the Attiny 45 datasheet and searched for the serial communication chapter.
Arduino
Processing


2019
Fab Lab Tecsup
Lima/Perú
