
Week 16
This week we continue to build on what we did during the previous (Mechanical Design) week. Me, Joris and Andres are building a infinite Y axis profile drilling machine. Below you can see a video of a fully functioning first prototype that is able to drive the infinite Y axis and drill the material placed on it.
You can read the full story on the machine building group assignment page.
Individual Contribution
As stated in Mechanical Design week page, I was taking care of the group web page. Also this week I did adjustments and improvements to it. I was contributing with various smaller things related to machine building and electronics, but nothing speciffic. Ideation on design improvements of the Y axis, but at the end we could make it work with the initial design.
The Process
While Andres was trying to get the Arduino CNC SHIELD to work, I was playing around with the Gestalt Single Stepper Node. Below I will explain how to get those working since none of the tutorials on the net seemed to explain it to the point it actually works. I did not add the FTDI adapter part since it is explained well. I also added the instructions to the respective Git repositories since there were no human-readable instructions there.
Apart from that I was iterating on the group documentation page, adding content, adjusting things, making videos to show up.
Gestalt 086-005 Firmware
This is the firware the Single Node board used in the Gestalt project by Ilan and Nadya. Which is nice. In this repository you will find files needed to program your Gestalt Single Stepper Node. You can find the files for PCB production in the board folder of this repository. Pick your revision (e.g. rev0.4) and make your own board!
Installation
This repository contains Makefile which is used by make to do the following.
- Burn the firmware
- Set the fuses
At the moment it is configured to use the AVRISP mkII. To make it work with FabISP or other AVR programmer, a lot of people will be happy if you add your custom code and make a pull request.
First make sure that your AVR programmer is connected. There are many ways to do it, I used lsusb on a MacOS system.
lsusb
The following is what I got in the list.
Atmel Corporation AVRISP mkII
Which is exactly what I need to proceed. We assume that things like avrdude or CrossPack are already installed.
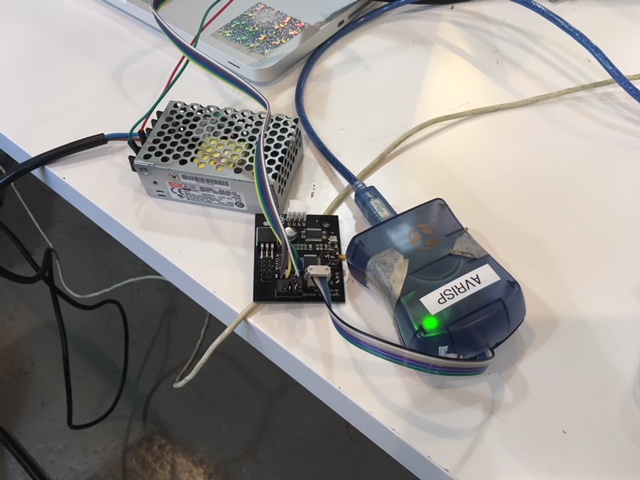
Second, make sure your Gestalt Node is properly connected to a power source, FTDI and AVR programmer.
At this point you can use make to burn the firmware.
make program-avrisp2
You should see output with things that look like progress bars and a polite Thank you! at the end.
Third make sure that you set the fuses. For that you have to use make once more.
make program-avrisp2-fuses
It might ask you to reset a fuse on the way, just hit ENTER unless you know what you are doing.
Congratulations! Your Gestalt Node is ready to be used. Now go to the pygestalt repository and continue from there.
Contributing
If you want the latest version of this, go to the origintal imoyer/086-005 repository or (of the README is not merged yet) to my personal fork under kr15h/086-005
Installing and Using the pygestalt Library
Pygestalt is a Python library with examples that enables the use of high-level language (Python) to control low-level things. So far G-code was used to describe what a CNC machine should do, which motor to spin, set the target temperature of an extruder etc. Pygestalt enables you to create your own language for the machine you are building.
Usage
First make sure that your Gestalt Node is there with the 086-005 firmware installed.
Second make sure that you have Python installed. You can check that by opening Terminal and using the following command.
python --version
It should output a line similar to the one below.
Python 2.7.12
If that is not the case, consult the Python Beginners Guide or ask your favorite search engine!
Third make sure that you have the Python package manager or pip installed. Follow the pip installation guide or, again, ask your favorite search engine.
Fourth install Python serial library or pyserial. Open Terminal and use the command below.
pip install pyserial
Fifth (finally )download pygestalt. To do that open Terminal, navigate to your secret machine project directory and use the following command (oh yes, you should have Git). You can also click on the green button above and download a .zip archive.
git clone https://github.com/nadya/pygestalt.git
Then you have to change directory to pygestalt by using the cd command.
cd pygestalt
Make sure that you are there by using the pwd (Print Working Directory) command. It should output a path with /pygestalt at the end.
Sixth install pygestalt. Run the following command to do that.
sudo python setup.py install
You can check if it is there with pip.
pip show pyserial
It should print some basic information about the pyserial library and its authors.
Seventh try it out! The best way is to pick the examples/machines/htmaa example, modify the single_node.py and run it. Below is the line you should edit, look for the follwing part.
portName = '/dev/ttyUSB0'
Use ls /dev/cu* (on a Mac OS system) to find out your serial port. It should look similar to the one below.
/dev/cu.usbserial-FTXW4I60
Replace /dev/ttyUSB0 with the one you got, save and run the single_node.py program.
python single_node.py
It will ask you to identify the X axis by pressing a button on the Gestalt Node board. If your motor is connected, it should move there and back.
Congratulations if you managed to get it working. For any comments feel free to add an issue or you see things missing, submit a pull request. Many people will be and remain thankful.
References
- pygestalt website
- A Gestalt Framework for Virtual Machine Control of Automated Tools - Master Thesis by Ilan Ellison Moyer (2013)
- Making machines that make - talk given by Nadya Peek touching on “pygestalt” given at 30C3 (2013)
Conclusions
The 3-axis profile drilling machine was not the easiest to make. Furthermore, after finalizing the mechanical design, one has to deal with electronics. Further even more, one has to choose software to drive the macine using G-Code or similar.
We used Marlin firmware on RAMPS shield designed for Arduino Mega. For G-Code parsing we used GRBL. Repetier software is used on a Linux desktop to send instructions to the board.
All in all for me two weeks seemed like not enough time to finish a machine like this properly. Joris was working the hardes and he definitely put more than two weeks to make the machine actually work.
If I would have to do this again, I would chose a less complicated machine, something like a camera slider and something that has gears in the design as from the introduction it seemed one of the most interesting things to learn more about.