mechanical design, machine design
.
lecture / slides: Fabacademy 2015 05.20D Lesson16: Mechanical Design MIT CBA Mechanical Design MIT CBA Machine Design.
topics: vendors, principles, materials, adhesives, fasteners, framing, drive, guide, couplers, bearings, rotary, lubricants, cables, liquids, conveyors, springs, mechanisms. stage, machine, sensors, actuators, power electronics, open and closed-loop control, static and dynamic paths, PID, acceleration, model predictive control, embedded and virtual control, real-time networks, file formats, toolpath planning, geometry solvers, design represenations.
group assignment: make a machine (incl. the end effector), build the passive parts and operate it manually and automate it! document the group project and individual contribution!.
division of labor: I teamed up with my friend and colleague Gabriel and we aimed to make a 2D Lightpainting machine. Since Gabriel's background is product design and I am diving a lot into coding we decided to split work initially into two parts and work simultanously on this two parts of the project, showing each one's effort. At the end of the week we still had to do major changes to both machine and code and we were the smallest team but hey, it worked out! A) Machine Design and first prototyping - Gabriel B) Programming & Interfacing - Alex C) Final prototyping - Alex & Gabriel (and Ferdi :-).
experimentation: We will use the Gestalt Nodes from MIT CBA's Machines That Make with two stepper motors. We had a look to similar projects and found inspiration from three particular projects: the Drawbot by AS220 in Providence, "Der Kritzler" from Germany and the Dullbits Drawbot (see links below). This setup allows you to have only two motors controlling a device that can be manouevred through space.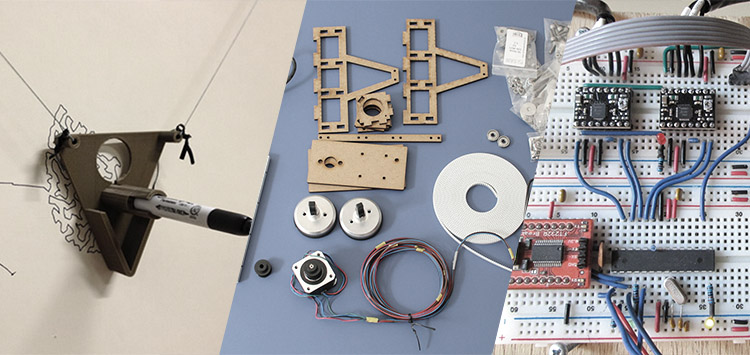 We thought of a machine that doesn't have its motors outside the end effector, needs proper fixations to hold the motors and has no need to attach a weight at the toolholder. Rather we followed the idea of putting the motors on the device, needing only any two points in space to connect the machine to. We are aiming for making a light drawing in space instead of painting on a surface. For now we were using a Arduino UNO and a Stepper Motor Driver from students at the FabLab but it will give our engine only 750mA (whereas Gestalt Nodes make 2000mA available for the NEMA 17 motor).
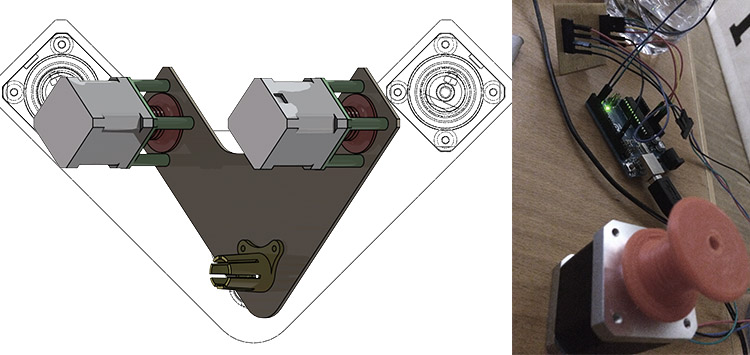 First movements of the machine, still with our Fab Lab version of the stepper driver and an Arduino UNO. We might face problems with the weight of the motors but we will try next to give them the full power running from Gestalt Nodes.
Ok, sweet so the first movements were down, communication is stable via python and Terminal (USB and external powersupply via FTDI Node board). Our next step was to replace the Arduino and stepper driver with the Gestalt Node that lets you in theory combine an endless amount of stepper motors to operate as one machine. You need to run several commands in Pythin but you can find all the links below (MTM, Gestalt System, pySerial and pyGestalt, if needed also wxPython and wxGestalt to have an interface - we choose another way though). Also we had some problems with balance so we decided in the first place to move each motor on one side of the plate and then removed the 3d printed cage. Gabriel modified the machine in that way that the rolling part would stick through and leave on the other side of the plate. We added some hooks to make sure the fishing line will enter and leave at a specific location.
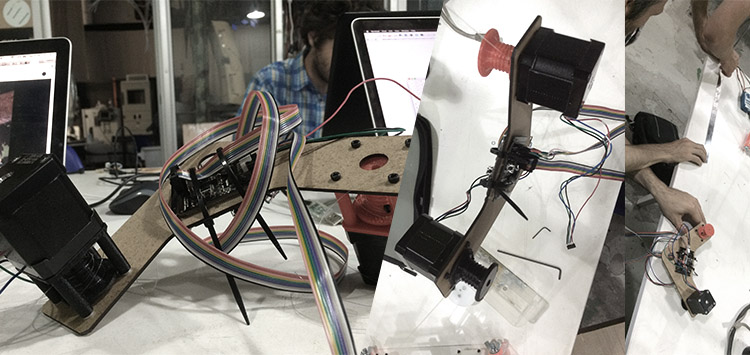 Sending commands via Python and Terminal we could make both engines move. We based the script upon the xy_plotter.py from htmaa but changed the X and Y values according to what we want to achieve. It's quite important to understand that the machine is not able yet to interpret just given points and drives there, it is connected to a speed rate, degrees per step, multiplication of distance / speed according to the leadscrew etc. In order to achieve certain distances we tried to modify all these values to get for example a 100mm cord movement out of a 100 value in x/y. I tried first to solve the path generation with an extension of Inkscape but I wouldn't make it run how I loved to. Anyway, we continued with simple x/y coordinates for now and we will be back to GCode later on. See here our first more or less controlled movements via Python.
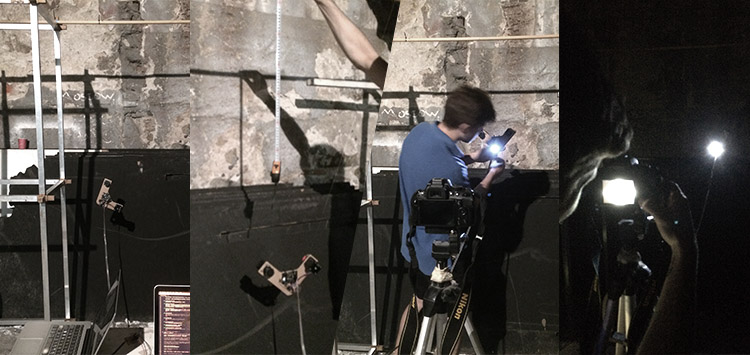
Alright, the Lab is nice but outside is nicer so we set up a little workspace in the backyard of Fab Lab Barcelona / IaaC to make our tests. We found a wooden stick and drilled two holes in 100cm distance. .
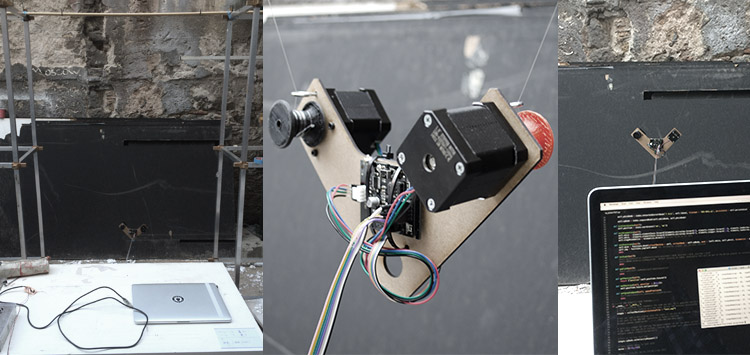 First video of a more random move, afterwards we lowered the speed to reduce the shaking.
So well, back to calibrating etc! It's important to work with measurements now because the machine has to be set up in order to understand its own size and the workspace.
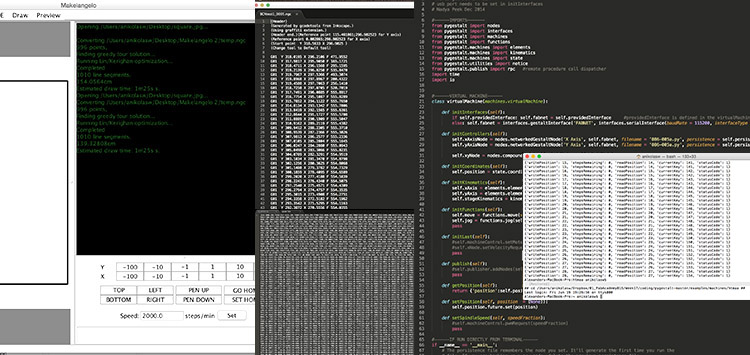
 Enough manual driving! We came across a software actually intended for another drawing robot called Makelangelo and we were happy to have the possibility to rip off the GCode before it is sent to the programme of the supposed machine. You can import an image filed .jpg / .jpeg and by choosing different "styles" of drawing achieve many outcomes. There is the possibilty to flip one engine when they are fixed on the wall as they are in usual drawing machines or flip the image to work on glass. Most importantly you can set up the machine space, the drawing area and the canvas size. It also controlls with a servo when the pen is pressing down, we could use this in the future as to turn on and off a LED. The code itself comes out nicely, just needs some postproduction to fit the python script. Ferdi showed me a sweet page full of tutorials for Sublime Text with shortcuts and so on, I was mainly using the chain: Select All - Selection Split Into Lines, et voila: you have a cursor per line. This makes it easy when you have thousand of lines to edit. Copy paste and we are there - almost.
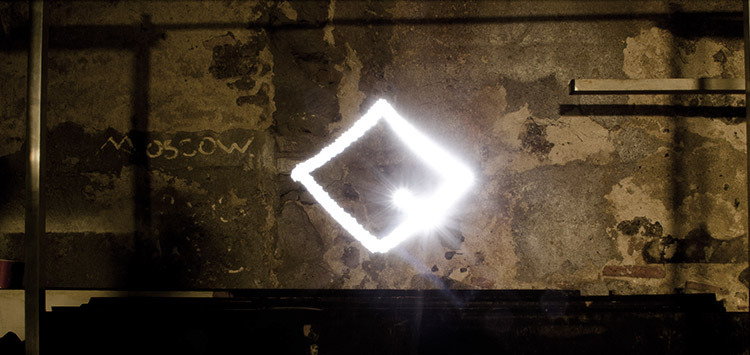
 Click, click and we are able to draw our first square with a bicycle front light that we added to the machine. Of course the effector can be exchanged and the machine could be also used for painting, milling, graffiti..
.
feedback session:.
files: Files wlzr Fab Academy '15 // w17.
bookmarks / links: James Coleman, Nadya Peek Modular Machines that Make MIT CBA Machines MIT Machine Making Notes Gabriel Tanner FabLab AS220, Providence Drawbot Der Kritzler drawing machine Dullbits Drawbot Python programming language Github Gestalt System Sourceforge pySerial Github pyGestalt wxPython Github wxGestalt CNC Club GCodeTools for Inkscape Marginally Clever Makelangelo 2 Software Marginally Clever How to Add Your Own Style to the Makelangelo Tuts plus Perfect Workflow in Sublime Text: Free Course.
global review: Fabacademy 2015 06.22B Presentations03: Machine building presentations Part 1-

Any content on these pages by Alexander Nikolas Walzeris licensed under a Creative Commons
Attribution-NonCommercial-ShareAlike 4.0 International License