computer-controlled machining
.
lecture / slide: Fabacademy 2015 03.18D Lesson08: Computer-Controlled Machining MIT CBA Computer-Controlled Machining.
topics: machines, stock, vendors, job shops, tooling, speeds and feeds, lubricants, abrasive machining, fixturing, squaring, dust collection, flexures, living hinges, kerfing, toolpaths, file formats, safety, welding.
assignment: make something big!.
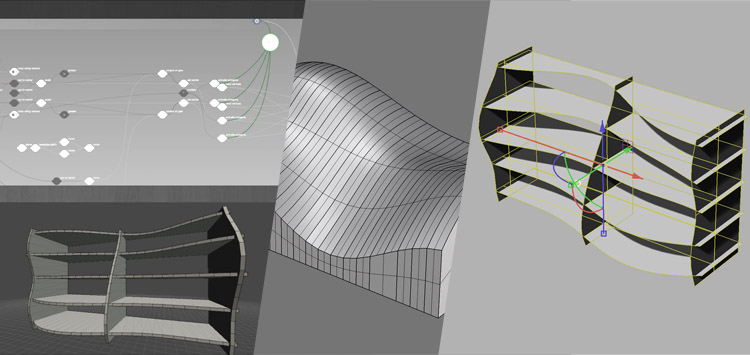
experimentation: Free wood! As both the Institute for Advanced Architecture of Catalunya (IAAC) and FabLab Barcelona were about to go into the Easter Holidays a lot of stuff was ready to be trashed and I was lucky to find two very nicely painted plywood sheets for free! I was measuring them out and redraw it in Rhinoceros 3D, making sure to fit everything afterwards on my sheets. It's also possible to take a picture from the top and then import it as a Image reference within Rhino to see better where the things we will cut out might be positioned and which textures they are taking on.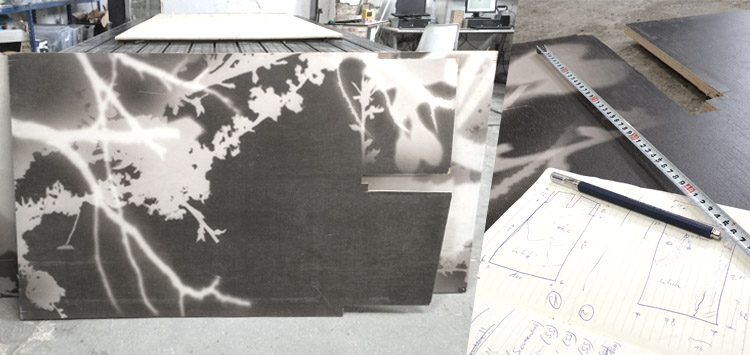 Earlier I played around with waffel-scripts in Grasshopper3D but strangely enough my virtual machine wouldn't start anymore. I knew it will take a bit to reinstall everything so I was looking for other options. I remembered from Week02 the in-browser node-based modeler MatterMachine and I was looking for something similar there. I found a very nice template, adapted it and exported it to Rhino. Unfortunately the interection were not solved so I had to do this manually. I duplicted the edges, remodeled a surface from them and intersected it with planes in the right positions The idea was rebuilt but everything still in 2D only.
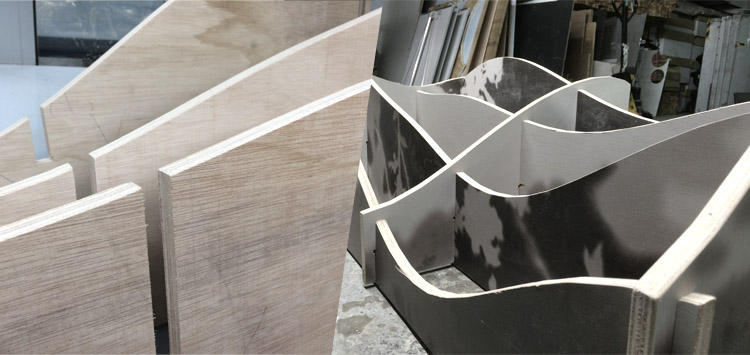
 Soooo the next step was to get half the lengths of each intersection curve and give the material a thickness. That was were the next error occured since I measured 15mm but it was 16mm! I just found out later when I went to mill the pieces but I had to sit back on the computer to adapt it. I wish I had my Grasshopper3D ready, it would have taken two seconds to make such changes on a parametrically built model. I layed the pieces flat on my sheets, checking for holes and openings in the wood. I could even leave a part of one sheet to a friend of mine who asked me for some wood for his project.
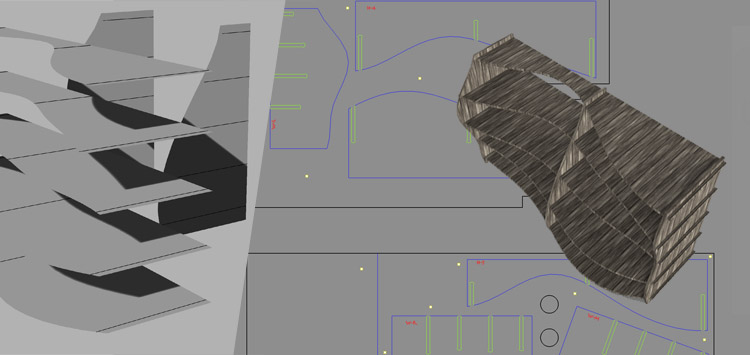 I was using RhinoCAM on Ferdi's laptop to set up all the machine settings, choosing the correct tool, speeds and toolpaths. After checking everything via simulation I exported the GCode for the machine I was supposed to use (in this case: Mach 3). GCode comes with different "flavors" so better make sure to use the right one, it might end up in a distaster otherwise.
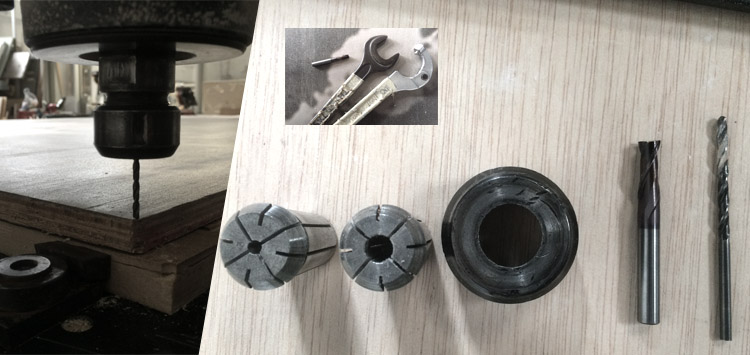
 Using the CNC milling machine you have to set manually the x,y,z axis value to 0 to make the machine understand its origin to the specific piece of material.
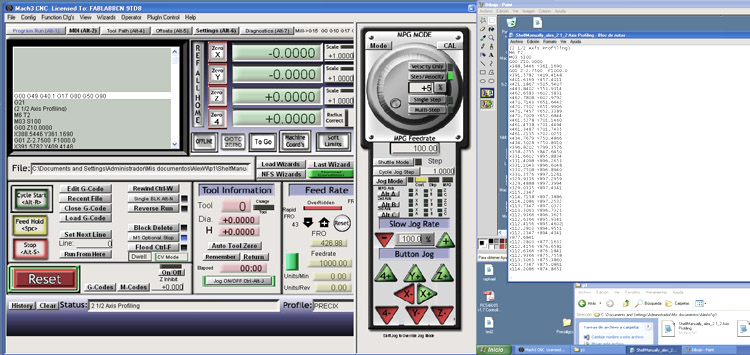 As we remember from the RhinoCAM there will be two processes taking place, first the drilling with a 3mm up-cut drill-bit. For this I was changing the tool using a pair of pliers and wrenches. I took some minutes and the holes were drilled! I took some screws and fixed the plate through the fresh holes: Using the Mach3 has a big advantage: you can change the operating speed in progress, that helps you when you face problems with the wood, strange bendings or surface issues due to the milling speed.
 Timelapse of production steps:
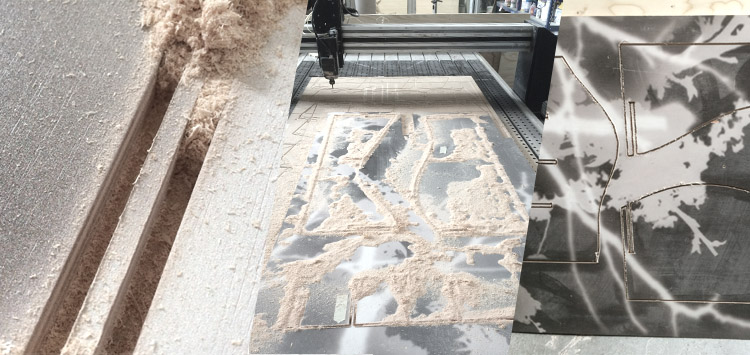
I switched back from 3mm up-cut drill bit to 6mm flat drill to mill out my pieces. Once again eveything was running fine and luckily no screws were touched. The machine path was running along the cutting lines/curves for four times, going deeper 5mm per cut. It took around 90 minutes and all the pieces were separated. I took them off and knocked the tabs of with a gentle push. The pieces needed some treatment on the corners using sandpaper and of course the second plate was still missing.
Timelapse of production steps:
I switched back from 3mm up-cut drill bit to 6mm flat drill to mill out my pieces. Once again eveything was running fine and luckily no screws were touched. The machine path was running along the cutting lines/curves for four times, going deeper 5mm per cut. It took around 90 minutes and all the pieces were separated. I took them off and knocked the tabs of with a gentle push. The pieces needed some treatment on the corners using sandpaper and of course the second plate was still missing.
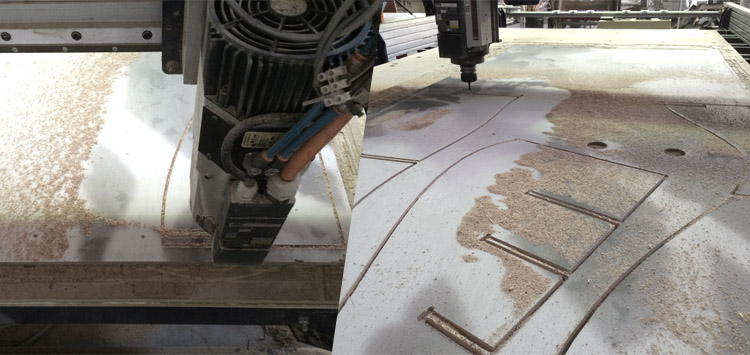
 ShopBot: Since our FabLab can be busy some time I was using the other CNC milling machine we have there, a massive ShopBot CNC mill. It’s important to set as G-Code “flavor” the one we have from ShopBot Valldaura, called just like that but then changing two lines in the G-Code: One (TR) setting the spindle speed to 12.000 RPM and increasing from 16.7 to 26.7 (what as that again???). The same game begun: going first with 3mm for the drilling holes. I set the x,y,z zero points by driving manually from the keyboard and the ShopBot Software interface. Ones the holes were made I could put in the screws, change the tool to 6mm for the profiling cut and run the subsequent code.
 Another difference and in my opinion great advantage is the fast tool changer using a hydraulic gripper to hold and release the tool. Just press a button and it’s ready to be exchanged (dont let it drop).
 It took around two hours, nothing burned and I was ready to remove the pieces from the sheet with a gentle push.
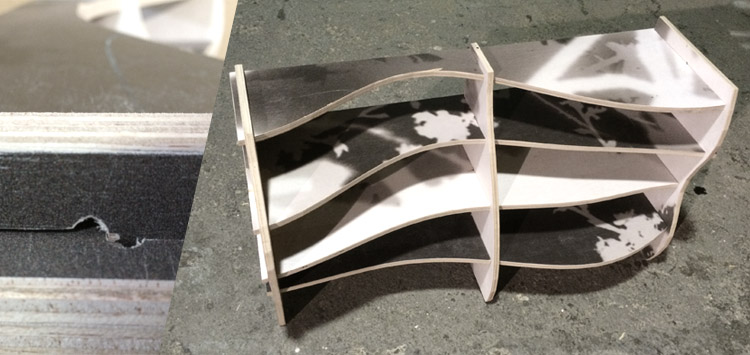
 The pieces are ready for being worked on with sandpaper and file (for the tabs better work in one direction only!).
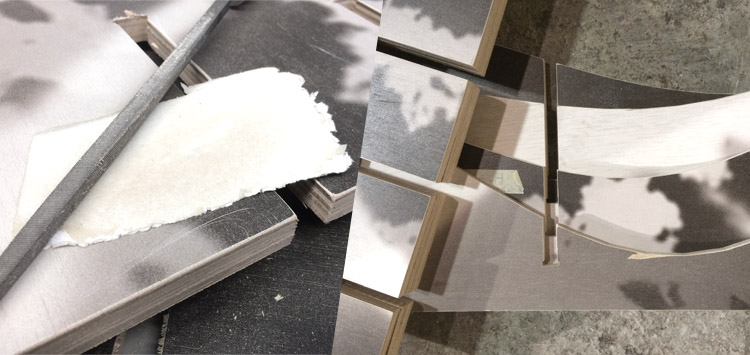 I could slide the pieces in gently but I think I left too much spacing in the slots. (16.4 instead of 16mm; just in case). I would keep it to 16.2 in the future, also keep in mind that sanding takes material away too.
 Done - It will mostly be used for my shoes!
-
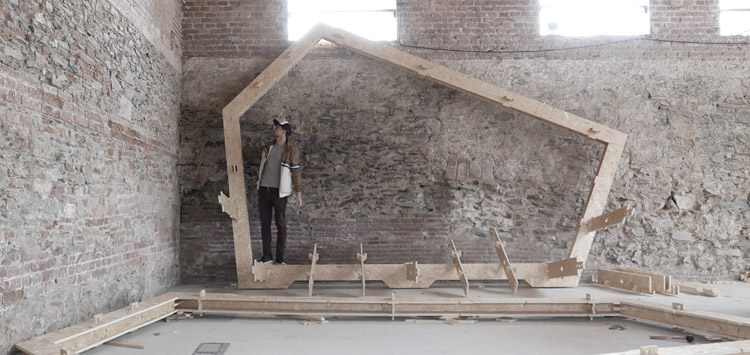
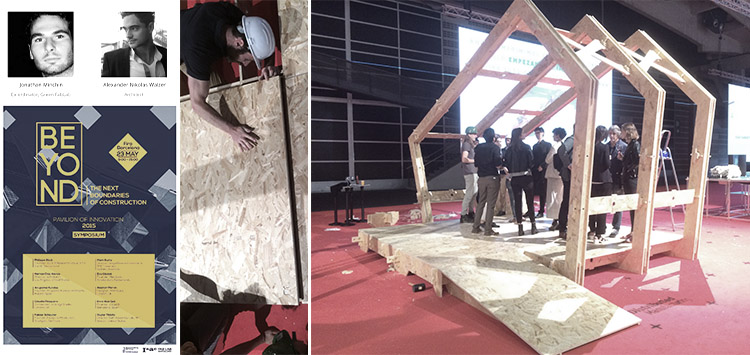
Wikihouse: Just some weeks after my first experiences on the CNC router I was helping to conduct a workshop at our GreenFabLab Valldaura. Students from the Architectural Association in London came over to prototype a 1:1 scale model of the WikiHouse. This project is an Open Source project in which you can download a house and fabricate it. Of course it doesn't work that easily but we could fabricate some parts of what will be our new WetLab. The design was adapted by the amazing group of Wikihouse NZ in New Zealand and built by us in Barcelona with students from London, the city where the project originated. I am still working on finishing the WikiLab files. We will build up six sections in total plus adding a ramp. The whole frame does not need screws or glues and can easily be transported. It will be shown at the Construmat Barcelona (BEYOND Innovation pavilion):
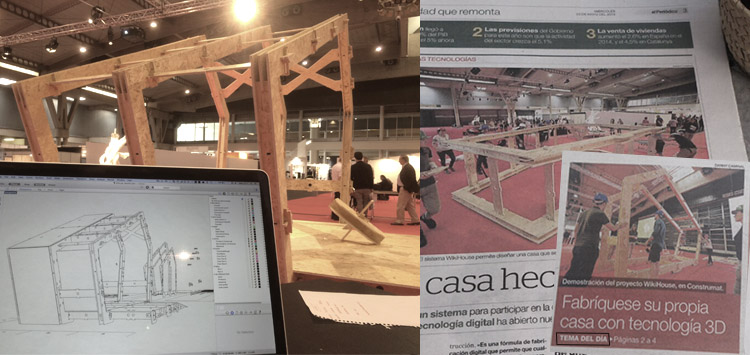
 A little documentation video, in total we gathered around 60 contacts and got some invitations to showcase in Brazil and Turkey:
That was huge! Withing the days of the exhibtion we were giving workshops, forwarding the production files and tested the wooden joints. The mayor of Barcelona came to visit, a lot of media and the newspaper 'El Periodico' mentioned the project as "topic of the day":
A little documentation video, in total we gathered around 60 contacts and got some invitations to showcase in Brazil and Turkey:
That was huge! Withing the days of the exhibtion we were giving workshops, forwarding the production files and tested the wooden joints. The mayor of Barcelona came to visit, a lot of media and the newspaper 'El Periodico' mentioned the project as "topic of the day":
 Workshop infos, final assembly and load stress testing. Result: very social!
.
files: Files wlzr Fab Academy '15 // w08.
bookmarks / links: MatterMachine MecSoft RhinoCAM Software Green Fab Lab Architectural Association (AA) School of Architecture WikiHouse Spacecraft Wikihouse NZ Beyond Building Barcelona - Construmat Beyond Building Barcelona - Pavilion of Innovation.
review: Fabacademy 2015 03.25B Review08: Computer-Controlled Machining-

Any content on these pages by Alexander Nikolas Walzeris licensed under a Creative Commons
Attribution-NonCommercial-ShareAlike 4.0 International License