molding and casting
.
lecture / slide: Fabacademy 2015 03.18D Lesson09: Molding and Casting MIT CBA Molding and Casting.
topics: molding: types, materials, additives, processing, safety, machining, software..
assignment: design a 3D mold, machine it, and cast parts from it!.
experimentation: For this weeks assignment I wanted to make molds for my first seedboombs from the correct recipe but eventually I decided to maybe go with chocolate first to attract people. According to this I started designing a praline in ZBrush which turned out painfully impossible to make a boolean operation run.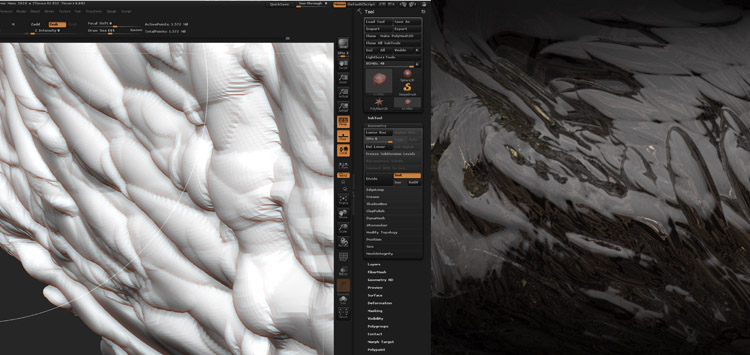 For the second design iteration I was using SculptGL (a free in-browser sculpting modeller) but I didn’t really consider overhangs and possible problems with colliding of the drillbit (always better check the geometry of it and understand the ways of production!). I imported it as OBJ into Rhino, cut it at the axis of symmetry and placed a box around it (that unfortunately was way too small!). In order to use the same mold for both sides (as it works with symmetrical pieces; you don’t have to mill two parts) its necessary to place at every corner lets say a small cylinder. This will be hollow in the mood and can be 3d printed with the double height ensuring to stay in position when both molds are joined.
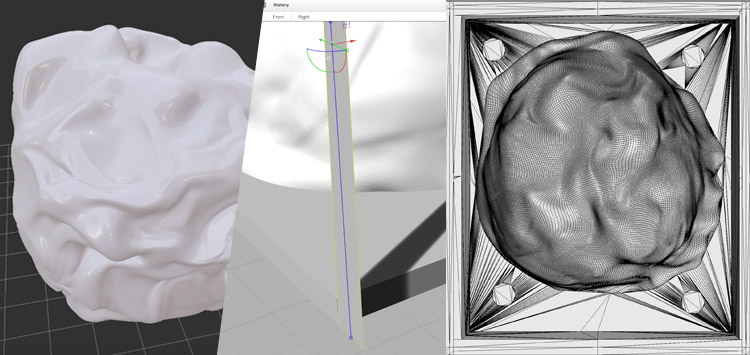 I was using the Roland MX20 milling machine and FabModules. The first round was for roughing that basically takes out most of the material in a rough and not detailed way, the second one (with a different mill bit) details then much more. Unfortunately I was running the second milling operation over night and the mill broke, stupid and dangerous! I decided to leave the geometry as it was since it was beautiful to see both levels of detailing on one object. Using the heat gun and carefully heating up the spot I could smooth it slightly and create and even more intricate surface finishing.
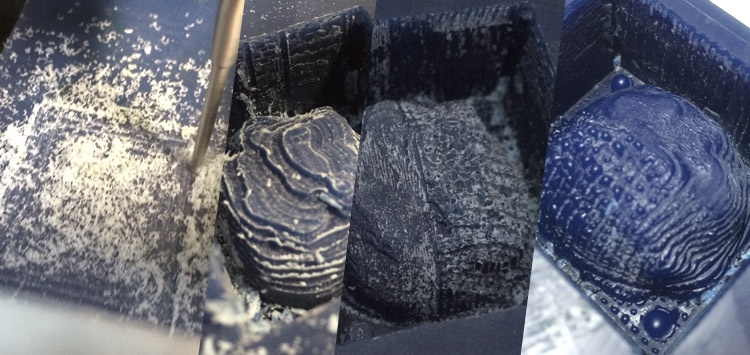 I actually gave up on this piece but my colleague Josefina was nice enough to cast the mold for me and also the subsequent positive since her piece was placed just next to mine on the wax brick. Eventually I agreed to still work on it and I will do it a second time later on with the food safe silicone rubber to have a chocolate praline from it. You can see the surface that was created by the broken milbit and the cancelled milling process before as somebody took the piece out of the machine.
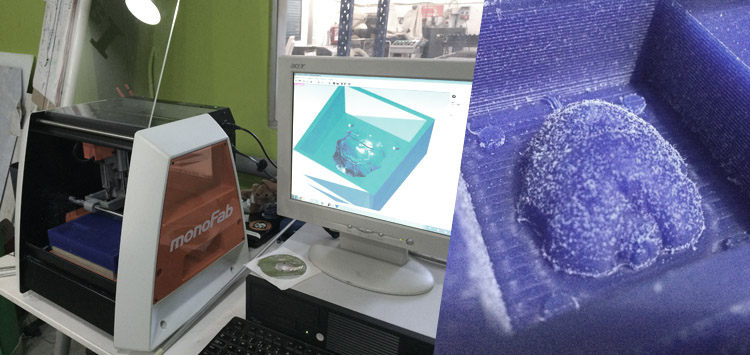
 A bit sad but also smarter than before I went back to the geometry I scanned some weeks ago for the scanning and printing assignment. The seed opened up already but the digital counterpart remains unchanged. I imported it in Rhinoceros, built a box around it respecting to give more space on the sides. This time I was using the Roland MonoFab SM-20 milling machine that operates a bit differently: Instead of using FabModules I was running the MODELA software to generate the toolpaths and set the machine with the V Panel (for setting the axis to zero etc.).
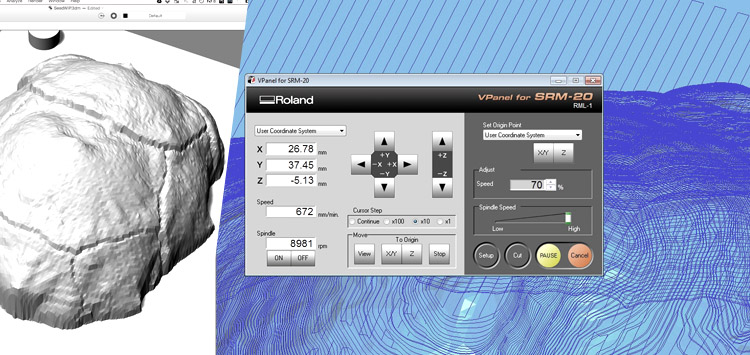 First running the roughing process, then changing the bit and then go for the detailing. Eventually everything went smoothly and once my colleagues that I share the wax piece with have finished their milling operations, we will be ready to cast the shapes, creating two casts per mold (I am not sure if the first attempt from before will work).
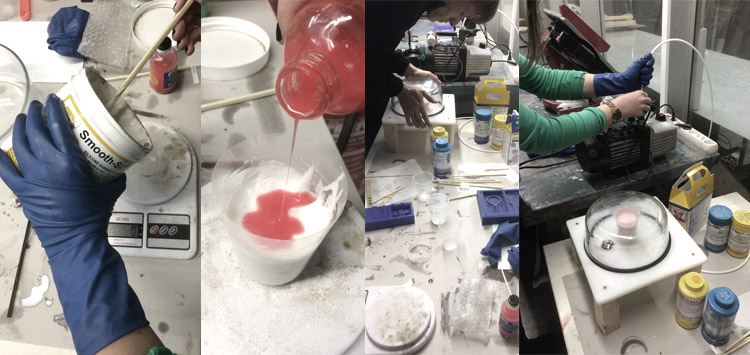
 Happily enough we got some food safe silicon rubber (two components) in the lab. Together with my colleague Josefina we checked for the indicated mix (10:1) and started to measure the amounts. We stirred firmly for some time and since pot life is only 30 minutes in this case we quickly moved on. Ferdi built a small vacuum chamber that allowed all of us to get rid of bubbles in the mixture in the first place. Bubbles will make the mold very very bad in terms of surface quality. We were running the vacuum process for about five times and always stopped when the boiling mix was about to pour over.
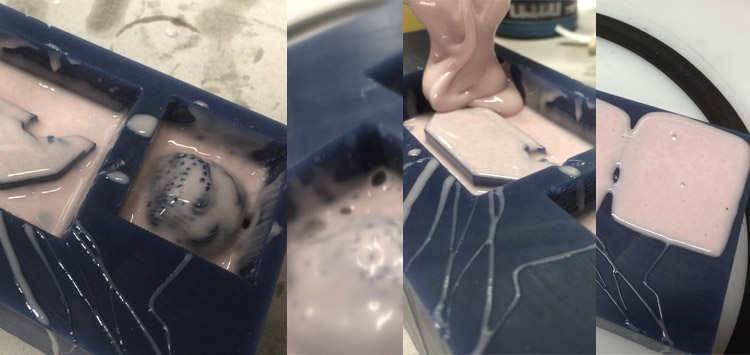
 It helps to put first a very thin layer of the silicone onto your geometry. This will ensure that there (hopefully) won't be any nasty bubbles at the very important point of your mold. We vacuumed the piece again some time, making the rubber boil quite a lot and make sure that most/all air will be gone. Then we firmly poured in mix from one side, slowly and again, making sure that there won't be any bubbles left. Additional vibrating always helps and keep the pot life in mind!
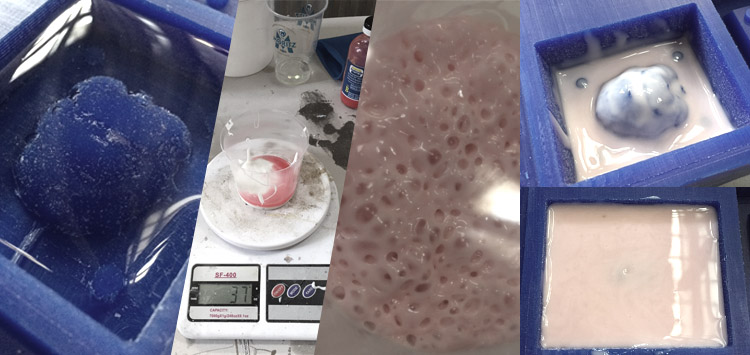
 I also repeated the process for the better version (the cypress seed scan). Especially when you mix smaller amounts it helps a lot to put first water into the wax positive, pour it over into a transparent plastic cup and get either/and both weight and volume of it. Redo the process then with the corresponding component mix as indicated on the package of the silicon. Vacuum it as mentioned above (bubble it hard) and apply a thin layer on top of the positive. Try to avoid bubbles, in the best case use a brush to get to detailes spots. The piece was too big to fit into the vacuum chamber but let's see! I should have done some more mixture, the highest point of the geometry is not covered completely and the mold might rip, let's wait until it's done:
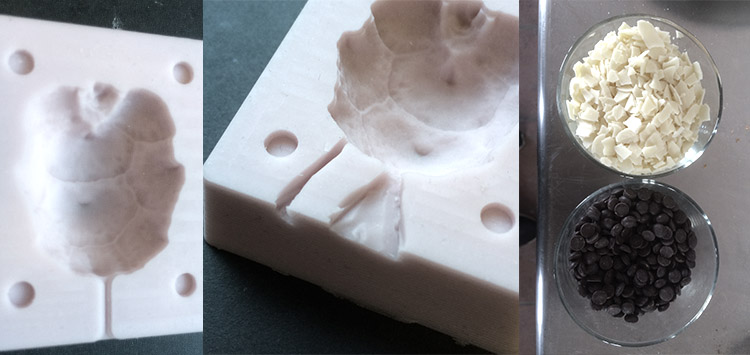
 The mold came out easily with a bit of help by the air compressor and I went on to produce a second mold from the same positive. In my digital file I didnt think too much on how to get the material inside so I grabed a knife and made the entrance hole a bit bigger and cut a second small tunnel/hole to let the air out. This does not necessarily have to be next to each other, you can either press the material inside or suck it via vacuum,just think of it before you design and mill! I got some dark and white cocolate flakes from the supermarket and let it melt in hot water but the white chocolate urned out clumsy and a bit nasty, also dark chocolate is healthier so I went on with that one:
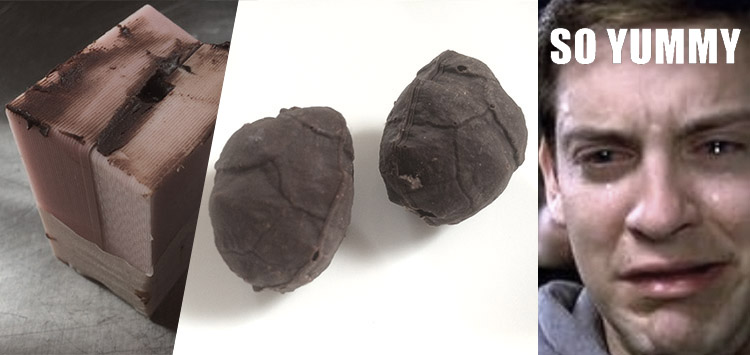
 Both sides of the molds and four little wooden pieces that connected the both sides together against slip were put together and fixed with some tape. I tried to just let the liquid chocolate just to flow inside but obviously this was the wrong dimension for this. Also I should have brought a siringe or a smiliar device to inject properly but I found a solution with a small wooden stick, just compressing the chocolate inside drop by drop, making sure of not opening the both sides of the mold and let the chocolate flow out of the intended shape. I then put it into the fridge and let it rest for half an hour. I repeated the process, opened the mold and enjoyed some very nice selfmade CNC pralines:
.
files: Files wlzr Fab Academy '15 // w09.
bookmarks / links: MYOM - Food Grade Silicone Mold Rubber BBC goodfood - How to melt chocolate.
global review: Fabacademy 2015 04.08B Review09: Molding and Casting-

Any content on these pages by Alexander Nikolas Walzeris licensed under a Creative Commons
Attribution-NonCommercial-ShareAlike 4.0 International License