electronics production
.
lecture / slide: Fabacademy 2015 02.18D Lesson04: Electronics Production MIT CBA Electronics Production.
topics: PCB fabrication, PCB materials, board houses, components, breadboards, assembly, CAM.
assignment: make the FabISP in-circuit programmer! The FabISP is an in-system programmer for AVR microcontrollers, designed for production within a FabLab. That is, it allows you to program the microcontrollers on other boards you make, using nothing but a USB cable and 6-pin IDC to 6-pin IDC cable. It's based on the USBtiny and V-USB firmwares, which allow the ATtiny44 to perform USB communication in software. Programming can be done through avrdude. The schematic is super simple: USB connector, ATtiny44, and 6-pin ISP header, with assorted passive components. I started with the Eagle files for the USBtinyISP, although there's almost nothing left of it. Most of the parts for the FabISP are in the FabLab inventory. Exceptions include the Mini-B USB connector (SparkFun, Digi-Key), 12 MHz crystal (Digi-Key), and 18 pF capacitors for the crystal (Digi-Key)..
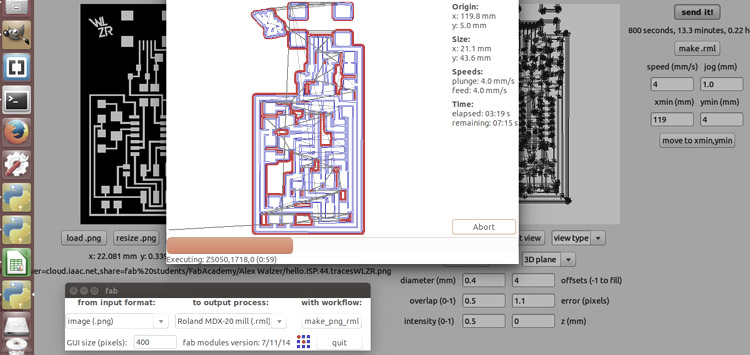
experimentation: MIT's Neil Gershenfield's fabISP template and personalized schemata, diagram and milling traces: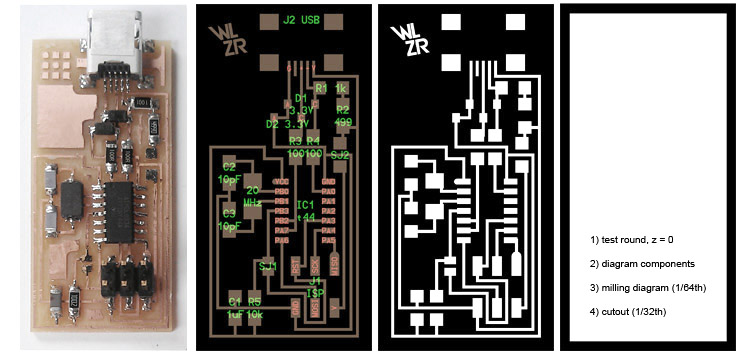 Generating toolpaths using MIT FabModules in Linux/Ubuntu:
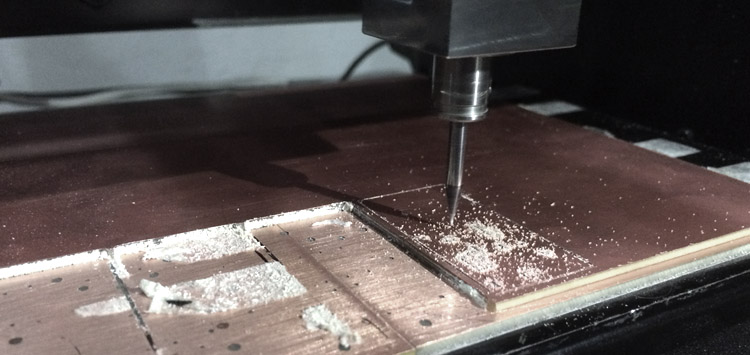
 The Roland MXD-20 desktop milling machine doing its job nicely using both 1/32th and 1/64th of an inch bits. The plate consists of phenol paper (class FR-1) with a copper layer on top:
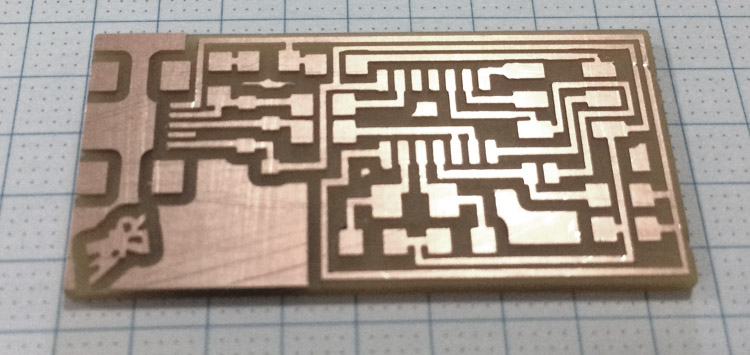
 The FabISP after being removed from its original plate, cleaned and slightly sandpapered on the edges, ready to be soldered on:
 Gathering of the components. some elements are that small and better kept in their enclosure before the solder job begins:
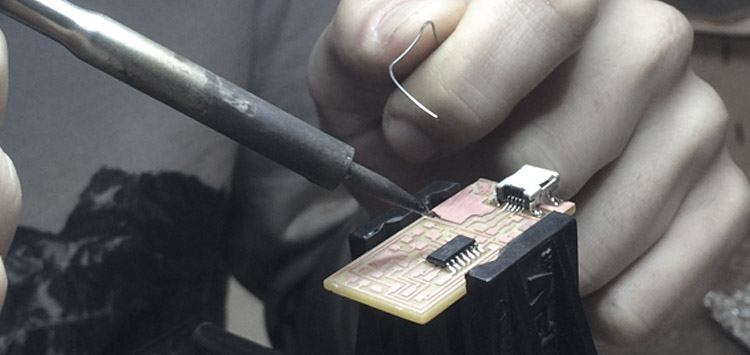
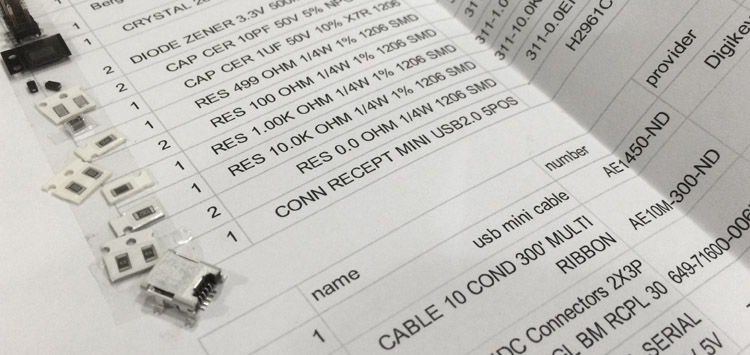 How to solder like a pro: cover the tip of the soldering iron with solder, if a ball is formed, bump it off on the table (the hand grip, not directly with the tip). heat up the copper and/or parts of the component to be soldered. when hot, apply solder material gently, it will melt in place. Remove the soldering iron fast et voila, it's done! In the best case it will create a glossy hill. Small pieces are tricky so better use a thin tip and keep it clean! Sometimes cleaning is done using the soft sponge. Get the plate fixed on a mount, dont bend it though! Get a lamp and of possible a magnifying glass, there are also combined systems.
Me on my mission, first two components soldered in position:
How to solder like a pro: cover the tip of the soldering iron with solder, if a ball is formed, bump it off on the table (the hand grip, not directly with the tip). heat up the copper and/or parts of the component to be soldered. when hot, apply solder material gently, it will melt in place. Remove the soldering iron fast et voila, it's done! In the best case it will create a glossy hill. Small pieces are tricky so better use a thin tip and keep it clean! Sometimes cleaning is done using the soft sponge. Get the plate fixed on a mount, dont bend it though! Get a lamp and of possible a magnifying glass, there are also combined systems.
Me on my mission, first two components soldered in position:
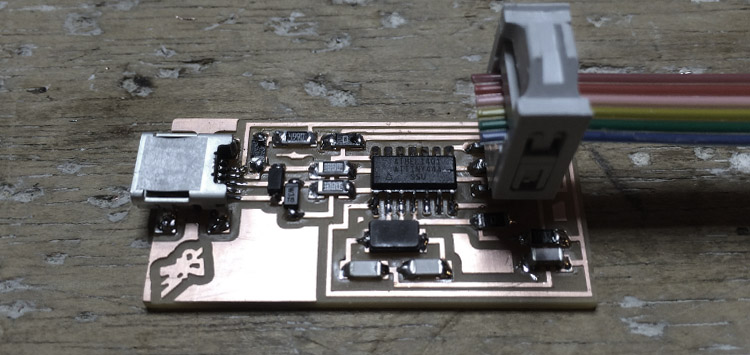
 After around one hour of soldering all the components are in their place. Note the two resistors with 0 Ohm resistance, they are used as soldering jumpers and once the programming is done, they will be removed in order to prevent overwritting the chip:
 The next step was to reduce the Multi Ribbon from ten to six cables, connecting the IDC connectors (2X3P). Testing with the multimeter (beep-mode) if cables are working and also finding the position of the ground on the board and marking it in order to attach cables properly when programming:
 Everything seems ready for programming:
 the programming part:
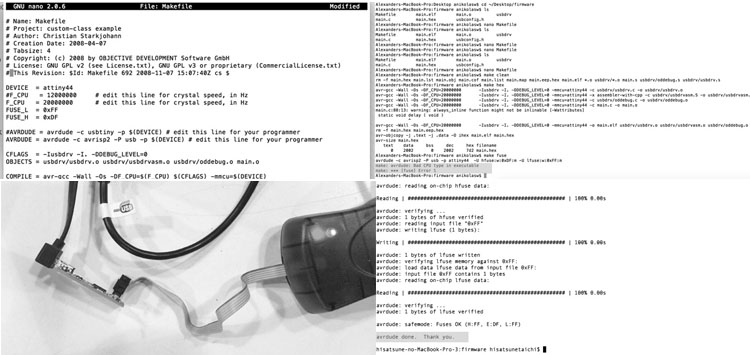
After downloading XCode (inluding Make), Crosspack AVR and the FabISP firmware the board was connected via USB to the Computer. Since nothing burned, the critical smoke-test has been passed. We continued connecting now also the AVRISP MK2 programmer from USB and both programmer with the 6pin cables (again, make sure to check the direction of the cables). The light on the AVRISP MK2 should turn green and we are ready for programming.
Following the great tutorial from AS220 Providence we checked/edited the AVR Makefile in Apple Terminal, Nano. Since both the FabISP and the AVRISP MK2 programmer are powered via USB cables I faced some problems. One of my USB ports is broken so I got notified with nasty errors and I thought my board might not be working at all.
I asked my colleague Taichi for help and we could use his computer to make the programming, see both devices as they were connected to the computer: Basically we followed the provided tutorials, running in Apple Terminal the following commands: make clean, make hex, make fuse, make program. At the end you should receive a message saying, "avrdude done. Thank you.":
the programming part:
After downloading XCode (inluding Make), Crosspack AVR and the FabISP firmware the board was connected via USB to the Computer. Since nothing burned, the critical smoke-test has been passed. We continued connecting now also the AVRISP MK2 programmer from USB and both programmer with the 6pin cables (again, make sure to check the direction of the cables). The light on the AVRISP MK2 should turn green and we are ready for programming.
Following the great tutorial from AS220 Providence we checked/edited the AVR Makefile in Apple Terminal, Nano. Since both the FabISP and the AVRISP MK2 programmer are powered via USB cables I faced some problems. One of my USB ports is broken so I got notified with nasty errors and I thought my board might not be working at all.
I asked my colleague Taichi for help and we could use his computer to make the programming, see both devices as they were connected to the computer: Basically we followed the provided tutorials, running in Apple Terminal the following commands: make clean, make hex, make fuse, make program. At the end you should receive a message saying, "avrdude done. Thank you.":
.
files: Files wlzr Fab Academy '15 // w04.
bookmarks / links: MIT CBA FabISP Atmel AVR Microcontrollers MIT CBA FabModules Roland MXDX-20 Milling machine Wikipedia Printed Circuit Board (PCB) Radio Electronics What is SMT Surface Mount Technology - Tutorial Apple Developer XCode ObDev Crosspack for AVR Development Atmel AVRISP MKII programmer AS220 Fab Lab Providence FabISP Programming Tutorial Taichi Hisatsune Apple Terminal (OS X).
review: Fabacademy 2015 02.25B Review04: Electronics Production-

Any content on these pages by Alexander Nikolas Walzeris licensed under a Creative Commons
Attribution-NonCommercial-ShareAlike 4.0 International License