Composites
- Assignment
design and make a 3D mold, and produce a fiber composite part in it

- This week, I made fenders for my bicycle with a cloth, styroform and polyester resin as materials and a futon compressing bag as a tool instead of a vacuum bag.
(But it was failed, I describe about this below.) 
The front fender of my bicycle got bended so I decided to make a new fender.
And I wanted to make this kind of simple shaped one.


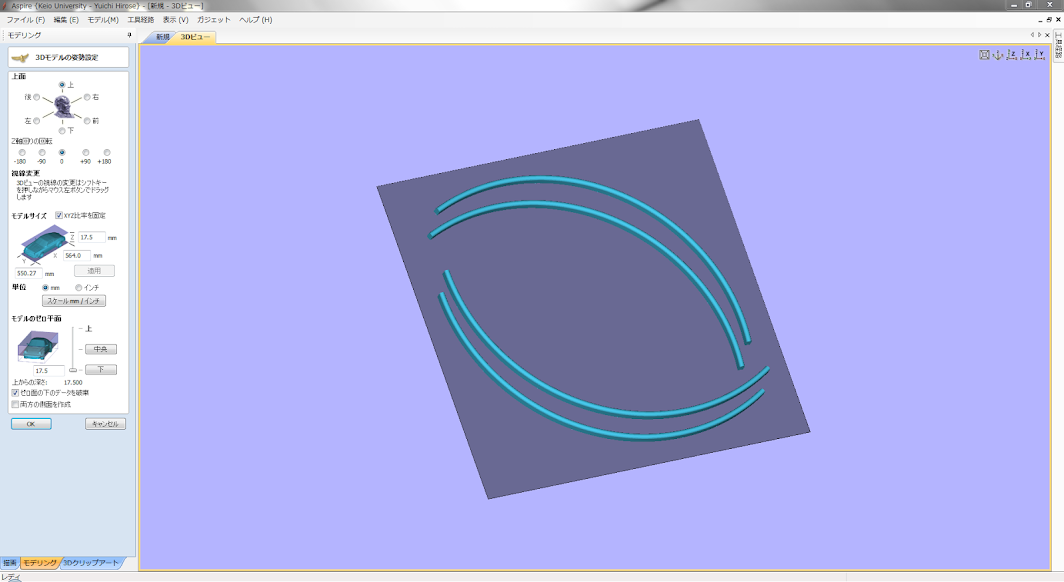
- I used Rhinoceros for CAD and Aspire for CAM.
- After modelling on Rhinoceros, you sould export the object(s) as a STL file.
- On Aspire, click File/Import/Import components/3D models to import the STL file.


- Here are tutorials for Aspire.
http://www.vectric.com/support/training-material/aspire.html - I made one milling path with which the machine mills the shape for 3 directions(x, y, z) and one profile path with which the machine just cuts through the profile.
- It is also possible to mill out the object only with the milling path but it will take a very long time.
What I couldn't get is this. Seeing this page, it seems there is a way to mill just around the object, not all of the rest part from the object, but I couldn't find how to do this on Aspire.
So it worked like this below. - ▼ milling (I want to know how to mill just around the parts, not the whole of the material)
- ▼ cutting out
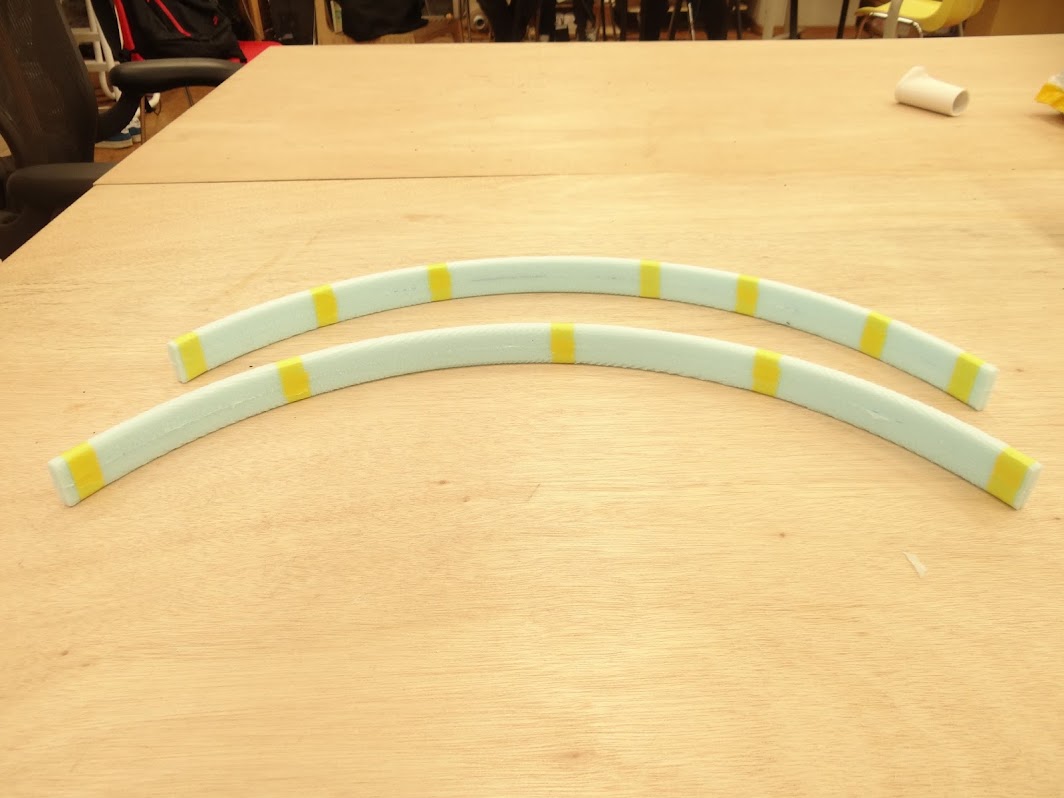
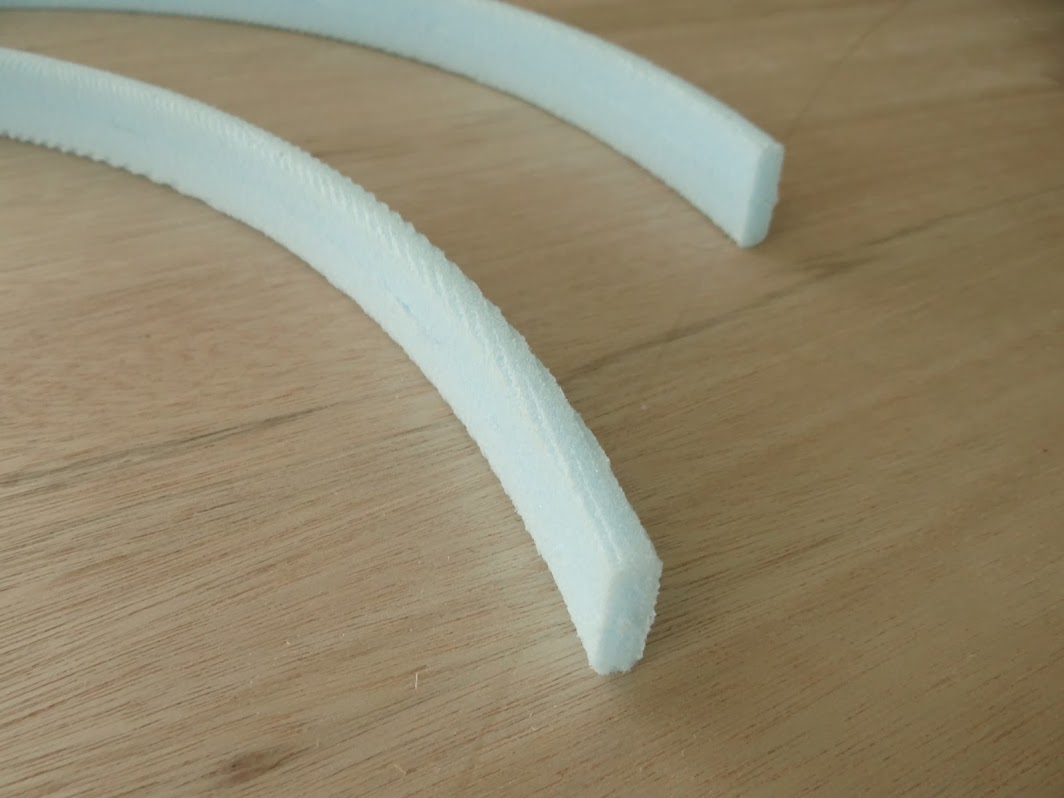
- The result was pretty nice.


- Stick the parts together


- After leaving about 6 hours, they were thoroughly sticked.
(I slept for 6 hours after glueing and checked the result after waking up so they might be sticked in less hours.) 


Sanded a little.
Mill and cut parts from styroform


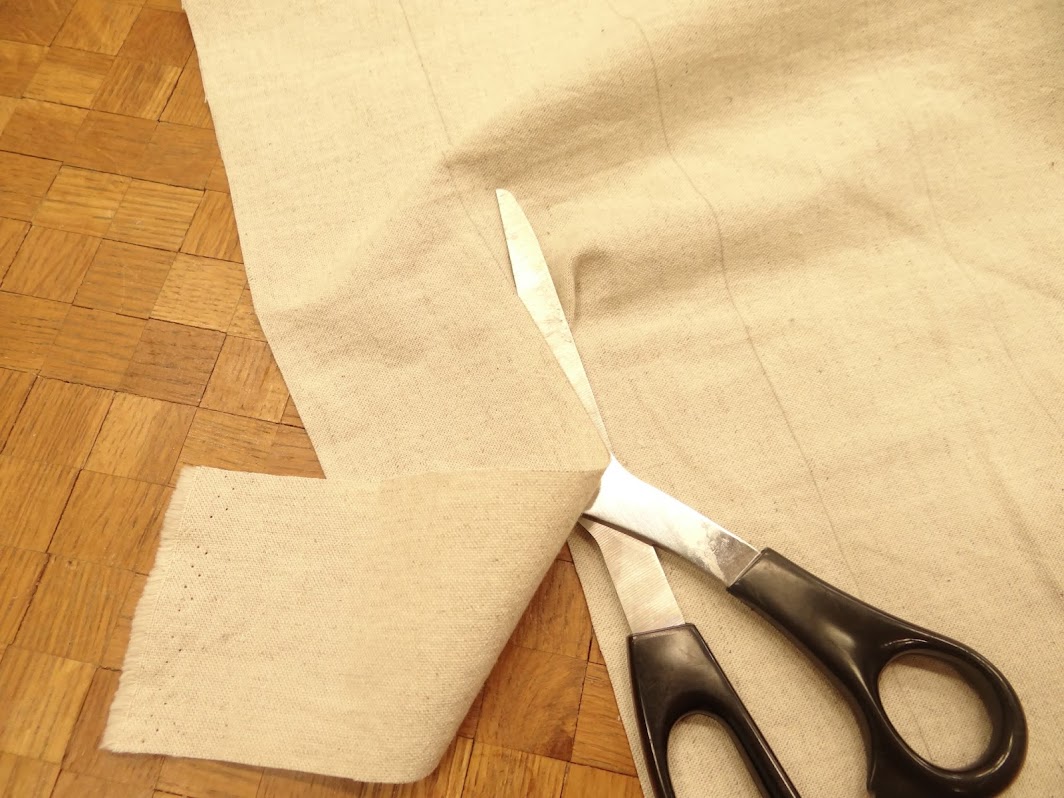
- Cut cloth

- Just cut. I manually cut it with sewing shears.
You also can use a lasercutter to do this when you want to cut a complex shape.
(BUT NEVER CUT PVC(polyvinyl chloride) WITH A LASERCUTTER.) - Mix resin and its hardening agent

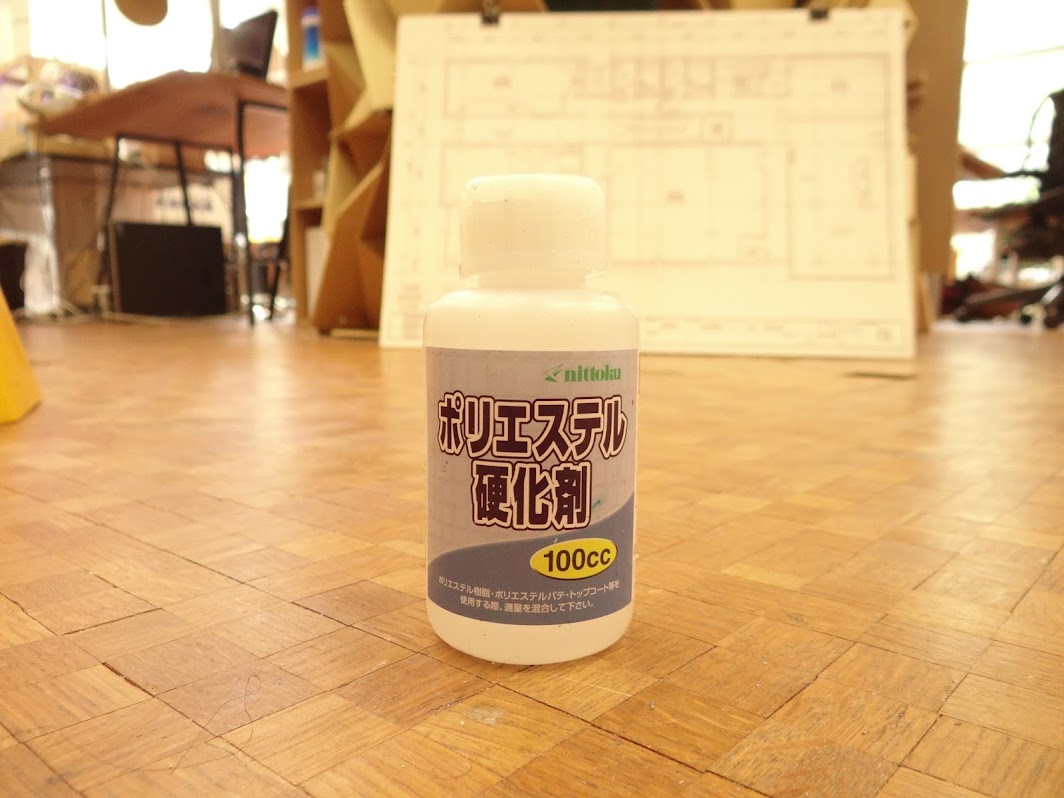
▲ Polyester resin
▲ Hardening agent- I used polyester resin and its hardening agent.
resin : hardening agent = 100 : 1~2% (maybe by weight, not volume) - So I firstly poured the resin until it became 200g then poured the hardening agent until the whole weight (the resin + the hardening agent) became 202g.
- Causion
- Do this outside the door.
- Use a mask which can protect VOC(Volitile Organic Compounds 揮発性有機化合物).
- Don't use fire near polyester resin. - Plus, at this section, I defininetly recommend you to use disposal gloves.
I used this.
http://amzn.to/10KZmEY - Failure
I painted resin on 6 pieces of cloth (aprox. 800mm * 70mm each) but 202g was not enogh.
I used another 100g resin. - Wind pieces of cloth around the milled styroform
- This part was most difficult in this week.
- Failure
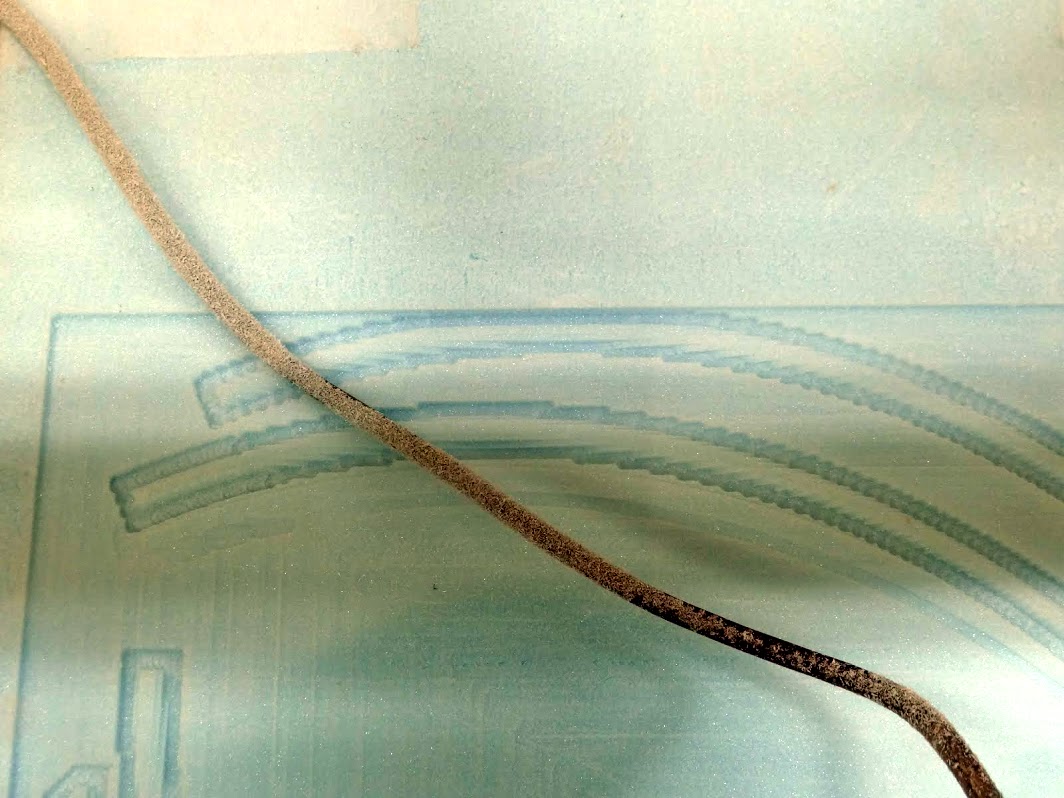
- The milled styroform were too thin and weak, one of them was broken and the other one was curved by the weight of resin.
- The pieces of cloth don't stick to the styroform parts well, which leads to the bad result I describe below.
Paint resin on the pieces of cloth and wind them around the milled styroform


- For bacuum bagging, I used a futon compressing bag instead.
I bought the cheapest one at the DIY store near my house.
This one. http://mp.moshimo.com/article/573178
I used an usual vacuum-cleaner with this.
Also, a DIY store clerk told me that polyethylene and nylon of which the futon compressing bag is made do not bond to polyester so I didn't use other materials like breather sheet (Should I have used?) - I left it for about 24 hours.
(If you use epoxy instead of polyester, it may be shorter, I guess.)
Vacuum bagging

▲ The styroform part was originally perfect curve but it was curved by the weight of resin.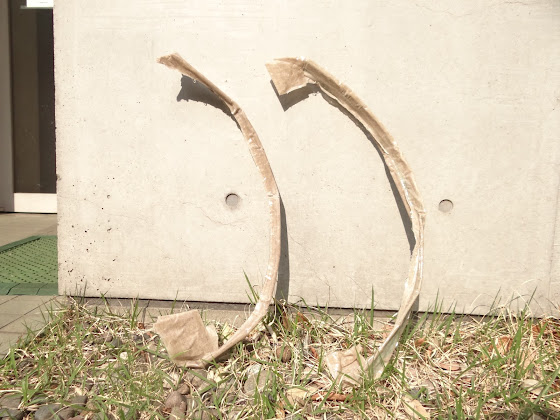
▲ left: 2 pieces of cloth on each side(face and back) (the styroform is curved one) / right: 1 piece of cloth on each side (the styroform is broken one)- As I described above, when putting them in the futon compressing bag, they were already curved/broken.
So, of course, they cured with curved/broken.
Actually I gave up their success halfway, so I tested how hard it become according to the numbers of pieces of cloth put on the styroform part.
Result

The first one is not layered. I put one piece of cloth on the face side of the styroform part and one piece on the back side.
The second one is layered. I put 2 pieces on the face side and 2 pieces on the back side.
There is a big difference between each hardness. (Of course the layerd one is much harder.)
- - use a mold and sandwich cloth between the styroform part and its mold.
- - do not use styroform but another harder material
- - stick the cloth to the part with double-sided tape or glue etc. before painting resin
- - use smaller pieces of cloth then they may stick to the part better according to the shape of the part.
- - (maybe) use more powerful vacuum-cleaner or a vacuum pump (I used an usual household vacuum-cleaner, which might be weak for vacuum bagging.)
Possible Solution
- URLs I referred this week. (Sorry, they are all in Japanese.)
- About FRP and resin
- アーカイブ/ウッドカヌーの作り方/FRPコーティング(ヒロウッデンカヌーショップ)
▲ This page shows clear differnce between polyester and epoxy.
ポリエステルとエポキシのちがいがわかりやすく説明されています。おすすめです。 - エポキシとは?(ヒロウッデンカヌーショップ/エポキシ)
- 株式会社 月形-有機系材料・不飽和ポリエステル樹脂-
- FRPを自分でいじる
- ごく少量の硬化剤の計り方-Ⅱ:作る人 (つくるんちゅ)日記
- http://fukusukeraigyo.digi2.jp/jisakufrppaipu/jisakufrppaipu.html
- About fenders of bicycles
- 晴れのち気ままに~自転車との日々~ なんでもやってみナイト! ~泥除け自作奮闘記~
- About vacuum bagging
- 真空引き用バキュームポンプの製作
- まずバギングの準備から - 仙台で、ビッグバンドとか・・ - Yahoo!ブログ
Reference
