3d Printing
Assignments: Design and 3D print an object. Scan and 3D print an object
Assignment I: Design and 3D Print an Object

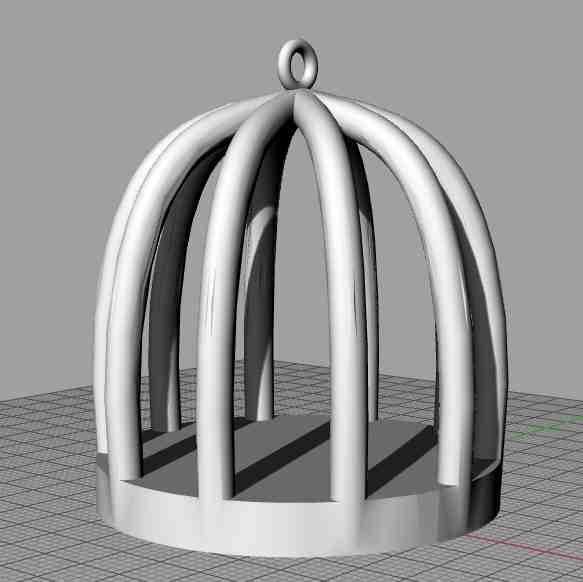
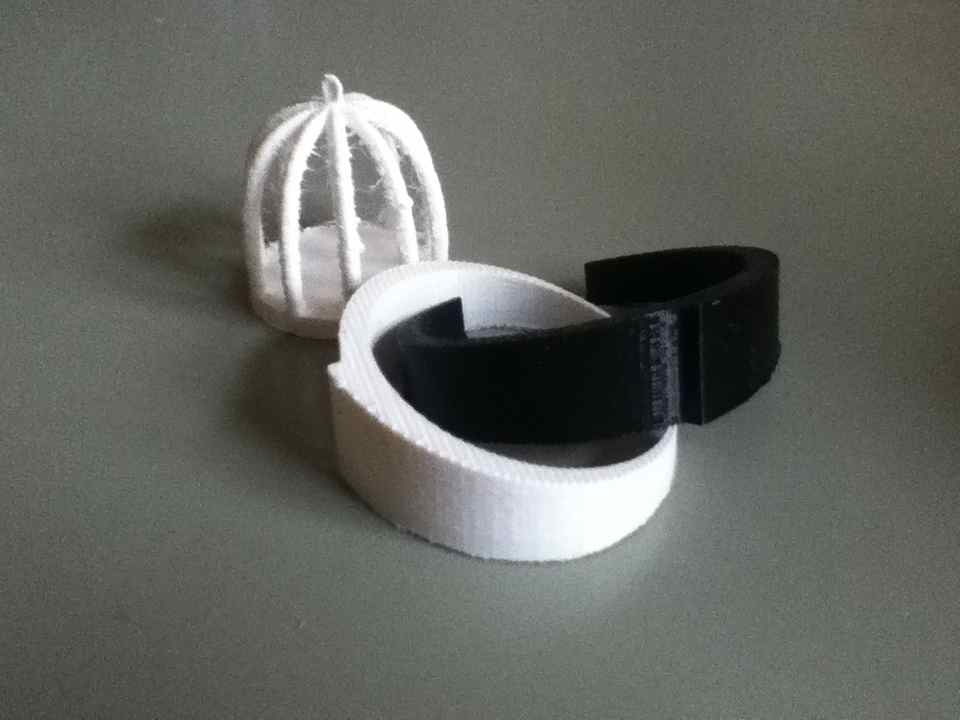
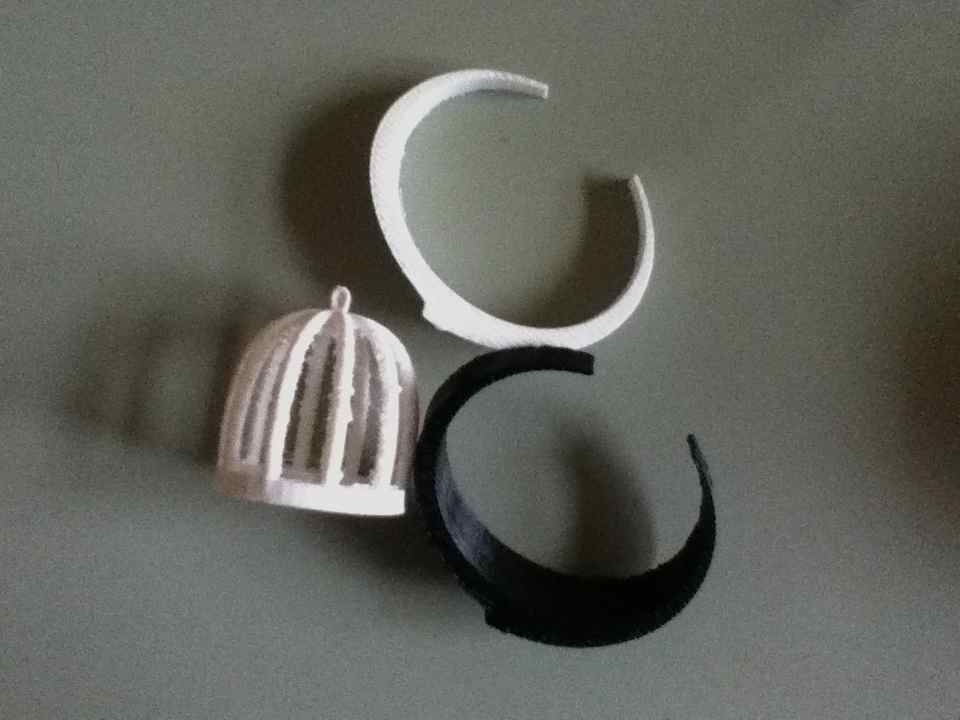
Printed my Rhino3d designs of a bracelet and bird cage.
Preparing models in Rhino for export as Stereolithography (stl) files
- Make sure your model is scaled to the size of the 3D print you want to make
- Move the model close to the Rhino Model Origin, and place the model in the positive X,Y, and Z quadrant.
- Select all the surfaces to be exported and join them into a single poly surface
- Deselect the model and try reselecting it. If the entire model does not reselect, then you have gaps in your model and you need to work on your model so all the parts of your model will join together
- Once your part is joined, select the joined part and choose: Mesh>From Nurbs Object. A window will appear. Adjust the slider and hit the preview button. This will preview a new mesh model that we will export as an STL file. Note: For a square shaped or a model with mostly flat faces, you can use a lower polygon count. Models that are curvy, you should use a higher polygon count. Caution: Higher polygon count = Larger file size and more time to process down the road
- Click OK to create the new mesh file The two models will now be on top of each other. To select the mesh model, choose: Edit>Select Objects>Polygon Mesh
- Choose: File>Export Selected to save your model as an STL file.
- Under Save as Type, choose: Stereolithography (*.stl) and Choose Save Under File Type, Choose Binary Make sure that Export open objects is checked. Click OK to save
Assignment II: Scan and 3D Print an Object
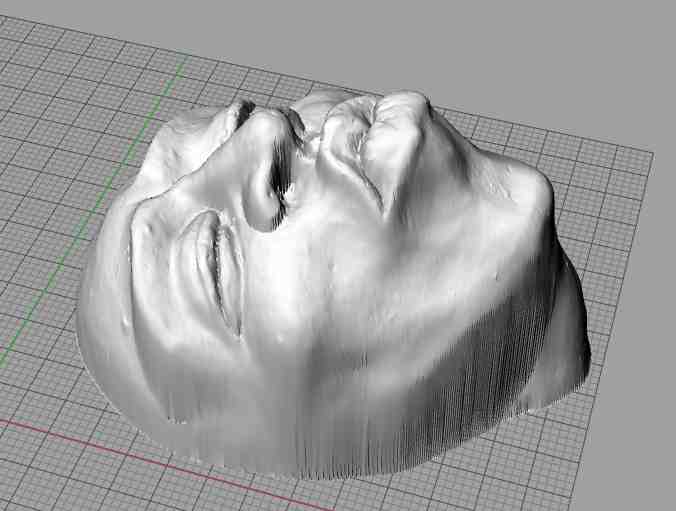
Scanned a small clay head on the Modela in the Dr. PICZA software.
Preparing Dr. PICZA for Scan
- Put object to scan close to Modela 0, 0
- Set scanning area.
- Preview scanning to narrow scanning area to small as possible.
- Scan pitch was set X = .2 Y= .2 , Z = 0
Dr.PICZA creates a ".pix" file which I exported to a ".stl" file. Import the ".stl" file into Rhino3d for cleanup and added cap to bottom. Choose a lovely red filament and 3d printed on Ultimaker.
 |
|
| Dr.PICZA pix file exported to stl in Rhino3d for cleanup (click to enlarge) | |
 |
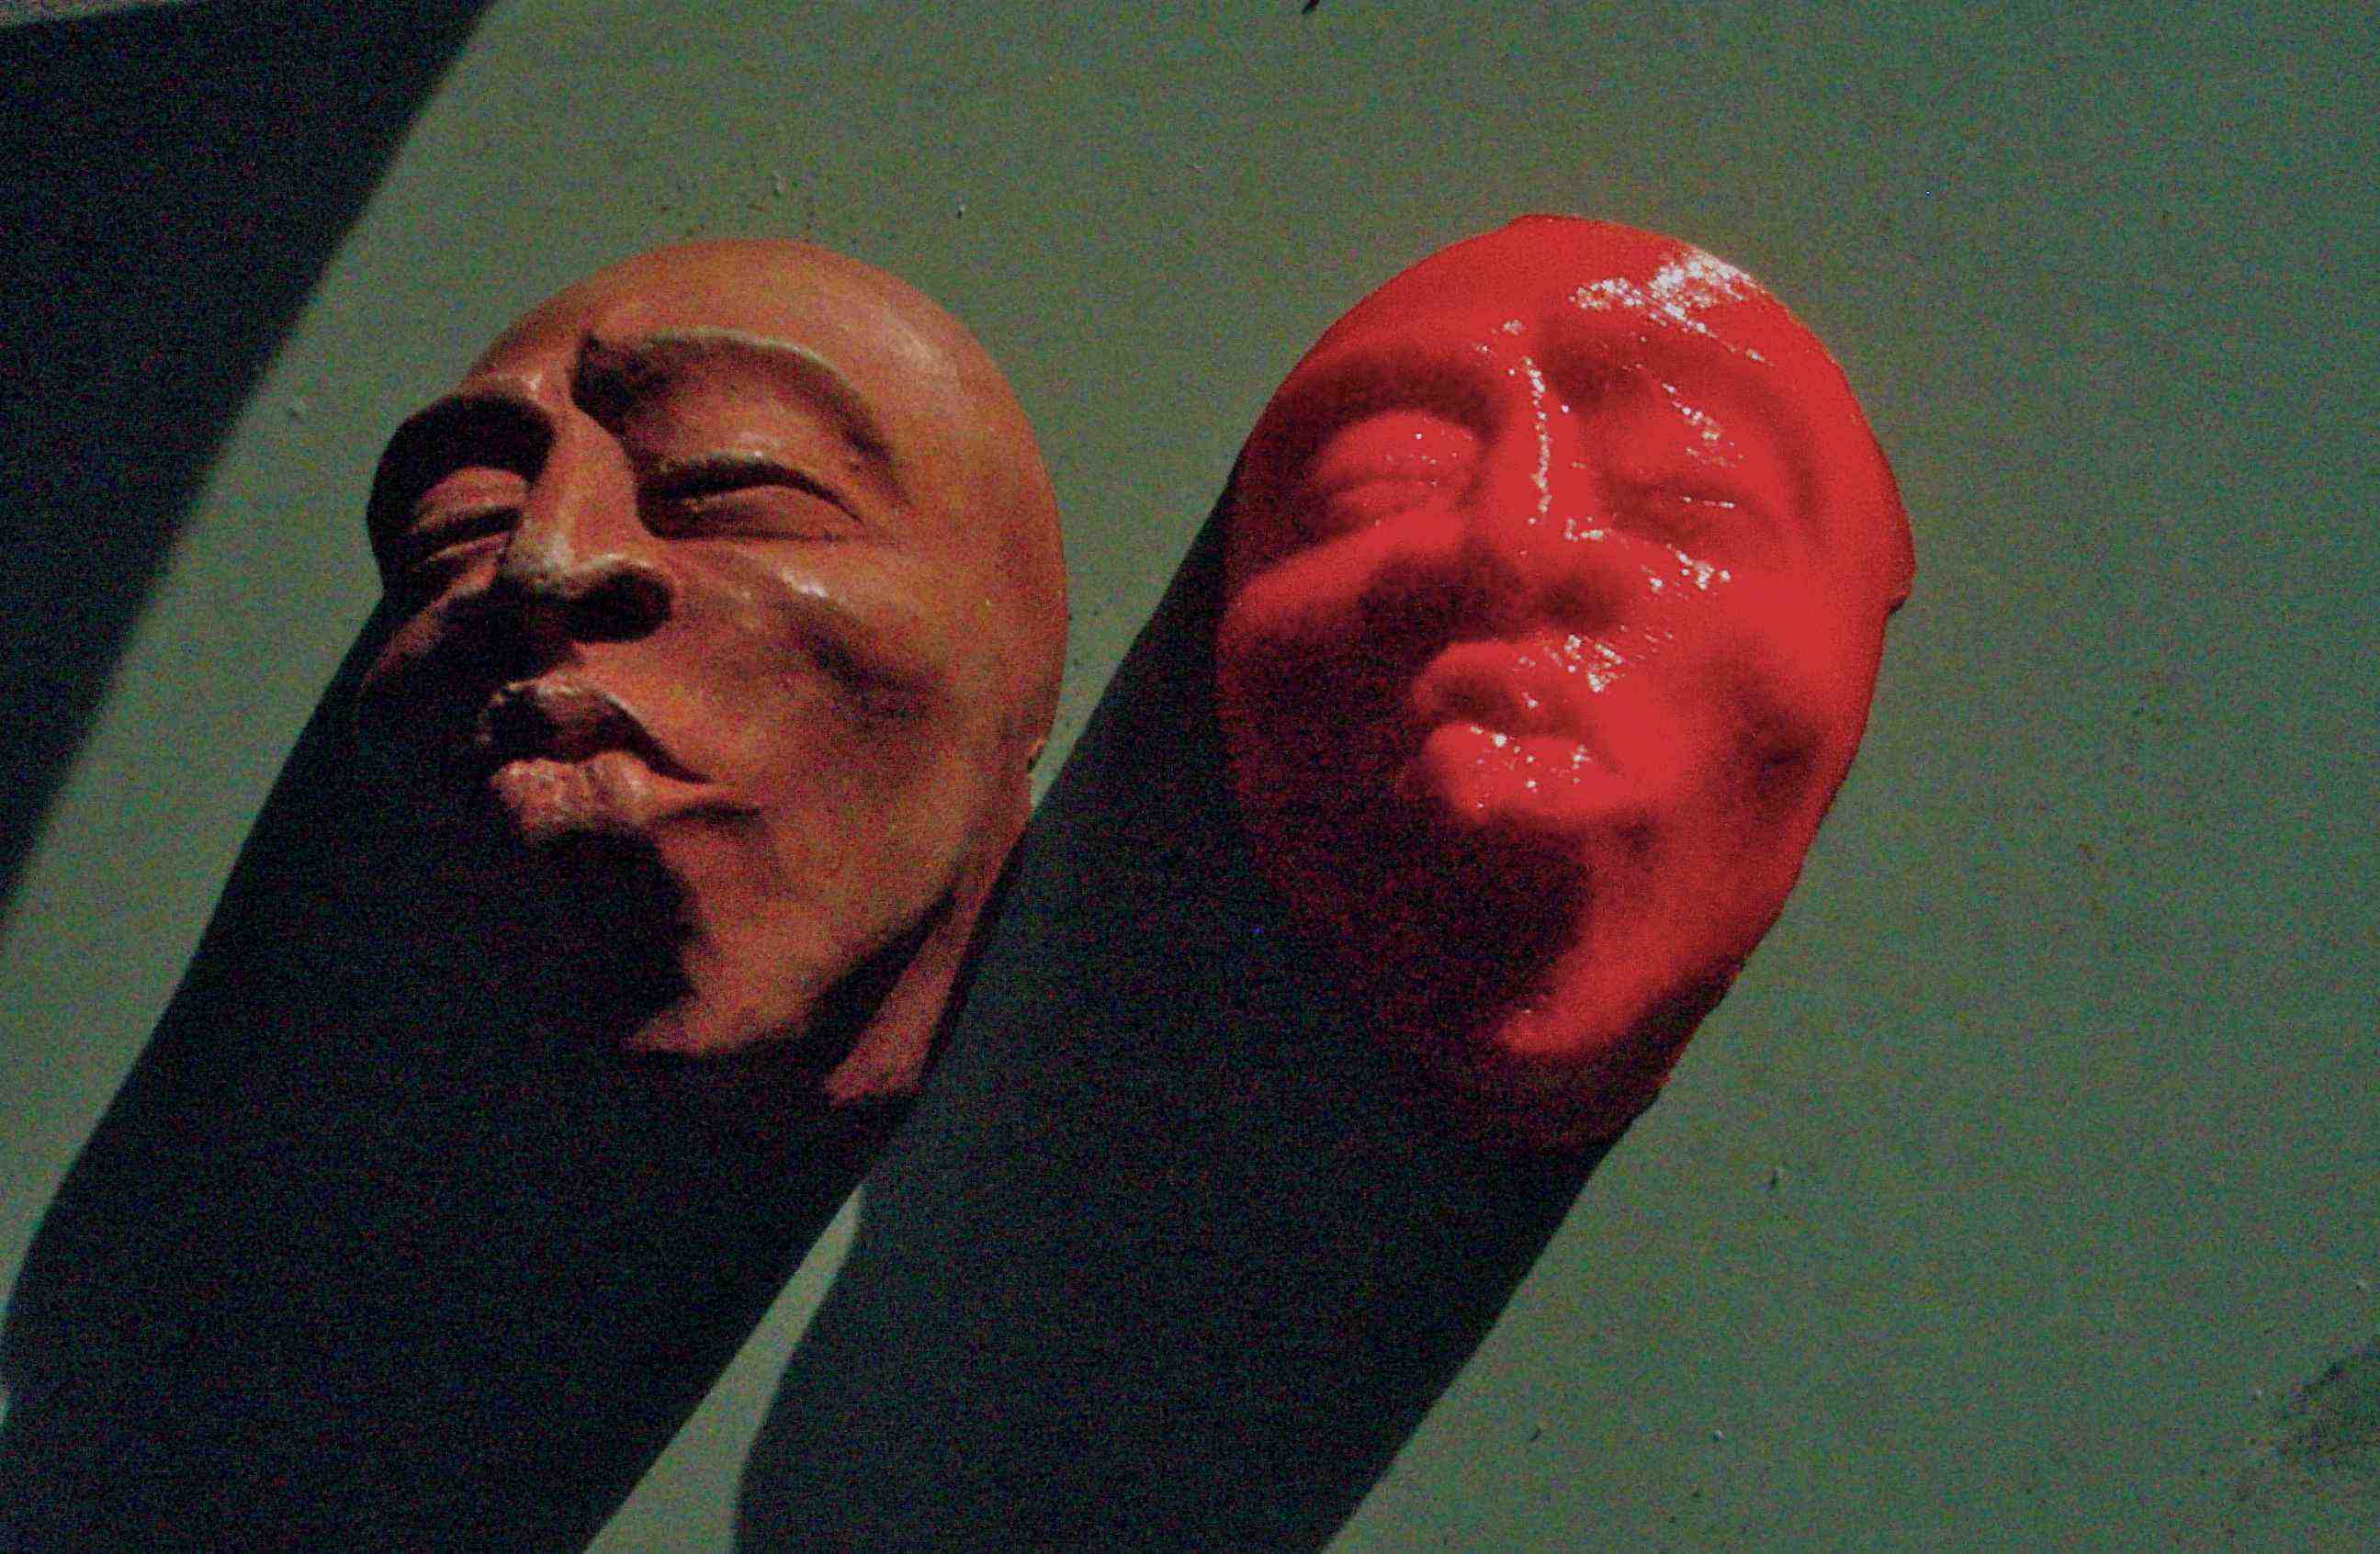 |
| 3dPrinting (click to enlarge) | Clay original and finished 3D printed object from scan |
 Lessons learned
Rhino
Scanning on Modela took over 16 hours.
After exporting image to ".stl" import that ".stl" file back into Rhino and check image again for open edges.
Ultimaker
If possible keep a local copy of the ReplicatorG app on your own computer with your preferred settings.