Project Draft
As my fab academy course project, I’m going to do a project called automatic ph controller, because I’ve built it before and I have never been able to do it as a project.
That is why I came up with this project as all the machines have to be used for 3D printing and PCB designing to build this project
Rough sketch
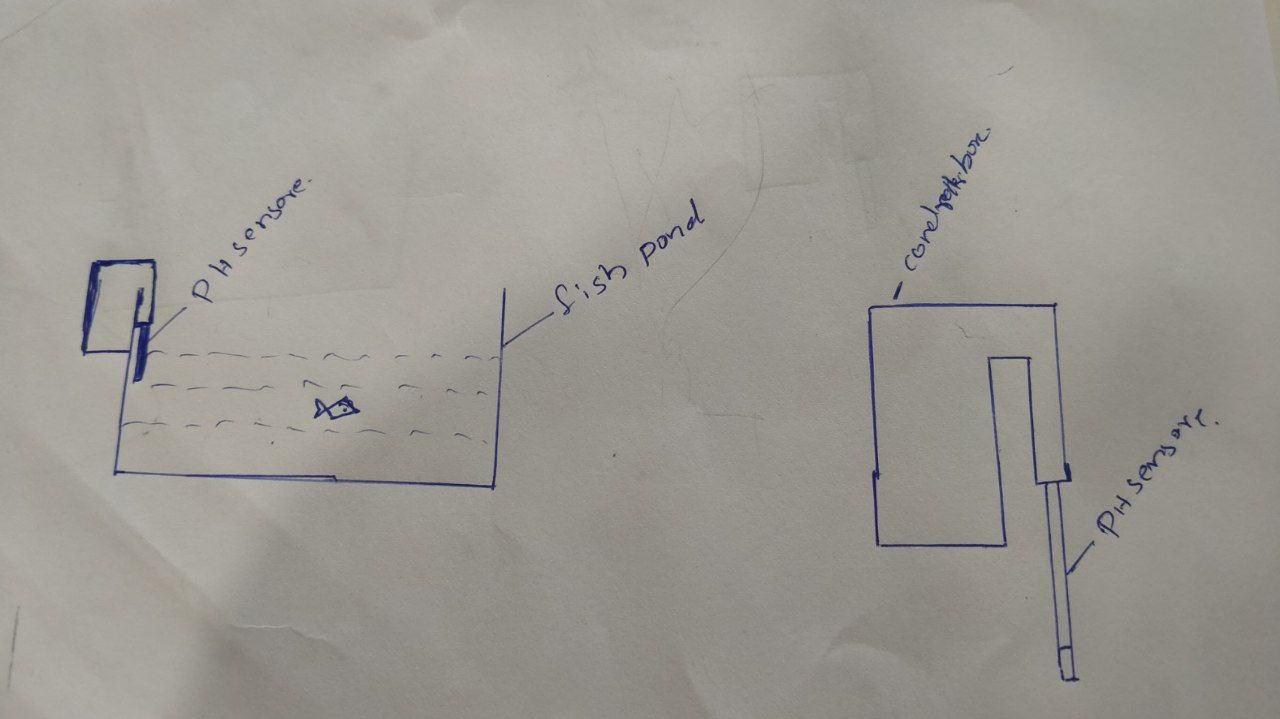
I’m working on a project called Automatic Ph Controller, which can be used in any tank, such as swimming pool, fish pond, and an aquarium. It has a PH sensor to measure the PH and then the PH is correct by using two pumps connected to an acid and alkaline liquids . I do a project like this. Used for.
3D Design


My FabAcademy Project Diary
The Final week’s class of my fab academy life took place and the professor Neil class started as usual,this week assignmend as khown as Project Development
Time Management of my final project

Time Management pdf Download
Bill of Materials

Bill of materials pdf Download
I started thinking about my Fab Project at the starting of my Fab Academy , I got many ideas and completed literature survey of some of them.
1.A Five axis Photography CNC Machine ( We done a Five axis Photography CNC during our Machine Designing Weeks Group Project thats why I want to do something diffrent)
2.Automatic pH Controler for fish pond -(I planned to do this Automatic pH Controler for fish pond, I discussed with tutor and my collegues after series of literature survey finally I droped this project)
This is my Third Project Idea.
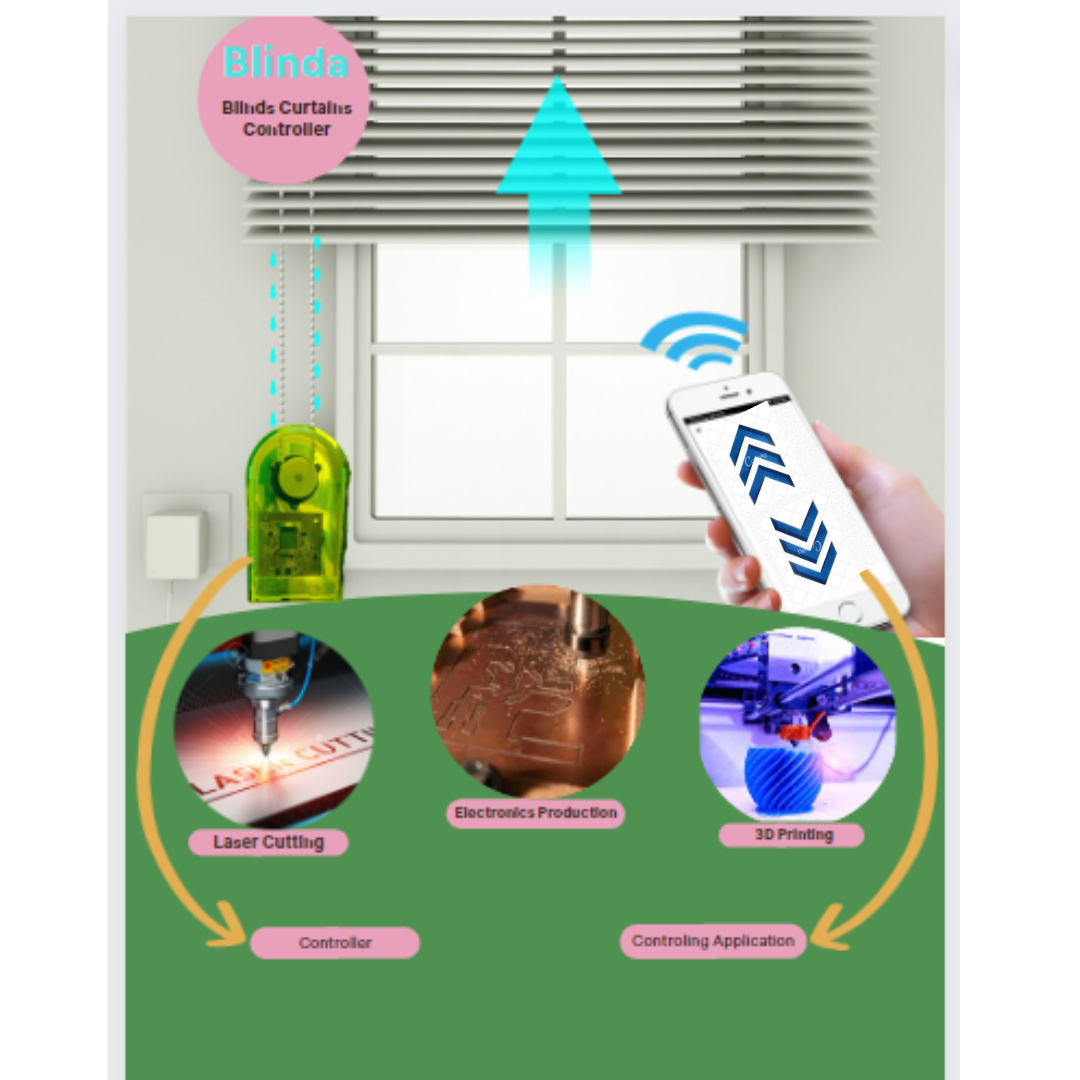
Blinda - Blinds Curtain Controler using Application
So first I start the design work,the big problen is to dsign the blind gear, in that gear to help to rotating to thr chain, So I find the design models to the google,At last I decide to make the gear.
So I start the designing
This is the design result

So after thet I test to the blind gear the curtain with the gear motor I chacked t the strength,power,stability it’s good
After that I start to desigh the control board using ESP32
This is the schematic
 This is the PCB

Then I milled it
 After millin I solderd the components,This is the final result

After the PCB making I start to body designing in fusion360
Then I printed the 3D printing parts

laser cutted parts

I assambled all parts
 After assambling I just connected to blind curtain

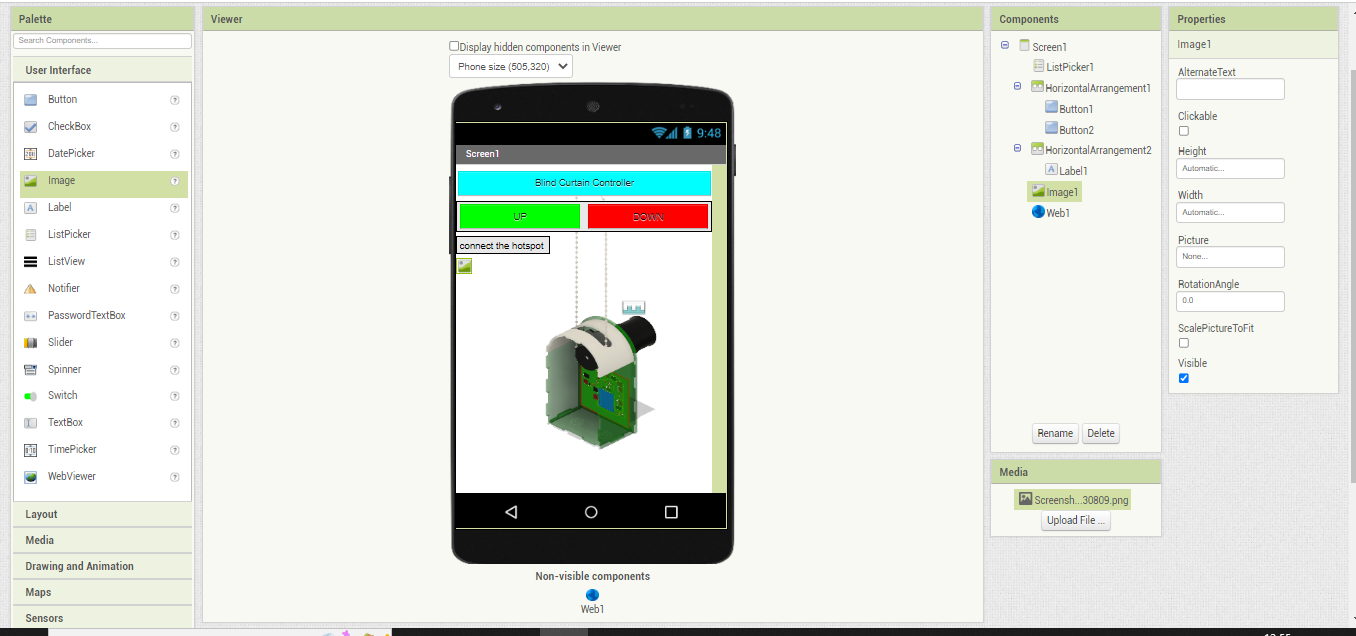
Then next step for my project to make A controlling application, So I make the application in MIT App Inventor, Detail for application making I attached for my Interface and Application Programming week’s documantation.
So I make the application
This is the result the design section
 This is the block section

After that I star the programming
This is the code
#include <WiFi.h>
const char WiFiPassword[] = "";//Leave Blank if you do not want to have a password to enter the Node
const char AP_NameChar[] = "JAndro" ;

WiFiServer server(80);

String request = "";
int LED_Pin = 16;

void setup()
{
  Serial.begin(115200);
  pinMode(LED_Pin, OUTPUT);
  digitalWrite(LED_Pin, LOW);//Turn on LED
  delay(400);
  digitalWrite(LED_Pin, HIGH);//Turn off LED
  WiFi.disconnect();
  boolean conn = WiFi.softAP(AP_NameChar, WiFiPassword);
  server.begin();

}

void loop()
{

  // Check if a client has connected
  WiFiClient client = server.available();
  if (!client)  {
    return;
  }

  // Read the first line of the request
  request = client.readStringUntil('\r');

  if       ( request.indexOf("LEDON") > 0 )  {
    digitalWrite(LED_Pin, LOW);
    //client.flush();
    client.println("HTTP/1.1 200 OK\r\n");
    client.println( "LEDON");
    client.flush();
    Serial.println("inside ON");
  }
  else if  ( request.indexOf("LEDOFF") > 0 ) {
    digitalWrite(LED_Pin, HIGH);
    //client.flush();
    client.println("HTTP/1.1 200 OK\r\n");
    client.println( "LEDOFF");
    client.flush();
    Serial.println("inside OFF");
  }
  delay(5);

}
I connect my board to laptop with FTDI programmer
 program uploding done
After I connect the controler in our Fablab’s blind curatin Na it’s work them
This si the result
All Files Download here Download

This work is licensed under a Creative Commons Attribution-ShareAlike 4.0 International License.
What does it do?
It will be controld blinds curtain.by utilizing applicaton control in up and down buttons.
Who’s done what beforehand?
Number of projects are done before, so I got inspiration from these projects to make my project
What did you design?
-
Blind Gear.
-
casing.
-
Moter holder.
-
PCB.
What materials and components were used?
-
Acrylic Sheet.
-
Gear motor.
-
ESP32.
-
Electronics Companies (Capacitor, Resistor, Regulator).
-
3D Printed Parts.
Where did they come from?
- Fab inventory.
How much did they cost?
-
Acrylic Sheet(2mm 30 x 25cm ) - ₹ 200/-
-
Single side copper sheet (70mm x 70mm) - ₹ 80/-
-
Gear motor - ₹ 150/-
-
ESP32 - ₹ 200/-
-
Voltage regulator - ₹ 3/-
-
Motor driver IC - ₹ 30/-
-
Push button switch - ₹ 10/-
-
SMD Resistor - ₹ 2/-
-
SMD LED - ₹ 2/-
-
SMD Capacitor - ₹ 2/-
What parts and systems were made?
-
The moter holde and blind gear are make using 3D printing
-
The casing will make Acrylic sheet used
-
Top Casing parts will make using 3D printing
What processes were used?
-
CAD modeling.
-
Electronics design.
-
3d Printing.
-
Laser cutting.
-
PCB milling and soldering.
-
Embedded programming.
-
Assembly.
What questions were answered?
-
In any situation the wi-fi will not get how this worked?
-
The strength of the gear?
-
The capacity of the moter?
What worked? What didn’t?
- My final project beautifully and worked as I imagined, There was nothing that didn’t work.
How was it evaluated?
-
The blind core gear will making is more task so I evaluat the make two more gears and test it will successfully completed.
-
I make to the PCB board it successfully completed.
-
I make to the application using MIT app inventer it successfully completed.
What are the implications?
- I can develop a better version of this device in future.