6. 3D Scanning and printing
This week I was first exposed to 3D printing, different filaments, and 3D scanning.
Link to group assignment page.
3D Printing
At this age, most, if not all, people have heard of 3D Printing. I got the chance to use them in a summer camp once, but I never got to actually finish and print my design. Before, actually printing my design, I am to test the printer and get exposed to its settings.
Group Assignment: test the design rules for your printer(s).
Testing
First, I downloaded the 3D printing software Ultimaker Cura using this link.
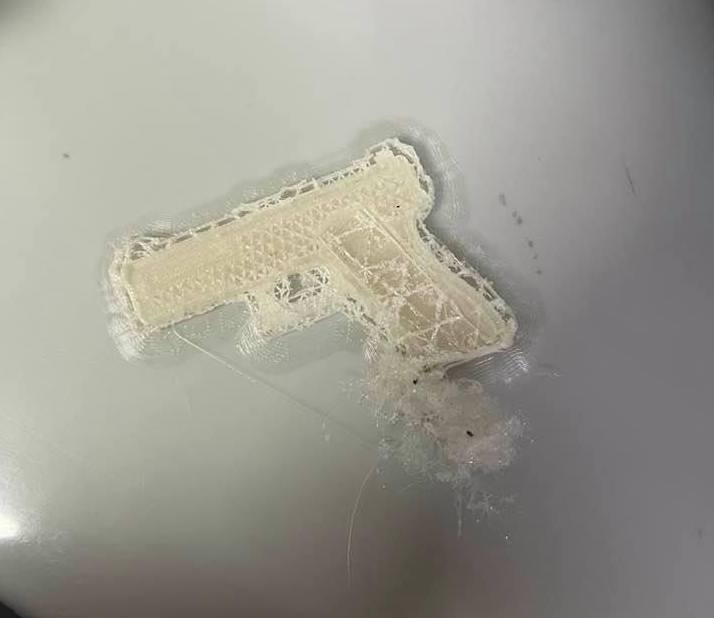
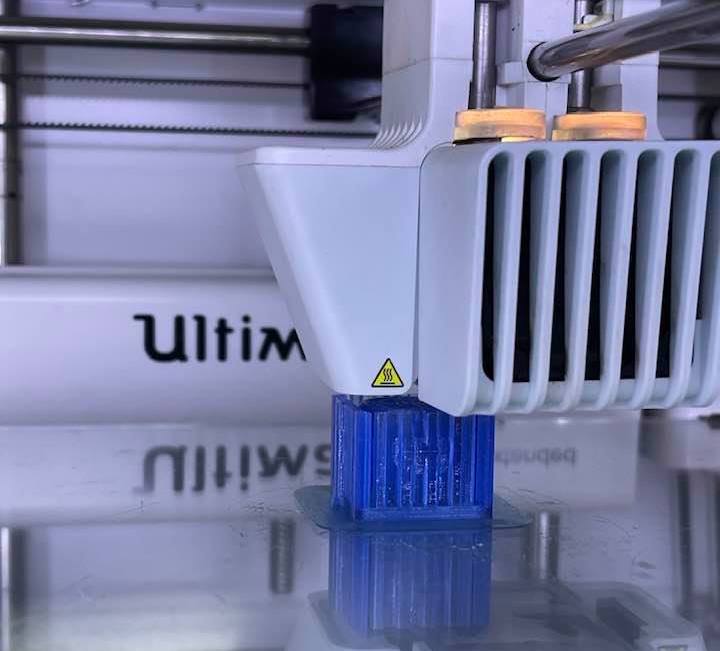
To test the design rules, I 3D printed a dummy gun I found on thingiverse.
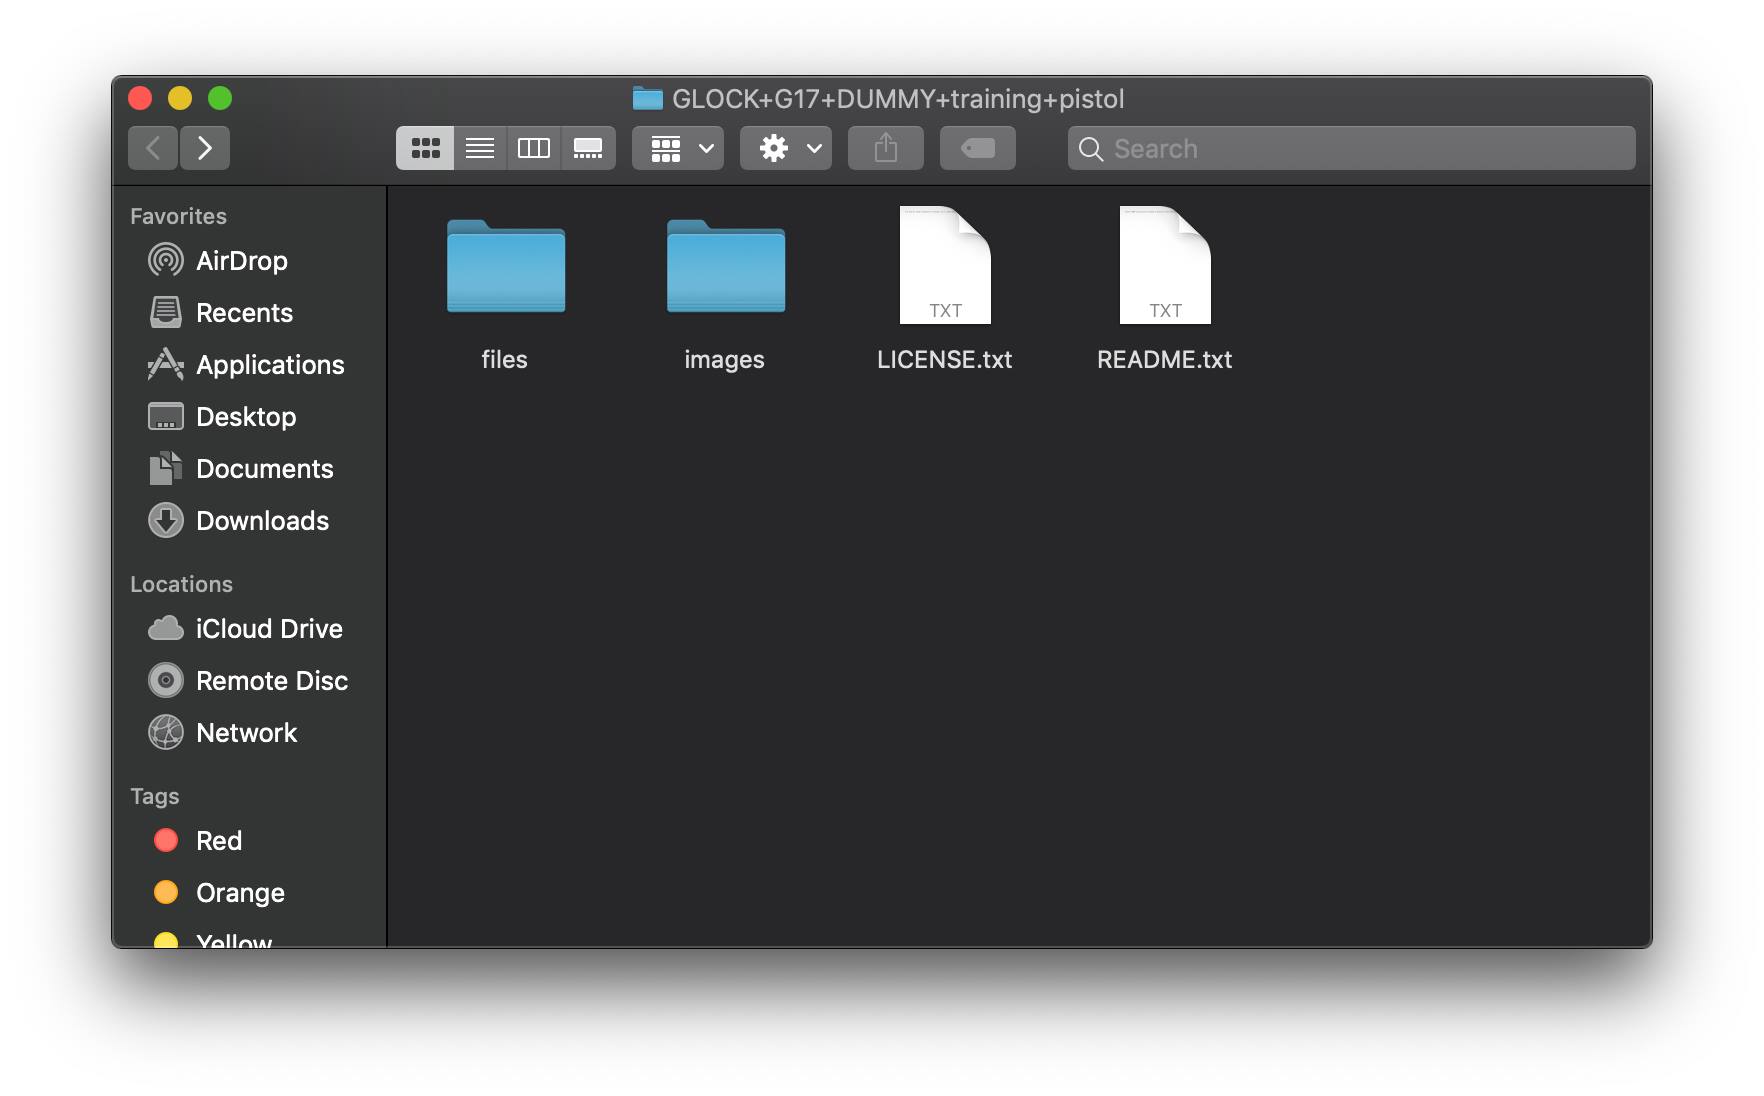
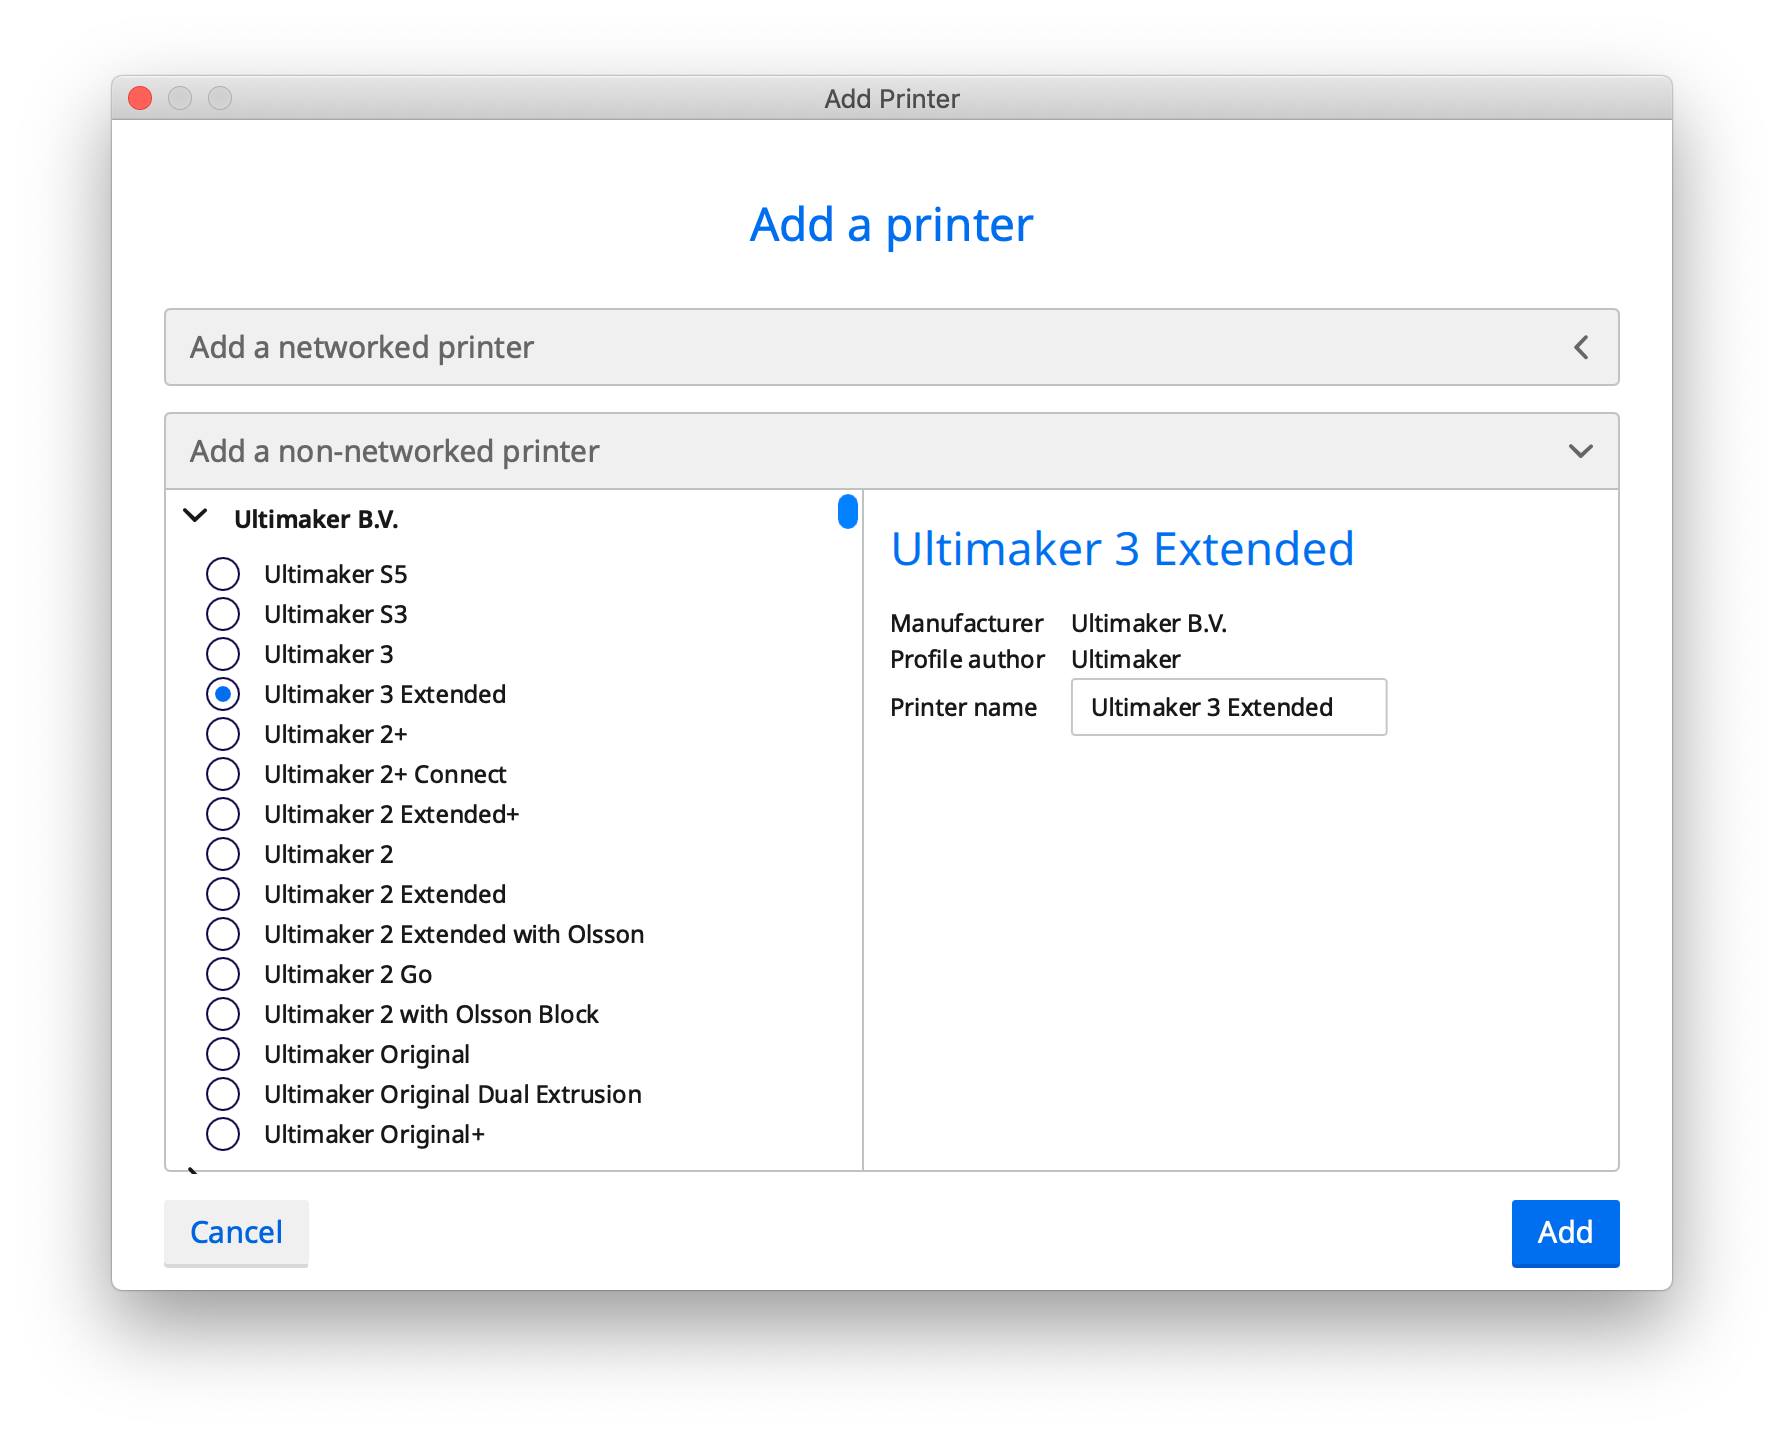
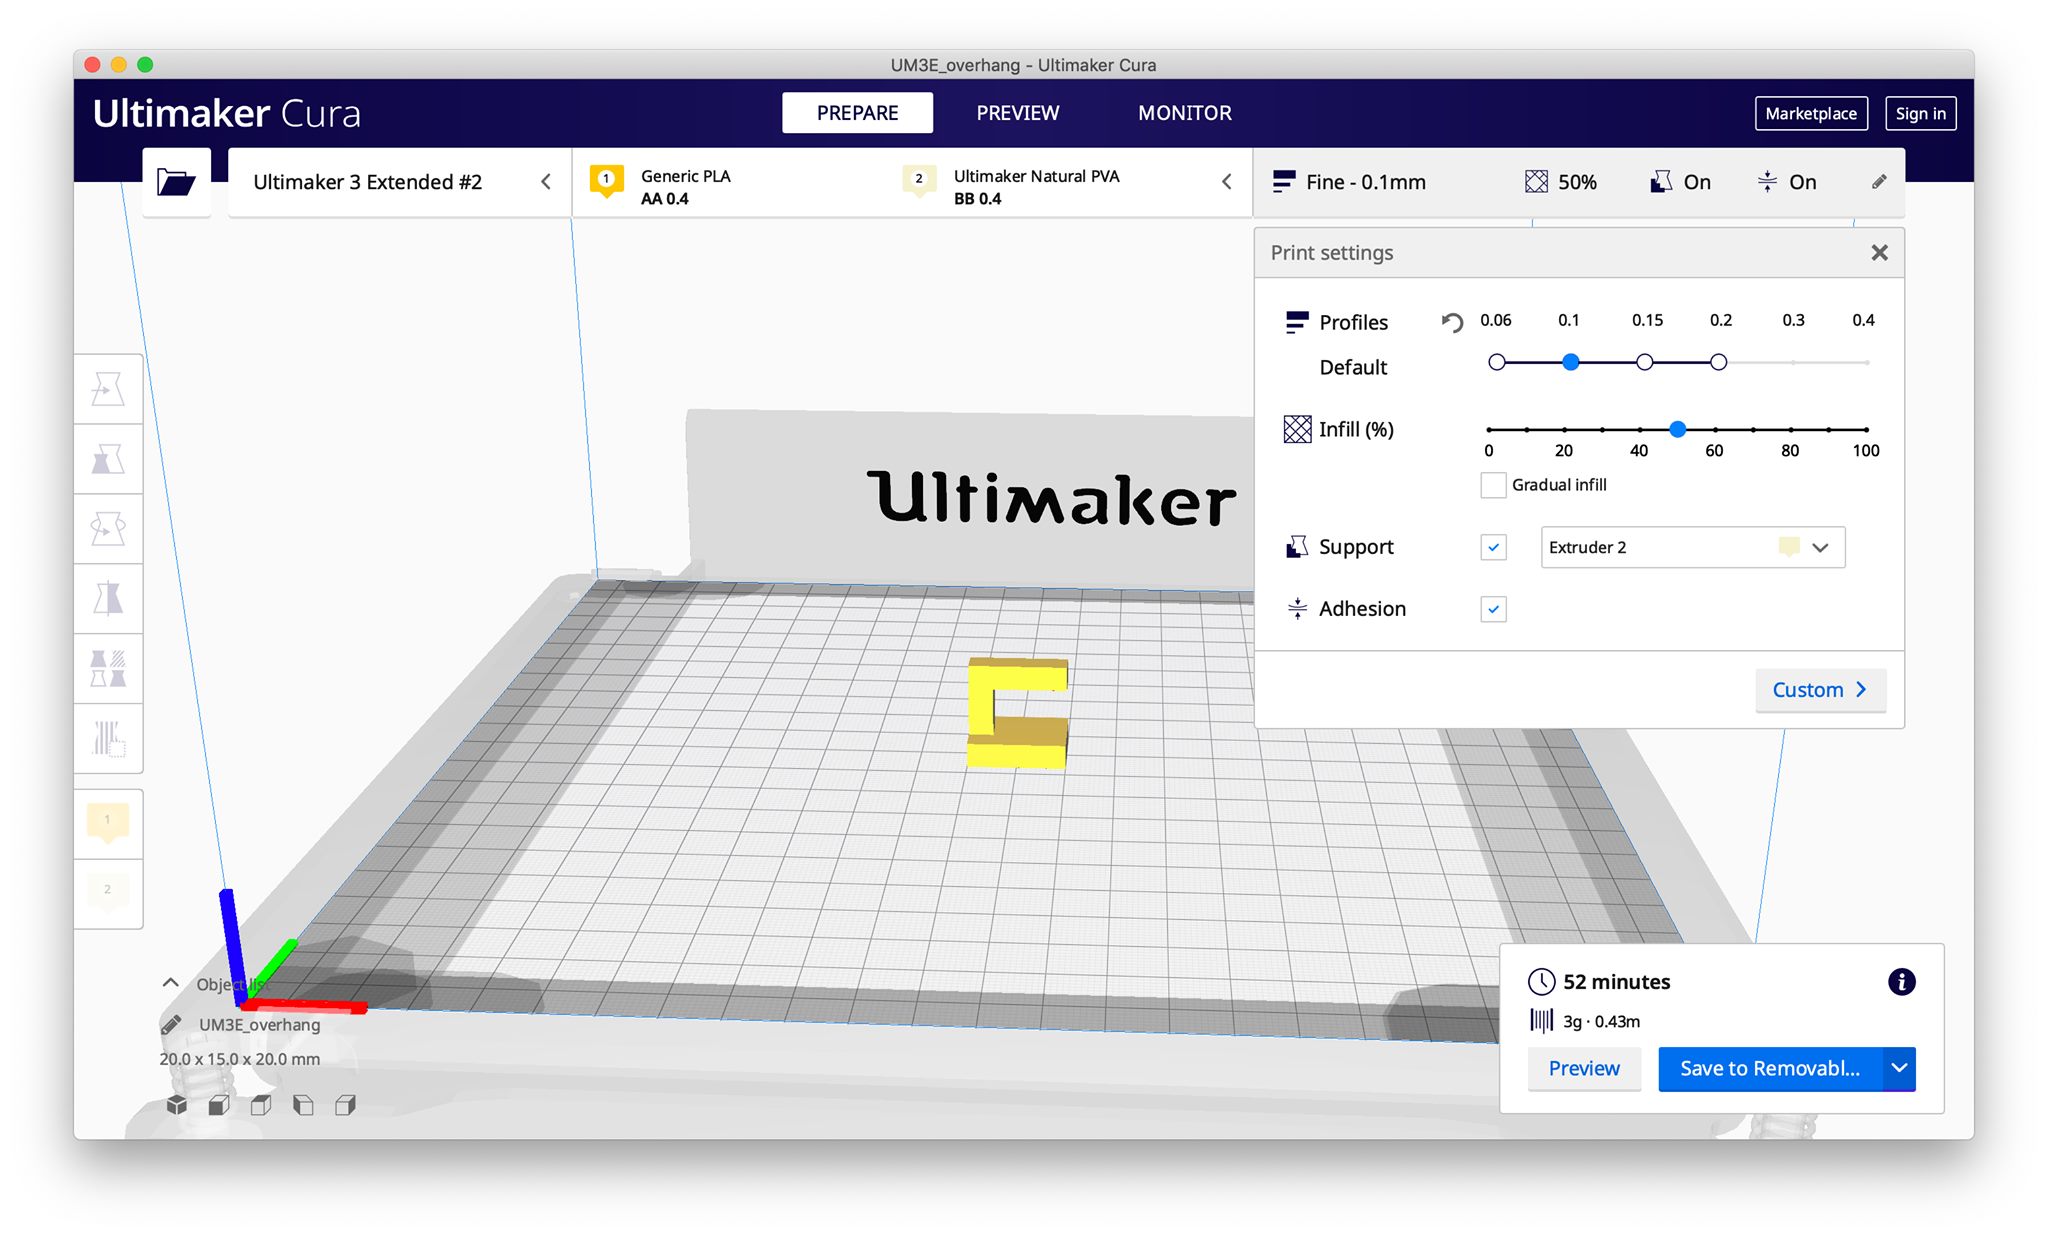
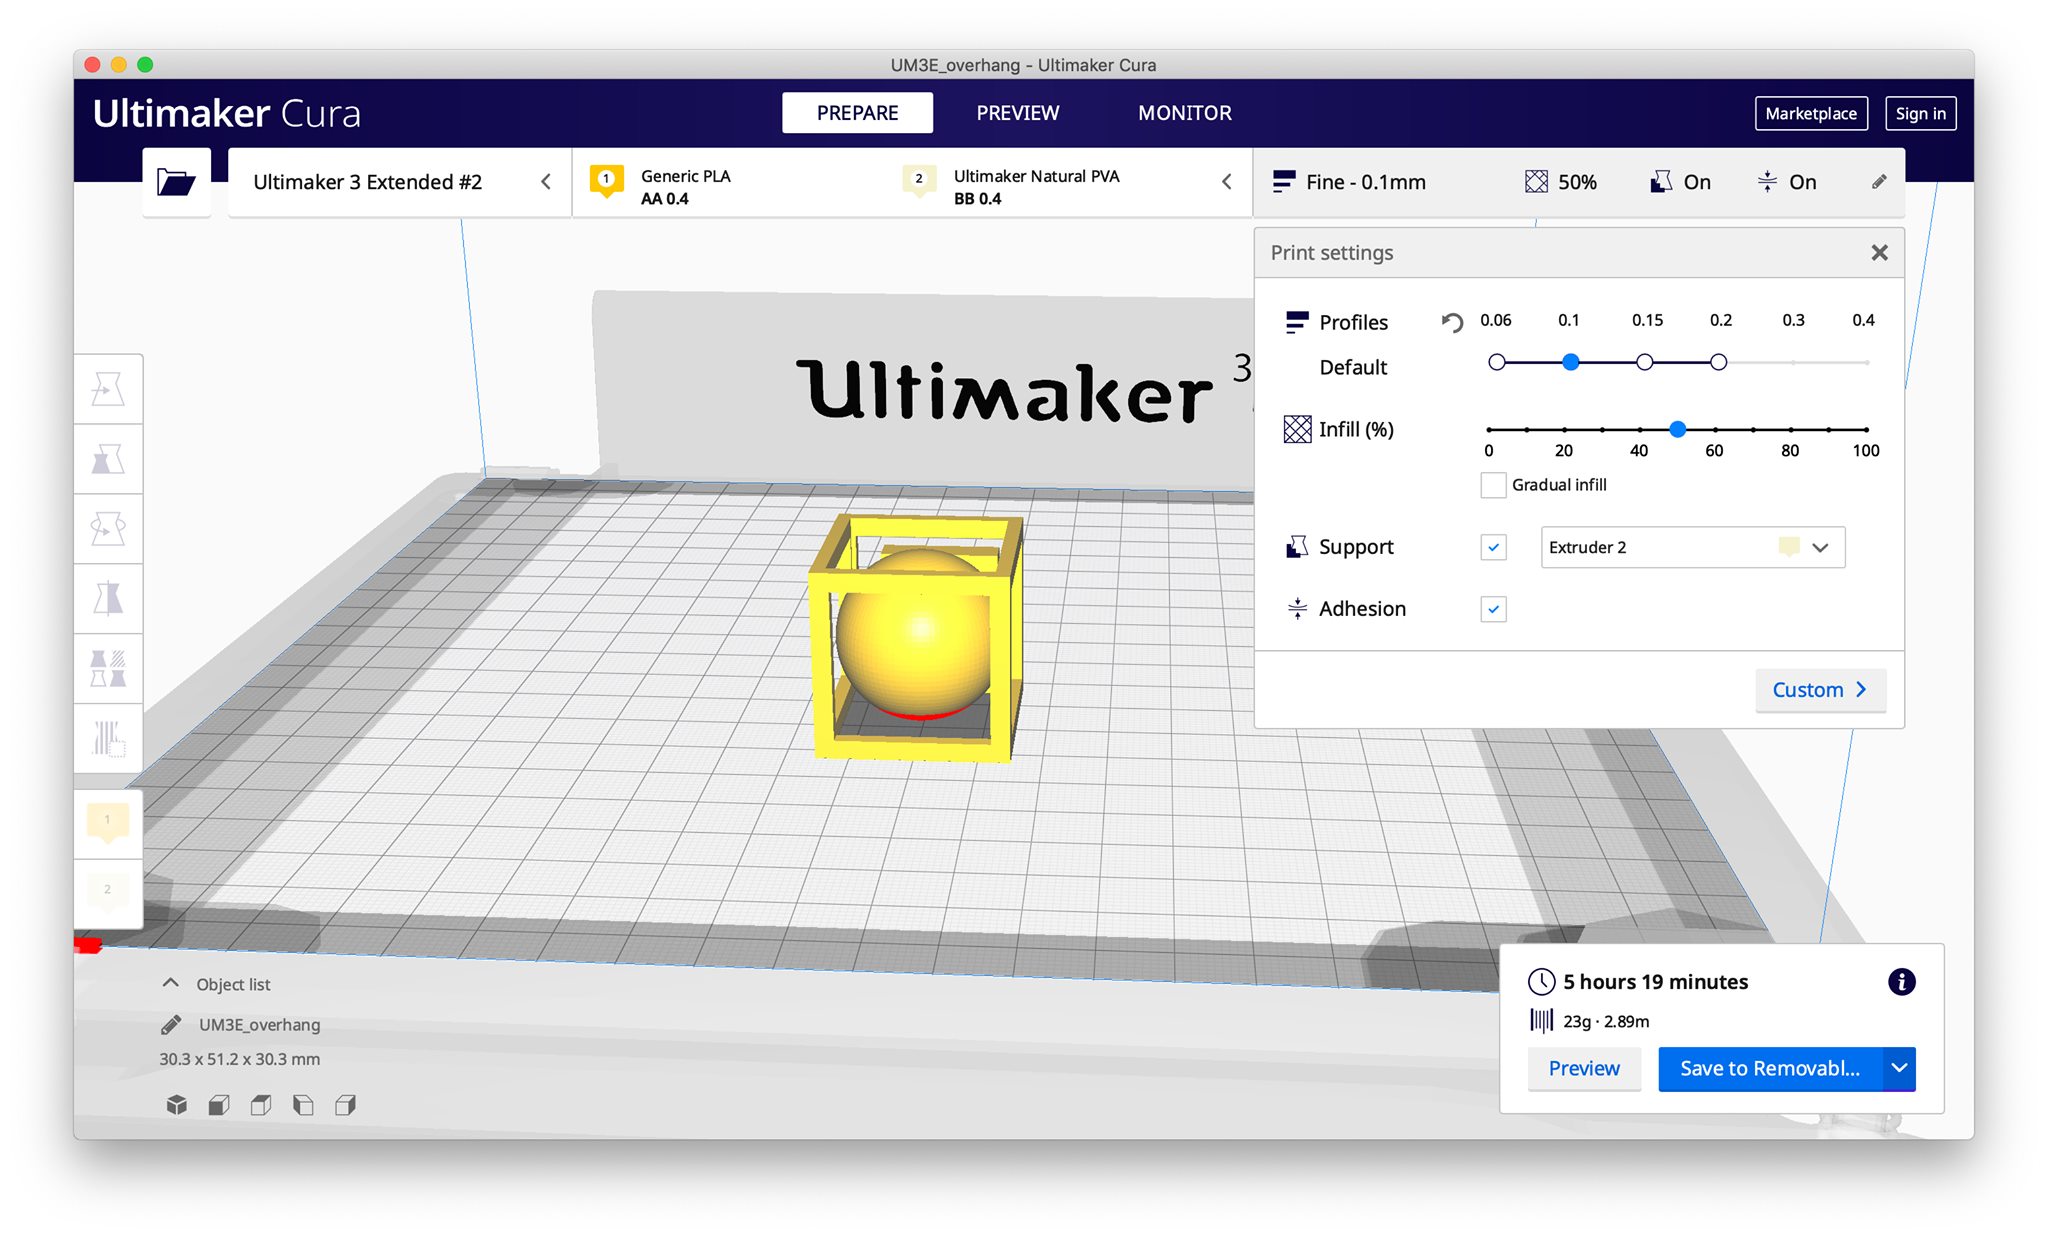
I downloaded all the files, and opened the .stl in the Ultimaker Cura software. To do so, I launched the software and then first connected to our 3D printer. Since I was using a USB drive rather than just connecting to it wirelessly, I connected to the Ultimaker 3 Extended under the non-networked printers.
After opening the .stl file in Cura, I edited the settings. First, using the rotate button, I rotated the object flat on the build plate. This way, the surface area in contact with the build plate is larger, offering a more stable build.
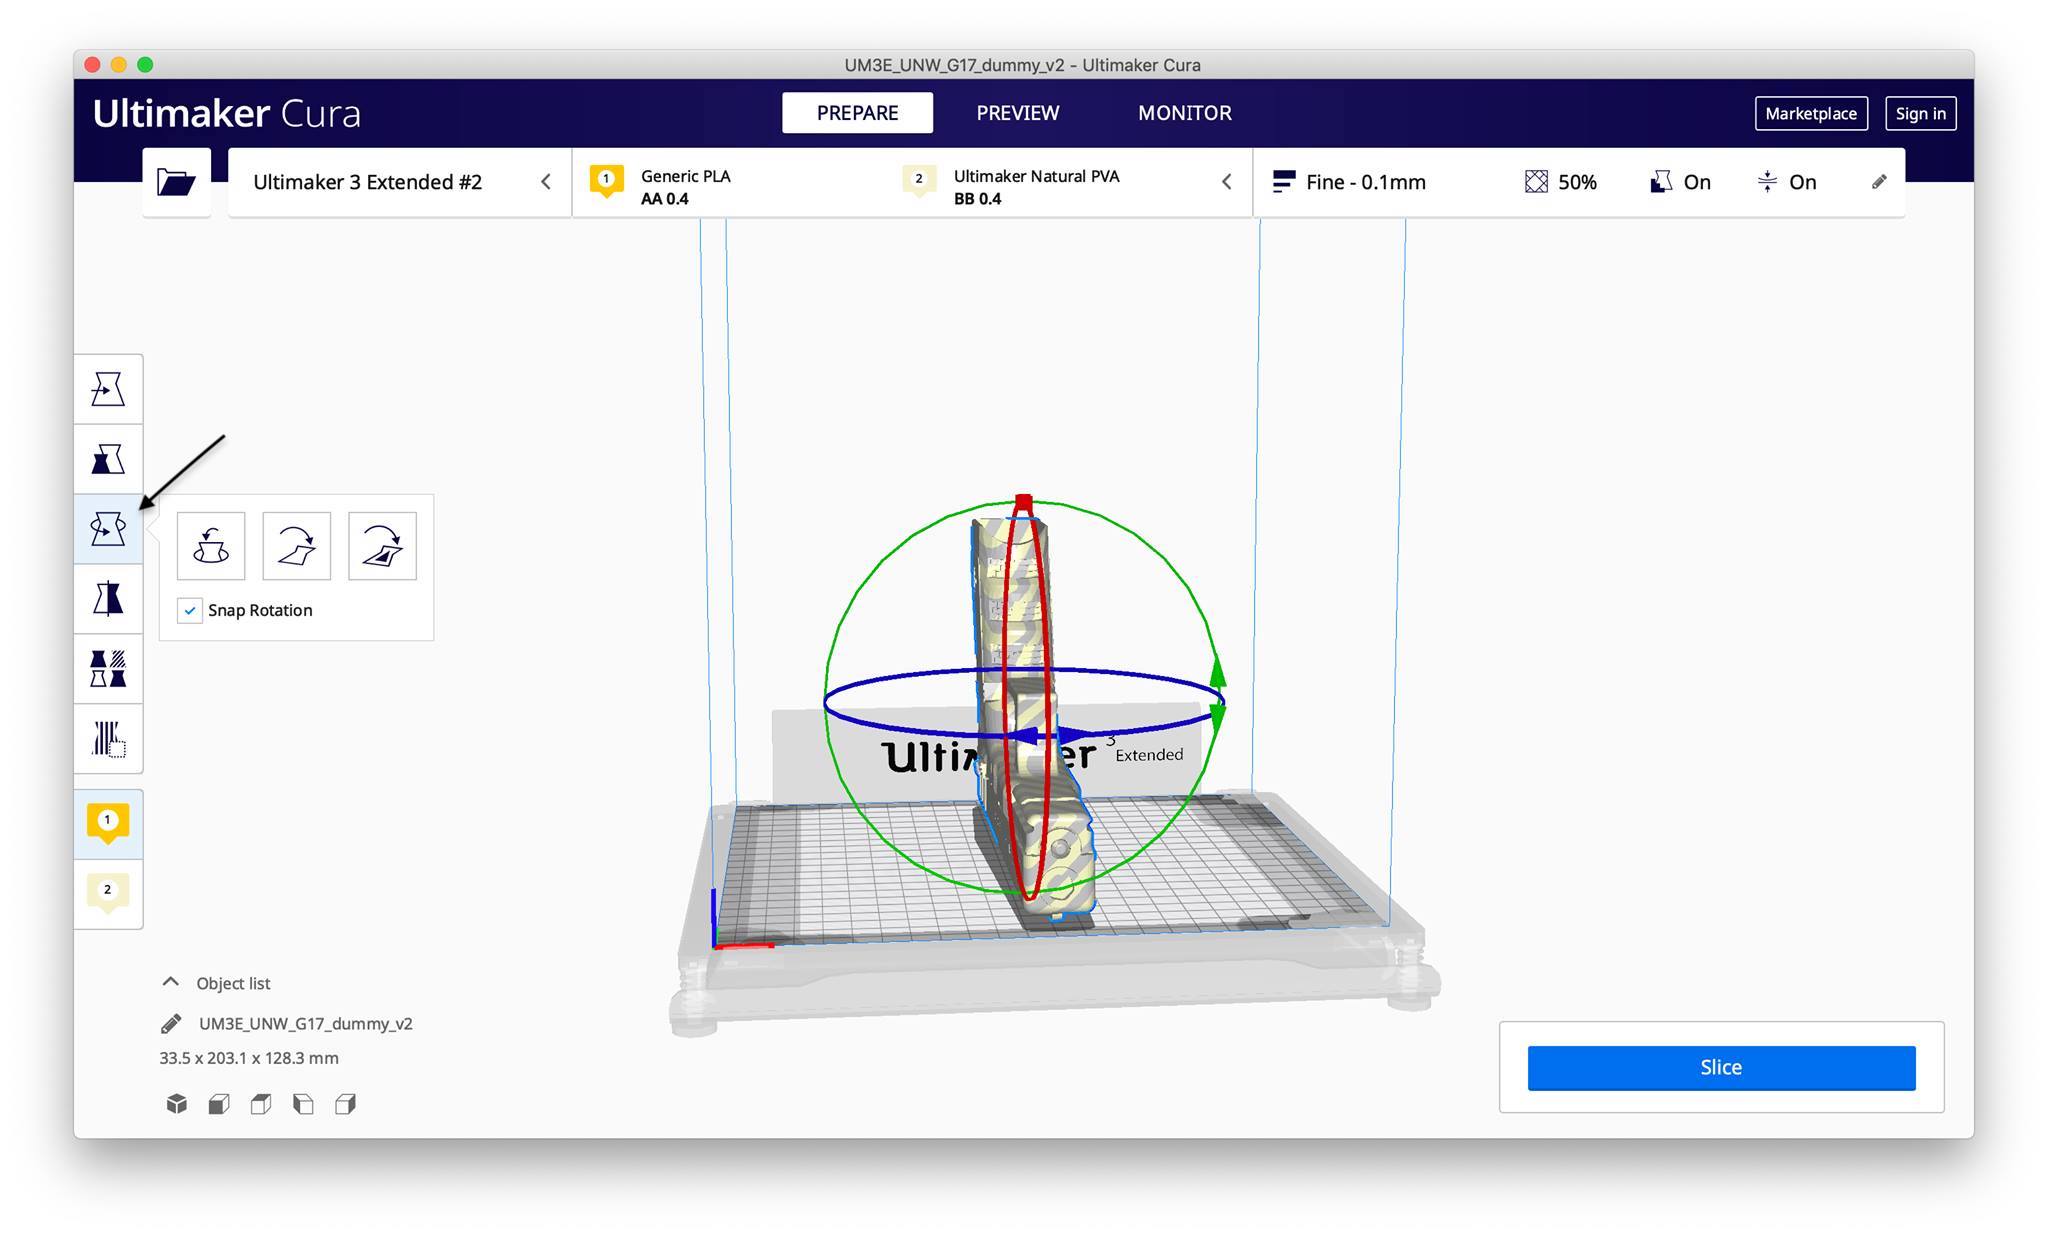
Then, I resized the object to have smaller dimensions using the scaling button since I was just testing.
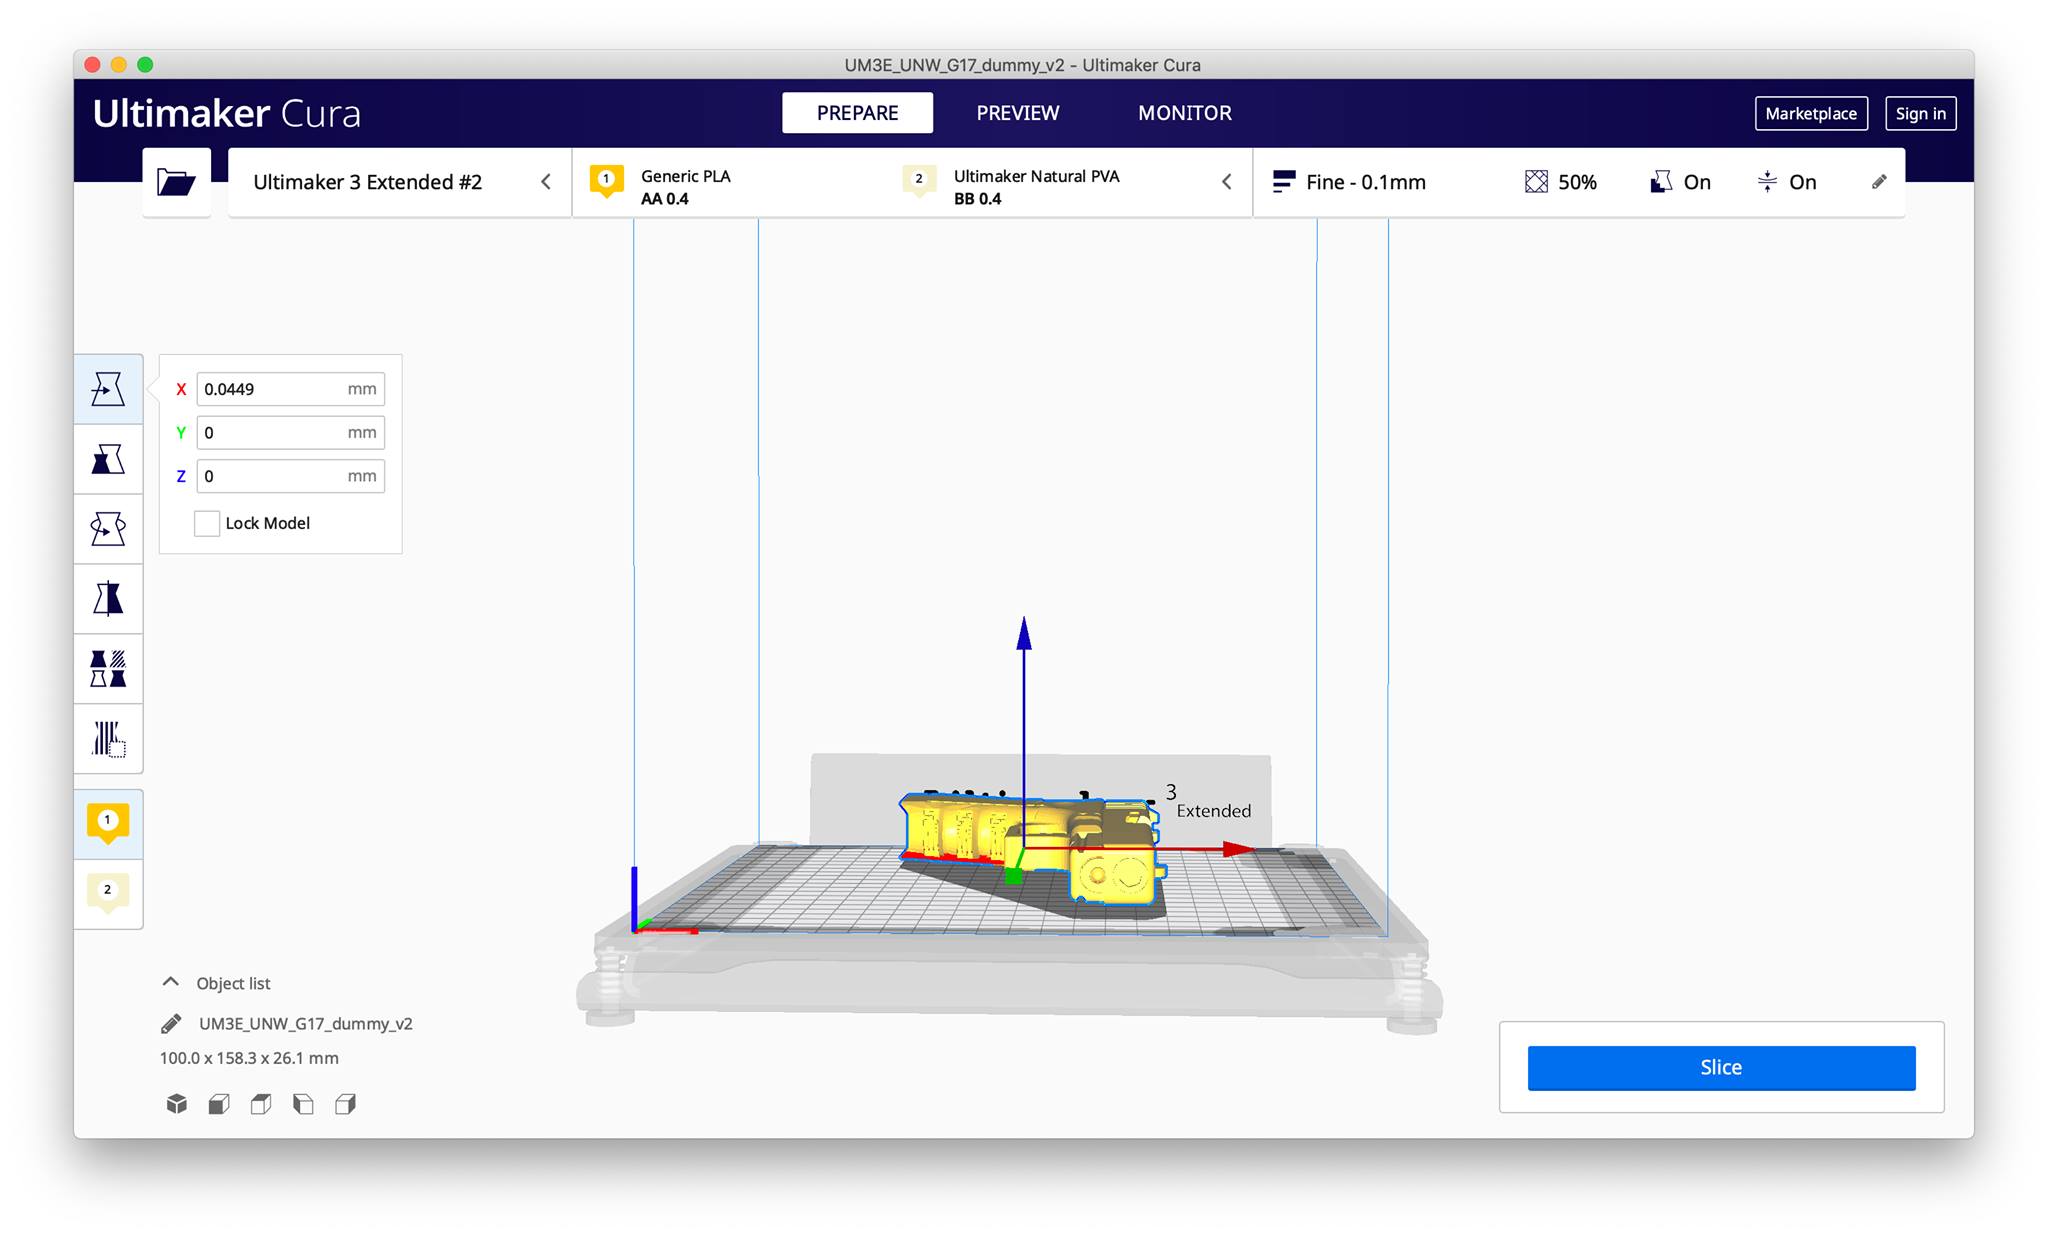
At this stage, I started editing the print settings, starting with the materials. I changed material 1 to Generic PLA as it is safe to use and more or less the most common filament used at the lab.
As for material 2, I changed it to Ultimaker Natural PVA, which will be the filament used for all the support pieces during the printing process. Since it is an all organic PVA, it will actually dissolve in water, leaving only the design.
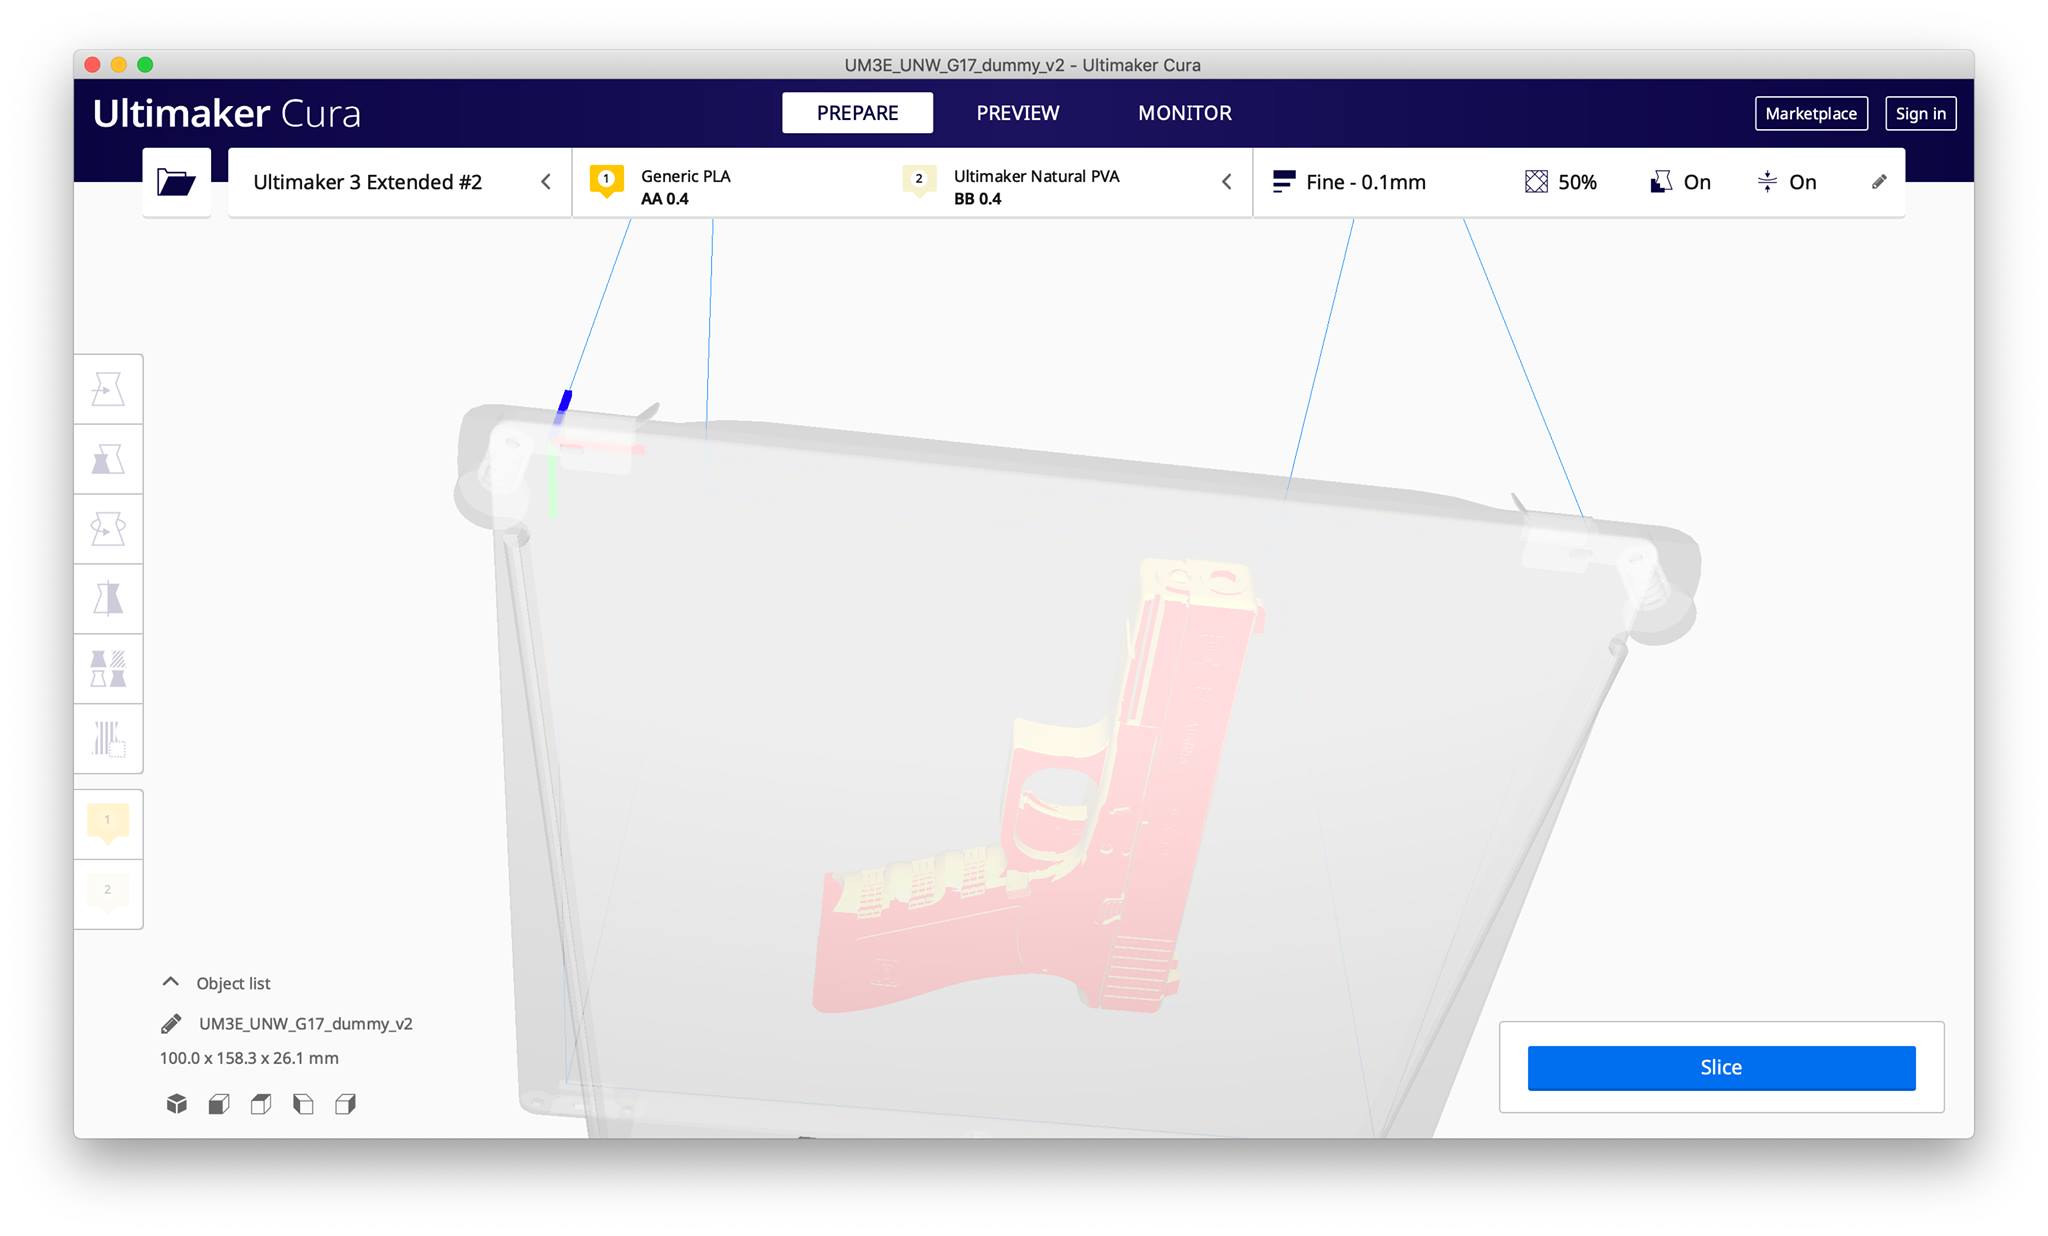
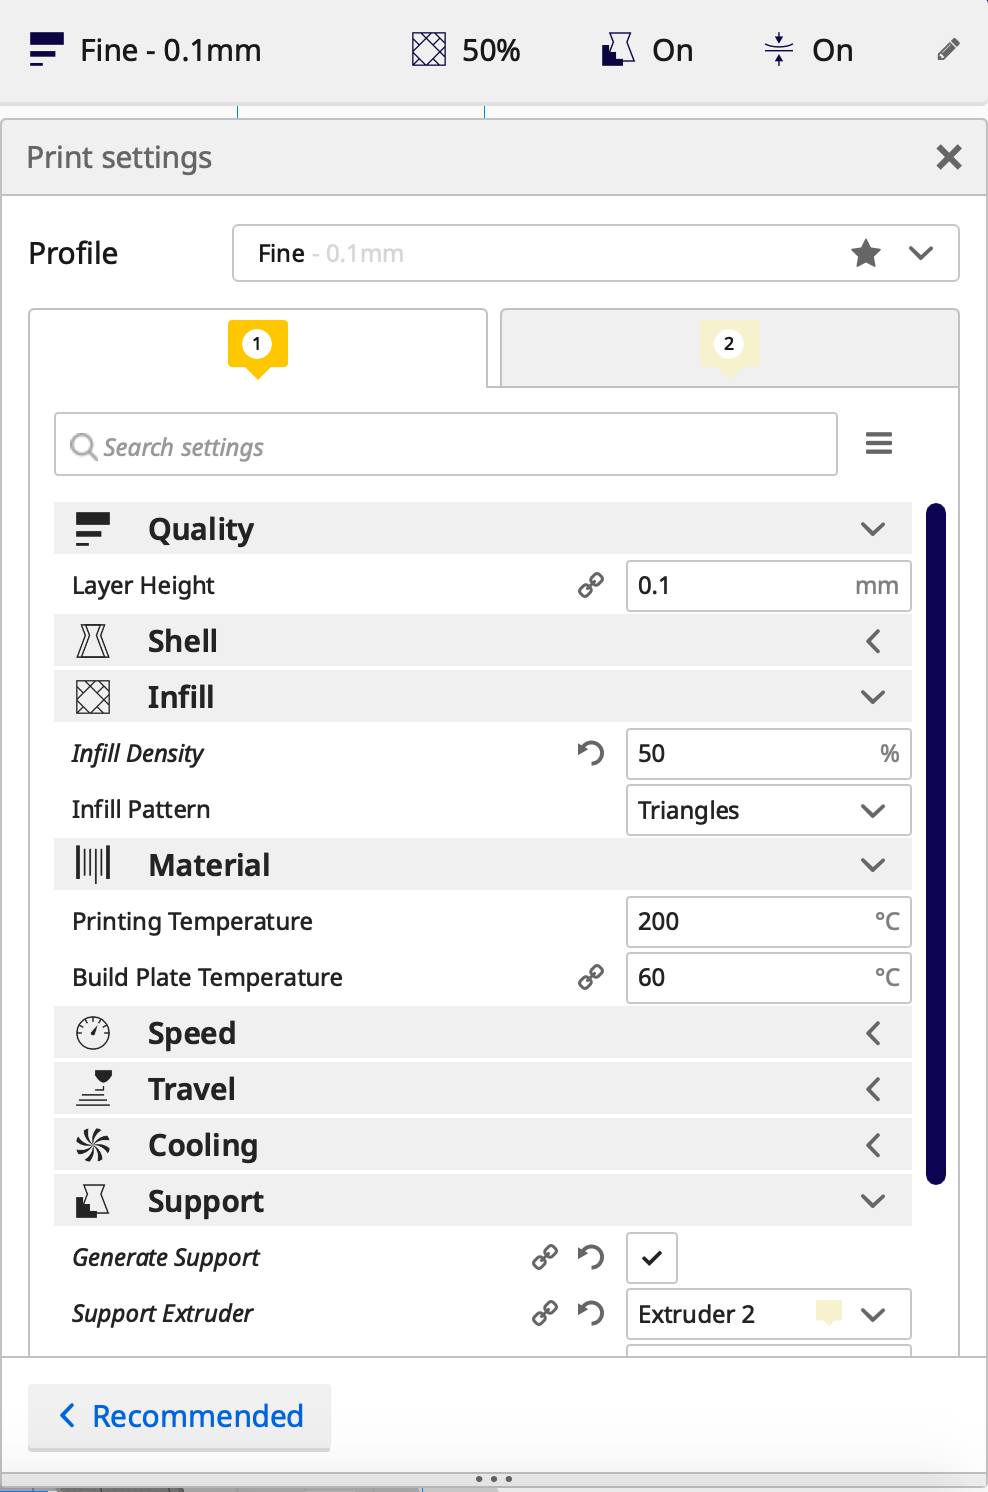
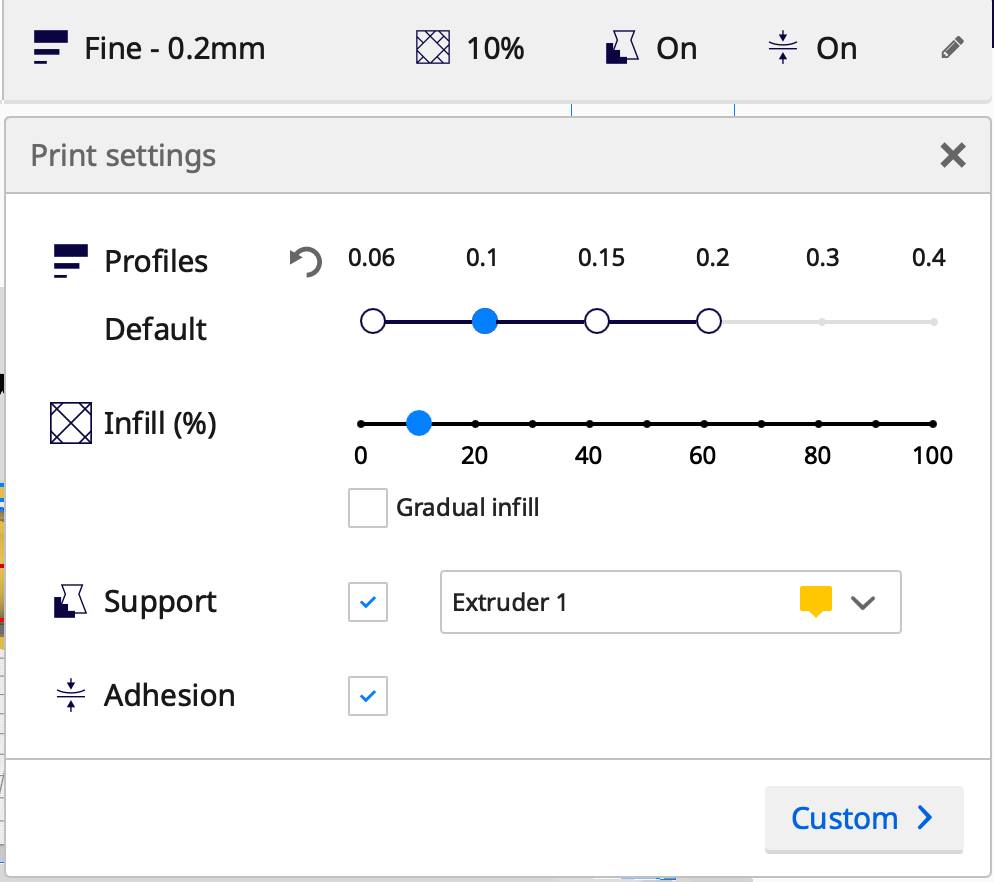
And I set the following as my print settings:
After slicing, the time required to complete the printing is shown below.
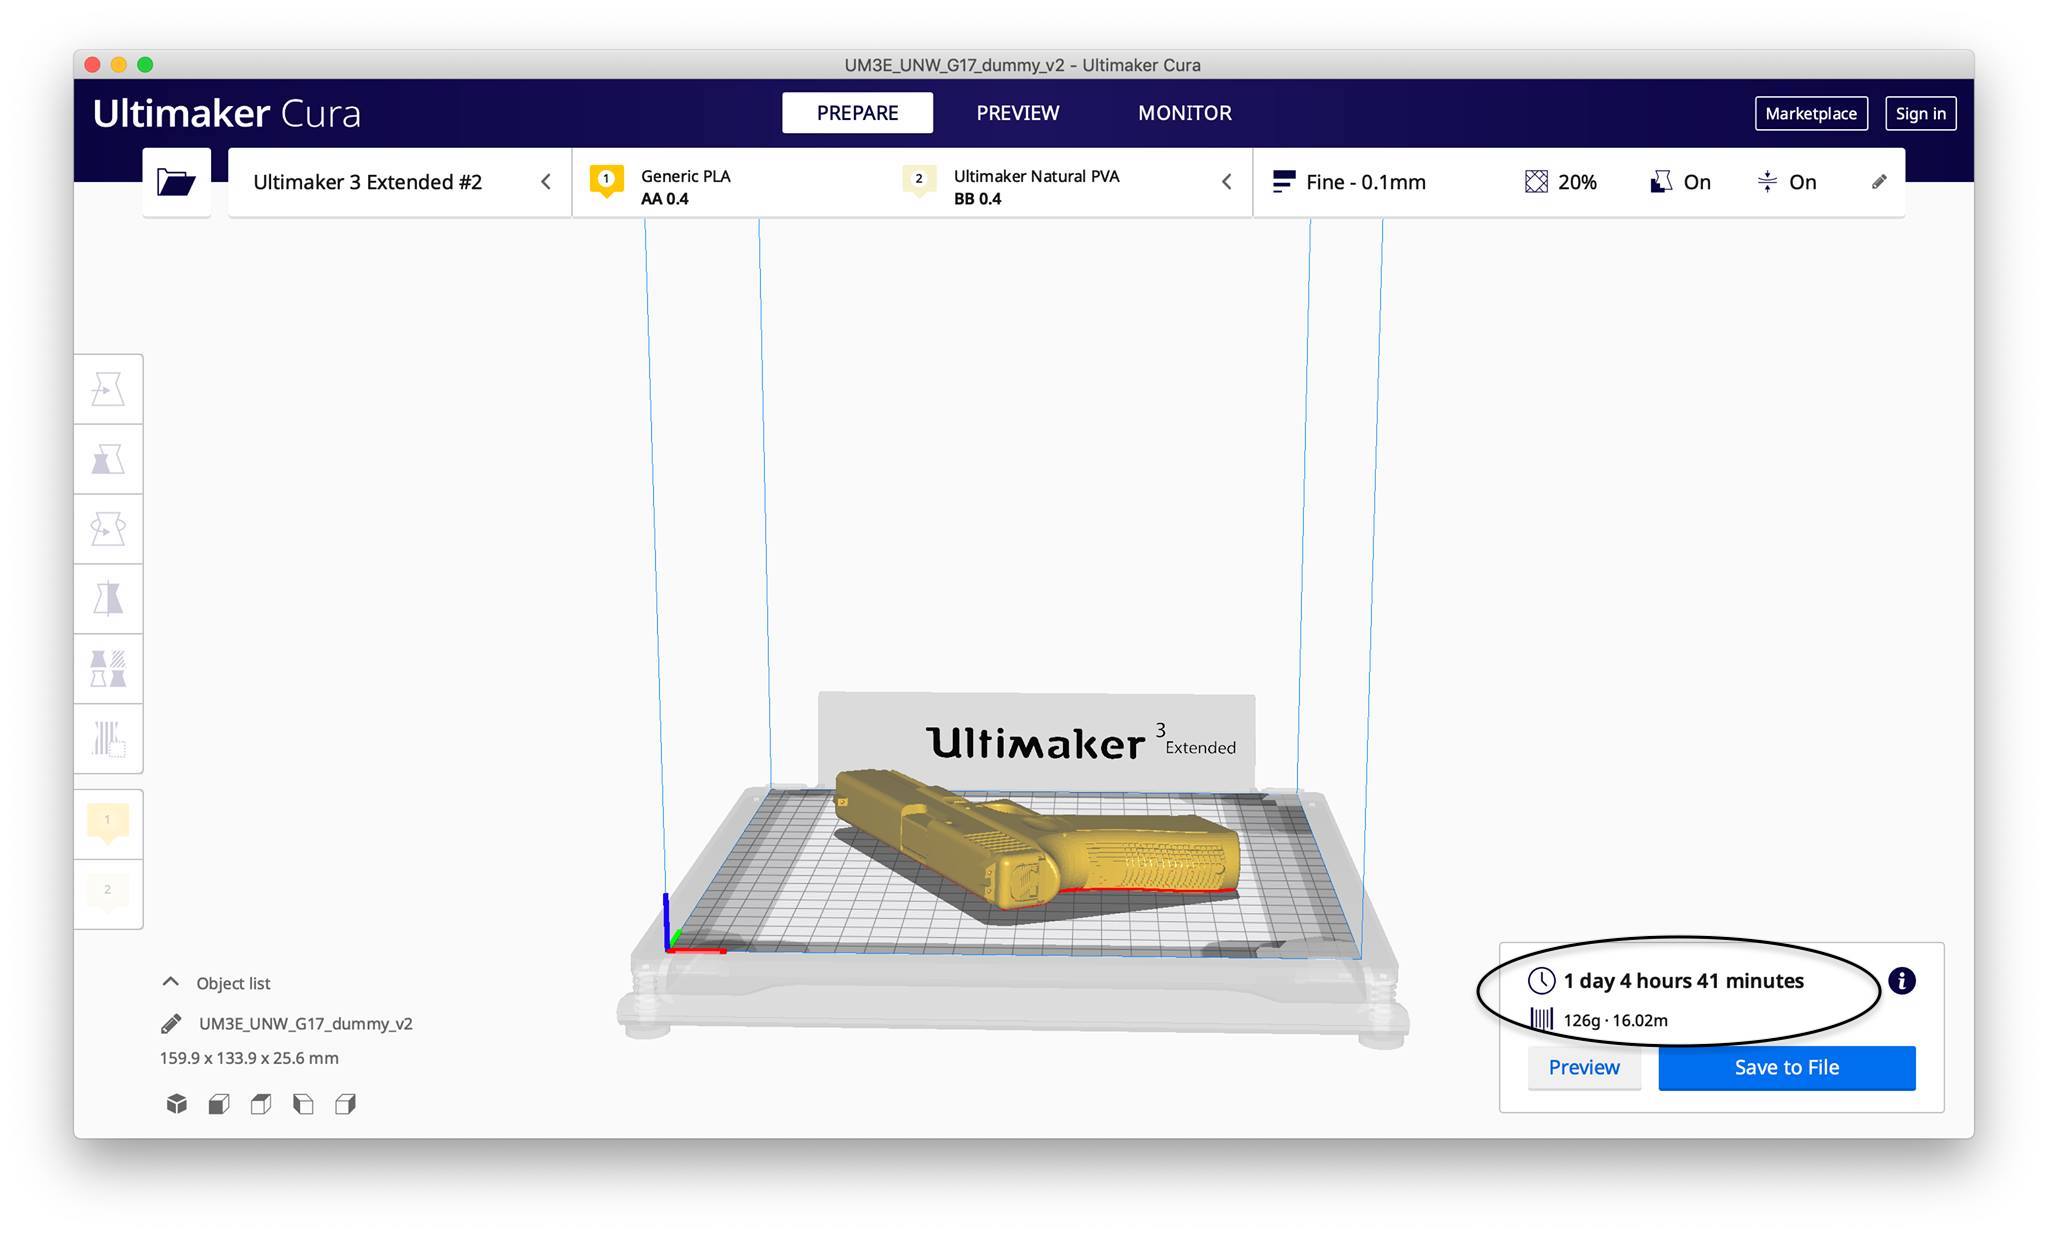
Then I clicked on save to file and saved it as G-code to my flash drive.

The Printing
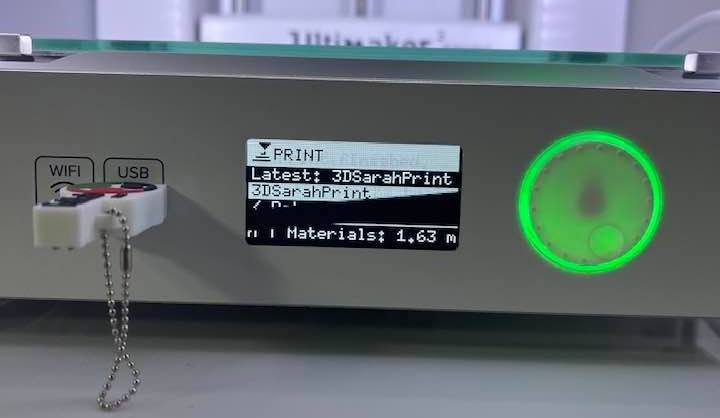
For printing, I plugged in my flash drive and chose the print option.
If the filaments aren’t loaded inside the printer yet, choose material/printcore > load > material 1 > PLA since i’m using the PLA filament > and then follow the steps on the screen. I repeated the same for material 2, but I chose Natural PVA since that was my support filament.
After the print option, I chose the file to be printed, and took a step back to let the printer give its show. Unlike the laser cutter, it isn’t necessary to supervise the machine during its printing, I just had to make sure the base was done right.
The base was done right, but then I got a text from one of my peers saying that it got messed up at a certain stage of printing. I was confused and rushed to the lab. I decided to start the group assignment using different settings since i’ve already tested - a failed test is still a test!
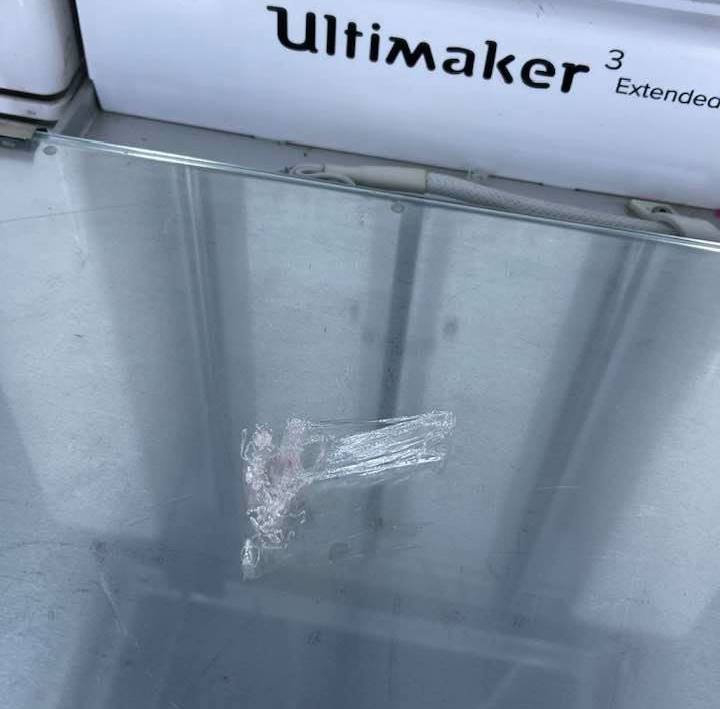
I sent the group assignment to print but the same error happened again.
…and again…

…and again!
Group Assignment: document your work and explain what are the limits of your printer(s) (in a group or individually).
Overhang test
For the group assignment, I was in charge of testing the overhang. I downloaded the file off of the FabAcademy website and saved it to my flash drive, then I sent it to print.
As aforementioned, at first, similar to the previous printing attempts, I had trouble with the print. It would start fine, but then always mess up after the first few layers. I switch my support from Extruder 2 to Extruder 1 and it worked.
I printed the overhang test with the recommended settings that are defaultly set by Cura, which are as following:
After printing was done, it was clear how crucial the support generated by Cura was for the horizontal piece floating above the base.
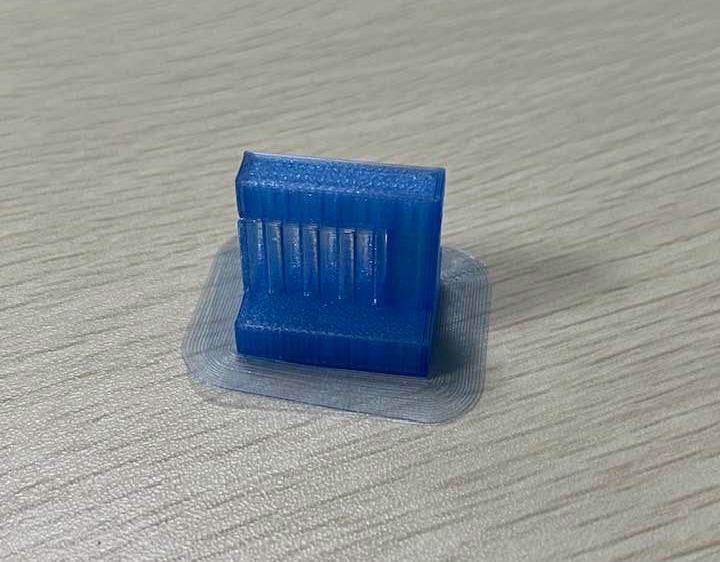
I broke off the support pieces and voila!
Individual Assignment: design and 3D print an object (small, few cm3, limited by printer time) that could not be easily made subtractively.
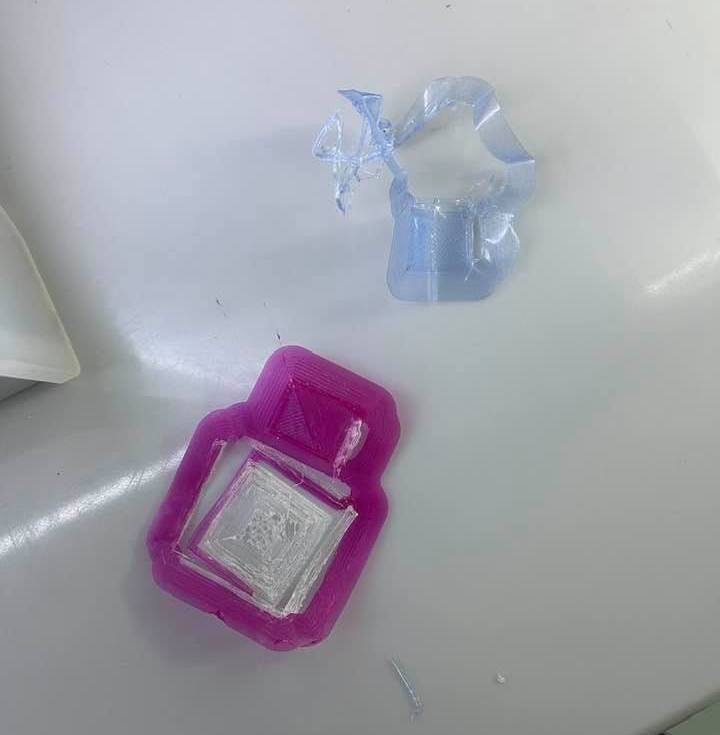
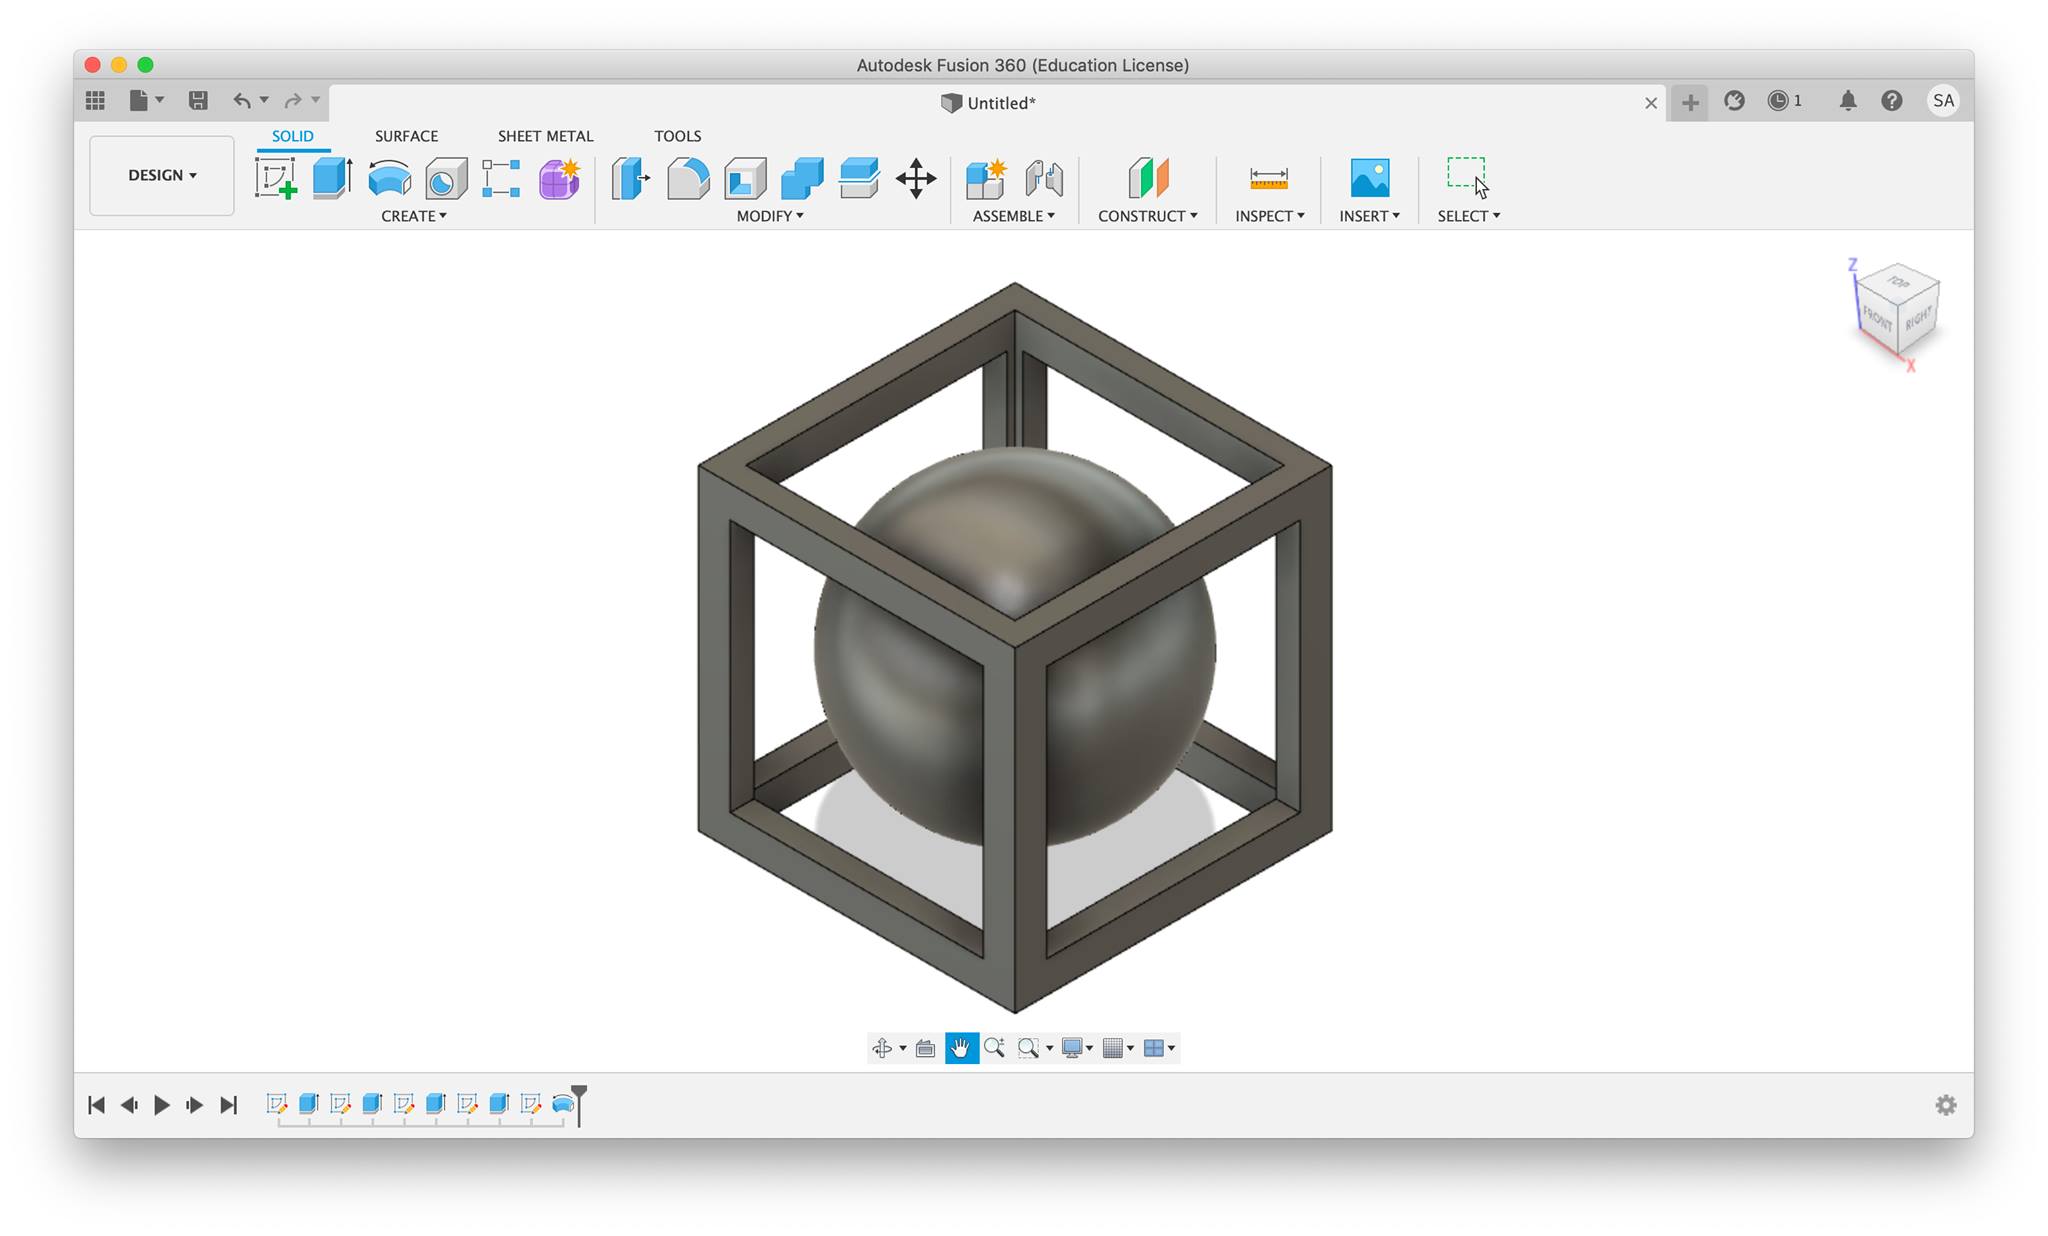
Sphere in a box
I had trouble differentiating between what could only be made using additive measures and what wasn’t. My original idea for this week was to print an asymmetrical candle holder. I designed it on Fusion 360 and had it really to be printed. Unfortunately, the design didn’t quite meet the assignment brief, so I set it aside for a later time.
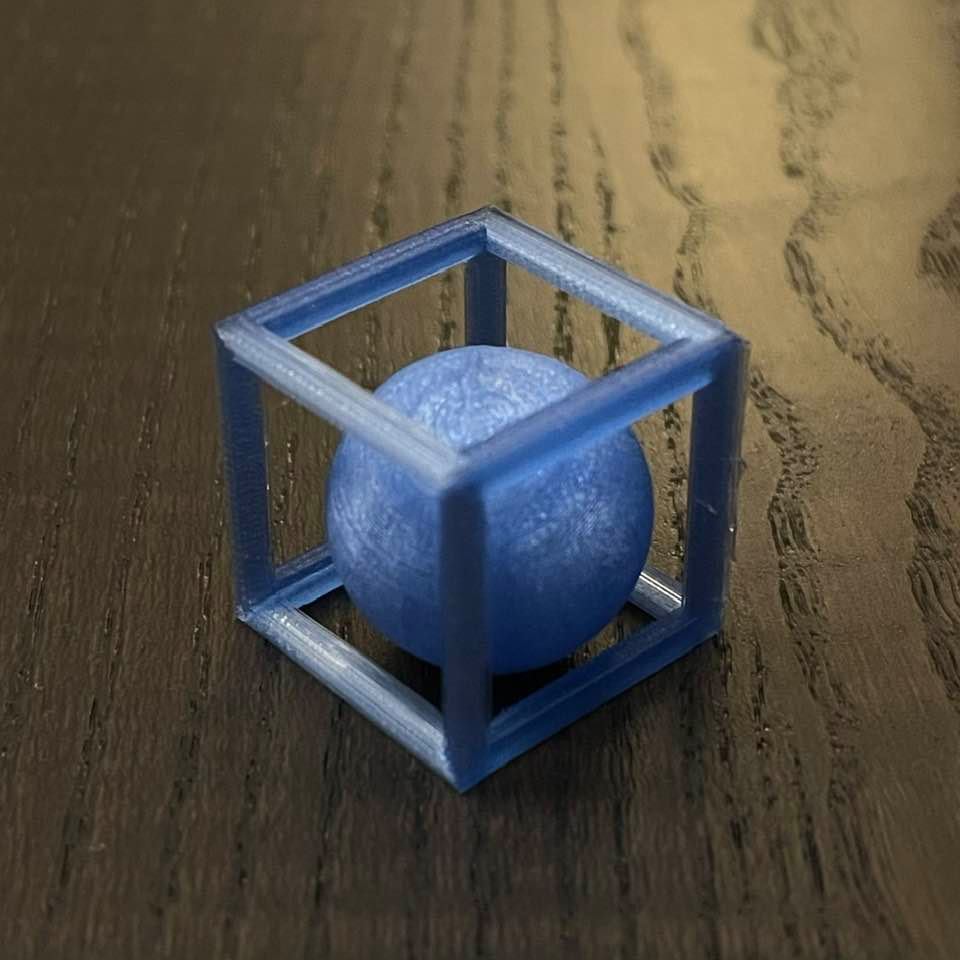
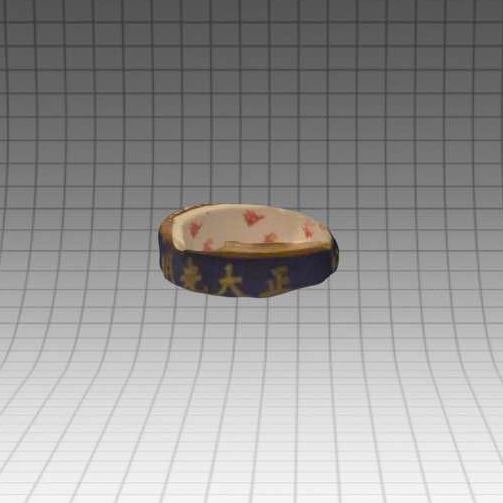
Instead, I designed the famous sphere in a box that many, MANY, of us FabAcademy students opted for. Honestly, I would want to have it on my bedside table, so I took the chance and ran with it. This design is hard to make subtractively because it is hard to keep the sphere from moving.
I designed it by making a cube then extruding an offset in each of the faces of the cube. Then using the revolve tool, I made a sphere inside, making sure its diameter was bigger than the area of the offsetted faces so it won’t fall out of it. I joined the two bodies into one using the modify > combine tool, and saved the body as stl.
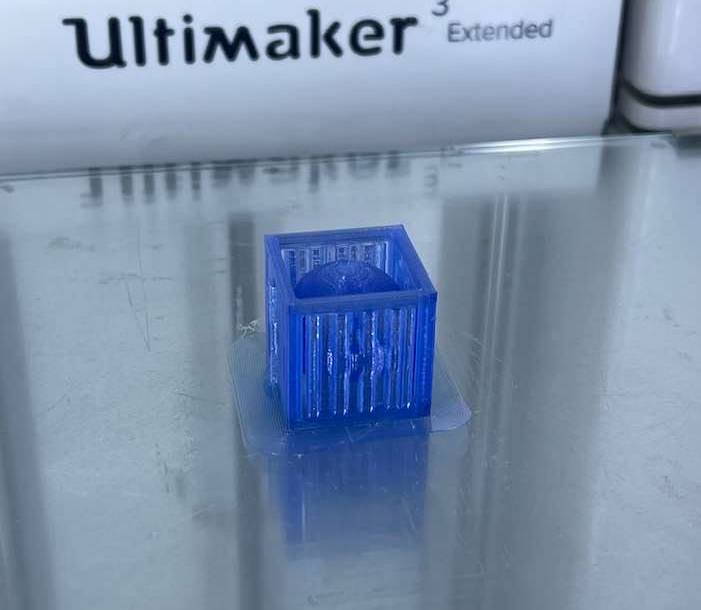
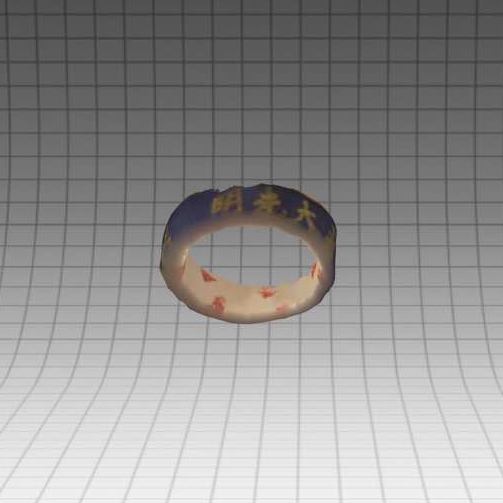
I opened the file in Cura, and resized the dimensions of the cube to 30mm each side. Using the same settings for my overhang test, I saved the G - code to my flash drive. I plugged the flash drive into the Ultimaker, waited for printing, and after an hour and 6 minutes, it was done.
I set my print settings as following:
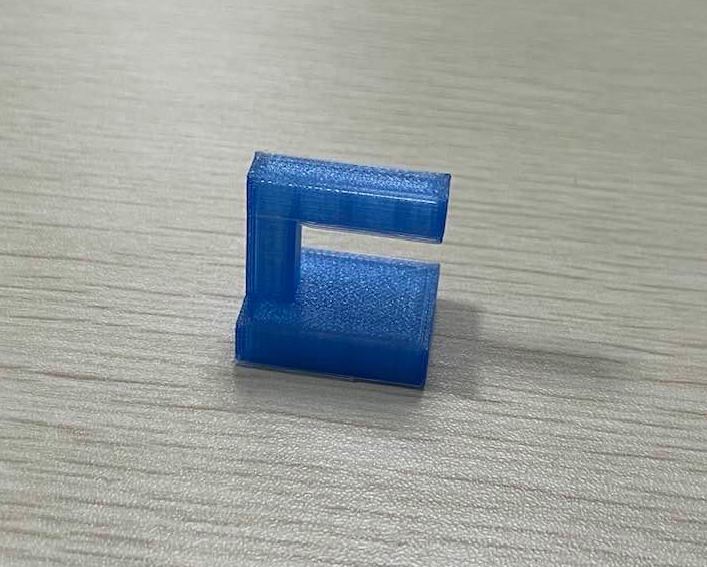
After printing, I just I broke off the support pieces to isolate the design from the unessential pieces, and I was done.
3D Scanning
Individual Assignment: 3D scan an object, try to prepare it for printing (and optionally print it).
ScandyPro
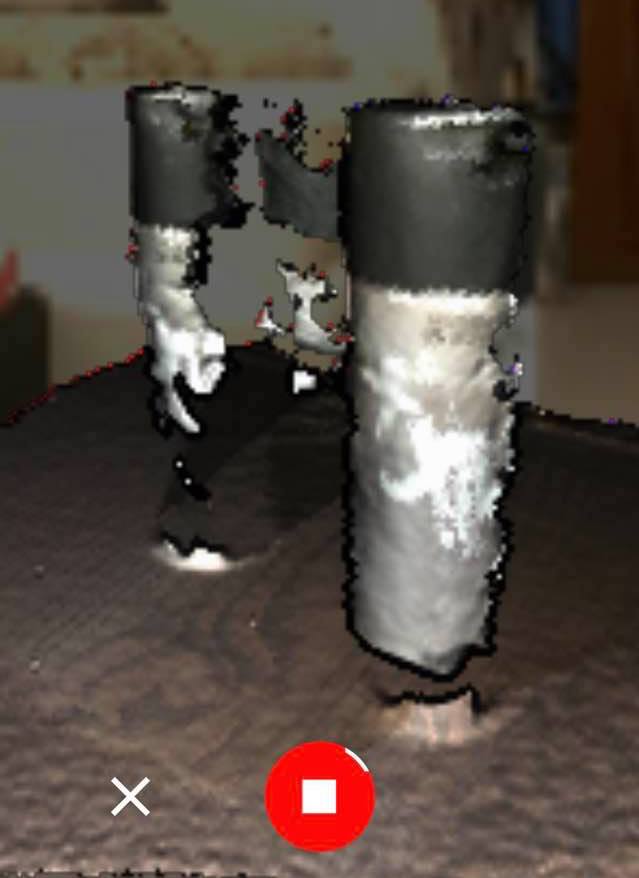
For 3D scanning, I installed “ScandyPro”, a 3D scanner app on my iPhone.
Then, I clicked on create scan and started the scan. However, to perform an object scan, the app uses the front camera, so that was a bit tricky.
To perform the 3D scan, I need to get a 360 degree scan. I shifted the phone around the object - a Mac Fix Plus seeting spray - till I completed the 360 degree scan.
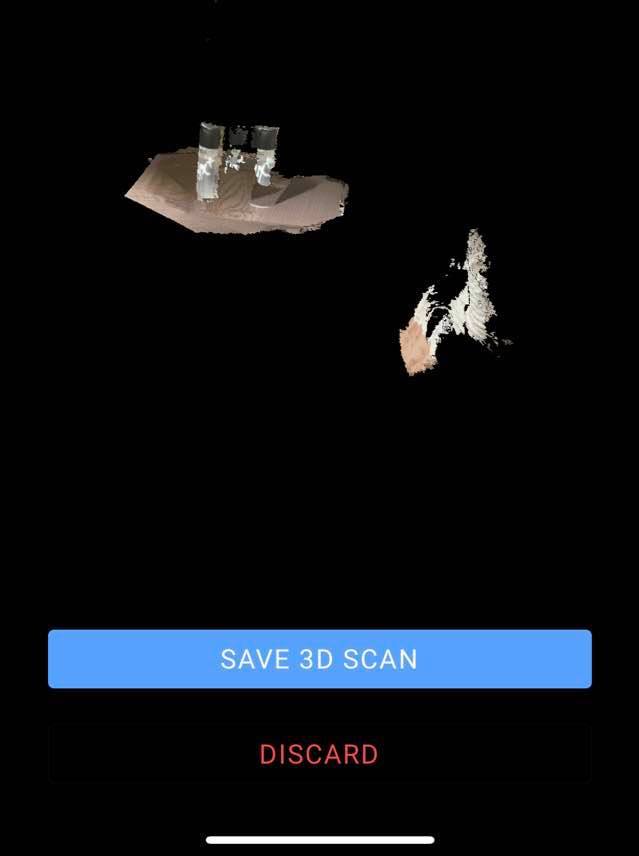
Then I saved the scan, and it was bad lol. Really bad.
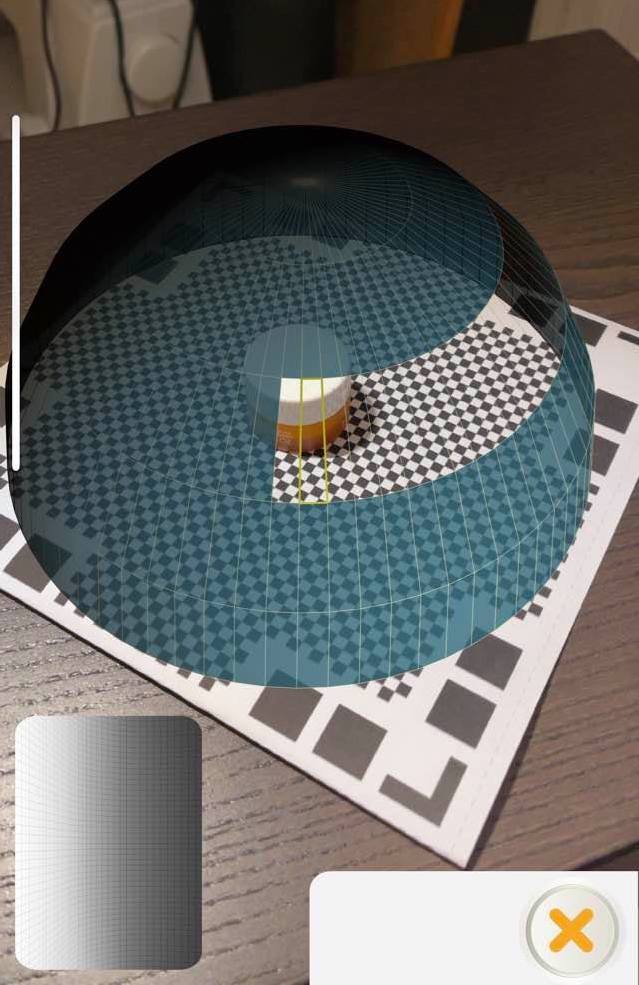
Qlone
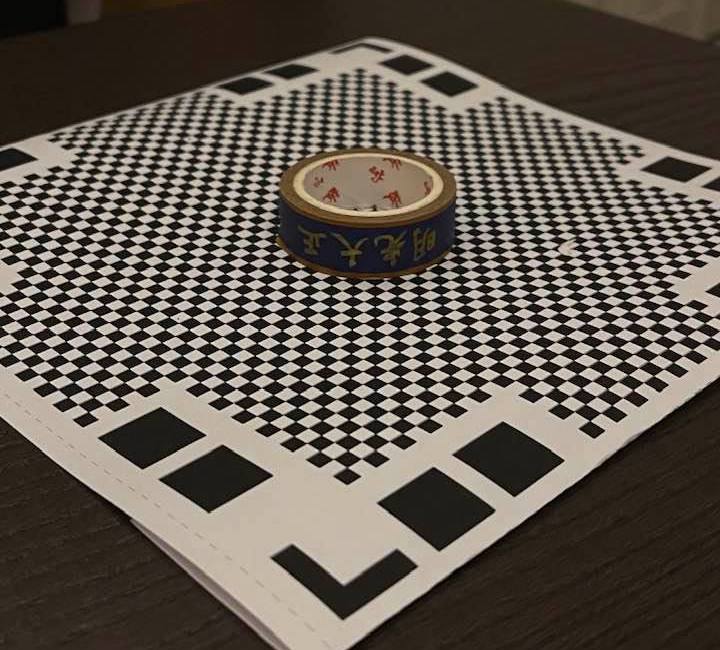
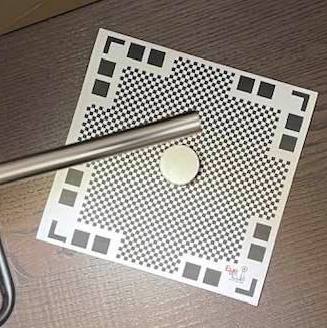
For my second try, I used a different app, a different object. I installed “Qlone” on my iPhone, and a roll of tape I got from my trip to China. I wanted to test whether the app will be able to capture the details of the tape.
For Qlone, I had to first download a mat provided by them. Upon doing so, I placed the object on top and started the scan.
I liked how the app would form a dome encapsulating the object as it made it easier for me to navigate my rotations for the 360 scan.
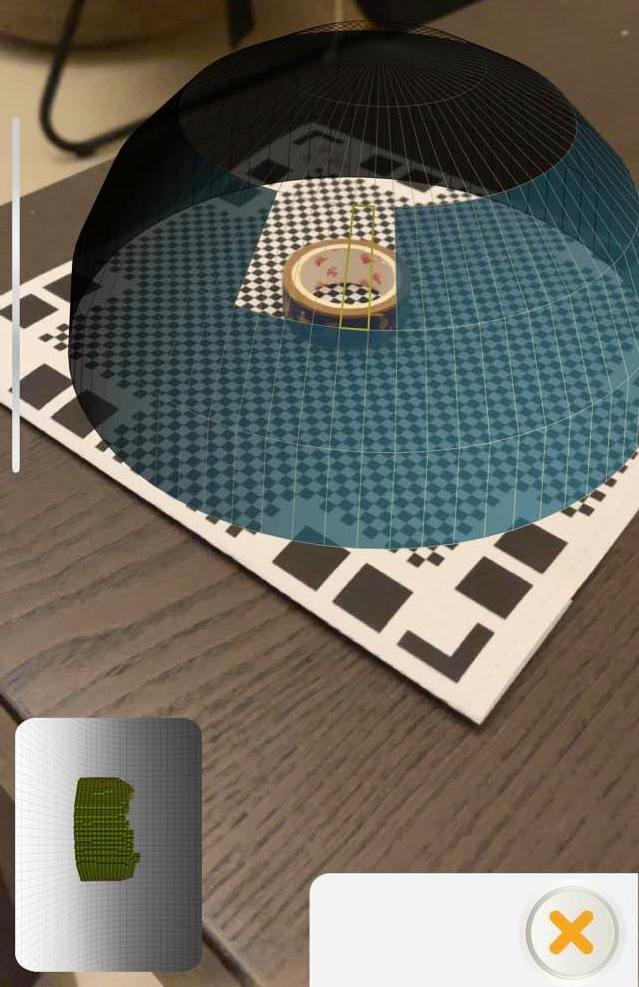
I rotated till all the sections dissapeared indicating that the app has captured that degree, and then I saved the scan. Spoiler alert: it sucked too.
For my final attempt, I changed the object to an eye cream, and added direct light to get better results.
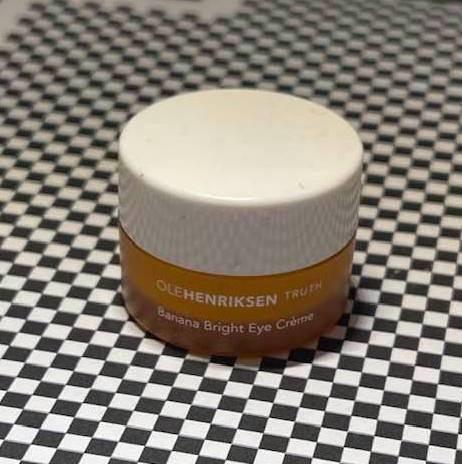
This time, I also made sure the object was perfectly in the center - this helped alot. I repeated the dreaded process of rotating the phone to get my scan.
The scan originally came with a cone-shaped lid, so I used the flatten top option on the toolbar on the right to resolve that, and I was done with the scan. This one was also too shabby. Overall, I didn’t enjoy the process of 3D scanning, ask my back and it’ll tell you all about it.