6. 3D Scanning and printing
THIS WEEK CHECKLIST
- [✓] Linked to the group assignment page
- [✓] Explained what you learned from testing the 3D printers
- [✓] Documented how you designed and made your object and explained why it could not be easily made subtractively
- [✓] Documented how you scanned and prepared an object (for 3D printing)
- [✓] Included your original design files for 3D printing (both CAD and common format for 3D printing)
- [✓] Included your hero shots
Group assignment
This time, I work with my groupmates together to test the design rules for your printer and document your work and explain what are the limits of your printer. CLICK HERE for the detailing of group assignment page.
Individual assignment
1. Design and 3D print an object (small, few cm3, limited by printer time) that could not be easily made subtractively
2. 3D scan an object, try to prepare it for printing (and optionally print it)
Design and 3D print an object
My school decide to have a STEM week about 3D printing introduction. Therefore, I decide to edit a video about What is 3D Printing in 3 minutes (Cantonese). After that, I decide on making mask a Mask Extender. Since some of the studetns always complaint about their mask too tight or too loose. For better putting in their mask cover or wallet. The Mask Extender cannot be too big or can be folded. I think this is a perfect souvenir about 3D printing for our students.
First of all, I go to Thingiverse to find the similar design of Mask Extender. Since there are many design in one peiece. Therefore, I need to redesign because I need to include the joint for foldable Mask Extender.
Here is the draft of the Mask Extender.
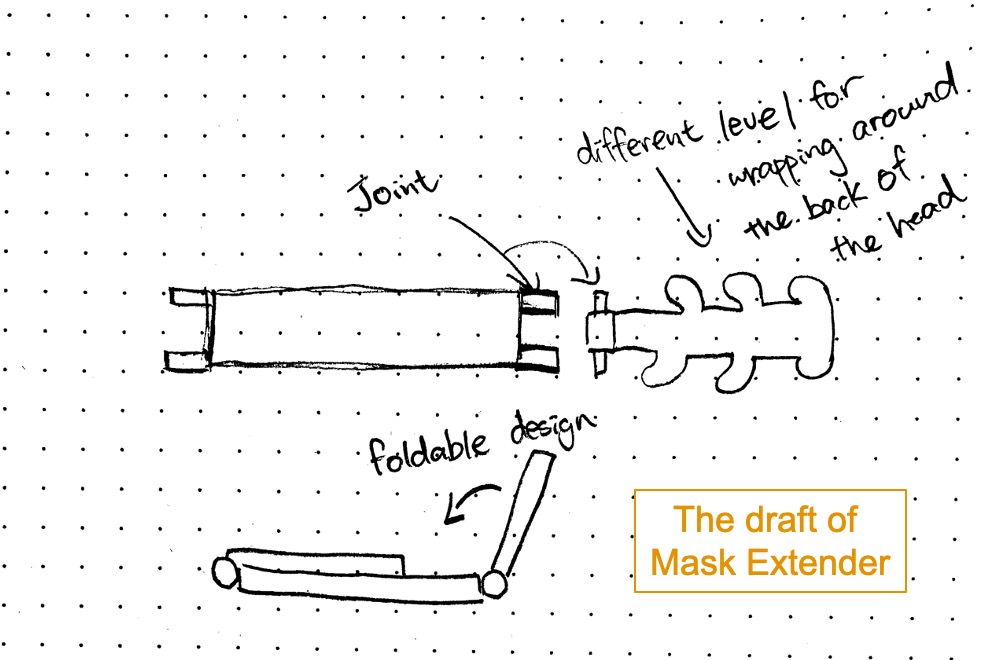
I sketch in Fusion 360. I draw the thickness of the Mask Extender is 0.75mm because according the characteristic of PLA, it is more elastic. It is good for people to bend when they use it.

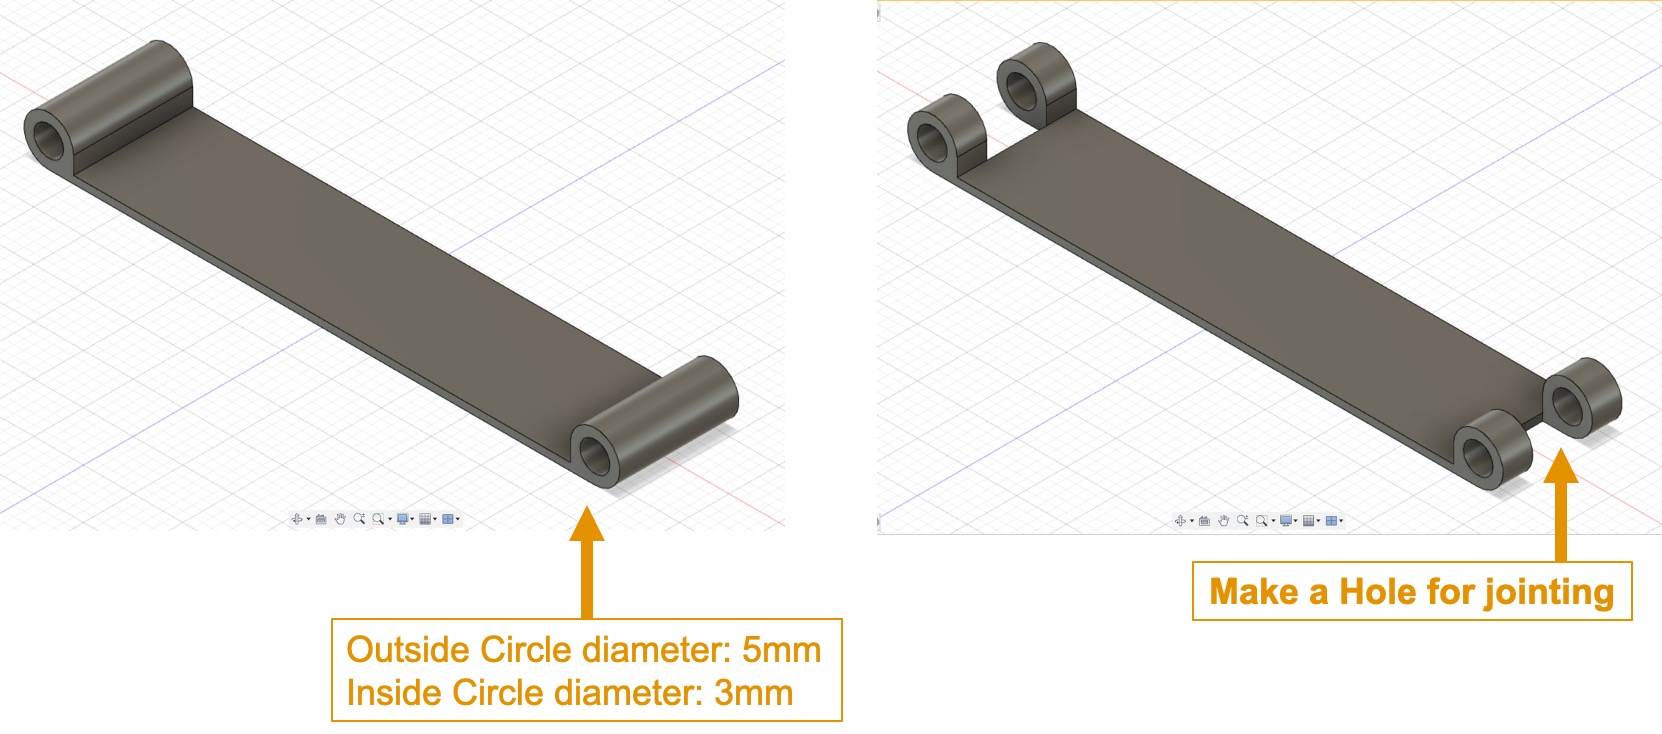
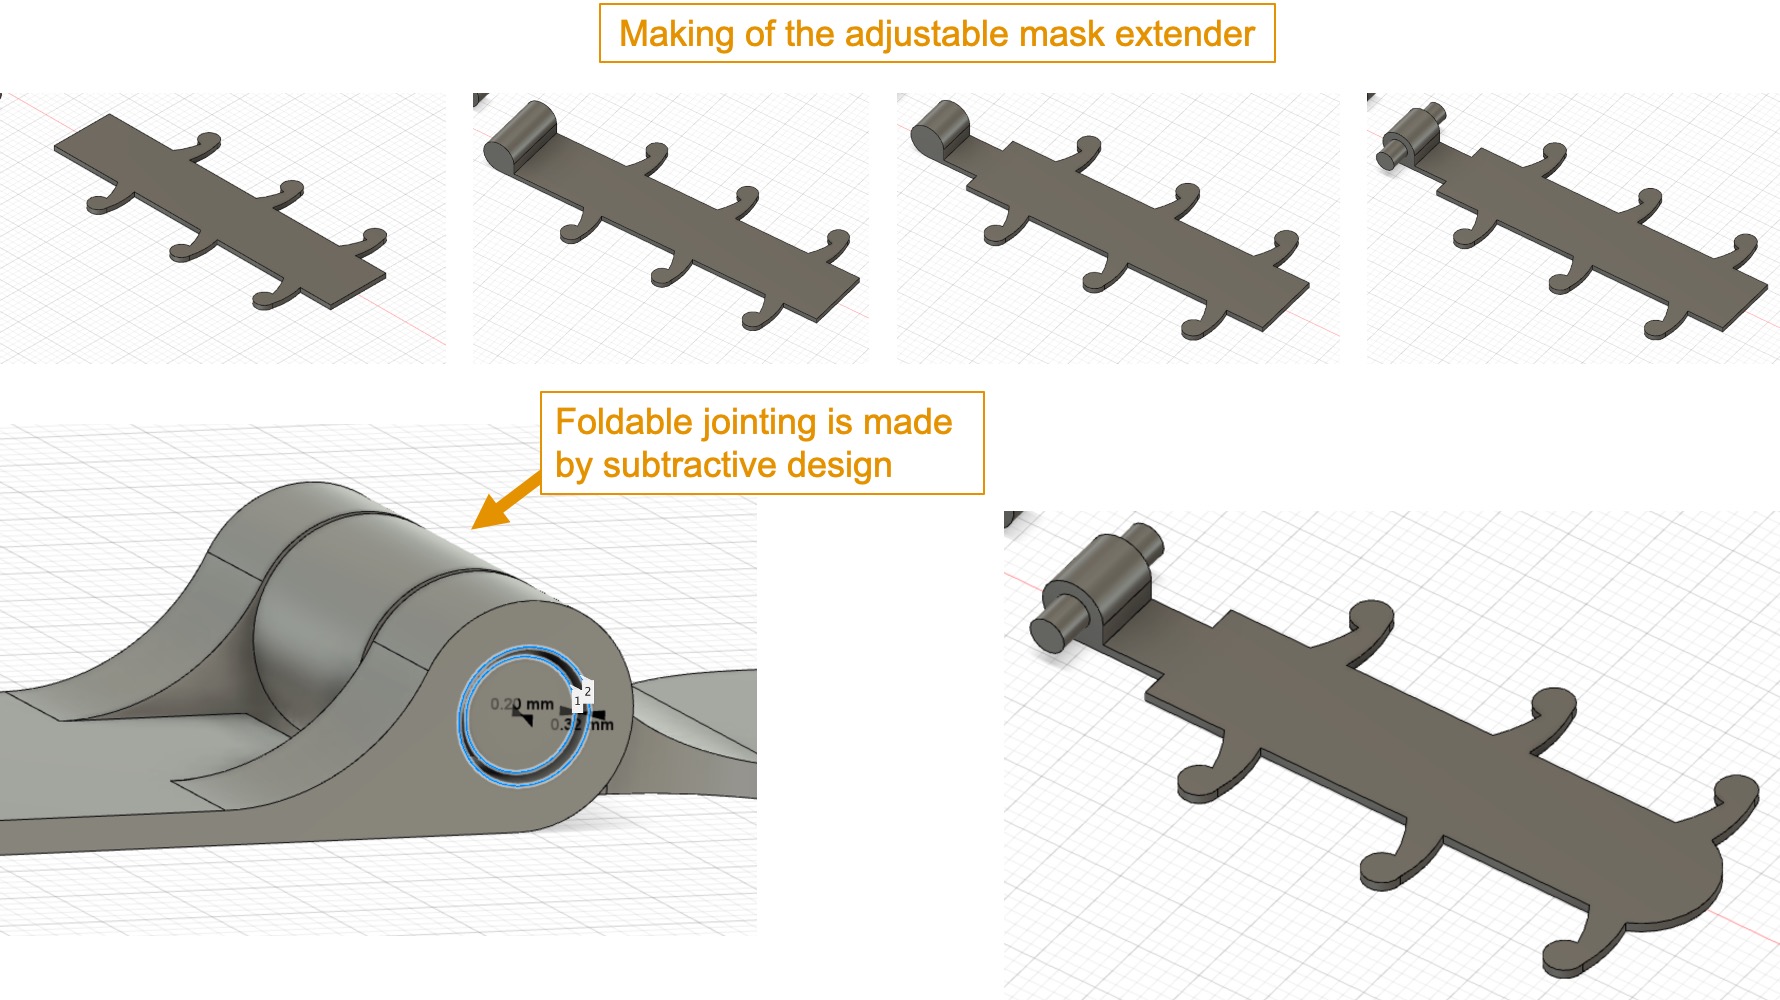
The foldable jointing part is made by subtractively. Since having a test (Support: Clearance) before, at least 0.2mm clearance is able to make the jointing part. Therefore, I decide to make 0.32mm as a clearance between the inside and outside circle.
After finishing the sketching. Please save as a .STL (file type). And that go to your 3D Printer Slicing software. This time, I use Raise3D N2 Plus 3D Printer for printing my design. Since 86Duino Enjoy Auto’s print bed is not big enough.
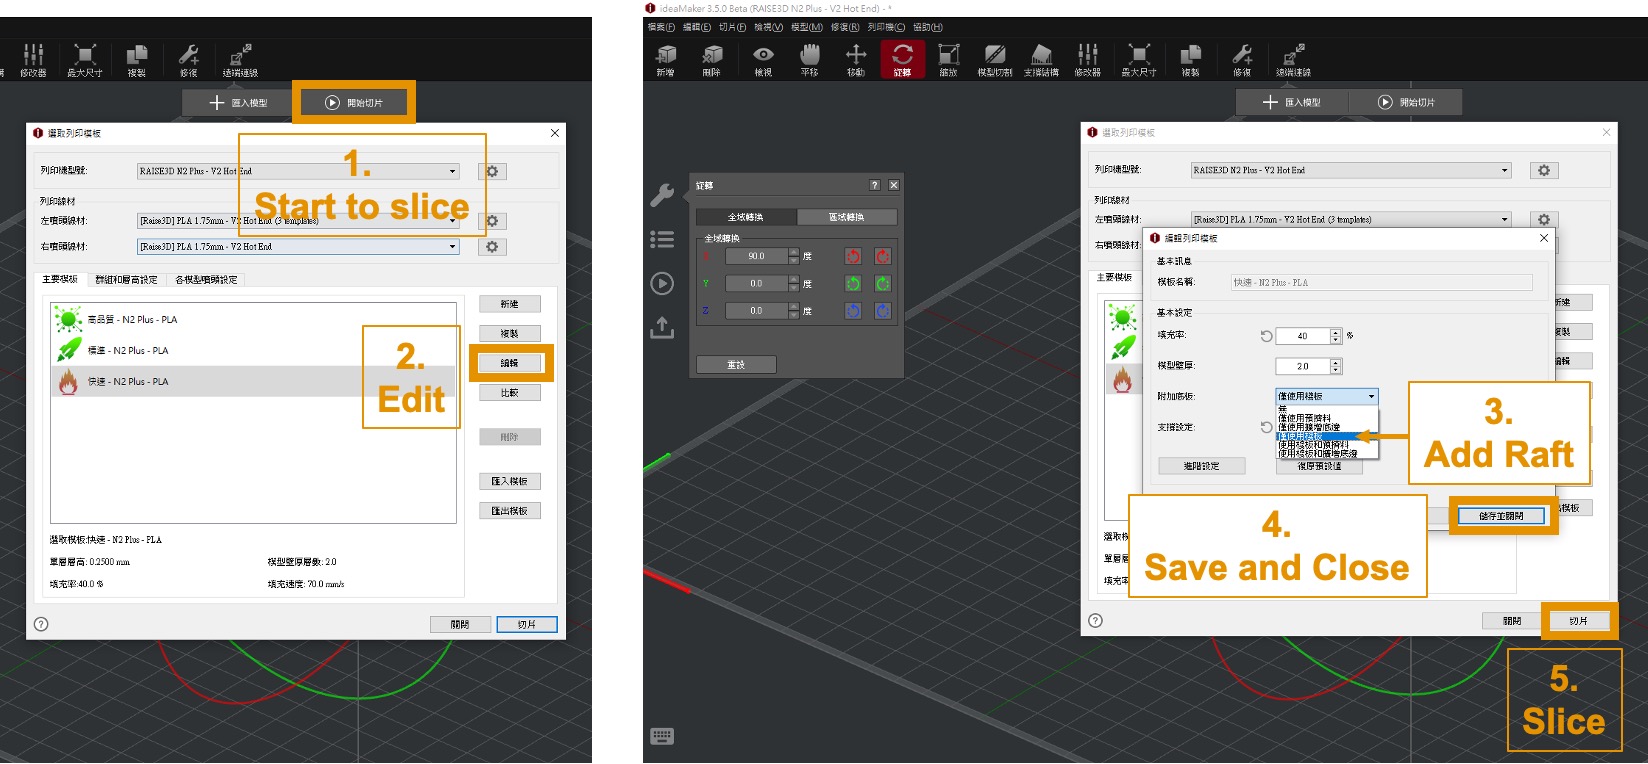
Before printing, you need to import your STL file into your Slicer Sofeware. We use ideaMaker as a Slicer Sofeware. After, I import the STL file into ideaMaker. The Mask Extender is put on the virtual print bed vertically. I need to Click Rotate to rotate the Mask Extender position on the virtual print bed horizontally.

I click Start to slide. And then, Click Edit. I add the Raft in my design. It is because every user said that using Raise3D N2 Plus 3D Printer better to add raft before printing.
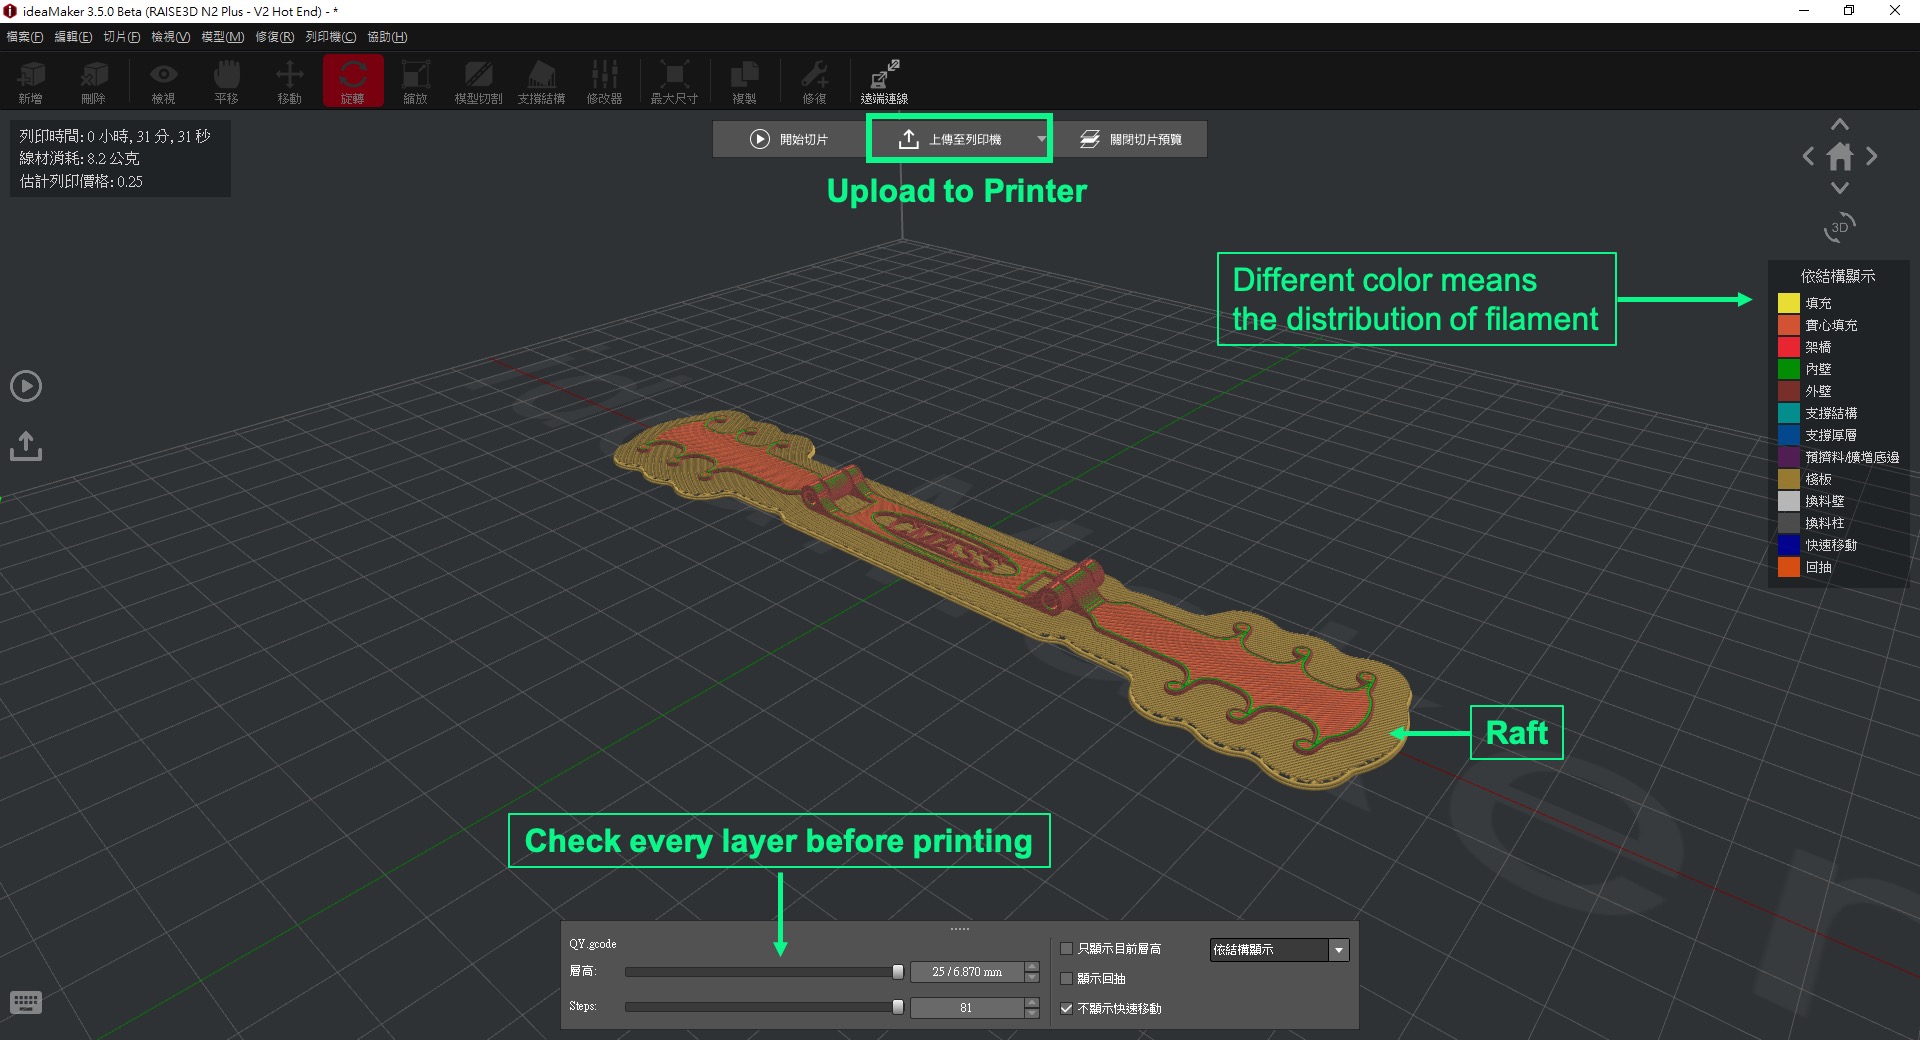
After finished the slicing process, you should final check your design layor by layor before printing. In this slicing software, you can see different color means different structure and distribution of filament.
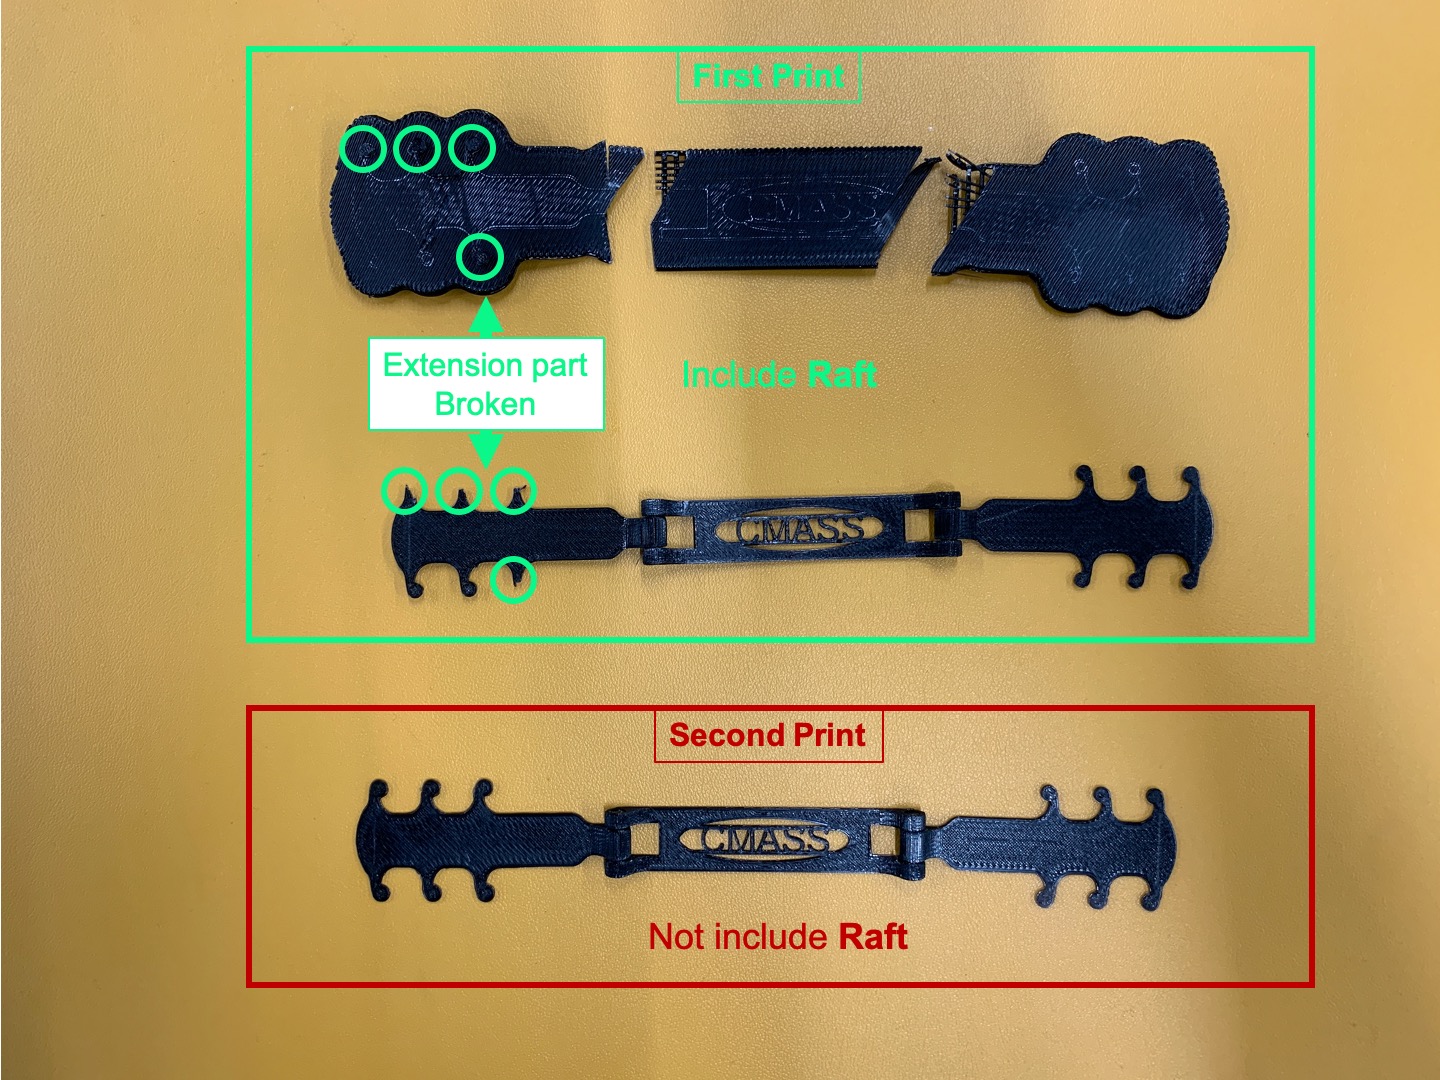
It times to print my design. Here is my final product. In my first print, since I add the Raft in my G-code. After removing the Raft, as you can see the green circle, the extension part was borken. It is because the design of Mask Extender was thin, so it is hard to remove Mask Extender from raft. Therefore, in my second print, I turn off the raft. I just need to remove the Mask Extender form the print bed. As you can see, the final product is fine.
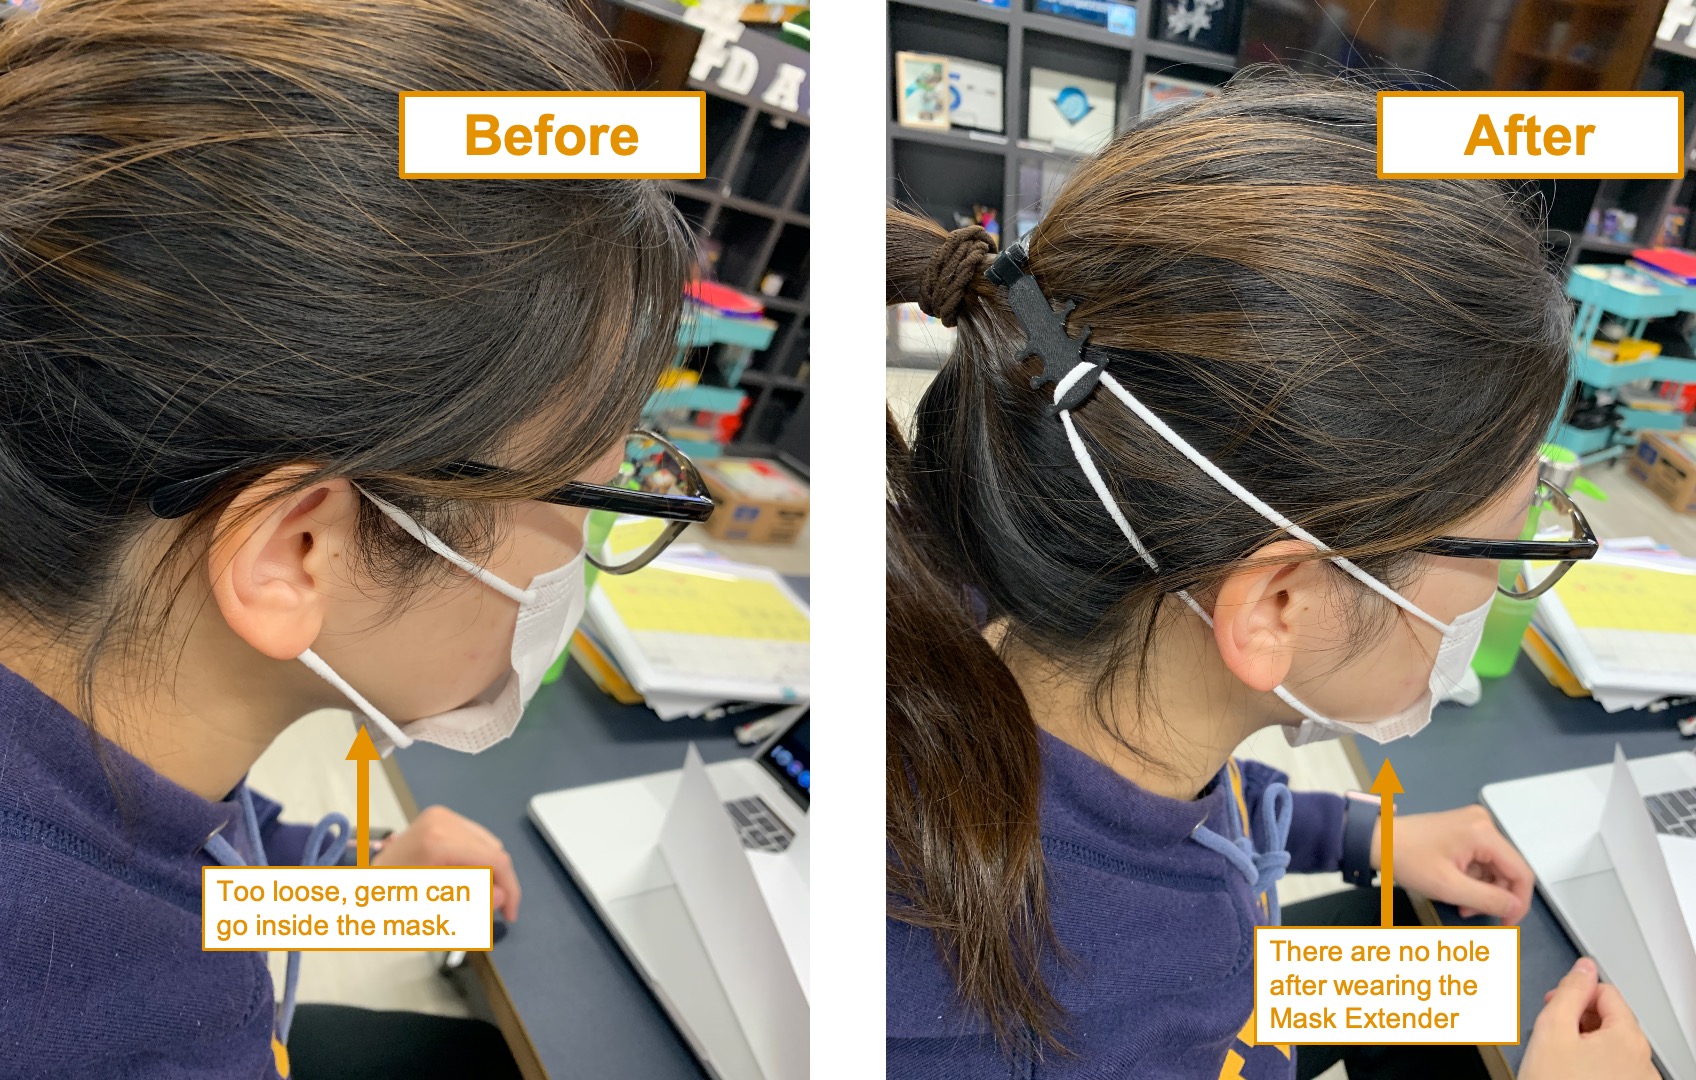
This is how to apply the Mask Extender on my head. Since the mask is too big for me, germ can go inside the mask. There are no hole after wearing the Mask Extender.
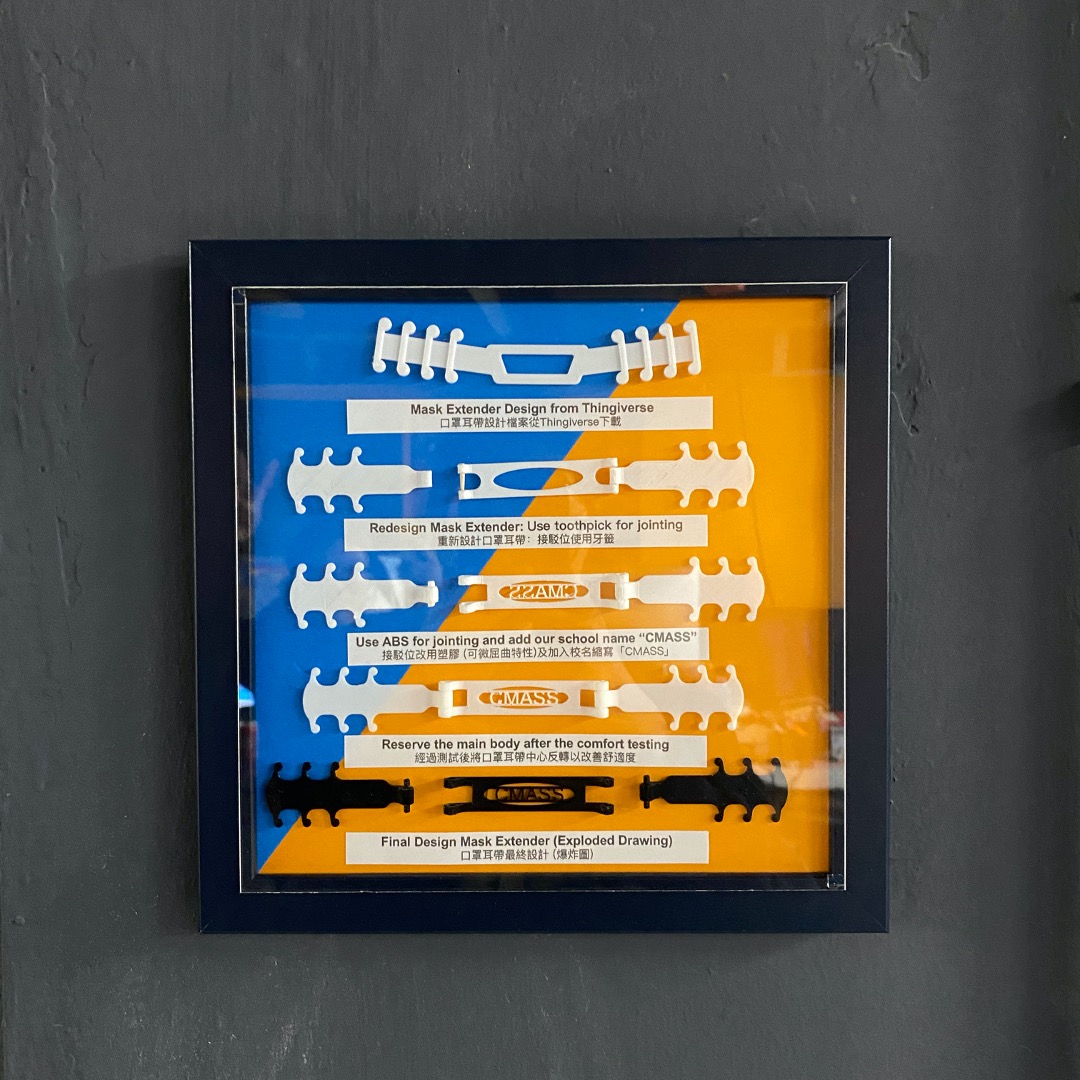
This is the hero shot of The process of redesign the Mask Extender. I put the redesign process and prototype in the frame and hang in on the wall.
This is the video about designing and printing of Mask Extender Process. Please Check it out.
Warning (Filament Broken)
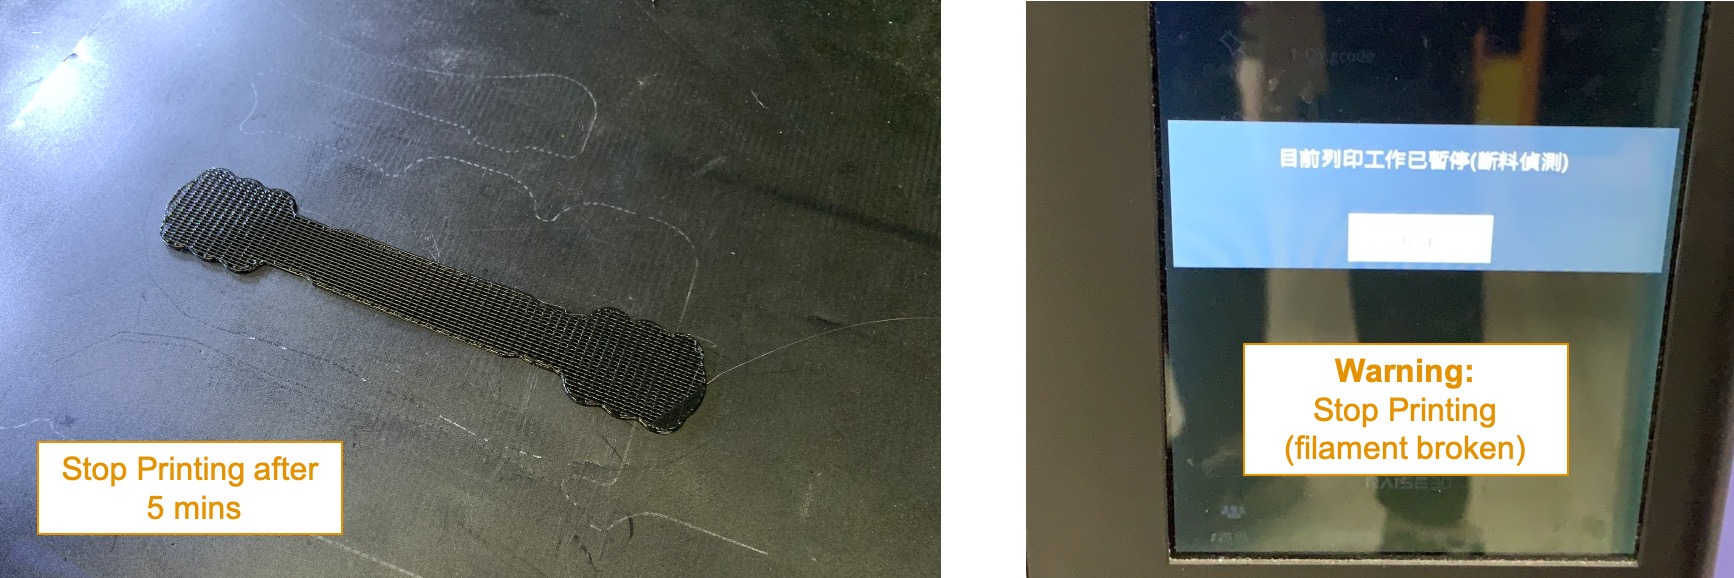
After I send the fike to the 3D Printer, it should be start to printing. However, I find the 3D printing stop printing after 5 minutes and the monitor show the warning sign filament broken.
It have 2 possibilities.
1. Out of filament, need to refill
2. Filament was broken with spool
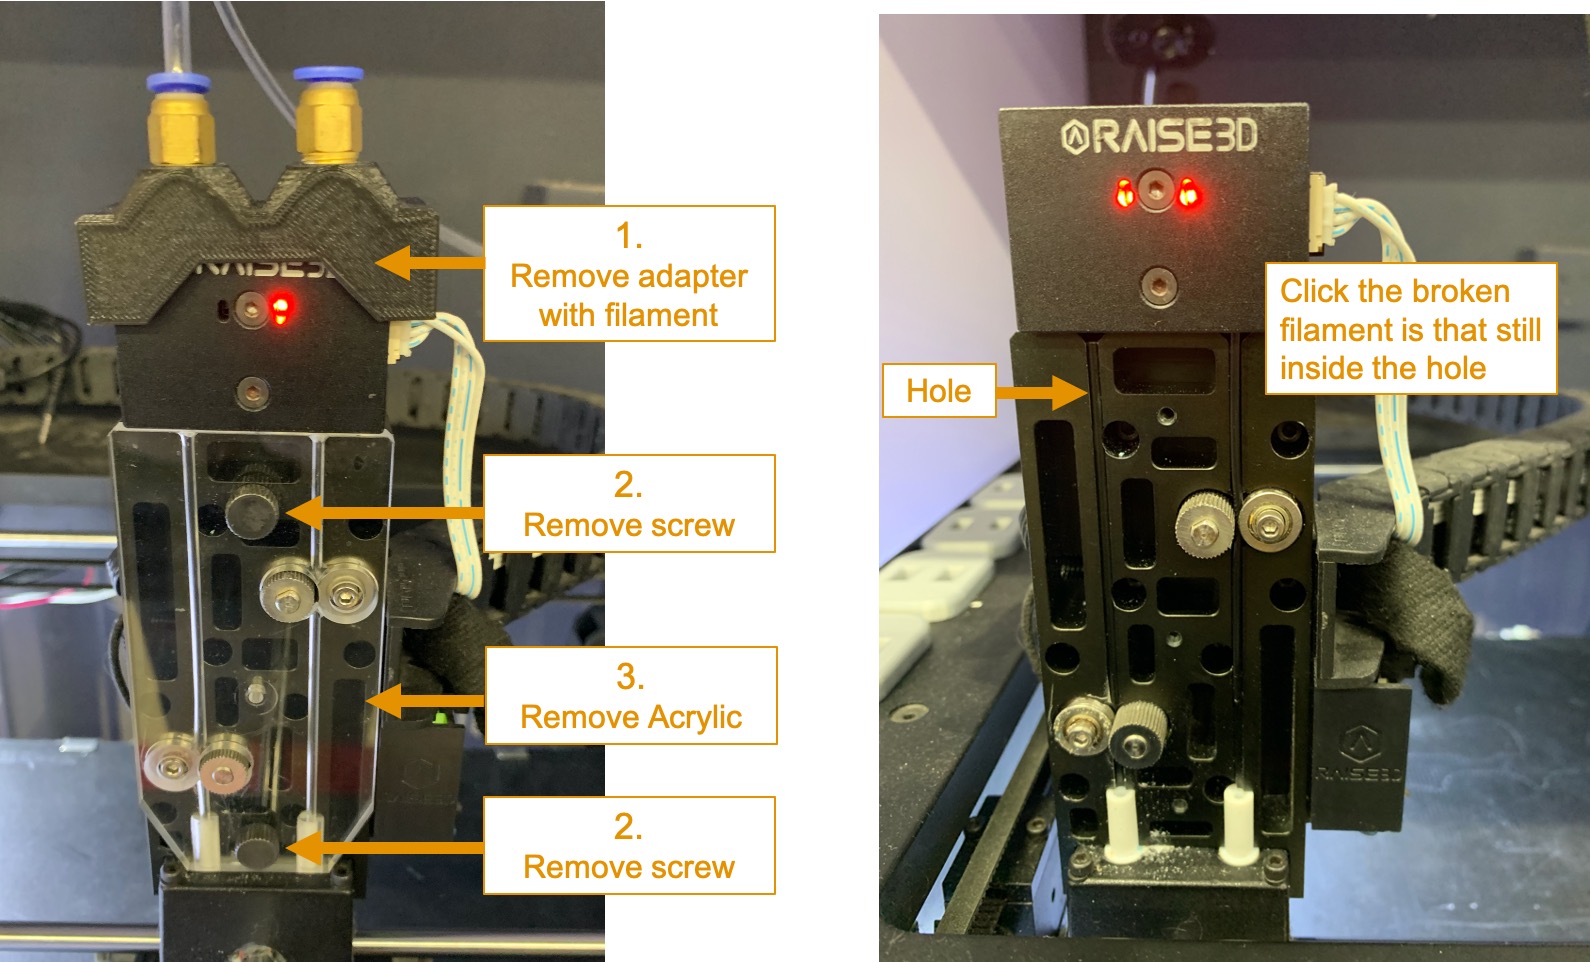
After checking, I find the spool still have lots of filament, so it is not about out of filament. I am sure that Filament was broken with spool. Therefore, I need to remove the broken filament first. First, remove the filament guide tube holder, screws, acrylic (Extruder Cover). Second, Check the hole, there are any broken filament still in there.
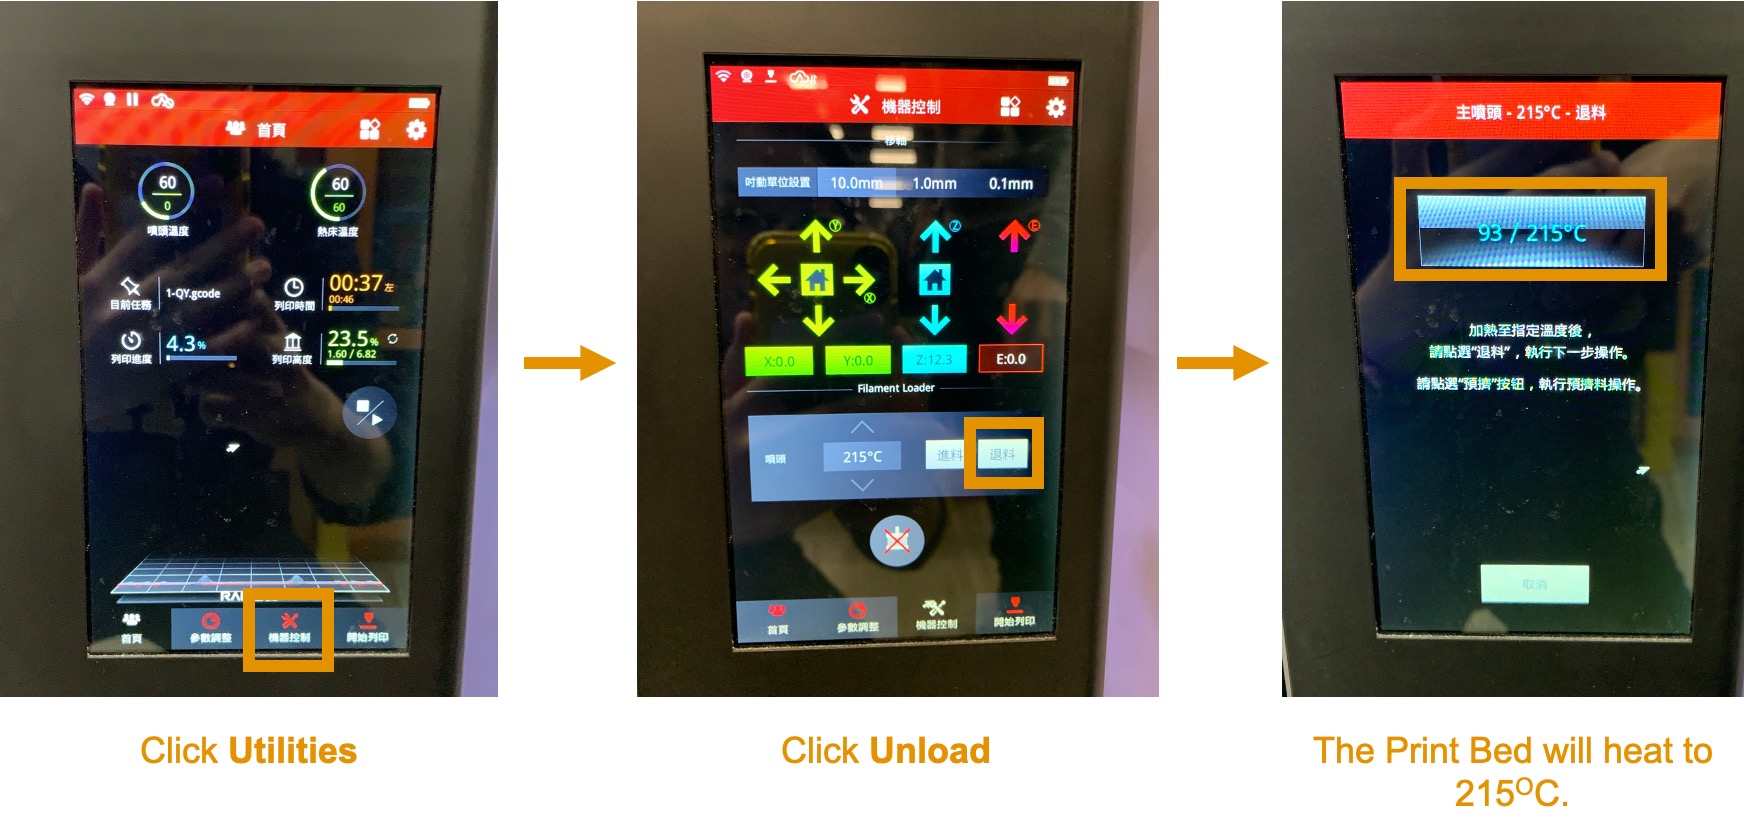
If yes, go to the 3D printer setting. Click Utilities –> Click Unload. The Print Bed will heat to 215 degree. After it reaching to 215 degree, the broken filament start to unload and take it out from the hole.
Left Photo: Finally, I unloaded the broken filament from the hole. If broken filament show in the same spool, it means that sppol of filament already got wet or expired. Please pat attention the condition about the filament.
Right Photo: This the dirction of how to unload the filament.

3D scan an object
In our lab, our 3D Scanner is Sprout by HP. Actually, it is an all-in one computer with Mixed Reality. The important thing is containing a Intel RealSense 3D Camera and pairing with 3D capture stage, the 3D object is able to scan 360 degree automatically.

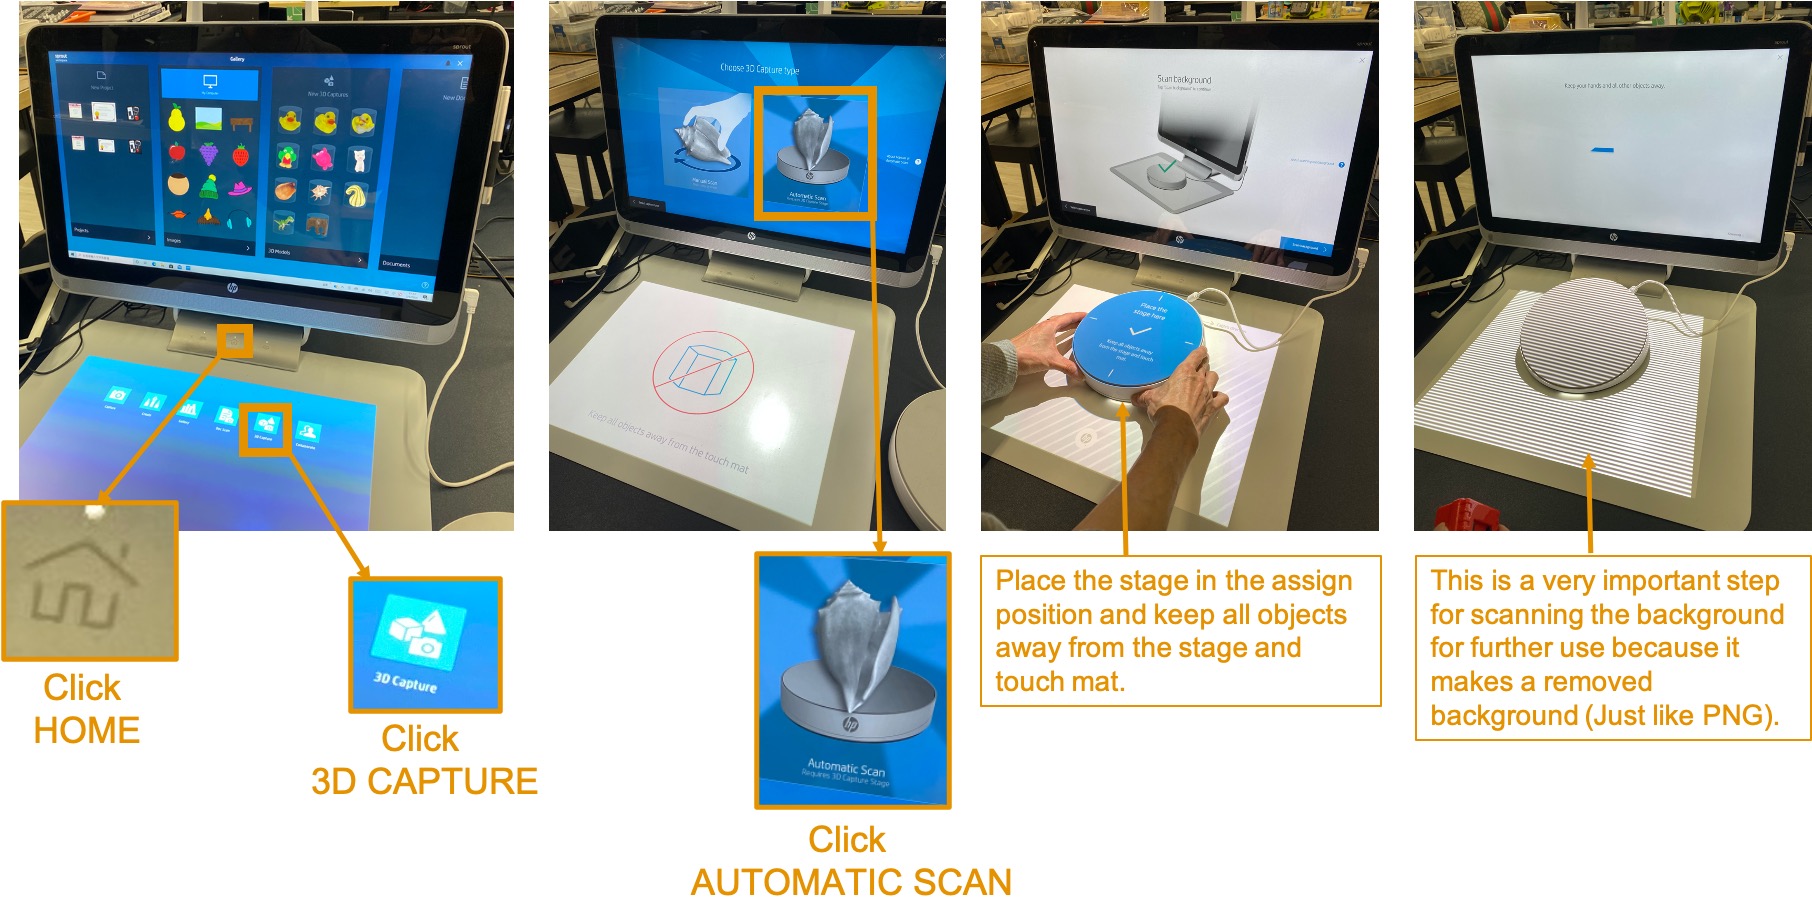
How to use Sprout by HP for 3D Scanning? First, Click HOME icon and Click 3D CAPTURE. Second, there is 2 types of 3D Capture (Manual Scan and Automatic Scan). This time, I use Automatic Scan pair with 3D Capture Stage. Thrid, placing the stage in the assign position and keep all objects away from the stage and touch mat. Forth, this is a very important step for scanning the background for further use because it makes a removed background (Just like PNG).
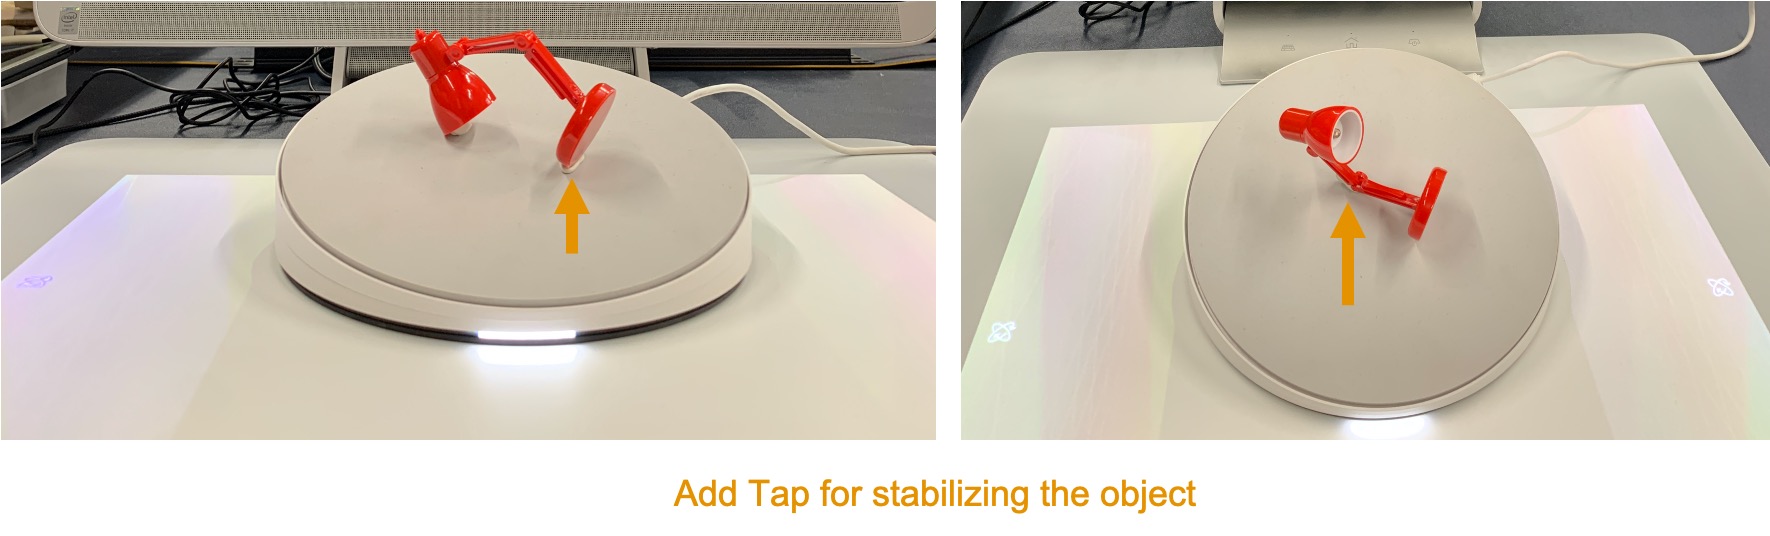
It is better to scanner 6 cycles (6 faces) for the object. Each cycle need to capture 6 photos. However, some of the face may not be stable . You may add Tap for stablizing your object when you are scanning. Remember, do not take to much Tap because it may show it in your finished scanner file.
This is the process how I use Sprout by HP as a 3D Scanner.
Finally, Sprout by HP generate 3 differents files (OBJ, MTL and OGJ.) I upload those 3 files on sketchfab and generate a 3D on the web. Here is the result of Scanned Mini Lamp.
You may copy the code below and change embed from sketchfab, so that you can show your 3D object in makedown.
<iframe width="560" height="315" src="embed from sketchfab" frameborder="0" allow="accelerometer; autoplay; clipboard-write; encrypted-media; gyroscope; picture-in-picture" allowfullscreen></iframe>
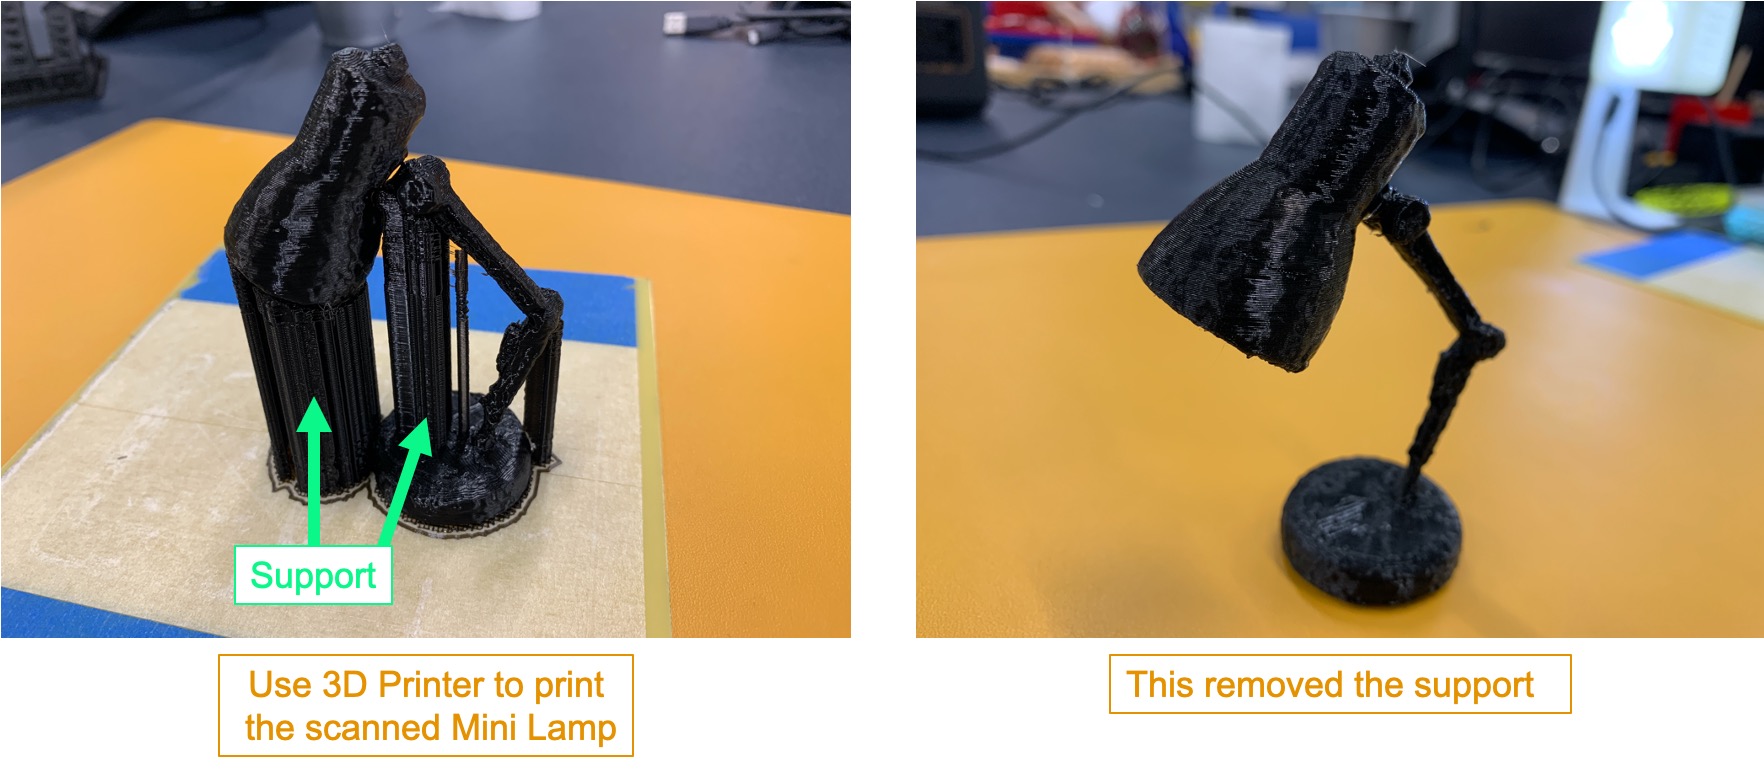
I printed the scanned Mini Lamp. Here is the result (Left Photo). Since the mini lamp is hanging, so it is very important to add Support before printing. Right photo shows after removed the support.
File Download
Mask Extender:
Mask_Extender_F3D
Mask_Extender_STL