2. Project management
This assignment is about:
Individual assignment
- work through a git tutorial
- build a personal site in the class archive describing you and your final project
Below are the steps I took to familiarise myself with building a website using Git, Mkdocs, and Markdown and documenting my learning process. These tools are all new and exciting to me.
Git
I follow the procedure below to set up my Gitlab repo
-
Clone the online repo by running git pull
-
Set up an SSH key and add the public key to my Gitlab profile
-
Edit the .md file template with a text editor (I used Notepadd++)
-
To add pictures, run git add

-
Run git commit -a

A window pops up asking what changes I made, so that I type those out, and close the window.
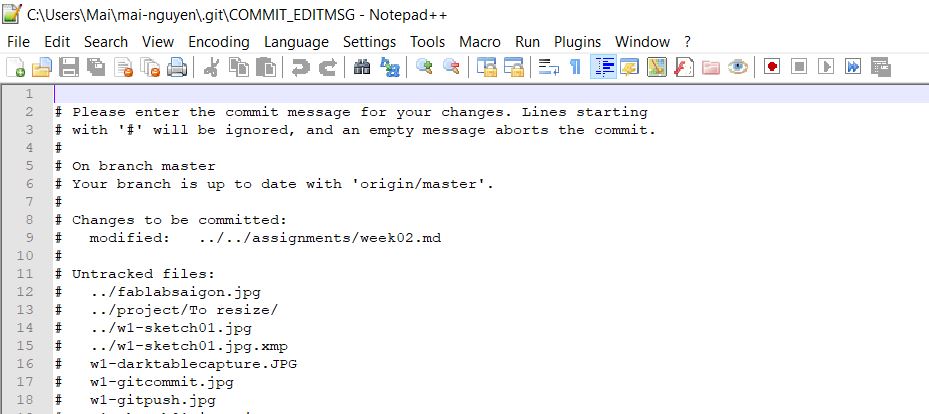
The system then returns

- Run git push


Now I am officially a git pusher. It feels great!
Problems encountered
1. Unable to push to Gitlab repository
Solution: check and log in to the correct account
2. Images not displayed even though the link to the file is confirmed correct..
Solution: run git add command
git add images/w1-sketch01-600px.jpg
Mkdocs
I followed the instruction on mkdocs.org to install Mkdocs.
After installing Python, I ran the following commands from terminal
pip install –upgrade pip
pip install mkdocs
mkdocs –version
mkdocs serve
The system returns
INFO    -  Documentation built in 4.72 seconds
[I 210213 13:41:24 server:335] Serving on http://127.0.0.1:8000
INFO    -  Serving on http://127.0.0.1:8000
[I 210213 13:41:24 handlers:62] Start watching changes
INFO    -  Start watching changes
[I 210213 13:41:24 handlers:64] Start detecting changes
INFO    -  Start detecting changes
Next, I opened the configuration file: mkdocs.yml in Notepad++ and customized site name, description, author, and social media links. I also changed the default font from Ubuntu to DM Sans.
I would like to change the favicon as well but I have not created a .svg for it.
Markdown
As recommended by FabAcademy tutorials, I followed this Markdown Tutorial to learn the ropes of Markdown syntax. I found it very quick and easy. I use Notepad++ to edit my local .md files.
Video compression
Previously I had used ffmpeg to extract images from a video frame by frame so it is already there on my computer. The ffmpeg.exe and videos to be processed need to be in the same folder. One can either copy the fffmpeg.exe file to where the videos are, or vice versa, copy the videos to the existing location of ffmpeg.exe, before running the following terminal commands.
Compress input.mp4 and save it as output.mp4
ffmpeg -i input.mp4 -vf scale=-1:720 -b:v 1000k output.mp4
With this, I was able to compress a 116MB mp4 file down to 6MB.
You can also trim a specific section in the video while compressing it
ffmpeg -i input.mp4 -ss 00:00:00.0 -t 00:00:07.0 output.mp4
To display the video, we will write the following in Markdown.