14. GUI and Applied Programming
This week I worked on an interface between my video synth and processing on a computer to control the video playing parameters.
Processing Video
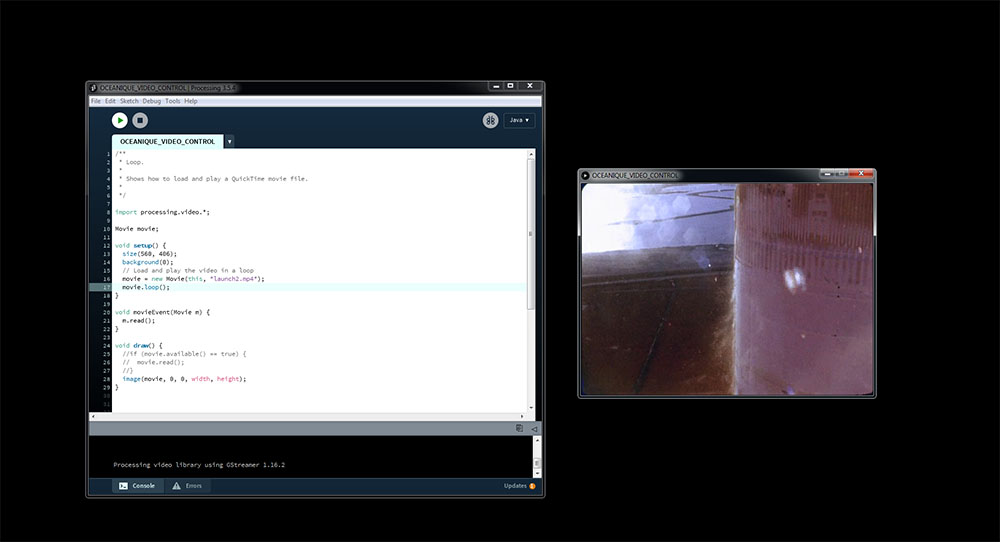
I’m using Processing to take commands via Arduino over serial to control video playing parameters (speed, frame rate, pause, jump) for my video synthesizer.
I first downloaded Processing and then the Movie library (https://www.processing.org/reference/libraries/video/Movie.html).
Movies must be located in the sketch’s data folder with the command: movie = new Movie(this, “launch2.mp4”).
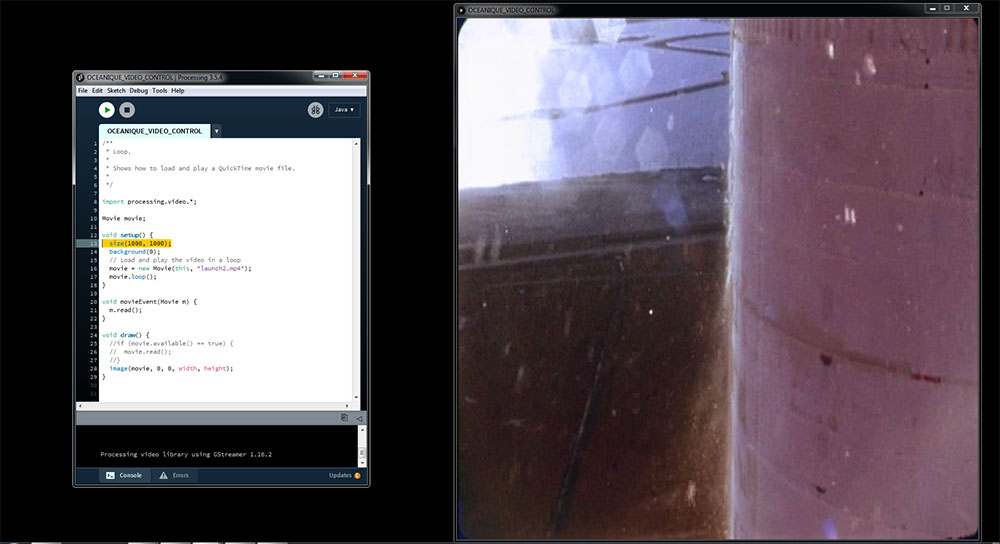
With size you can change the size of the window:
size(1000, 1000);
You can change the FPS with frameRate: frameRate(1);
And you can change the speed of the movie between 0.1 (1/10th speed) and 2.0 (twice the speed) for instance: movie.speed(2.0);
Here is me resizing the video in Processing:
Processing Arduino: Step 1
I followed this tutorial: https://learn.sparkfun.com/tutorials/connecting-arduino-to-processing/all
Here is the code I’m running in Processing:
import processing.serial.*;

Serial myPort;  // Create object from Serial class
String val;     // Data received from the serial port

void setup()
{
  // I know that the first port in the serial list on my mac
  // is Serial.list()[0].
  // On Windows machines, this generally opens COM1.
  // Open whatever port is the one you're using.
  String portName = Serial.list()[1]; //change the 0 to a 1 or 2 etc. to match your port
  myPort = new Serial(this, portName, 9600);
}

void draw()
{
  if ( myPort.available() > 0)
  {  // If data is available,
  val = myPort.readStringUntil('\n');         // read it and store it in val
  }
println(val); //print it out in the console
}
I selected Port 1 from the list because Arduino saw my port as second in the list and it worked.
And here is the code I’m running in Arduino:
void setup()
{
//initialize serial communications at a 9600 baud rate
Serial.begin(9600);
}

void loop()
{
//send 'Hello, world!' over the serial port
Serial.println("Hello, world!");
//wait 100 milliseconds so we don't drive ourselves crazy
delay(100);
}

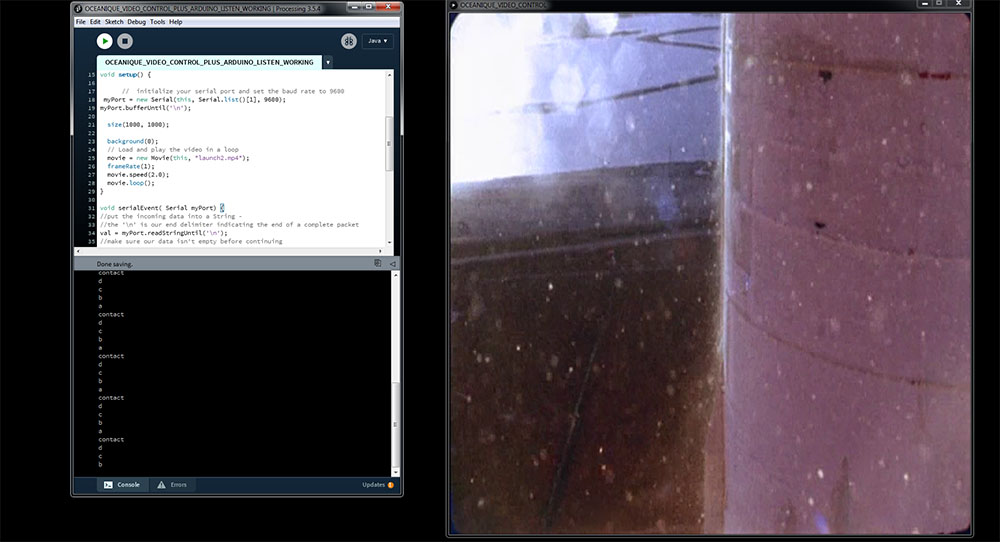
Processing Arduino: Step 2
Now I’ve got Processing and Arduino connected, I want to send characters to Processing from Arduino which will effect the playing of the movie.
To get Processing recieving chars using the serialEvent function:
import processing.serial.*;

Serial myPort;  // Create object from Serial class
String val;     // Data received from the serial port

void setup() {
  size(200, 200); //make our canvas 200 x 200 pixels big
  //  initialize your serial port and set the baud rate to 9600
  myPort = new Serial(this, Serial.list()[1], 9600);
  myPort.bufferUntil('\n');
}

void draw() {
  //we can leave the draw method empty,
  //because all our programming happens in the serialEvent (see below)
}

void serialEvent( Serial myPort) {
//put the incoming data into a String -
//the '\n' is our end delimiter indicating the end of a complete packet
val = myPort.readStringUntil('\n');
//make sure our data isn't empty before continuing
if (val != null) {
  //trim whitespace and formatting characters (like carriage return)
  val = trim(val);
  println(val);

  //look for our 'A' string to start the handshake
  //if it's there, clear the buffer, and send a request for data
    if (val.equals("a")) {
      myPort.clear();
      println("contact");
    }

  }
}
Now I want these characters to effect how the movie is played.
Here is the working hybrid code:
/**
 * Loop.
 *
 * Shows how to load and play a QuickTime movie file.
 *
 */
import processing.video.*;
import processing.serial.*;

Serial myPort;  // Create object from Serial class
String val;     // Data received from the serial port

Movie movie;

int a = 1;

void setup() {

      //  initialize your serial port and set the baud rate to 9600
 myPort = new Serial(this, Serial.list()[1], 9600);
myPort.bufferUntil('\n');

  size(1000, 1000);
 frameRate(a);
  background(0);
  // Load and play the video in a loop
  movie = new Movie(this, "launch2.mp4");

  movie.speed(2.0);
  movie.loop();
}

void serialEvent( Serial myPort) {
//put the incoming data into a String -
//the '\n' is our end delimiter indicating the end of a complete packet
val = myPort.readStringUntil('\n');
//make sure our data isn't empty before continuing
if (val != null) {
  //trim whitespace and formatting characters (like carriage return)
  val = trim(val);
  println(val);

  //look for our 'a' string
  //if it's there, clear the buffer and print contact
    if (val.equals("a")) {
      myPort.clear();
      a = 50;
     frameRate(a);
    }

        if (val.equals("b")) {
      myPort.clear();
      a = 1;
     frameRate(a);
    }

  }
}

void movieEvent(Movie m) {
  m.read();
}

void draw() {
  //if (movie.available() == true) {
  //  movie.read();
  //}
  image(movie, 0, 0, width, height);
}
Now I will add buttons to Arduino to control the FPS. I have buttons connected to A0 and A1. By default they are pulled down with 10Ks and are connected to 5V when pushed :
void setup()
{
//initialize serial communications at a 9600 baud rate
Serial.begin(9600);

pinMode(A0, INPUT);
pinMode(A1, INPUT);
}

void loop()
{

if (digitalRead(A0) == HIGH)
{
Serial.println("b");
delay(1000);
//wait 100 milliseconds so we don't drive ourselves crazy
}
if (digitalRead(A1) == HIGH)
{
Serial.println("a");
//wait 100 milliseconds so we don't drive ourselves crazy
delay(1000);
}
}
Here is the video of this operating:
I reproduced this using a board I had made from the remote control drone project using the joysticks to go up to control ‘a’ and ‘b’. It is plugged in to a USART cable. Here is the code for the board:
void setup()
{
//initialize serial communications at a 9600 baud rate
Serial.begin(9600);

pinMode(8, INPUT_PULLUP);
pinMode(A2, INPUT_PULLUP);
}

void loop()
{

if (digitalRead(8) == LOW)
{
Serial.println("b");
delay(1000);
//wait 100 milliseconds so we don't drive ourselves crazy
}
if (digitalRead(A2) == LOW)
{
Serial.println("a");
//wait 100 milliseconds so we don't drive ourselves crazy
delay(1000);
}
}
And here is the video of it working: