5. 3D Scanning and printing
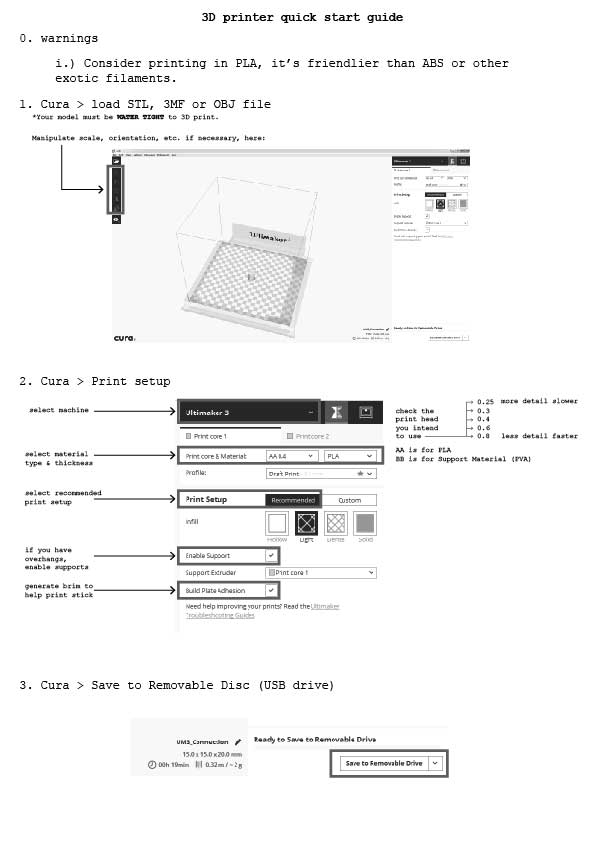
Homework for this week:
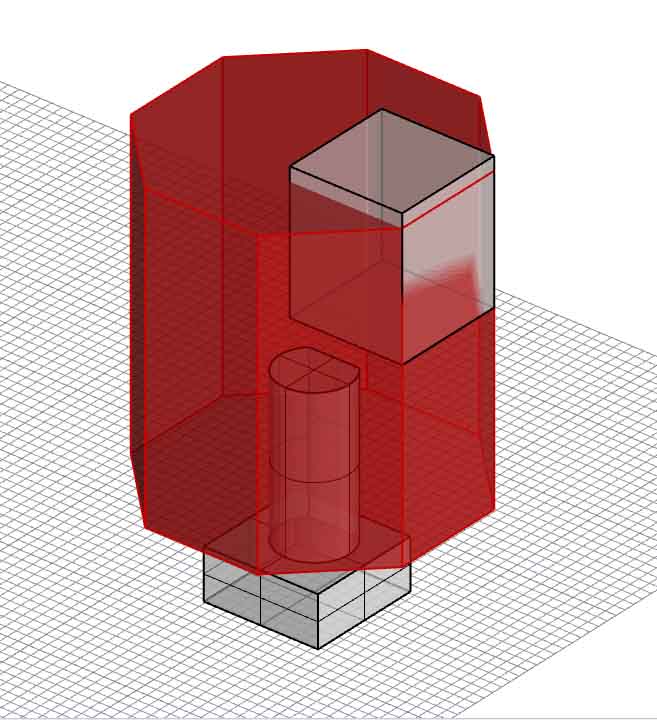
group assignment: test the design rules for your 3D printer(s)
individual assignment: design and 3D print an object (small, few cm3, limited by printer time) that could not be made subtractively and 3D scan an object (and optionally print it)
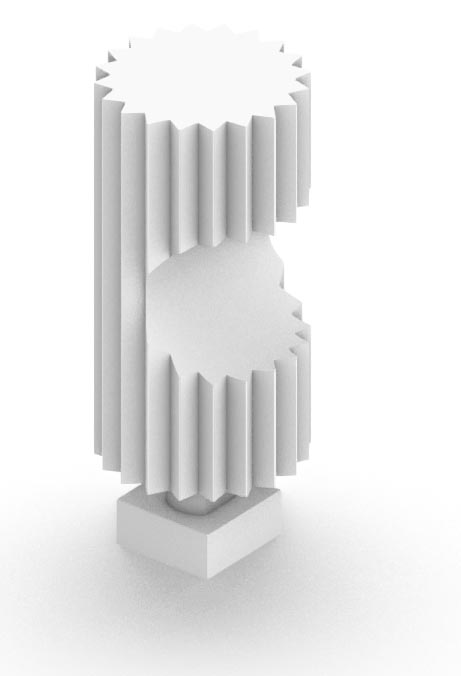
Here are the 3D knobs I developed this week :
And here is my 3D scan :
3D Printing
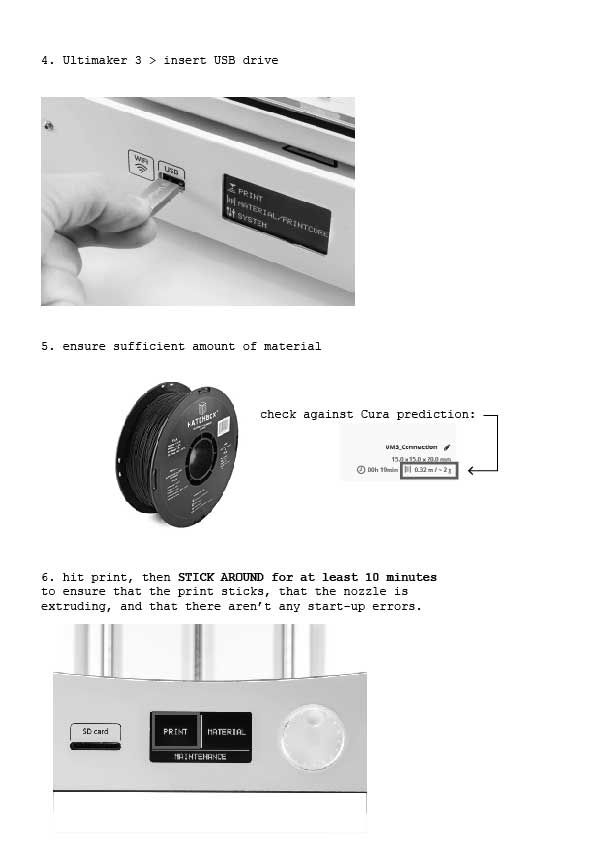
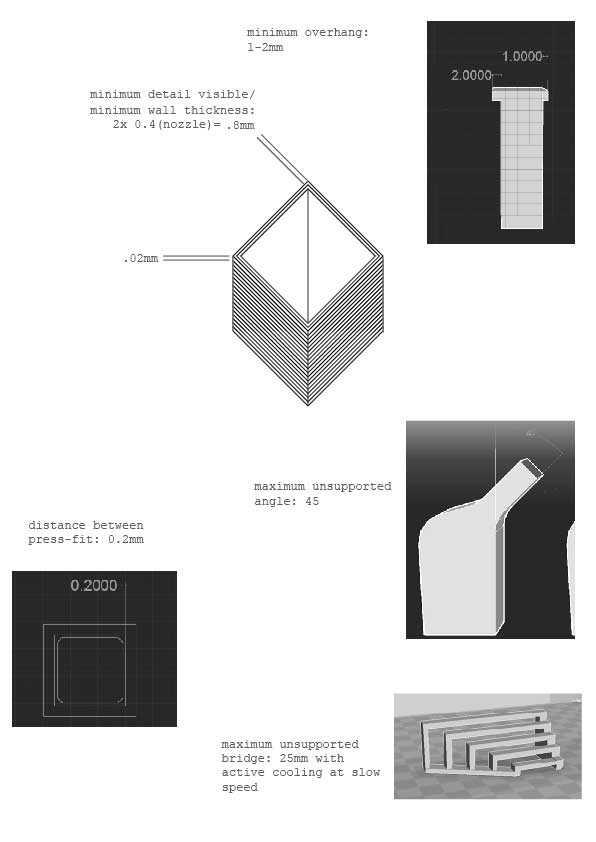
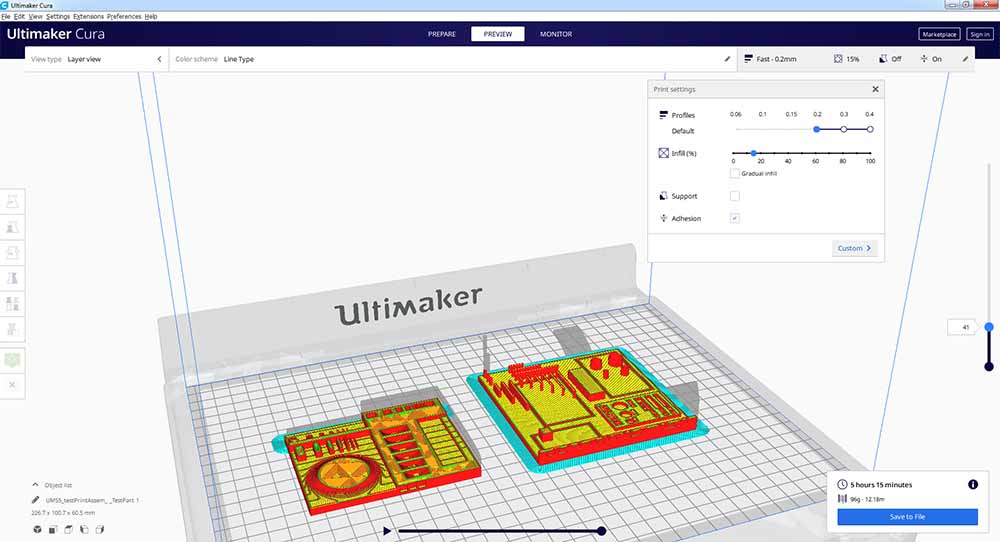
I’ve put together a cheat sheet for the Ultimakers and with Cura:
I did some quick research online to determine some basic constraints associated with this type of printing:
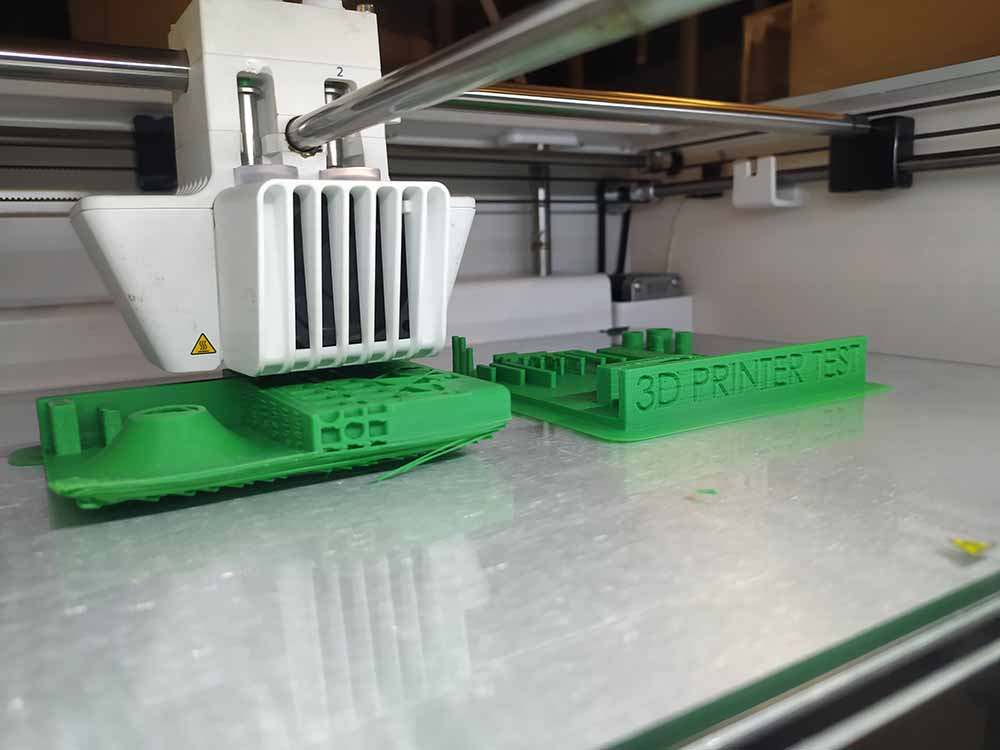
Following Remy Ducros’ idea from last year, I printed these two calibration models:
https://www.thingiverse.com/thing:636363
https://www.thingiverse.com/thing:2656594
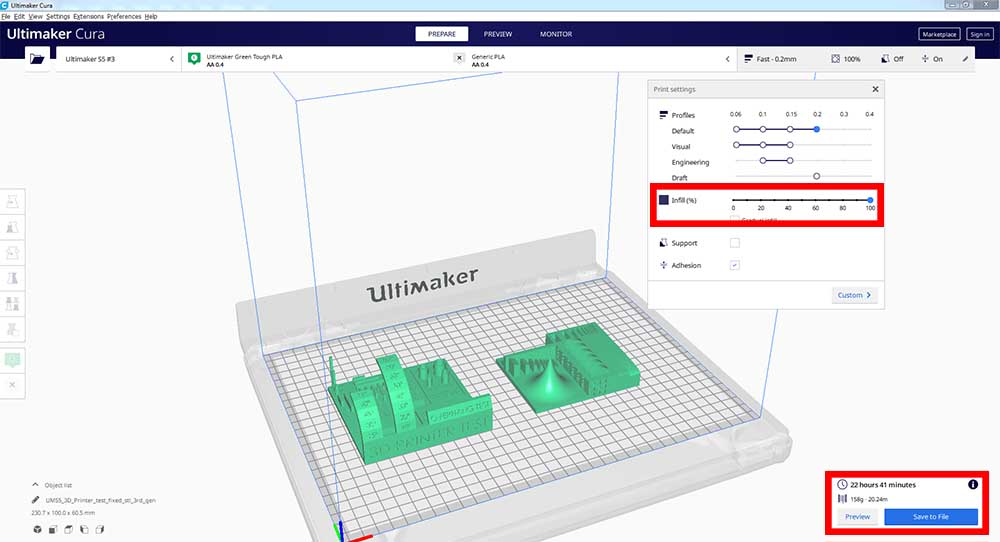
Here I am using the preview to see the layers in sequence that will be printed:
The left print had problems sticking to the platform but managed to right itself as the print progressed. I should have done this print on a finer head but unfortunately the others were being used.

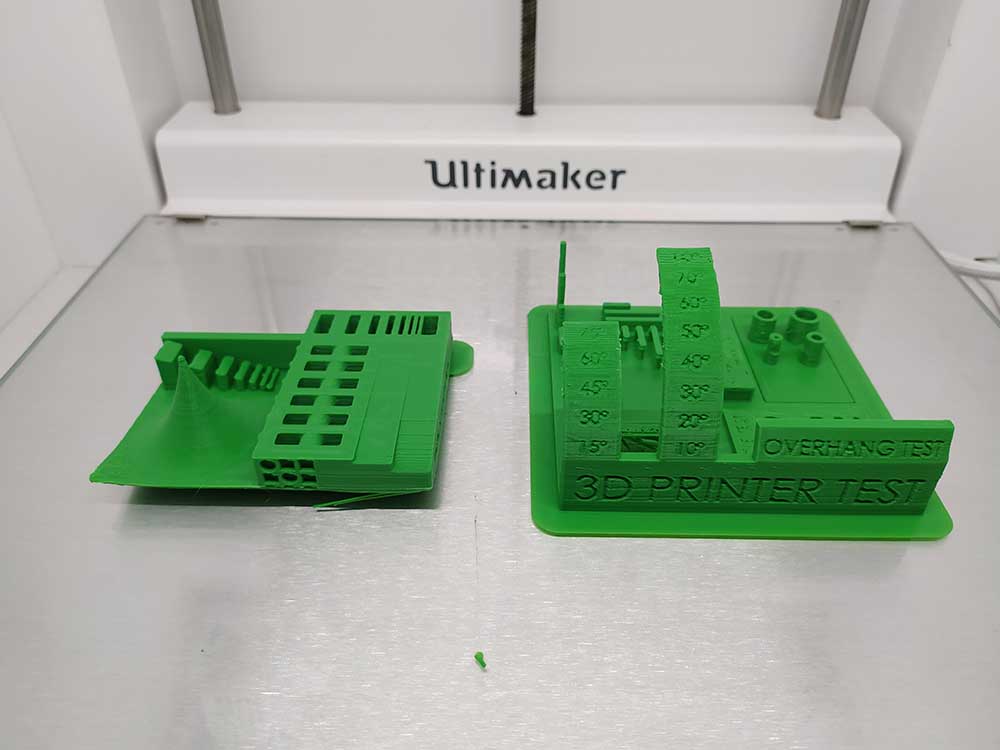
Here is the finished print:
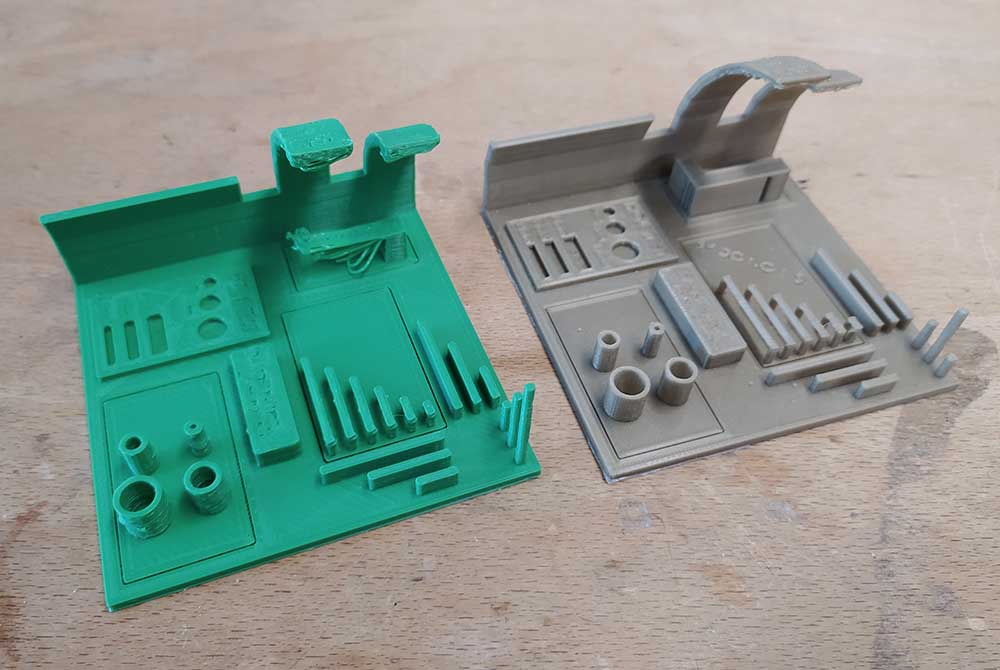
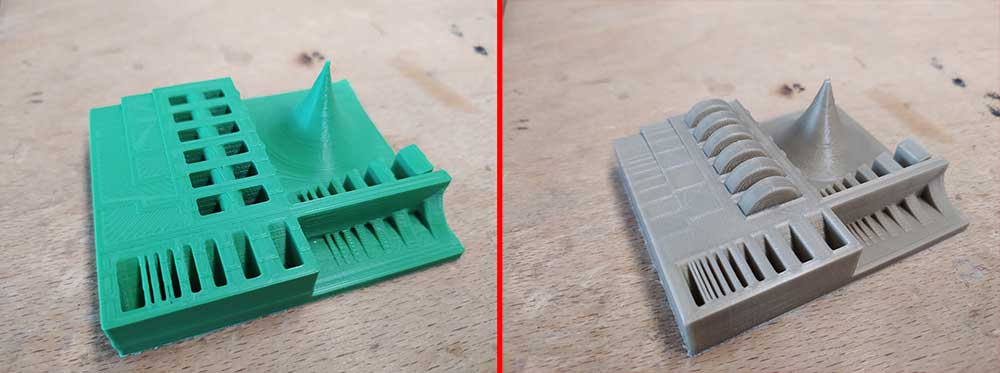
I decided to do a quick comparison with the same print on different sized nozzles.
The difference is considerable between printing time between a 0.8mm nozzle - 5.5hrs and a 0.4mm nozzle - 14.5hrs:
Here is the difference in printing time between 10% fill with the 0.4mm (14.5hrs) and 100% fill with the 0.4mm (22h.5hrs):
Comparing with a 0.4 nozzle print here are the detail shots (green is 0.8mm and bronze is 0.4mm):
Looking at the overhangs, the 0.4mm fared better.
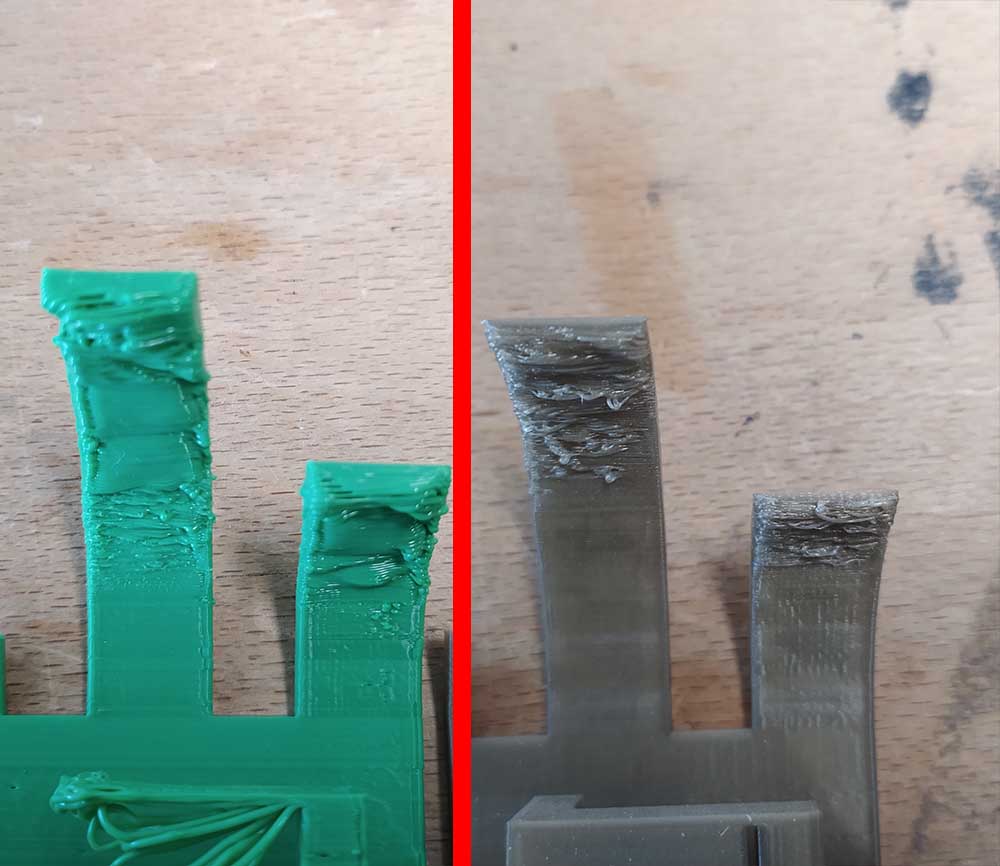
In terms of bridging, there appears to be no difference. The cantilevered surface can’t be compared because in the 0.4mm print it was done with support.
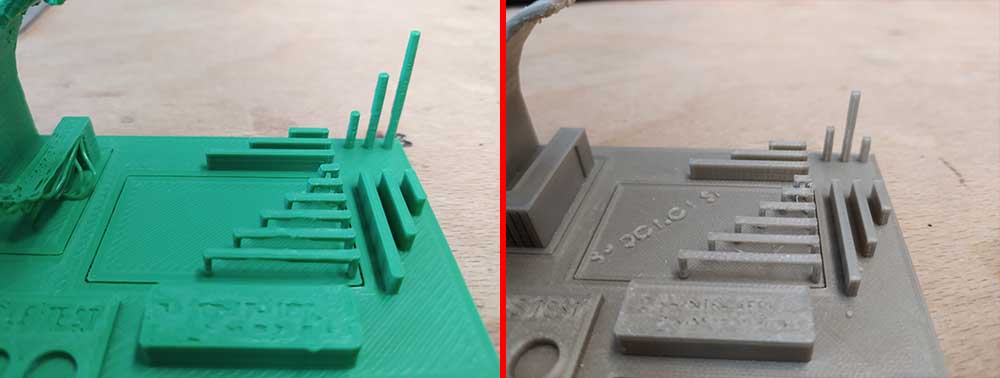
The gaps also appear to have printed fine in the larger print nozzle. The finest gap isn’t visible in the 0.8mm version however.
Designing a 3D object
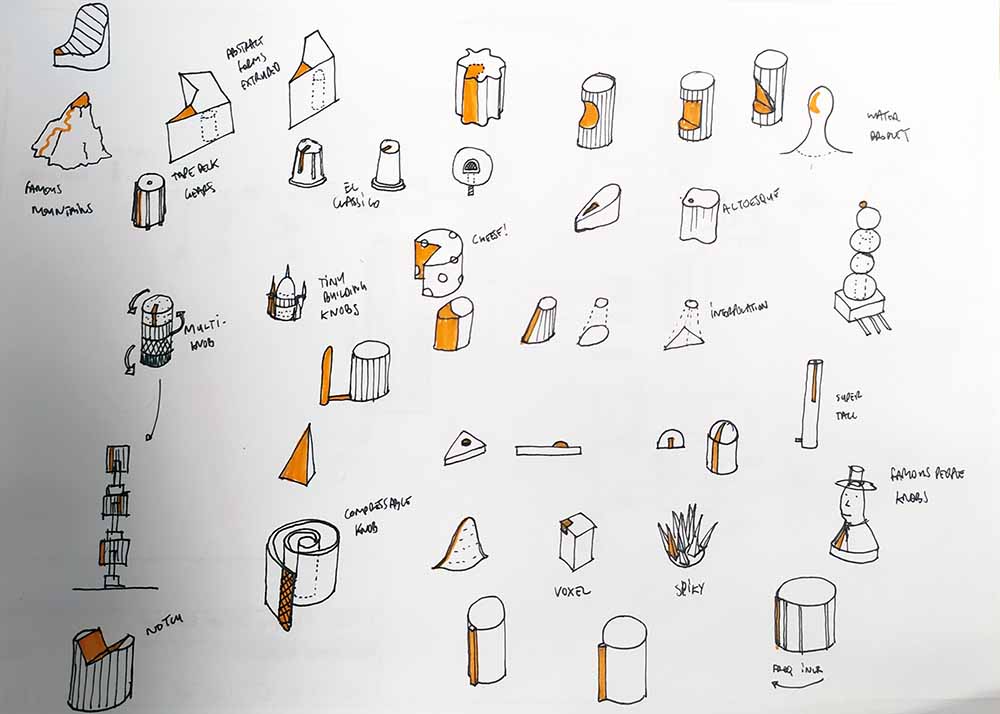
I am designing a cutom knob for my video synth. Here are some ideas:
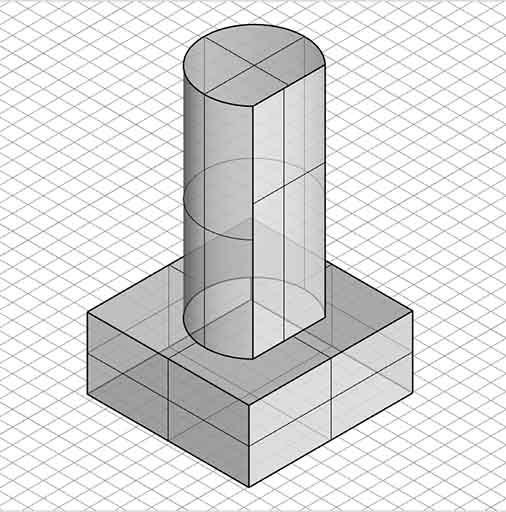
I started off by modeling the potentiometer I will be using.
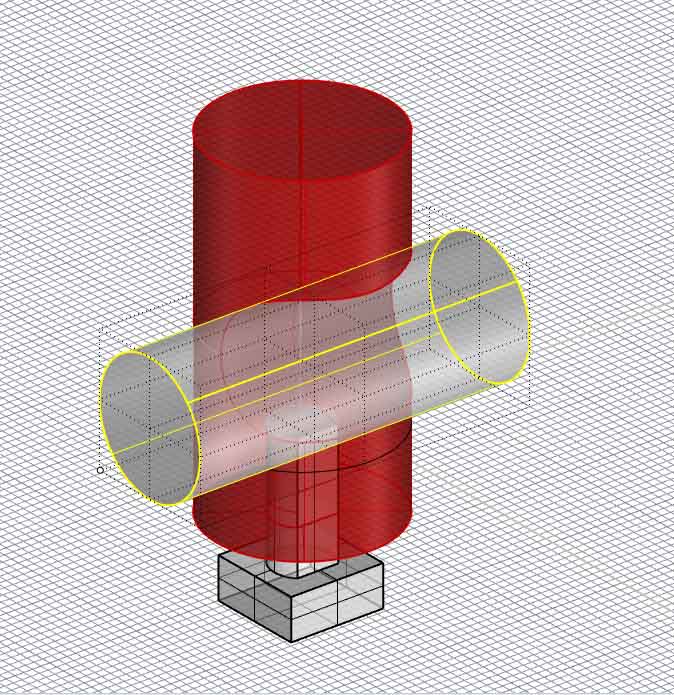
I am using Rhino 3D and mostly using Boolean subtractions and unions. Here I subtracted a cylinder for the indication.
This is what the final rendered version looks like with triangular knob texture:
For another iteration, I subtracted a toroid at an angle…
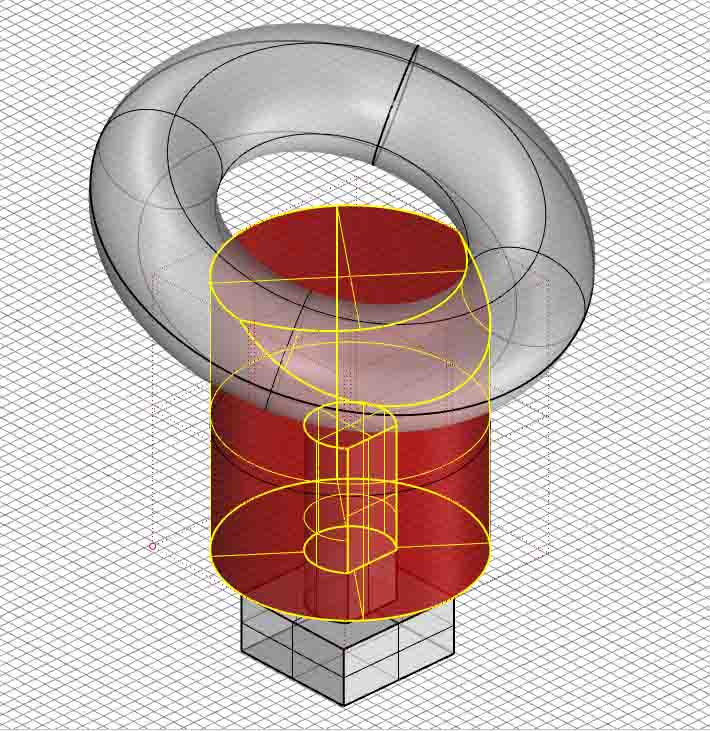
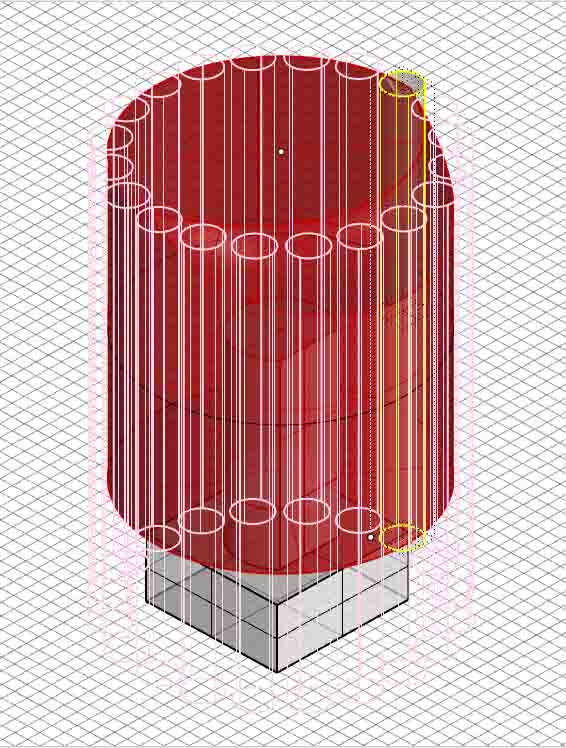
…and then subtracted a series of cylinders using the ArrayPolar command.
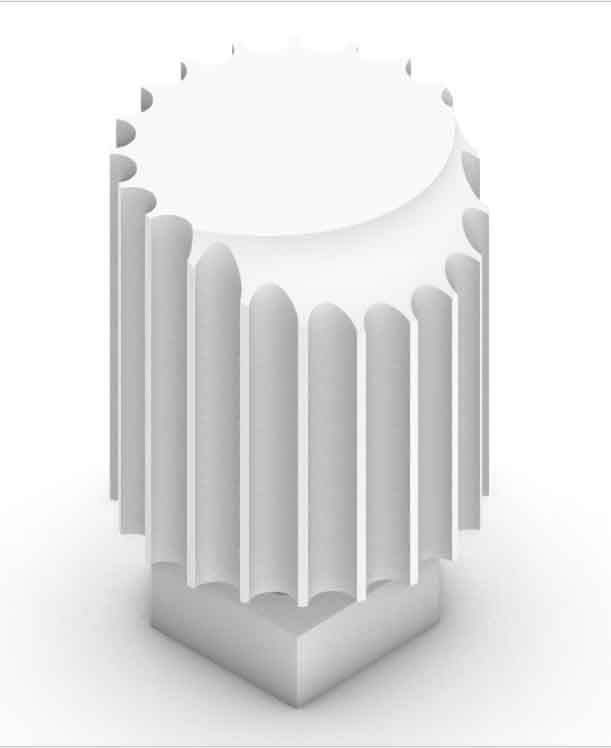
Here is a render of that particular knob:
More iterations with different knob undulations:
Here I extruded a deformed cylinder, then subtracted a tilted rectangular prism and then added a sphere for indication:
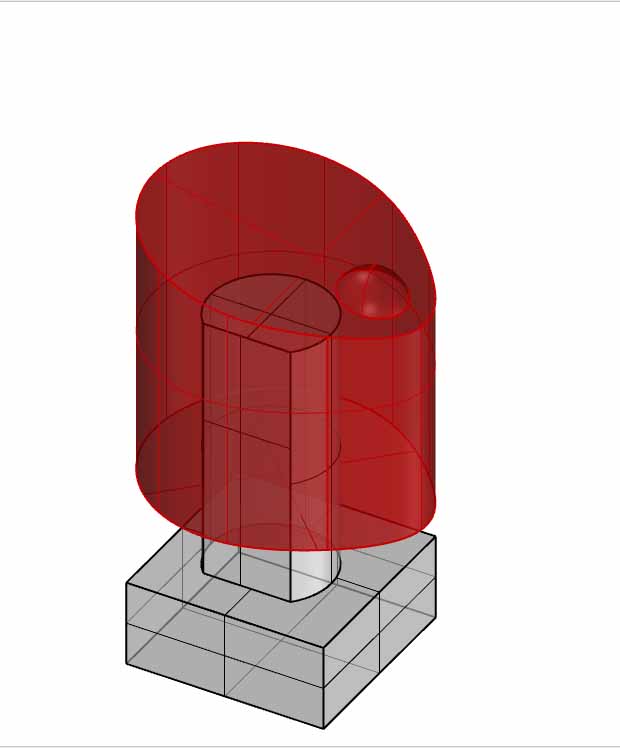
Here is the boolean subtraction step :
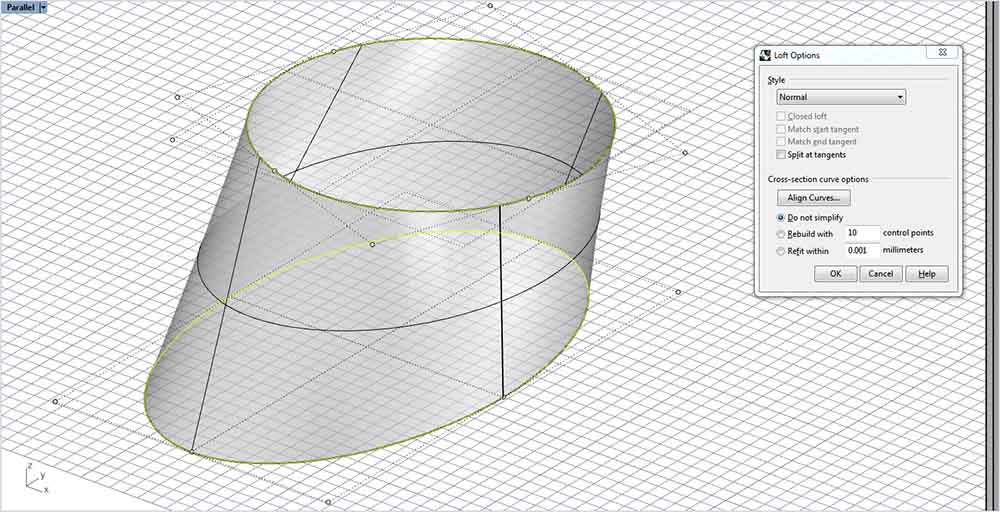
For another iteration I created a loft using the Loft tool between a circle and an oval:
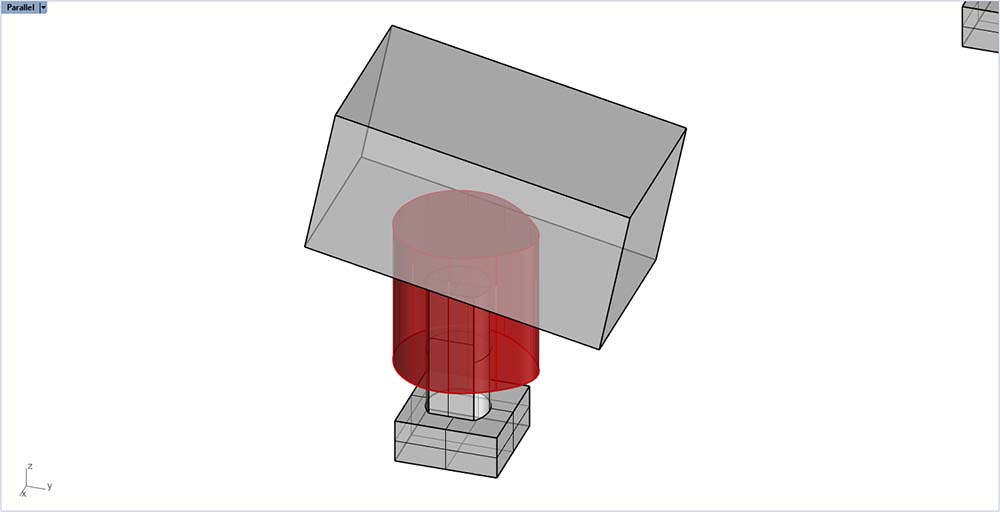
For yet another iteration I subtracted a rectangular prism from an extruded octogon.
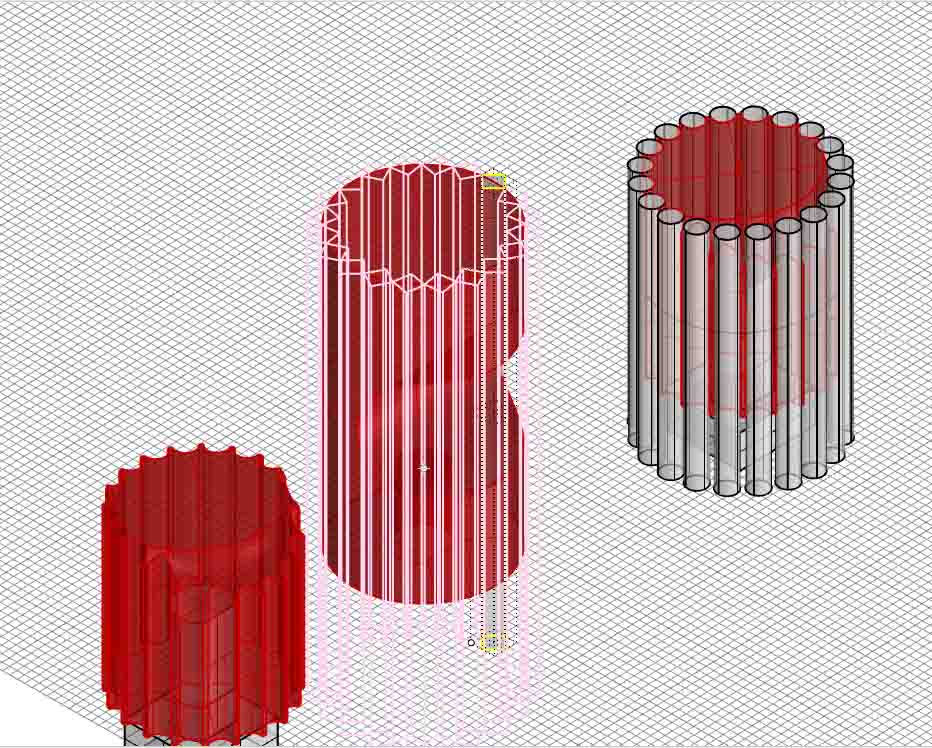
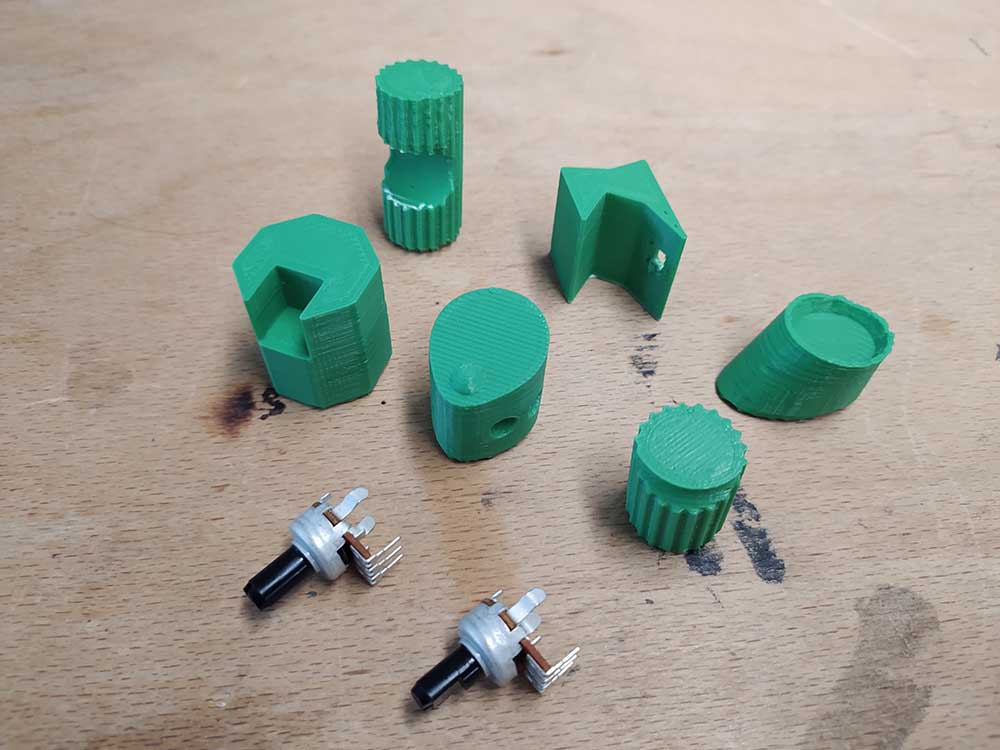
In total I made 6 iterations to test:
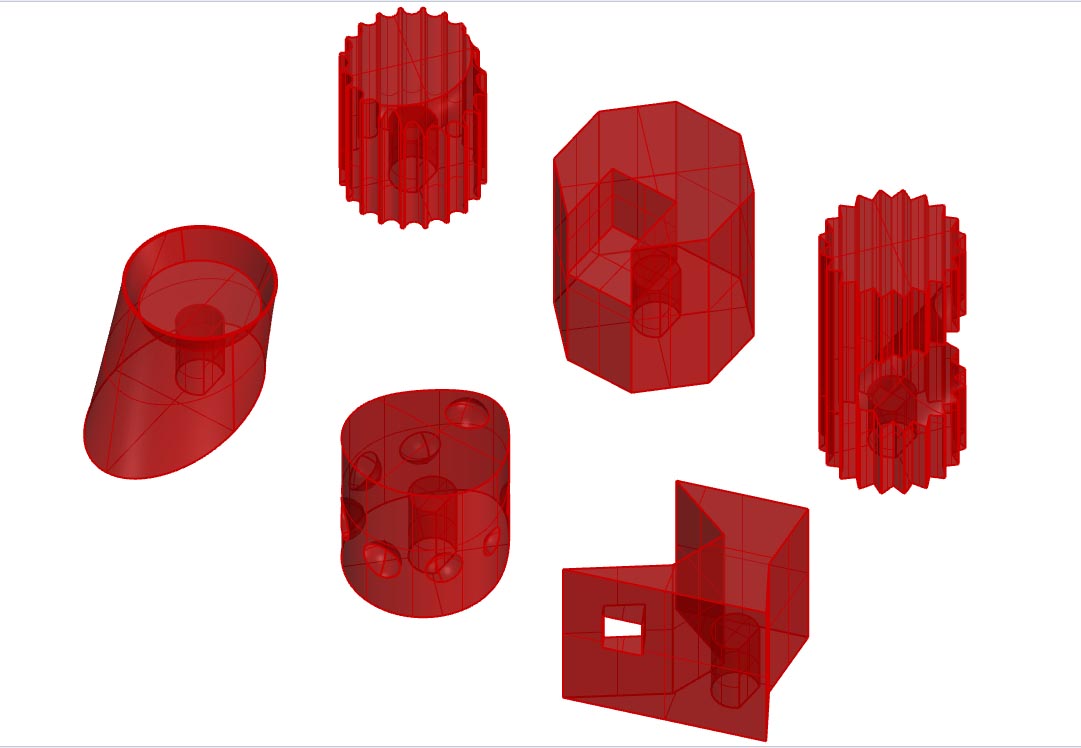
Here is what they look like underneath:
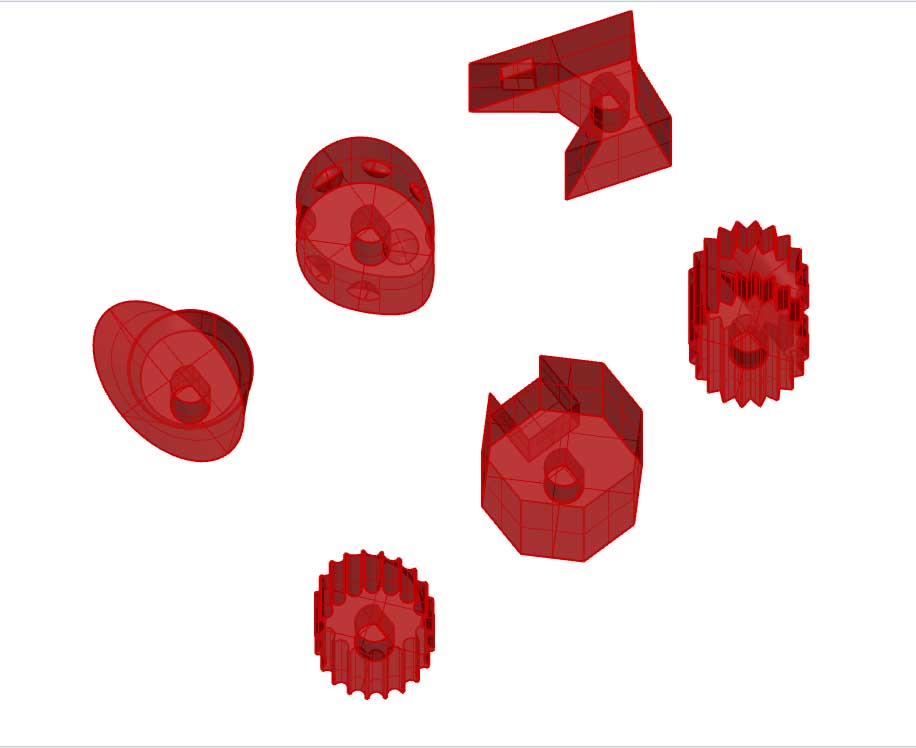
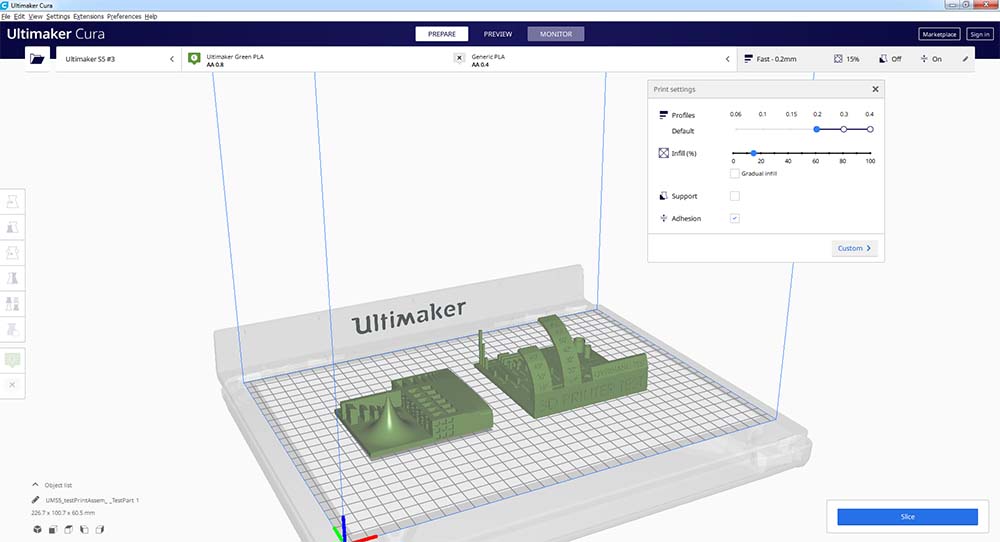
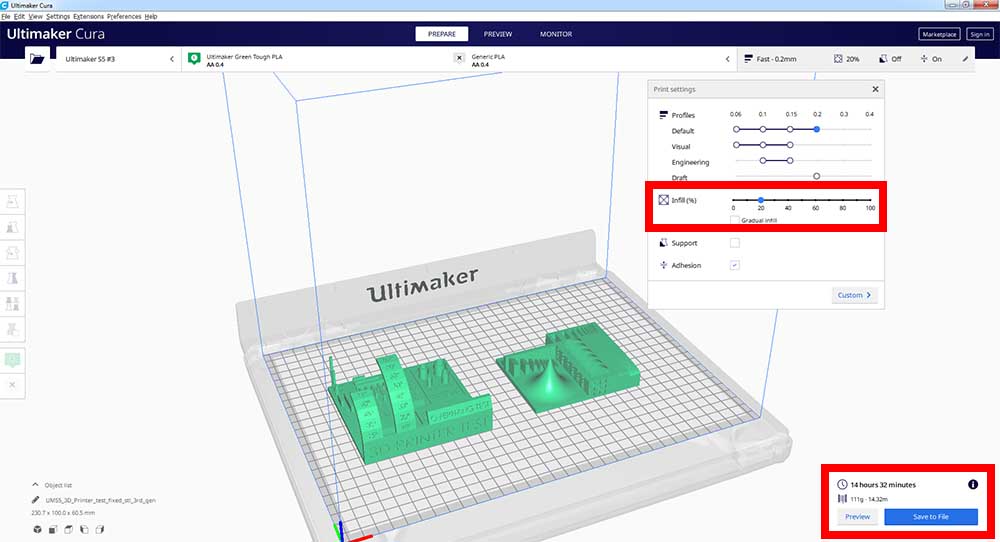
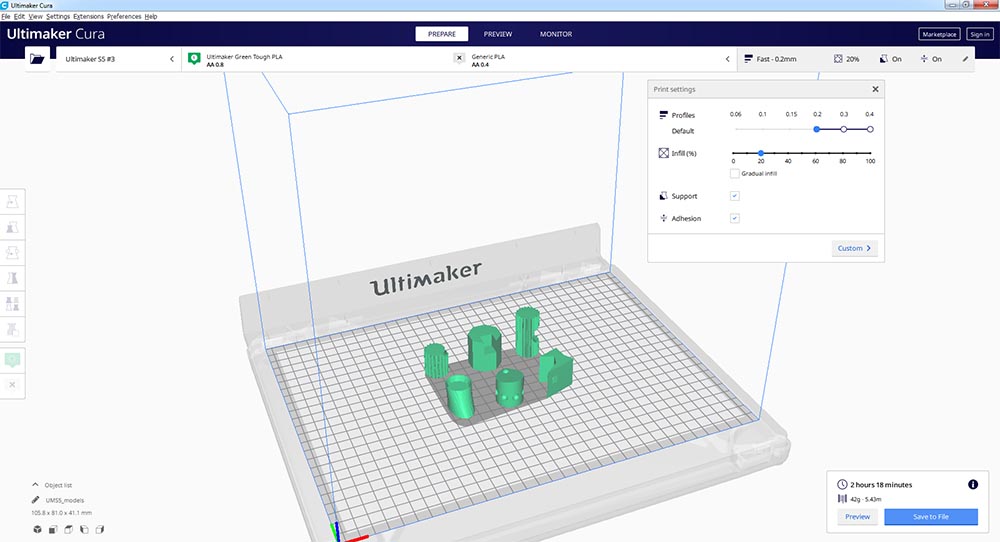
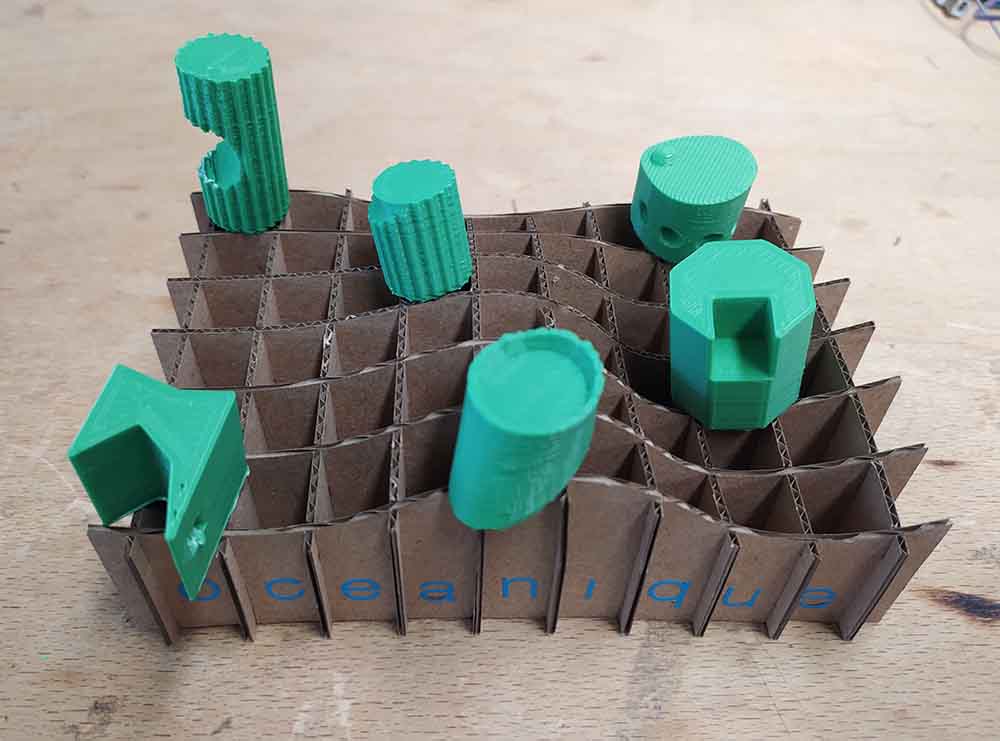
Here they are in Cura, I’m using 0.8mm head with Tough Green PLA, 10% infill and support + adhesion turned on for the Ultimaker S5.
Here are the prints about half way done. You can see the subtraction in the base of the knobs to allow them to fit onto the potentiometers. This shows that this model could not have been made easily on a cnc mill.

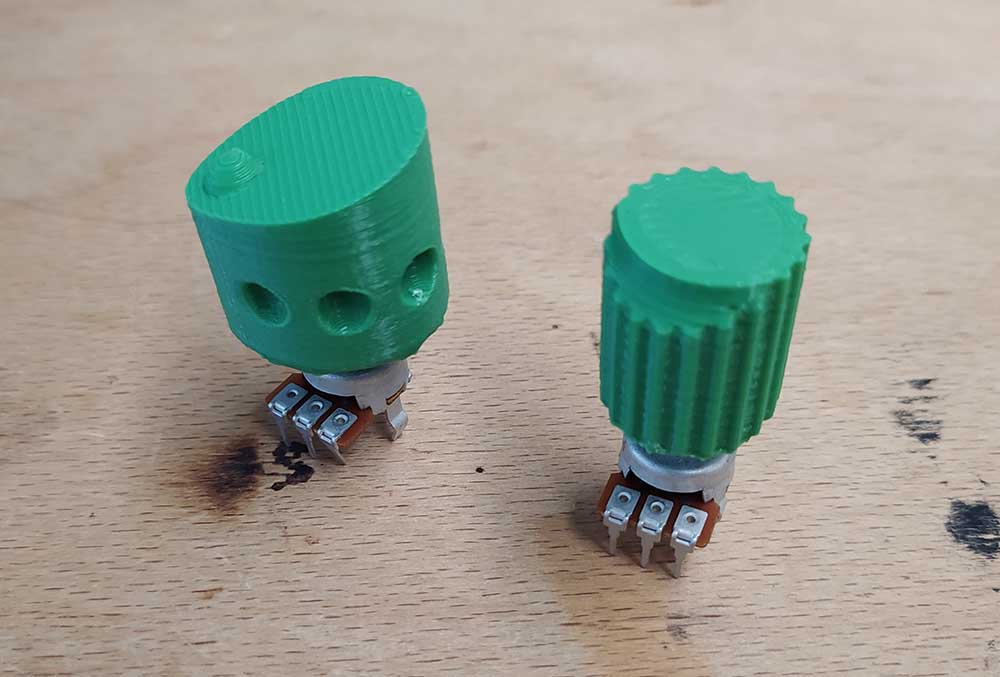
Here’s the final output:
As knobs for the video synth they look pretty wild !
They fit nicely on the pots I chose to use:
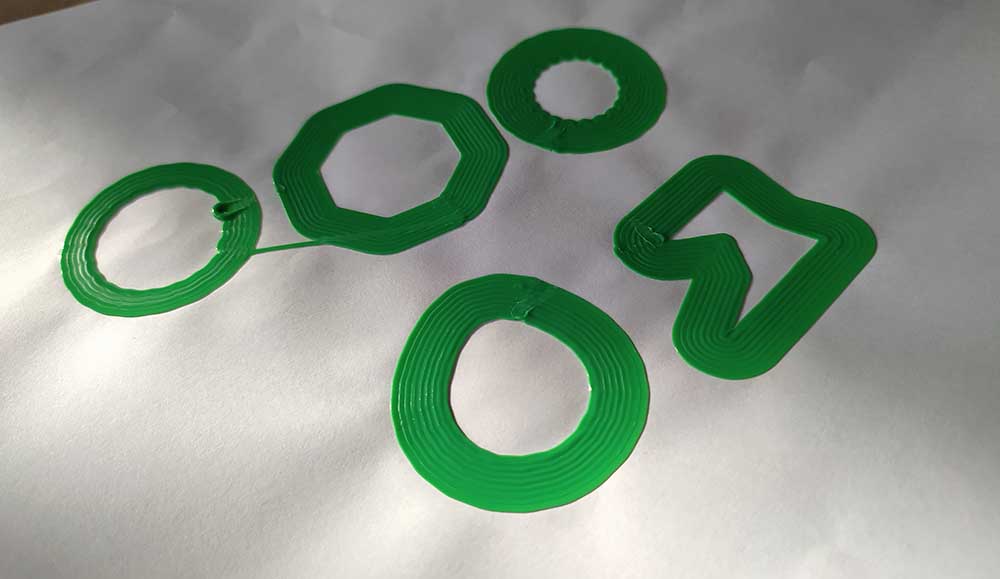
Just for fun I also printed some forms on a sheet of paper that I affixed to the build platform with spray glue:
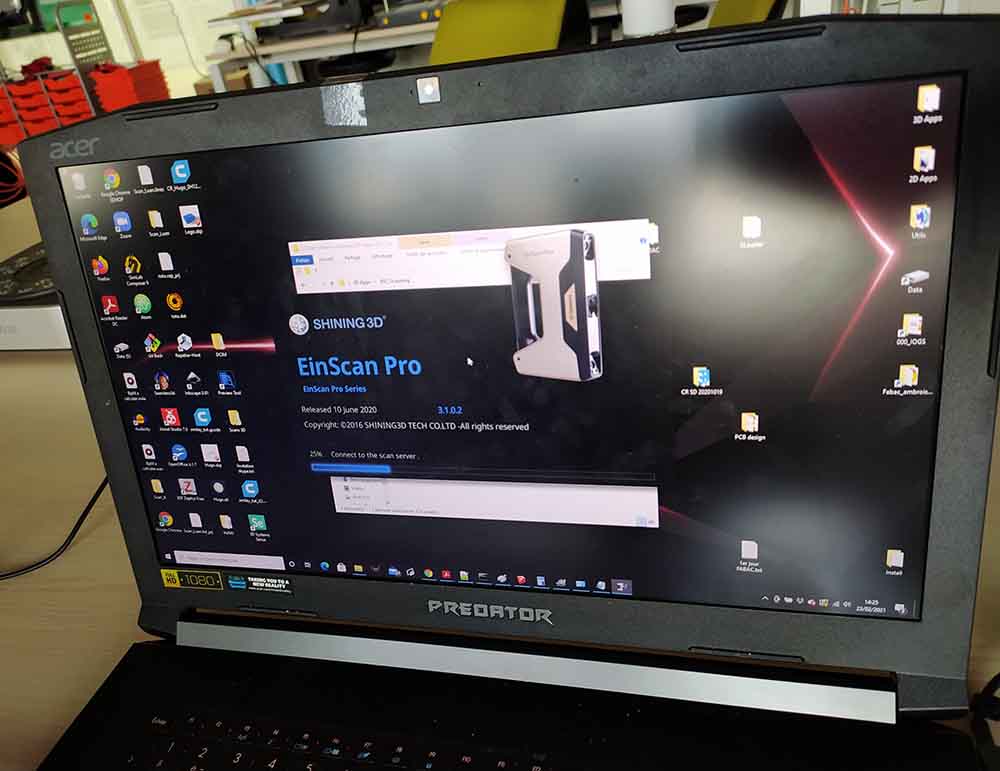
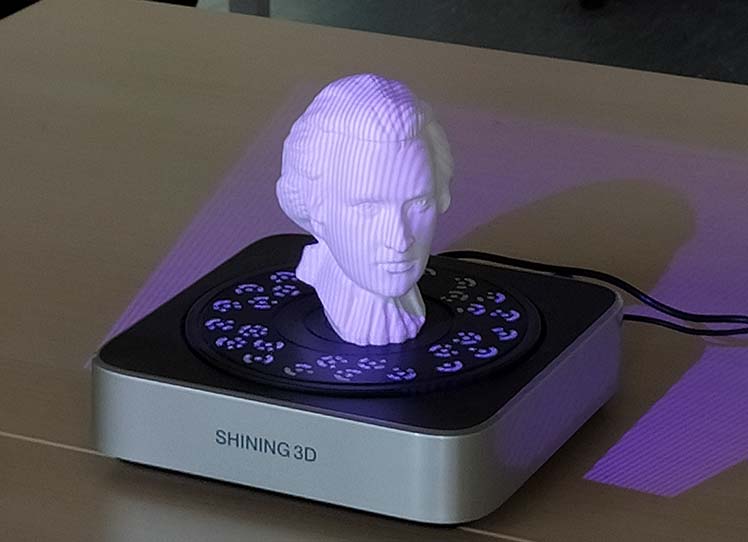
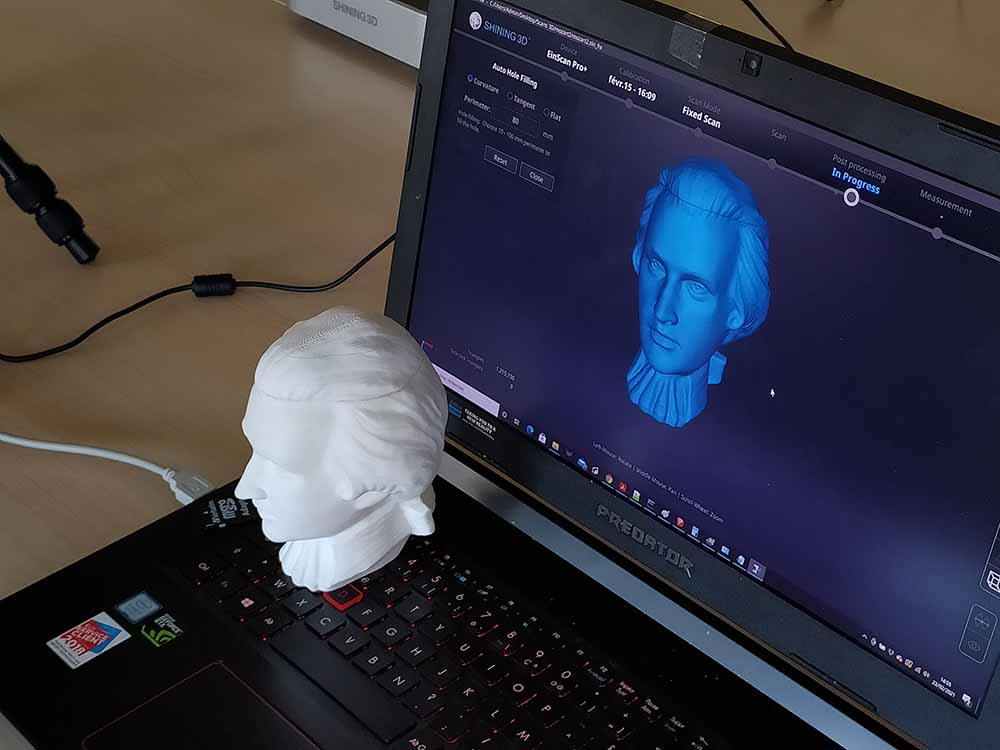
3D Scanning with EinScan Pro
We’re using Shining 3D which works with structured light projection. It has two cameras to detect the deformation of the projected image.
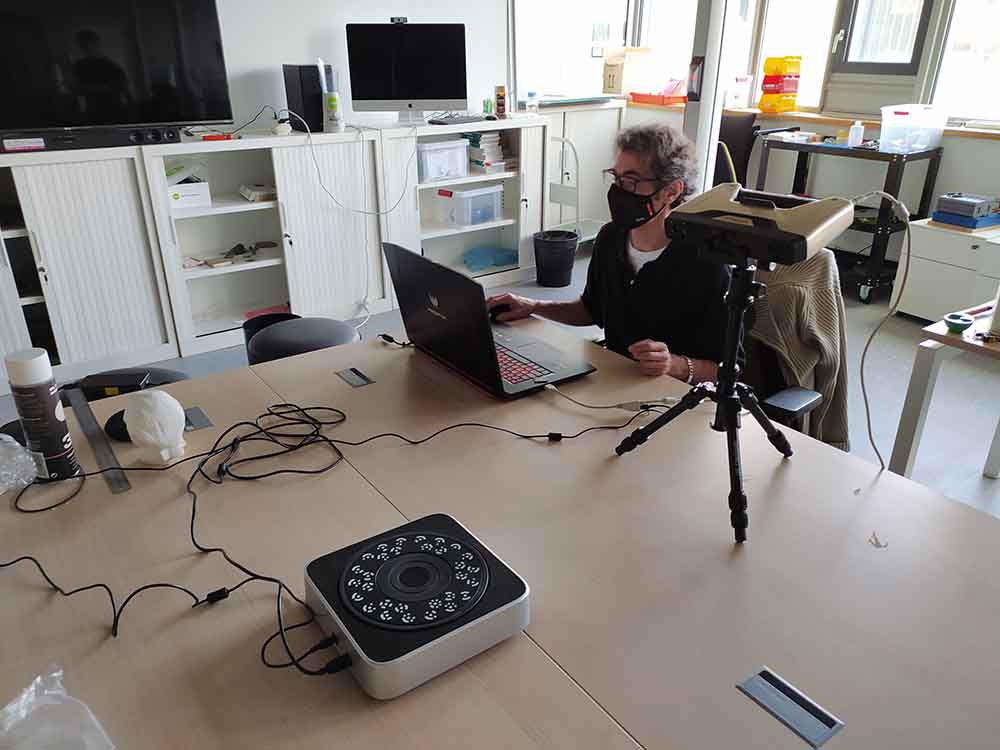
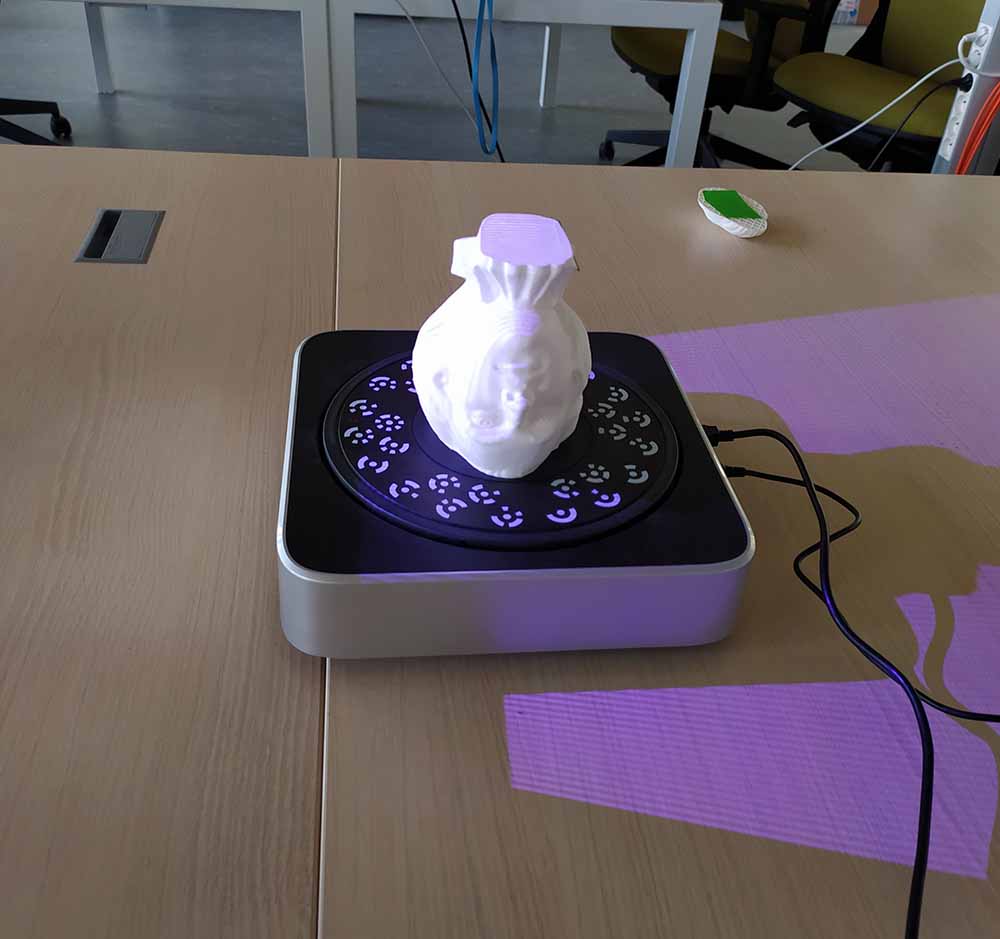
This is set up we have going with the turntable and object to scan 50cm away from the scanner on a tripod. We chose this room because it had little direct light. The object we chose is matt white which is a good color for scanning. (Fuducial stickers or a special chalk spray are required for transparent objects). It is a bust of Mozart and has a removable top part to facilitate scanning upside down.
We are using EinScan Pro 3.1.0.2 on a gaming laptop.
Ambroise getting everything set up:
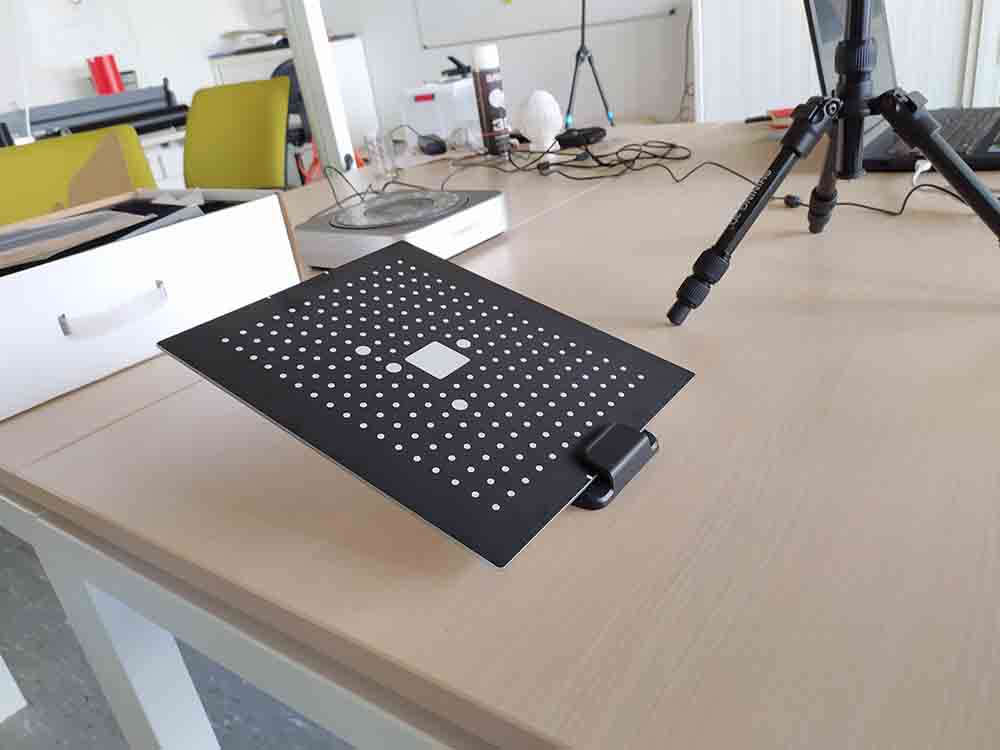
Here is the calibration image to get everything started. The angle is important for calibration purposes.
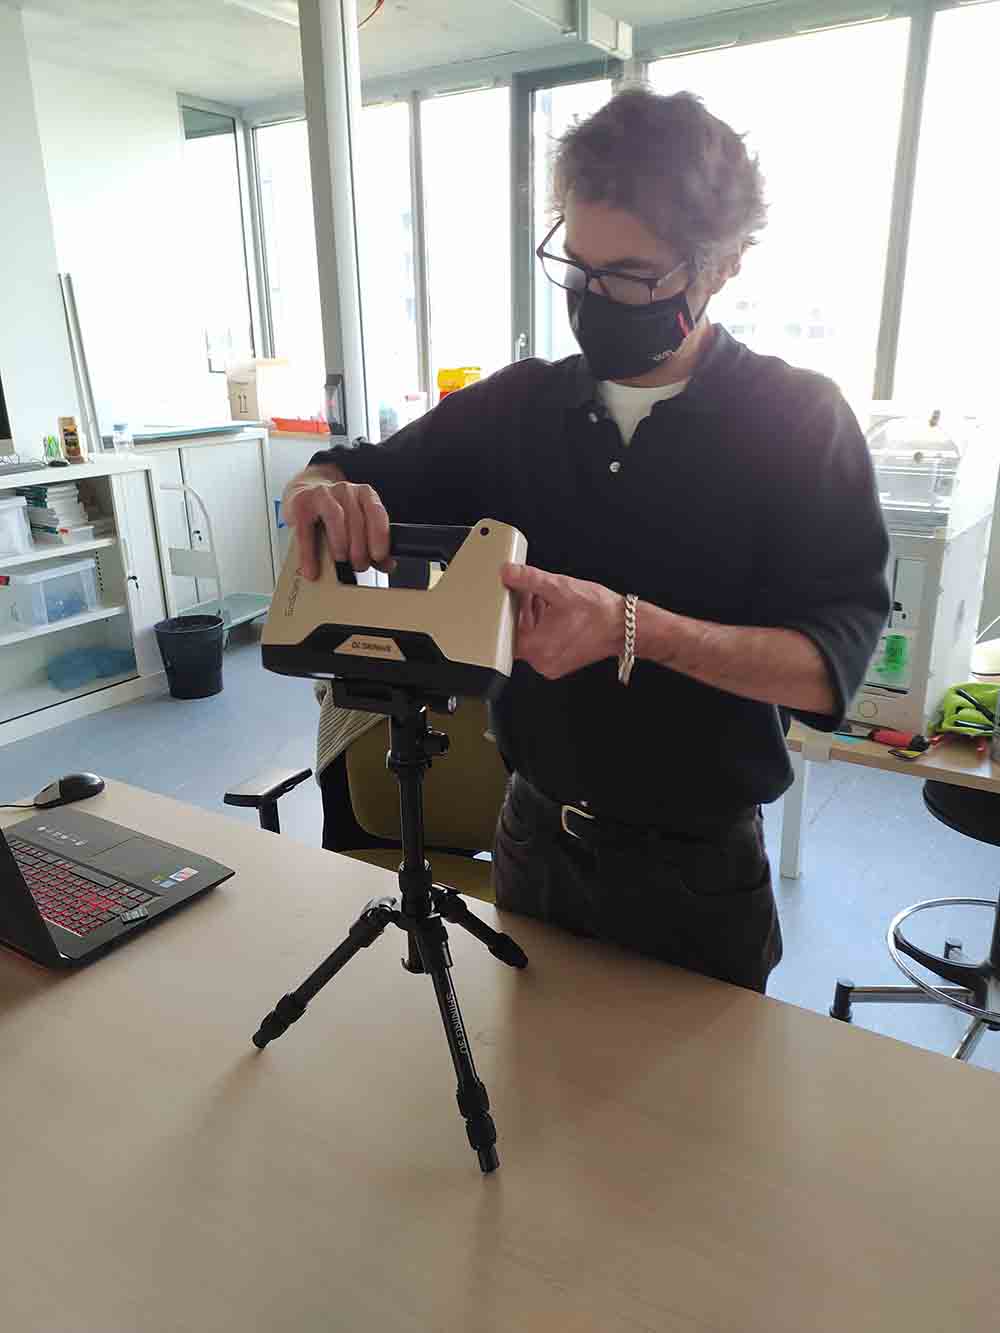
Ambroise, who is leading the workshop, is installing the Shining device onto the tripod (we therefore will select scanning in Fixed Mode when asked):
This image shows the fudicials on the turntable used to track the 3D model during rotation.

Here we can see the horizontal bands that are projected onto the scanned object. We set the rotation to 360 degrees in 8 steps. We calibrated the brightness using the software to adapt to the room’s lighting.
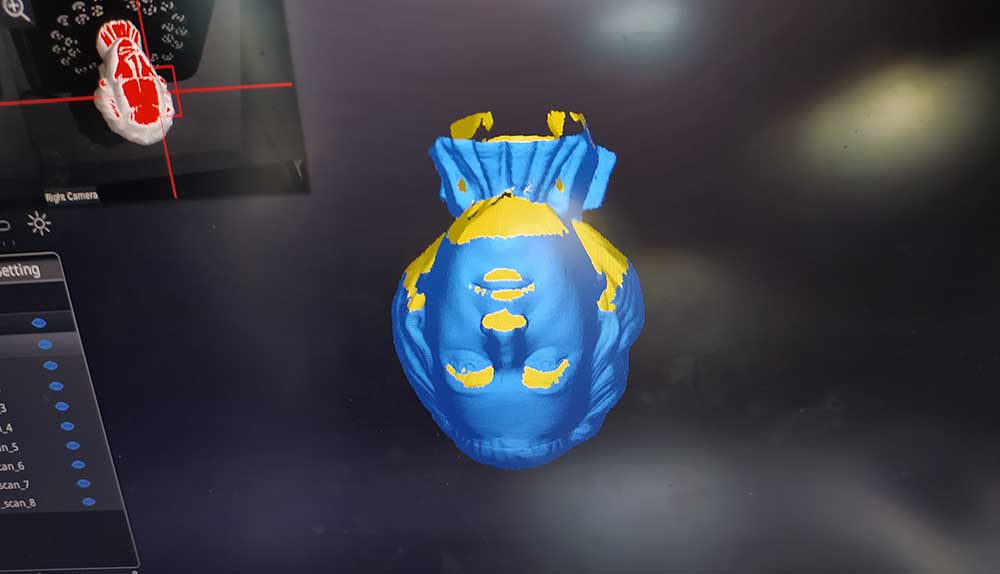
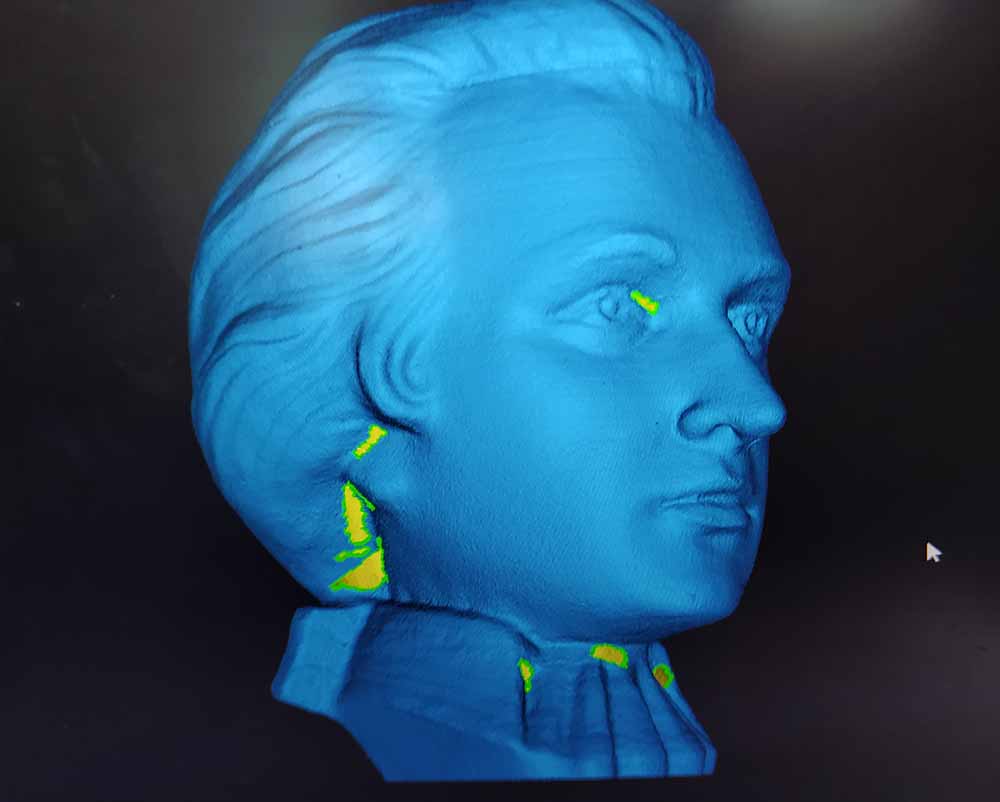
Once we scanned right way up we reinstalled the head with the top part removed to get the underparts (beneath the chin, under the nose) that were not visible to the camera the first time around.
Here we can see the yellow portions that were visible in the second scan but not visible in the first scan. The software automatically stitches the two together to make a collection of points called a point cloud.
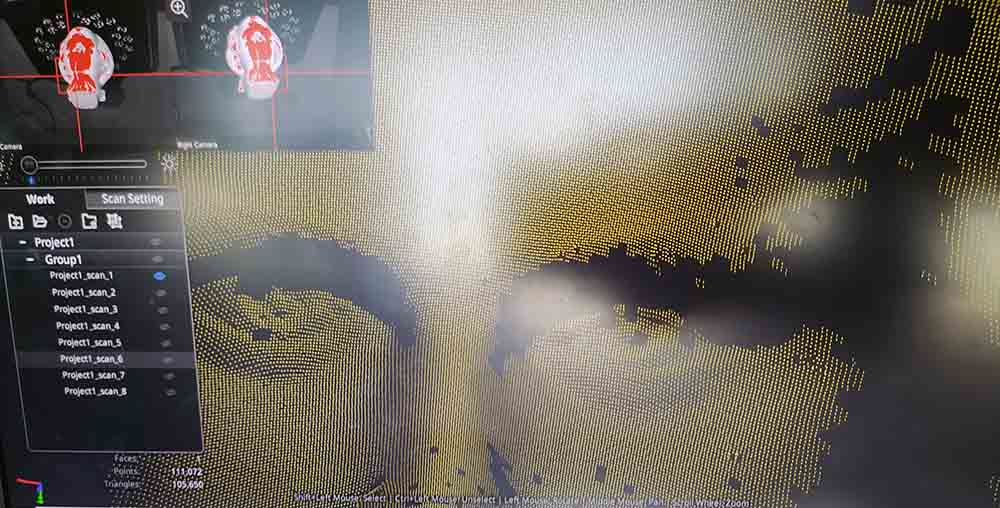
Here we can see the resolution of the point cloud zoomed in to the eyes.
After our two scans we selected to create a non-water tight set of triangles. The software interpolates the surface from the point cloud and doesn’t attempt to fill holes.
We manually filled the holes using the Curvature mode (flat was another option) and the software had no problems filling our holes in blue.
Here is the final result next to the original model. The software even maintained the scale of the object!
3D Scanning with Meshroom
https://alicevision.org/#meshroom
After downloading, I uploaded a series of images taken on the same object from different angles on a white background.
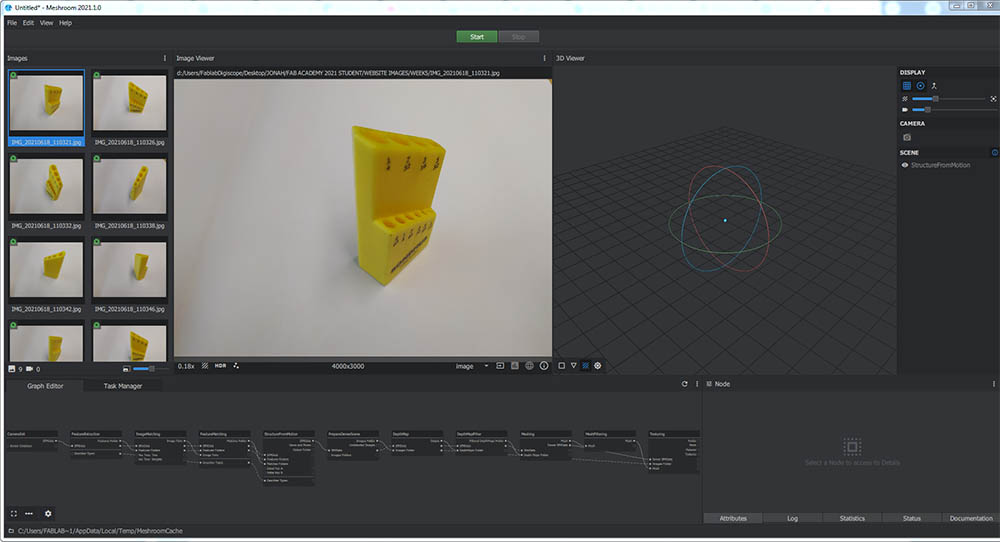
However I am getting the error “no nodes to execute.” Looking online it seems like this can be a result of file names having spaces or non english chars.
I kept getting different kinds of errors after sorting out the first and eventually gave up.
3D Scanning with 3D Zephyr Free
https://www.3dflow.net/3df-zephyr-free/
This one gives me a download error.
3D Scanning with Autodesk Recap Photo
I chose to scan this allen key holder because it has a cool form:
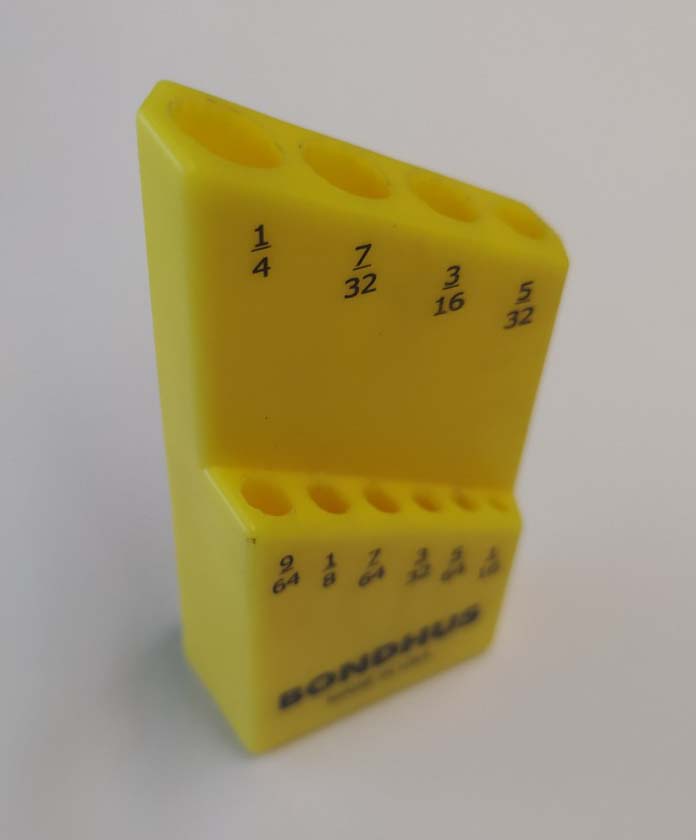
https://www.autodesk.com/products/recap/overview
This downloaded fine and appears to work very well. It requires a minimum of 20 photos.
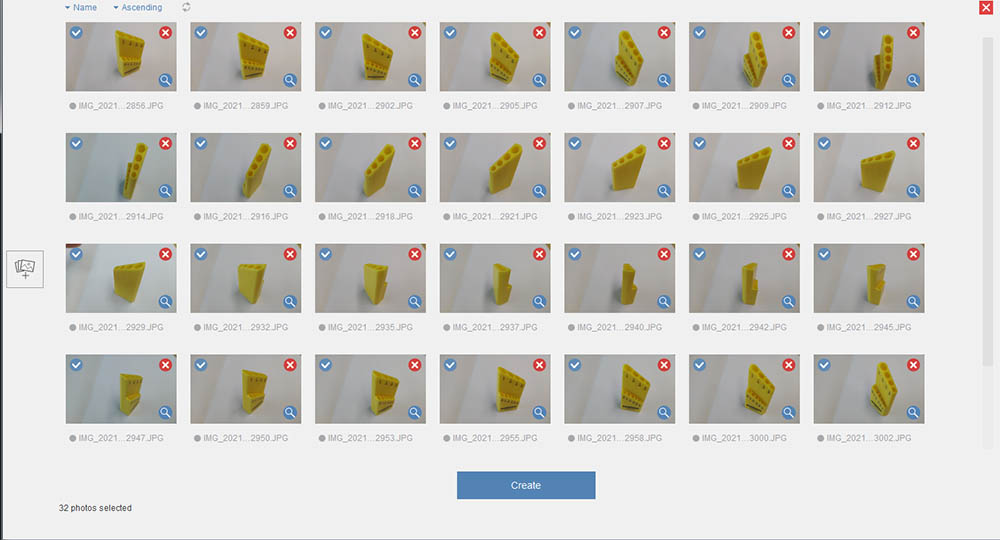
It took a while in the cloud to process but I left it in the cloud over the weekend and it was done on Monday.
I then exported it as OBJ…
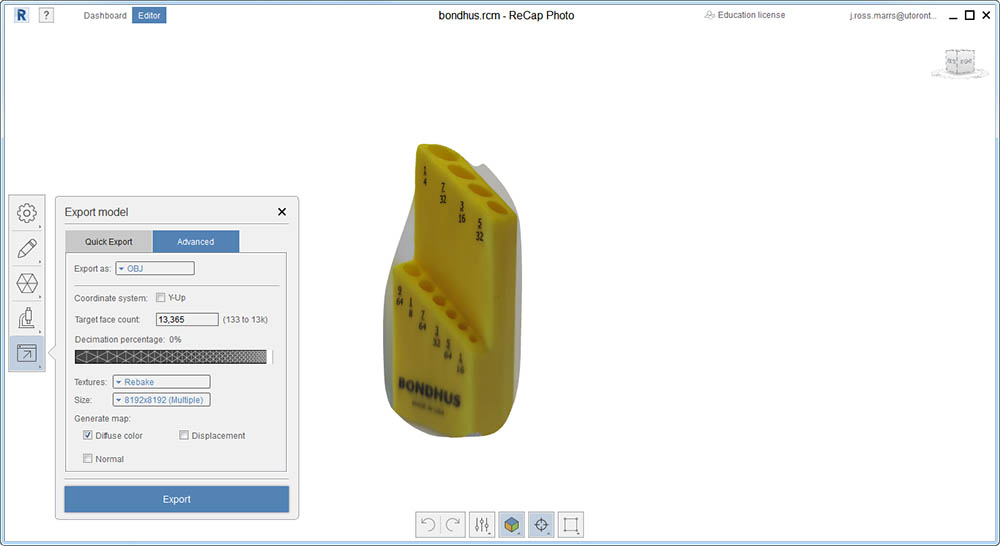
…and opened it up in Rhino before exporting to STL.
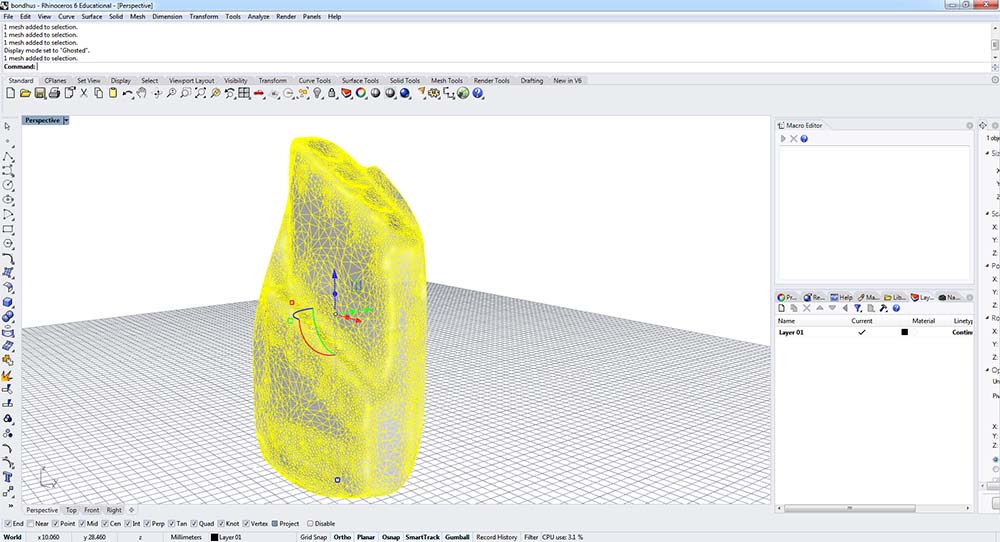
Clearly I should have included more photographs as the scan appears to have only worked well on one face of the object. Download link at the top of the page but here is another view of it :