1. Principles and Practices and Project Management
Week one is focused on choosing an idea for a final project and further developing it. My final project will be a robotic car that can map out a room and upload it to a web server.
Ideas
My final project will be creating a robot car that can map out a room and upload the map to a website. I will map out the room by tracking the position of the car and by using a distance sensor. To track the position of the car, I will use math to determine the position and angle from the motor movements instead of using a gyroscope.
Notes:
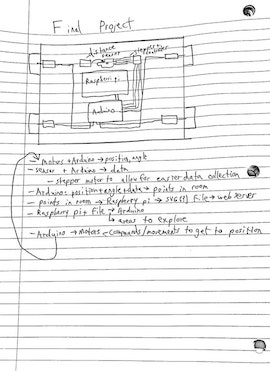
This is a general idea of how my code would work. I will use a stepper motor along with my distance sensor because it would allow me to take data without moving the actual car, which would improve the accuracy of the points (in case of slippage), and it would decrease the total power used.
General Project Idea:
For the main body of the car, I will use the CNC machine to cut out a frame with slots for electronics and motors. I will 3D print brackets and casings for motors. I will also 3D print the wheels and create grips for the wheels and padding on the car by molding and casting. For input devices, I will use some form of a time of flight (distance) sensor. One promising sensor was the VL53LOX because it was small, cheap, and had enough range and accuracy for my project. Along with the sensor, I will probably have a stepper motor that will spin the sensor to make it easier to take measurements without moving the car. I will also have four motors to spin the wheels on the car. I will use a sashakit board to control the motors and sensors, and the board will also process the data. I will then send this data to a raspberry pi, and upload it to a web server. I will create an interface to display this data, and maybe allow for remote control of the car.
List of Parts
| Machine | Part |
|---|---|
| CAD | Design the main body of the car |
| computer-controlled cutting | Body and framework for electronics |
| electronics production | Sashakit microcontroller, motor boards, ToF sensor |
| 3D scanning and printing | 3D print the wheels and casings for motors |
| embedded programming | Code to make the car autonomous, code for sensors and motors |
| input devices | ToF sensor |
| output devices | Motors |
| molding and casting | Grip for wheels, pads for car |
| networking and communications | Raspberry Pi to send data of a room to a server |
| interface and application programming | Interface to show the data and maybe control the car remotely |
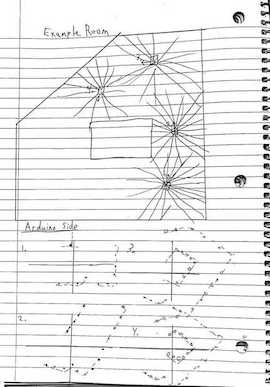
The car will start at some position in a room, and it will drive around, take data, and map out the room. I will do this by having it drive to specified points, and then have the distance sensor and stepper motor take data from a circle.
The car will start initialized at 0,0 0º and will drive around and map out a room relative to this starting position
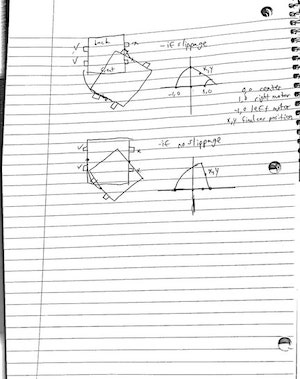
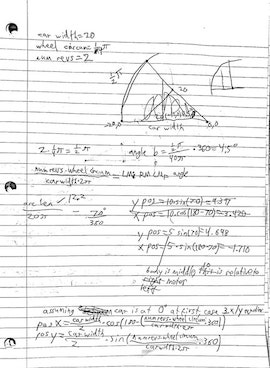
Before I started developing my idea, I wanted to make sure I could accurately track the position of the car. I wrote a few equations for different ways the motor could turn- cases 1, 2, and 3 in the images. Case 1 is the right motor is moving the opposite amount of the left, case 2 is the left motor is moving and overpowering the right, but the right motor is on or slipping. Case 3 is the left motor is on, and the right motor is off and not slipping.
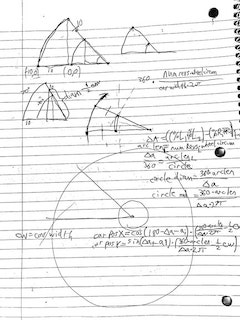
Final position tracking equations:
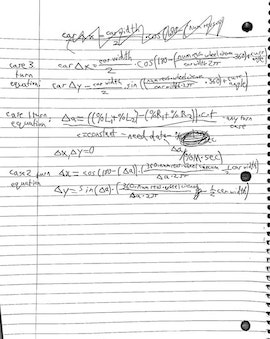
∆A=((%L1+%L2)-(%R1+%R2))*t*c
%L/%R=how much the left or right motors are on
c=constant, 1º/(%*sec)- I need data to find this
t=time
ai=initial angle of the car
∆a=change of the angle of the car
∆X/∆Y=change in the position of the car

Case 1 (Left on, right equally on but opposite direction):
∆X=0
∆Y=0

Case 2(Left on, right on but slower or slippage):
∆X=(cos(180-∆a-ai)+cos(ai)))*(360*num RevolutionsL*wheel Circumference/(∆a*2π)-½*Car Width)
∆Y=(sin(∆a+ai))+sin(-ai)))*(360*num RevolutionsL*wheel Circumference/(∆a*2π)-½*Car Width)

Case 3(Left on, Right off, no slippage):
∆X= Car Width/2*(cos(180-(360*num RevolutionsL*wheel Circumference/(car Width*2π))+ai))+cos(180-ai)))
∆Y= Car Width/2*(sin((360*num RevolutionsL*wheel Circumference/(car Width*2π))+ai)+sin(-ai)))
Website
To run my website, I used the application Visual Studio Code with mkdocs. This would allow me to host it from my computer without having to push it to GitLab. It was a very annoying process, and I spent many hours getting certain parts of its setup to work on my Mac.
I set up my website the week before the week one lecture was posted and I foolishly did not check the previous year’s lecture about setting up our sites, so I had to find everything on my own. Fellow student Teddy Warner did a lot of research on how to set up our sites, and he helped me set up my personal site as well. After setting up my own site, I created a workflow to help my fellow students at CLS with setting up and running the site on MacOS because of how annoying the process was for me. The workflow is a simple walkthrough with commands and some information for setting up the site on a mac computer and uploading changes to GitLab.
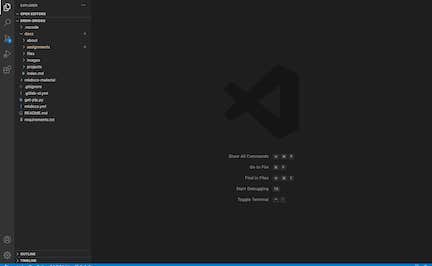
Visual Studio Code
Setup
Visual Studio Code is a code editor that I use to run my site locally and push my site to git. It was recommended to me by Teddy Warner, and it is very easy to use. The first step in the process of setting up the site was some installations. I installed the Visual Studio Code software, python, and git. To install git, I had to install the package manager homebrew. After installing all this, I realized that python had not automatically installed pip, so I ran a few commands into the command line to manually install it.
After these installations, I ran a few more commands into the command line to set up my SSH key and linked the key to my fab academy account. I then had to clone the site with my SSH key. This is where I had my first hiccup. I was running the command line to do this in the terminal in Visual Studio Code, and the cloned folder would always go to my downloads instead of under my name under users. This is a problem because Visual Studio Code needs a direct path to this folder, and it would not allow me to open the folder it created. I tried to repeat the command prompt with the only difference being an identical folder inside the original folder in downloads. I deleted all the folders and tried again in the Mac terminal instead of that of Visual Studio Code. This time, the folder was created in the right location, and after restarting Visual Studio Code, I was able to open the folder and start editing my site.
Customization
The folder for the site initially appears to be fairly small, but opening some of the folders shows that there is a lot of different files and documents. The majority of what I will be editing is under the “docs” folder. This folder contains five folders, as well as a document called index.md. The about, assignments, and project folder are each a section under the site, and the images and files folder are locations to upload images and files for the site. The index.md file is the file for the home page.
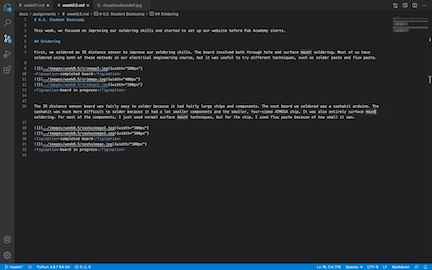
Markdown vs HTML
I have not used neither HTML nor Markdown before Fab Academy, and I was fairly nervous about learning these languages. However, after looking at Markdown syntax, I was relieved at its simplicity. I knew that it was an easier version of HTML, but I had not realized how simple it is. I looked at a basic sytnax website for markdown and laughed to myself as I read through it. The syntax was nearly English, and I quickly realized I would have no trouble learning it.
HTML was slightly more difficult, but after reading through a few different websites, I had a basic understanding of how it was structured. Most of my site will be made through Markdown, but there are some things markdown cannot easily do, such as making captions. For these problems, I will use HTML instead of markdown. It is very easy to use the two languages together, and I can just switch between languages however I want:
Pushing to GitLab
To push the site to GitLab, I have to run these three commands into the command line in visual studio:
Git add .
Git commit -m "comments"
Git push
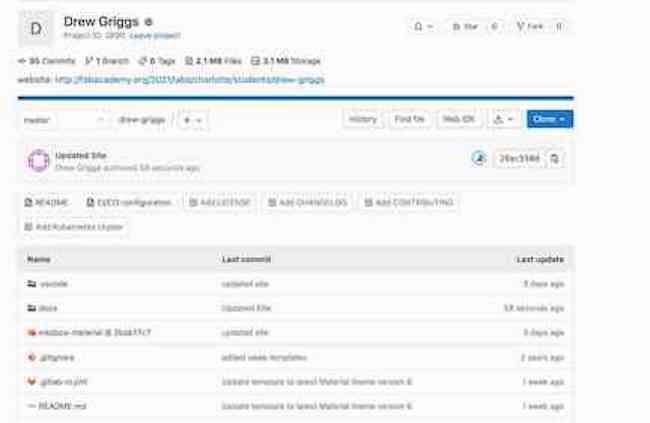
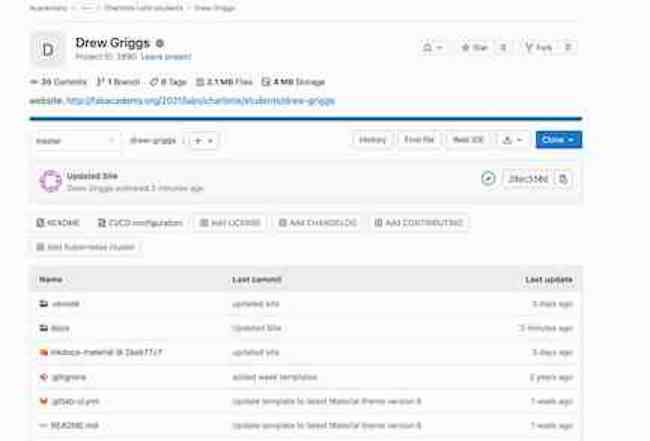
The site will then upload, and when the blue progress bar becomes a green checkmark the updated site can be viewed.