This week we had to design, build and connect a wired or wireless node with a network or bus address.
For this I used I2C to read request data from my daughter board and process it with the mother boad.
I2C (I Two C or I squared C) is a multi mother multi daughter serial communication bus. It uses only two lines: SDA for Serial Data and SCL for Serial Clock. You can read more about it HERE.
To use I2C with my mother board I used the Wire-library provided by the arduino IDE. For the ATtiny85 on my daughter-board I had to download this TinyWire Library. You can read more about it HERE.
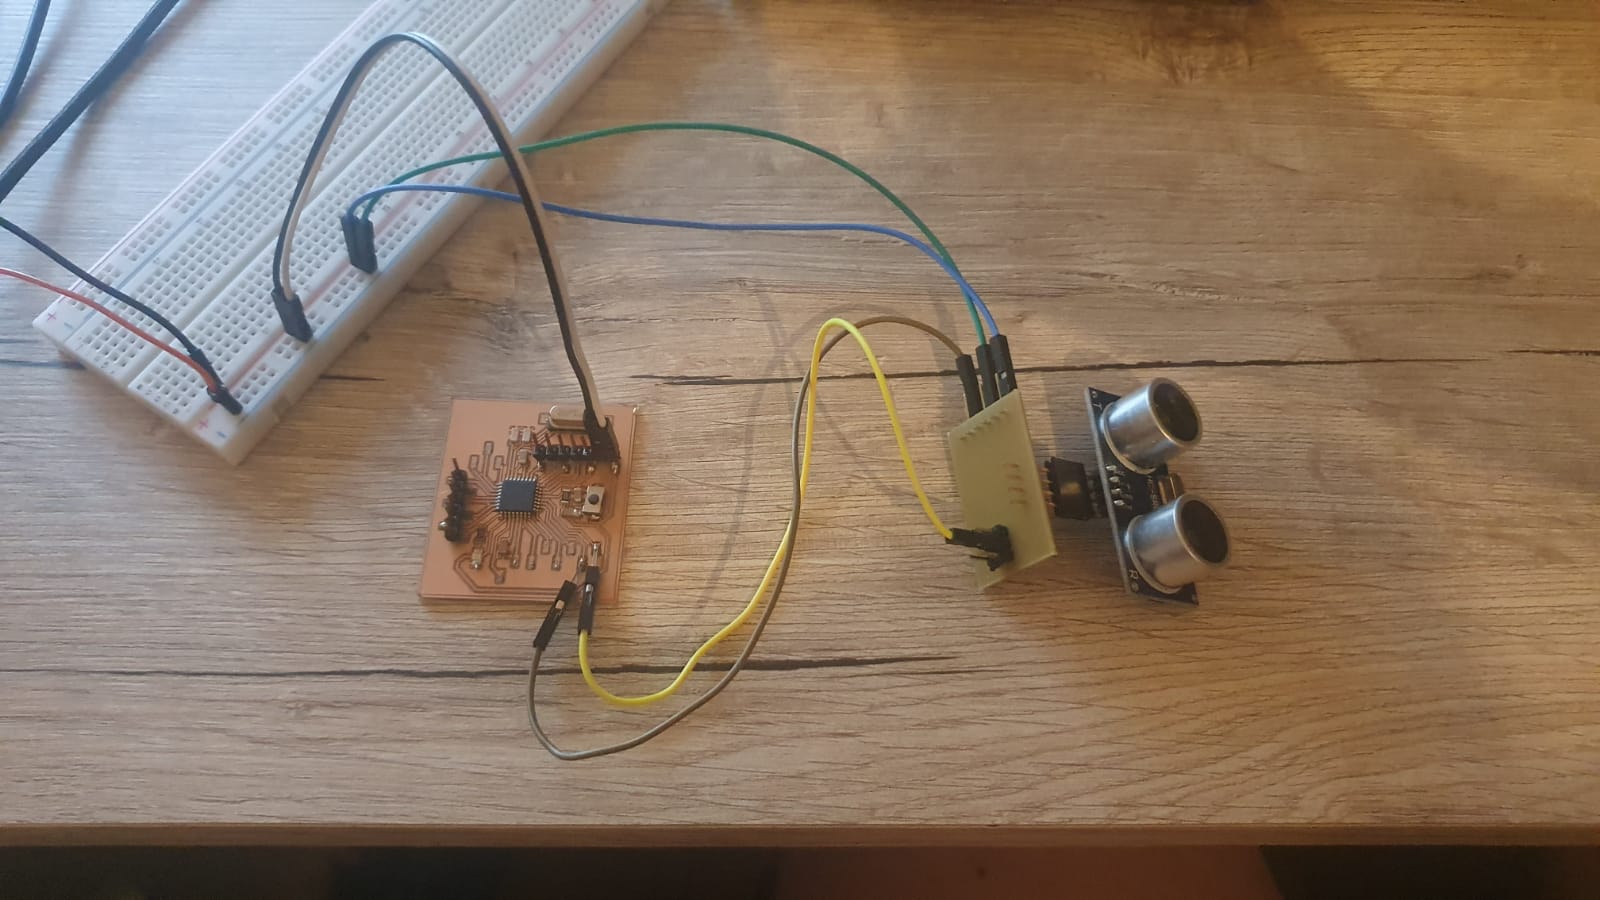
The ATmega328p provides a SDA and a SCL pin, which I wired to PB0 for SDA and PB2 for SCL on my ATtiny85. I used this Tutorial as refference.
Here you can see the wiring:

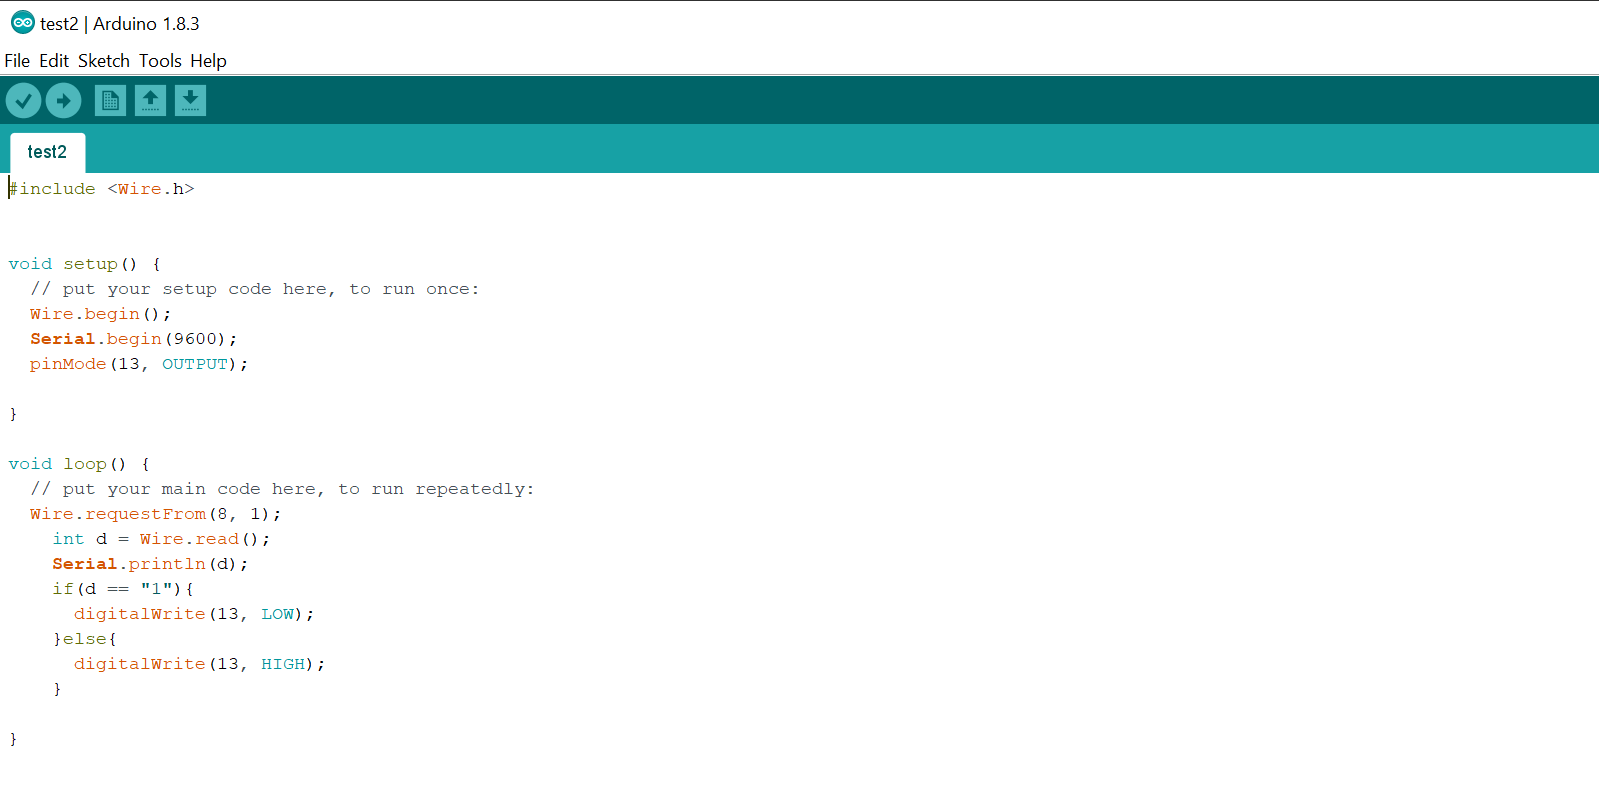
The programming consists of two parts, one for the mother-board and one for the daughter-board. The mother-board will start the I2C connection. Then it will send a request to the daughter board. After receiving the data it will turn on or off the build in LED at pin 13.
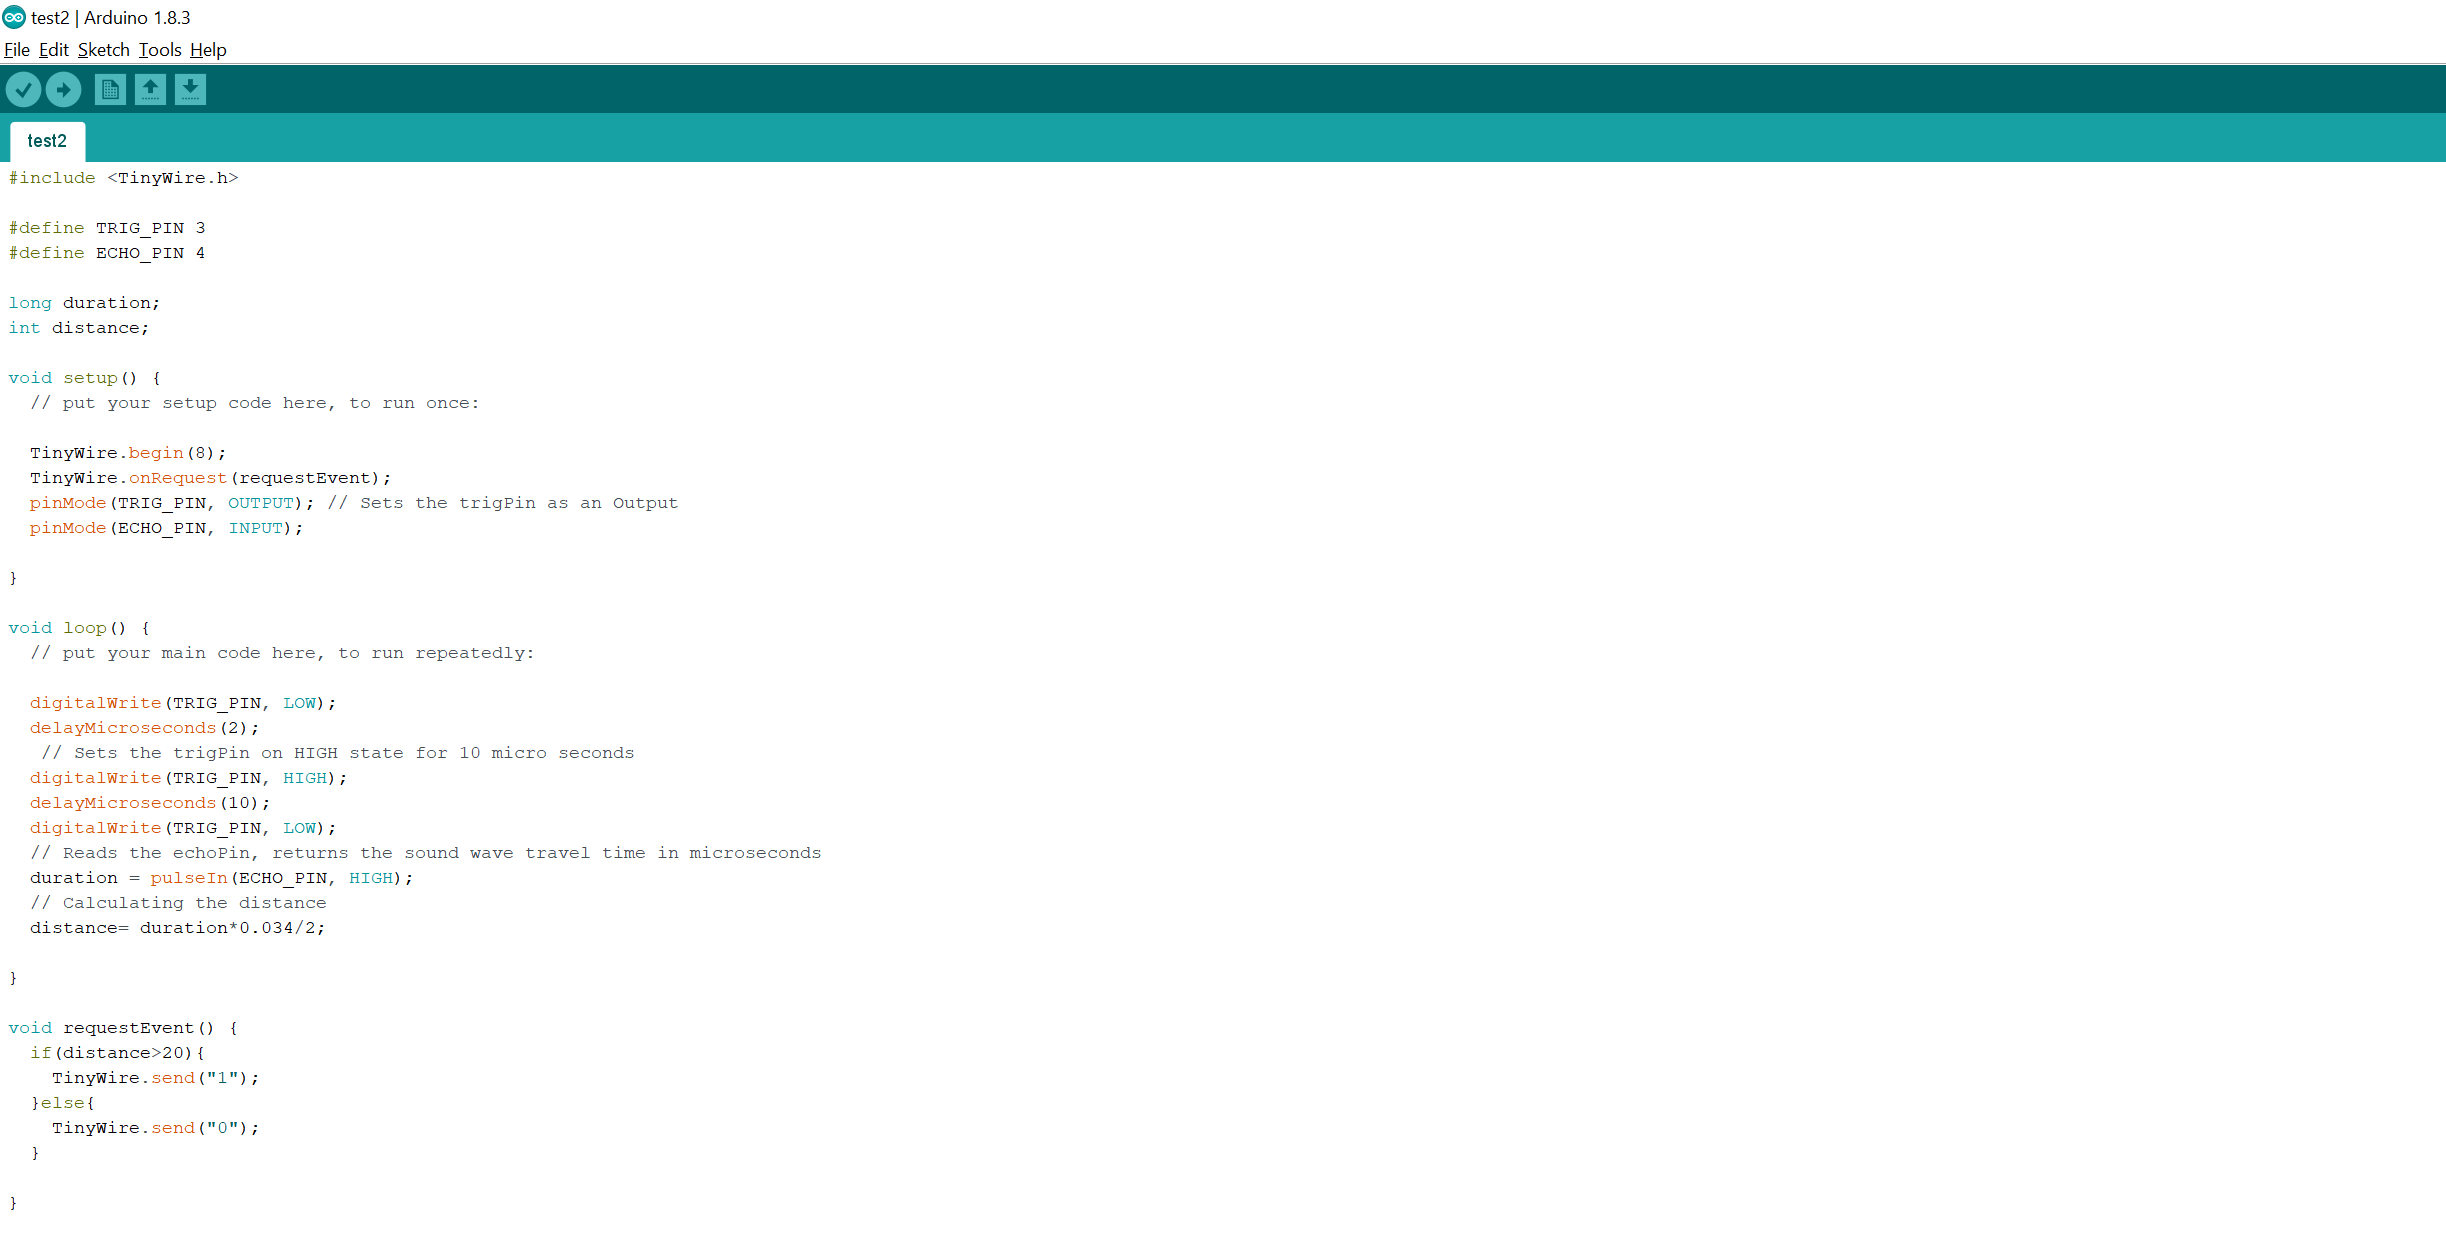
The daugther board will join the I2C bus with a specific ID. On request from the mother-board it will send data depending on the last measured distance from the attached ultrasonic sensor.
Here you can see the code for the mother-board:

And here you can see the code for the daughter-board:

Before I uploaded the code to my boards, I used two Arduino Uno just for testing. After everything worked and I removed all errors I changed the code for the daughter-board-arduino from Wire to TinyWire.
I then uploaded the code to my boards, used a breadboard to power both boards and you can see the result below:
As you can see it worked!!
For our group assignment we had to send a message between two projects. Lana and I used each one of our boards to communicate and send data.
You can find the documentation and the results HERE.