This week we had to add a sensor to a microcontroller board and measure some values with it.
As Groupassignment we should probe the analog and digital signals of an input device and document it.
As input device I wanted to use a ultrasonic sensor. In my final project this sensor should measure if a cat is inside my litterbox or not.
I oriented my schematics at this board layout, but I used an Attiny85 instead.
As ultrasonic sensor I used a typical HC-SR04, more informations on this sensor you can find HERE.
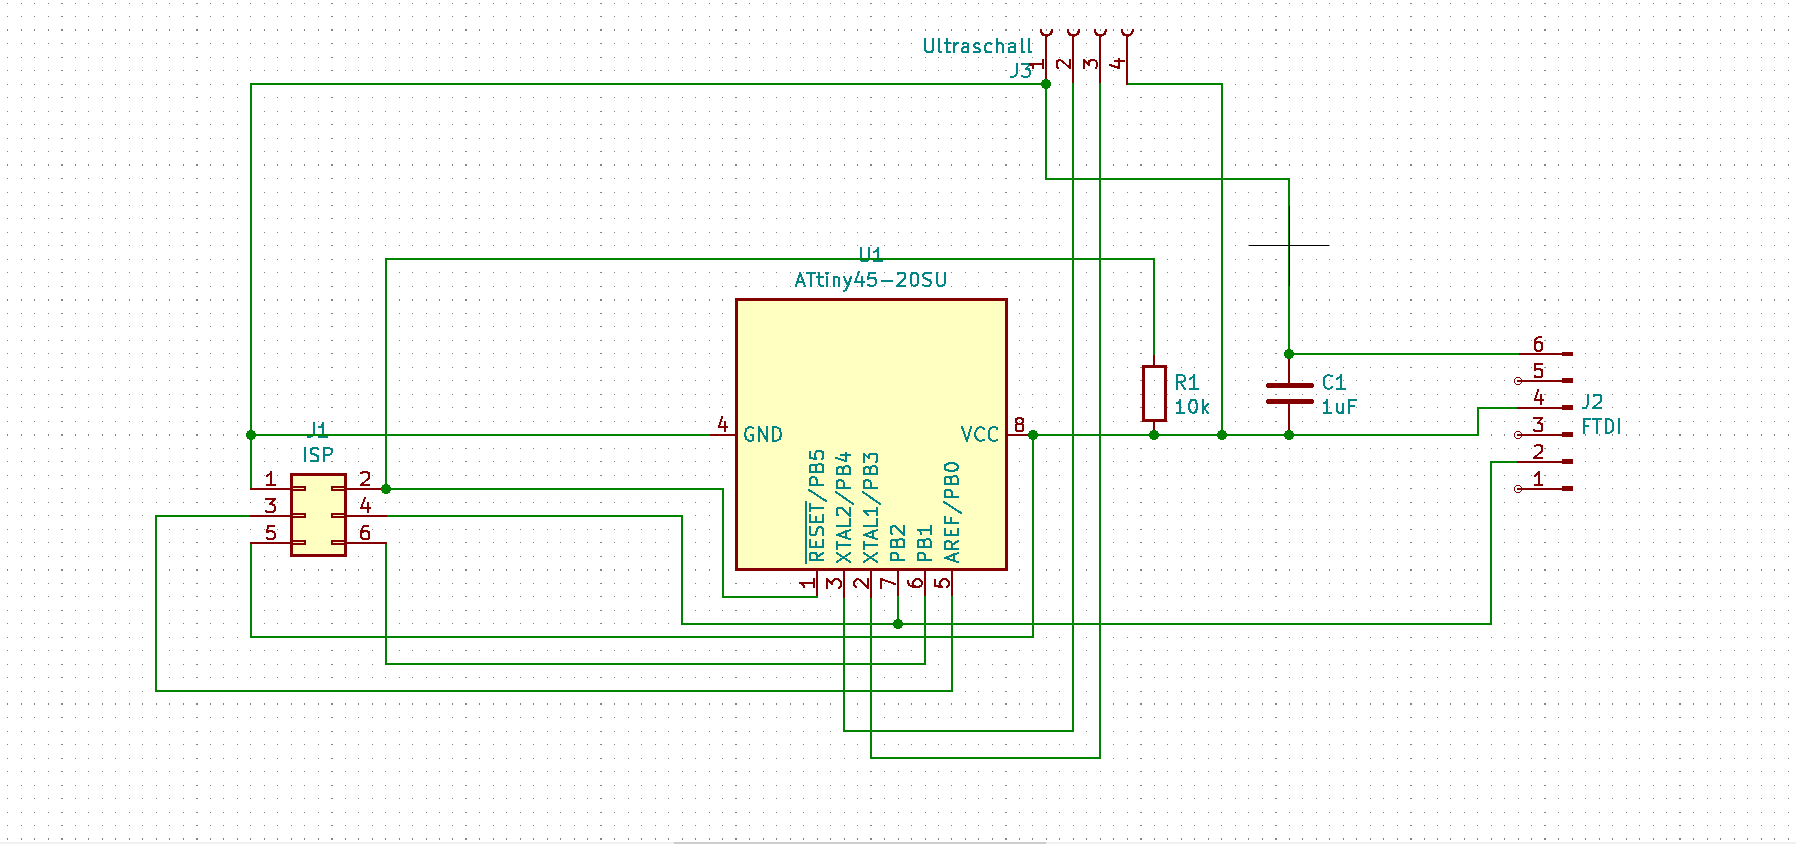
As I did before I used KiCad for this.
So my schematics look like this:

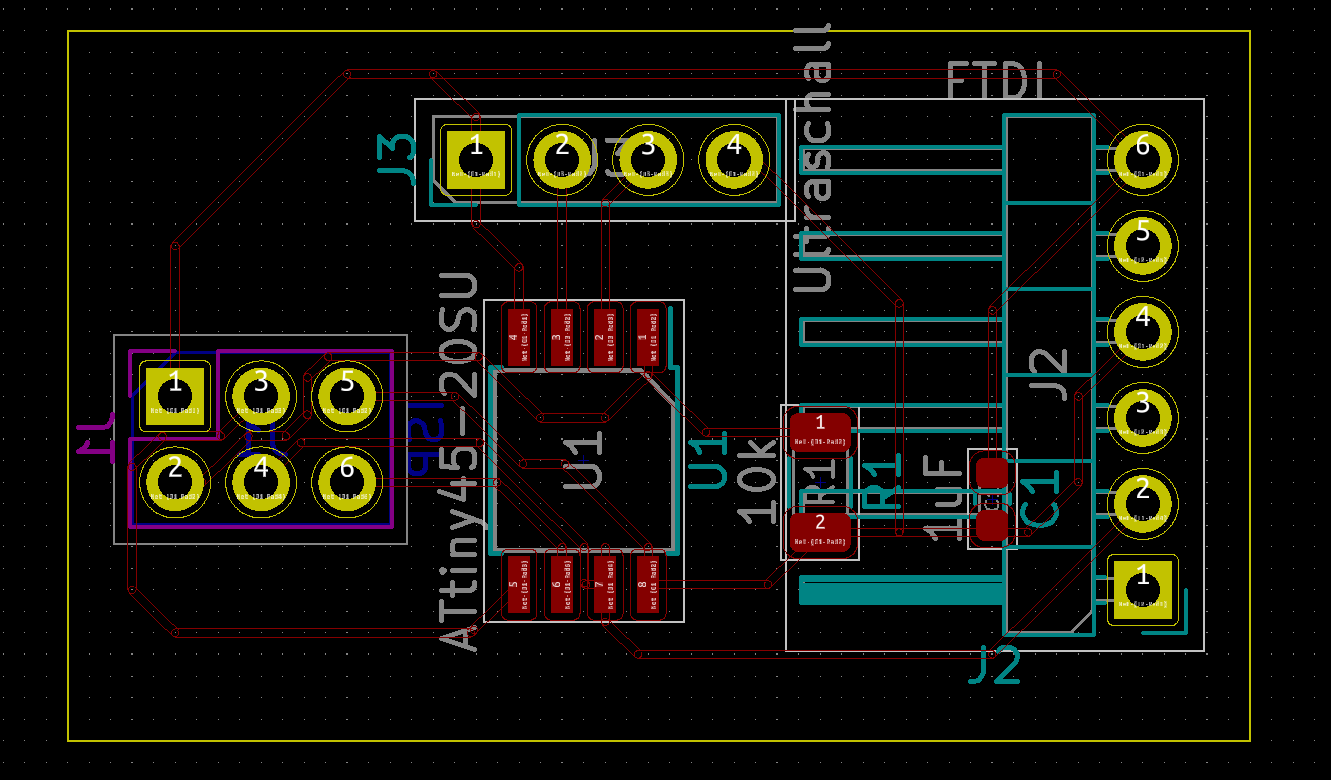
After everything was connected I created my board layout, which looked like this:

I uses our LPKF PCb milling machine to mill out my board design.
Then I applied solder paste and the componets, before using the solder oven to solder everything to the board.
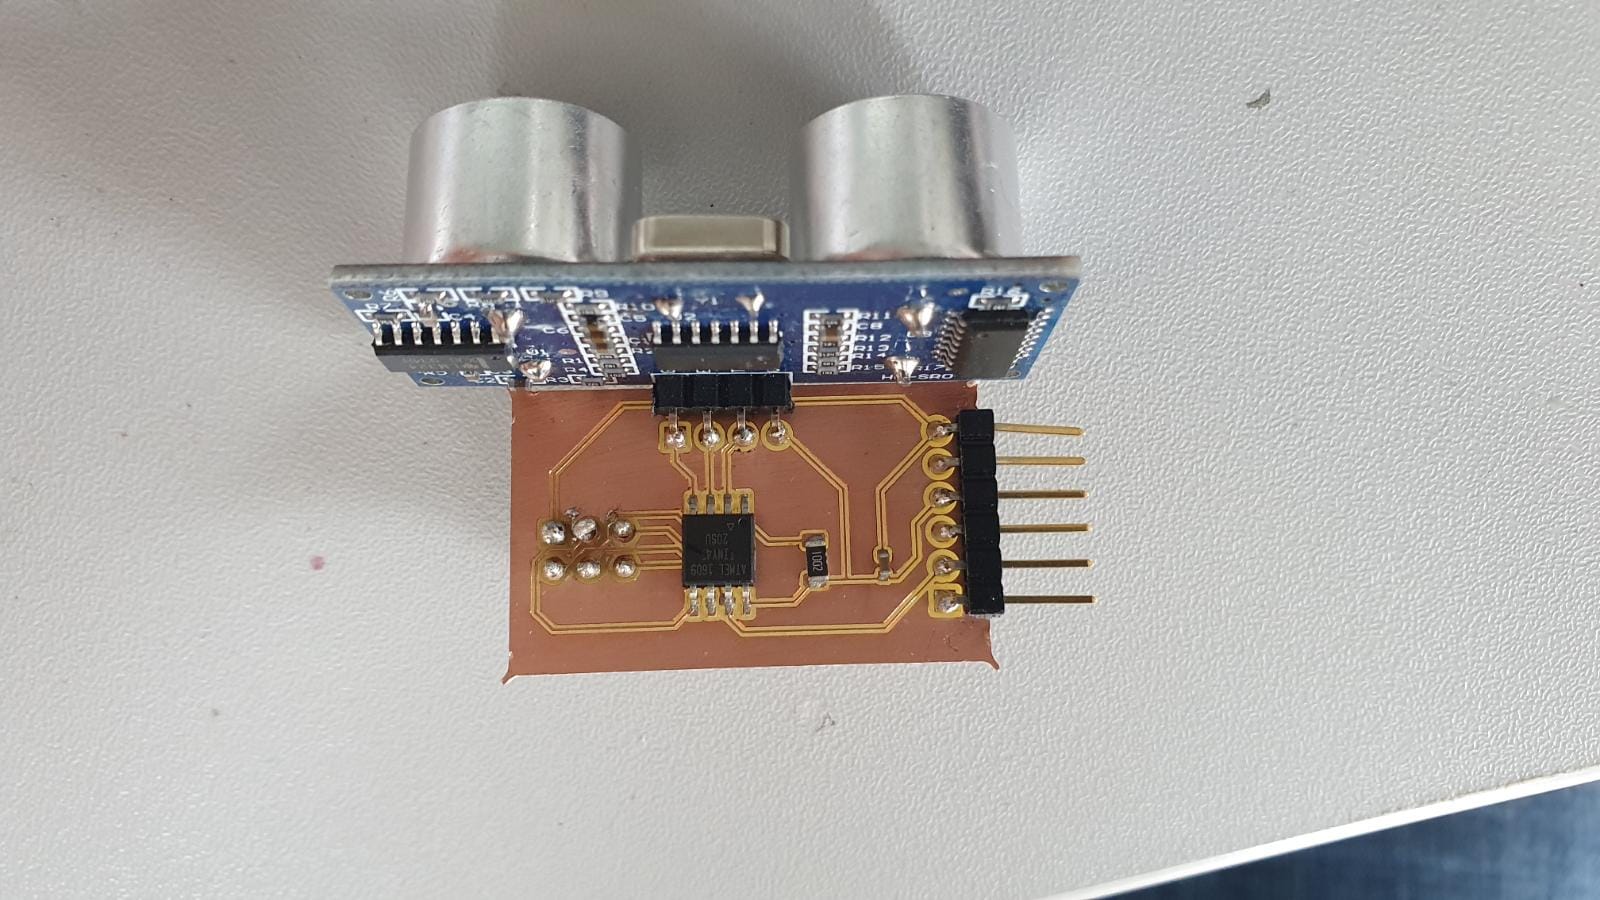
The finished board looks like this:

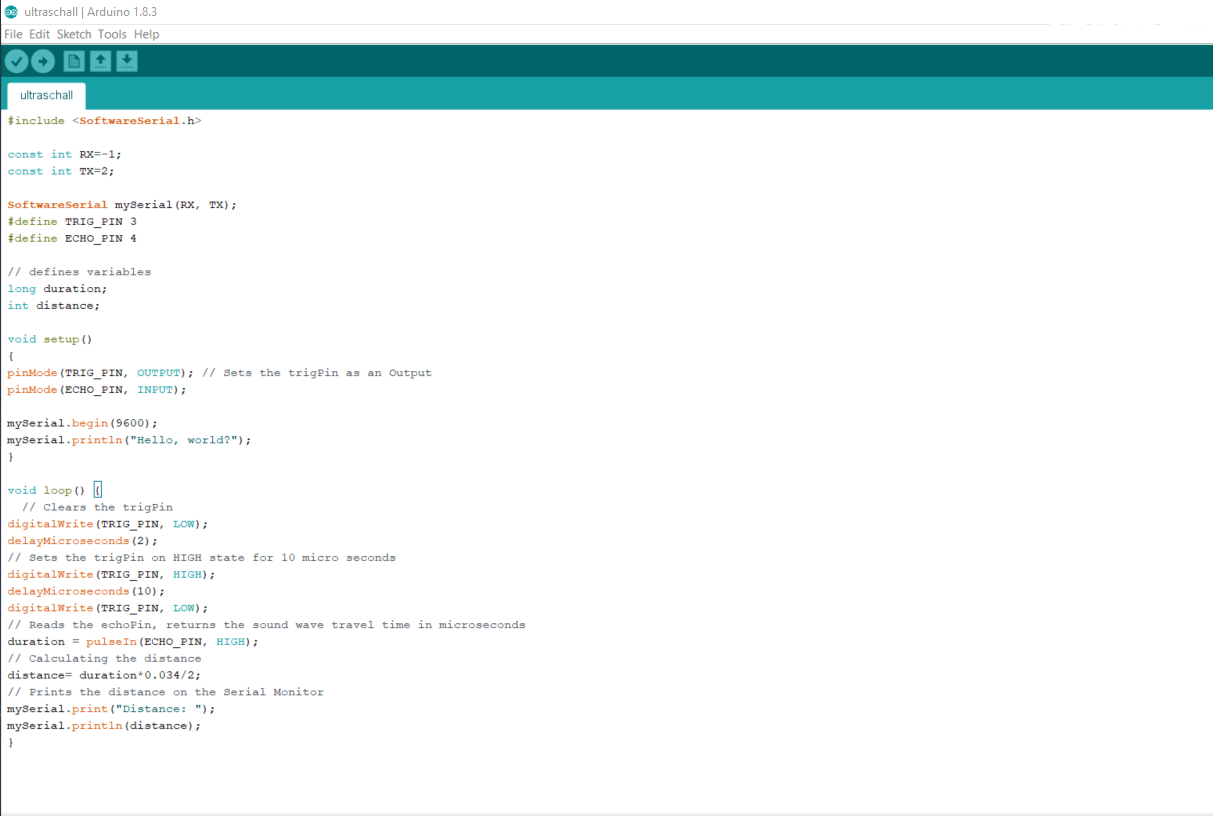
I did a quick research on how to use the ultrasonic sensor. At the End I used the exaple code of the Arduino IDE for my first test.
Only things I had to add was a Software Serial communication, which you can see in the Code below:

I uploaded the code via the Arduino IDE, using an arduino uno, as described in this tutorial.
After connection my board via an UART to USB adapter and opening the serial monitor, I could read out the distance values of my ultrasonic sensor:
Here you can see it with my hands moving:
For our group assignment we had to probe the analog and digital signals of an input device.>br>
You can find our probing and the documentationen on the website of our group meber Lars Mattern HERE.