Introduction.
The topic is very interesting because it includes all the processes that are carried out to
design a machine, both its parts and how it works.
Machine design is concerned with creating machinery that works safely and reliably well. A
machine can be defined in many ways, but the basic definition is that it is an apparatus
formed by interrelated units. The interrelated parts are also known as machine elements.
Group assignment.
- design a machine that includes mechanism+actuation+automation
- build the mechanical parts and operate it manually
-
document the group project and your individual contribution
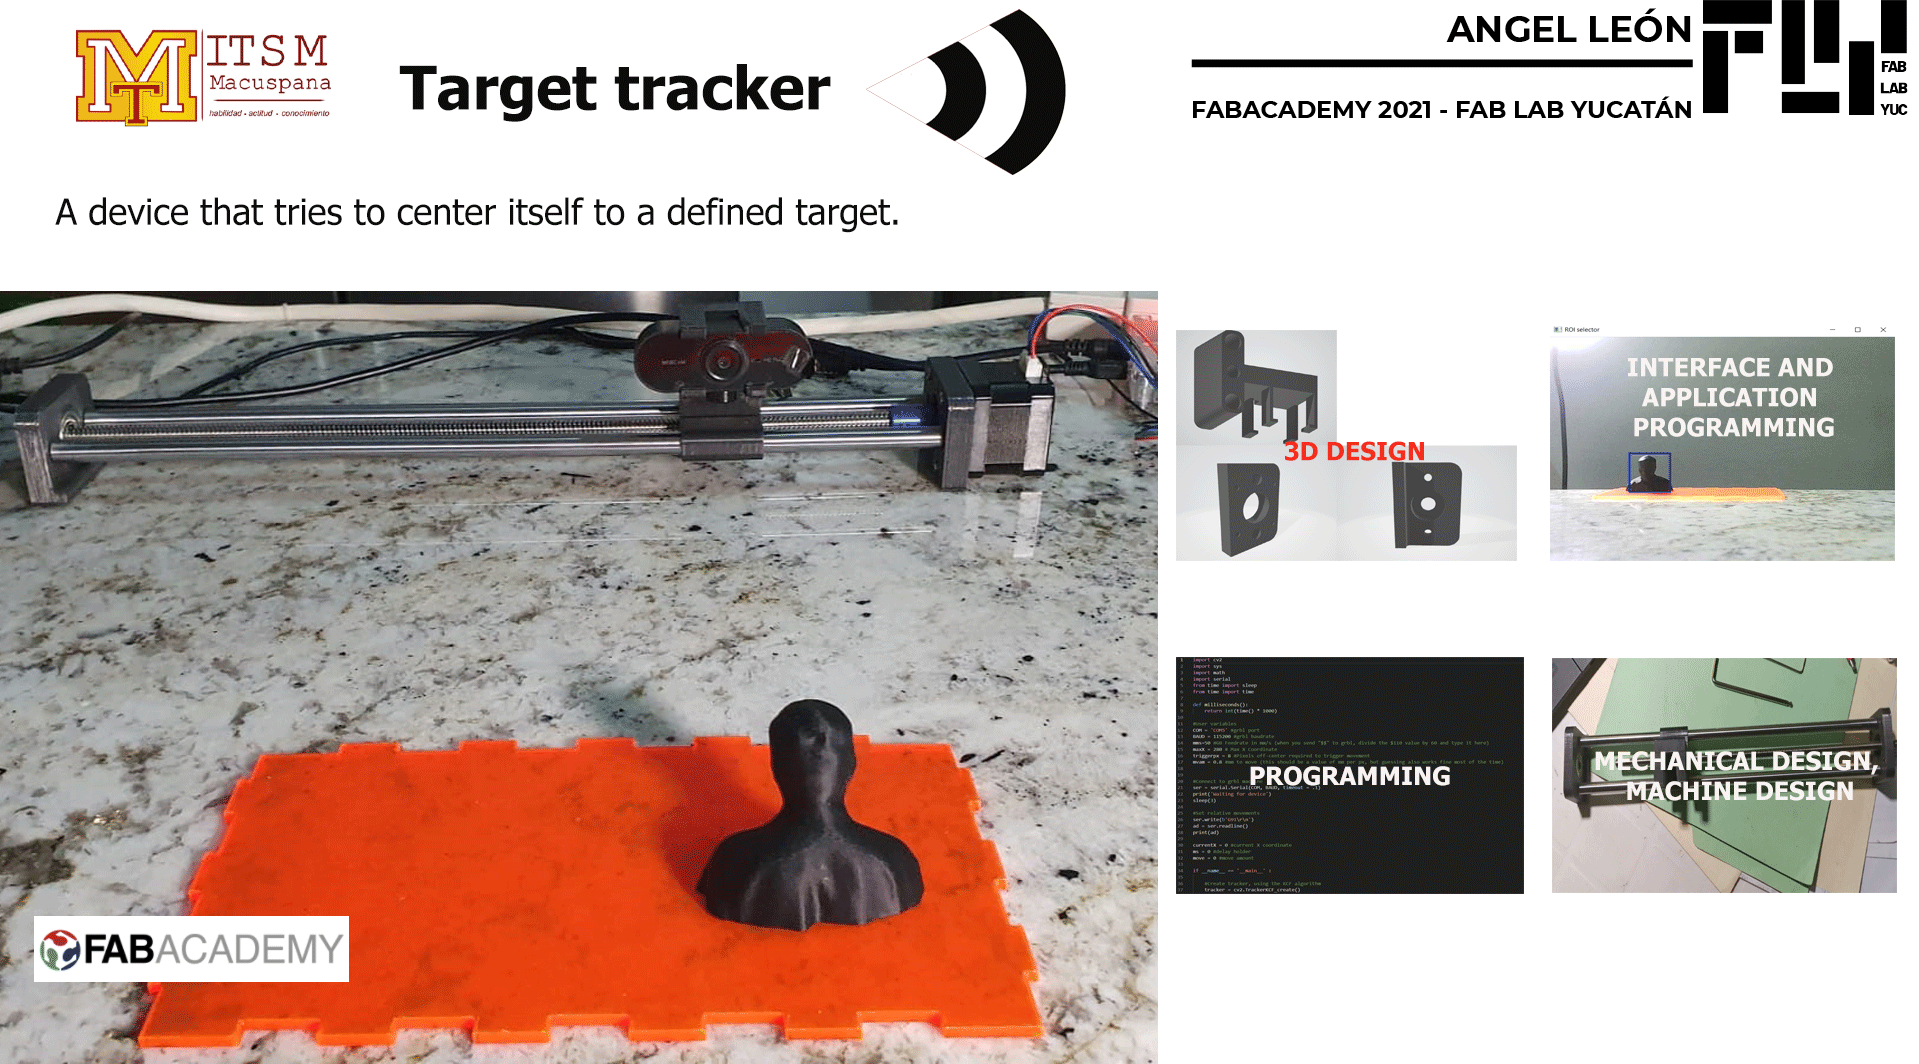
For this assignment i decided to make a machine that holds a camera and allows to move it on
one axis in order to follow a target.
Due to low mobility and the Covid-19 situation, I did not have access to more addecuate
tools and materials to assemble this machine, so everything has been 3d printed
Requeriments.
| quantity | Name |
|---|---|
| 1 | T8 300mm lead screw |
| 1 | 22x10x7mm ball bearing |
| 2 | 325mm*10mm linear axis rail |
| 1 | NEMA 17 stepper motor |
| 1 | 5-8 coupling |
| 1 | GRBL control board |
| 1 | 24v power supply |
| 4 | M5*10 bolt |
| 4 | M3*6 bolt |
| 1 | Generic HD webcam |
-
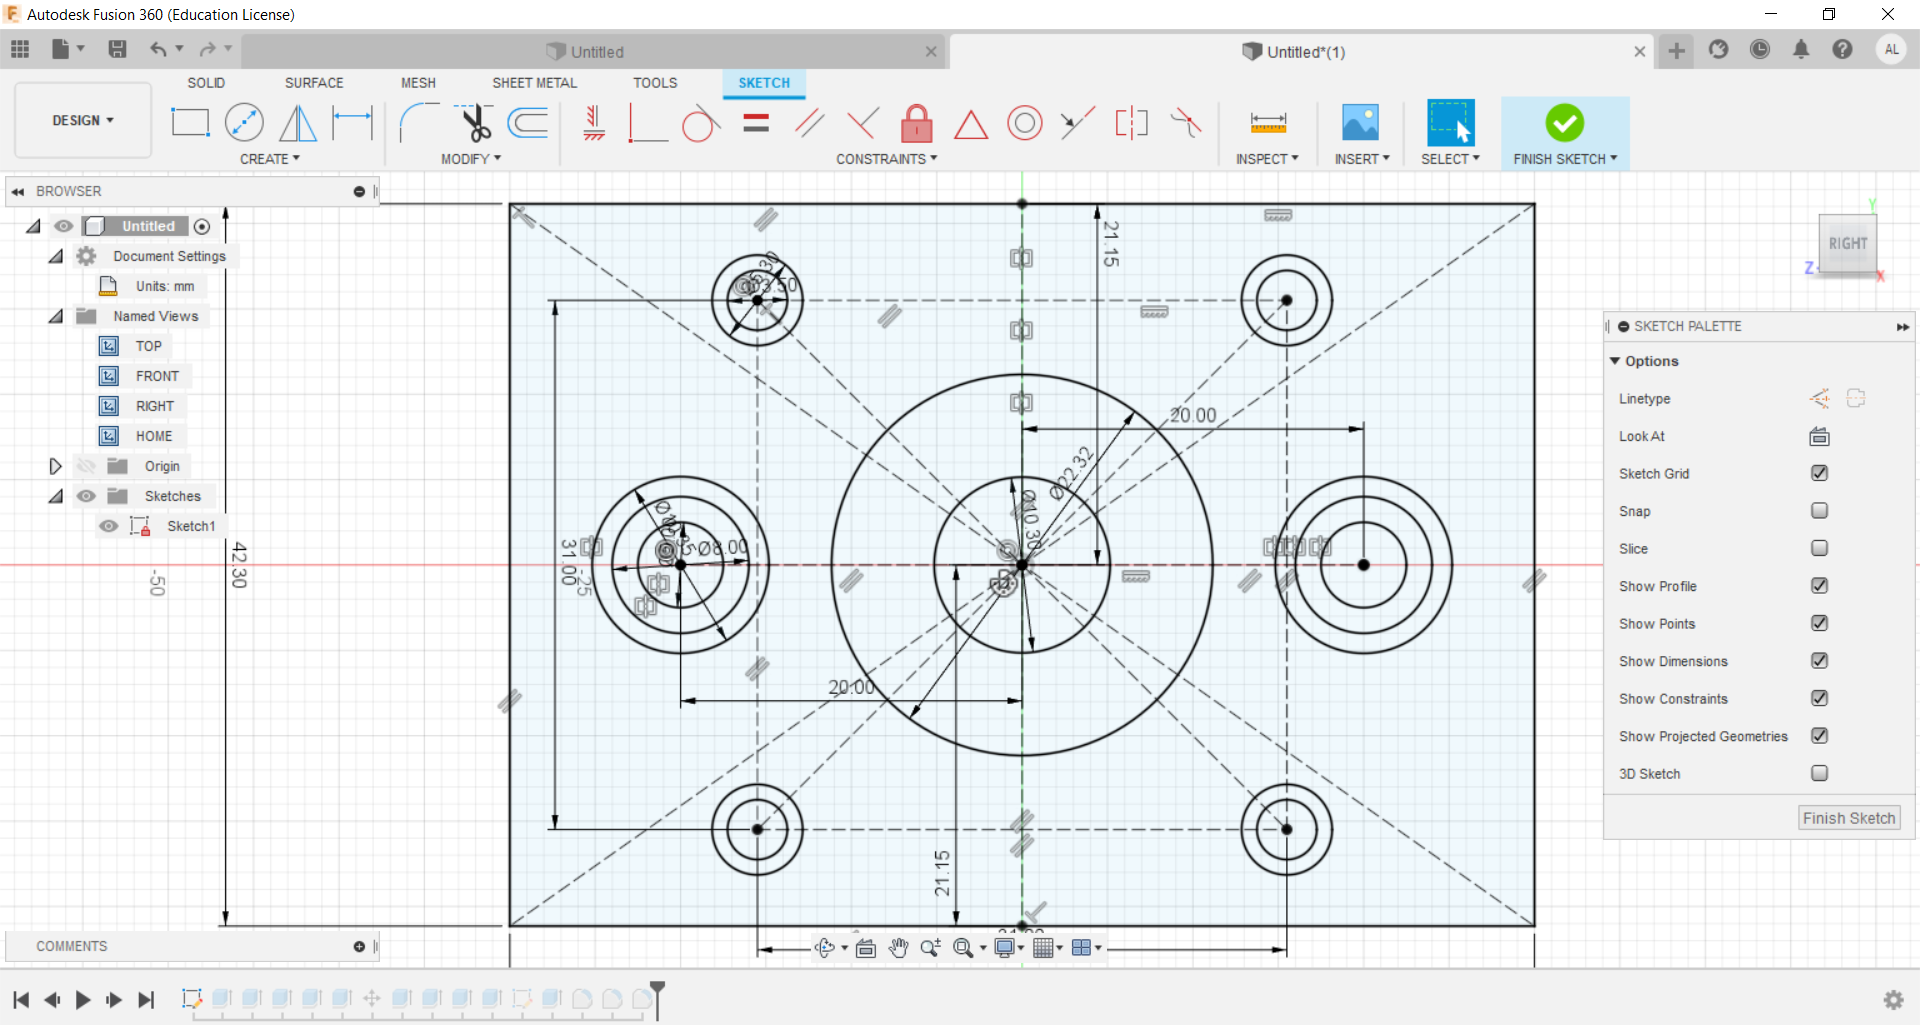
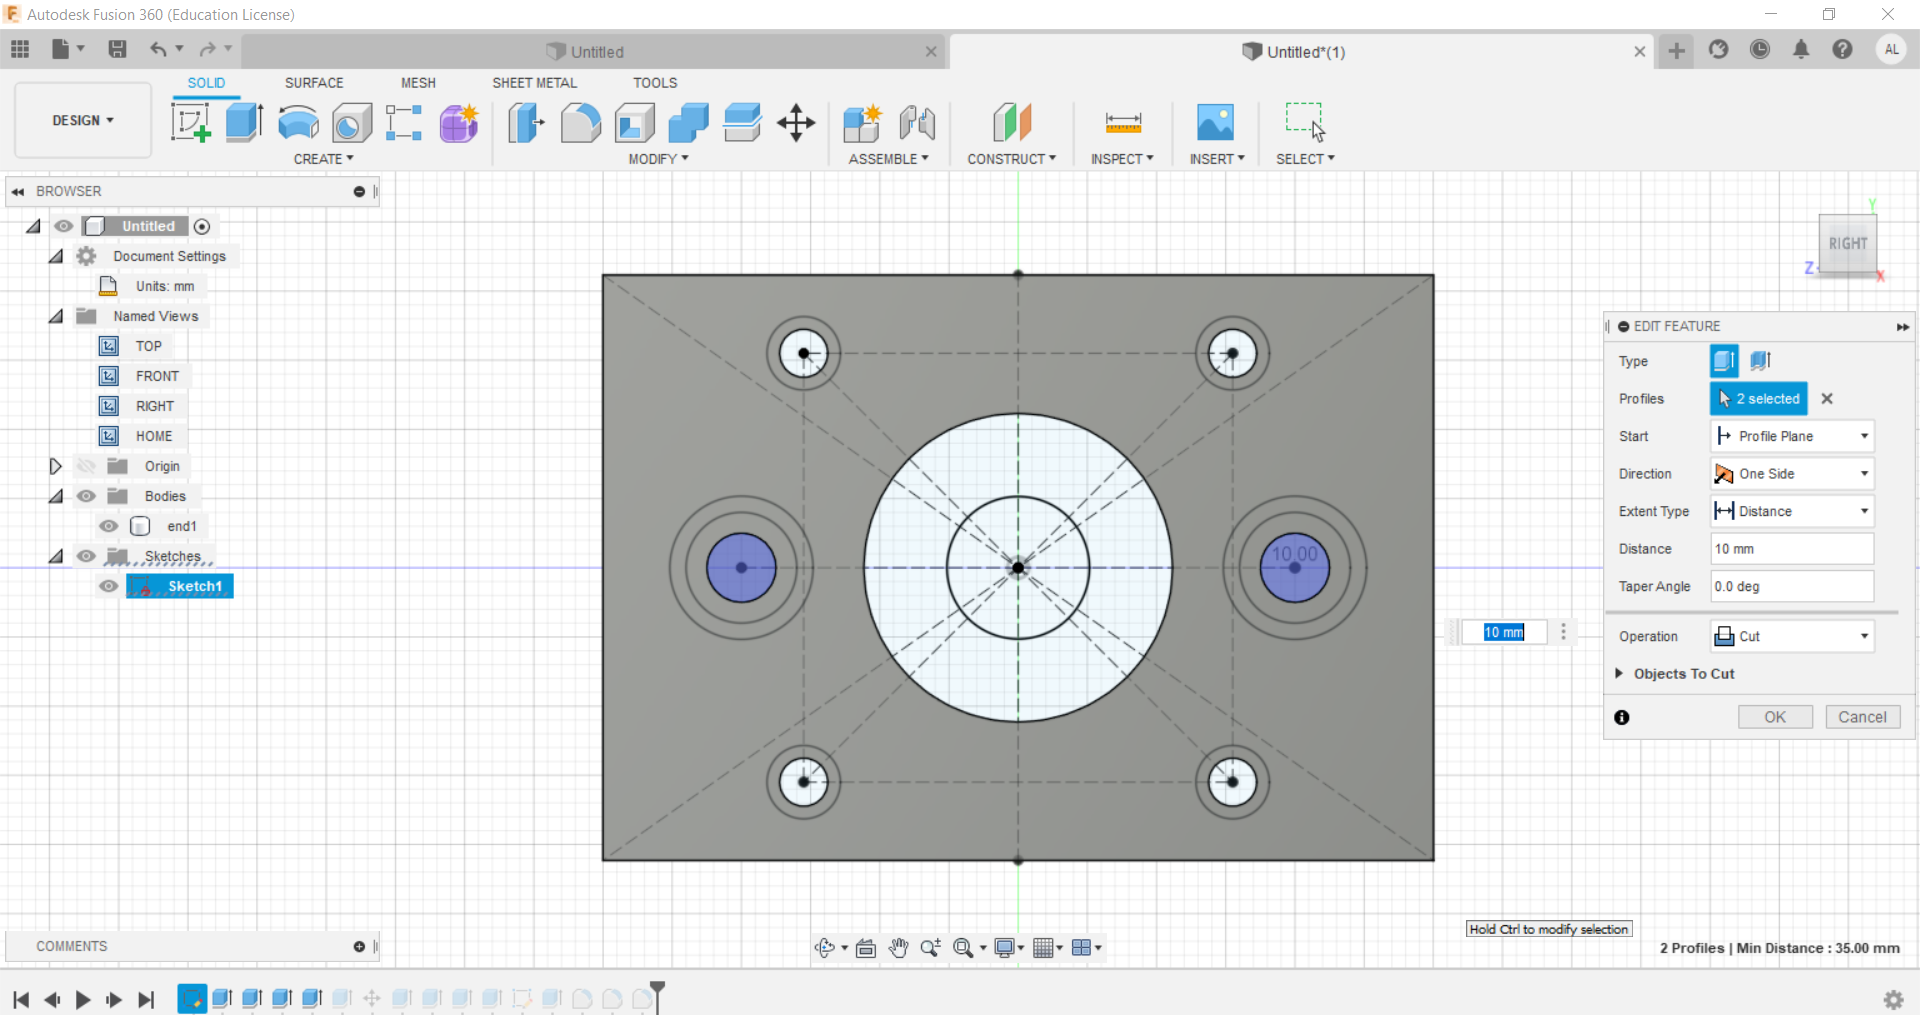
Design the support parts in 3d using Autodesk Fusion 360. New project and sketch
creation.
-
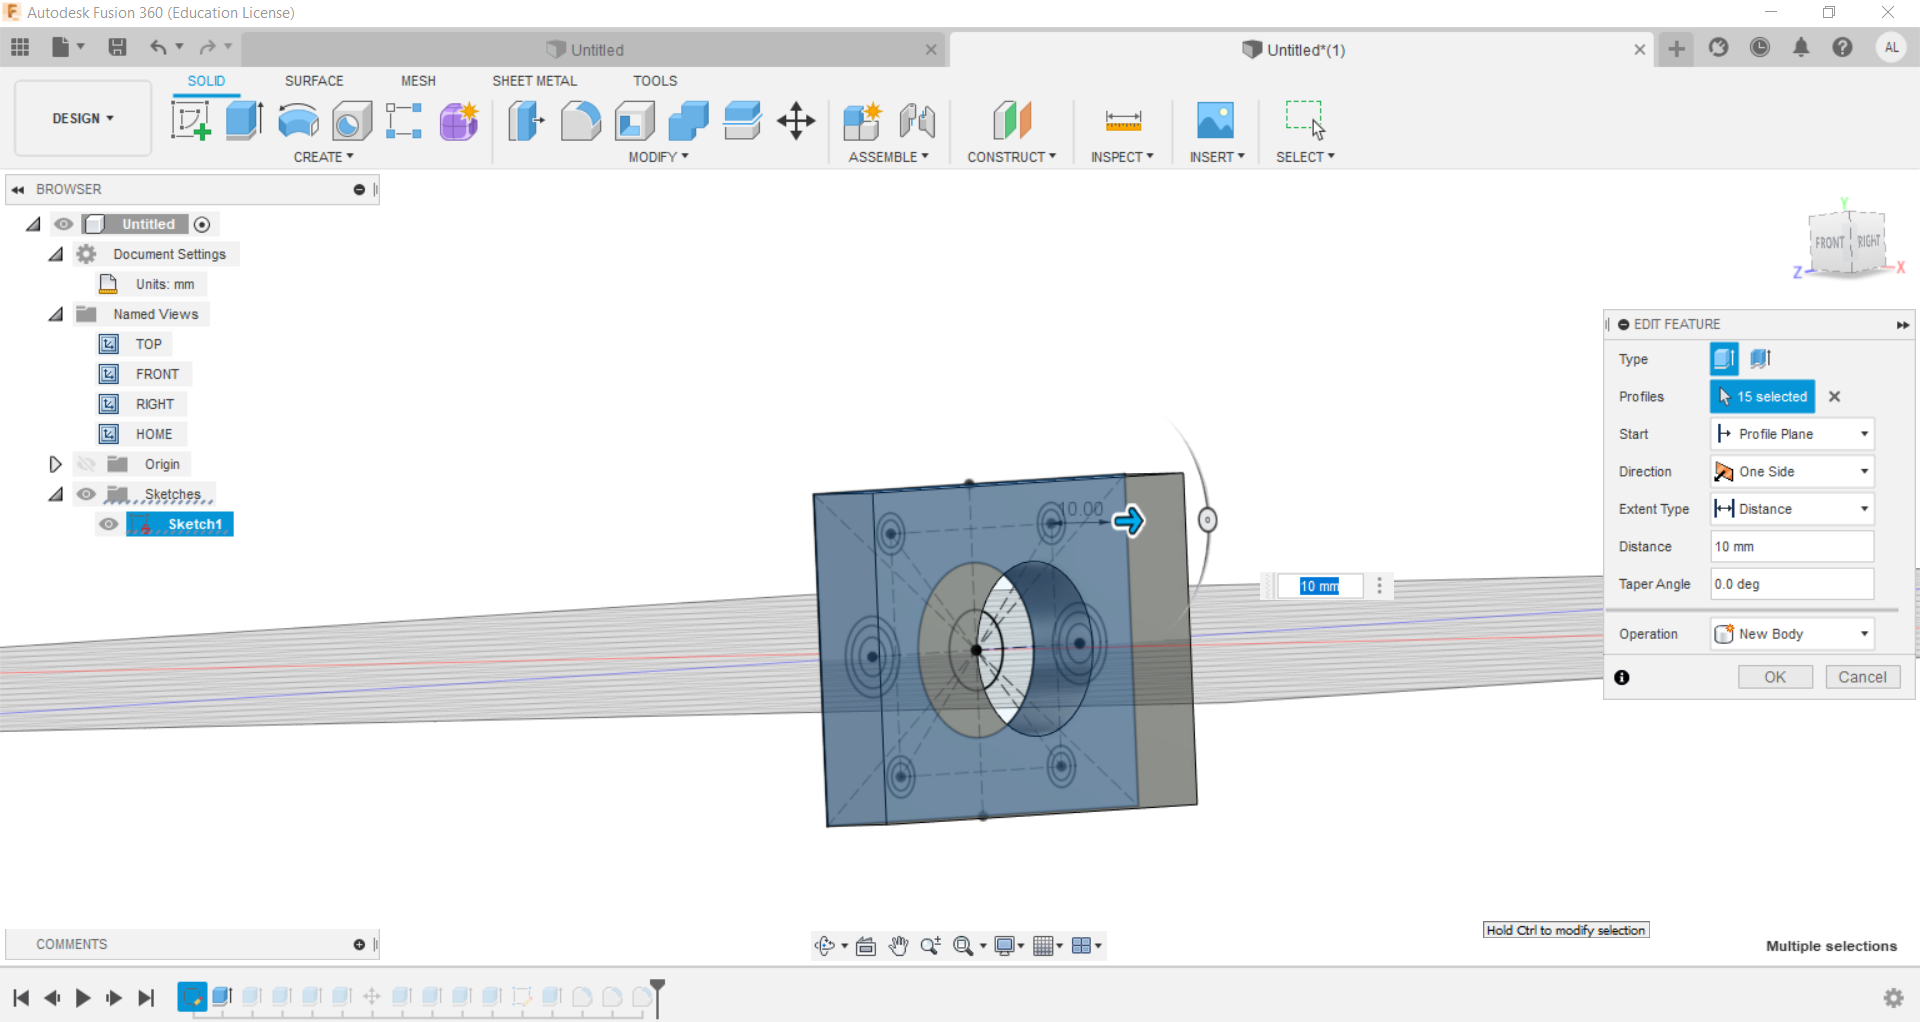
Extrude rectangle.
-
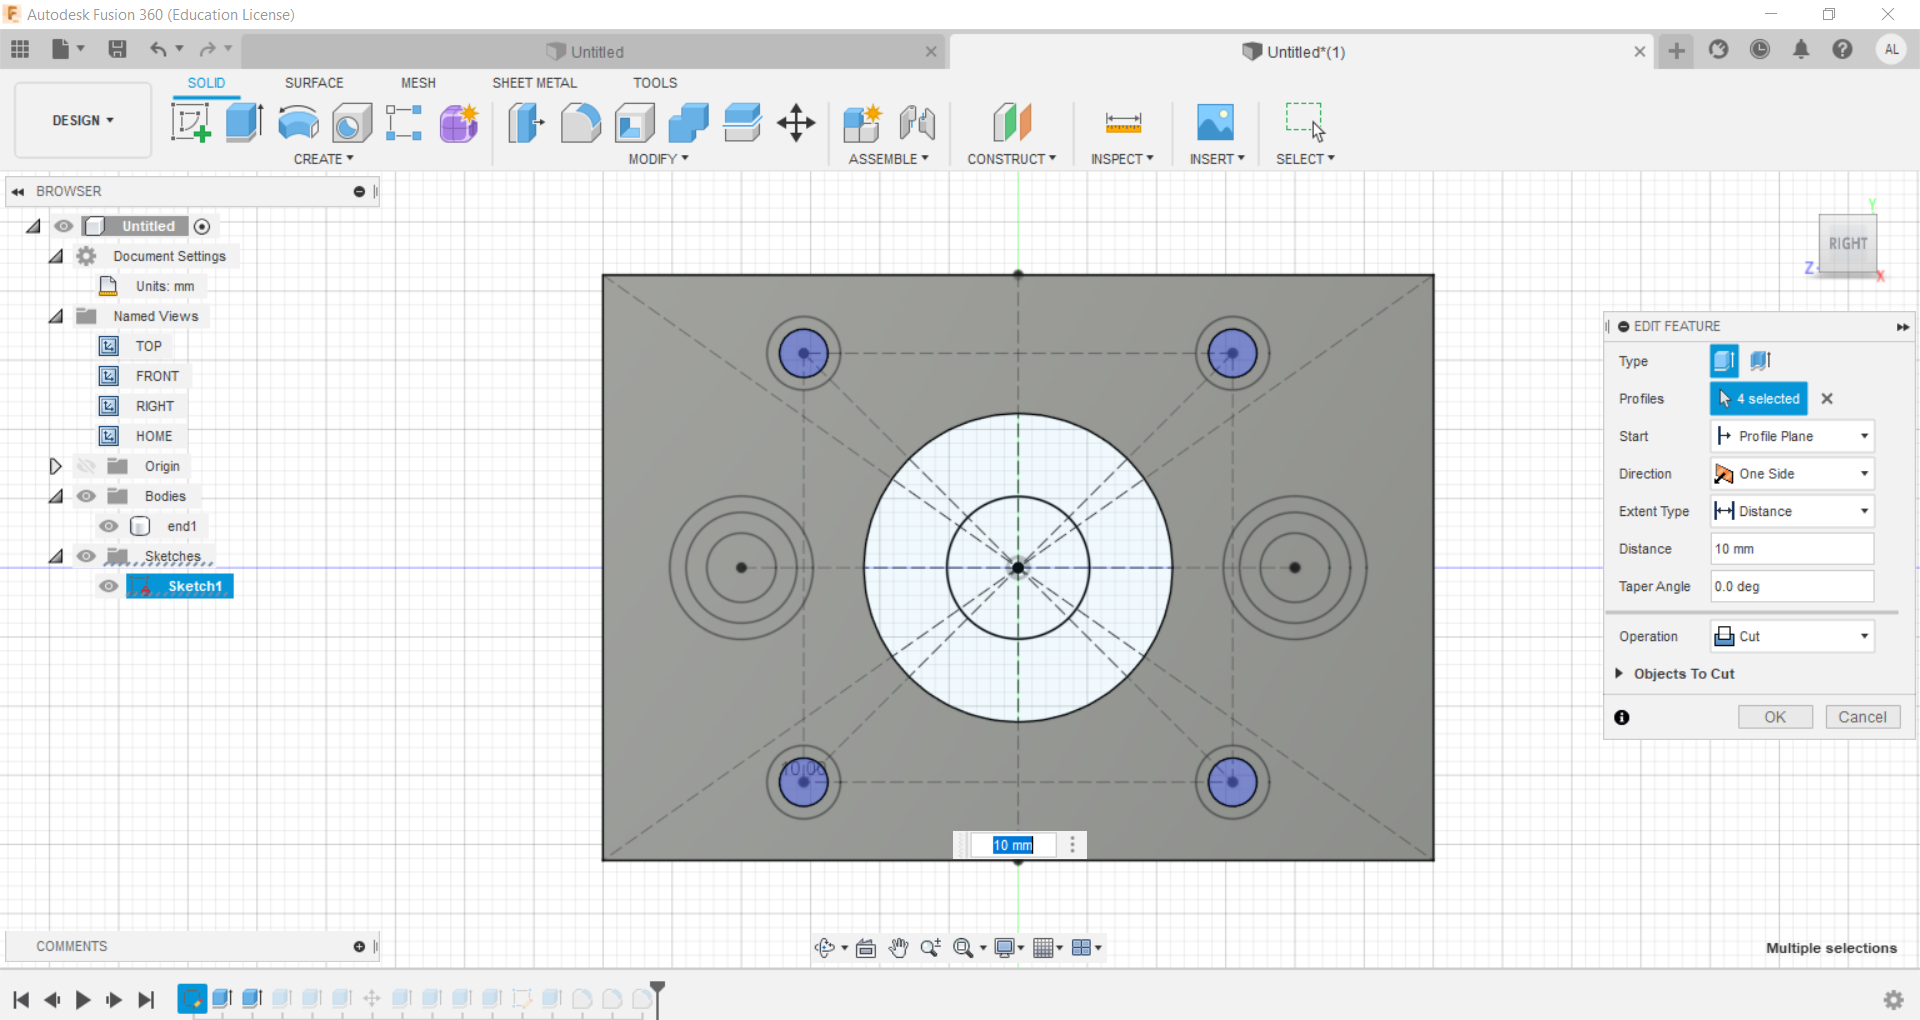
Extrude inner circles (for screws).
-
Extrude outer circles (for screws).
-
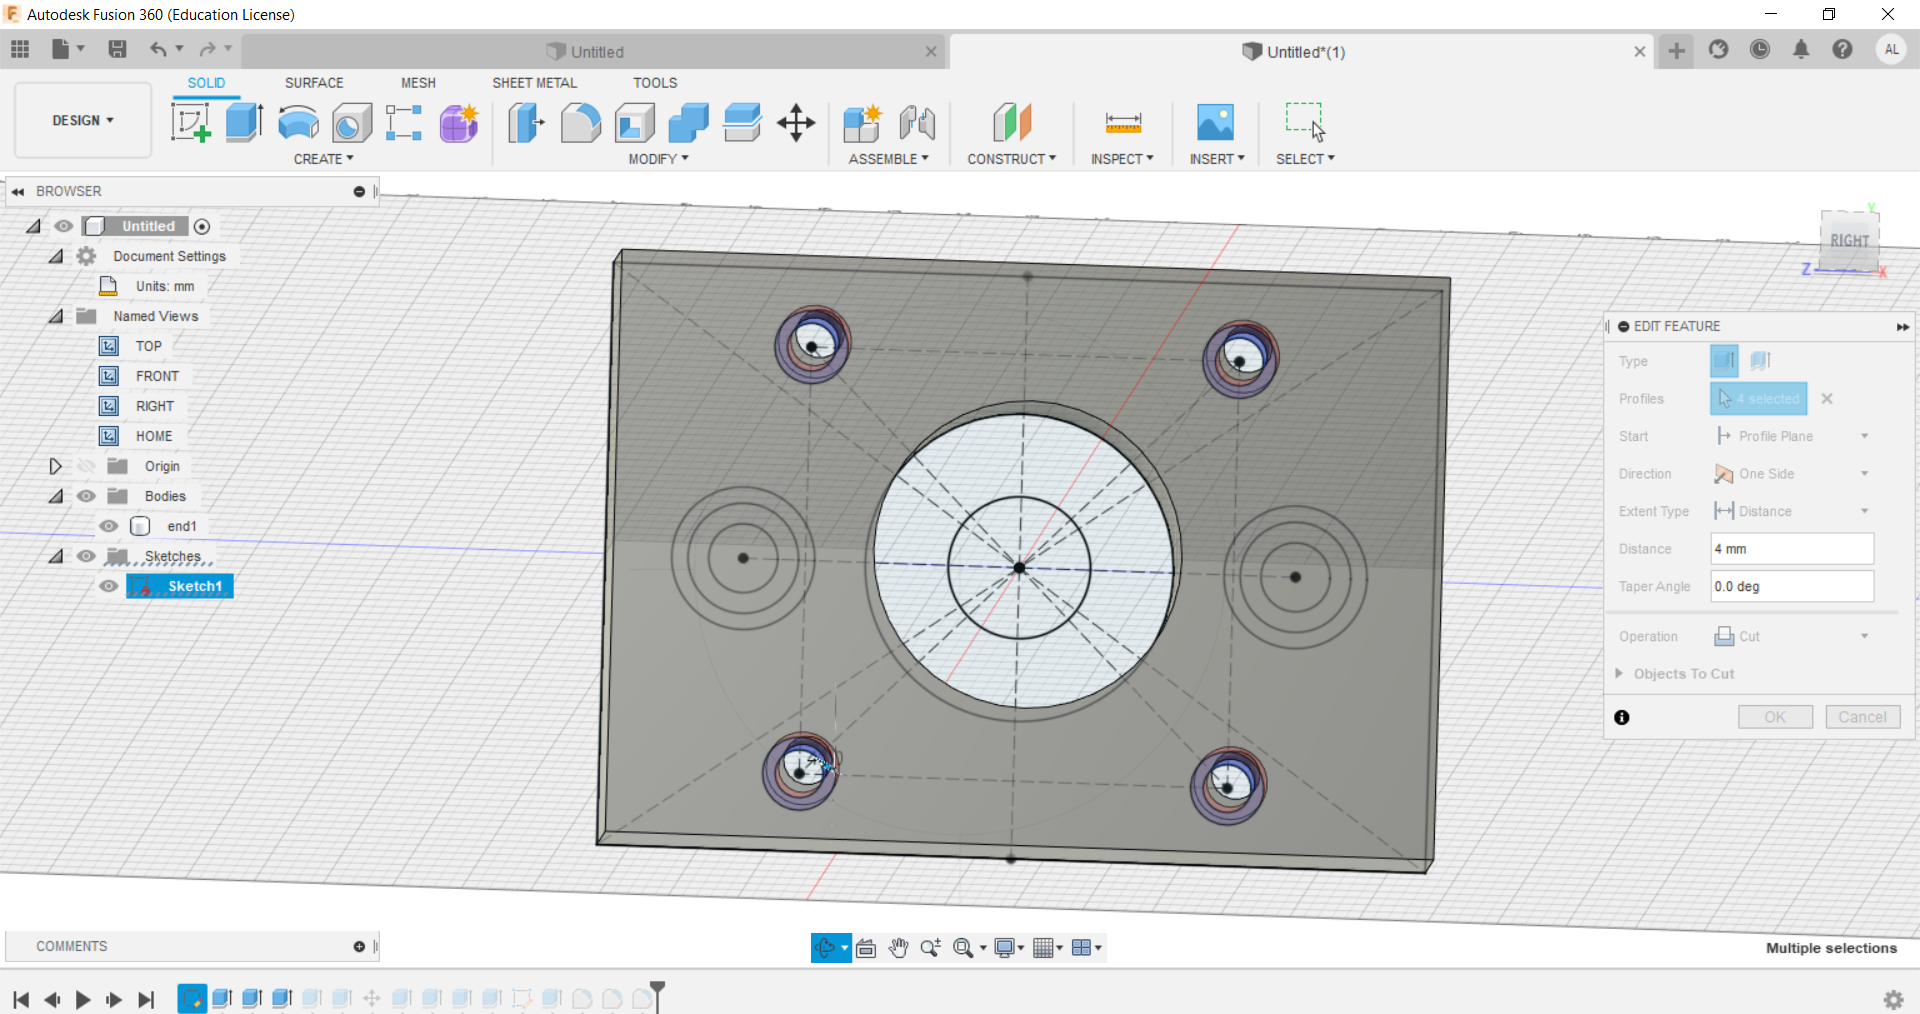
Extrude inner center circles (for screws).
-
Finally the first support is ready.
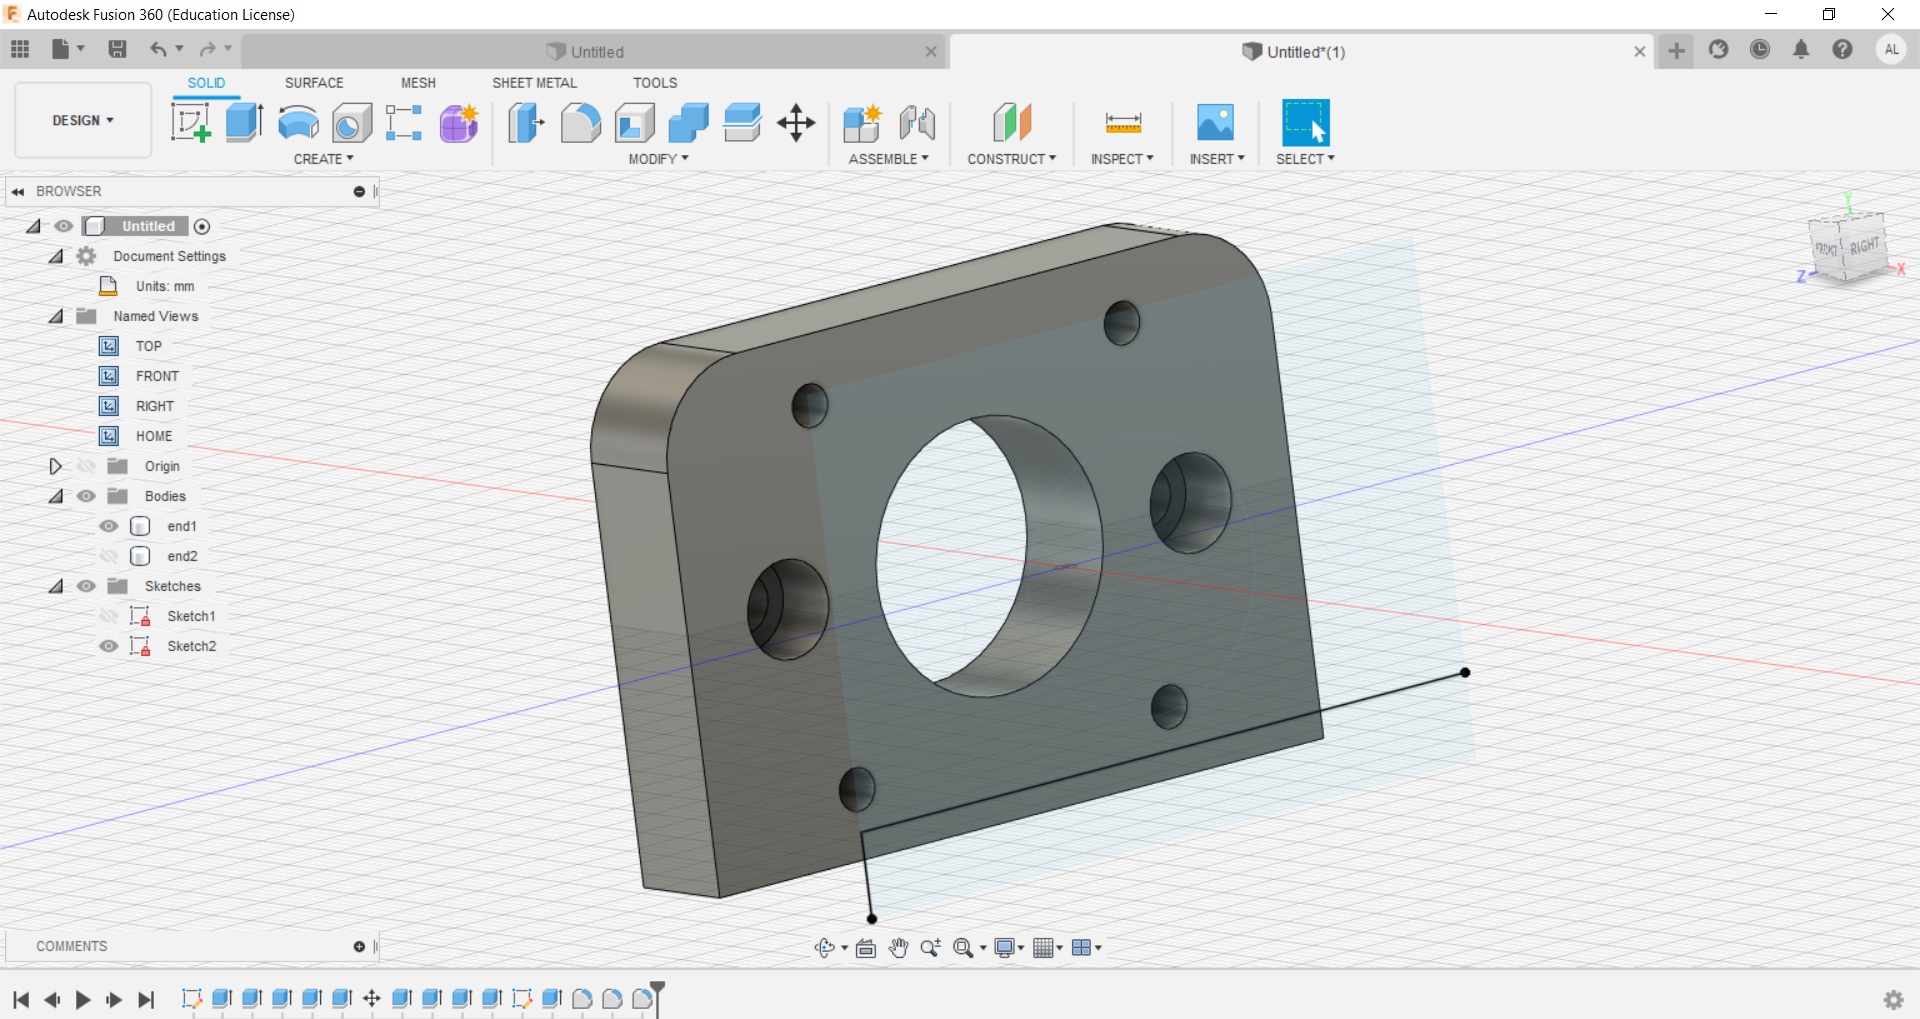
-
Design of the support for the web cam.
-
Parts
Components used to assemble the mechanism, in the image the pieces printed in 3d are indicated.
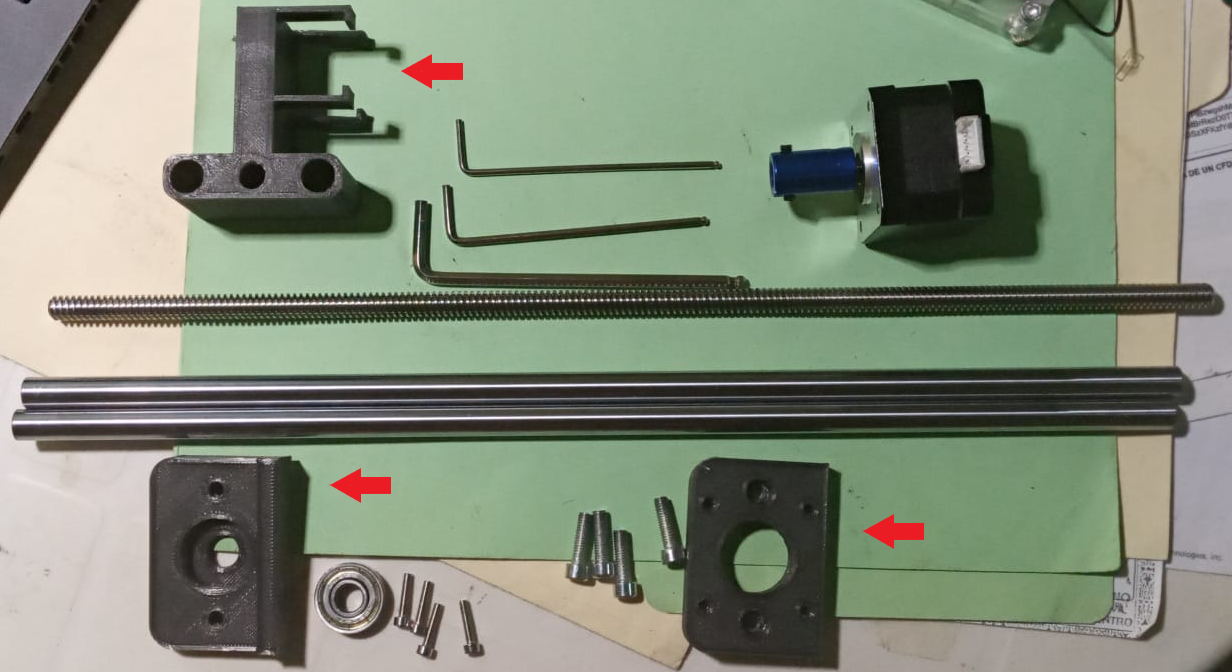
-
Assembly of the parts.
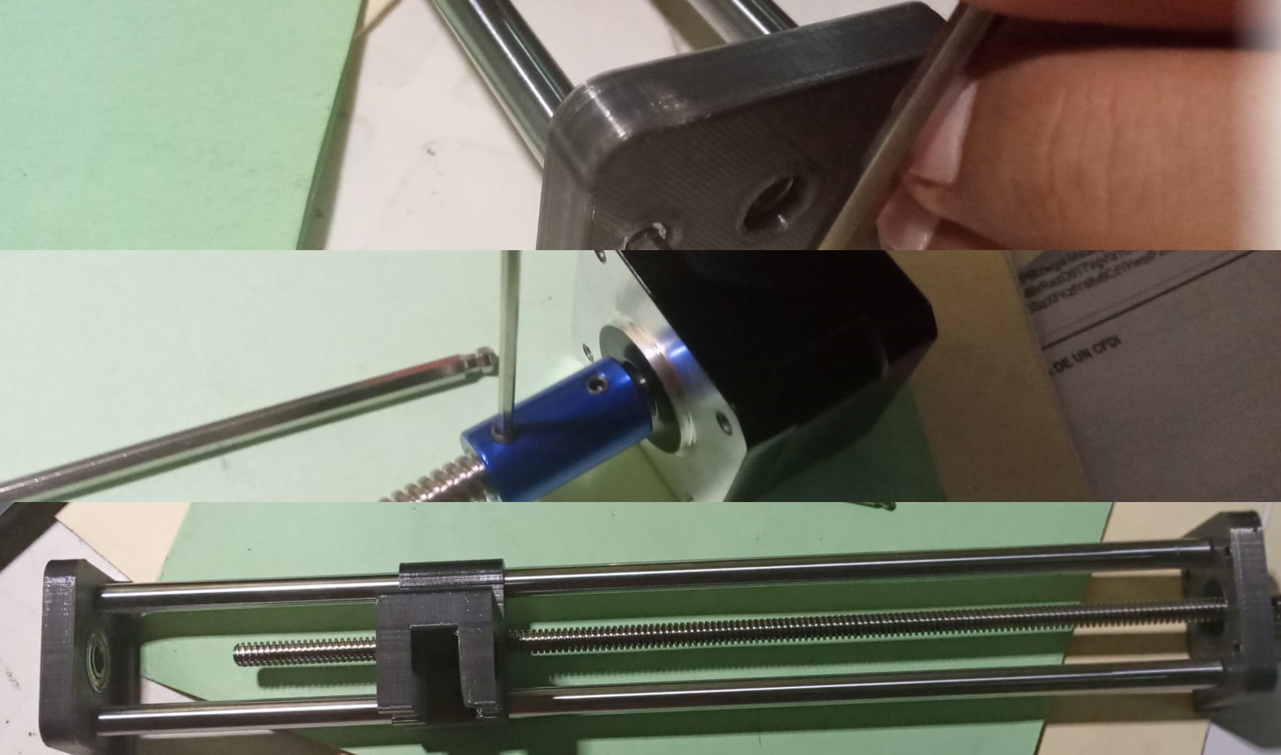
-
Mechanical Movement: Operate manually.
Once everything is ready, I move the axis, as shown in the video.
-
Connect the electronic components for control. So far everything seems fine.
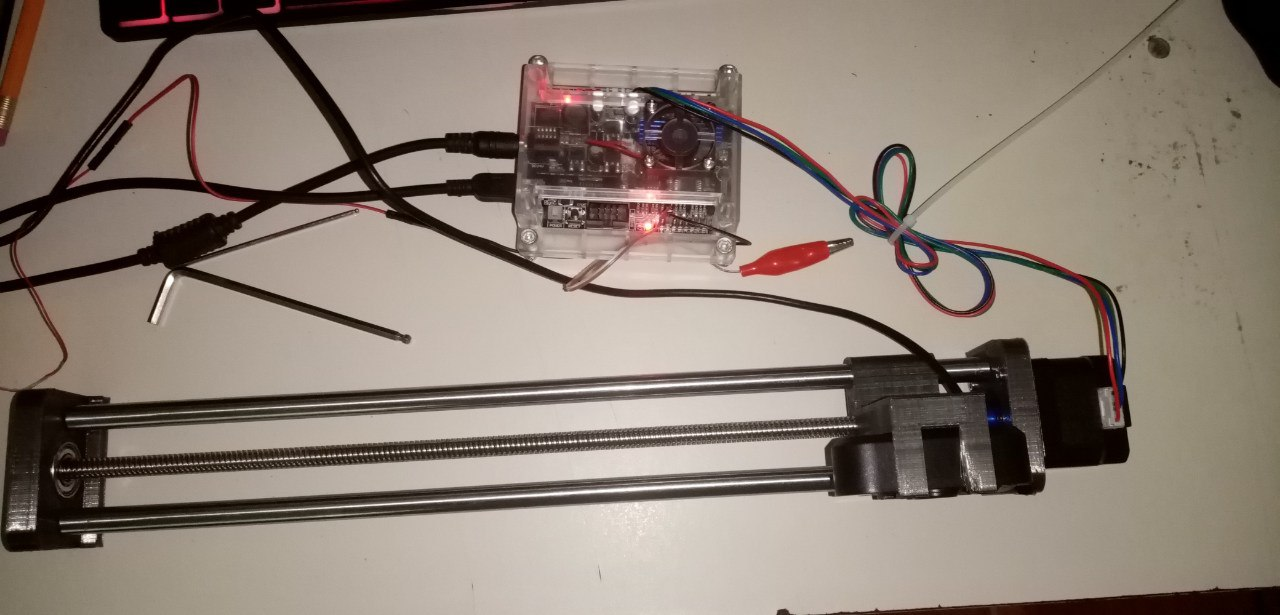
-
Programming will be done in Python, using Visual Studio IDE code, but another code
editor can be used.
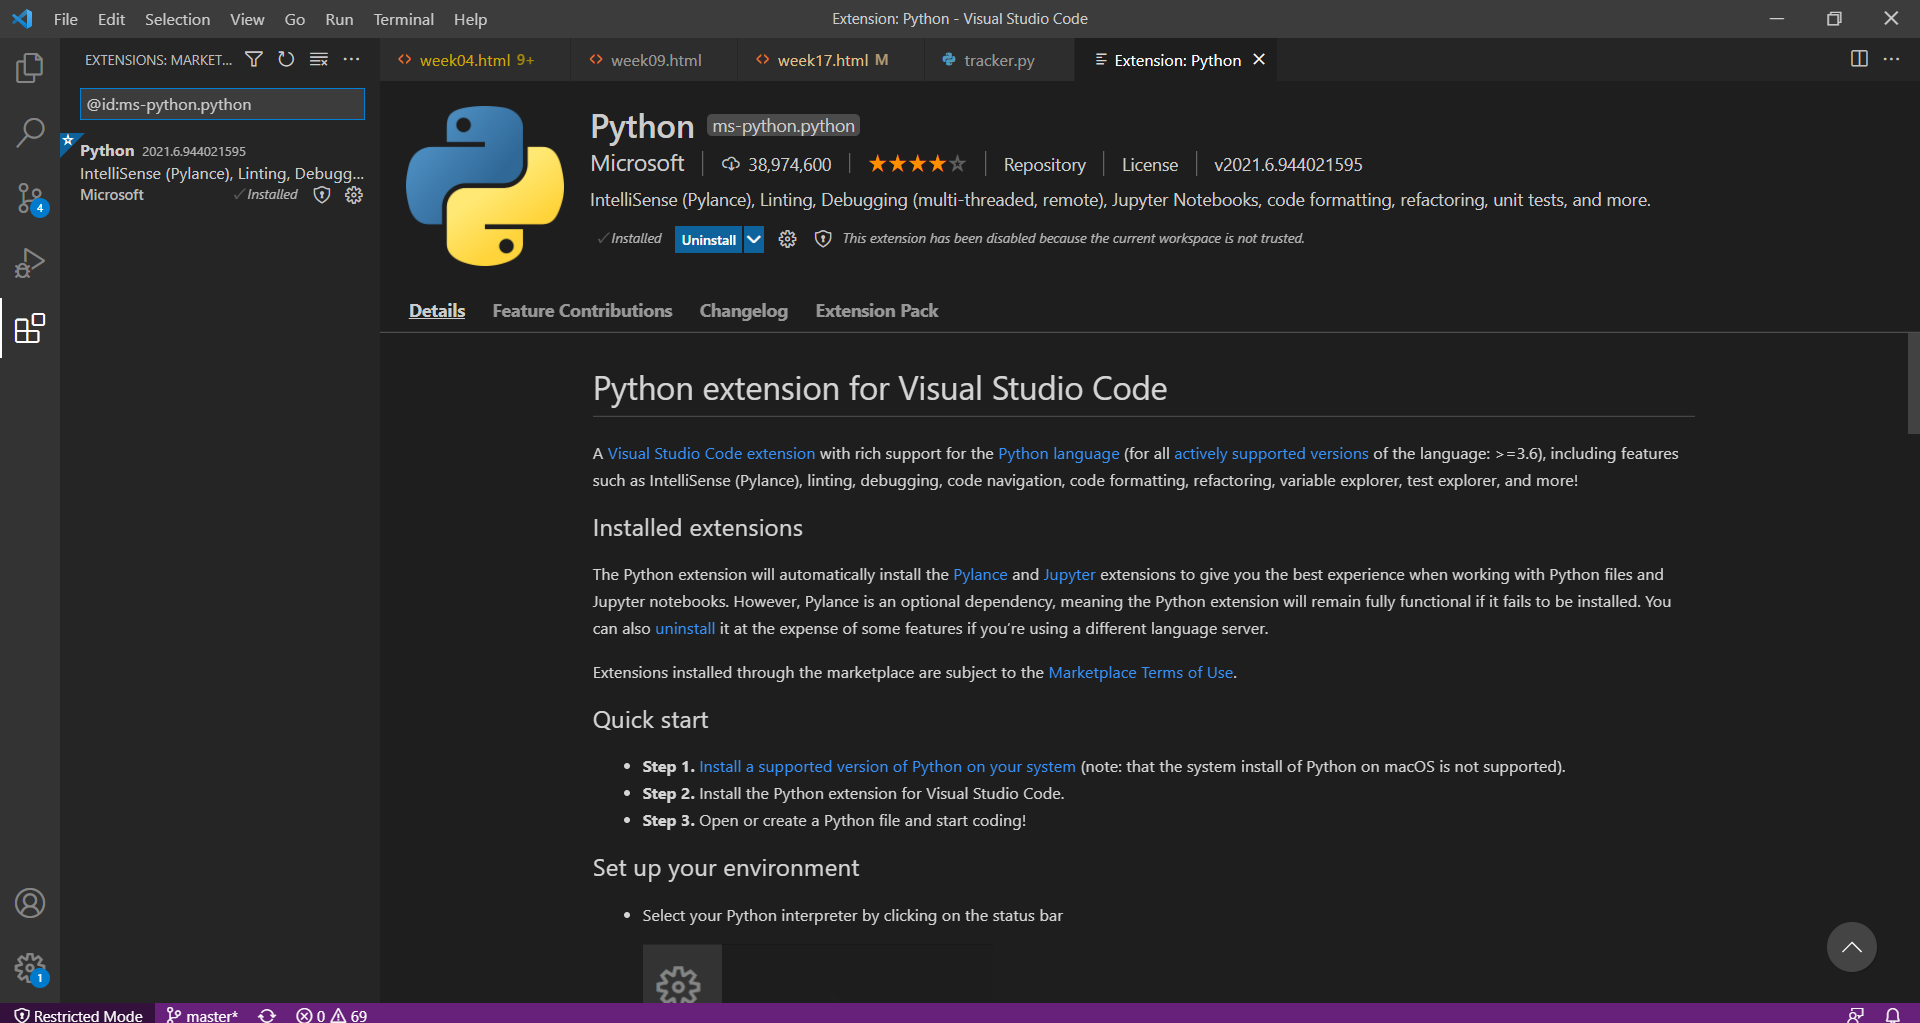
-
The following code allows you to set a target so that the camera can track it.
import cv2 import sys import math import serial from time import sleep from time import time def milliseconds(): return int(time() * 1000) #User variables COM = 'COM5' #grbl port BAUD = 115200 #grbl baudrate mms=50 #G0 Feedrate in mm/s (when you send "$$" to grbl, divide the $110 value by 60 and type it here) maxX = 280 # Max X Coordinate triggerpx = 4 #Pixels off-center required to trigger movement mvam = 1.5 #mm to move (this should be a value of mm per px, but guessing also works fine most of the time) #Connect to grbl machine ser = serial.Serial(COM, BAUD, timeout = .1) print('Waiting for device') sleep(3) #Set relative movements ser.write(b'G91\r\n') ad = ser.readline() print(ad) currentX = 0 #current X coordinate ms = 0 #delay holder move = 0 #move amount if __name__ == '__main__' : #Create tracker, using the KCF algorithm tracker = cv2.TrackerKCF_create() # Open camera stream video = cv2.VideoCapture(0) # Exit if stream not opened. if not video.isOpened(): print ("Could not open stream") sys.exit() # Read first frame. ok, frame = video.read() if not ok: print ('Cannot read stream') sys.exit() #Create target bounding box bbox = cv2.selectROI(frame, False) # Initialize tracker with first frame and bounding box ok = tracker.init(frame, bbox) (h, w) = frame.shape[:2] while True: # Read a new frame ok, frame = video.read() if not ok: break # Start timer timer = cv2.getTickCount() # Update tracker ok, bbox = tracker.update(frame) # Calculate Frames per second (FPS) fps = cv2.getTickFrequency() / (cv2.getTickCount() - timer) distance = 0 distancex = 0 # Draw bounding box if ok: # Tracking success p1 = (int(bbox[0]), int(bbox[1])) p2 = (int(bbox[0] + bbox[2]), int(bbox[1] + bbox[3])) #Get center coordinates of the tracking box centerx = (bbox[0] + (bbox[0] + bbox[2])) / 2 centery = ( bbox[1] + (bbox[1] + bbox[3])) / 2 #get distance from tracking box to video's center distance = int(math.sqrt(math.pow(centerx-(w/2),2) + math.pow(centery-(h/2),2) ) ) distancex = centerx-(w/2) #Draw a line from the video's center to the tracking box cv2.line(frame, (int(w/2),int(h/2)), (int(centerx),int(centery)), (255,0,255), 1) #Draw target box cv2.rectangle(frame, p1, p2, (255,0,0), 2, 1) else : # Tracking failure cv2.putText(frame, "Tracking failure detected", (0,170), cv2.FONT_HERSHEY_SIMPLEX, 0.75,(0,0,255),2) # Display tracker type on frame cv2.putText(frame,"KCF Tracker", (0,20), cv2.FONT_HERSHEY_SIMPLEX, 0.75, (50,170,50),2) # Display stats cv2.putText(frame, "FPS : " + str(int(fps)), (0,50), cv2.FONT_HERSHEY_SIMPLEX, 0.75, (50,170,50), 2) cv2.putText(frame, "2D distance : " + str(int(distance))+"px", (0,80), cv2.FONT_HERSHEY_SIMPLEX, 0.75, (50,170,50), 2) cv2.putText(frame, "Distance (X) : " + str(int(distancex))+"px", (0,110), cv2.FONT_HERSHEY_SIMPLEX, 0.75, (50,170,50), 2) if(int(abs(distancex))>triggerpx and ms == 0 and currentX>=0): move = 0 #mm to move if(distancex>0): move = -mvam currentX+=mvam #check if movement does not exceed max X coordinate if(currentX>maxX): move = 0 currentX -=mvam cv2.putText(frame, "Out of range", (0,170), cv2.FONT_HERSHEY_SIMPLEX, 0.75, (0,0,255), 2) elif(distancex<0): move = mvam currentX-=mvam #check if movement does not go below 0 on the X coordinate if(currentX<0): move = 0 currentX += mvam cv2.putText(frame, "Out of range", (0,170), cv2.FONT_HERSHEY_SIMPLEX, 0.75, (0,0,255), 2) #if there is any travel ammount available, send it to the machine if (move): ser.write(b'G0 X'+str(move).encode() +b'\r\n') #set a delay to wait for the movement to finish ms = milliseconds() + int((abs(move)/mms) * 1000) #check if previously declared delay already passed on this frame if(milliseconds() >= ms): #reset timer ms = 0 #Display what is getting executed on the machine cv2.putText(frame, "executing G0 X"+str(move), (0,140), cv2.FONT_HERSHEY_SIMPLEX, 0.75, (50,170,50), 2) # Display frame cv2.imshow("Tracking", frame) # Exit if ESC pressed k = cv2.waitKey(1) & 0xff if k == 27 : #go back to X0 ser.write(b'G0 X'+str(currentX).encode() +b'\r\n') break -
create python virtual environment
-m venv .venv
the file to activate the virtual environment (.venv / bin / activate) is executed.
install packages
pip install opencv-contrib-python
pip install pyserial
After installing the required packages, you have to execute the code, it is recommended to use PoweShell, once the file is executed it shows an interface, the camera is activated and you have to set the objective so that the camera follows it. - Personally, the idea seems excellent to me, which could well be improved, perhaps to create a water dispenser for birds It can be improved by designing a 2d structure that covers all the mechanical and electronic parts, using acrylic or mdf.
Slide
video