9. Embedded programming
In this week’s group assignment, we are comparing several popular choices of microcontrollers. Our goal is not to make an exhaustive list, but rather give a landscape of the current era in embedded programming.
Overall comparison
Here is a table comparing several numerical values, gathered from https://www.microchip.com and https://www.espressif.com/ :
| name | company | year | type | GPIO | ADC | prog. mem. | data mem. | RAM | f_CPU (max) |
|---|---|---|---|---|---|---|---|---|---|
| ATmega328p | Atmel | 2010 | 8-bit | 23 | 6 | 32kb | 1024b | 2kb | 20MHz |
| ATtiny1614 | Atmel | 2018 | 8-bit | 12 | 10 | 16kb | 256b | 2kb | 20MHz |
| PIC32MX320F064H | Microchip | 2008 | 32-bit | 53 | 16 | 64kb | 12kb | 16kb | 80MHz |
| SAMD11C14 | Atmel | 2015 | 32-bit | 12 | 5 | 16kb | 6b | 4kb | 48MHz |
| ESP32 | Espressif | 2016 | 32-bit | 34 | 18 | 16Mb | 4Mb | 520kb | 240MHz |
Note that the data memory can be either implemented in EEPROM (ATtiny1614 and ATmega328p) or flash (others). As a rule of thumb, the processor frequency multiplied by the number of bits per instruction gives an idea of the computing power offered by the chip.
It is interesting to note that a 32 bit processor could effectively affect the values of 32 pins in a single instruction, as they use 32 bit ports internally.
Atmel Corporation was acquired by Microchip in 2016, putting Microchip in a situation where they can provide cheap 8-bit families, as well as their more advanced 32-bit options.
We will now compare in more details the chips selected in our work.
ATtiny1614
Quick overview
The ATtiny1614 is a minimalist 8-bit microcontroller embedding a remarkable set of features for its size. Here is a pinout of the ATtiny1614:
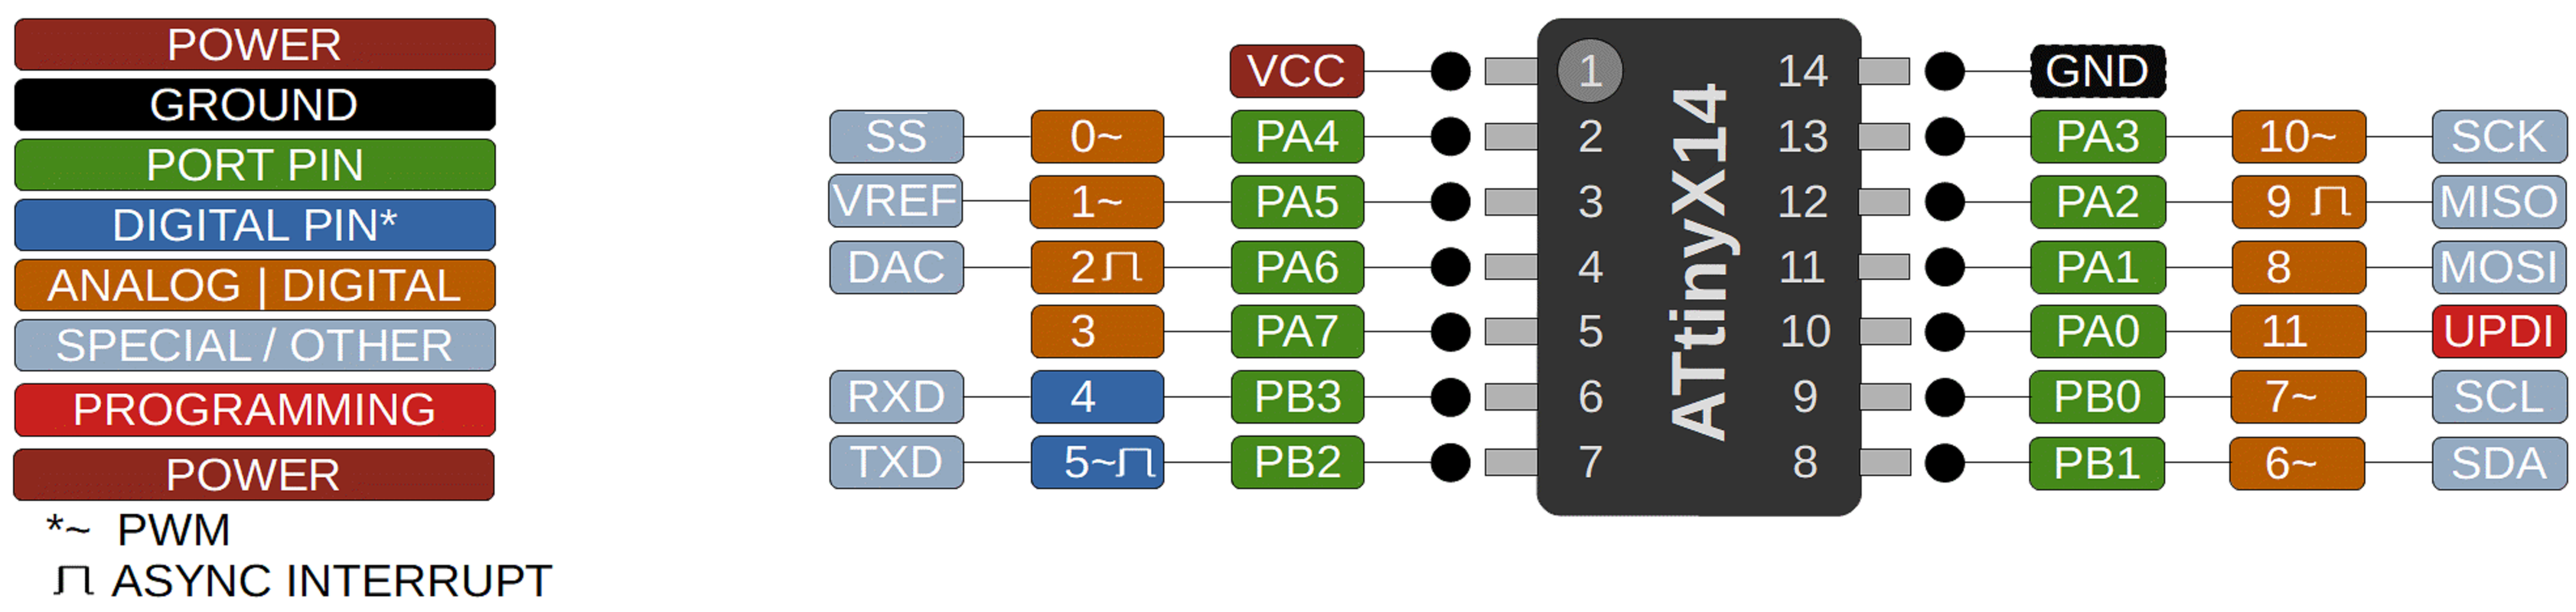
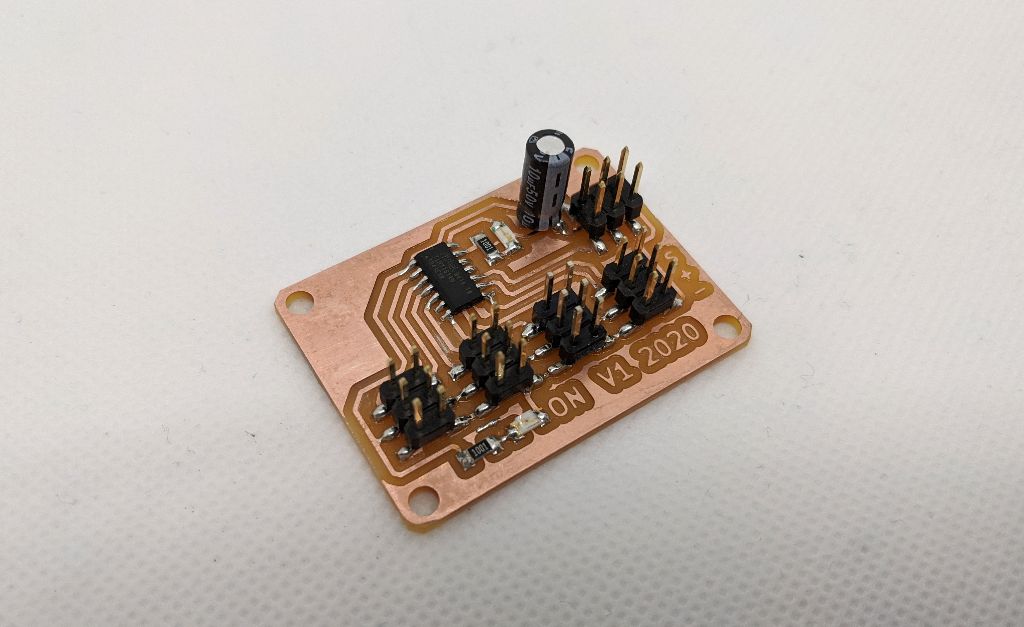
Varied input voltages are supported, including 3.3V and 5V. The number of digital pins is reasonable for most projects, and on top of that, several communication ports are available such as serial, SPI and I2C. An example board based on an ATtiny1614 was presented by Quentin during the electronics design week:
A guide on how to use the Arduino IDE with the ATtiny1614 is available here.
Flashing
This device is programmed through the UPDI protocol, which is a procotol acting as a serial port on a single bi-directional wire. There is a reserved UPDI pin on the ATtiny, that will trigger a reset whenever the voltage is set to 0V.
To program a UPDI target, it is necessary to have a host PC with a serial to USB converter. To communicate with the ATtiny during flashing, we use the pyupdi Python package.
SAMD11C14
Quick overview
The SAMD11C14 is a 32-bit microcontroller that includes a USB port. This feature makes the SAMD11C14 a great all-in one device, able to perform both low-level I/O tasks and higher level communications with a host PC. It can even be programmed as a computer keyboard or mouse.
Here is a listing of the pins, (from Shawn Hymel):
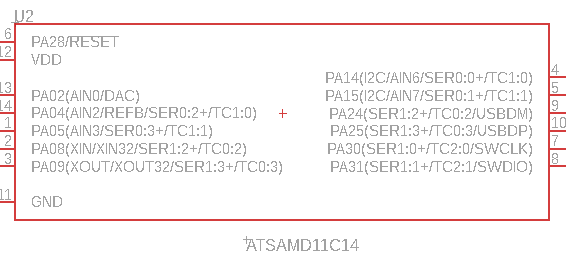
This chip also features a higher clock speed of 48 MHz, which is useful for faster data transfer over the USB.
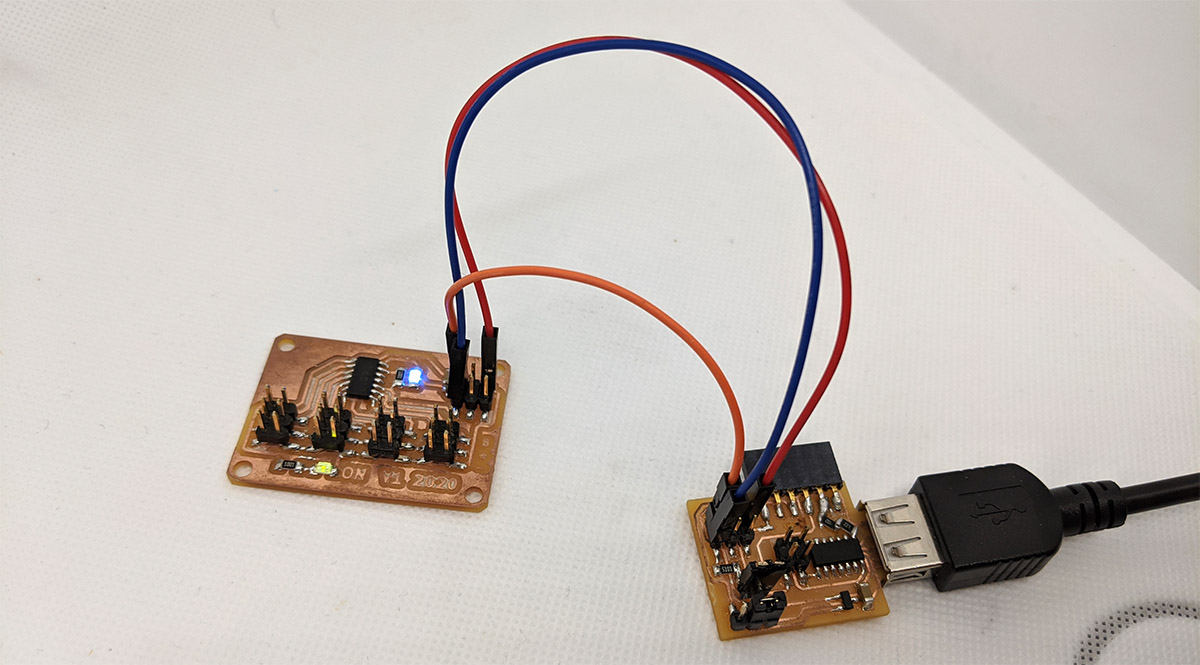
You can find an example use-case of the SAMD11C14 in Quentin’s UDPI programmer:
Flashing
The SAMD11C14 can only be programmed through the JTAG protocol. This uses a total of 4 pins, not including the power supply:
- CLK: clock, using for synchronization of the data transfer.
- DIO: bi-directional data cable.
- RES: reset, forces the SAMD to enable flashing.
- GND
A specific JTAG programmer is needed for this; we use the Particle Debugger. However, if a bootloader is installed on the SAMD, there are other ways to flash the chip. For instance, the Arduino bootloader enables compatibility with the AVR ISP programmer of the Arduino IDE.
ESP32
Quick overview
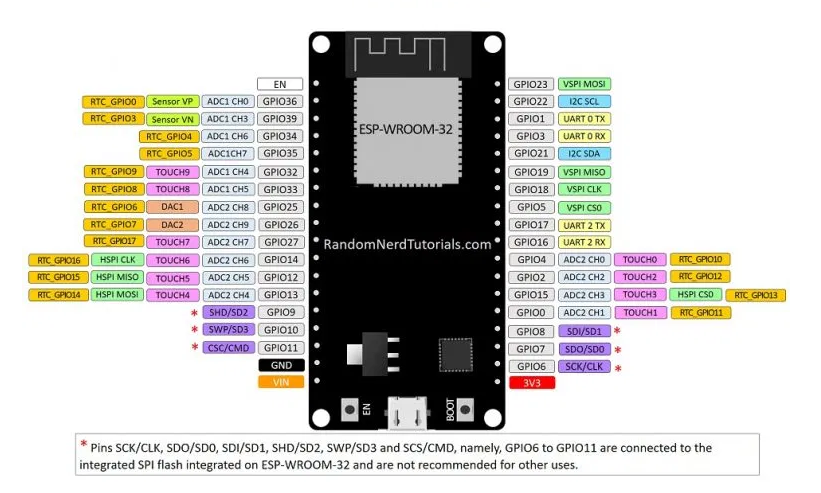
The ESP32 is a recent 32-bit microcontroller with advanced features: WiFi, bluetooth and up to 240 MHz clock with 500kb RAM. Their manufacturer, Espressif, is a relatively new actor in the embedded electronics world.
The exact pinout will depend on the PCB used. Here is a pinout with one of the most basic kit available, the ESP32 DEVKIT (from https://randomnerdtutorials.com/esp32-pinout-reference-gpios/):
High-level peripherals are available for the ESP32. In Quentin’s final project, you can can see a use-case of the OV2640 camera module.
In Robin’s project, an ESP32 is used as a bluetooth controller for the pump of a fountain.
To learn how to program the ESP32 with the Arduino IDE, you can follow this guide.
Flashing
The ESP32 features two methods for flashing:
- Serial port 0: it is necessary to poll the pin D0 to 0V to enable this.
- Over the Air (OTA): if enabled, the ESP32 will open a web socket when connected to the WiFi. The OTA service handles the transfer and flashing of the ESP32.
You can see an example of OTA programming in Quentin’s final project.