6. 3D Scanning and printing
This week the group assignment consisted in characterizing the design rules for our 3D printers. There are two 3D printers in our FABLAB: - the ORIGINAL PRUSA I3 MK3S based on the FDM (Fused Deposition Modeling) technology, and - the Form 3 based on the SLA (Stereolithography) technology.
For both printers we used a torture test to assess their capabilities.
Test on the ORIGINAL PRUSA I3 MK3S
For the ORIGINAL PRUSA I3 MK3S we found an Open-Source torture test on GitHub. With this torture it is possible to assess the quality of the printing for unsupported angles, overhangs and bridging, the tolerances on the wall thickness, the backlash between two parts and the surface finish.

We downloaded and installed the Prusa software : PrusaSlicer and we opened the .STL file inside it. We decided to print the torture test twice with two different layer depth. Therefore we first put the settings by default in PrusaSlicer on “0.20mm QUALITY MK3” for the first print and on “0.10mm DETAIL MK3”.
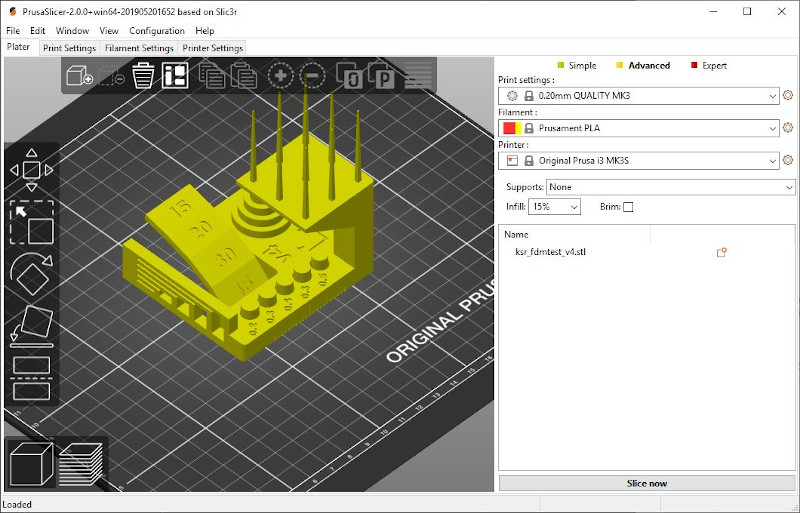
With PrusaSlicer we sliced the object and we exported the G-CODE that we copied on the SD card of the 3D printer.
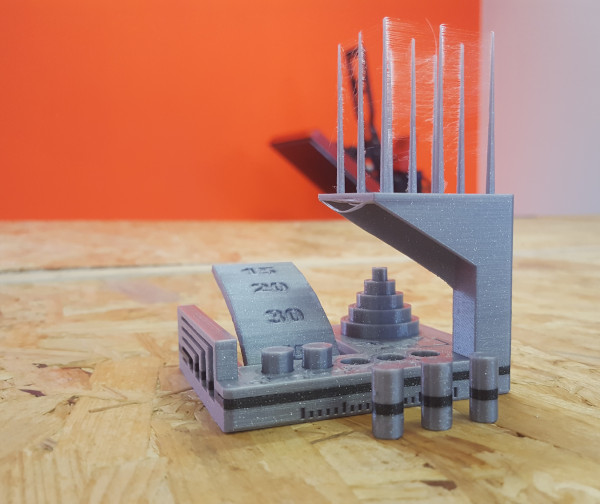
The first object was printed with layers of 0.2mm. The general aspect of the object is satisfying. The angles, overhands and bridging were successfully printed with some surface distortion underneath them. Only three cylinders were completely disconnected from the base but with a little bit of force it was possible to disconnect the two others. The peaks were correctly printed even if they were connected by some undesirable threads.
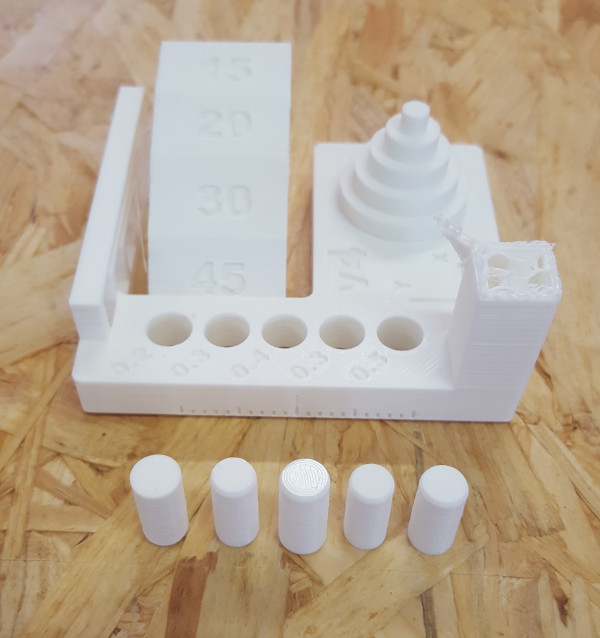
The second object was printed with layers of 0.1mm. Unfortunately something went wrong during the printing. A possible explanation is that there had been a jam in the printer nozzle. With these settings the surface finished was not exceptionally better than the previous one. In fact it is slightly worst. Nevertheless all the small cylinders were completely disconnected from the base. This means that assemblies with 0.2mm of backlash can be printed with these settings.
As you can see for the object printed with the “0.20mm QUALITY MK3” standard we changed to filament color during the printing. To do that we just pressed “pause print” on the 3D printer. Then we unloaded the grey filament and loaded a new darker one. Note that we still used a PLA filament, it is important to keep the same material as the temperature of the nozzle and the plate are parametrized for one material. In this case it is a PLA filament. We repeated that task a second time to just have a dark line in the printing.
Test on Form 3
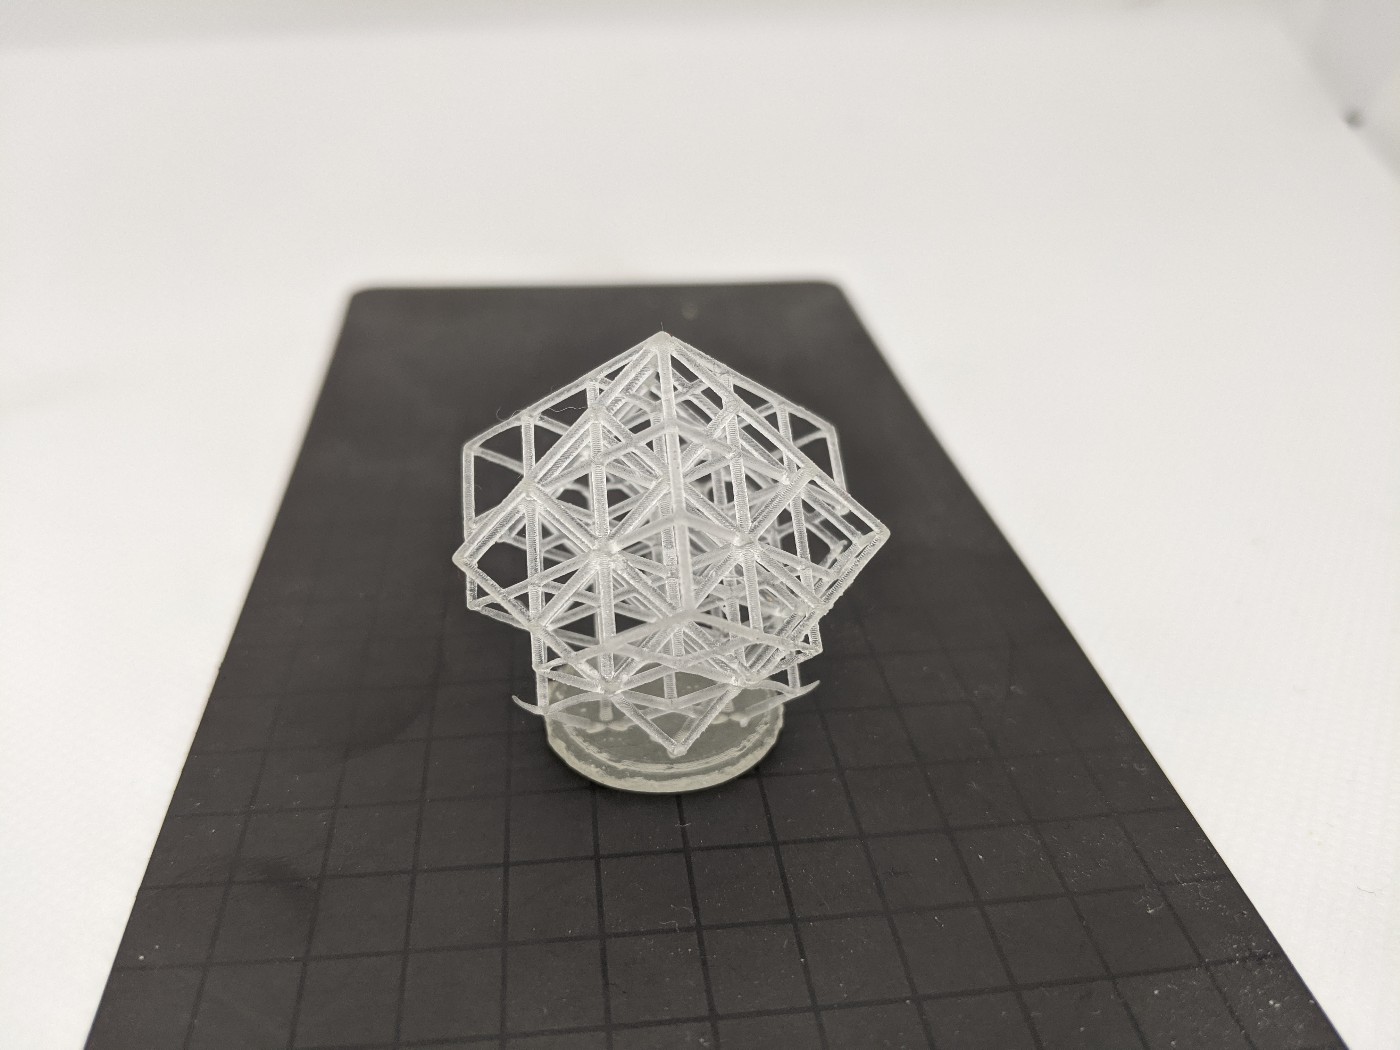
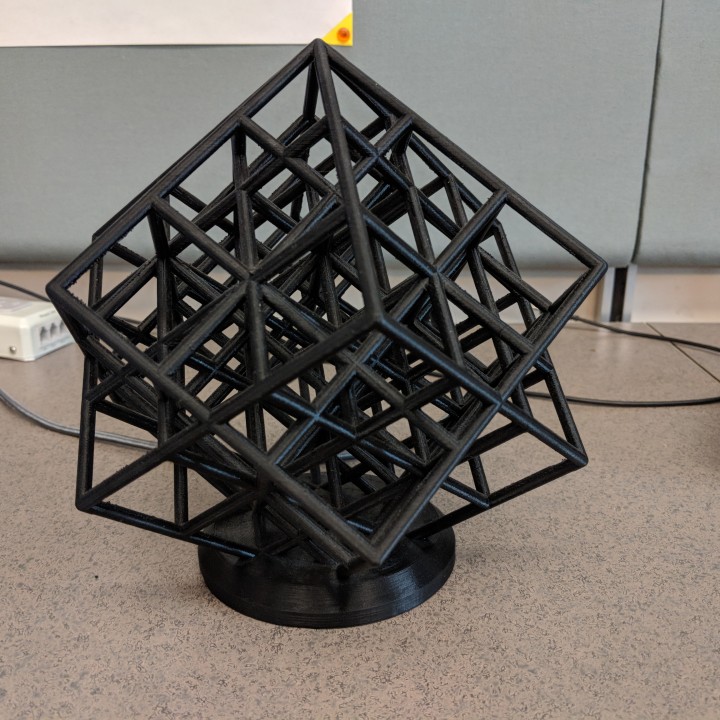
For the Form 3 we thought that printing an object with sharp angles and no support would be a good test for the SLA printer. A spun lattice cube was the perfect object for that task.
We downloaded and installed the Form 3 software : PreForm and we opened the .STL file inside it. We left the parameters of PreForm by default and we didn’t add any support for printing.
Afterwards we just plugged the USB connector of the SLA printer to our computer and we ran the printing. The file was transferred to the printer buffer such that we could unplug the computer after the end of the transfer. We still had to wait for a while before the printer starts to print. This time was needed to rise the resin temperature up to 31°C. It is not recommended to force the printing if the resin has not reached that temperature.
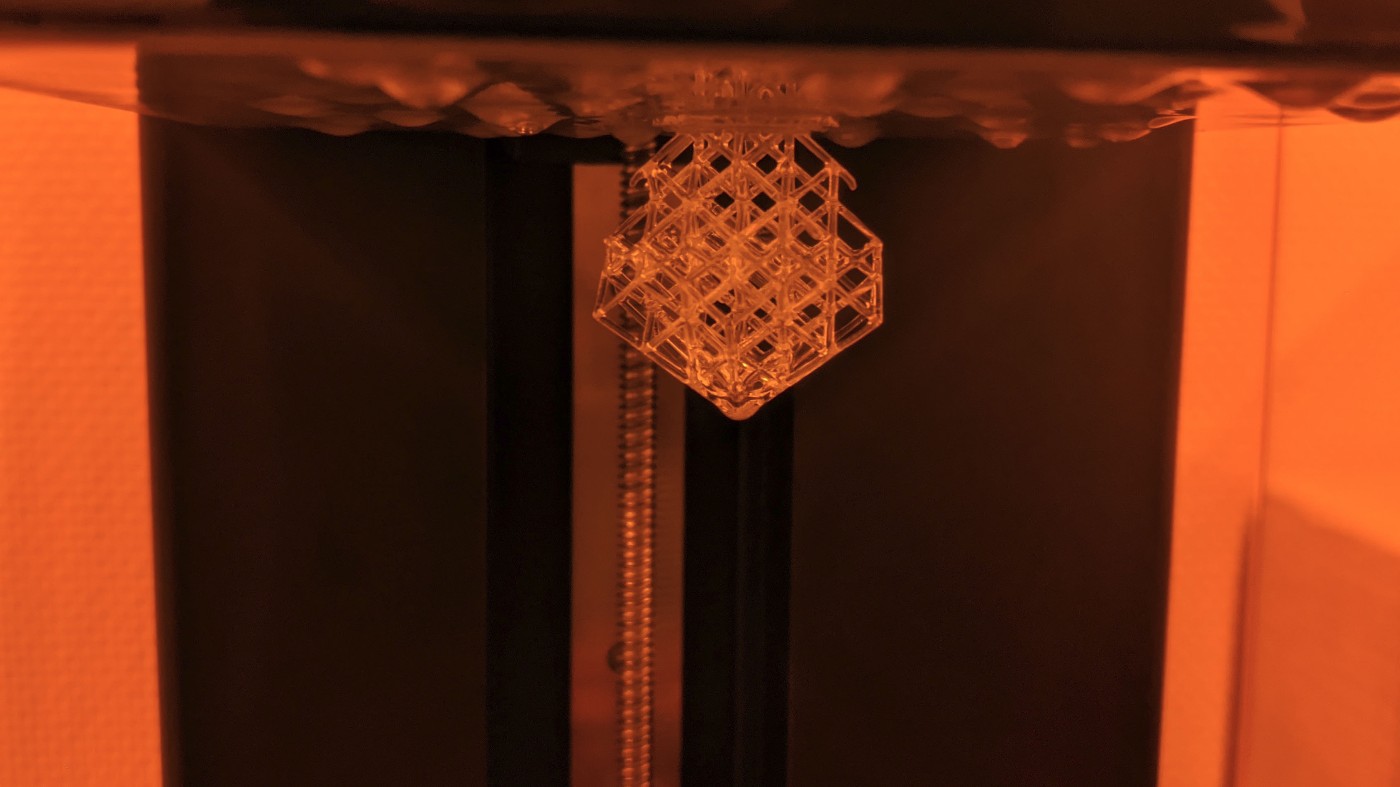
Hereinafter is a picture of the lattice cube while printing.
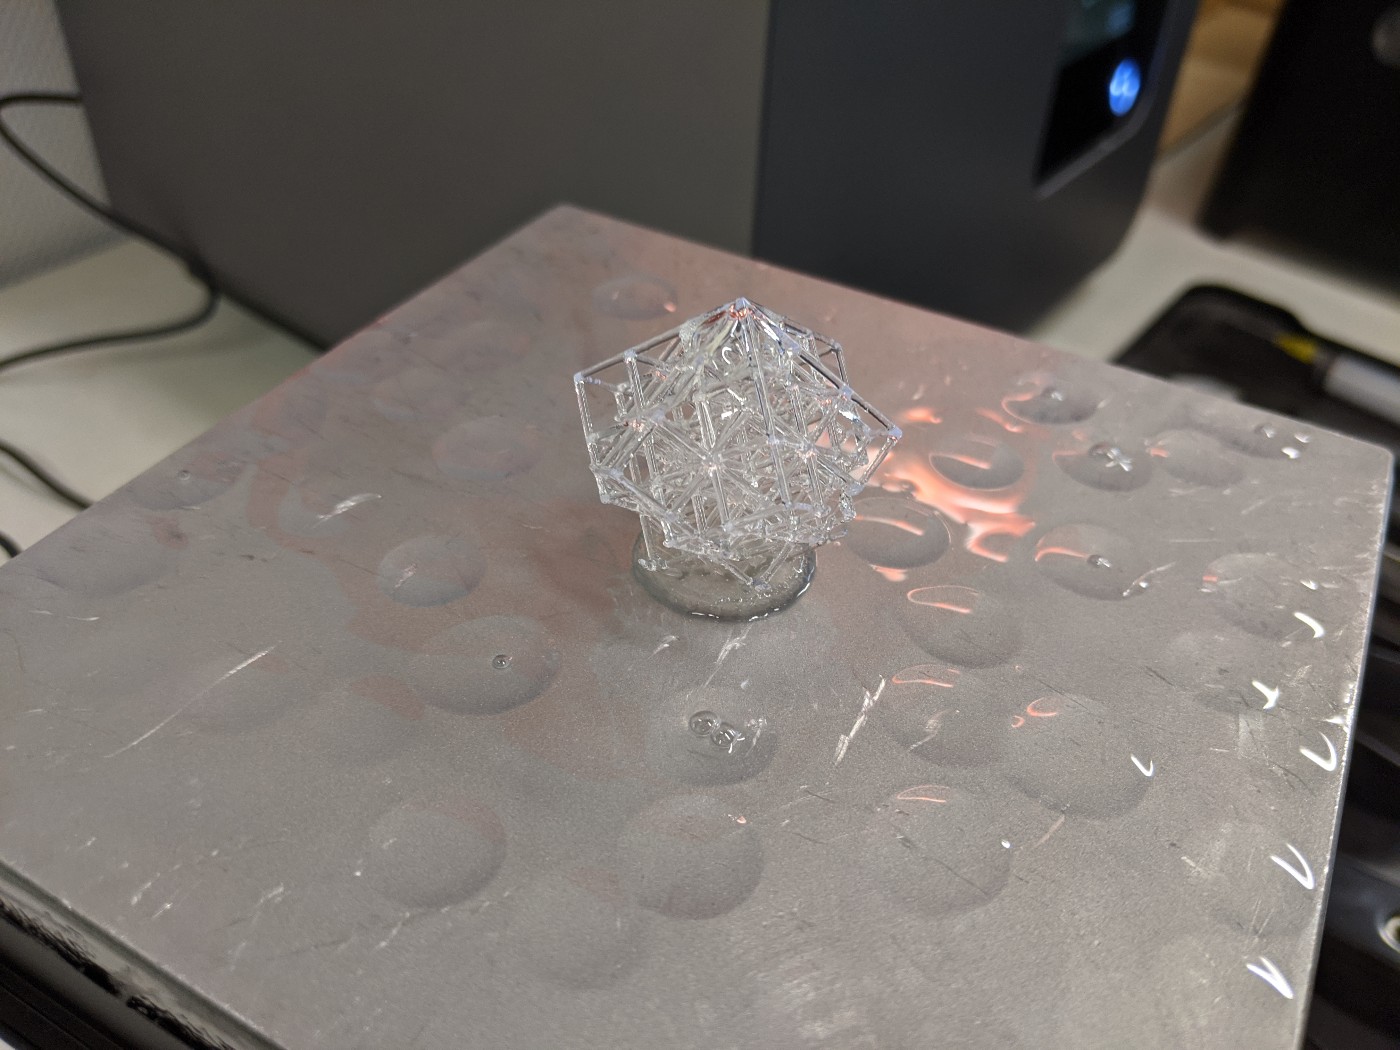
After the printing the lattice cube was remove from the tank but it was still attached on the printer plate.
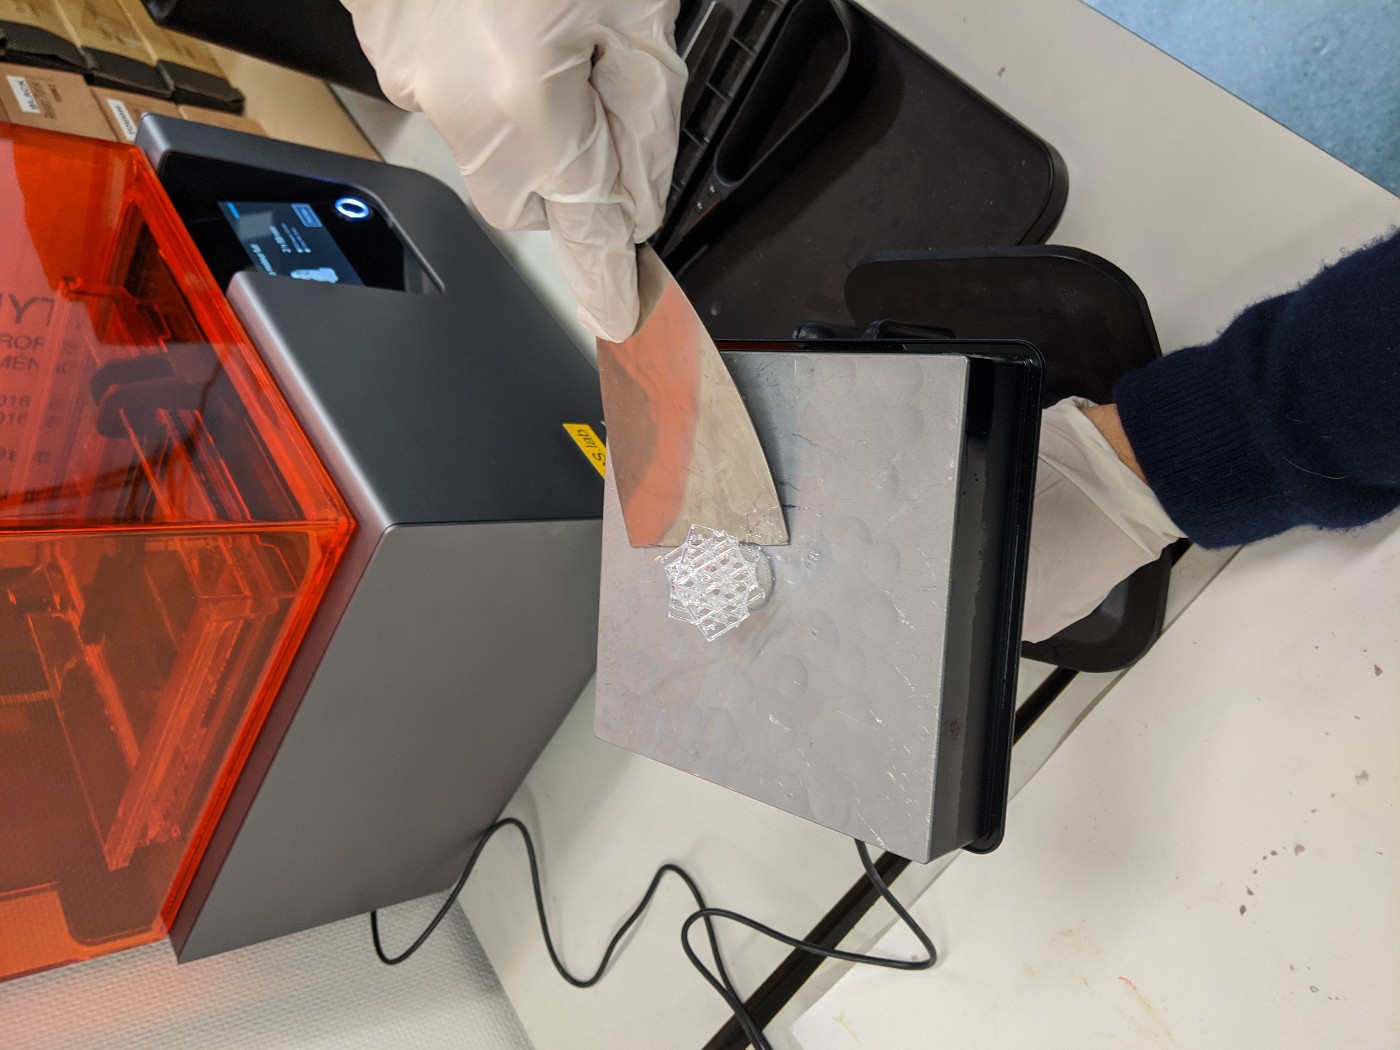
We used a spatula to remove the cube from the printer plate.
Then we cleaned it in a bath of alcohol. Once cleaned we left the cube under a UV light lamp for 20 minutes.
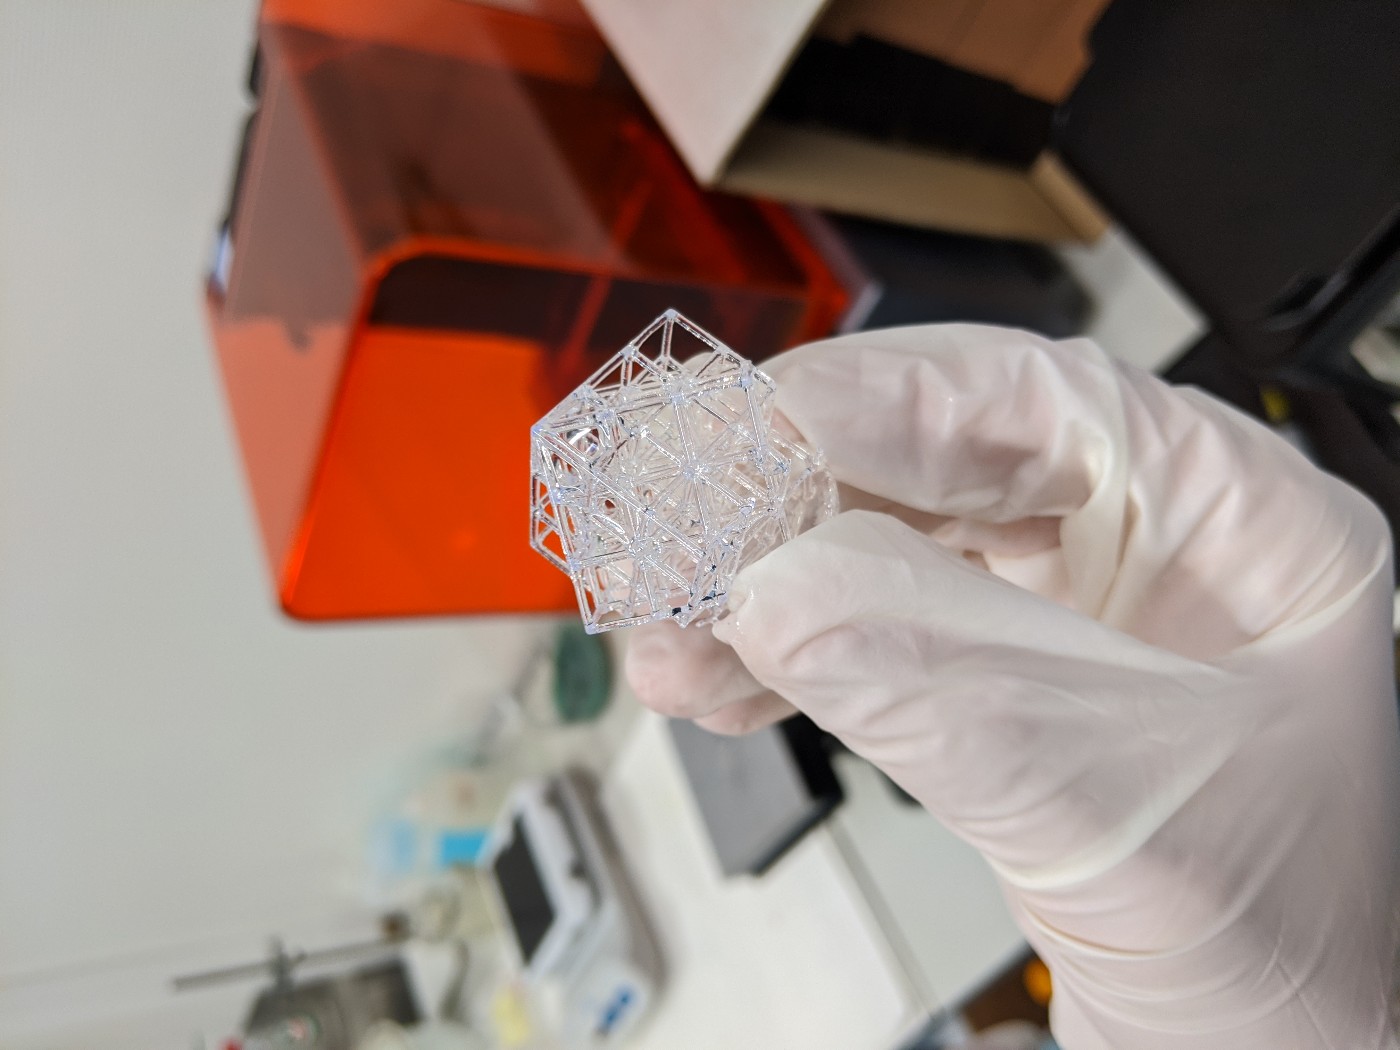
Here is the final result of the printing. Some cube edges was not properly printed but we are not sure that a support enforcer would help to solve that issue. A possible explanation for that defect might be the expiration date of the resin.