16. Molding and Casting
Individual assignment:
- Design a mold around the stock and tooling that you’ll be using, mill it (rough cut + (at least) three-axis finish cut), and use it to cast parts.
Group assignment:
- Review the safety data sheets for each of your molding and casting materials, then make and compare test casts with each of them.
16.1. Individual assignment
16.1.1. Design a mold
I have to design the mold according to the characteristics of the tools that I have available to mill it.
-
Wax block. My mold has to fit on the wax block. Its measurements are 148x88x38mm.
-
Diameter and length of the mill. I have a mill of 3.15mm in diameter and 30mm in total length.
So, the holes in my mold must be greater than 3.15mm for the cutter to pass through. I choose 4mm to make sure. And the maximum depth of my design should be less than 25mm.
I am going to use SolidWorks to create the 3D model. I’m going to try to make a shark …


Now I create the model of the silicone mold. I leave 7mm from the shark to the walls of the mold.

I use the combination of solids to subtract the shark from the silicone mold. And I cut the block in half.

Since my piece is symmetric, I use the ‘symmetry’ operation to generate the mold for the other half of the shark.

I generate a frame to fit the 2 molds.

I create a hole that serves to pour the casting material and other smaller ones to allow air to escape.

Now I create the wax mold model with the wax block measurements.

Finally, rest the silicone mold on the wax block, using the solids combination operation.
I save the model in STL format.

16.1.2. Generating the GCODE
Now I am going to use the Aspire software to generate the Gcode to mill the model in the wax block.
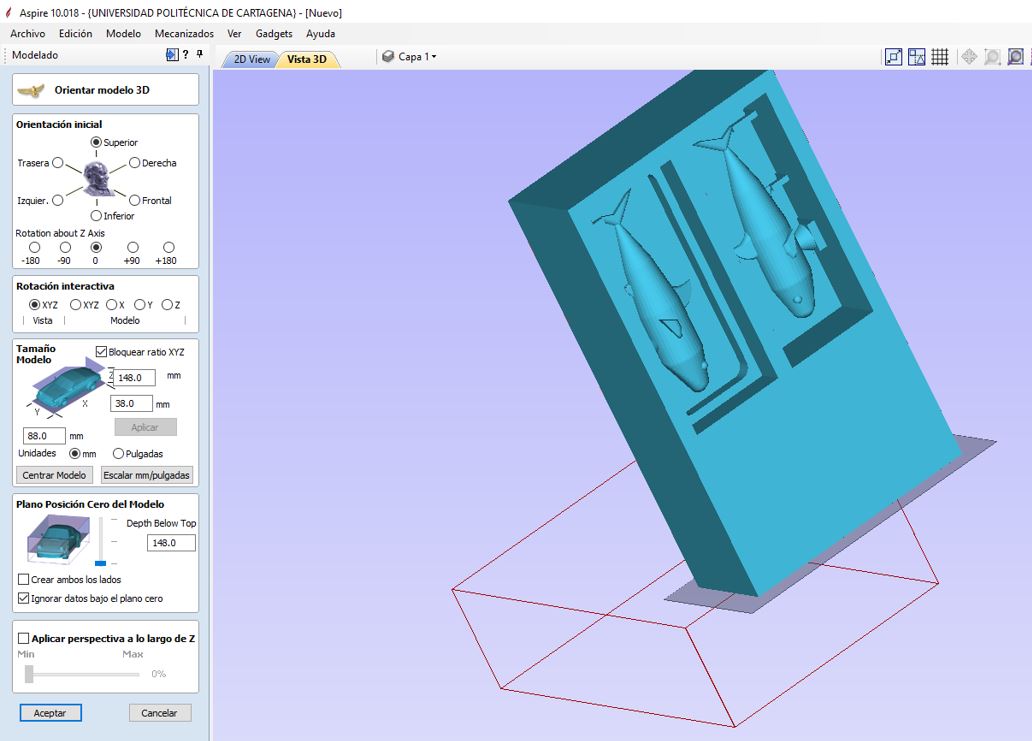
First, in the ‘modeling tools’ window, I click on ‘Import a component or 3d model’. And I select my model in STL format.

In the ‘Orient 3D model’ window, I position my model to match the volume of the working material.
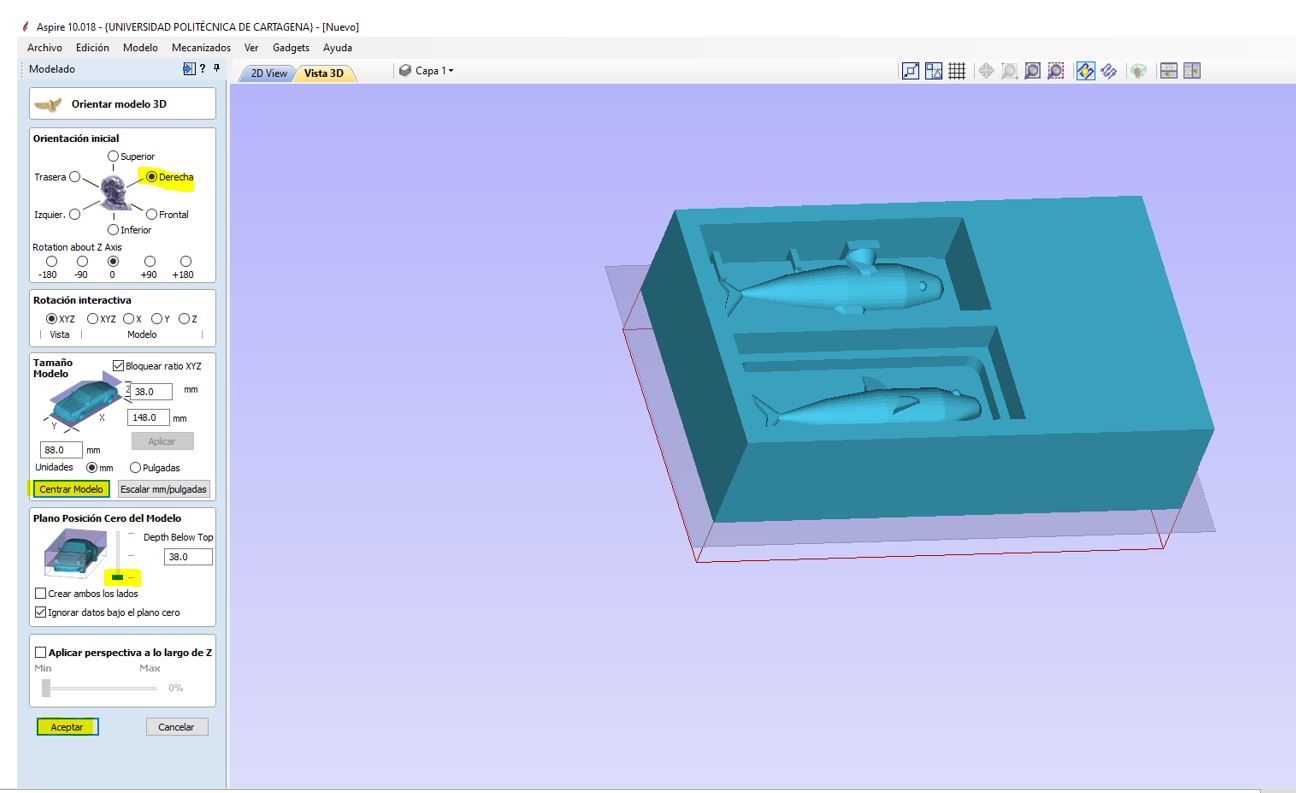
Now, in the ‘tool path’ window I select ‘Roughing’, and a ‘Material configuration’ window opens, where I check the configuration of the reference point where I will have to zero in the milling machine.

Now I define the ‘Roughing’ operation. In the ‘Edit Tool’ window I configure the diameter of the cutter (3.15mm), the depth of cut (1mm) and the stepover (40%).
I set ‘Over thickness’ = 0.5mm and the rest I leave it by default. And I click on ‘Calculate’.

With the tool ‘simulation of trajectories’ I can simulate the result of the operation. I check that the mill manages to pass through all the areas.

IMPORTANT: On the first attempt, I thought it did not matter, because when generating the finishing operation, the milling cutter would pass through the non-milling areas of the roughing operation. The problem is that the Finishing operation mills from one pass to the final depth. The result was that the mill jammed, splashing liquid wax around the room, and the milling machine lost the reference zero. A disaster. I had to redesign my mold and start again.

After checking that the roughing operation is generated correctly, I set up a finishing operation. I use the same mill, but you have to change the stepover (10%). The lower the stepover, the better the finish but the longer the milling time.

I simulate the finishing operation to check the result. It is right. So I generate the GCode of the 2 operations for my milling machine.

16.1.3. Milling
I use Stepcraft 420 milling machine and Stepcraft UCCNC software to mill the wax mold.

This is the wax mold at the end of the roughing operation.

It is correct if I start the finishing operation.

After 2.5 hours milling I get my wax mold.

16.1.4. Casting the silicone mold
To make the final mold I have used Easyl 940-FDA silicone. It is a platinum silicone (addition) of Shore A 25 hardness, very easy to use and suitable for making molds of different foods.

The working time is 30 minutes and the curing time is 3-5 hours.

To prevent the silicone from sticking to the wax, I used ACMOS 82-2405 release agent.

This silicone has two components that I must mix in equal parts. So first I calculate the total volume, filling the wax mold with water. Pour the water into 2 containers until the water level is equal. This is the volume that I will have to add to each component of the silicone.

I mix the two components well by removing it. I put a bit of release agent in the wax mode and pour the silicone in the bowl, making sure that it enters everywhere with the help of a stick.

After pouring the silicone, you have to vibrate the wax mold, tapping it, so that the air bubbles come out.

After 24 hours I take off my silicone mold. I think it has a good finish. Then I put the mold in the oven at 100 ºC for 4 hours. And I leave it cool.

You have to wash the mold well with water and soap before using it
16.1.5. Casting chocolate
For my first test, I have melted chocolate and poured it into the mold.
I have used olive oil as a release agent.
The chocolate is very viscous, so I have to vibrate the mold so that the air bubbles come out.

I’ve put it in the fridge for about 3 hours.


16.1.6. Files
You can download files here.
16.2. Group assignment
The Group Assignment page is at the following link.
The materials we have used are:
-
Easyl 940-FDA silicone
-
ACMOS 82-2405 release agent
16.2.1. Easyl 940-FDA silicone
EASYL 940-FDA is a two-part silicone, platinum-cured or addition type, with a mixing ratio of 1A: 1B in volume. It can cure at room temperature and also under heat. It is a type of food grade silicone and is used mainly for the manufacture of molds.
In summary, the Safety Sheet of this product indicates that for its use and handling it is necessary:
-
Good ventilation.
-
Wear waterproof gloves, such as butyl rubber, neoprene, or PVC.
-
Safety glasses with side shields
16.2.2. ACMOS 82-2405 release agent
Release agent in spray bottles. The release agent is silicone-free. Suitable for polyester, epoxy resins, PMMA and polyurethanes. For the construction of molds. Advantages Excellent release CFC-free propellants Wide application field Economic use.
Safety sheet 82-2405 release agent
Hazards:
-
Extremely flammable.
-
Irritating to skin.
-
Toxic to aquatic organisms, may cause long-term adverse effects in the aquatic environment.
-
Vapours may cause drowsiness and dizziness.
In summary, the Safety Sheet of this product indicates that for its use and handling it is necessary:
-
Good ventilation.
-
Use only chemical protective gloves with CE marking category III according to EN 374.
-
Safety glasses with side shields