5. 3D Scanning and Printing
Group assignment:
Use the provided models to test the design rules of our 3D printers.
Useful links to our Student Sites
- Alecia Gorski Fab Academy Site
- Christopher Leon Fab Academy Site
- Hallie Krudy Fab Academy Site
- Ryan Corrigan Fab Academy Site
- Sydney Richardson Fab Academy Site
The Printers

The Materials
| Model | Process | Model Material | Support Material |
|---|---|---|---|
| MakerGear M3-ID & SE | FFF | PLA | PLA |
| Sindoh 3DWOX1 | FFF | PLA | PLA |
| Stratasys F370 | FDM | ABS | Proprietary Dissolvable |
| Stratasys Object 260 | Poly-jet | Vero | Proprietary Dissolvable |
The Models
We used the 10 provided models found here:
These models are designed to test the various idiosyncrasies of 3D printers, specifically FFF (Fused Filament Fabrication). 3D printing has come a long way since its inception, it still isn’t an exact science. The core functionality of most FFF printers are basically the same, different manufactures’ try to improve upon one aspect or another. Our two examples of consumer-level printers we used perfectly demonstrate this.
The Printers in-depth
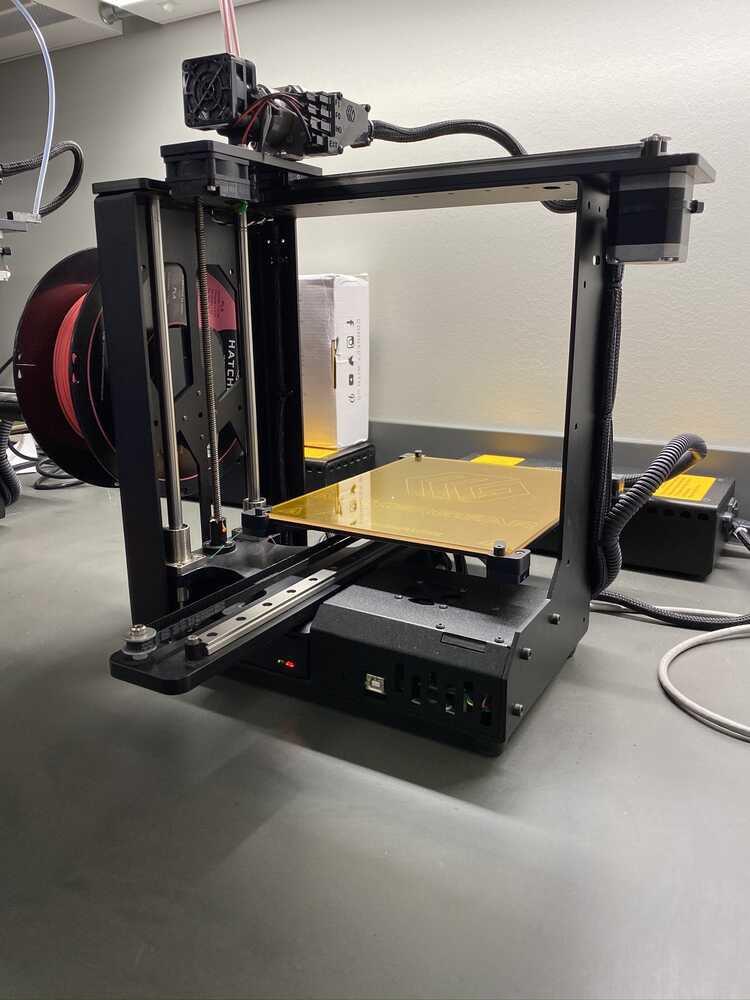
The MakerGear M3-ID and M3-SE are designed to be a very open-source platform. The construction is open and allows for easy modifications, and also allows for experimentation with different kinds of materials. The M3-ID also adds an independent second extruder for multiple colors or separate support materials. These printers run an on-board Raspberry Pi hosting an Octoprint server. Slicing for the MakerGear’s is handled by Simplify3D:
This is a premium software (retails at $149USD) but is included with the purchase of the printer. It’s strength and weakness are the same, settings options. Simplify3D allows for control of over 100 different settings, even allowing G-Code level control. Luckily, MakerGear and most other manufactures provide profiles that have settings preset for their respective printers, so they should operate right out of the box. But, every 3D printer is different. Even between our M3-ID and M3-SE, there are some slight settings differences. The open nature of the printers do make them susceptible to the environment. Ambient room temperature and humidity can greatly affect 3D printing, so being able to control even the smallest setting can ensure successful prints.
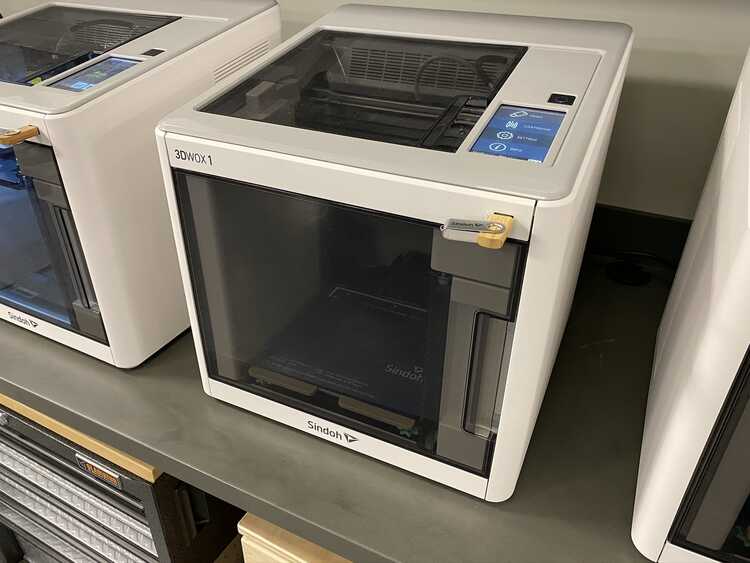
Our other consumer FFF 3D printer is the Sindoh 3DWox1. These printers have an enclosed environment, a bespoke software package, and filament that is pre-packed in cartridges. These 3D printers are designed for out-of-the-box functionality. The software, 3DWOX Desktop, include settings have been tuned so that almost any 3D model can be sliced and printed with very few changes. The easy mode of the software only gives four options.
There is an advanced mode that gives some control over more detailed settings, but it isn’t nearly as comprehensive as Simplify3D. For the purposes of this test, the ‘Normal’ setting was used, disabling supports when needed. Having an enclosed print area reduces the affects of the environment but it’s at the cost of build volume. The filament cartridges have NFC chips that inform the printer of material type, color, and how much filament is remaining. Controlling the printer is done via the on-board color touchscreen.
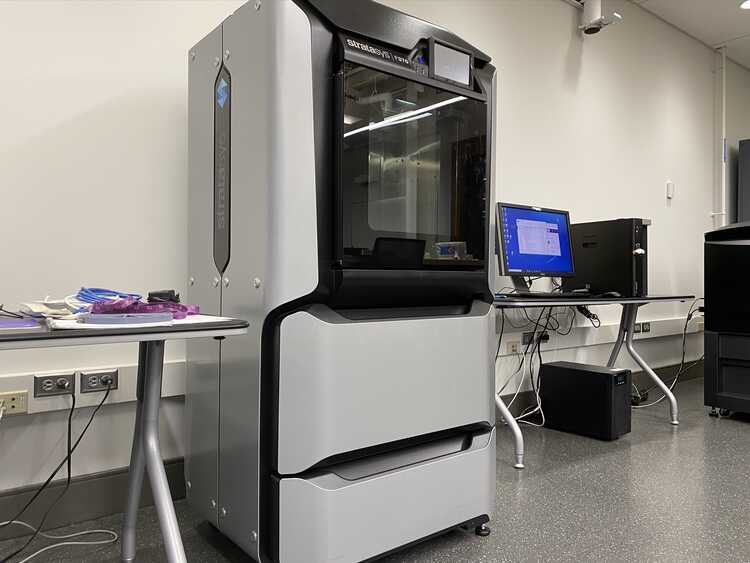
Both the Stratasys F370 and Objet 260 are very expensive commercial/industrial printers. It’s unlikely somebody is going to have these in their home. The F370 uses FDM (Fused Deposition Modeling, which a trademarked name for FFF). The Objet is a Poly-jet technology that functions like an ink-jet printer, using UV light to cure liquid resins. They use expensive proprietary materials, have rigorous maintenance routines, and require a strong alkali solution in specialized tanks for removing support material. In addition, the Objet’s materials are in a liquid state and are a hazardous material before it’s polymerized. There are obvious advantages to printers like this, however. With the dissolvable support material, functional, moving parts can be made as one piece. They are also very dimensionally accurate and can print with engineering grade materials. The Objet is also capable of handling three different materials at once, multiple colors, opaque and transparent, even different hardnesses can be blended into the same print.
Testing
MakerGear
Using the MakerGears starts with Simplify3D:
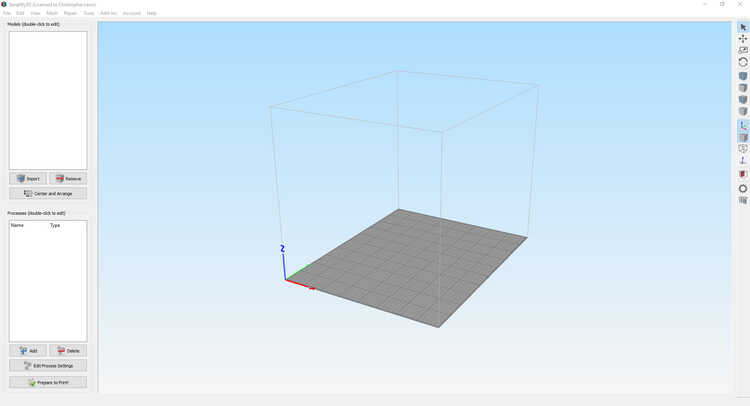
First, import the .STL file. Here, the thickness model was used:
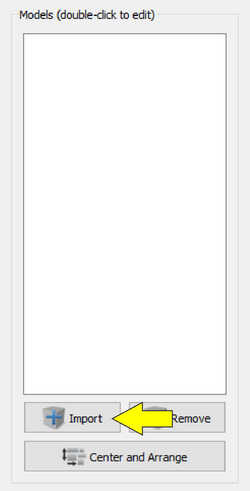
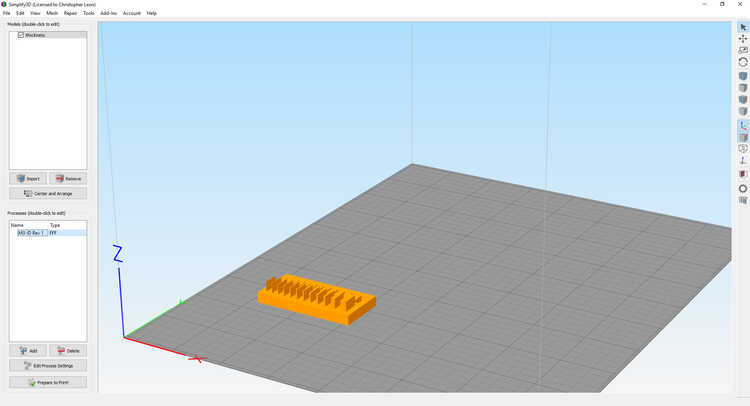
Imported model
Add the setting profile, this is called a process:
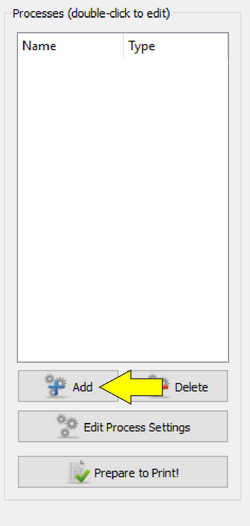
Basic settings profile:
| Variable | Setting |
|---|---|
| Layer height | 0.2mm |
| Extruder temperature | 210°C |
| Bed temperature | 70°C |
| Print speed | 60mm/s |
| Infill | 15% |
| Raft | yes |
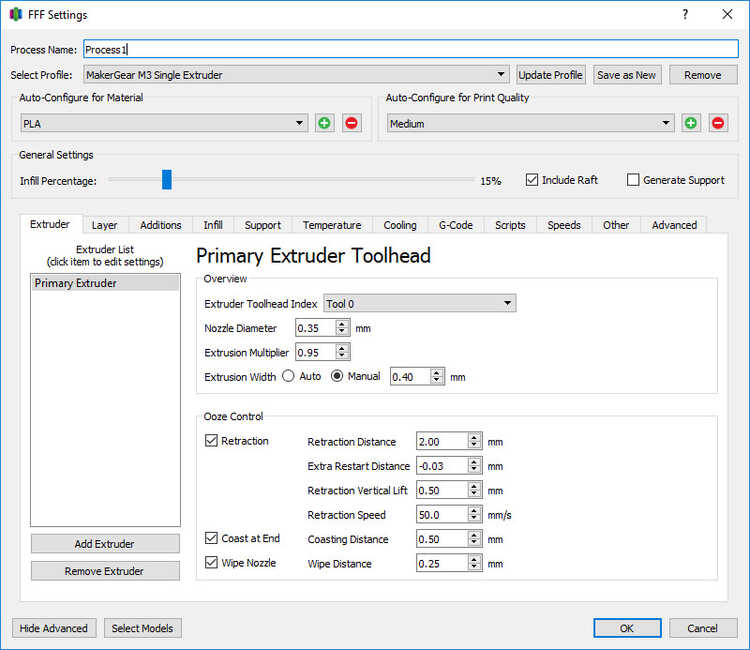
Select the proper printer and adjust any settings as needed. Note the multiple tabs, each tab has numerous settings that can be changed, adjusted, and tweaked. For the sake of control, default settings were used:
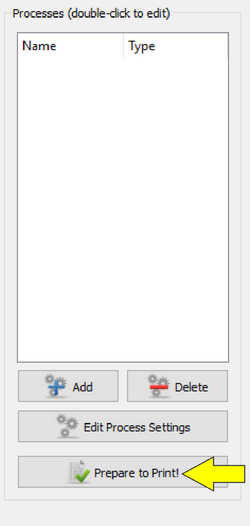
Slice the model with the selected process using the Prepare to Print button:
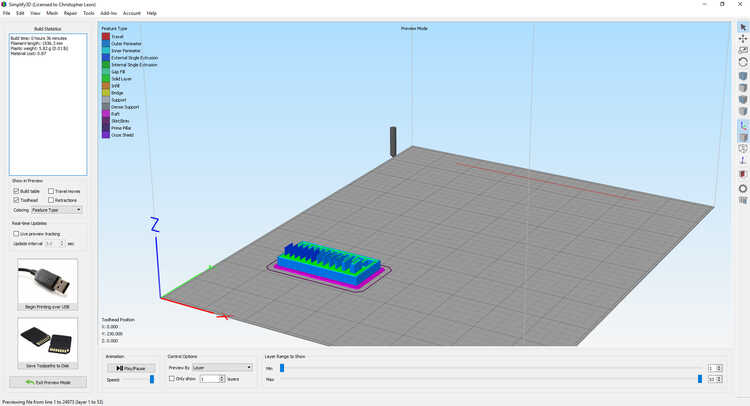
This brings up the preview screen. Here, a layer-by-layer simulation can be viewed, as well as different colorings for feature types and speeds, as well as an estimage of the time, amount of material and cost of the print. Any problems areas with the print, speeds, geometry, overhangs, bridges, etc, can be viewed here:
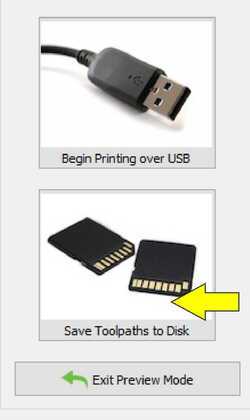
The slicer produces G-Code for the machine to interpret, so that needs to be saved:
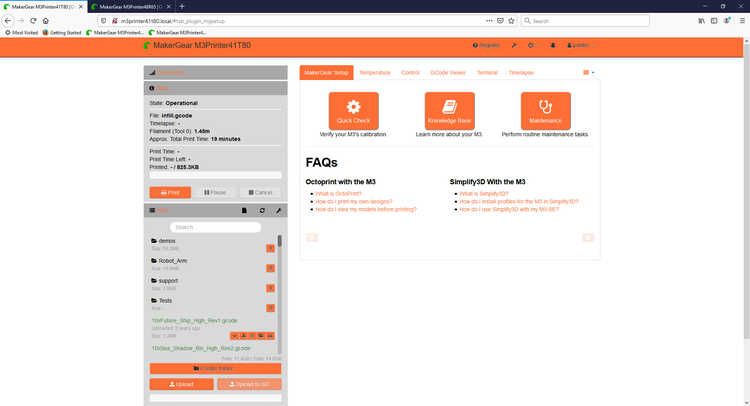
The saved G-Code needs to be uploaded into Octoprint. Octoprint acts as a local server that can be accessed via any web browser. This acts as the interface for the MakerGear. Homing, temperature, upoading files, telemetry monitoring and more can be performed:
Log-in to the desired 3D printer and upload the G-Code file:
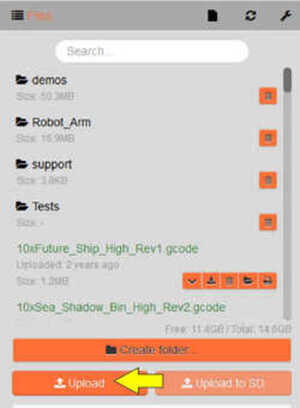
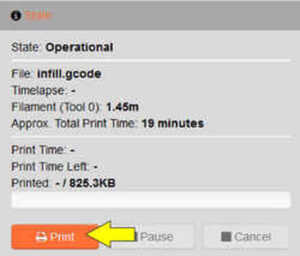
Once the file is uploaded, select print:
After about 30 minutes, the print is complete :
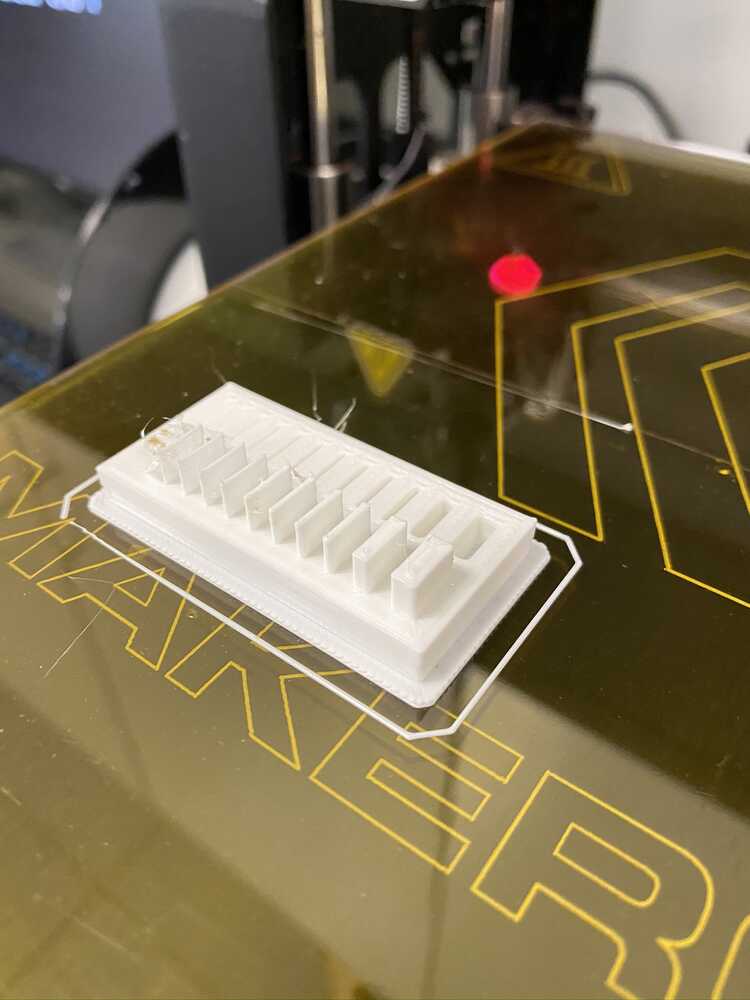
When the print finishes, there will be an impulse to remove it. It’s best to let the bed cool for a few minutes before removing. The bed temperature is about 70°C, which is close to the transition temperature of PLA. In layman’s terms, the model is still very soft and will be damaged if removed right away.
Something of a side note, when changing out materials, be sure the nozzle is completely clean. If there is left over material, it could fall into a print, possibly causing a print failure.
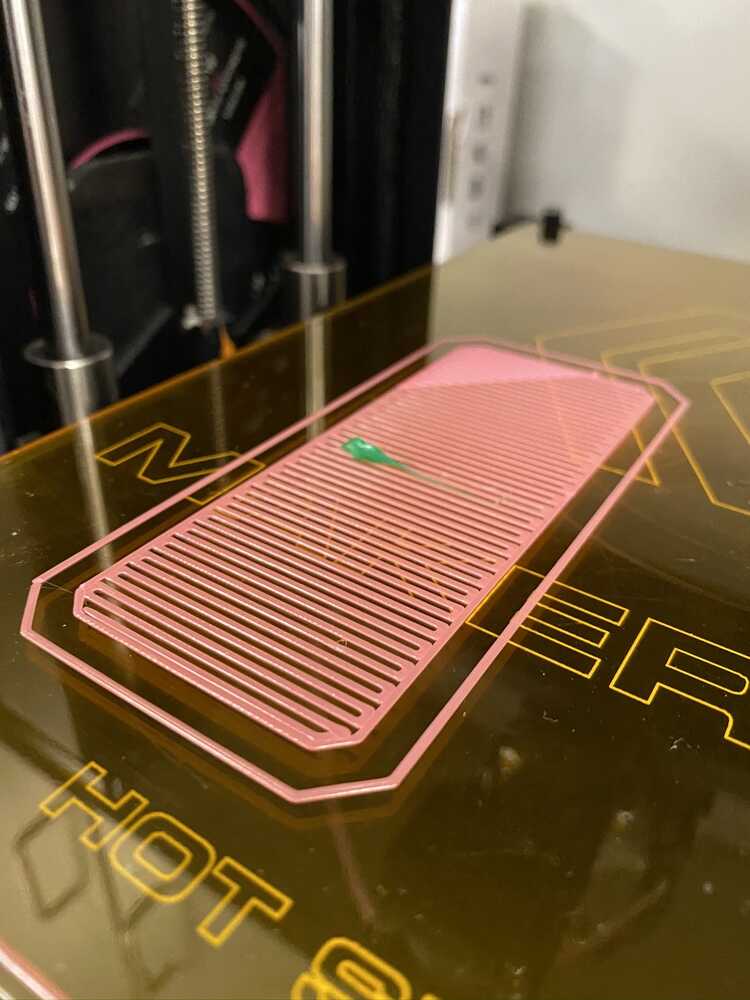
It’s fortunate that this was caught early and the print could be stopped. Had it continued, the green material would have hit the nozzle and been dragged, possibly causing the entire print to lift off the bed.
3DWOX1
Using the Sindoh 3DWOX1 begins with the 3DWOX Desktop program:
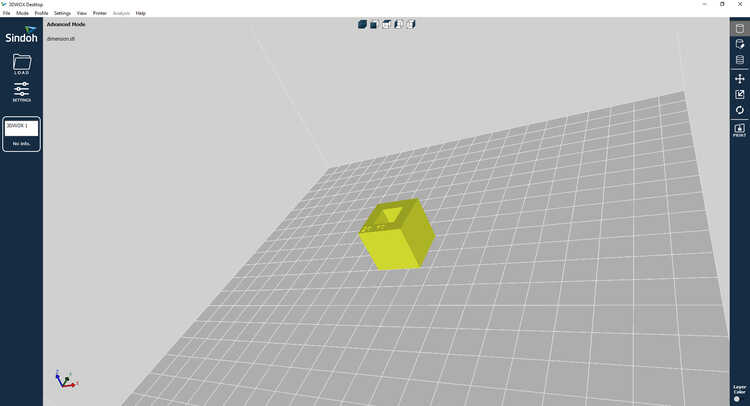
First, import the .STL file. Here, the dimension model was used:

Next, select the settings profile:

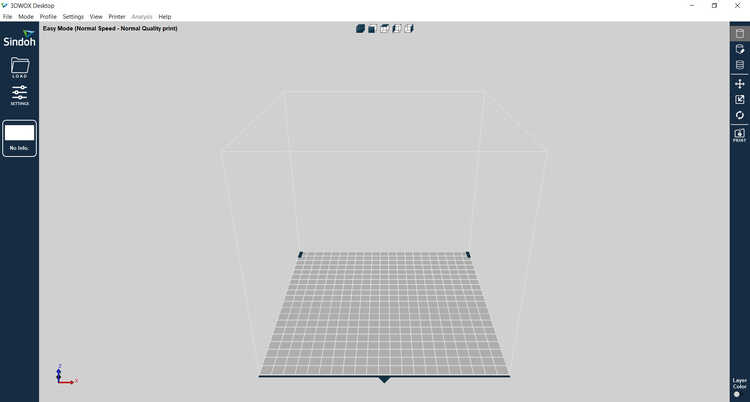
As mentioned earlier, 3DWOX desktop has both an easy and advanced mode. For control, the ‘Normal Speed-Normal Quality Print’ under the Easy Mode was used:
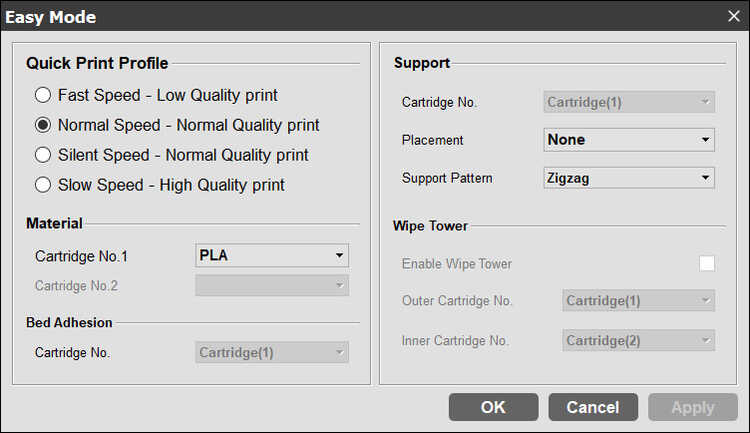
Although they can’t be seen in the Easy Mode, here’s the basic settings profile:
| Variable | Setting |
|---|---|
| Layer height | 0.2mm |
| Extruder temperature | 200°C |
| Bed temperature | 60°C |
| Print speed | 40mm/s |
| Infill | 15% |
| Raft | yes |
Slice the model by selecting the slice icon:

Once the slice is complete, a preview screen appears:
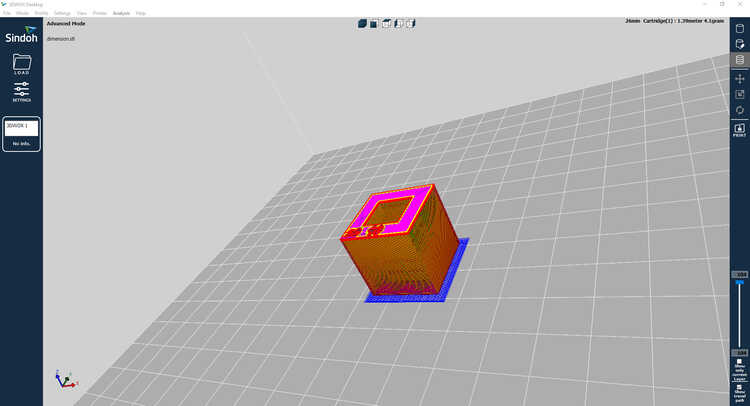
This screen provide a simple interface to simulate the build process. The features (infill, perimeters, bridging, etc) are color-coded for easy troubleshooting.
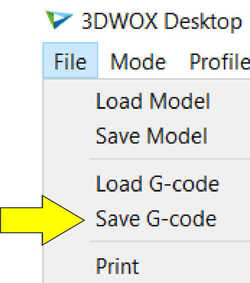
Next is to save the G-Code to a USB flash drive:
Remove the USB flash drive and insert it into the 3DWOX1. The next steps involve navigating the simple interface to load and print the model:
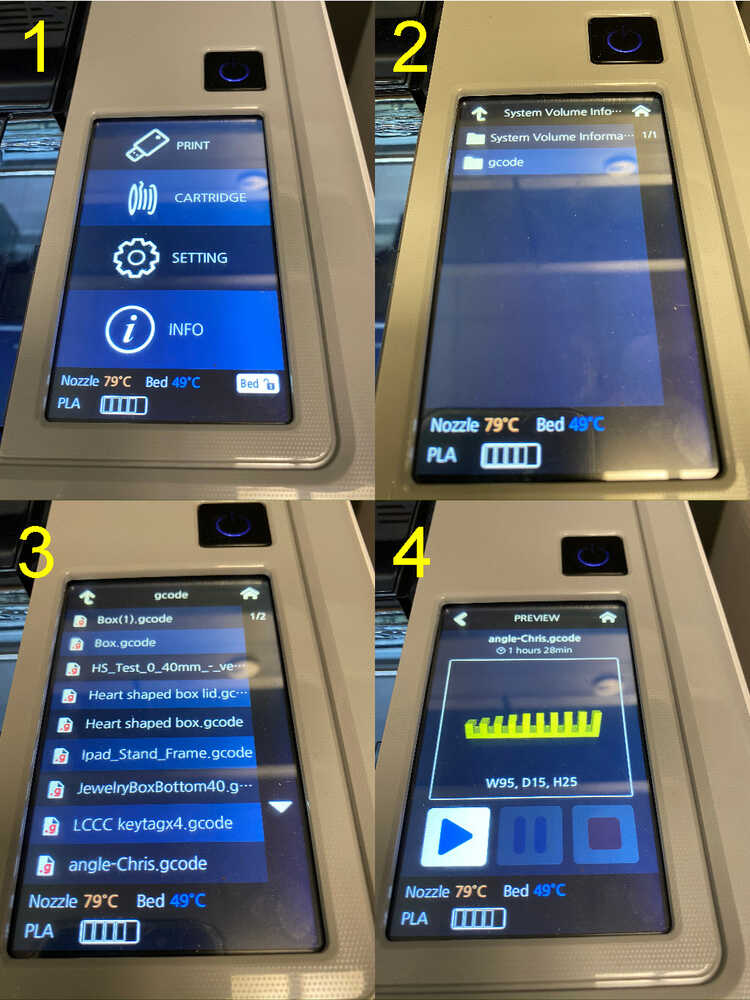
Select PRINT to access the USB flash drive
Select the gcode folder
Navigate to the file
The screen will load with a preview, and show the dimensions in millimeters. Press the play icon
Once the print completes, the printer beeps a few times and displays an option to remove the print:

The print bed moves forward for easy access to the print:
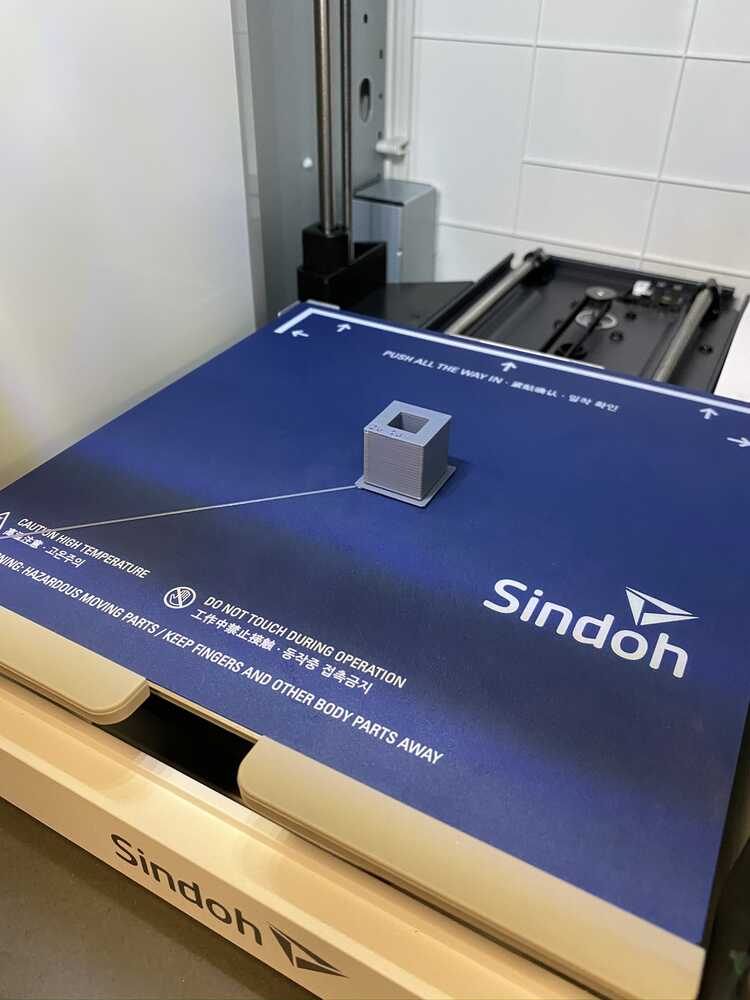
An interesting feature of the 3DWOX1 is the magnetic, removable print bed. This print bed is also flexible, which assists in the removal of the print:
Results
After a few hours of printing, here’s the results. The MakerGear prints are the white and pink, while the 3DWOX1 prints are black and gray:
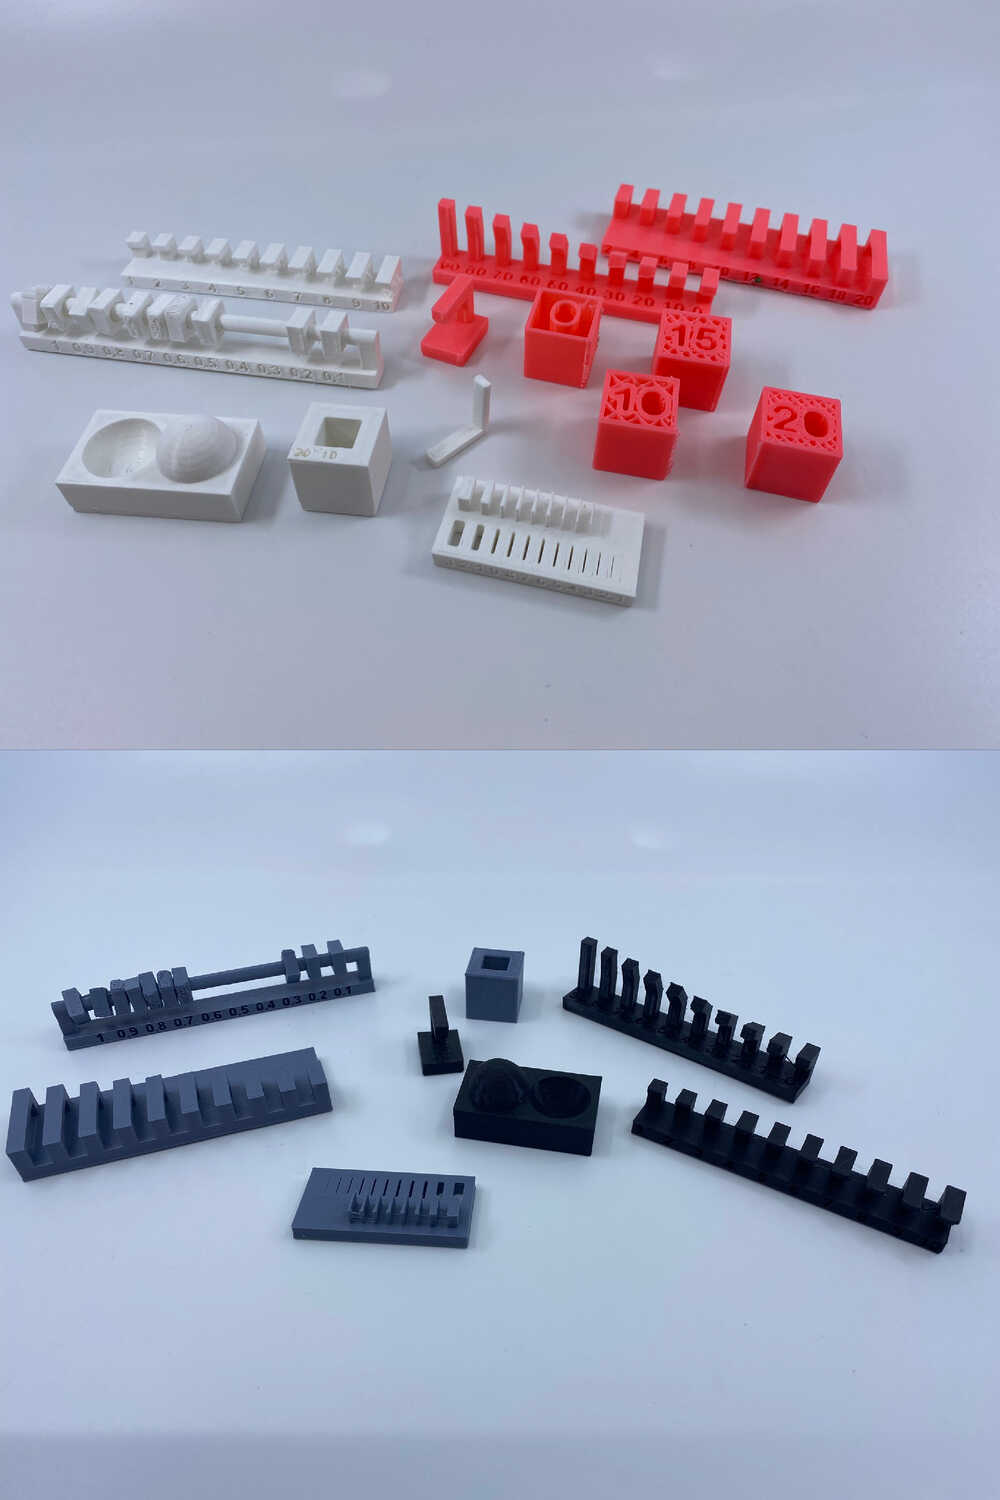
All of the models from the MakerGear and the Sindoh
The bridging test models from both 3D printers were impressive. Both printers performed equally, with slight sagging on the last bridge:
All little fun with the focusing
The MakerGear out-performed the 3DWOX1 on the finish test, but only marginally. The stepping was less noticeable and the feel was smoother from the MakerGear:
With the benefit of hindsight, black wasn’t the best color to use
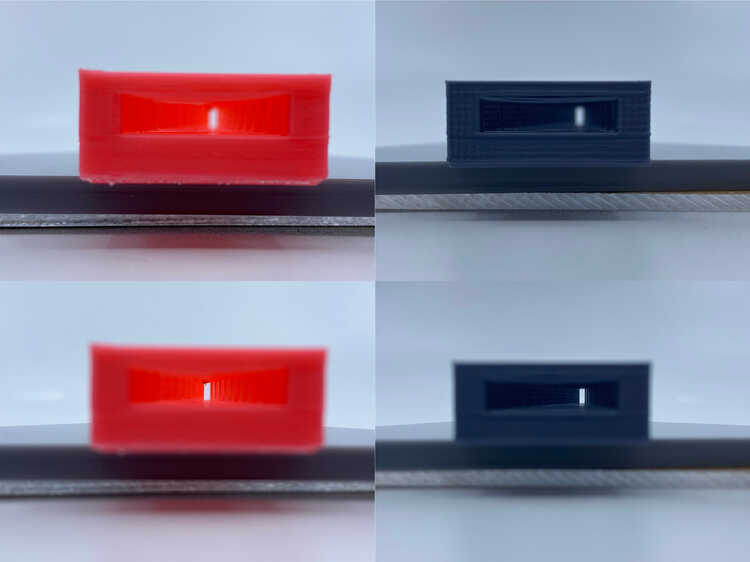
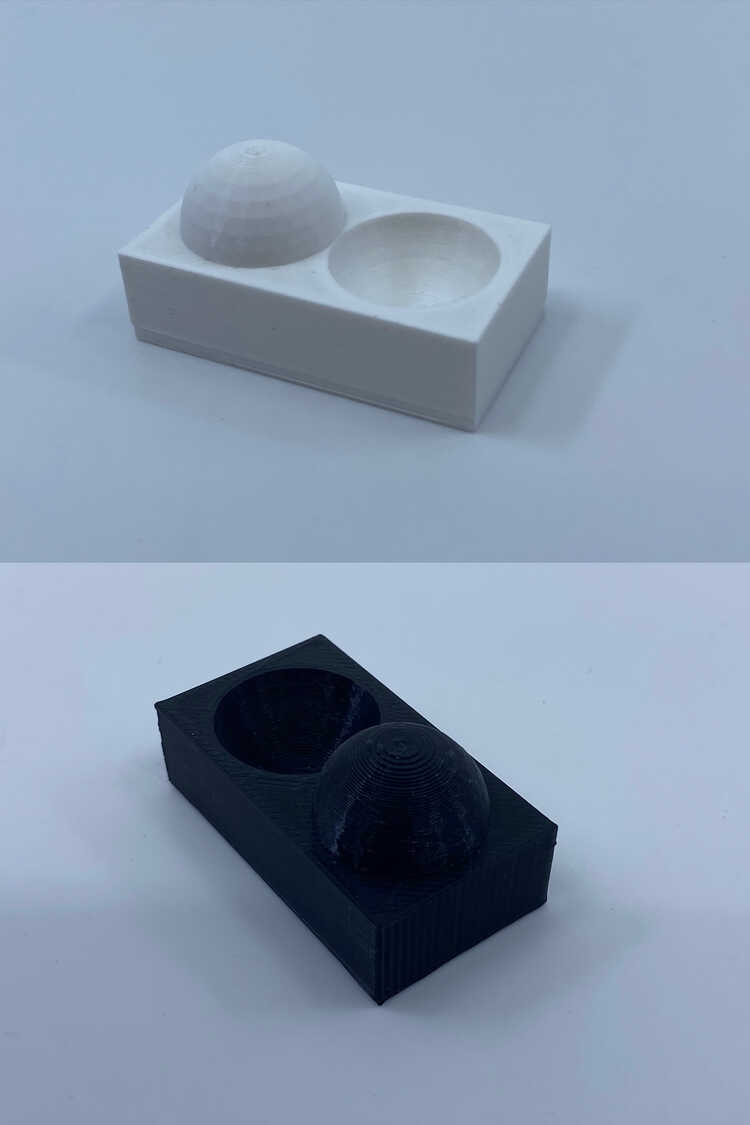
The next test involved the Clearance, Wall thickness, angle, and overhang models:
![]()
Clearance
-
Both printers performed about the same
-
The free-spinning parts stuck at 0.2mm
-
Pieces were rough and difficult to spin at 0.3mm
Wall thickness
-
MakerGear out-performed 3DWOX1
-
MakerGear printed walls down to 0.3mm, however thinnest wall broke free. Slots transmitted light down to 0.2mm
-
3DWOX1 ignored walls thinner than 0.5mm. Gaps sealed at 0.3mm
Overhang
-
Both printers performed equally
-
Print quality was poor
Angle
-
MakerGear out-performed 3DWOX1
-
MakerGear started to have sagging at 10° but print quality was still good
-
3DWOX1 started sagging at 20° and the print quality went down considerably from there
Dimensional accuracy was tested next using a 20mm cube with a 10mm square hole through the center:
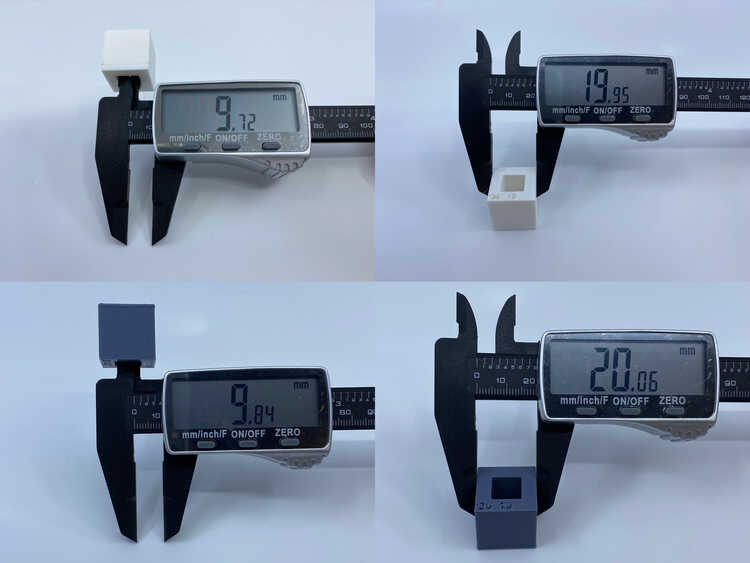
Both printers made both the interior and exterior dimensions under-sized
The infill model was only printed on the MakerGear using the rectilinear pattern from Simplify3D:
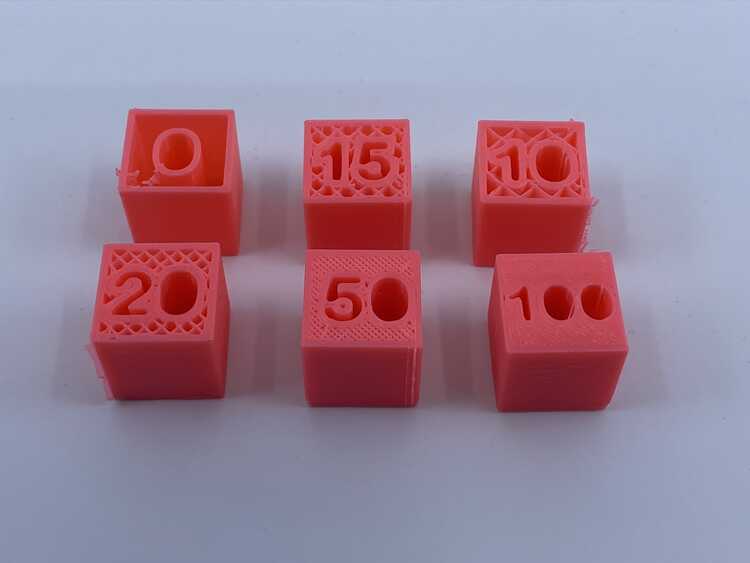
Most difficult part of this was changing the numbers using the FreeCad file
Just for the sake of comparison, the clearance model was printed on the F370 (white) and Objet 260 (transparent). The results of this print test were surprising.:
![]()
Pricy prints
Considering both these printers use a dissolvable support material, the results of this test were surprising.
The F370 model’s free-spinning parts stuck at 0.3mm, but the rest were smooth and easy to spin.
The free-spinning parts of the model from the Objet 260 only stuck at 0.1mm. All of the other parts moved smoothly.