3. Computer controlled cutting
Group assignment:
To do lab’s safety training characterize your lasercutter’s focus, power, speed, rate, kerf, joint clearance and types.
Determining the Laser Kerf
To ascertain the kerf of the laser, we referred to a particular source for guidance. Our methodology involved utilizing CorelDraw to design a rectangle containing 10 smaller rectangles, resulting in a total of 11 line cuts.
Following the cutting process, we amalgamated the smaller rectangles and measured their combined length using a caliper, yielding a measurement of 119.27mm. Additionally, we measured the dimensions of the “frame” rectangle, which amounted to 120.30mm.
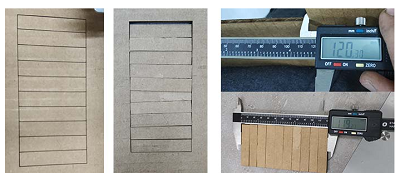
By subtracting the former value from the latter and subsequently dividing by 11, we obtained the laser kerf:
(120.30 - 119.27) / 11 = 0.09mm
Therefore, the kerf of the laser was determined to be 0.09mm.
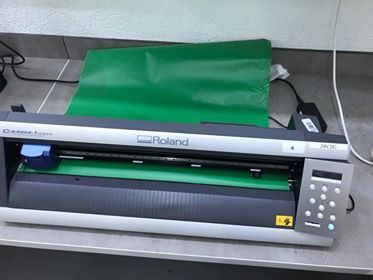
The Vinyl cutter
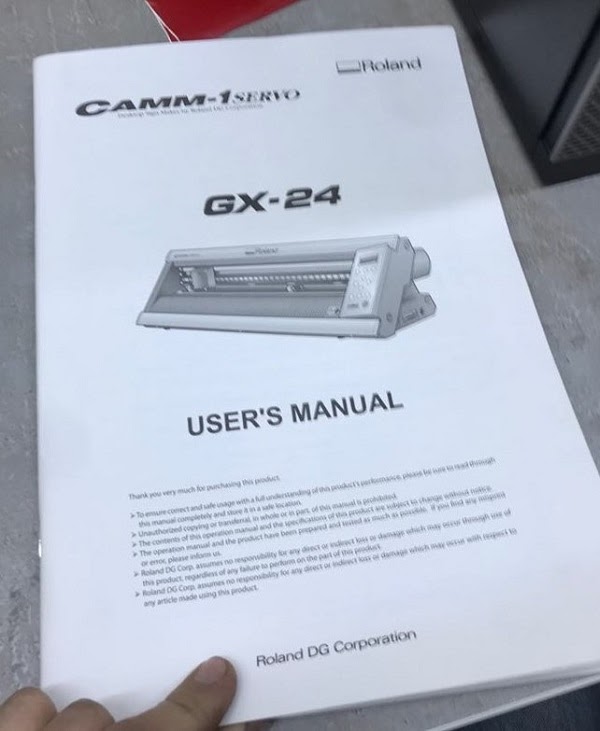
Initial step involved thoroughly reading the manual for the Roland GX-24 vinyl cutter. Without this essential guide, navigating the machine’s operations would have proven challenging. Personally, I found the section detailing force adjustment and test cuttings particularly enlightening.
Perform a Cutting Test
To obtain high-quality cutting results, carry out a cutting test to check the cutting quality for the material before you perform the actual cutting.
tutorial for changing the blade force
The tutorial for changing the blade force in the original manual is exceptionally well-explained. It provides clear, step-by-step instructions that make the process easy to understand and follow. This clarity is essential for users to confidently adjust the blade force according to their specific cutting needs.
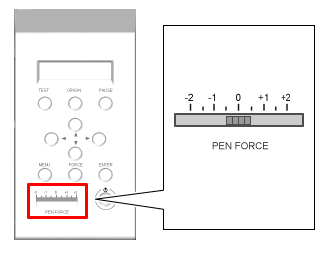
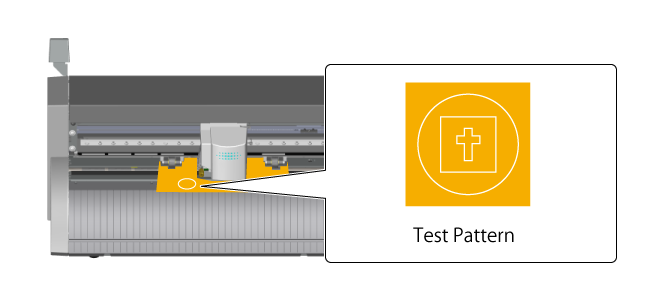
Procedure
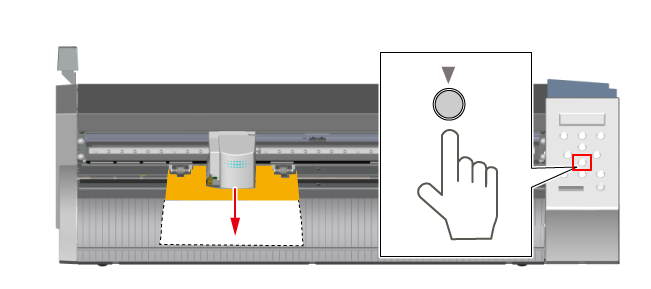
- Check that the PEN FORCE slider is in its center setting (at “0” on the scale).
- Hold down key for one second or longer.
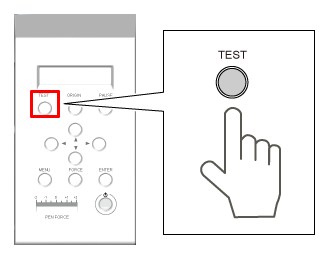
The test pattern is cut.
The position of the blade at the time the button is pressed is the cutting test start position. The position can be set as desired using the cursor keys.
- Press to feed the material forward.
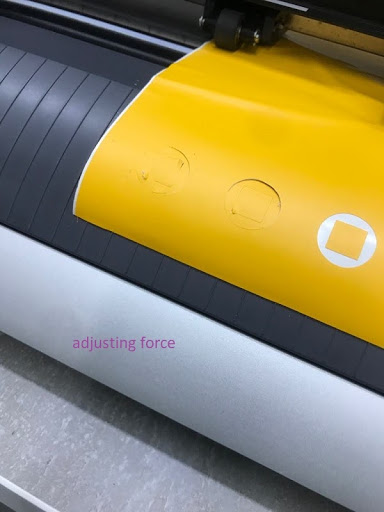
- Peel off circle 1.
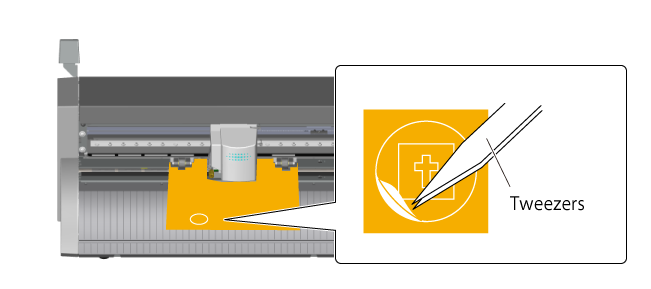
Useing the tweezers to peel off the cut shape, and check the cutting quality.
If circle 1 peels off alone that is good result.
If other shapes also peel off / The Machine Cuts the Carrier Paper → Changing the Blade Force
Not designing
Since I’m not particularly strong in designing stickers, I made the decision to search for existing pictures or vector files that I could use for cutting. This approach allowed me to leverage existing designs and focus on the cutting process rather than designing from scratch The first few stickers I made specifically for my laptop. Two of these stickers have adorned my notebook since 2020, and they remain proudly displayed to this day.To convert JPEG files to SVG, I utilized a specific website. Subsequent modifications were then made using Inkscape for further customization.

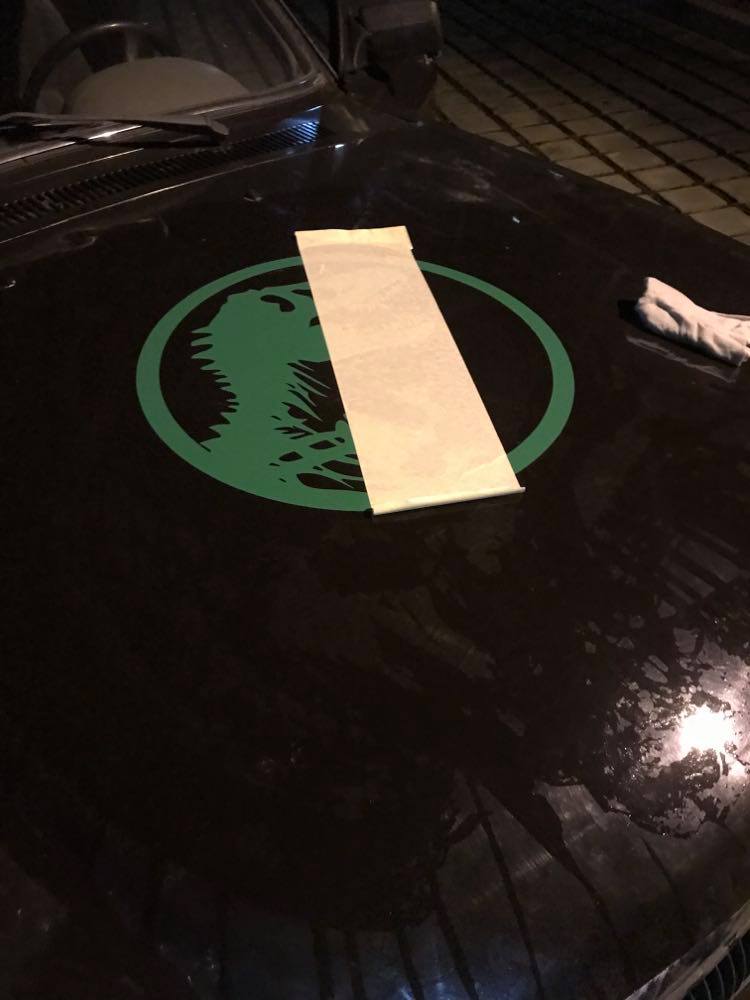
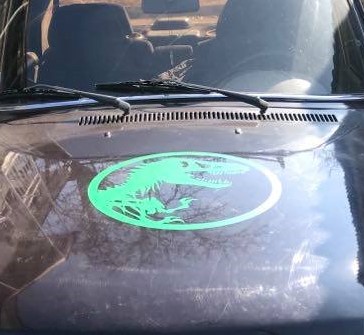
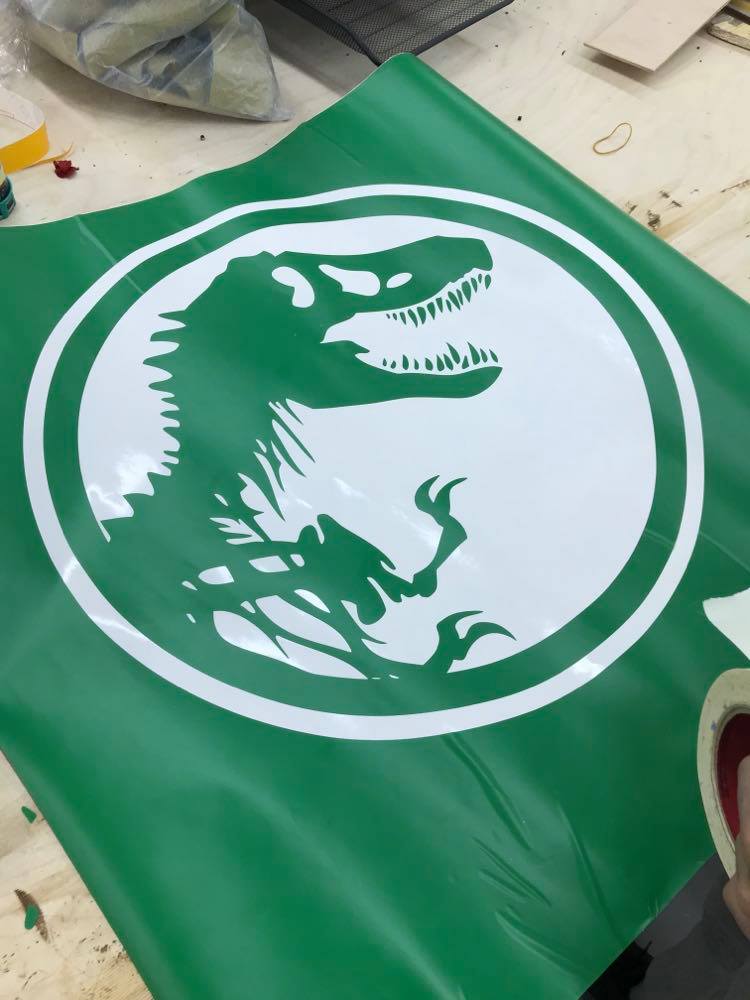
The next sticker I created was considerably larger, intended for the car I was driving at the time. To be honest, the car was quite old and weathered, with a bit of rust here and there. We decided to craft a sizable sticker featuring the Jurassic Park logo, which we then affixed to the hood. This sticker remained proudly displayed on the car until we sold it in 2023. take a look !!
Transferring a large sticker onto a car can indeed be quite a process, especially considering the size and intricacy of the design. Here’s how the process might unfold:
Preparation: Begin by thoroughly cleaning the area of the car where the sticker will be applied. This involves washing the surface with soap and water, ensuring it’s free from any dirt, dust, or grease. Once cleaned, dry the area completely with a lint-free cloth.
Positioning: Carefully position the sticker on the desired spot on the car’s surface. For large stickers, it may be helpful to use masking tape or painter’s tape to hold the sticker in place while you work.
Applying Transfer Tape: Peel back a portion of the backing paper from the sticker, exposing the adhesive side. Then, carefully align and place a piece of transfer tape over the adhesive side of the sticker, smoothing out any air bubbles as you go.
Peeling Backing Paper: Slowly peel away the backing paper from the sticker, ensuring that the sticker adheres to the transfer tape as you go. Take your time with this step to prevent any tearing or misalignment of the sticker.
Wetting the Surface: Lightly spray or mist the surface of the car where the sticker will be applied with a mixture of water and a small amount of soap. This will act as a lubricant, allowing you to reposition the sticker as needed during the application process.
Applying the Sticker: Carefully place the sticker onto the wet surface of the car, using the transfer tape to help guide it into position. Once positioned correctly, use a squeegee or a soft cloth to smooth out any air bubbles and ensure the sticker is firmly adhered to the car’s surface.
Removing Transfer Tape: Once the sticker is applied, slowly and carefully peel away the transfer tape from the sticker, working from one side to the other. Take your time with this step to ensure the sticker remains in place and adheres properly to the car.
Final Touches: After removing the transfer tape, use a squeegee or a soft cloth to press down on the edges of the sticker, ensuring it’s securely attached to the car’s surface. Check for any remaining air bubbles and smooth them out as needed.
Drying Time: Allow the sticker to dry completely before exposing it to any moisture or harsh weather conditions. This will ensure that the adhesive bonds properly to the car’s surface and the sticker remains in place for a long time.
Overall, transferring a large sticker onto a car requires patience, precision, and attention to detail. However, the end result can be highly rewarding, adding a personalized touch to your vehicle’s appearance.