This week was dedicated to Computer Controlled Machining, i.e. mostly operation of the ShopBot for now.
# Group assignment
Since our time in the lab was fairly limited this week, we were only able to run a quick test last week that nevertheless proved interesting: we set up a test cut of two 5 inch squares, one with an inside profile, one with an outside profile.
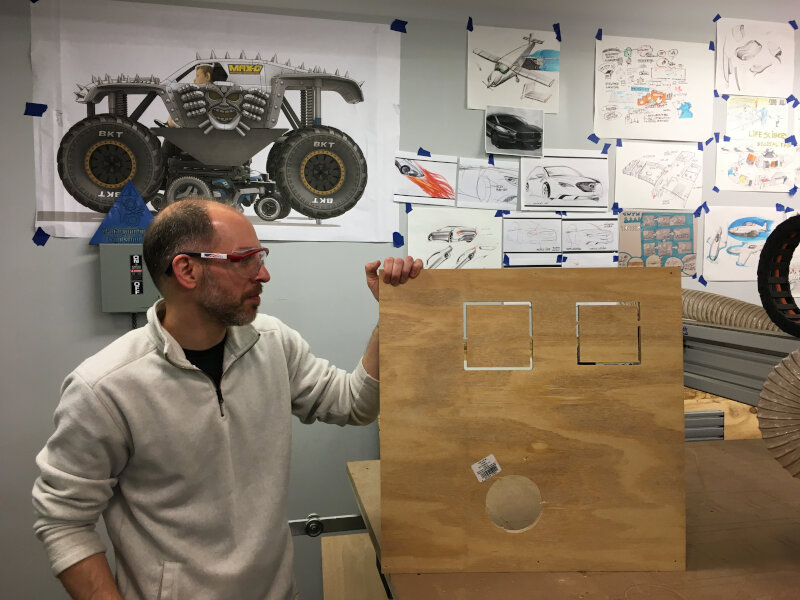
Sal, a former FabAcademy student, helping out with the Shopbot!
The outside profile resulted in a square of the expected size with extremely little error.
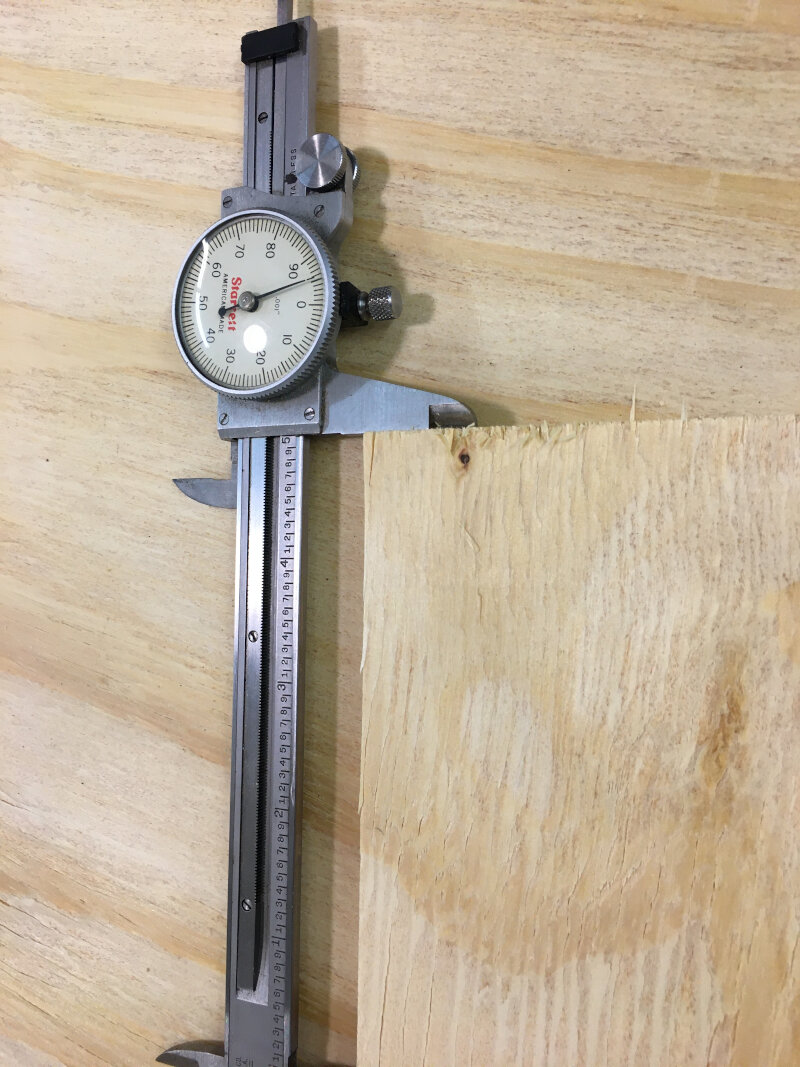
The outside profile square was a tight press fit in the inside profile cut.
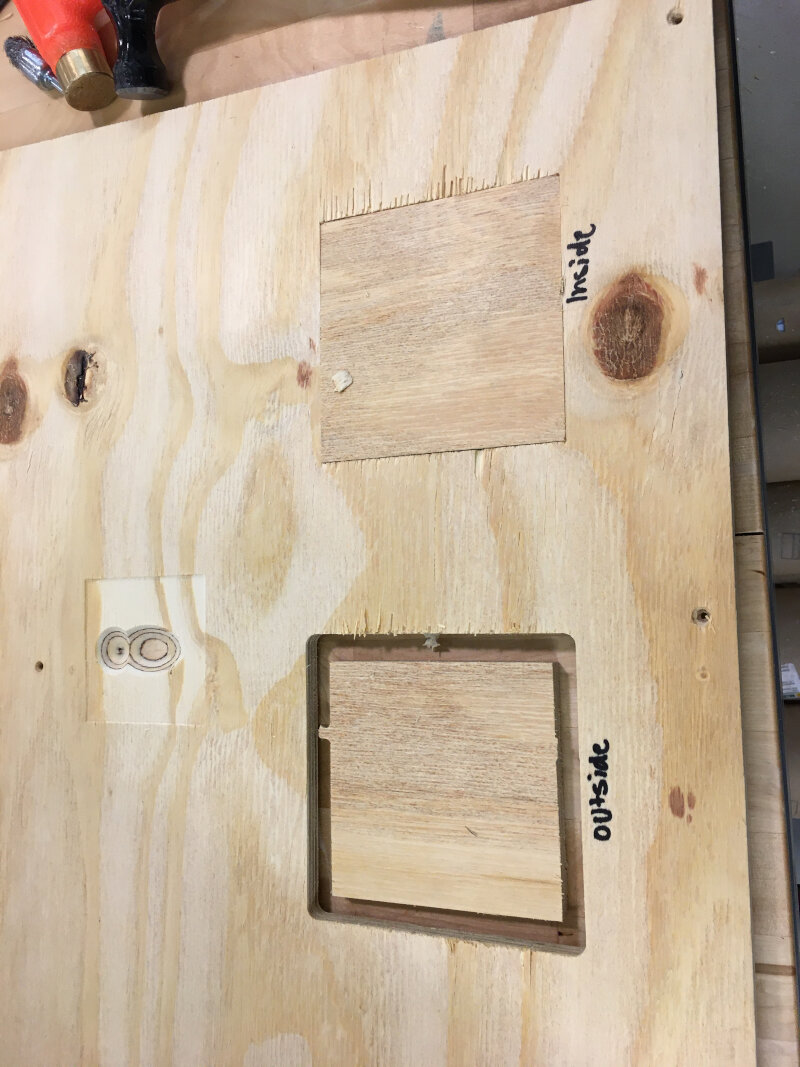
While this test was simpler than we might otherwhise have hoped, there is still a very useful conclusion here: if set up correctly, cuts should be accurate enough that there is no need to account for runout or other errors in CAD. Most of the work involved in designing for the ShopBot should be in working around the inherent limitation of a router (e.g. no sharp inside corners) and in setting up the CAM side of things correctly.
# Individual assignment
For my individual assignment, I completed a personal project that I had been working on for a while. More information on this project page.
Since I had this project completed last week, I had hoped to use the extra time to explore further with the ShopBot. In particular, I would like to experiment with these topics:
- two sided milling
- flexures
- onion skinning
I also found these inspiring projects that I would like to attempt to customize / replicate / adapt to the ShopBot:
Finally, this great documentation for 50 CNC-able joints would be worth exploring for future projects.
Unfortunately, nature had other ideas for this week and a good chunk of it was spent preparing for the closure of the DS 3DExperience Lab.
I did manage to draw one of the joints from this document in Solidworks, however, and run a quick test cut:
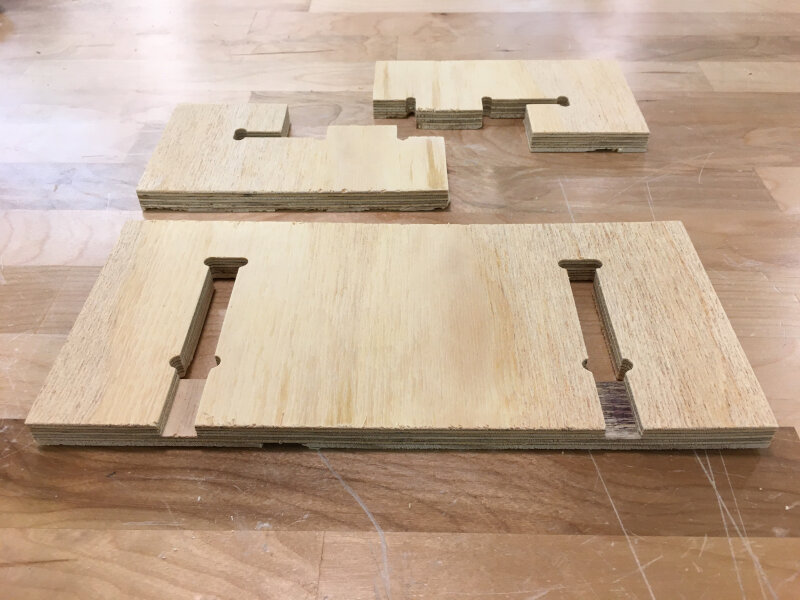
This joint turned out to be quite interesting: it is easy to cut, easy to assemble, and it can come apart again.
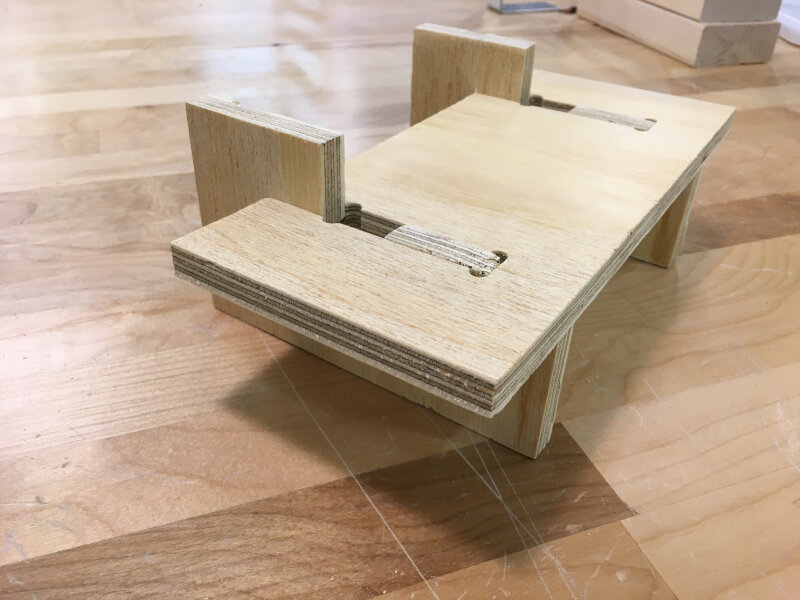
I also personally think it looks rather nice as a design detail!
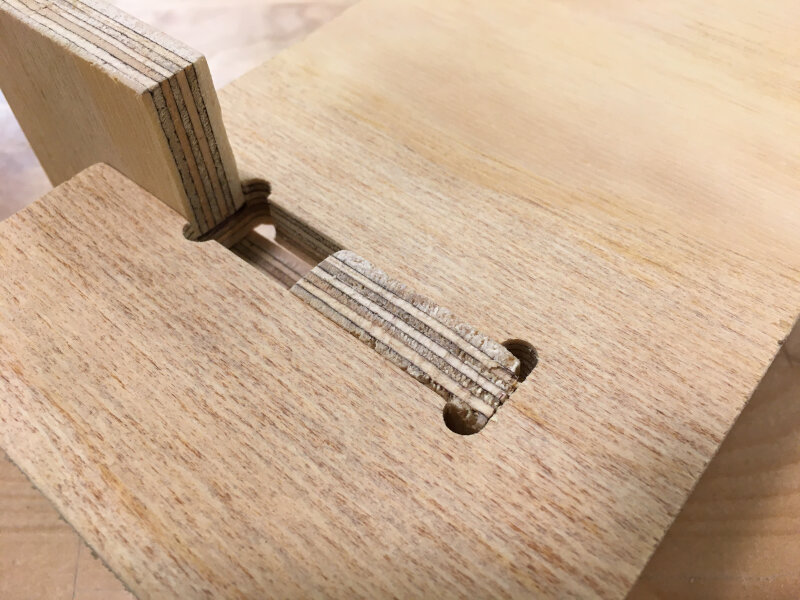
Finally, it is also surprisingly strong, especially considering this test cut was made from 1/2" (~1.27cm) plywood.
Courtesy of SARS-CoV-2, that's unfortunately it for this week!
# Class notes - To organize later
Frequent materials, in rough descending order of structural strength
- plywood would be best
- OSB is unloved for its visuals but is cheap and structurally strong
- MDF is cheap, easy to machine and paint, but structurally weaker
Other fun materials to think about:
- HDPE would be interesting to try. More expensive than wood but good structurally properties and machines really well.
- Lexan and polycarbonates are really strong (too strong for most lasers to cut)
- Garolite (basically the core of a PCB) is very strong and machines well but is costly
Start out with OSB for this week.
For sourcing: links in the lesson are relevant for our lab in the Boston area and look promising.
It might also be interesting to look at the list of job shops to get design profesionally manufactured!
Flat end mills vs ball end mills: you would traditionally rough with flat, finish with ball end mills... at least if machining by hand. With 3(+) axis CNC, since you can move all axes continously at the same time, this isn't necessarily all that relevant. The ball end mill might still be useful for its radius of curvature, to get into smaller features in the Z axis.
Book recommendation: Machinery's Handbook
The briefest explanation of chip load, feed rate, cut depth and step over ever!
Fixturing:
- tape's not going to cut it, obviously
- vises for small machines (mostly for metal?)
- bar clamps / C clamp, good for smallish stock, doesn't prevent bowing / cupping in the middle
- just screw it down into the sacrificial layer!
- fancy: vacuum beds! https://www.thingiverse.com/thing:1672325 , http://fabacademy.org/2019/labs/ulb/students/axel-cornu/assignments/week08.html
Sacrificial layer, squaring: did this on our ShopBot when the sacrificial layer was replaced by an intern just before leaving! Add pictures of the process
Shaping, ideas to explore:
- flexures
- steam bending
- wacky wood Check out these ideas in the lesson and explore them
Joinery: same, check the lesson and explore manufacturing some joints Check out the reciprocal frame joinery link too!
Toolpaths:
- conventional vs climb, part 2. Usually, conventional for roughing, climb for finishing
- swarf machining: angling the tool on a 5 axis machine to cut on the sides
- adaptive clearing: plunge down and then cut up
- trochoidal: cutting in circles: https://youtu.be/m6ff6p7cPgM?t=70 more efficient use of chip load
- two sided milling and registration: something to explore
- 2, 2.5, 3D, 5 axis machining, etc
- t-bones: see project, link to Make book
- tabs, onion skinning https://www.wwgoa.com/video/onion-skin-cutting-cnc-machine-015597/
Software:
- check out Camotics
- checkout Solidworks CAM one day 😄
- Fusion has built-in CAM
- Check out Slicer for Fusion (doesn't actually need Fusion?), finally!
CLIMB v CONVENTIONAL: Climb could in theory give a better finish but it also pushes the bit away from the cut, which on a Shopbot (not that rigid compared to say the Tormach metal mill) might result in chatter and a poorer finish. Maybe use Climb as a finishing pass?