# Individual assignment
For this week's assignment, I elected to try to complete a mini project. Since I already have experience with embedded programming, I have two goals I want to accomplish over these coming weeks with no access to the lab:
- explore Atmel Studio and native AVR programming more; I decided to push this back to next week to focus instead on...
- accomplish something practical, in a reasonable amount of time, without letting myself go down my usual rabbit holes of research that lead projects to take way too long
To achieve that second goal, I picked something that would be immediately useful, if slightly silly: turning a regular, human powered soap dispenser at home into an automated dispenser.
The first step of achieving this was controlling a servo motor from an Arduino. This is thankfully pretty simple:
#include <Servo.h>

int servoPin = 9;
Servo servo;
int angle = 0;  // servo position in degrees

void setup() {
    servo.attach(servoPin);
}

void loop() {

    // scan from 0 to 180 degrees
    for(angle = 0; angle < 180; angle++) {
        servo.write(angle);
        delay(15);
    }

    // now scan back from 180 to 0 degrees
    for(angle = 180; angle > 0; angle--) {
        servo.write(angle);
        delay(15);
    }
}
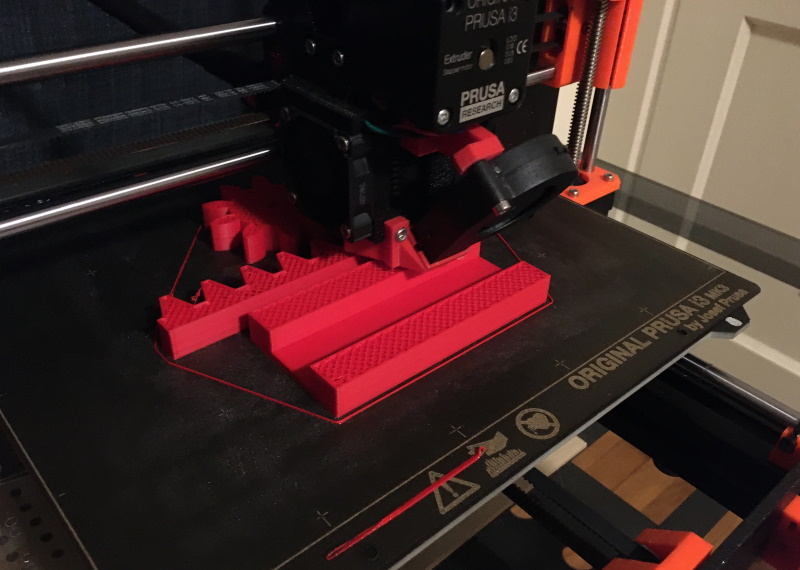
This immediately begs the question of converting the rotation of a servo motor to linear motion, however. Thanks to one of my classmates (thank you again Madison!), I temporarily have access to a Prusa i3 MK3 printer at home.
I decided to prototype a simple rack and pinion mechanism. This turned out to be pretty trivial to design in Solidworks, print and connect to a servo running the above program:
The next step was to enhance the code to also read an ultrasonic distance sensor and move the servo when triggered:
#include <Servo.h>

Servo servo;

#define angle_min 0
#define angle_max 70

const int servoPin = 9;
const int trigPin = 11;
const int echoPin = 12;

void setup()
{
  Serial.begin(9600);

  servo.attach(servoPin);
  servo.write(angle_max);

  pinMode(trigPin, OUTPUT);
  pinMode(echoPin, INPUT);
}

void loop() {
  float distance = measureDistance();
  Serial.println(distance);

  if (distance < 5.0f) {
    pump();
  }

  Serial.println("done pumping");

  delay(500);
}

void pump() {
  static const uint8_t move_speed = 5;
  for(uint8_t angle = angle_max; angle > angle_min; angle--) {
    servo.write(angle);
    delay(move_speed);
  }
  delay(50);
    for(uint8_t angle = angle_min; angle < angle_max; angle++) {
    servo.write(angle);
    delay(move_speed);
  }
}

float measureDistance() {
  digitalWrite(trigPin, HIGH);
  delayMicroseconds(10);
  digitalWrite(trigPin, LOW);

  float echoTime = pulseIn(echoPin, HIGH);
  float distance = echoTime / 58.0f;

  return distance;
}
This code is pretty basic and needs several enhancement in the future: most notably, it essentially busy waits between triggers, which will result in significant power usage, when the MCU could instead be put to sleep and awakened at regular intervals by a timer to save on battery. This simple version will have to do for this week, though!
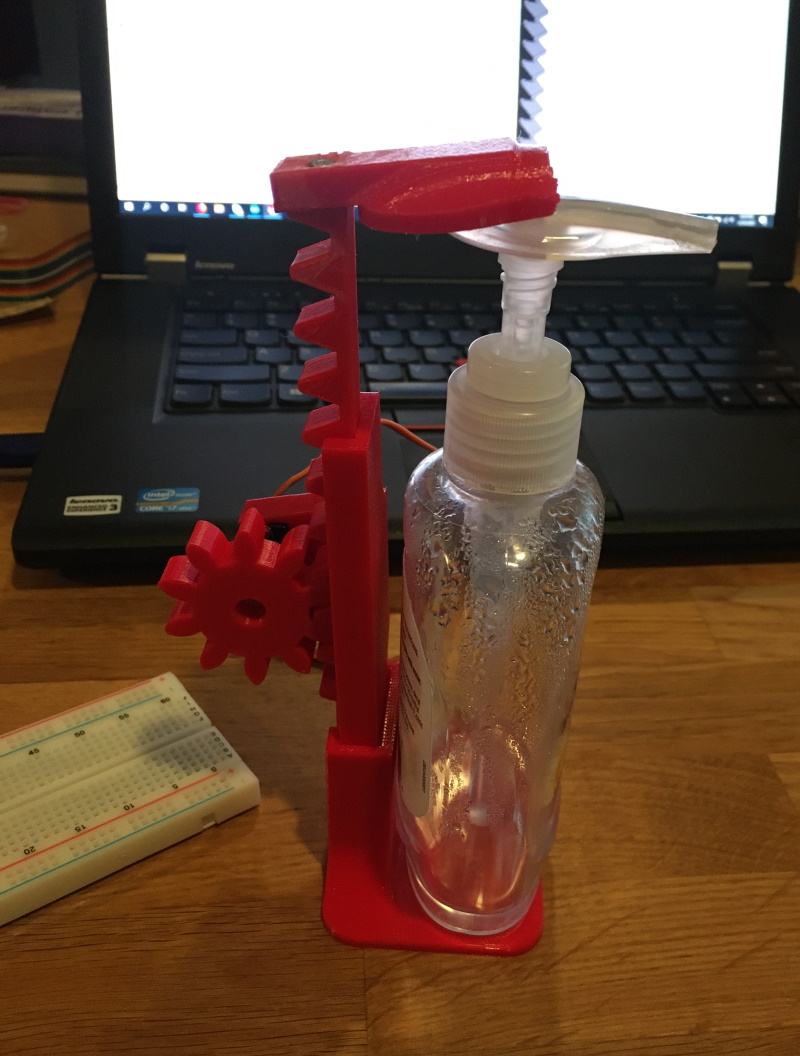
To go with this code, I designed a simple holder for the previous rack and pinion design, as well as a top piece to press on the soap dispenser.
Unfortunately, in this design, the top piece and the rack are printed separately (for ease of printing as well as design); this might have worked if I had some stronger glue on hand, but I did not, and a small screw to attach both was not enough: the servo would simply cause the top to bend away from the rack.
A subsequent design made the rack and top piece a single part:
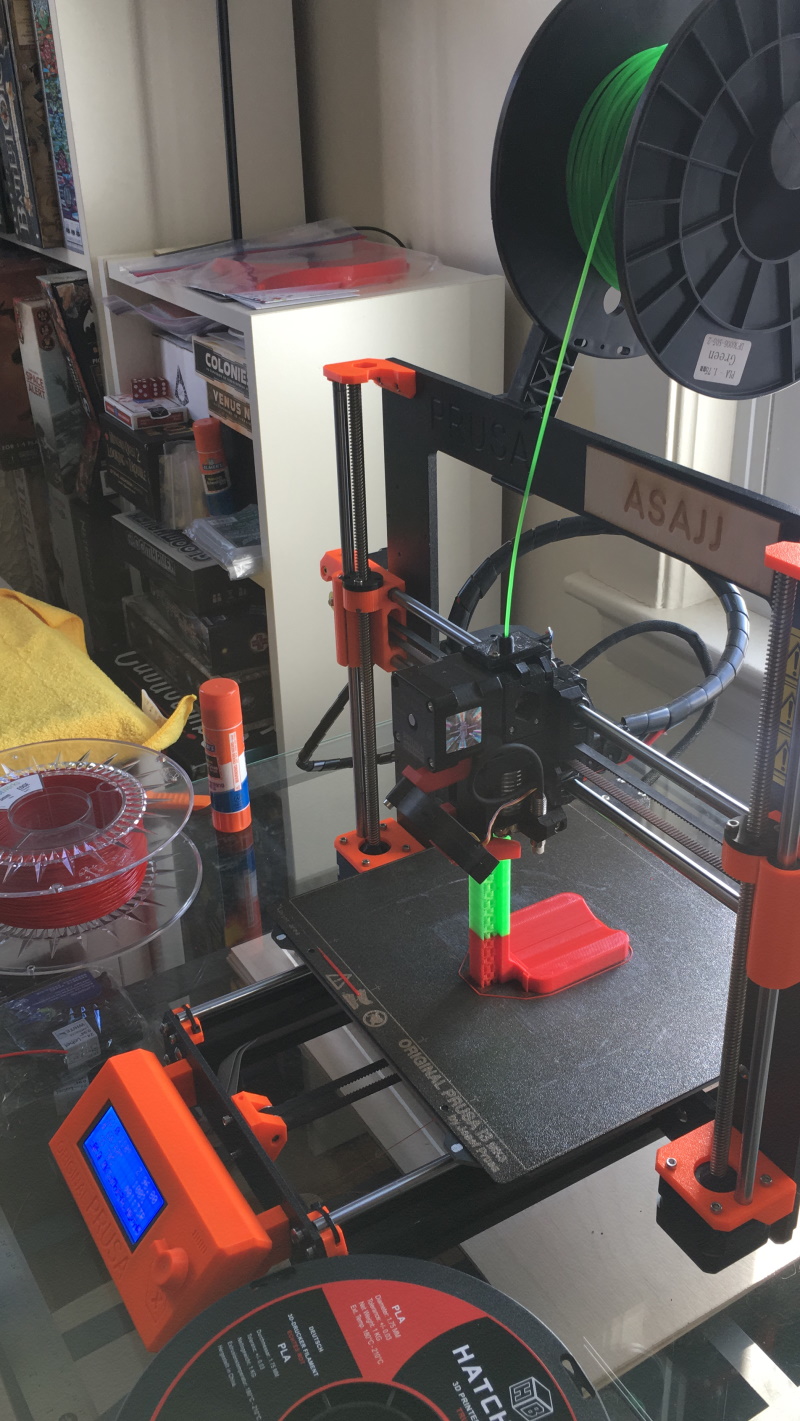
Unfortunately, this design turned out to also have issues:
As you can see, once the rack and top piece were made into a single part, the rack itself started bending away from the slot it was supposed to ride in.
At this point, I went back to the drawing board and redesigned the base piece from scratch, with two (somewhat competing) goals in mind:
- improve rigidity
- improve printability
While I was at it, I added a holder for the ultrasonic sensor.
This final design completely encloses the rack, which now also extends to the sides to ride in "rails" in the base piece.
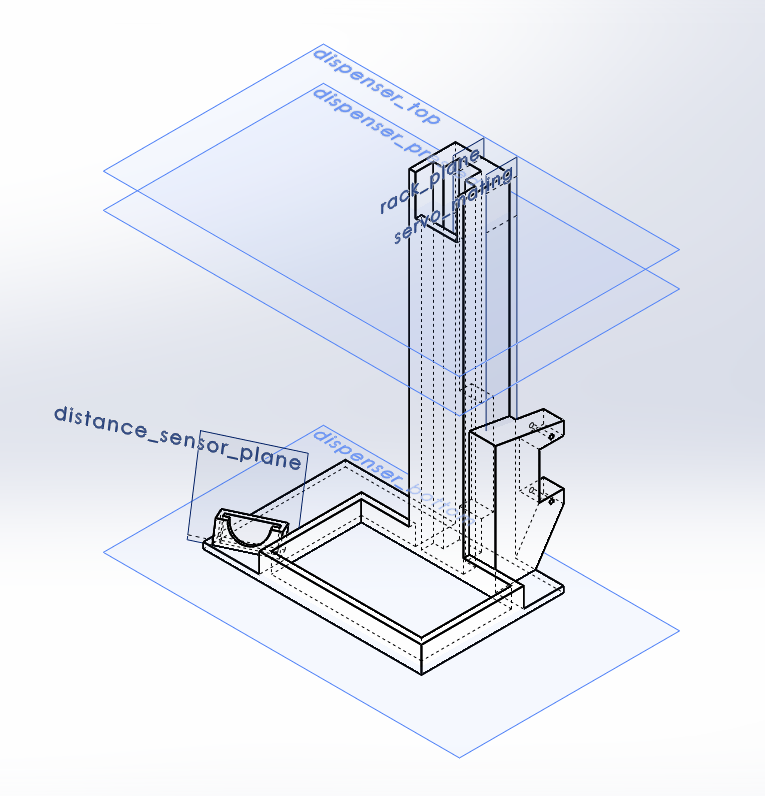
This design took a little while to print but came out looking quite nice, and was very easy to assembly since it is now only three parts:
- the base, which holds the soap dispenser, has attachment points for the motor and a slot for the ultrasonic sensor
- the rack and top actuator as a single part
- a gear to connect both
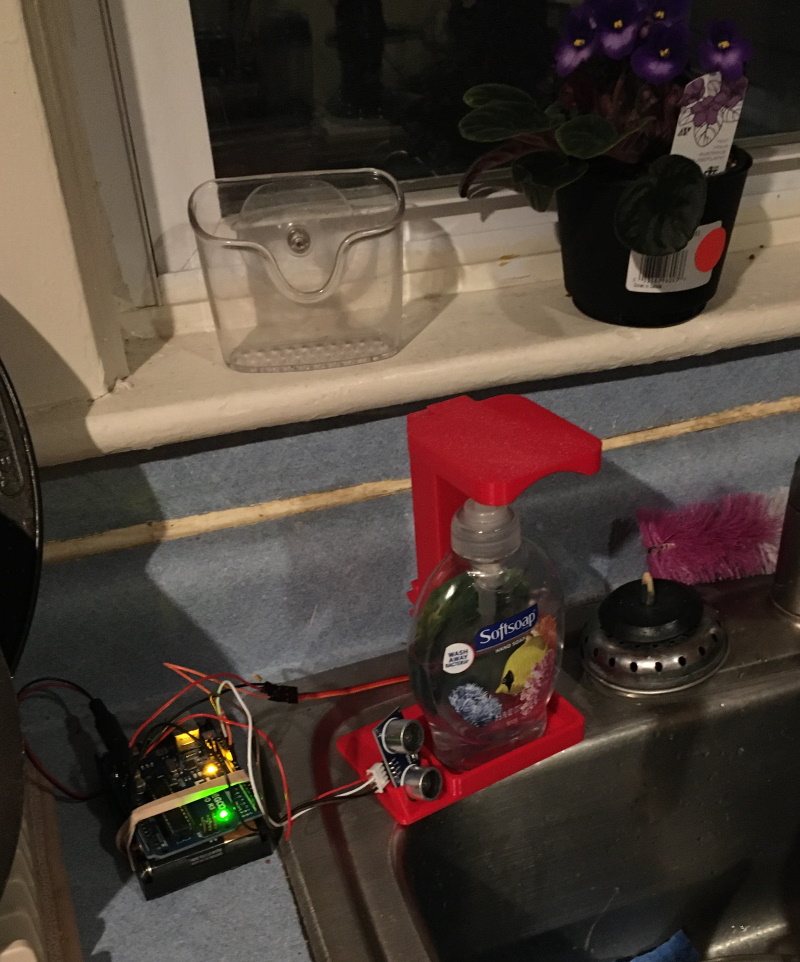
This design was finally a success! It works much better than I was expecting for a project done in under a week, to be honest.
If I had more time, I would love to investigate the following:
- integrating the Arduino and batteries more cleanly in the design
- lowering power consumption significantly
- re-writing the code for bare AVR, both to save power and for better control of the servo
# Class notes
Useful things:
- list of sensors in class text
- PIR sensors for motion?
- "radar" (microwave radar)
- need a microphone? use MEMS, don't use regular microphones anymore