9. Mechanical and Machine Design
Group Documentation Page
Group Members:
Andrea, Emily, Hala, Magdalena, and Riichi
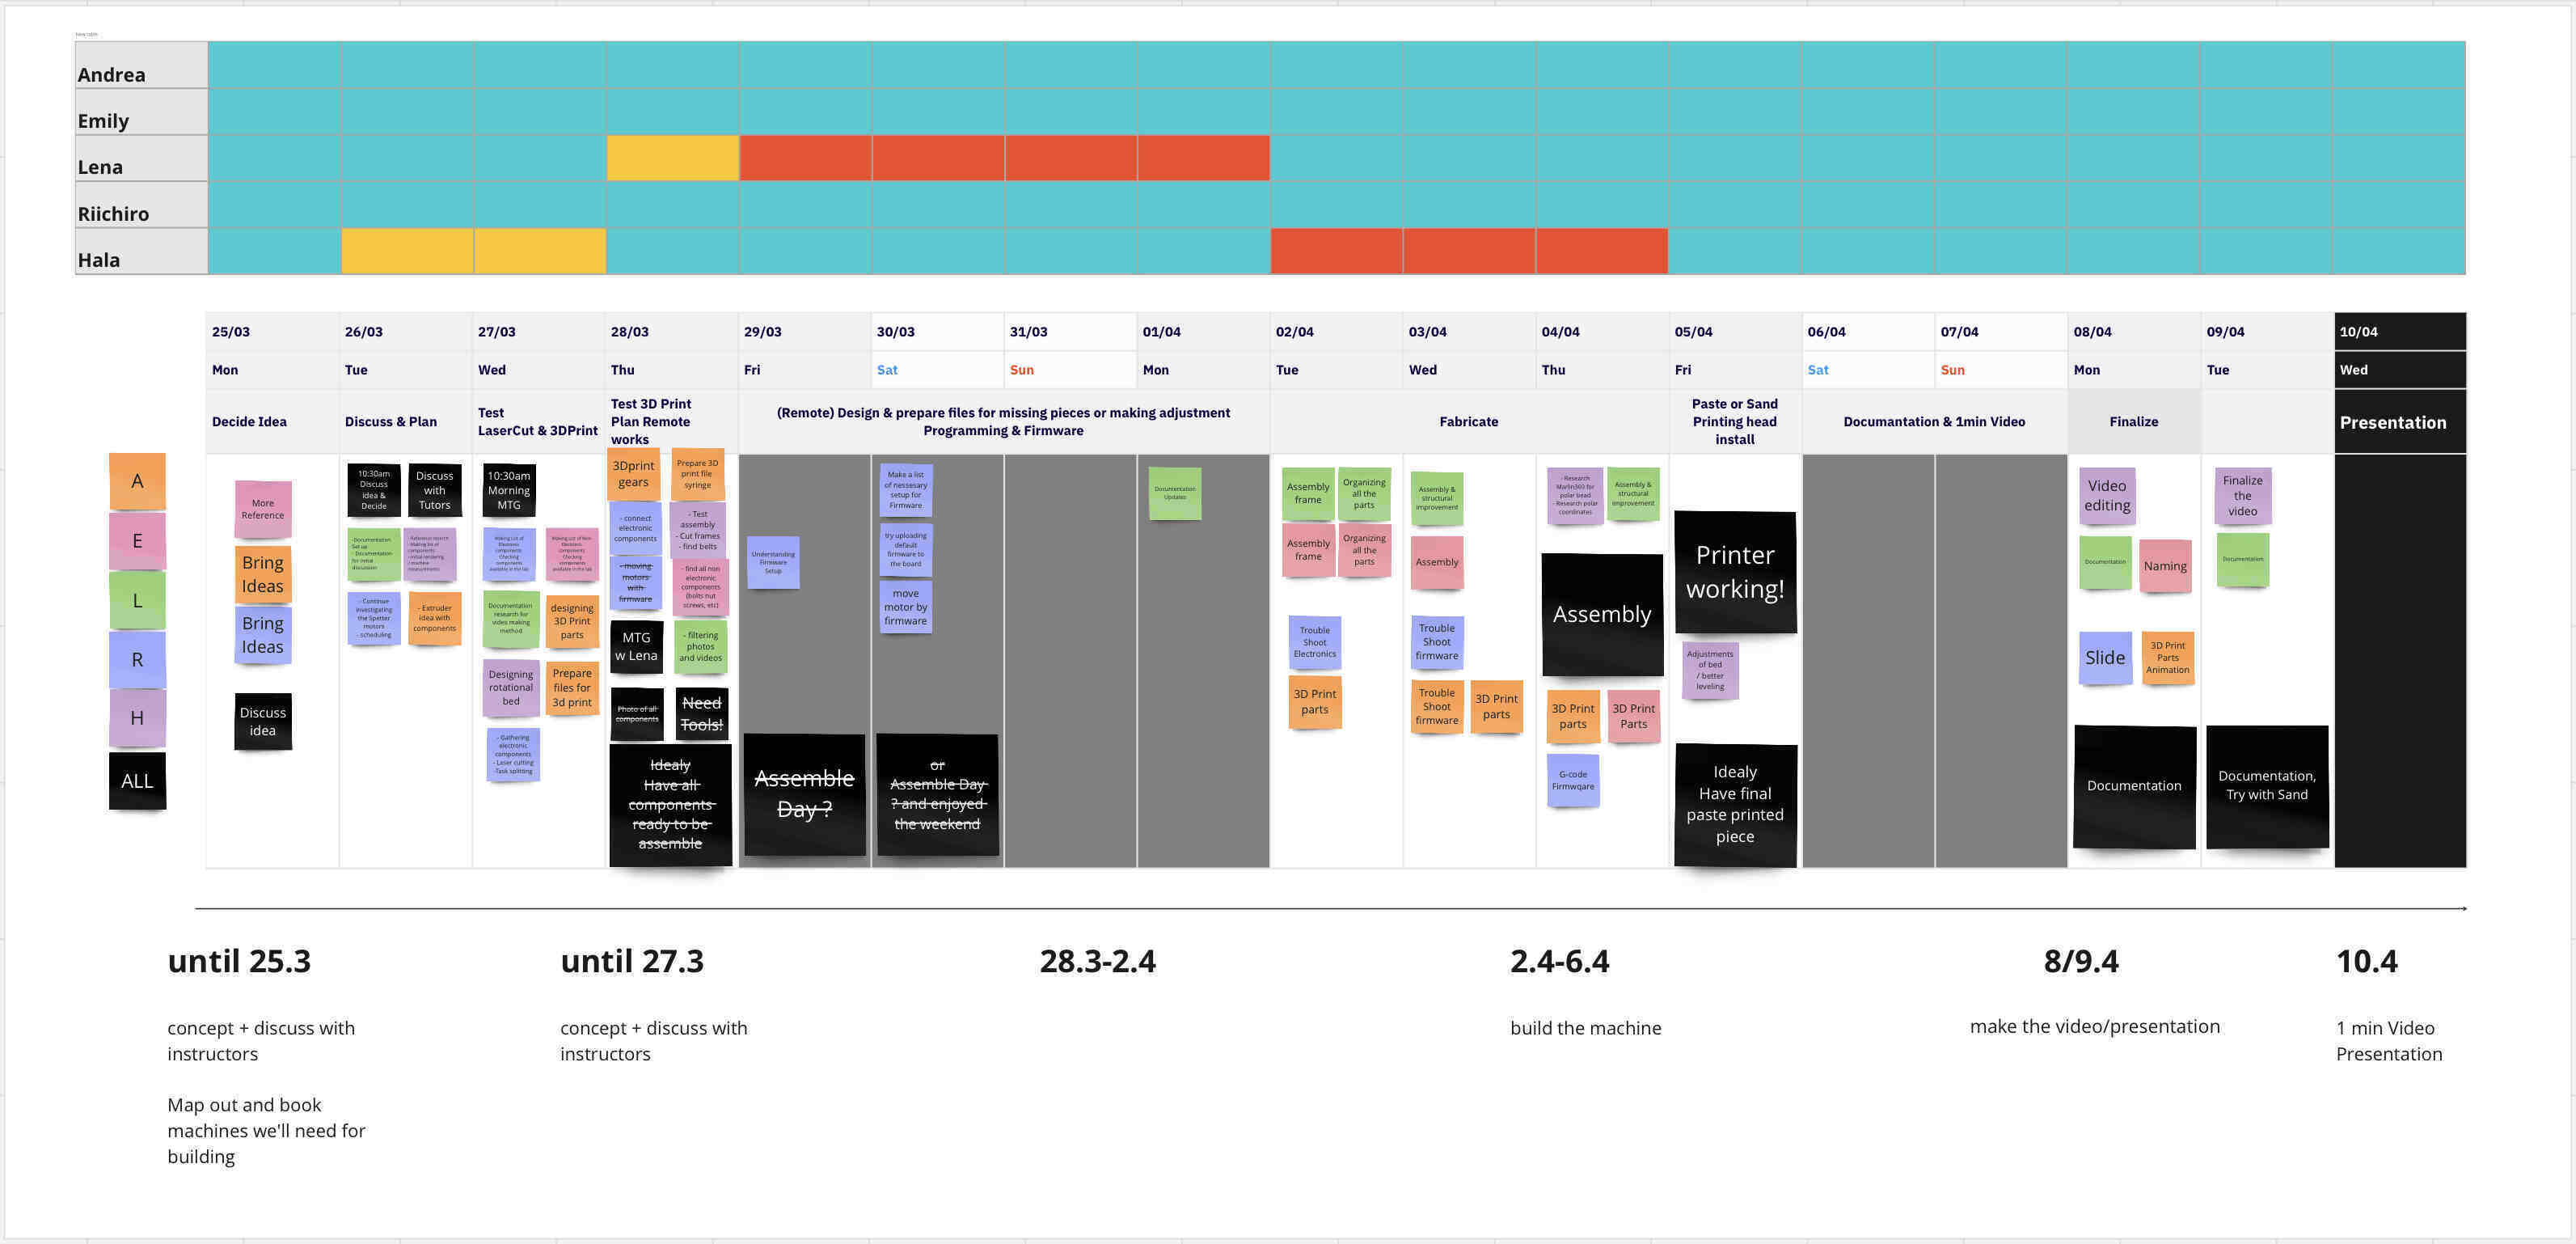
Our group was formed because we all had an interest in learning about paste printing and wanted to aim for building the full machine rather than building an accessory for the extruder. We started the assignment by brainstorming on our Miro board where every group member did some research on existing machines and documentation. We also built a schedule to follow to make sure to finish the machine on time.
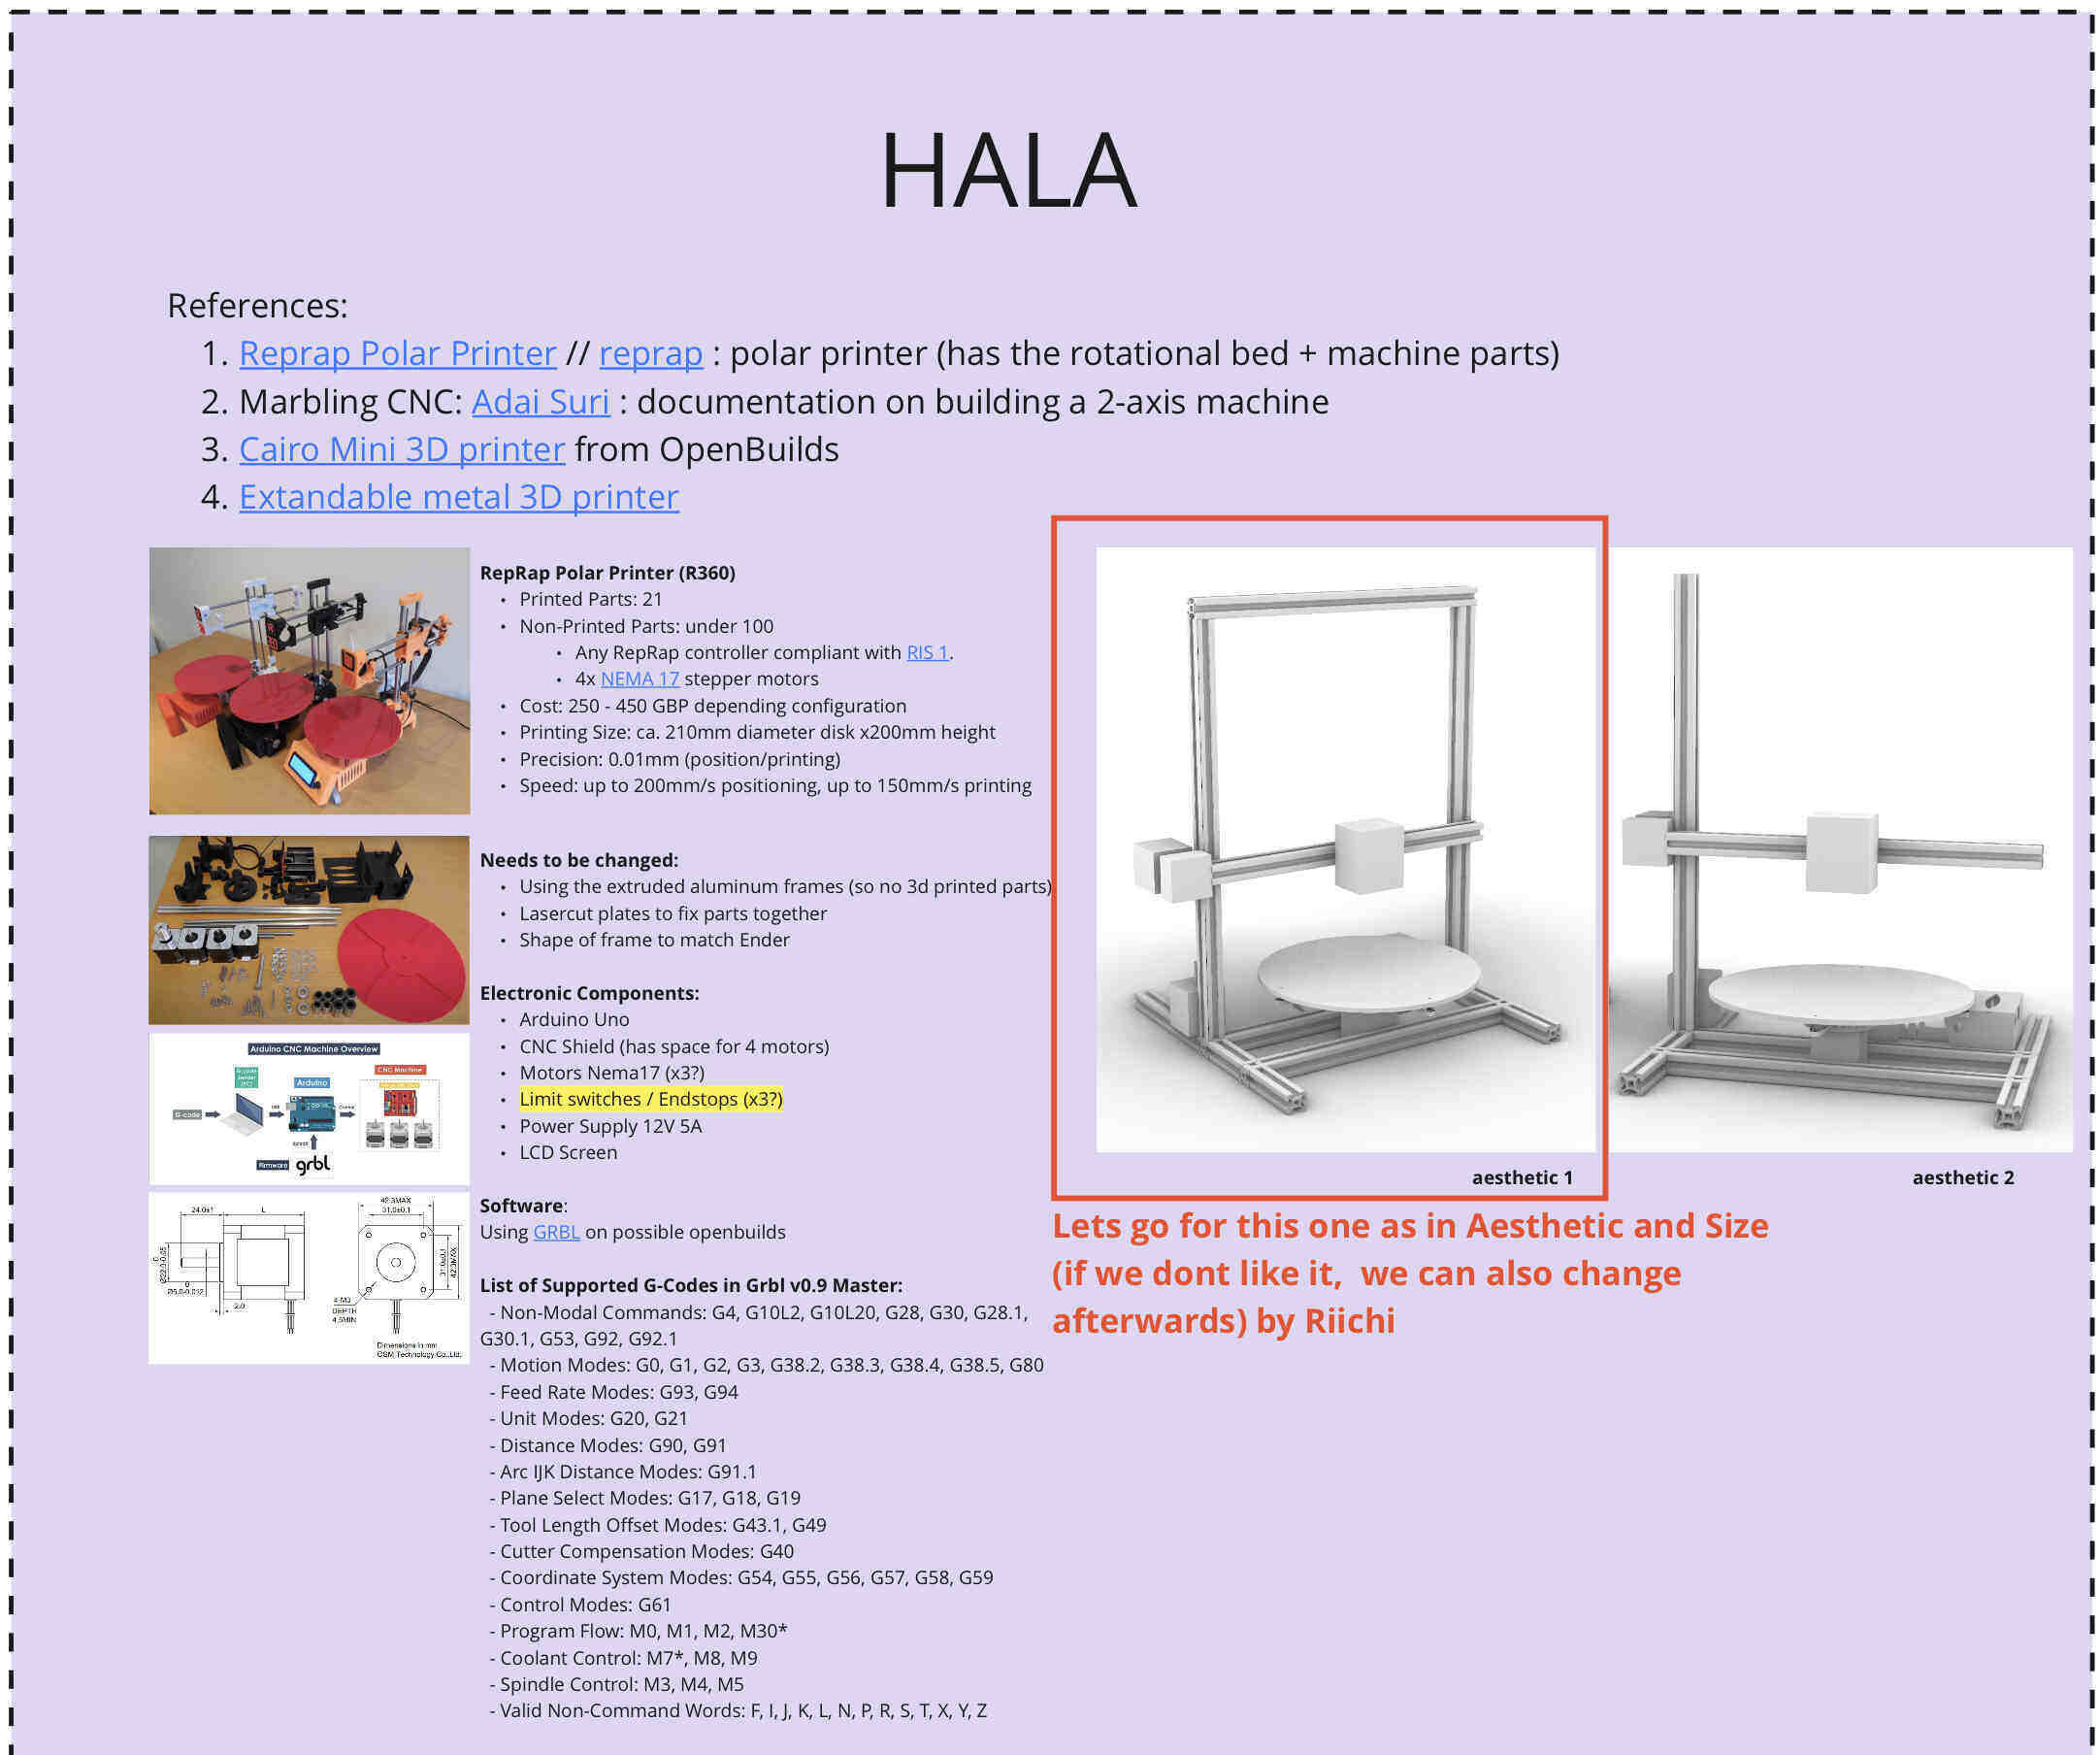
I found documentation of a machine, R360 Repo, which was already adapted for a Polar Bed and had all the .stl files available. However, it had no documentation whatsoever on the assembly, a manual, or the firmware and software part. To start off with, I started by breaking down how this machine works, what parts it has, and what we would need to adjust from it.Then I made quick 3D models on how our machine would look like using the aluminum extrusions available in our Lab rather than the metal rods the R360 uses.
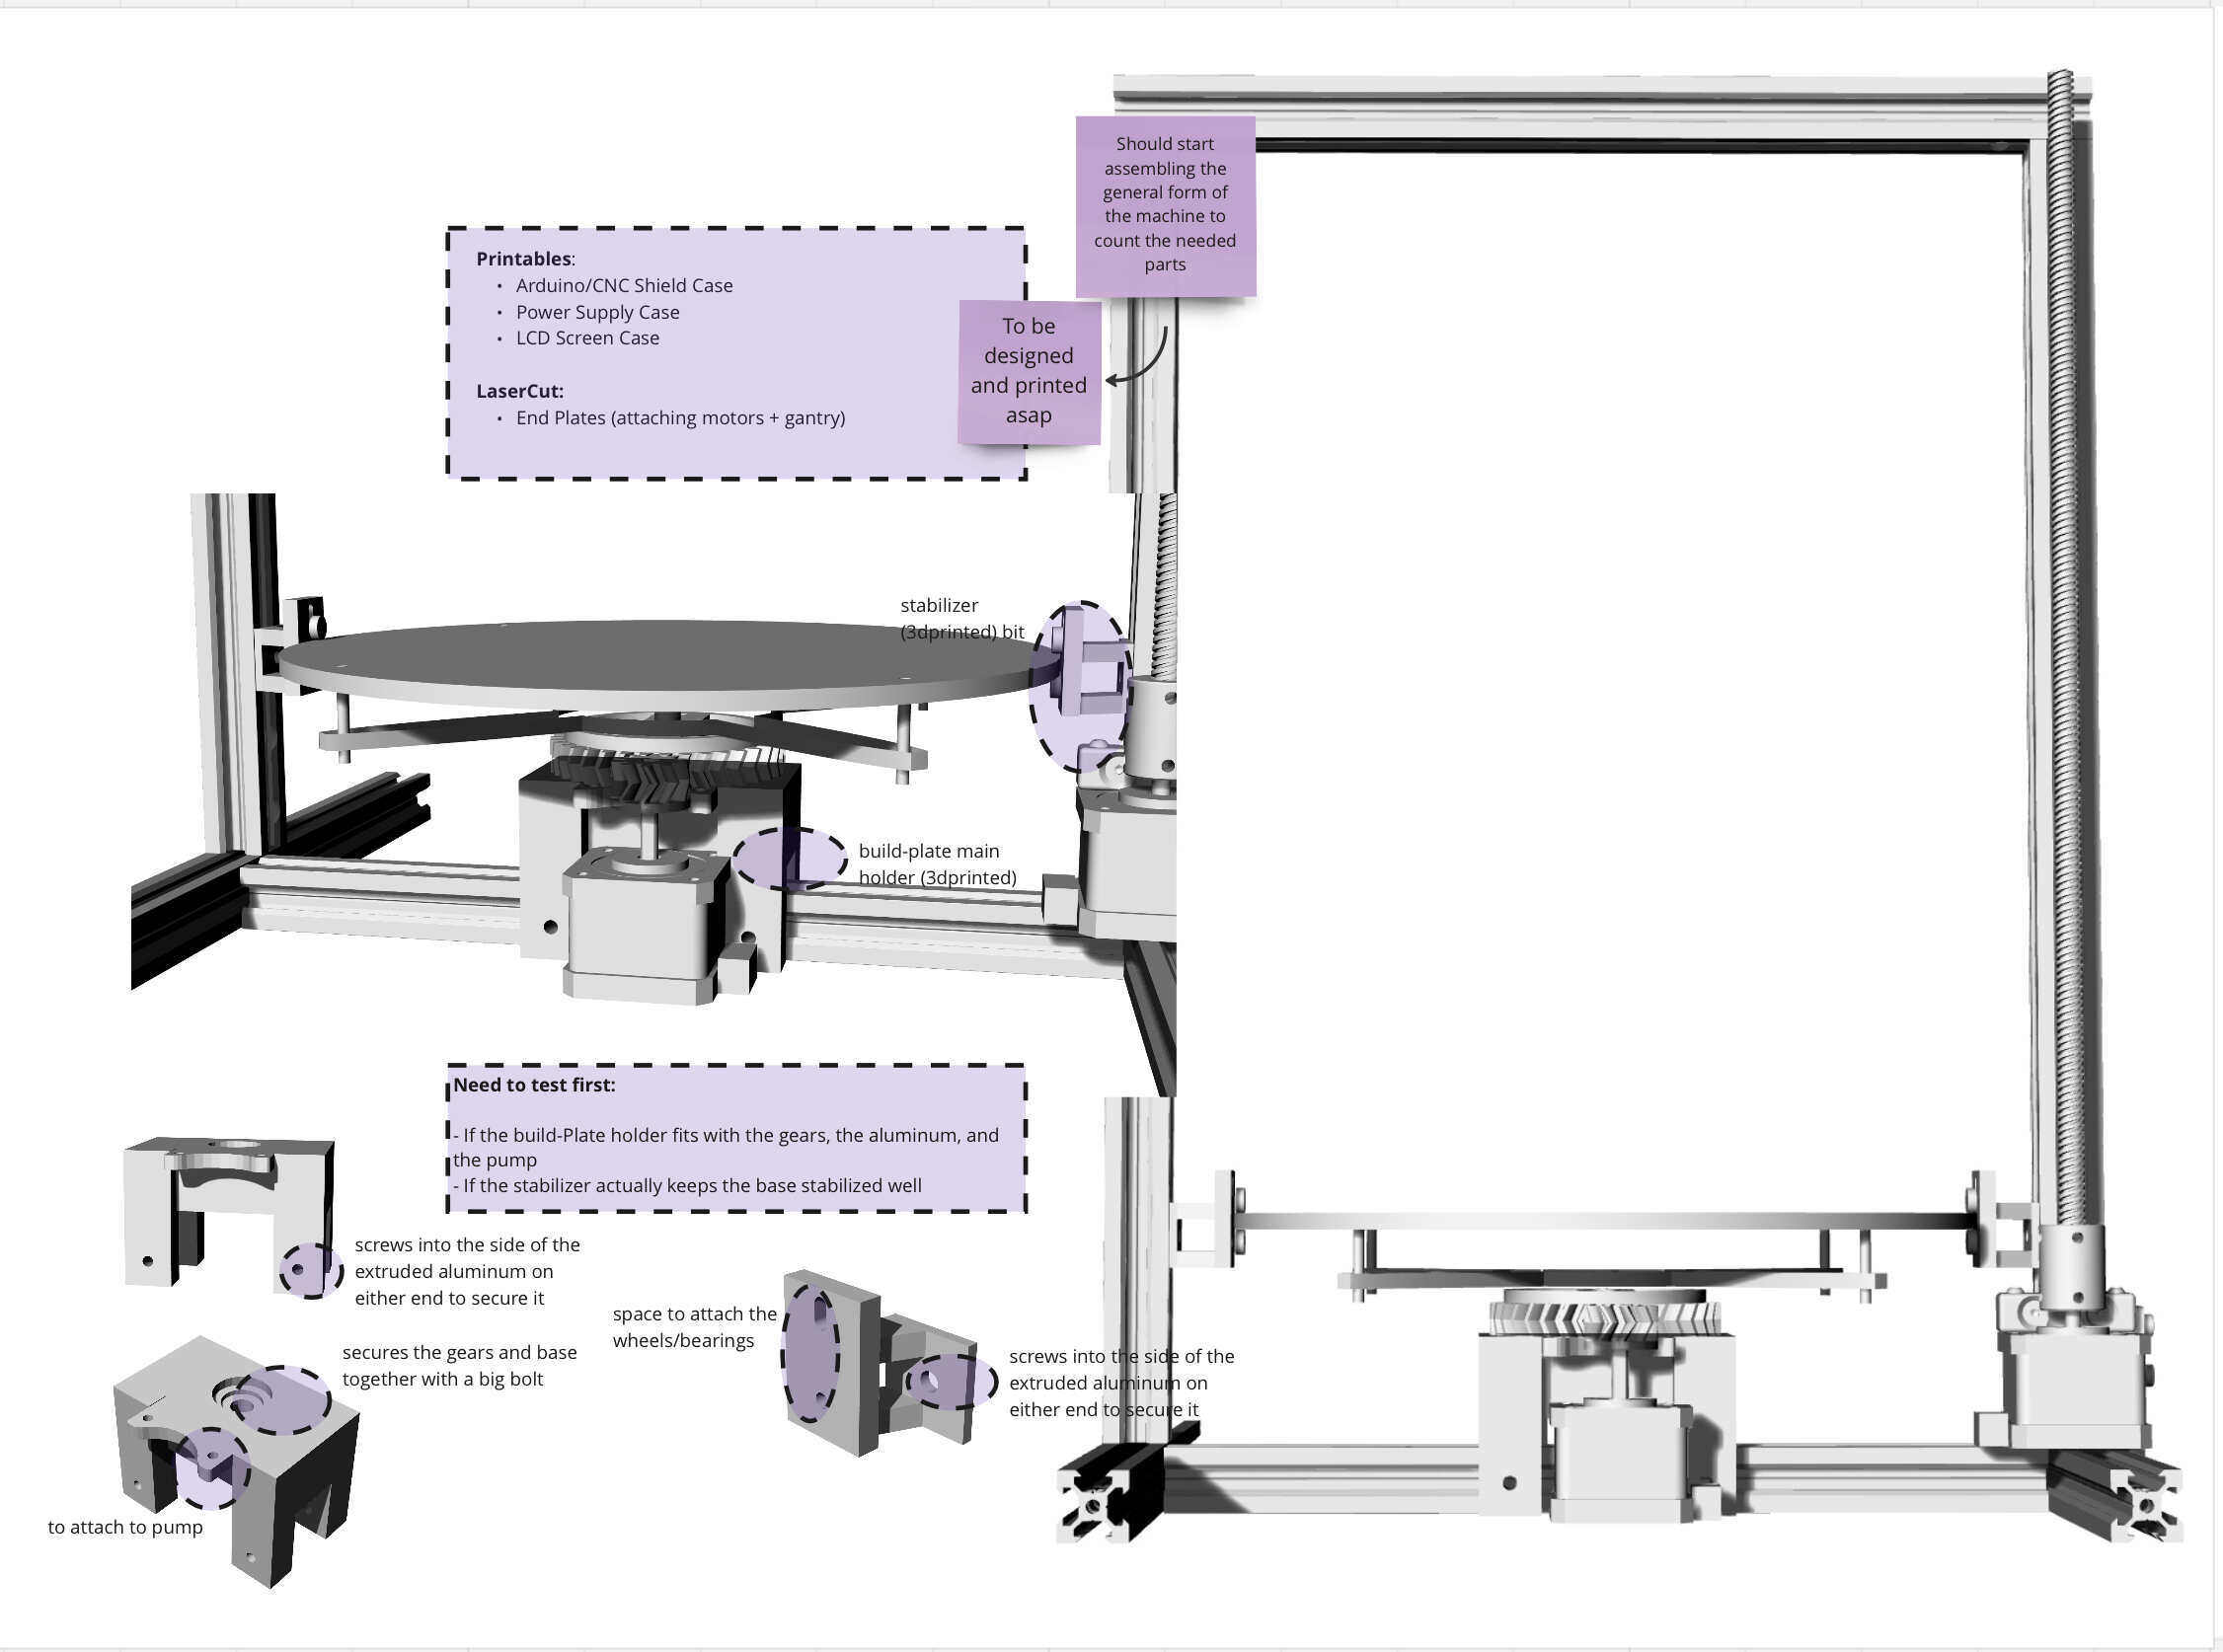
As a group, we wanted to finish 3D printing and lasercutting the parts needed for the machine and assembling it right away to account for the errors we might face on the way. So I started by assembling the parts from the R360 and the Ender on Rhino and adjusting the placements of what we need on the way. Putting all the parts together on Rhino helped us understand what it is we need to remodel and what could just be printed as is.
I took the job of figuring out the rotational bed assembly. We needed a base to hold the gears, motor, and bed and needed to stabilize it somehow. So I modeled a part that sits on top of an aluminum extrusion and holds the parts together. Then for the stabilization of the bed, I adjusted the model used from the R360 and placed it on two sides of the bed following the X-axis.
We printed the first main base part and the stabilizer part. Testing the first model, we found a few errors as expected. The holes were too tight and the hole made to embed the bearing in was too shallow. Also, as there was no direct information on the gaps intended we had to test out, trial and error, what the perfect gaps between parts are. We placed the bolt, washer, acrylic bed holder, washer, gear, washer, 3d printed part, then nut at the bottom. That wasn’t allowing for very smooth rotation because of the friction on the 3D printed parts. To test, we used a soldering iron to make the holes and gaps bigger and tested embedding bearings on both ends of the 3D printed base. That made the rotation much smoother but the heights of the two gears were not precise and so it wasn’t rotating well.
Next adjustments:
- Made the holes bigger
- Made the bearing spacings bigger
- Brought the motor holes closer in so that the gears can fit in together better
- Placed thicker washers between the 3D printed base and the large gear
Once we assembled the machine, we realized that the leveling of the bed was still very off. We placed the stabilizers on the two ends which helped a little but it was still very shaky. So we changed the nut to a lock nut, changed the washers between the gear and the 3D printed base holder to cover more surface area, and which made the gear lift up a little which we matched with the smaller gear.
As for the stabilizers, the first attempt showed that the holes were too small and placed too close together as well. I first intended to use a bearing above and below the acrylic bed but realized that it might pinch the bed and hinder the rotation which would do no good except add an additional step. I also realized that we needed more of an angle to be able to comfortably place the nut in the back. We made those adjustments and reprinted them.
Testing the polar bed to the final machine and testing.
All the Files
ROTA - polar paste printer by andrearubio18 on Sketchfab
Firmware & Software Assistance
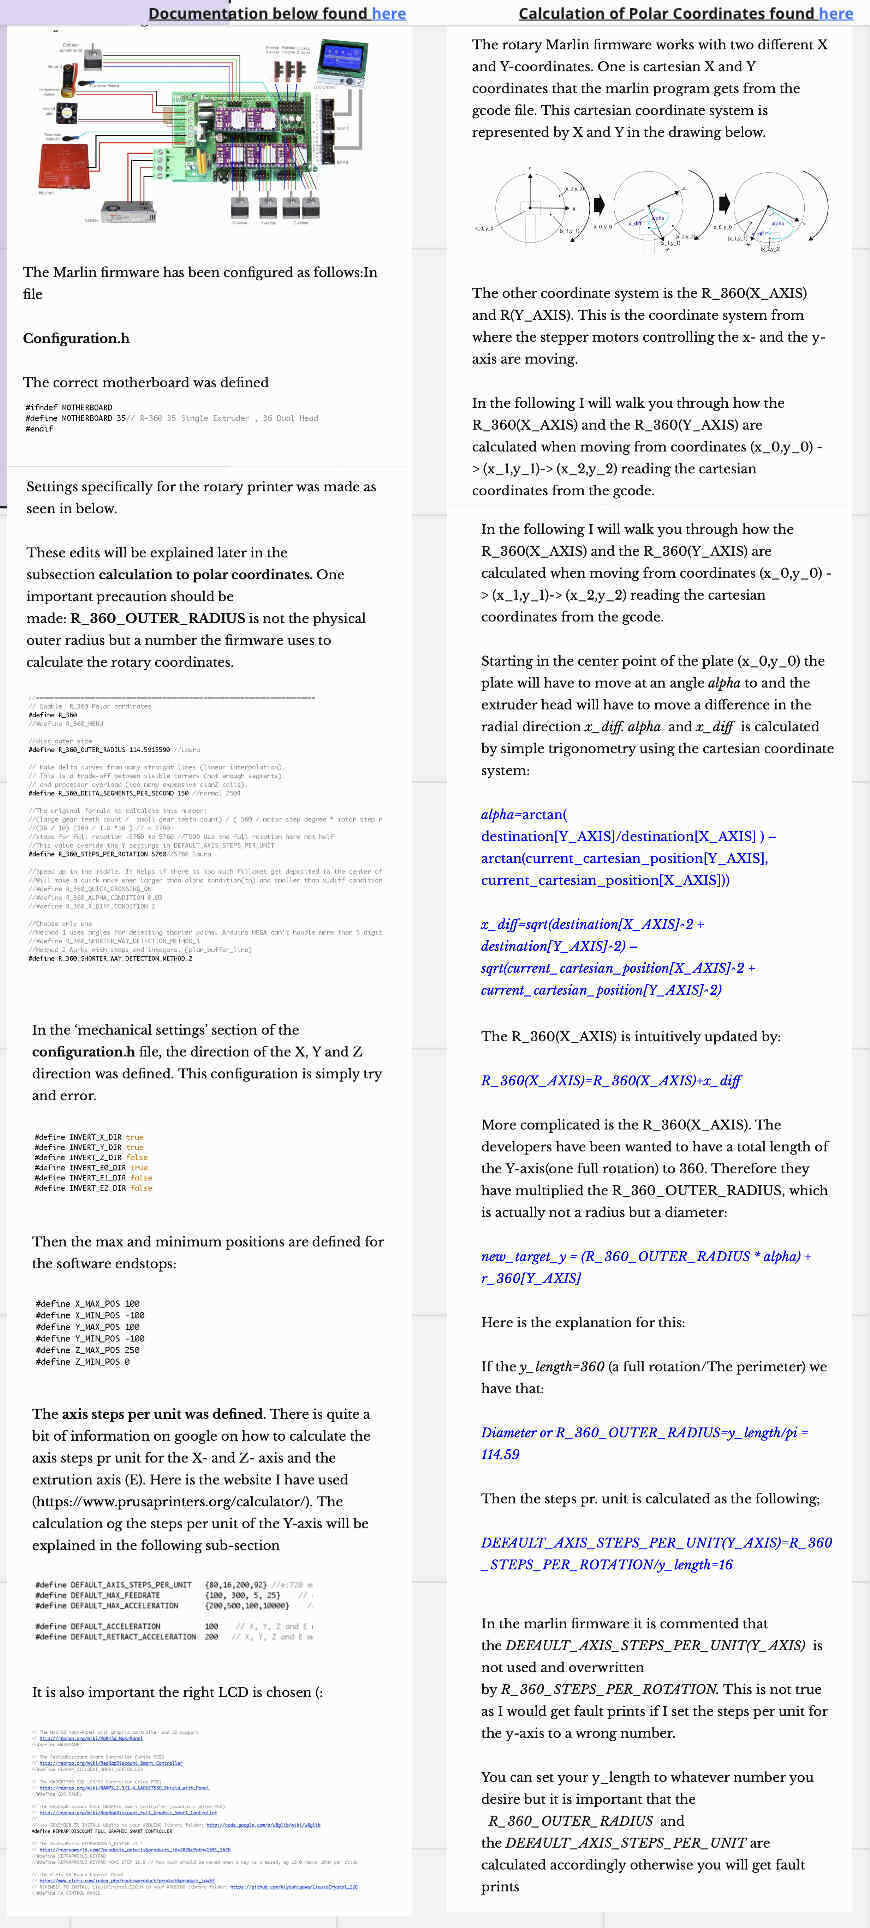
Riichi was the one to work on the electronics and the firmware by Andrea. I very mildly assisted Riichi and Andrea by doing some research on Marlin and Marlin 360 polar set up. I also spent some time figuring out what the polar coordinates are, however, we didn’t end up needing to use them.
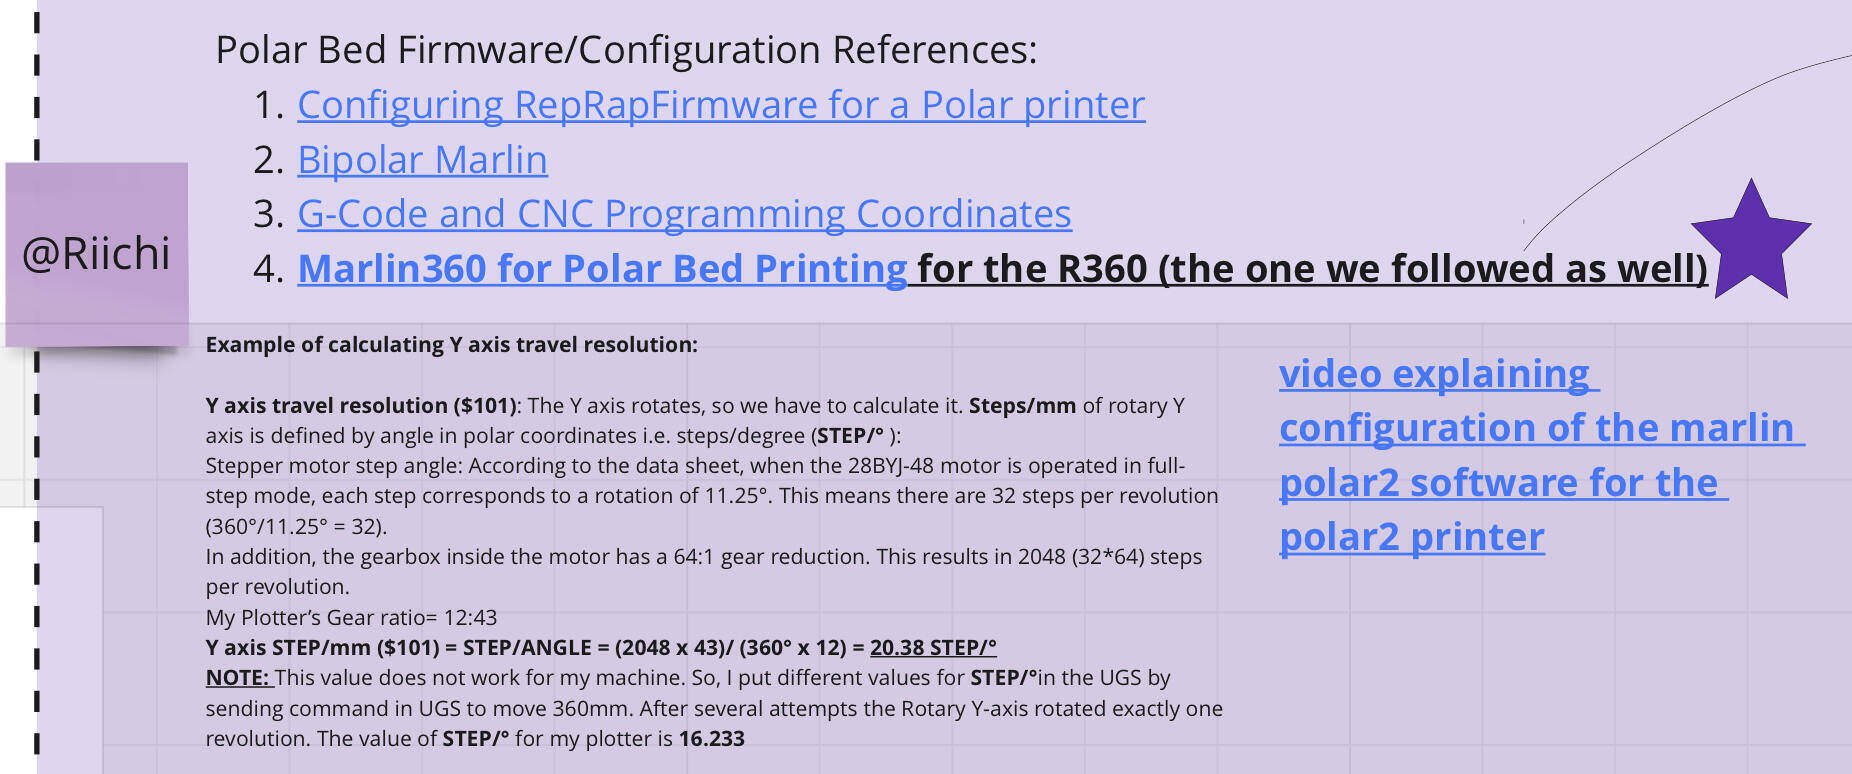
Visit Riichi for in depth documentation on the electronics!
Video Planning & Editing
I took the role to edit the video by joining some videos that the group added shared cloud.
