The assignment was to test the design rules and limits of a printer in the lab. We decided to use an FDM printer, the
Creality CR-10 S5, and we downloaded a test file off of
Thingiverse. This specific test file is a good option as it tests many different features like the: Z-height check, warp check, spike, hole in wall, raft test, overhang Steps 50° - 70°, 2 different extrusion widths: 0.48mm & 0.4mm. All the steps taken to slice and print on the printer are outlined by my colleague
Lynn Dika. The results of the tests were somewhat successful in relation to everything except the thickness consistency of the layers, I believe there is some unerextrusion.
Individual Assignment
3D Printing
Design
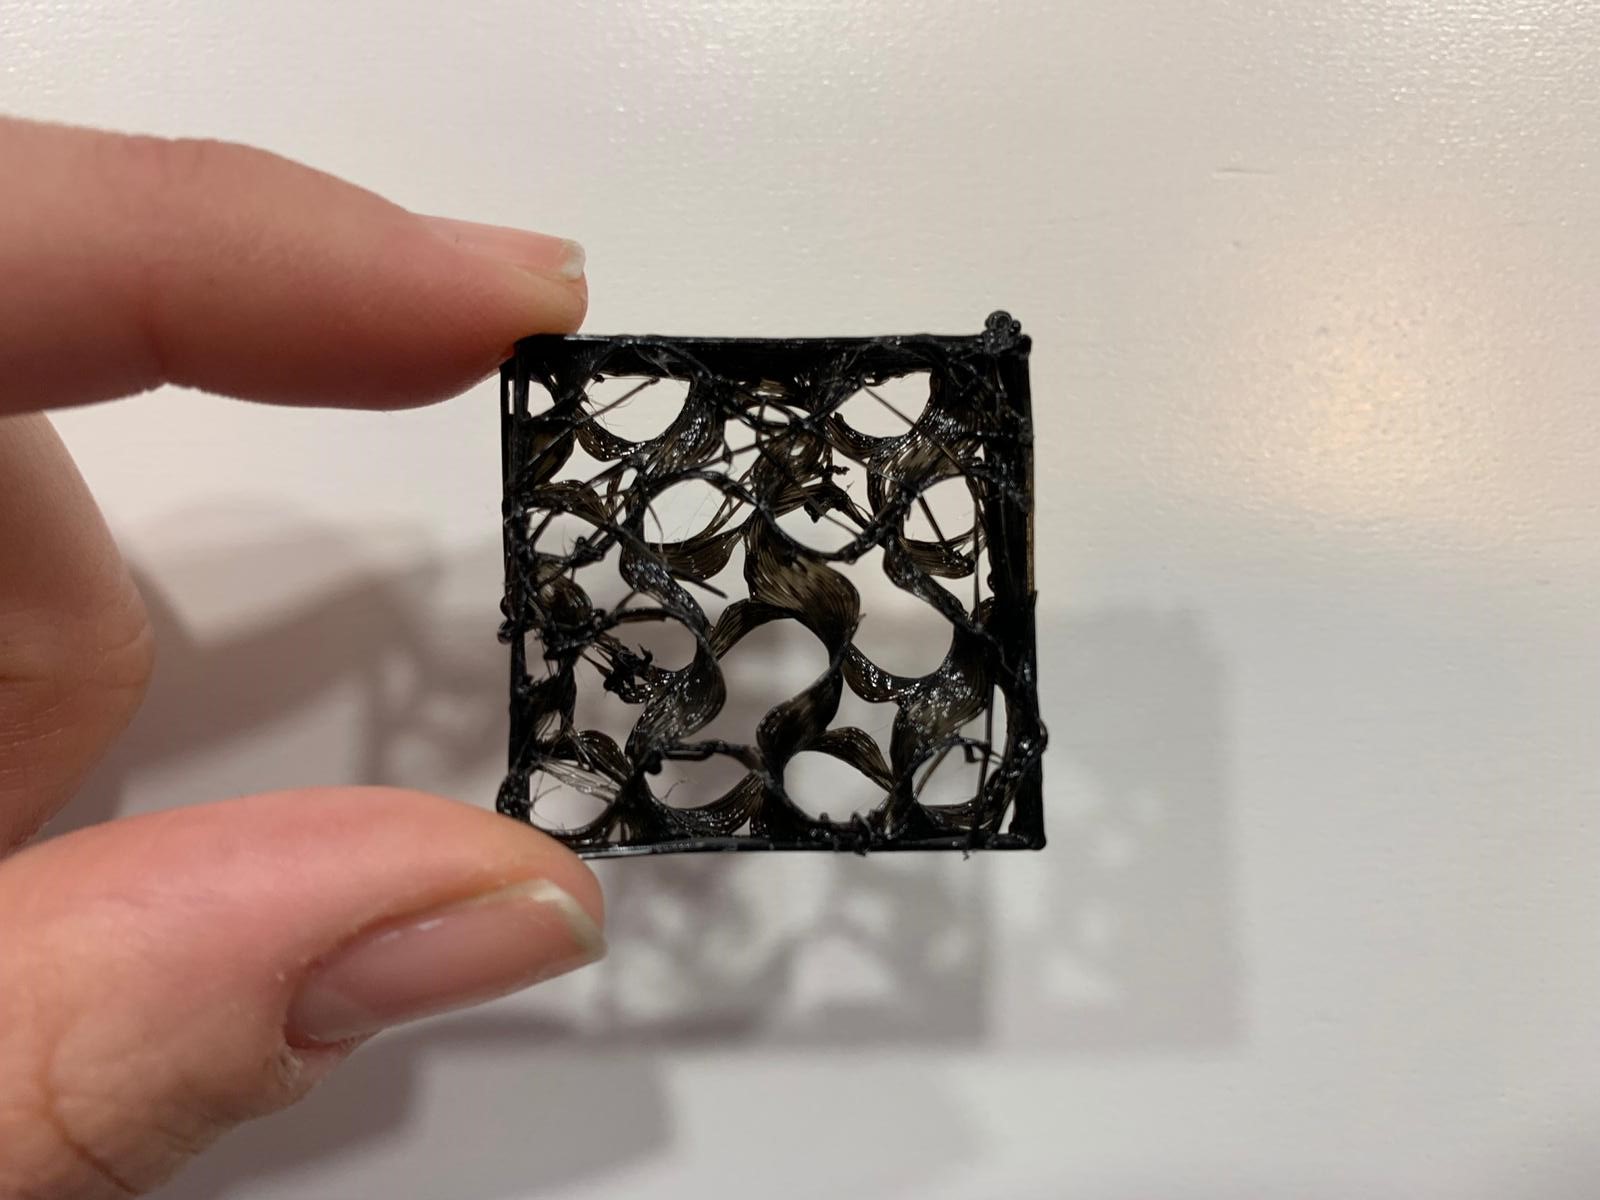
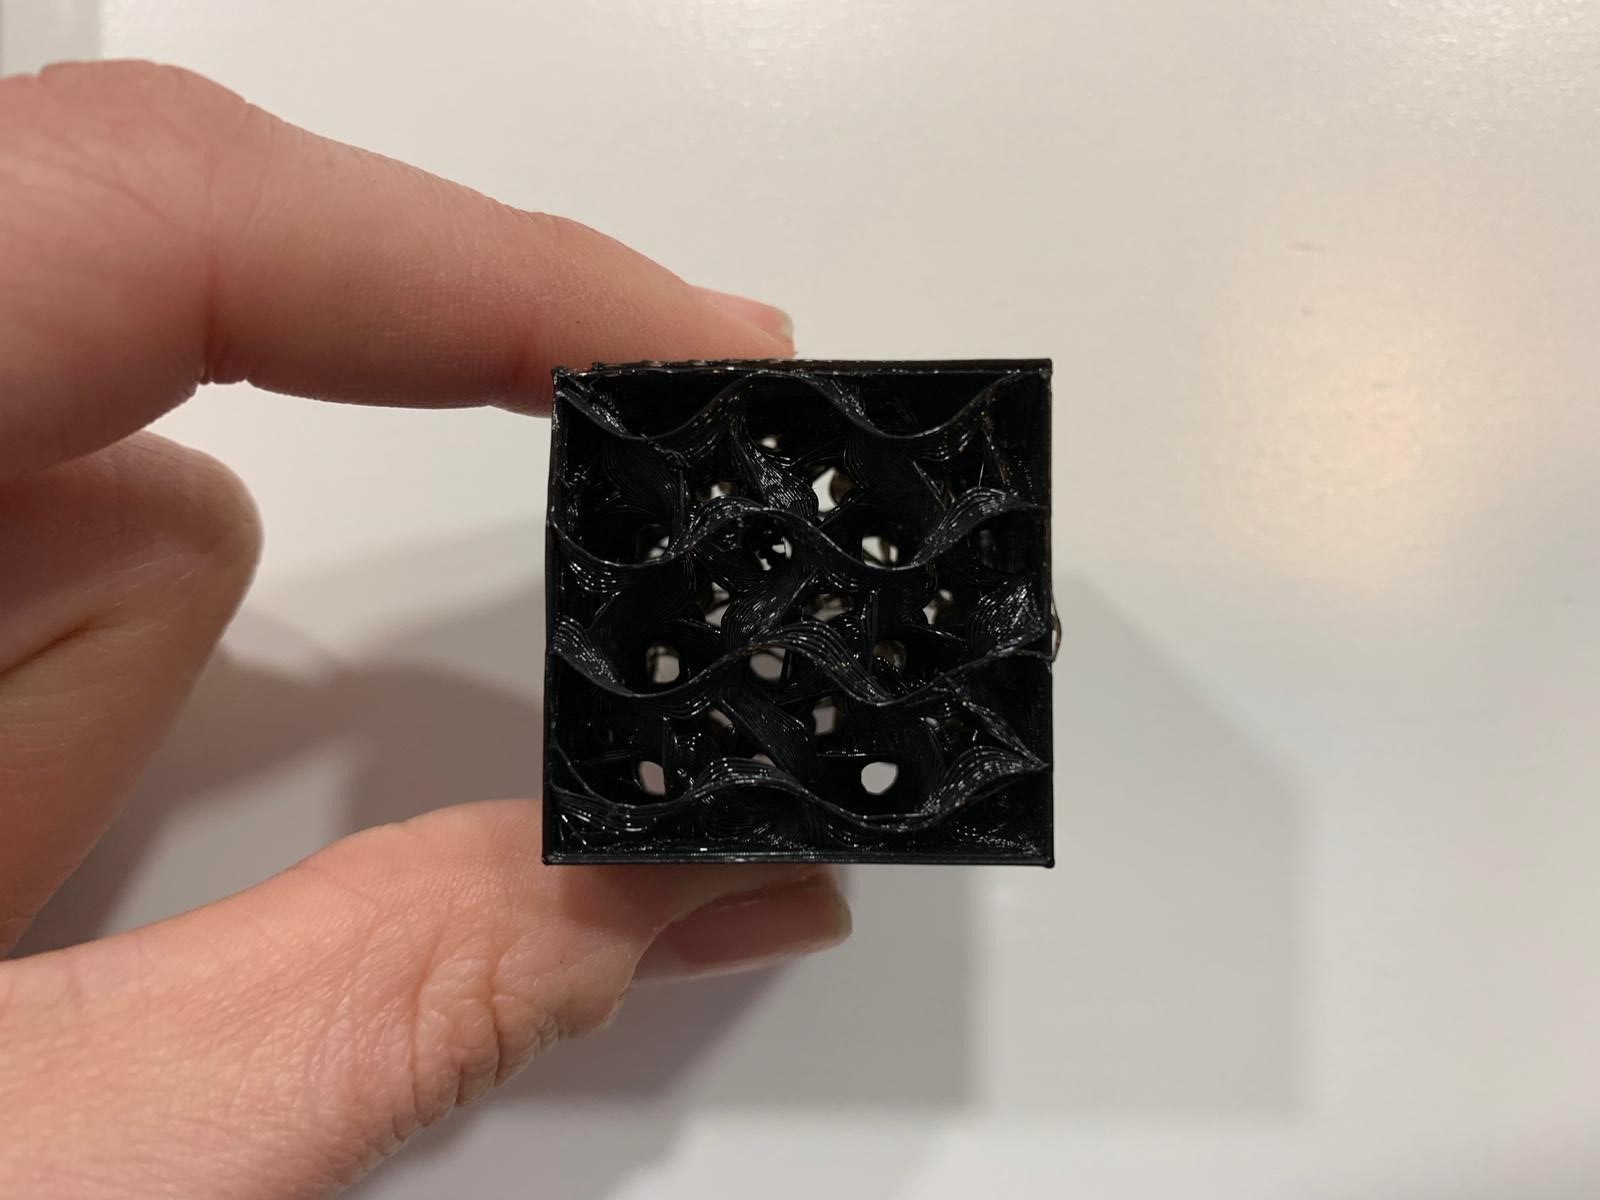
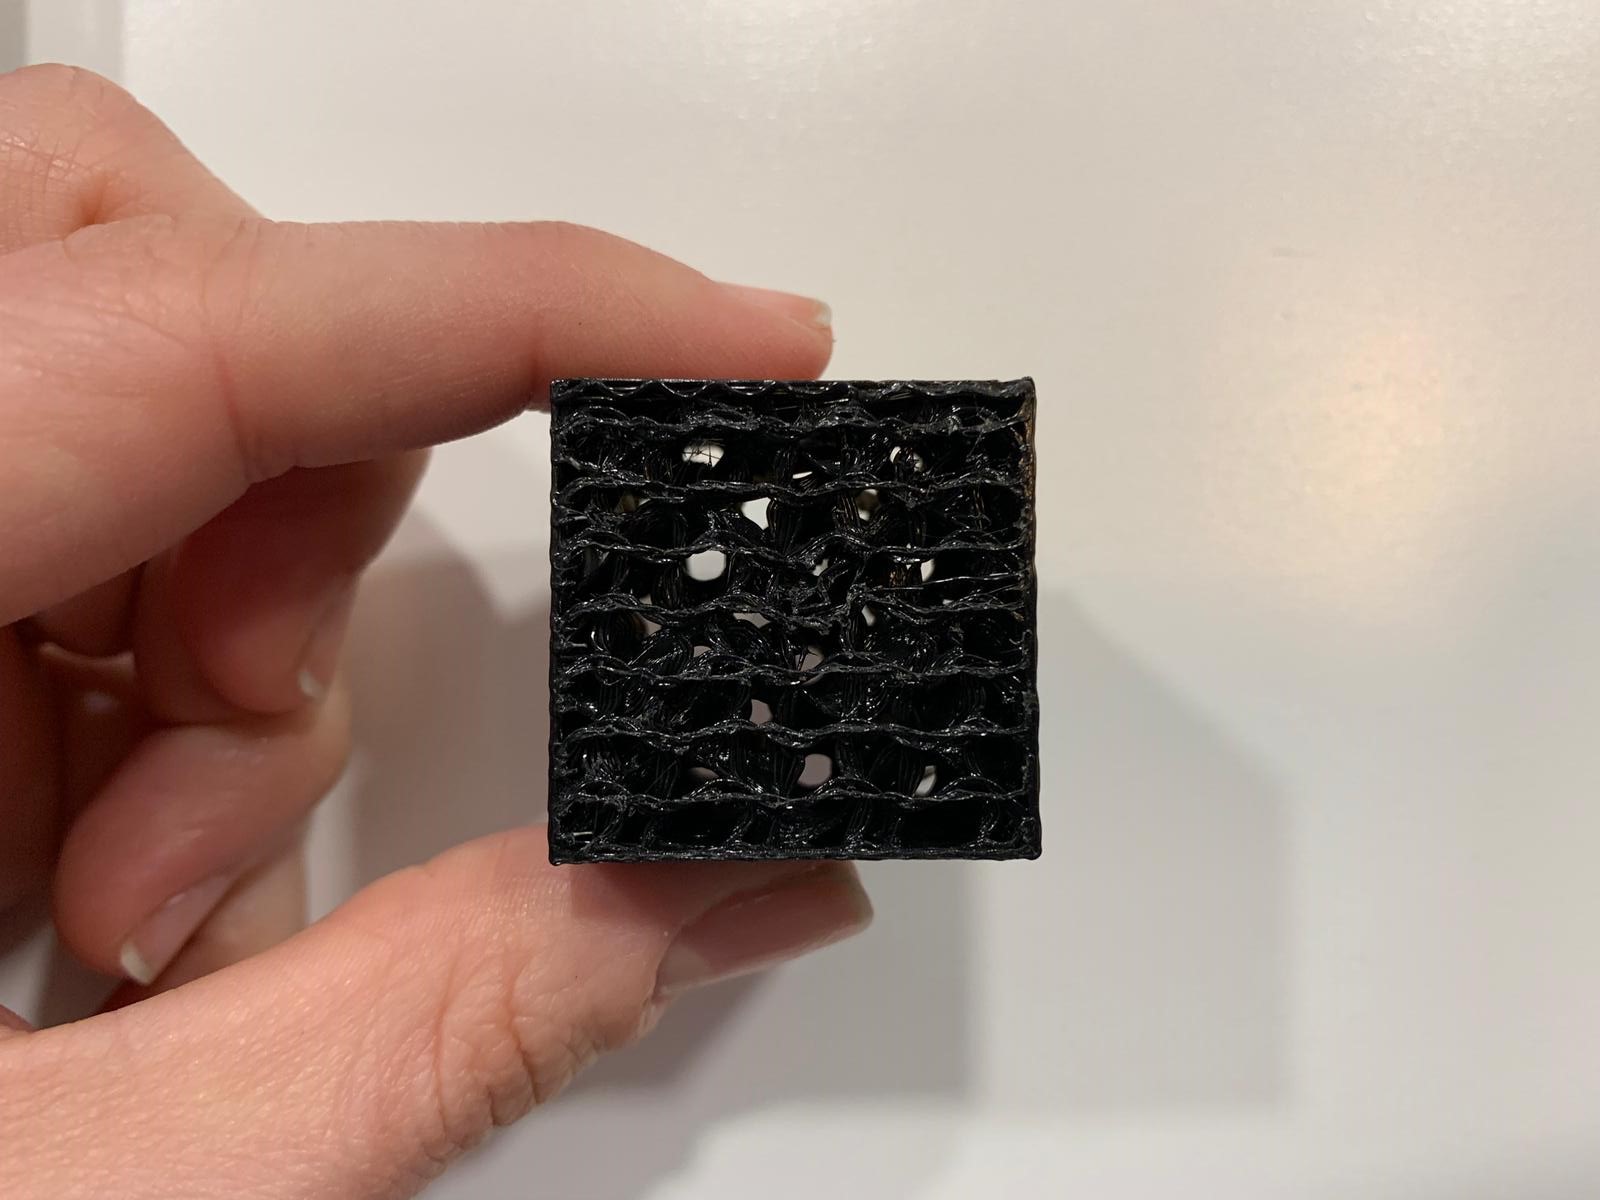
For this week I wanted to experiment with the infill patterns. The idea was to use interesting patterns of infill which are usually hidden and use them as the designed piece itself. The infill patterns I wanted to experiment with were the wiggle, to test the movement, and the gyroid, for the aesthetic. There are two ways I could approach the design:
- One was to create a simple cube and through the slicer software, Ultimaker Cura, add the infill and mess with the settings to reach my goal
- the other is to use grasshopper to create the code for the infill patterns.
I decided to experiment with the first option, so I made a simple cube on Rhino, exported it as an .stl, and began to play around with Cura settings.To do so, create a cube on Rhino by using the Cube option and select the size for the length, width and height. Then, export by typing export selected as an .stl.
3D printers only understand gcode and as 3D modeling softwares are not able to directly export to gcode you will need to export them to .stl which can be translated into gcode through a slicer, like Cura.
Cura Setup
I downloaded Cura, chose the type of printer that I will be working with, which was an FDM Reprap printer, and uploaded my .stl file. As the file was a regular cube, the plan was to use a double-extruder machine with soluble support material and invert the extruders. (printing the infill with the PLA and the mode itself with the soluble support). By doing that, I would be able to play around with the infill and be able to see it without having to make a complicated design beforehand. #tipsandtricks. However, the double-extruder was not available and I had to settle with the Reprap single-extruder. In the preparation options,
- I selected the quality of the print at 0.2mm so as to save time,
- turned on gradual infill with the step of 2 and density of 50%,
- changed the top and bottom layers to 0 layers and sliced.
Printing
After setting up the files and saving to the SD card, I put the first print which was using black PLA. The bed heated to around 45 degrees and the extruder to 200 degrees and then it started autoleveling. Once it was set, it began to print the skirt layer. I noticed that there was some underextrusion but decided to wait and see the first few layers before increasing the material flow. After a few layers, the print got detached from the bed and was moving freely. I checked the machine's extruder and the motor which were both working fine and so I concluded that the error was from the z-axis. The extruder head did not autolevel precisely at the z height.
After the first print failed, I loaded the print one more time. I cleaned the extruder head to make sure there were no left over traces of material and I began the autoleveling process one more time. Once it was done, I loaded the file one more time as I knew the problem was not from the setup of the file. Once it heated and began to print, the first layers have improved but they were still not as constant as they should be and for that reason I decided to increase the material flow that was at 90 to a 130. The increase of the material flow cancelled out the instability in the extrusion and made the print much more consistent per layer.
Print Conclusion
The print was successful in the sense that the infill did gradually increase and the print stuck to the bed for the full duration. The FAILURES include warping and underextrusion. The warping happened on one corner, probably because I did not add a brim or that it needed more heat and the underextrusion was minimal but could be seen at some layers were they were thinner than others. For the future, to avoid such failures I would, rather than allowing the machien to autolevel, manually level the Z-height. Another fix I would focus on is the retraction and depending on it I might still need to increase the material flow. Finally, I would preheat the bed a little longer than the presettings.
Benefits of Additive
The original reason I decided to do this project was to highlight the infill which is usually an after thought and to make something that can not be made subtractively. The additive machining allowed me to have undercuts and overhangs at the same time and the gradual increase allowed me to print it without extra support. The gyroid would not have been successful in subtractive machining due to its constantly changing angles in the 3 dimension where subtractive machining focuses on 2 dimensions at once, max 2.5 dimension.
3D Scanning
For the scanning part of the assignment, we were to scan an object and set it up to be printed and the purpose of that is to understand the benefits of scanning technology in digitizing objects. I decided to go with easy-to-use-on-a-daily-basis scanning options, as most photogrammetry methods/applications are not that easily achievable, and since we almost all carry semiprofessional cameras in our pockets I looked for an app that allows you to 3D scan and obtain the files. Through the search I found a number of phone applications, and began testing them. The application I prefered using was ScandyPro which is available on the App Store (unfortunately, it only allows one free scan a day for exporting)
Idea
A mold of my face with a specific expression to use as indicators of what I'm feeling while working so as not to be disturbed. If I am to make it successfully then through the molding week I could pour it and make it into a stand for my desk or an attachment to laptop screen.
Scanning
ScandyPro uses the Depth Sensor found in the front camera of the iPhone, typically used for facial recognition on devices, and it also has its own photogrammetry pipeline for devices without the depth sensor. I began by taking scans of my airpods first to understand how the application works and what the range of motion I have is. I took the images on different backgrounds as the airpods are white and there needs to be contrast with its background to focus on the object.
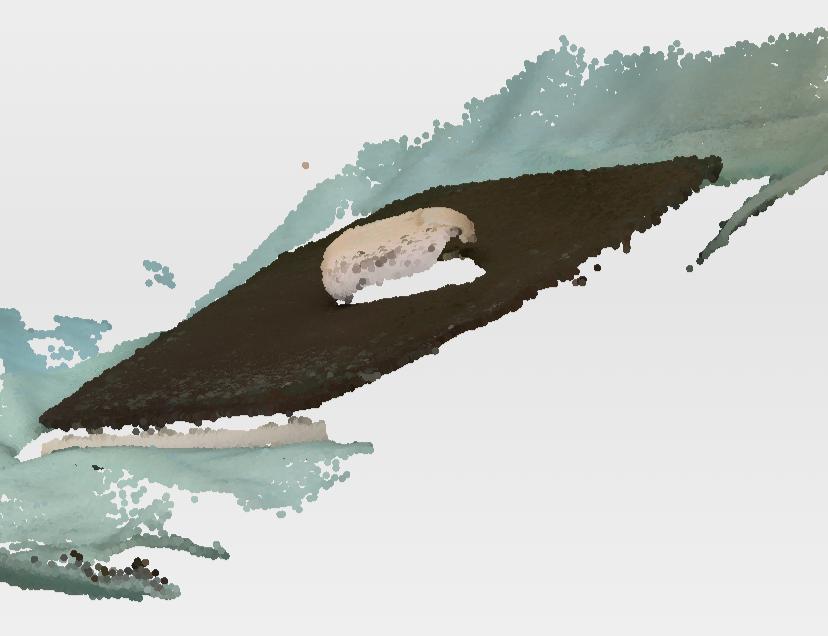
Tried to use a black background under the object for the contrast. Failure was that the range of the detection was super large and it kept detecting all the surroundings. What is needed is to bring the object into more focus on allow it to receive more light
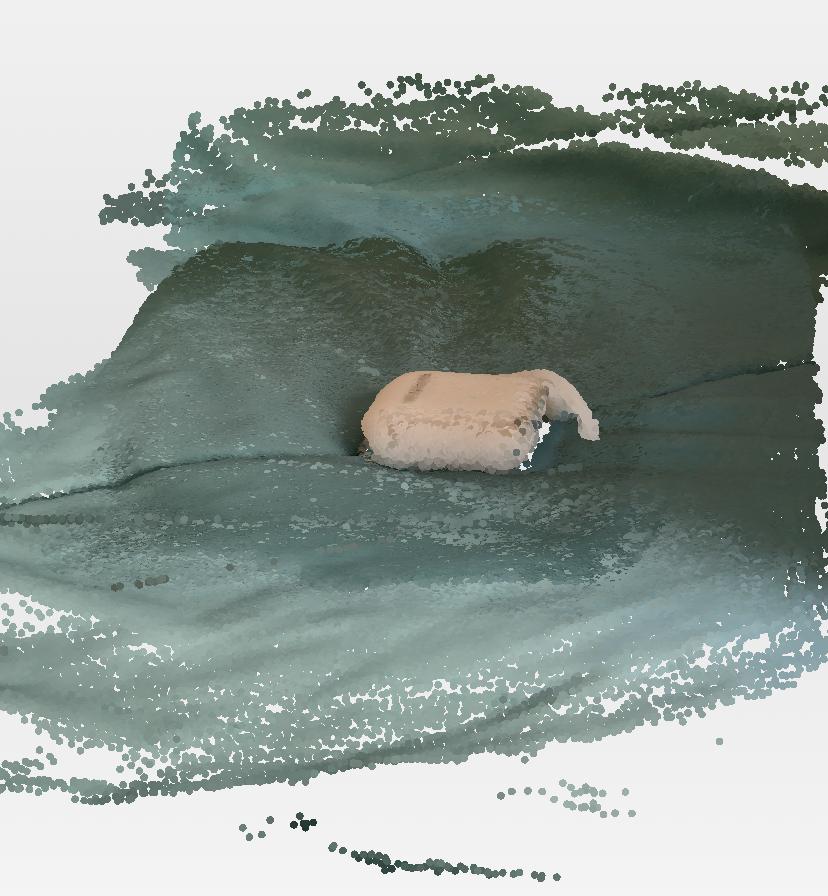
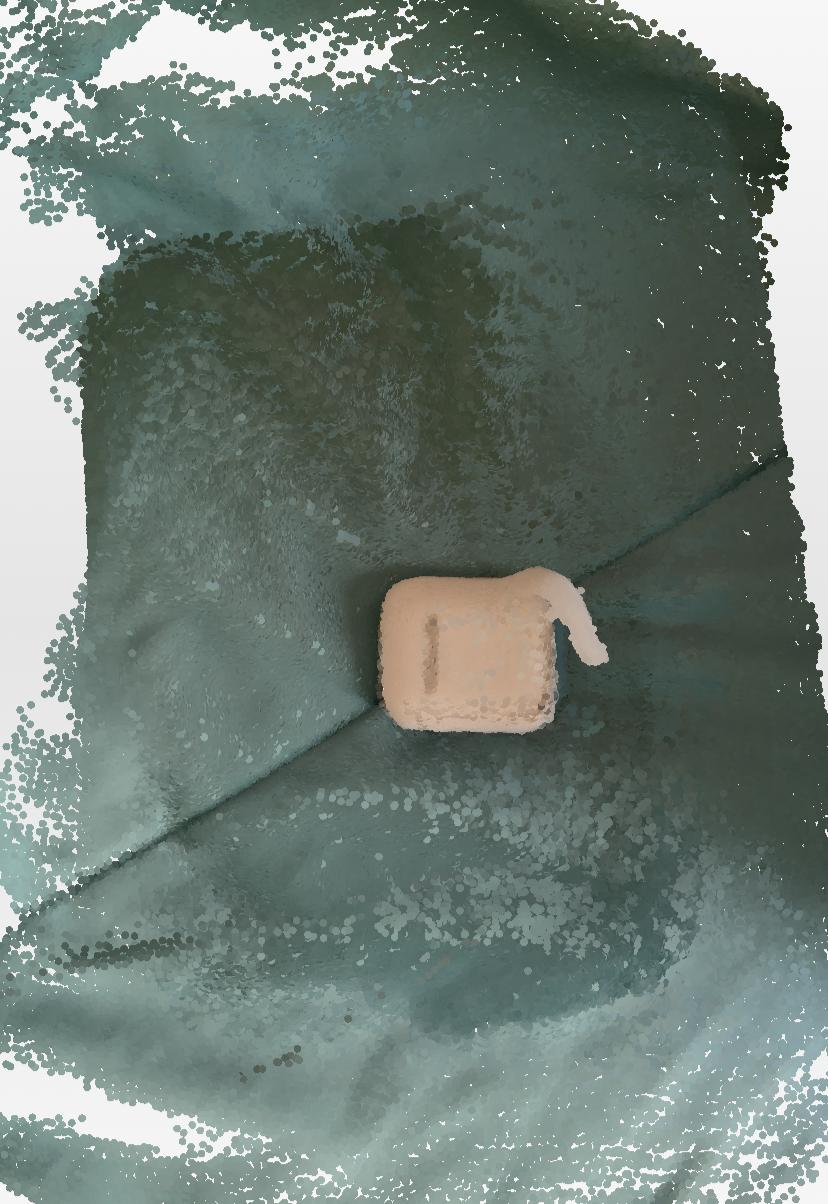
Without the black background there was ore focus on the airpods yet my movement disfigured the shape, I need to be more careful and slow while moving around the object to make sure it continues to detect the same angle.
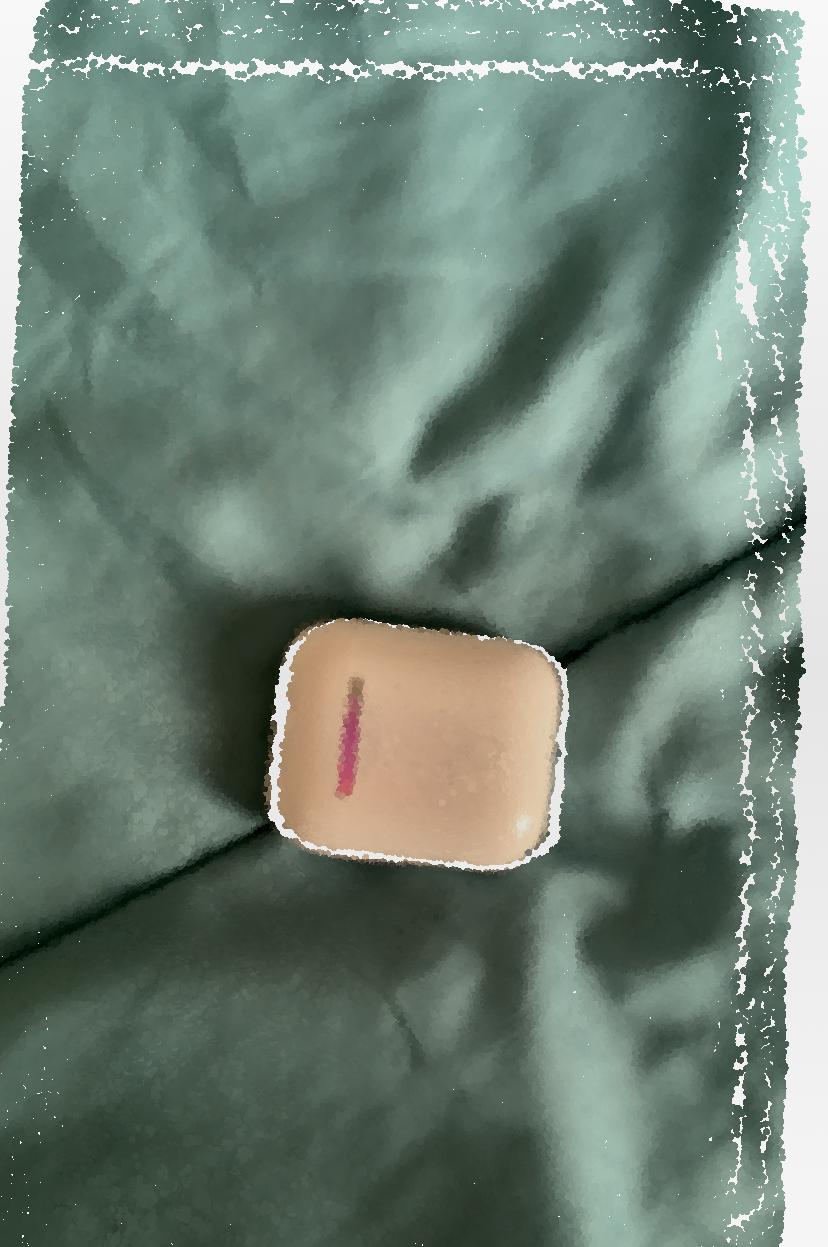
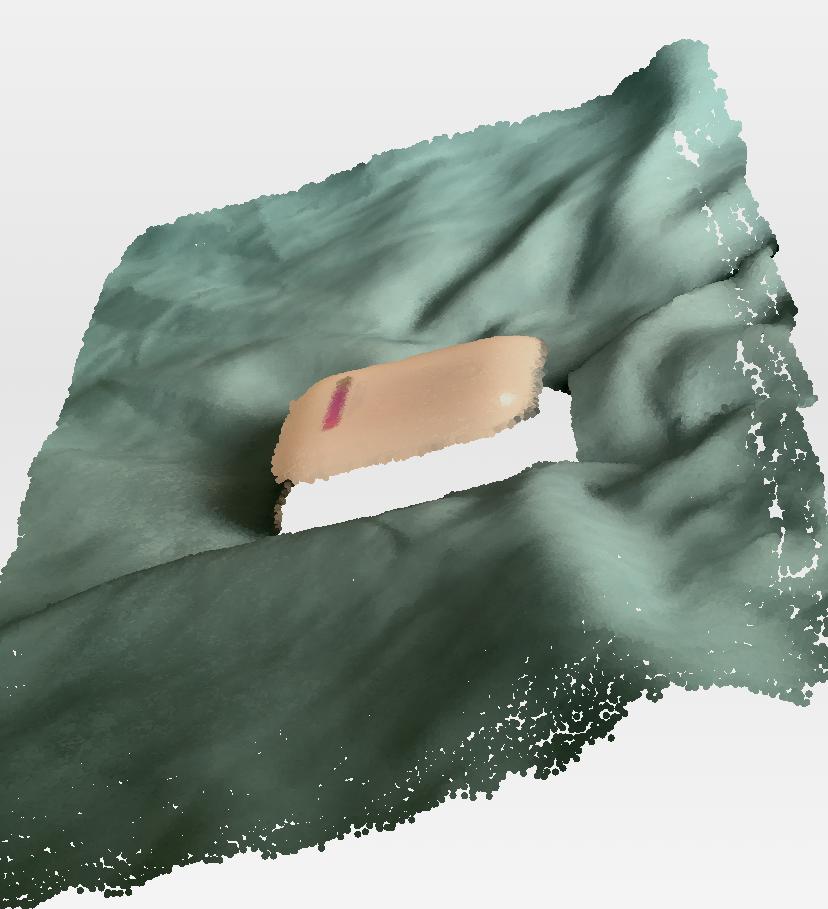
The best results were when I moved the camera closer to the object to put it more in focus and stayed still for a few second before very gradually and slowly moving. It did not catch the sides of the case but the top profile was perfect.
I wanted to continue scanning the airpods and so I tried to export the files and I realized that I could only do one export every 24 hours and so I decided to jump to my original idea, my face.
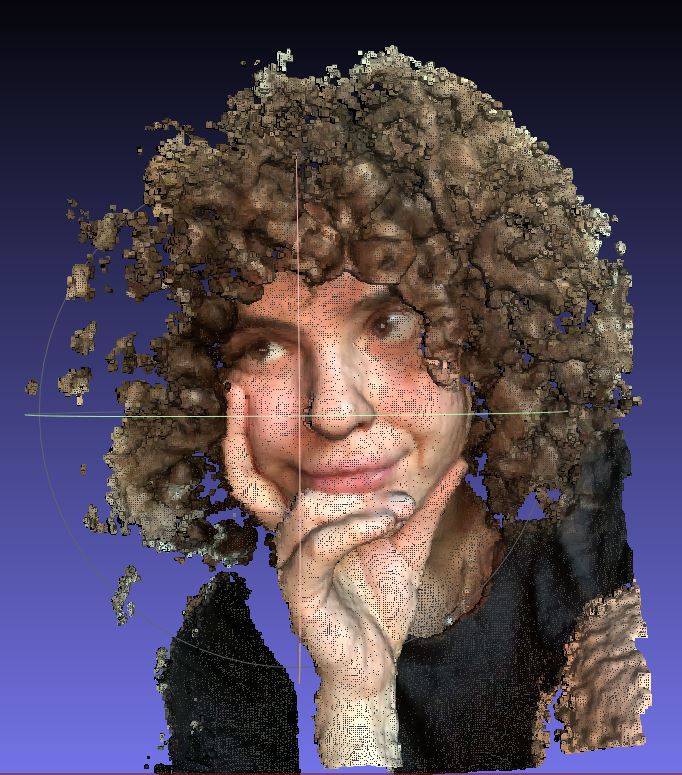
I moved on to take scans of my face, now that I know how slow the movement was and the distance from the camera it was much easier to scan. After several tries I had a scan that was had a good amount of detail yet had many holes, I made the decision to patch up the holes instead of retaking the scans.


Preparing for Print
My first step to patch up the holes was to try and use Netfab, however, after many tries of uploading the .obj of the scan it kept sending the same error that it failed to load the mesh.

Instead, there are a few tools that I could try to patch up the scan like Meshlab and MeshMixer. I downloaded Mehslab and imported the .obj and began testing out how I could patch up the hole on the nose.
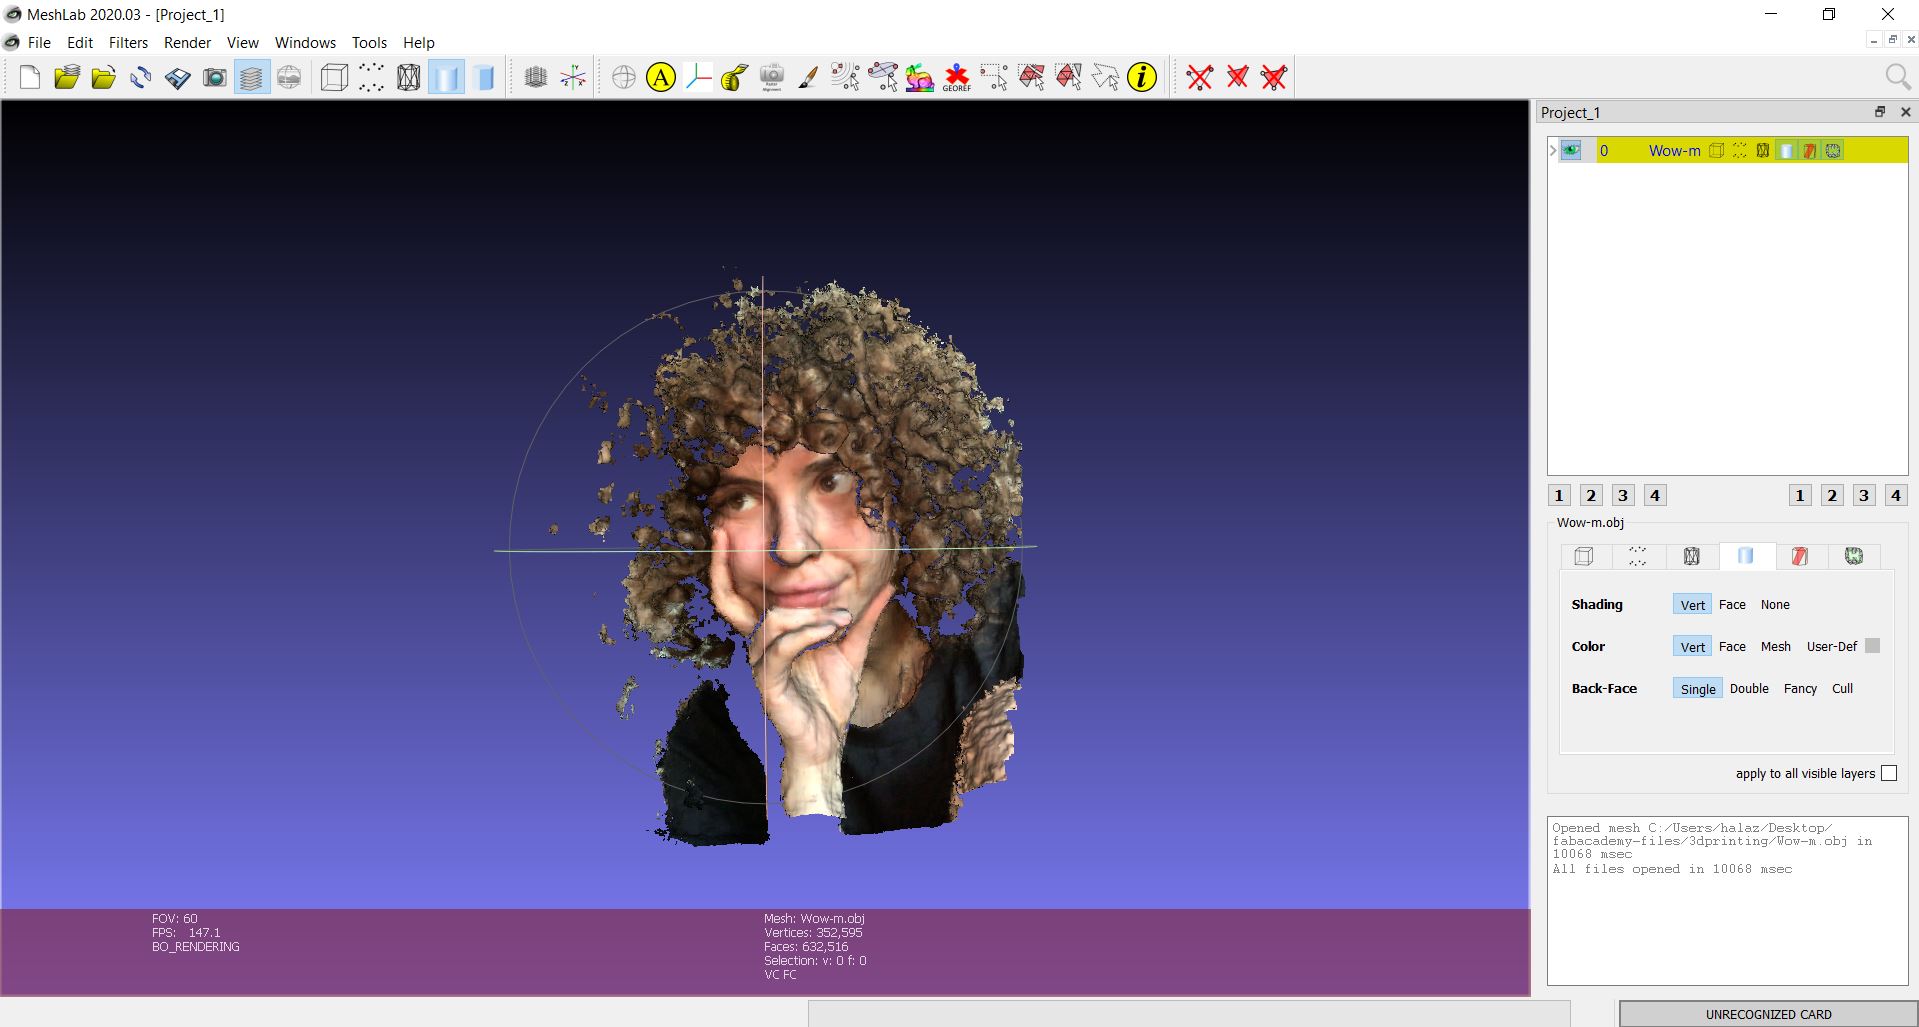
conclusion of this part : FAILURE
Final Thoughts
The 3D Printing section of the assignment was very interesting to push the limits of the machine and test its capacities. The scanning part was a pain as the scans that I made were filled with holes and the mesh patching softwares were not downloading. The app I used to scan was not allowing me to move around the object to cover most of its surface and it required much work to be able to do it. However, the skill obtained from being able to digitize an object is very valuable as sometimes it is too time-consuming to measure and then model from scratch, especially when you are working on repairs. Digitizing an object with the scans, placing them on a 3D software, and then scaling them to the correct size would cut the work and make the flow much easier.
Files